Large Scale Central

D&RG 315, My week in Silverton

Way to go!! Your love of the train and its restoration will be an inspiration to others on the Board. Hope you still get a chance “to get your hands dirty” and poke your camera into the fascinating world of old steam trains. GOOD LUCK with the new leadership role…you gonna do fine.

Doc Tom

You’ll have to change the heading on this thread to “My 2 Years in Silverton”…Fascinating stuff!

Kent you are right, and I thought I had some long weeks.

He should change it to "my second life @ Silverton "

This has been a fascinating, entertaining and enlightening journey, may it continue for a time yet.

Congratulations on your appointment, I hope it doesn’t interfere with these updates.

Wayne from Oz

A couple of updates… We have tucked the reefer 39 in for the winter in Durango. Tarpped up to protect from the snow and rain…

The Stock cars are all but done, needing only the final little lettering on the sides. They have both been moved to Silverton, and will spent the winter there, and probably the rest of their lives being tenderly cared for, and never again to be pooped in.

The Flat is wintering over in Arboles at San Juan Timberwrites. We are awaiting some funding from grants to proceed to restore her.

The Flanger is snowed in, in Silverton for the winter, and work will resume after the spring thaw.

D&RGW 315 is safely tucked away in the Silverton Northern engine house for the winter.

That leaves the D&RGW 04432 Water Service bunk car, as current projects.

Way back at the start of the summer, we started to replace the roof, and the first thing that I did was remove the roof walk braces. These had been replaced by the crew at The Georgetown Loop RR when they put a modern replacement on the roof.
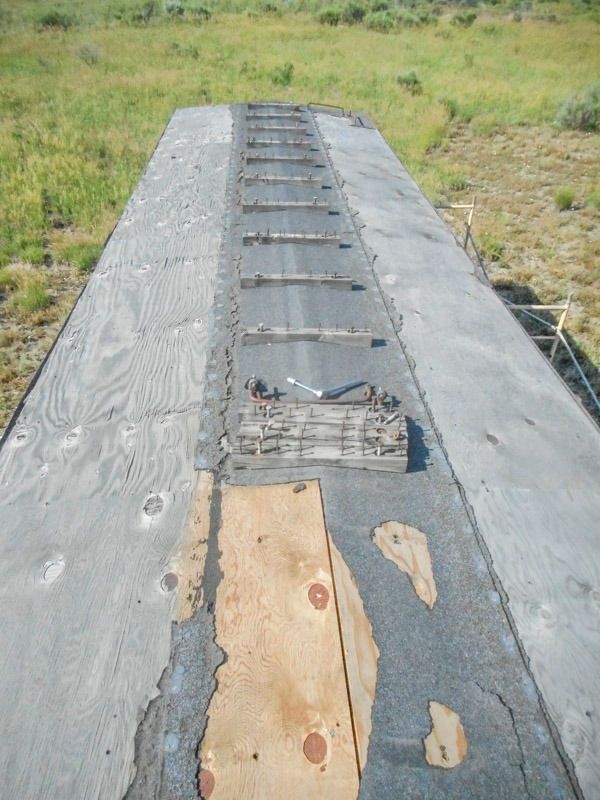
Well it has come around full circle. I have been tasked to cut and make the replacements.
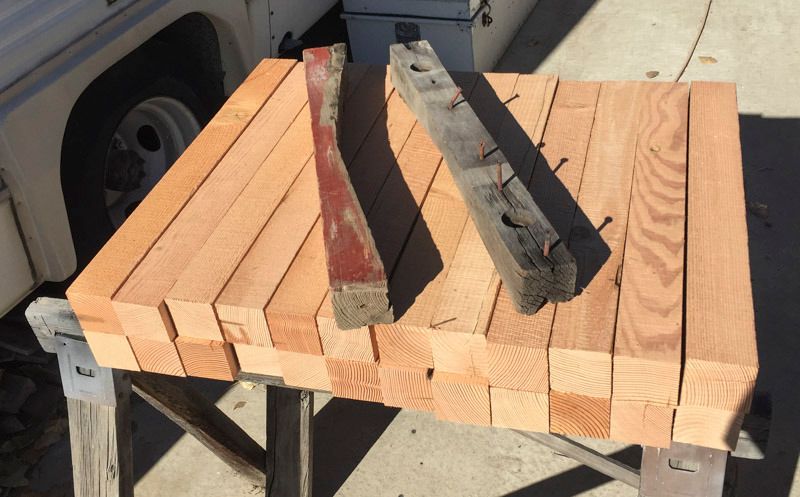
I have been entrusted with 24 - 3 1/4" x 3 1/4" x 24" long Fir blanks. These were cut from “Old Timbers” by San Juan Timberwrites. On top of the stack (Right side) is one of the braces that was installed by GTL when rebuilt by them, and removed when we started the re-roofing. And on the Left side is a brace that we found inside the car when we cleaned it out. We believe that it may be an original replacement on the car. It has no bolt attachment holes, only nail holes (8), and 6 screw holes on the top where the roof walk boards were attached. This car has wood roof beams, and other work cars that went thru rebuilds (C&Ts) and D&S all have metal roof beams and the braces were bolted thru the center of the car top thru the metal beam. 04432 shows no sign that that was the way the roof walk was attached. This brace also shows the scars of being cut with a hand saw.

Note: when this car was originally built, it had 18" wide roof walks, it wasn’t till the turn of the century that it had to be “up dated” to have 24" wide roof-walks. So we know that it has had at least 3 prior sets, before the set that I will make.
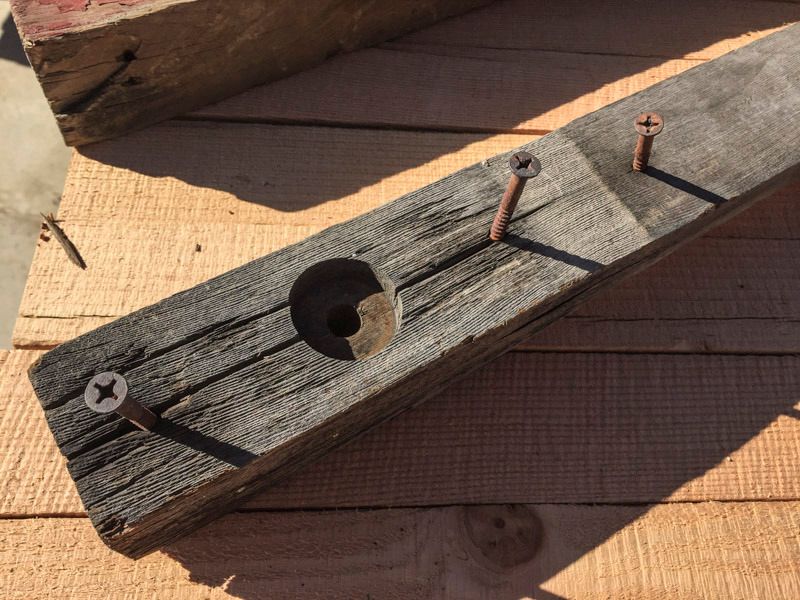
This is the brace that the Georgetown Loop made for their replacement roof. Note the recessed bolt hole in the top, and the use of modern phillips head screws. They used two 1/2" hex head wood screws per to attach to the roof and no nails. We have a copy of the original blue prints, But remember that the original 18 inch was replaced for 24 inch. The original specifications called for 8 nails in each brace. The brace we found had 8 nail holes, 6 of them toe nailed. So that is what we decided to go for, believing that it’s our best guess. The new safety codes in '03 allowed the braces to be painted, but the top side of the roof walk boards had to remain unpainted, to improve foot traction in inclement weather.

Time to make some saw dust… Have bandsaw, will cut for train rides!

Dave, . . . Terrific !

I got my membership card in the mail the other day.

I plan on coming over ( with spring thaw as the deciding factor re date ) and lending a hand for a while. It will be FUN ! (http://www.largescalecentral.com/externals/tinymce/plugins/emoticons/img/smiley-smile.gif)

Welllllllll… Great plans, poor execution … !!! I switched out the blade on my band saw, to a 3/4" 3TPI re-saw blade that I haven’t used in a couple of years. Great start… The Old Fir wood was mightier then the saw. Didn’t cut worth a sh#t. Saw bogged down, and actually stopped a couple of times. Saw is underpowered for this task, and the blade probably isn’t the sharpest…

Back to another approach, Look out table saw… here I come.

Dave, . . . I’m glad to hear that you are “having so much fun” . . . . (http://www.largescalecentral.com/externals/tinymce/plugins/emoticons/img/smiley-wink.gif)

Hate when that happens! Hope you have a couple of extra blanks for experiments. If not you might mill some up out of whatever you have laying around.

Sharpen up your chisels, grab a cup o joe and let the love flow…

Next time get your resaw blades from;

www.highlandwoodworking.com

My saw station is exposed on my back deck, the blades get a rust patina, but never fail to cut, nice and straight.

I use them on 50 year old cedar planks, I salvaged the roof from my sister’s remodel.

Get on their mailing list, I like this on their Name plate; Fine Tools and Education.

John

@John, Thanks for the link, Blade on order.

Spent a few minutes at the table saw, and I think I have a plan, If only I can find my taper tool, Now three years ago I used it for a new leg, and then loaned it to Bob, he gave it to Mike to give back to me… I’d had better call Mike…

Dave,

First time I made them for my caboose, I used my table saw, second time I used the museums band saw, with a significant improvement in quality. when done on table saw you can only cut so far, then need to remove the remaining material up to the crotch with a hand saw with mixed results. used cedar 4x4’s both times.

Al P.

Stole some time… and spent a few minutes at the table saw after getting my taper jig back from John (long story).

Al P. You are 100% right, man with exact experience. But My band saw is the only one available to me to use, and the new blade (thanks John for the link) is still in route. So table saw it is.

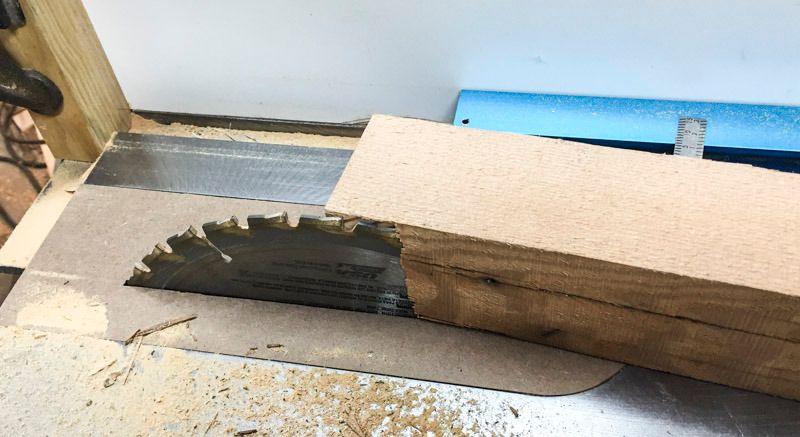
Set up the taper jig to the 7deg. to match the original, and measured out a stop block so as to not cut past center with the bottom of the blade.

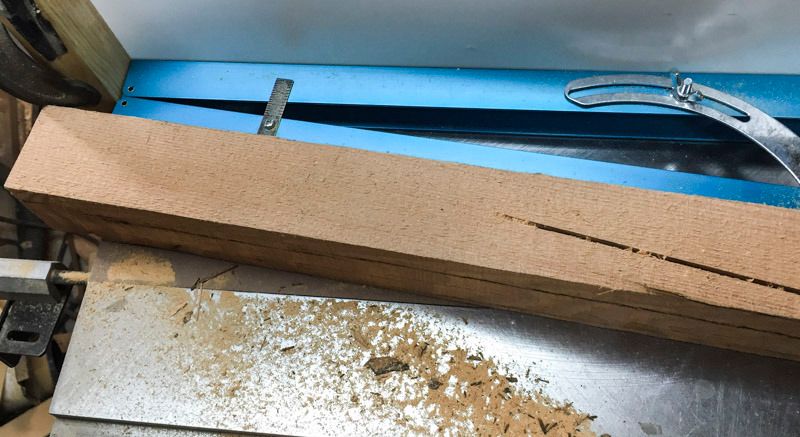
Then flipped the board over to cut the other end, and side. My saw/blade combination didn’t cut clean thru the total 3 1/4" thick wood blank. Leaving a 1/32" of wood above the blade, and of course the part that was above the blades curve un-cut.

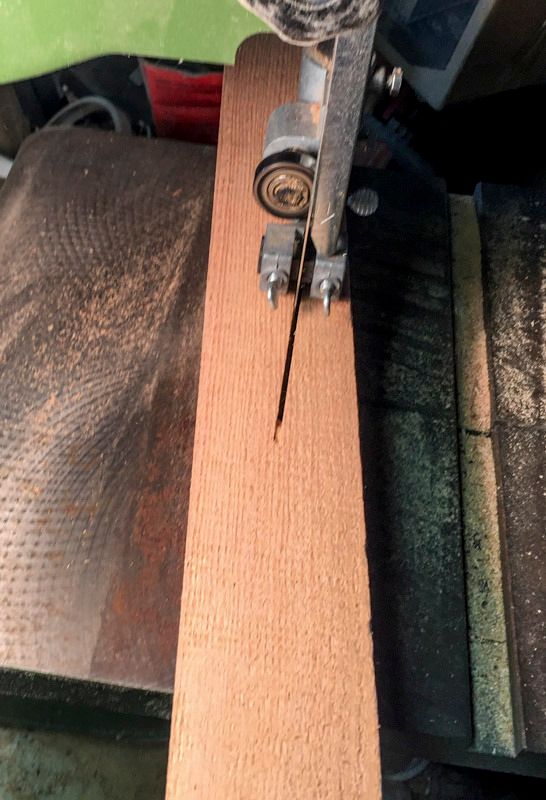
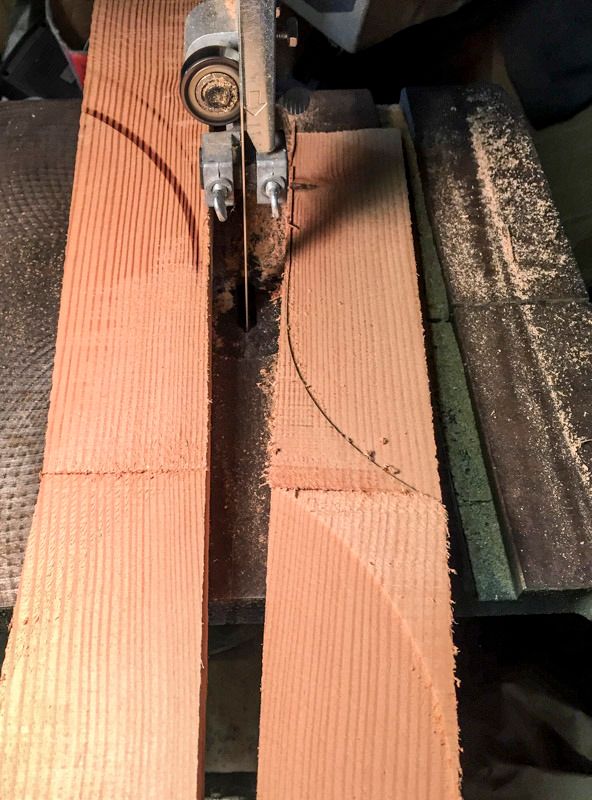
The kerf you see facing up is the bottom cut from the first cutting. Both cut only go as far as the center line. Now on to the band saw to Finnish the cuts clear thru.

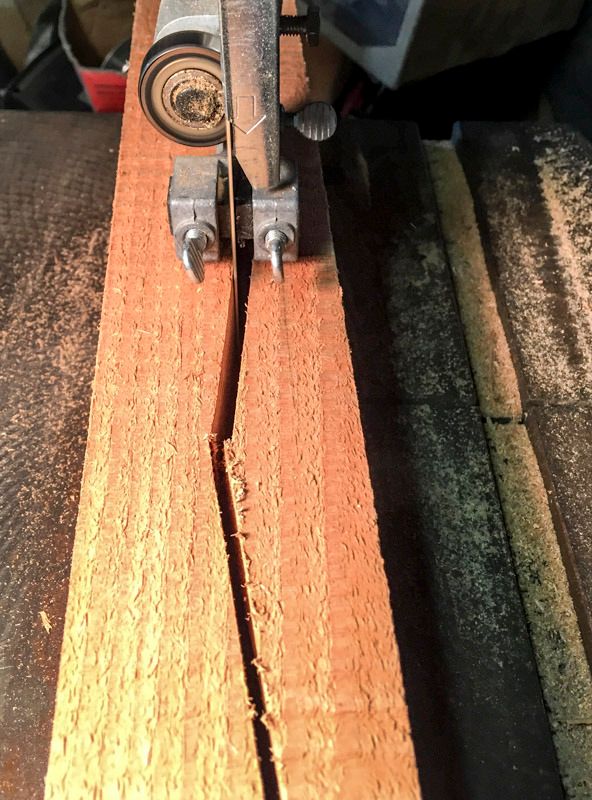
And flipped over to cut the other side. Since the band saw blade kerf is much narrower then the table saw blades, I kept to the good side of the wood, and cut to the center, firing the cut out piece.

Here is the brace on the left side and the cutout piece on the right after separation. Note that you can see the triangular shaped wedge that the table saw blade left after reaching the center with the bottom edge of the blade. That is the piece that I had to band saw out to separate the two halves.

It works… 23 more to go…

Where did you find clear fir in that size? That must have cost a king’s ransom!

Piece 'o cake!

Are you done yet?

Oh you are welcome re; blades.

John

Steve Featherkile said:

Where did you find clear fir in that size? That must have cost a king’s ransom!

Dave stated in an earlier post . . . : "

I have been entrusted with 24 - 3 1/4" x 3 1/4" x 24" long Fir blanks. These were cut from “Old Timbers” by San Juan Timberwrites. "

Dave, . . good work (http://largescalecentral.com/externals/tinymce/plugins/emoticons/img/smiley-smile.gif)

It is nice to see you having so much fun . . . . .

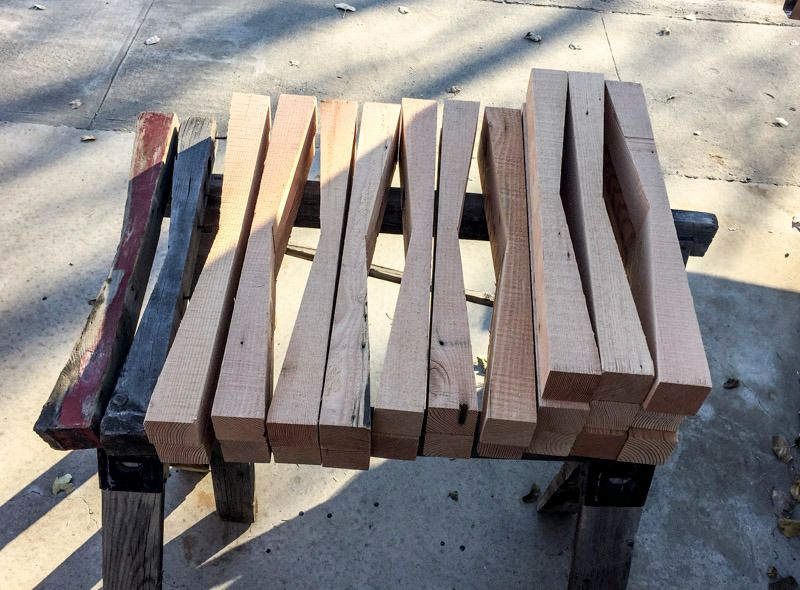
Just like magic… Presto… 22 more cut and finished.

22 plus the original 1 = 23… One board had a crack that went thru it and fell apart after only cutting 1/2 way down…

Another small step along the way…

More work on the Emma Sweeny. A little Press is always a good thing.

http://www.durangoherald.com/article/20151218/NEWS01/151219553/From-silver-screen-fame-to-Durango’s-Santa-Rita-Park

The Elk Horns took a bunch of work to find a set that matched what was originally put on the RGS 20 and the ES.

Enjoy.