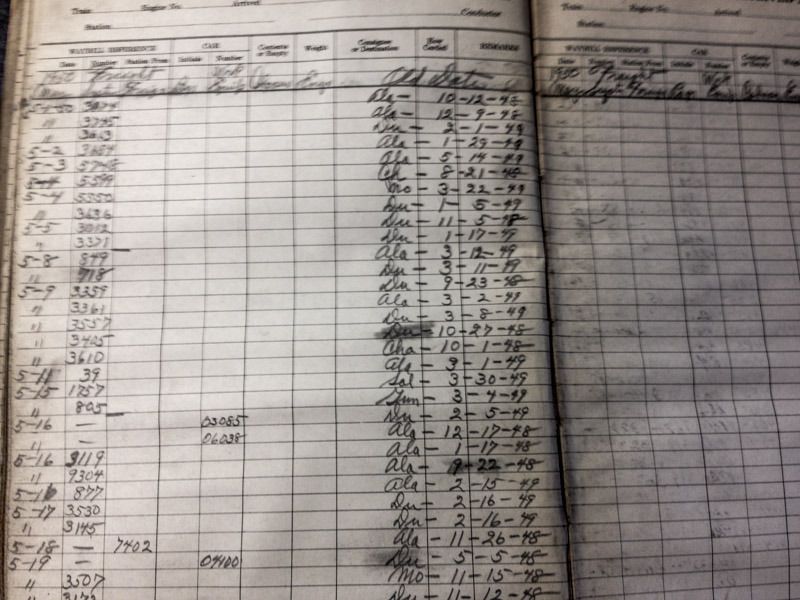
And yet another roster listing has been found. This one from March of 1949.
With two references we are now set for sure, to qualify for the Colorado State Historical funding.
And yet another roster listing has been found. This one from March of 1949.

With two references we are now set for sure, to qualify for the Colorado State Historical funding.
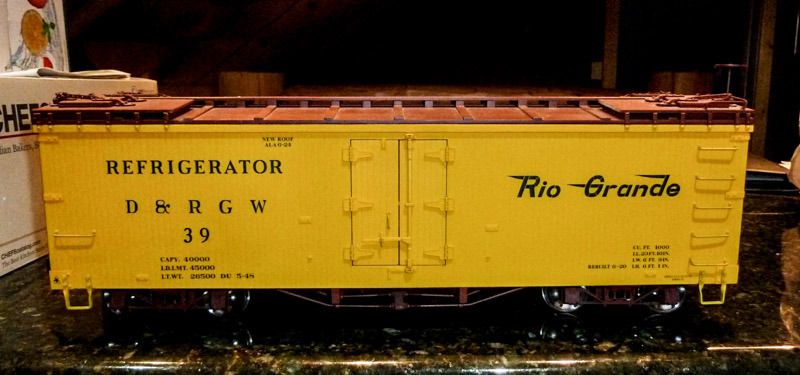
A restored Reefer will be a great asset. Keep the cold drinks and ice cream cold for crews working in the summer . . . . 
Well there you go. Those kind of finds just make a persons day. I love it when someone calls me or emails me and says you have probably seen this one and well . . .no, no I haven’t.
A friend sent me an inspiration. Its what we’re looking to get to some day. It’s an Aristrocraft.
Spring Has started to Sprung. At least around here. And that means that it’s time to get back to work on some cars.
Tuesday we had a work session on the Bunk car ( water service car) to get the roof walks installed. The Ground around the car had dried out enough to not be a mud bog.
Started to get the parts played out.
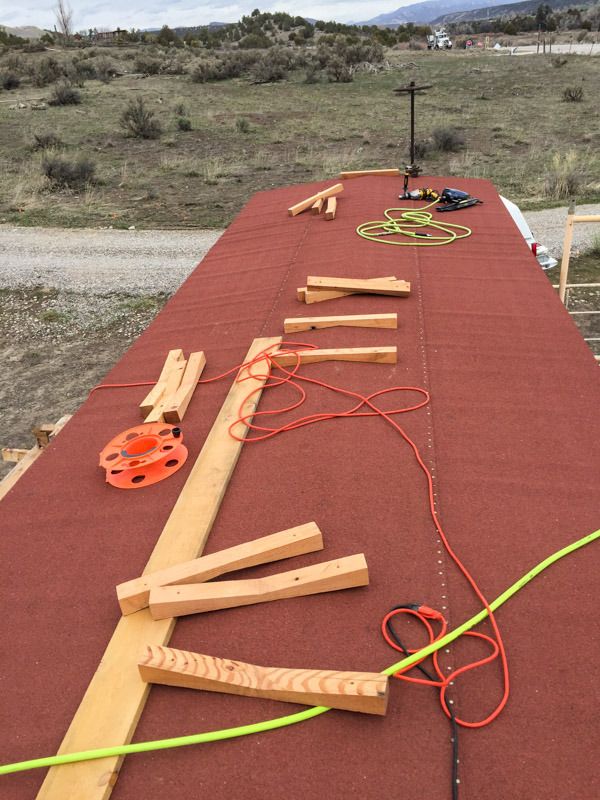
The roof walk braces are 2ft on center, as per the original D&RGW build plans. So 2ft it is.
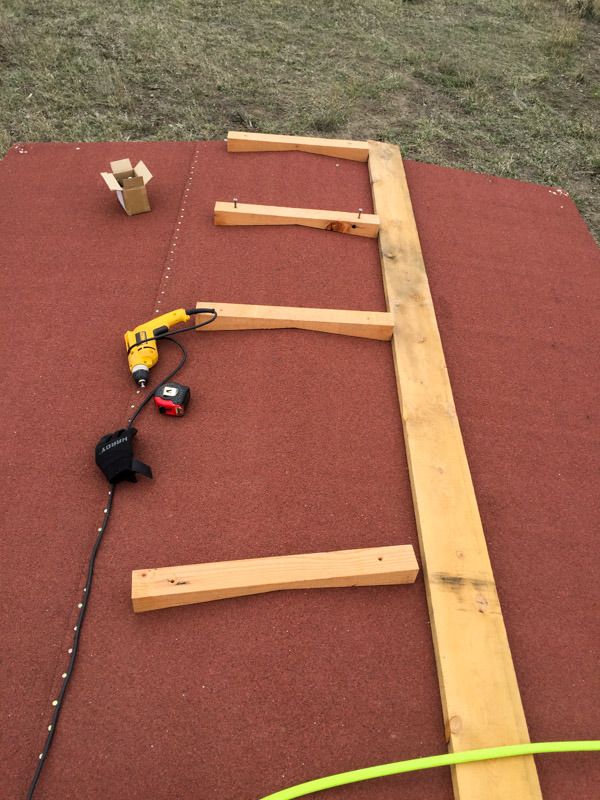
We used a long “walk board” to align the roof braces.
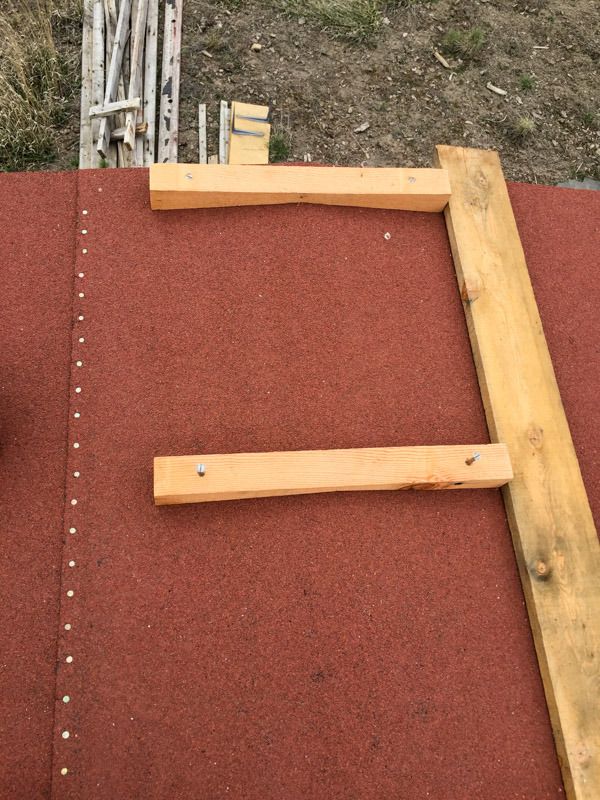
The braces were attached with two #22 4" slotted wood screws, thru pre-drilled and countersunk holes.
The FRA requirements were that the roof walks had to be 24 inches wide, and UN-PAINTED after 1905. The D&RGW used on this series of Box cars 2 - 6 inch Boards and 1 10" board with a 1 inch spacing. So that’s what we did.
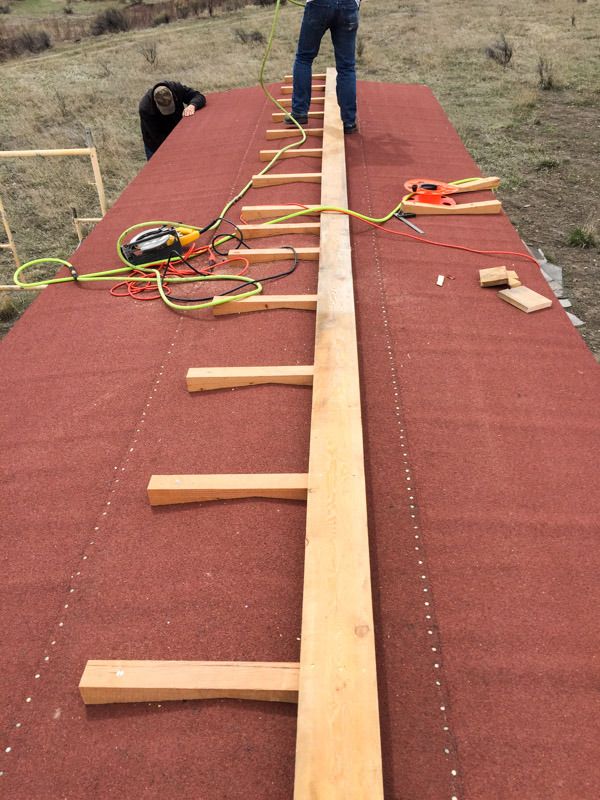
The plans called out that 3 nails were to be used on each 6 inch board at each brace, and 4 nails for the 10 inch board.
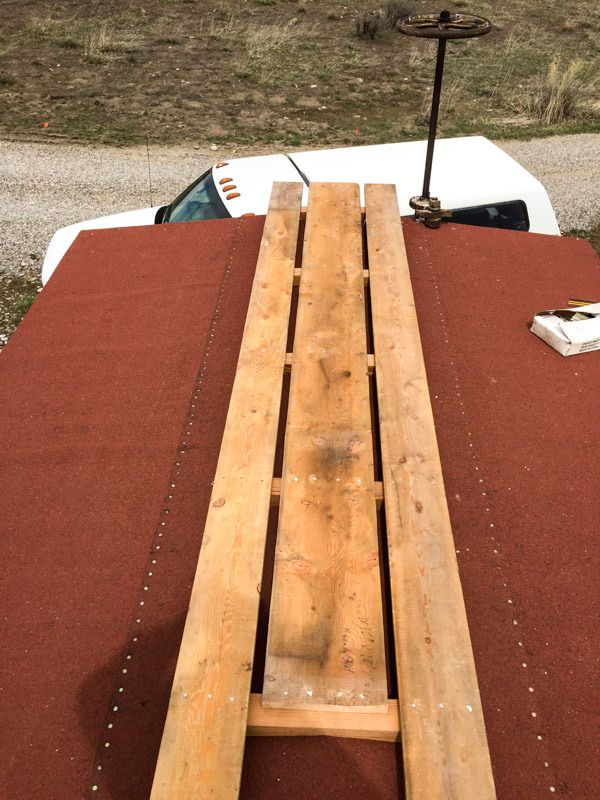
And of course, we didn’t have enough 10" board to Finnish.
Spent the rest of the day scrapping down the old paint in prepping for the new paint job.
Dave, . . . sure looks like a lot of FUN . . . . 
Did Yunz seal the screw holes with something (caulk) so water doesn’t find its way in?
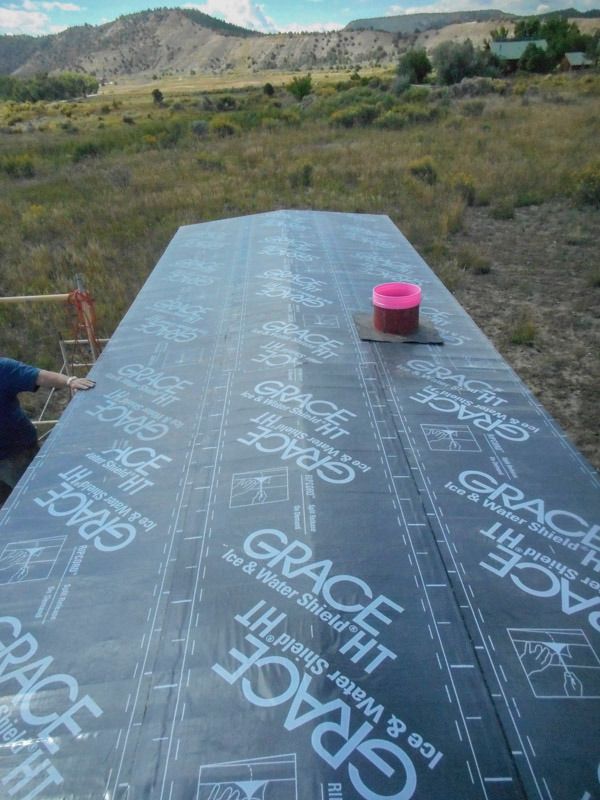
@ David Not really, We had used the “ice barrier” sticky tar stuff under the rolled roofing. It claims to be “Self Sealing”
Dave,
the FRA did not exist in 1905, would have been ICC. do you actual have a copy of this document? I have looked for it over the years and I treat it as an urban legend. paint with sand mixed in is most acceptable.
Al P.
Al, and all. You got me thinking.
So I started doing some research and reading. So far I can find Nothing Yet, from the ICC 1893 requirements, or the 1903 updates, or the 1911, 1915 also. I also cannot find even the details calling out the hand grip placement and sizes requirements, nor the roofwalks call outs. I did find details on the coupler heights requirements for both standard gage and NG cars.
I will continue my research on the roofwalks. We know that there was a mandatory change to all hand grips, and the size and placement, and I haven’t yet found the call outs and specs for them either, and they were requirements that were forced on the RRs.
More research required.
As to our car. The original blueprints that we have from the 1904 D&RGW rebuild, Specifies the size and wood and nails and placement for this car series. The operative here is “This Car series” at the 1904 re-build. One example does not make a universal standard. As we are under a Colorado Historical grant and their historical rebuild requirements, we MUST restore as built.
I am guilty of making assumptions based upon the call out on the blueprints. One wonders why thou the specification would be called out for 24" wide, when 2 - 10" boards for 20" would be cheeper to build. We all know how cheep the RR’s were, and if they could get away with 20" instead of 24", I think that they would have. We also know that this car when built in 1893 had 20" roofwalks. And were changed over to 24". The assumption I’ve made is that they (RR) were forced to, by the new ICC regulations coming into effect. I could be wrong. This car still has the holes in the sides from the original small Grab irons from the original build. The new ones (1904 installed grips ) used one of the original bolt thru holes, and a new hole the size of the new grips up the side of the car.
More reading ahead…
It’s a federal law, the railroad safety appliance act. The ICC didn’t write the law, or its later amendments, they were just charged with enforcing it. Wikipedia has information on it, and I am sure an evening with your favorite search engine can turn up more information.
@David Spent more time looking up. This is what I found, best so far. It is dated 1968. Haven’t found anything older that gives the actual spects that this does. Will keep looking.
Yup. I found where it calls out the size (width and length) of the running boards, and the construction of them. But nothing about painting them. However, it does say that if a material other then wood is used, it must have the same or better anti slip properties as wood. So, maybe, the law was interpreted to mean unpainted wood.
2016 SPECIAL WORK SESSIONS
Plan & Schedule
Durango Railroad Historical Society
The DRHS has finalized our plans for this summers work sessions.
We will have 5 week long work sessions, some of sessions overlap each other, giving a choice of which project that you would to help with.
Session #1 June 13 - 17 D&RGW Water Service Bunk Car Durango, CO
Scrap, seal, fill, sand exterior sheathing
Paint base color on exterior
Seal floor and paint walls and ceiling
Seal and paint window frames, then install
Install stack on roof and metal shield for stove
Session #2 June 13 - 17 Const. Silverton Northern Oil Shed Silverton, CO
Frame floor, walls, and roof
Install corrugated metal to exterior walls and roof
Run electrical wiring from engine house and wire the shed
Session #3 July 18 - 22 D&RGW Water Service Bunk Car Silverton, CO
Paint lettering
Clean out journal boxes and add new wool waste and oil
Perform other tasks not completed in June work session
Session #4 July 18 - 22 Const. Silverton Northern Oil Shed Silverton, CO
Install electric wiring
Insulate walls and ceiling, then drywall same
Paint interior
Move furniture from boxcar to shed
Session #5 Sept 11 - 15 D&RGW Stock Cars Silverton, CO
Remove floor planks at both levels from doorway of double deck car
Seal and install new floor planks at both levels from doorway of double deck car
Install door post protectors (steel angles) and other misc. hardware
Finish lettering cars
Clean out journal boxes and add new wool waste and oil
You are all invited to come join in the fun, for 1 day or the whole week(s). Even if you think that you don’t have the skill set thats needed, We will have plenty of work for you to help us with. If you will be coming out this way, Let me know, and I’ll get you started on the rest of the process.
Horrraaahhhh. Finally, got final approval from the D&S to run D&RGW 315 this fall.
Locomotive 315 Excursions for 2016
We plan to run the 315 on both the Durango & Silverton Narrow Gauge Railroad (D&SNG) and the Cumbres & Toltec Scenic Railroad (C&TS) this year. Here are the current plans, which are subject to changes. Check back for updates or email us at [email protected] if you have questions. Make reservations with the appropriate railroad.
Durango & Silverton Narrow Gauge Railroad – August 18–20, 2016
The 315 is stored in the Silverton Northern engine house. For this event it will pull historic passenger cars on round trips from Silverton to Elk Park. Boarding will be near Blair and 12th Streets. Tickets will be available from D&SNG on their website at www.durangotrain.com and during August 19–21 at the Grande Imperial Hotel in Silverton or at the Durango Railroad Historical Society booth at the corner of Blair and 12th Streets in Silverton.
Thursday, August 18 – Photo Roundtrip to Cascade
Depart Silverton at 3:00 pm and arrive Cascade about 4:30 pm. Assemble for some photo run bys of the 315 train and enjoy a picnic (Please note there will be no concession car, but passengers can purchase food and drinks in Silverton prior to departure). Depart Cascade about 5:30 pm and arrive Silverton about 7:00 pm.
Evening photo shoot with the 315 at the D&S depot.
Tickets are $65 per adult, $32.50 per child age 16 or under (purchased along with an adult ticket).
Friday, August 19 – Photo Roundtrip to Elk Park
Depart Silverton at 10:15 am and arrive Elk Park about 11:15 am. Assemble for some photo shots as D&S trains roll by and perhaps enjoy a picnic (Please note there will be no concession car, but passengers can purchase food and drinks in Silverton prior to departure). Depart Elk Park about noon and arrive Silverton about 12:30 pm.
Tickets are $50 per adult, $25 per child age 16 or under (purchased along with an adult ticket).
Saturday, August 20 – Two Roundtrips to Elk Park
First 315 train will depart Silverton at 9:30 am and arrive Elk Park about 10:00 am. Leave Elk Park about 10:30 am and arrive Silverton about 11:00 am.
Second 315 train will depart Silverton at 4:00 pm and arrive Elk Park about 4:30 pm. Leave Elk Park about 5:00 pm and arrive Silverton about 5:30 pm.
Tickets are $30 per adult, $15 per child age 16 or under (purchased along with an adult ticket).
Cumbres & Toltec Scenic Railroad – August 27, 2016 Weekend
We will transport the 315 from Durango to Chama after running on the D&S. We are making plans to run it during the Narrow Gauge Rendezvous over the weekend of August 27. We will post details as soon as the plan is fully developed.
Edit to correct dates
Thursday work session on D&RGW 04432 Water service Bunk car.
The weather has finally turned for the better, and we held a work session to get back to work on the bunk car. My job for the afternoon was to re-place the trim around the East door (thats the way the car is currently setting), and the trim around the two sliding pocket windows. Well, that was the plan at least.
Her is the East side door, the original wood was useless, and had been removed previously. The bare wood underneath has been treated with two coats of boiled linseed oil as a base protectant.
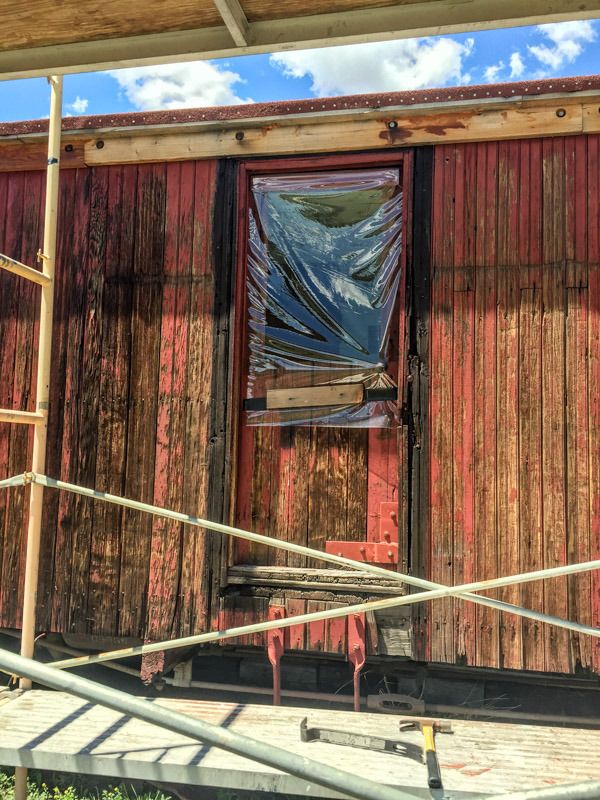
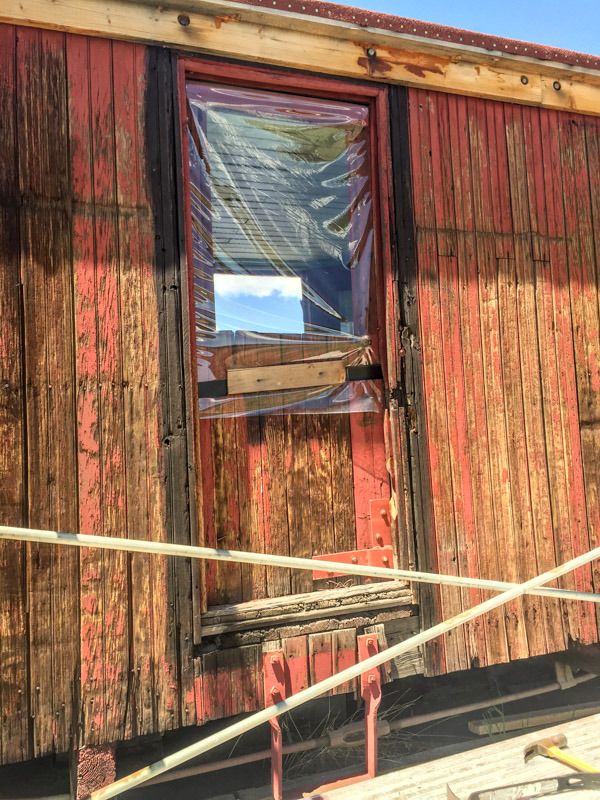
Notice that there is a couple of siding boards missing on the lower right bottom of the door. Need to replace first. We have a few old recovered proper size boards that we take care of. These boards were originally added to the inside of the cab on Engine 315 to keep it from coming off in its last years of service, there were salvaged 13 years ago and saved for this kind of special use. BTW: they are 70+ years old, and to say the least, dry and brittle.
BTW NOTE: when sawing old dried brittle wood, I have found that using a sharp hand saw causes much less splintering than a power saw. Hand cut the two pieces, and of course pre drilled the nail holes to prevent splitting.
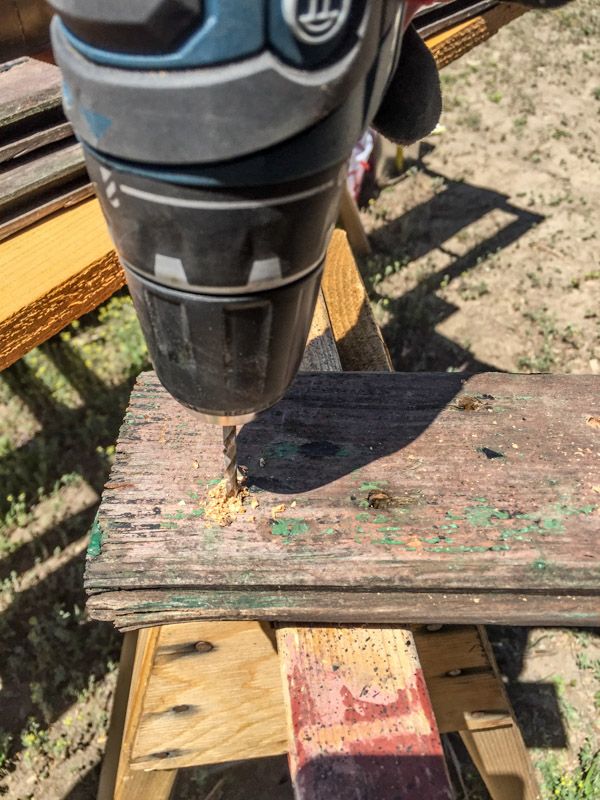
And installed the new old pieces.
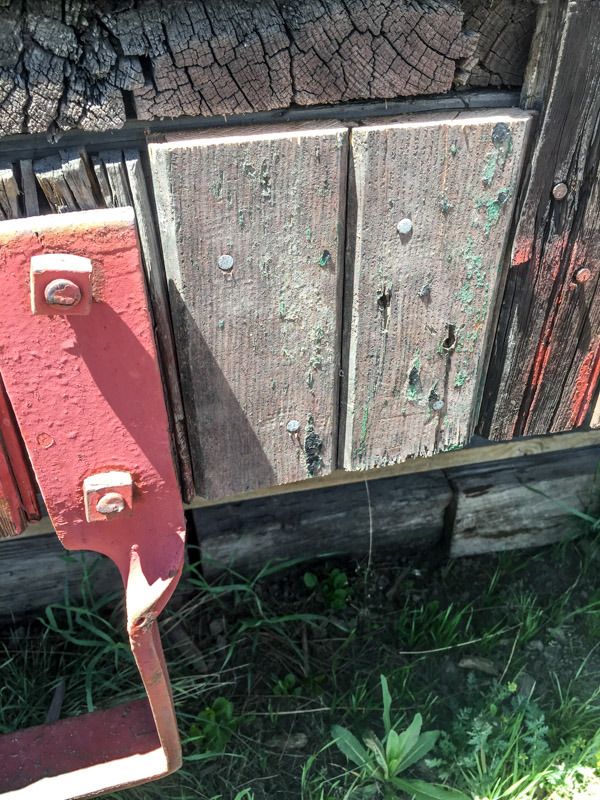
And the finished trim work. Nailing was very selective, as finding sound wood underneath was a bit of a challenge.
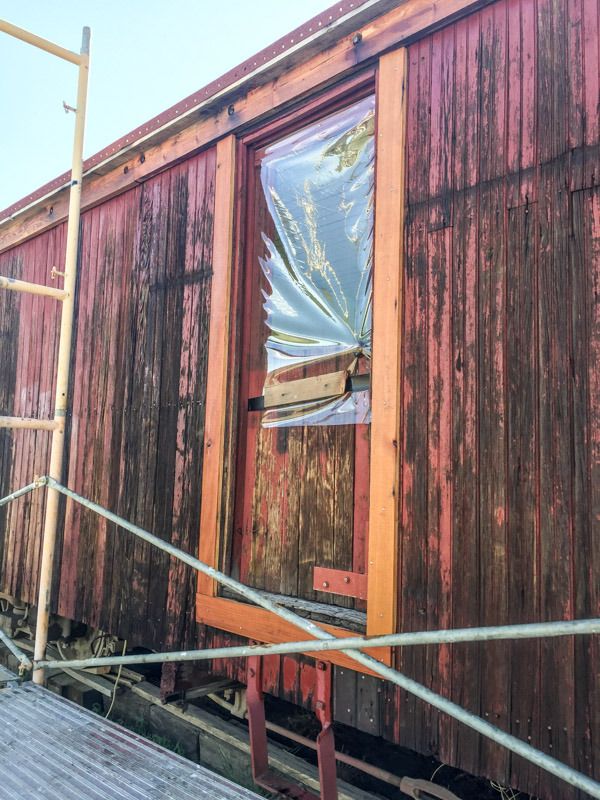
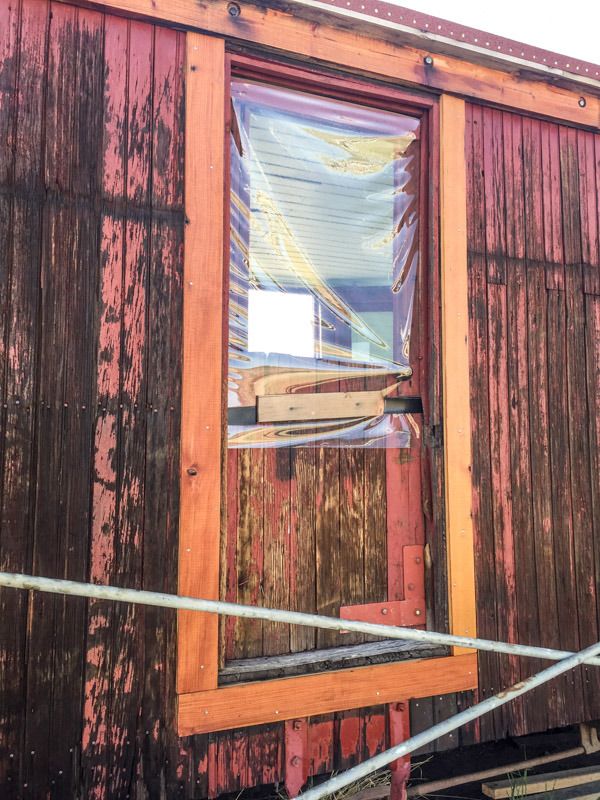
These new pieces of trim were heavily coated with the boiled linseed oil in prep for painting.
And now the saga of the windows begins. Seems simple enough, put up the new trim around the windows… well when you’re working with a 113 year old car, you had better be prepared for adapting to changes as you go along. Well, here is the sill on the East side window.
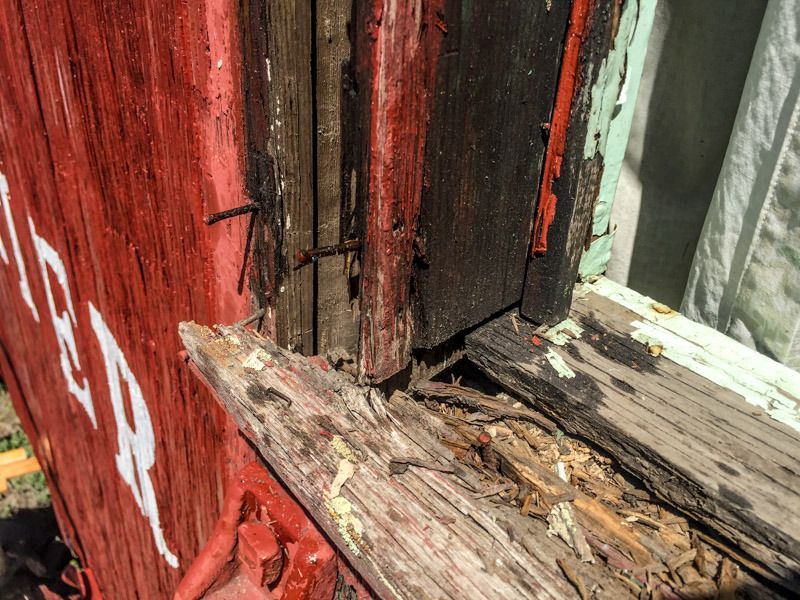
I just couldn’t leave it like that, It will have to be replaced before the trim and the window can go back on…
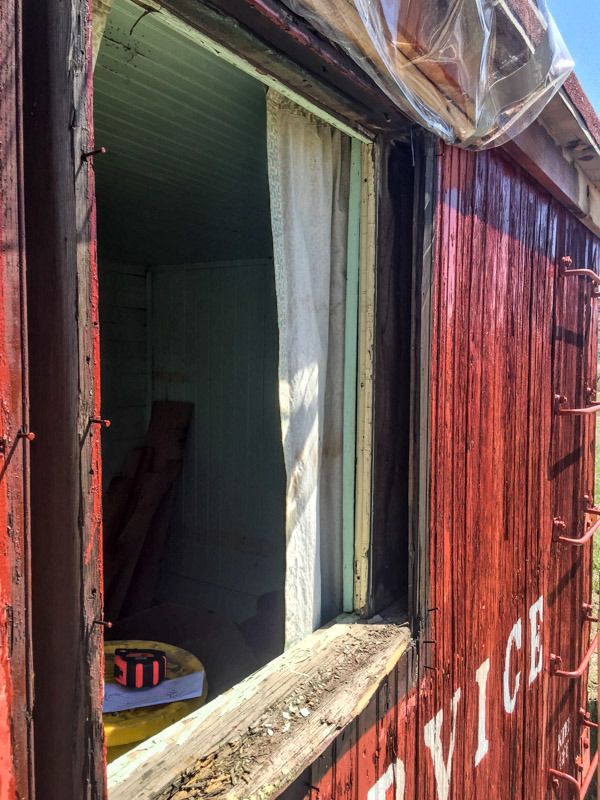
And looking into the pocket hole for the sliding. I made the decision to scab onto the inside of the sill that is still sound and replace the outer half of the sill. Removing the whole sill would entail opening up the inside wall, not something that we really wanted to do. Measured for the piece that I will have to fabricate. I’ll make the new one from oak or ash so it will out last me.
Up next… Sill making.
Edit: to correct fat finger typos
Dave , . . . so good to see updates on the work you are doing. (http://www.largescalecentral.com/externals/tinymce/plugins/emoticons/img/smiley-smile.gif)
The Replacement window sills.
The sills on each side are naturally very different, Its just what you learn to expect on these old cars. Got a couple of sticks of Oak, one 4/4 and one 6/4, and started to work from the drawing I made at the car itself.
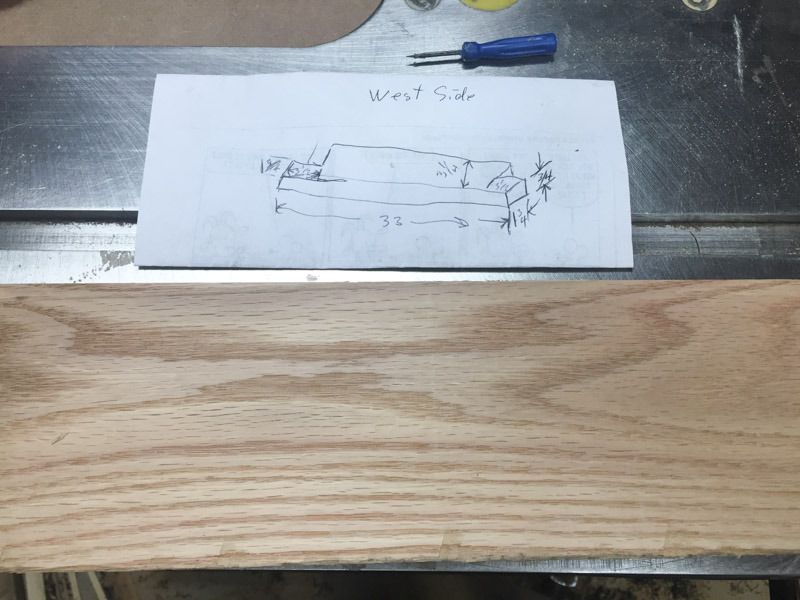
Simple enough, I plan to scab the new wood onto the sill thats left after cutting it back to sound wood.
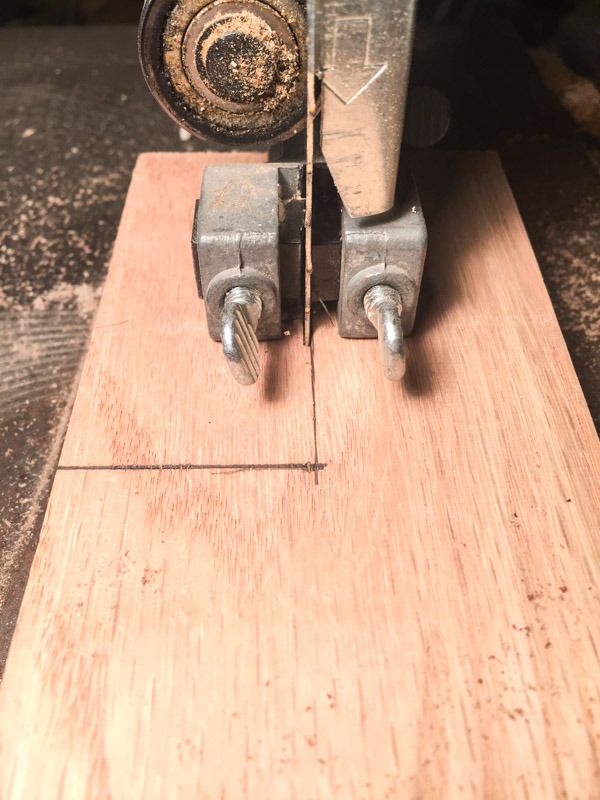
Laid out the pattern after cutting to width, and plaining to thickness. Basically notching the ends on the band saw.
And the two boards ready to install.
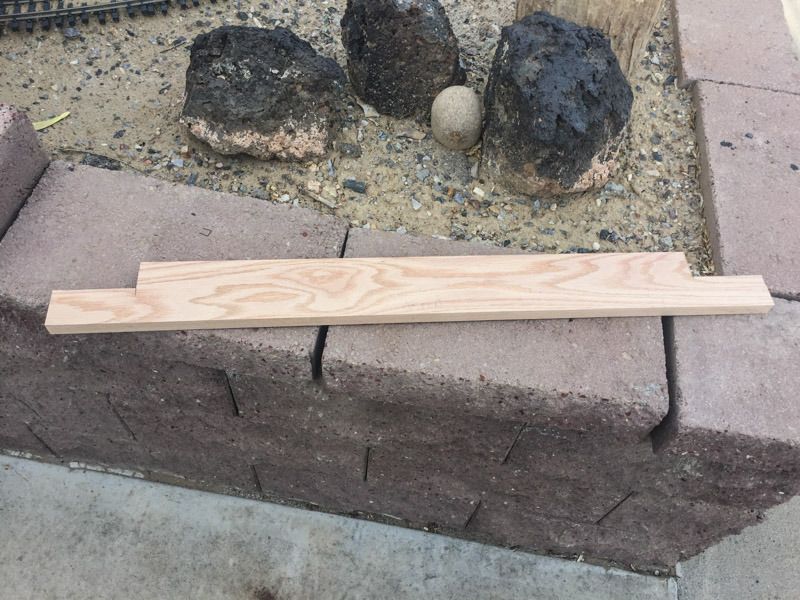
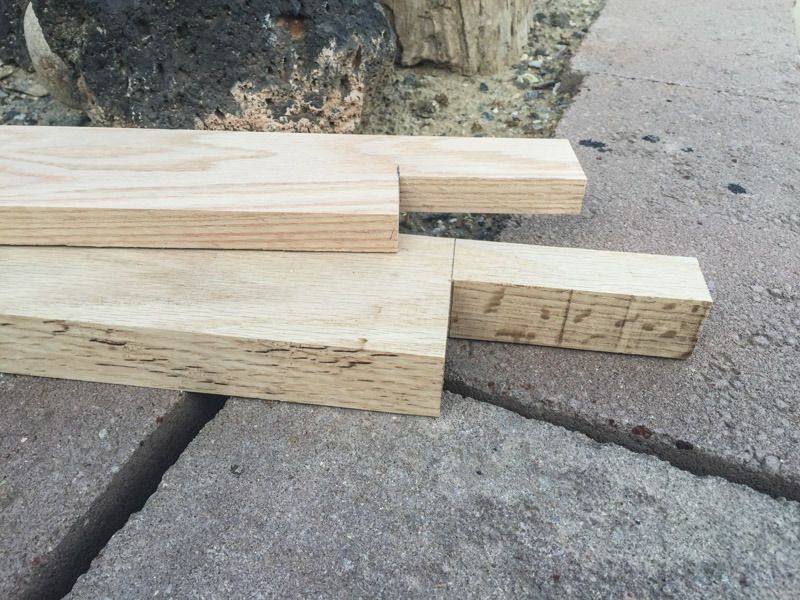
I plan on doweling the two adjoining edges, with TightBond III. I’ll dowel on site to be sure that I can get to the existing board.
More fun coming up!
Good luck!
Window work on D&RGW 04432 Water service Bunk car.
Worked yesterday on the two window openings. Both are unique “Pocket Hole Windows”. Meaning that they slide into the opening in the wall created by the space between the inner wall and the outer wall. Most added on windows on converted box cars are sliders either on the outside or the inside. The regular sliders are a whole lot easer to install, and maintain. The pocket sliders required that several “Wall support beams” had to be cut, and the support for the “Pocket” had to be installed. #04432 has a total of 5 windows, one in each end compartment, the pocket hole sliders, one in each man doors ( non opening [fixed in the door]) in the center section, and one typical inside slider in the center section. And at one time, both doors had screen doors. None of the windows has screens attached, that we know of.
Started by drawing a cut line where the old window sill would be joined to the new sill. Notice how bad the old wood really was.
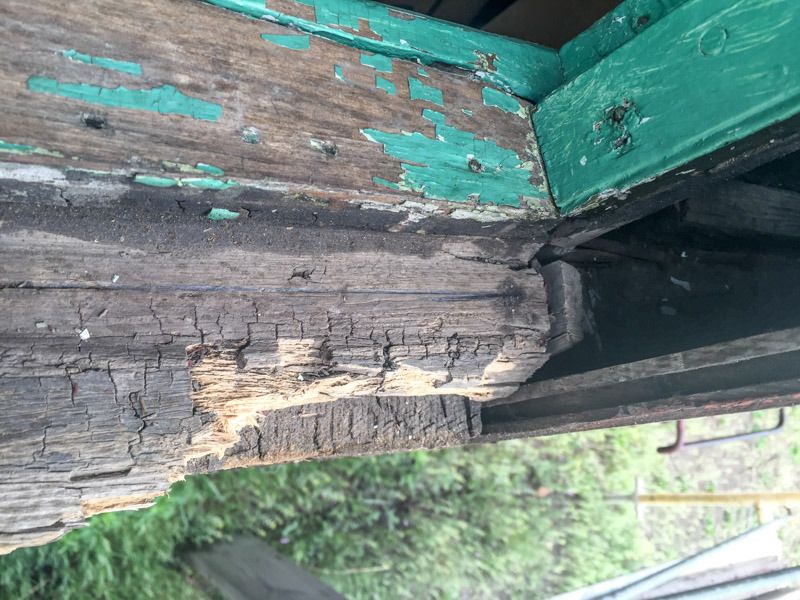
Getting a saw in there wasn’t an option, so it was chisel time, east work do to the deteriorated condition of the 100 year old wood.
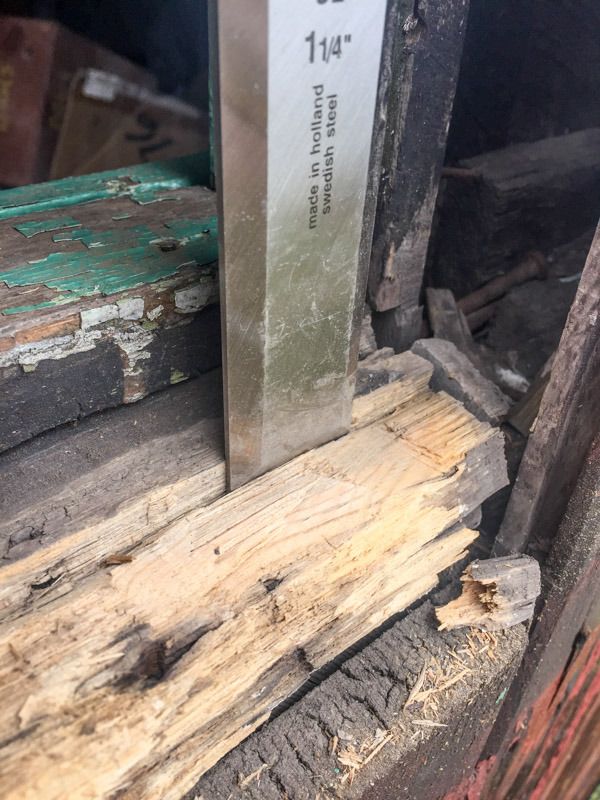
Laid out the dowel points.
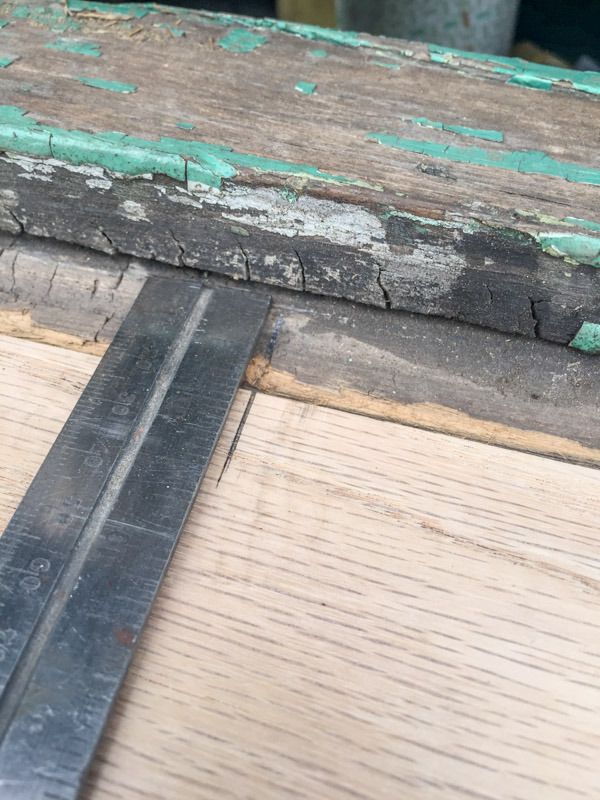
Drilled for 3/8" dowels, and liberal application of TightBond III all around.
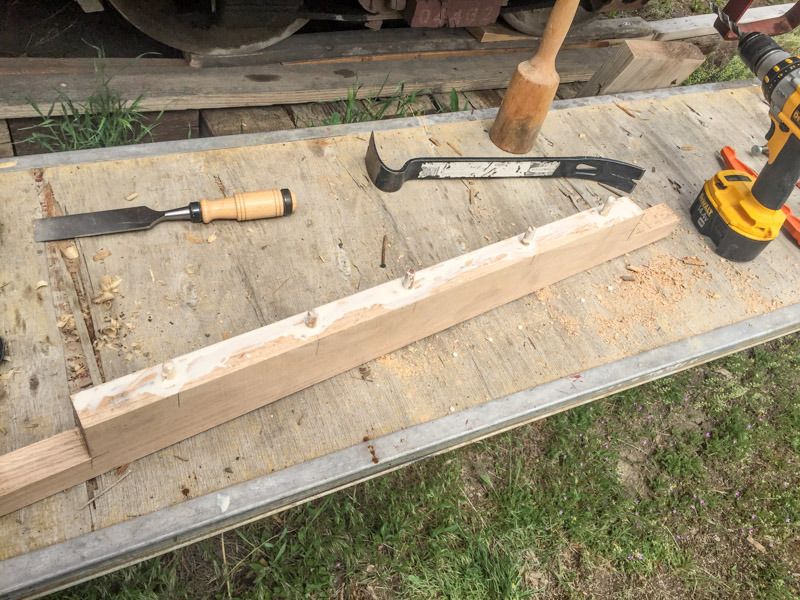
Went to work on the other side window, as I waited for the glue to set up. About the same procedure, other then this side had only a 3/4" thick sill, and we used 1/4" dowels. Another little mystery as to why would you make then different? Only the guy that built them 100+ years ago would know. But they are of a bit different construction, maybe built by different guys, or at different times? And maybe changed out or overhauled sometime along the way.
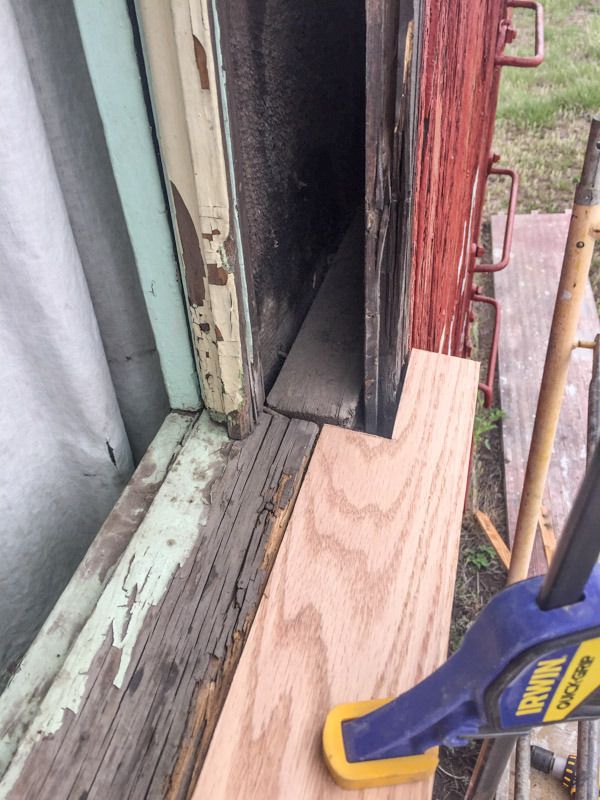
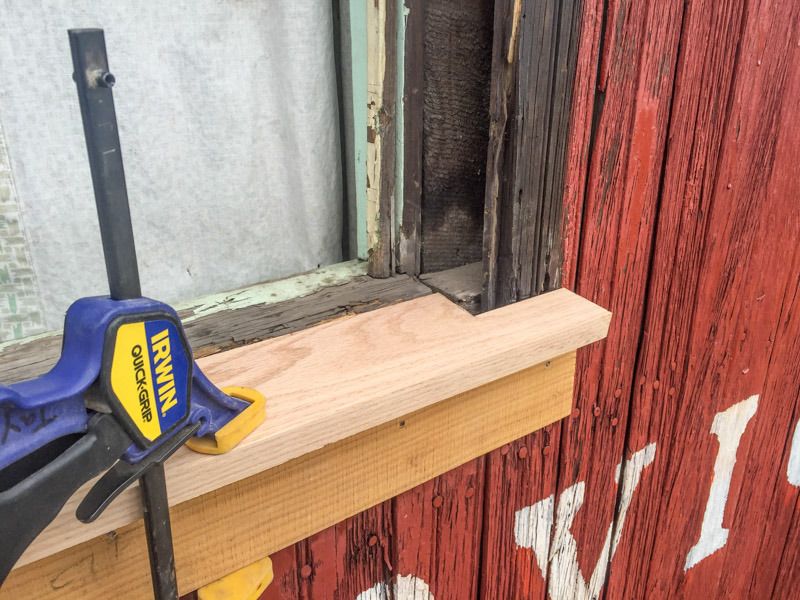
Added on the new trim, to Finnish the job up. All the trim pieces had to be custom cut to fit, and to match the size and construction of the original that we removed. I would have done the sills and trim different if it was my original project. As we restore these cars, we have to keep remembering and reminding ourselves, that our first priority is to preserve the historical content of the cars, and not just make a new car. We have to follow the lead given to us by the original construction. Some times we scratch our heads and ask “Why would somebody have done that?” Such as when there is a really big spike nail used when a finishing nail should have been used. So we put back in the really big nail, but this time we pre-drill the hole and not split the wood.
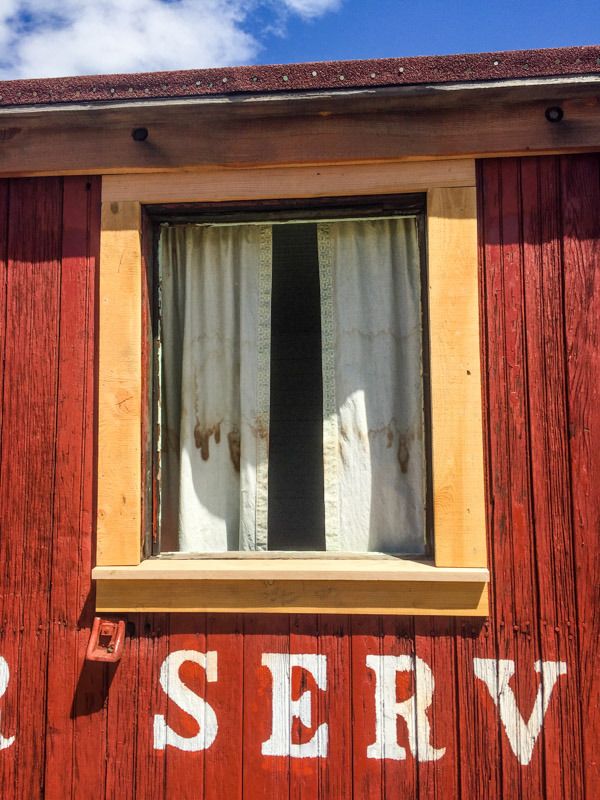
And the other side.
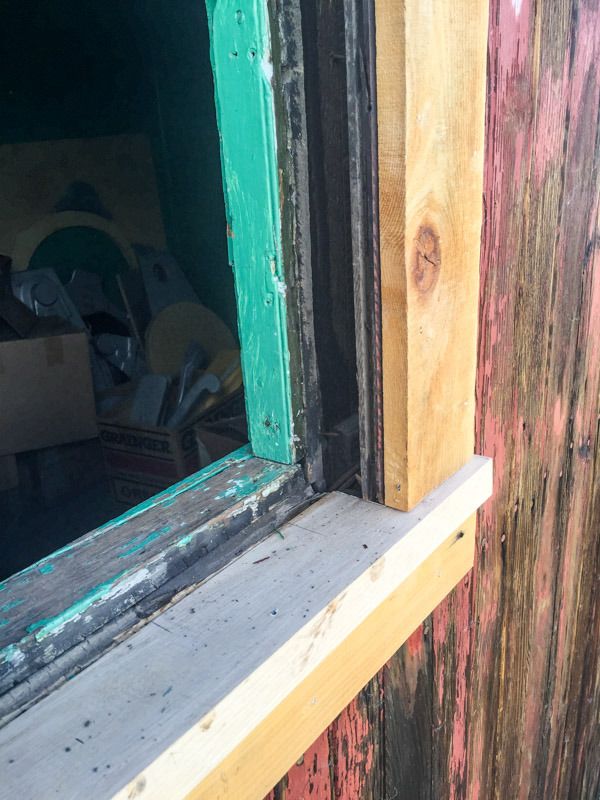
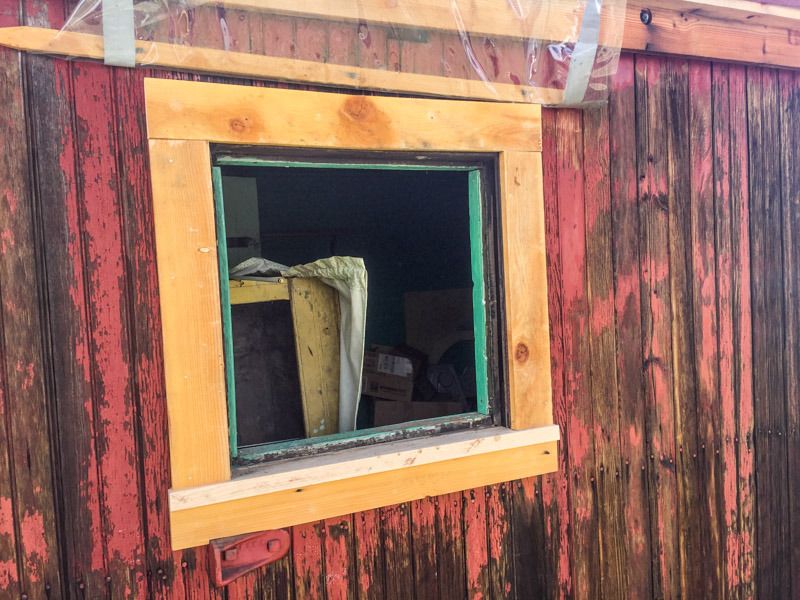
Yes, that is the boxcar door stop still on the side of the car, Go figure! And it is different then the one on the other side.
On a side note. After installing the new sills and trim, the walls are substantially more rigid then they were before.
Other workers got more done, and we are getting closer to getting the first coat of paint on, then she will look a lot more homie.