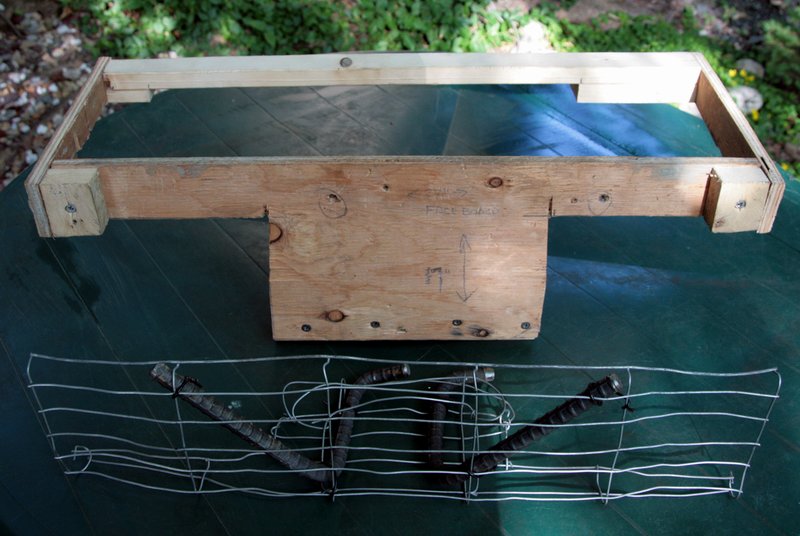
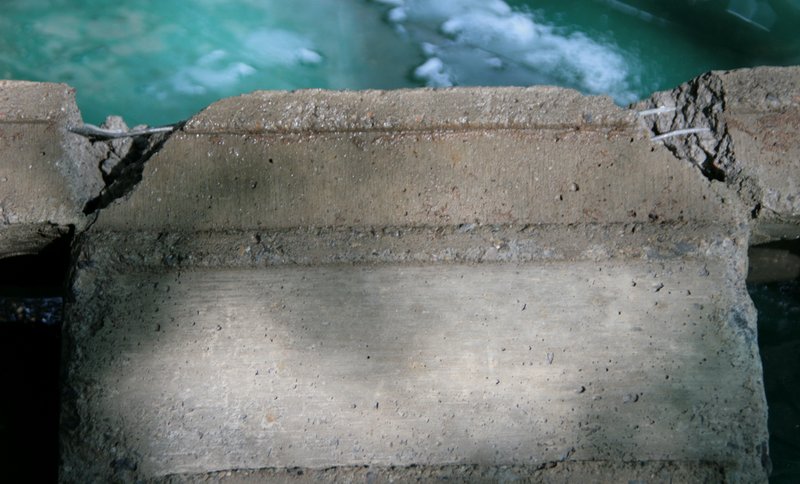
OK, just for Steve, I worked under threat of severe thunderstorms. So far everything is dry  For the last few days I’ve been working on the last piece of the portal, the face. Originally I wanted to model one of the EBT tunnels, but my terrain is too different, so I decided before I poured the wing walls that I would model the EBT’s utilitarian concrete design, but not an exact replica of any tunnel. A second consideration came into play a week or so ago when I realized that this piece was going to close in the opening making access from the portal end more difficult. I made the decision to try and make this pour a cast-to-fit removable piece. The form work was some of the most complex work on this project to date. Since a fairly large portion will be supported by a relatively thin pice, I decided it would need a serious rebar cage. This is what I came up with for the form and the cage… [url=lsc.cvsry.com/Post/DeepCutTunnel-48-1200.JPG]
(http://lsc.cvsry.com/Post/DeepCutTunnel-48-800.JPG)
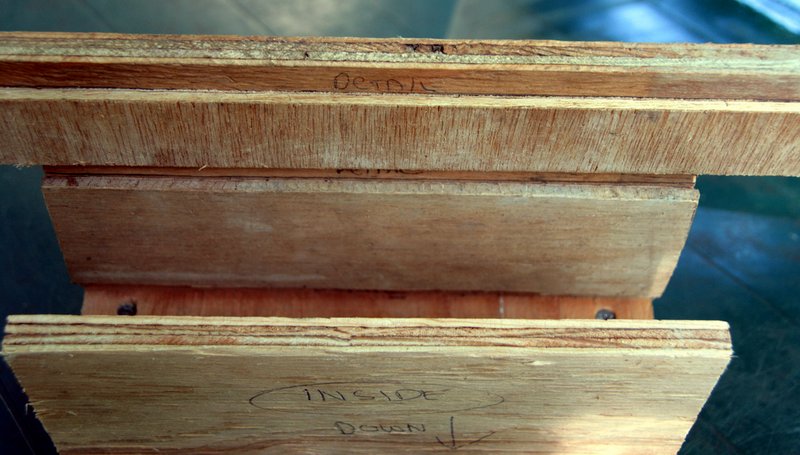
[/url][color=blue]FF: Click to Enlarge - IE: Right Click Photo and select Open Link in New Window to Enlarge[/color] I used some luan plywood attached to the inside of the form with headless pins to create some EBT style detail… [url=lsc.cvsry.com/Post/DeepCutTunnel-49-1200.JPG]
(http://lsc.cvsry.com/Post/DeepCutTunnel-49-800.JPG)
[/url][color=blue]FF: Click to Enlarge - IE: Right Click Photo and select Open Link in New Window to Enlarge[/color] [url=lsc.cvsry.com/Post/DeepCutTunnel-50-1200.JPG]
(http://lsc.cvsry.com/Post/DeepCutTunnel-50-800.JPG)
[/url][color=blue]FF: Click to Enlarge - IE: Right Click Photo and select Open Link in New Window to Enlarge[/color] Here is how the rebar cage is supposed to fit in the form. In practice, I added some concrete first, then pushed the cage into it… [url=lsc.cvsry.com/Post/DeepCutTunnel-51-1200.JPG]
(http://lsc.cvsry.com/Post/DeepCutTunnel-51-800.JPG)
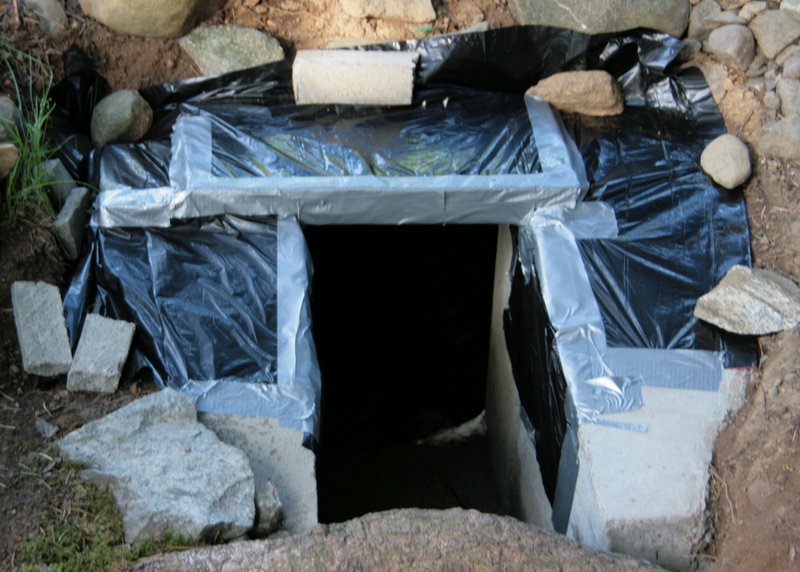
[/url][color=blue]FF: Click to Enlarge - IE: Right Click Photo and select Open Link in New Window to Enlarge[/color] To keep the concrete from bonding to the existing portal foundation and wing walls, I covered them with plastic and duct tape… [url=lsc.cvsry.com/Post/DeepCutTunnel-52-1200.JPG]
(http://lsc.cvsry.com/Post/DeepCutTunnel-52-800.JPG)
[/url][color=blue]FF: Click to Enlarge - IE: Right Click Photo and select Open Link in New Window to Enlarge[/color] The form in place, ready for concrete… [url=lsc.cvsry.com/Post/DeepCutTunnel-53-1200.JPG]
(http://lsc.cvsry.com/Post/DeepCutTunnel-53-800.JPG)
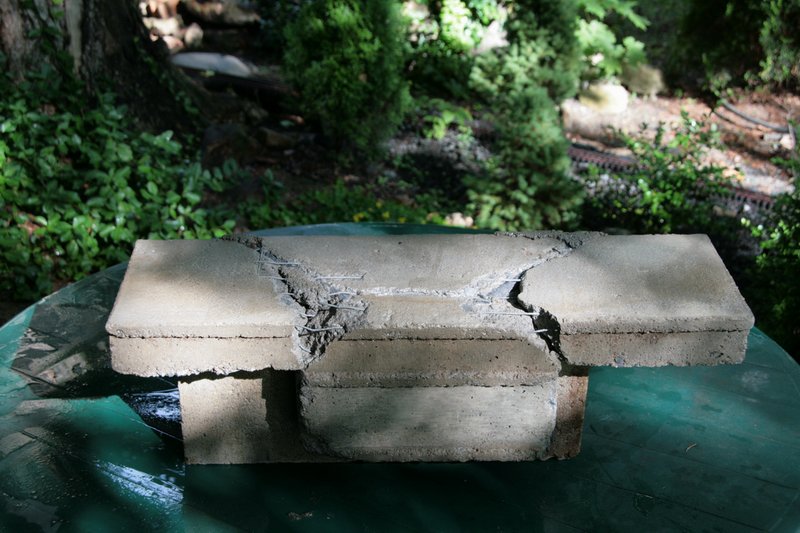
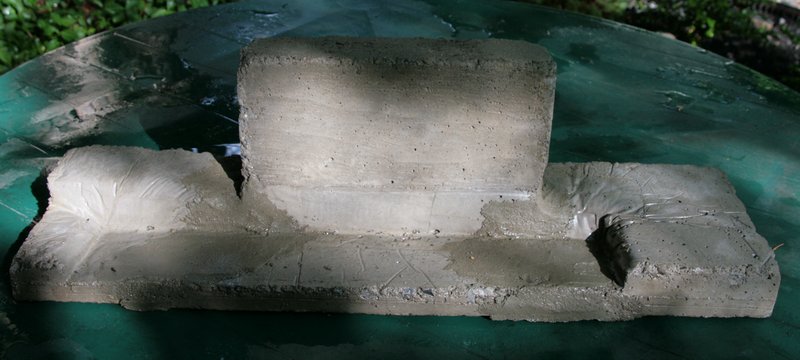
[/url][color=blue]FF: Click to Enlarge - IE: Right Click Photo and select Open Link in New Window to Enlarge[/color] I poured using a mixture of concrete and mortar to make it more workable… [url=lsc.cvsry.com/Post/DeepCutTunnel-54-1200.JPG]
(http://lsc.cvsry.com/Post/DeepCutTunnel-54-800.JPG)
[/url][color=blue]FF: Click to Enlarge - IE: Right Click Photo and select Open Link in New Window to Enlarge[/color] I’m going to leave the forms in place for several days, and not try lifting the finished piece for at least 5 days. I don’t want to take any chance of cracking it while still green. This is perhaps the most time and material consuming 7 foot of railroad ever built :o I just hope I have it finished in time for Fred’s funeral. The way he’s going that will probably be another 20 years or so. I think I have a slight chance of finishing in time


 I spent the day today with the wet vac and towels getting it dried out. The good part is that it was vacuumed and detail cleaned inside for the first time in several years. If I hadn’t of backed into the garage with the lift gate open {crunch}, it would have been a good day