Large Scale Central

CVSRy considering expansion on raised benchwork

I’ve long been a fan of raised outdoor railroads, initially admiring Richard Smith’s system up in Oregon and most recently Ken Brunt’s re-build in Pennsylvania. My railroad was designed to expand North across the front of my house to an un-improved area on the North side of my house. To get to the North Slope (for those who have been following me for a long time) I need to go through the cement and stone front steps to the house. That obstacle kept my expansion plans cool. More recently I’ve given thought to turning West and running out into my back yard on raised bench since the existing track at “Wall” is already 3 feet above the grade of the back yard.

Today I got serious about planning this. Step one was to survey Coal Dump Curve so I could plug it into Visio CAD software and RR Track to play with design ideas. Since Coal Dump Curve was bent to eye, I decided the best way to determine the radius was to lay out a string grid so I could take some measurements. I ran a string diagonally across the inside of the curve from start to finish…

Then ran out the tangents from either end of the curve to the point where they meet at a 90 degree angle…

Then ran a string from the center of the first line to the intersecting point of the tangent lines…

Once this was done, measurements were taken along the string lines to allow me to draw the existing arc in CAD to determine the radius and/or diameter of the curve.

While I was out there, I took my paper template of a USA or Aristo #6 switch and laid it on the track. It looks like the #6 will cut right in to the existing curve which works out to be 16.6 foot diameter or just slightly bigger than Aristo’s 16.5 Ft curves…

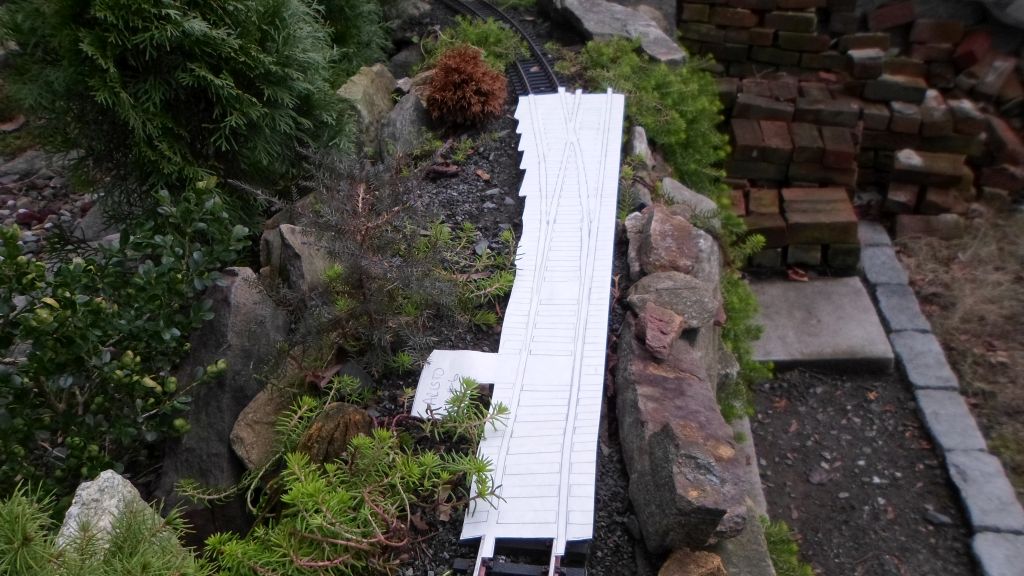
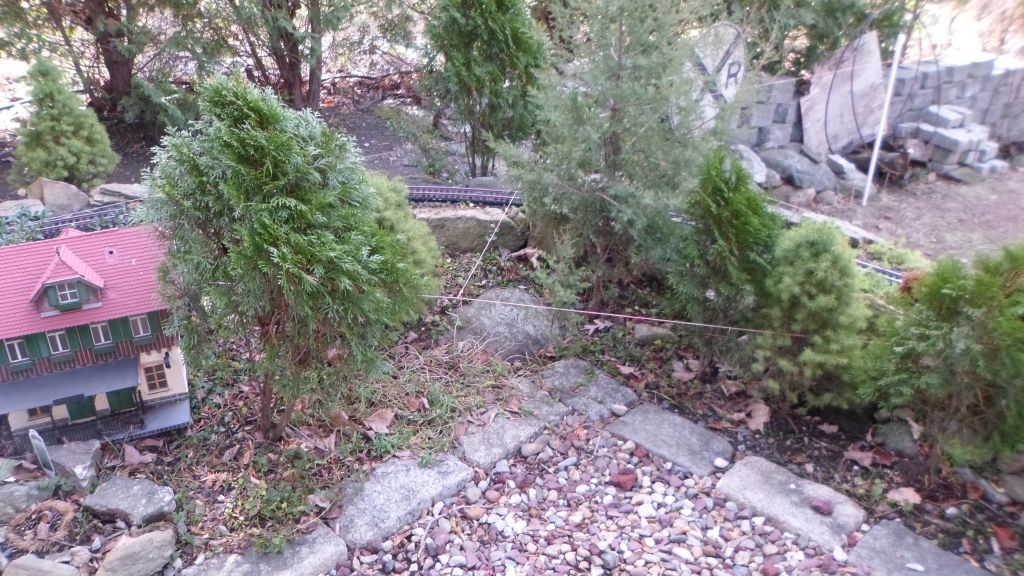
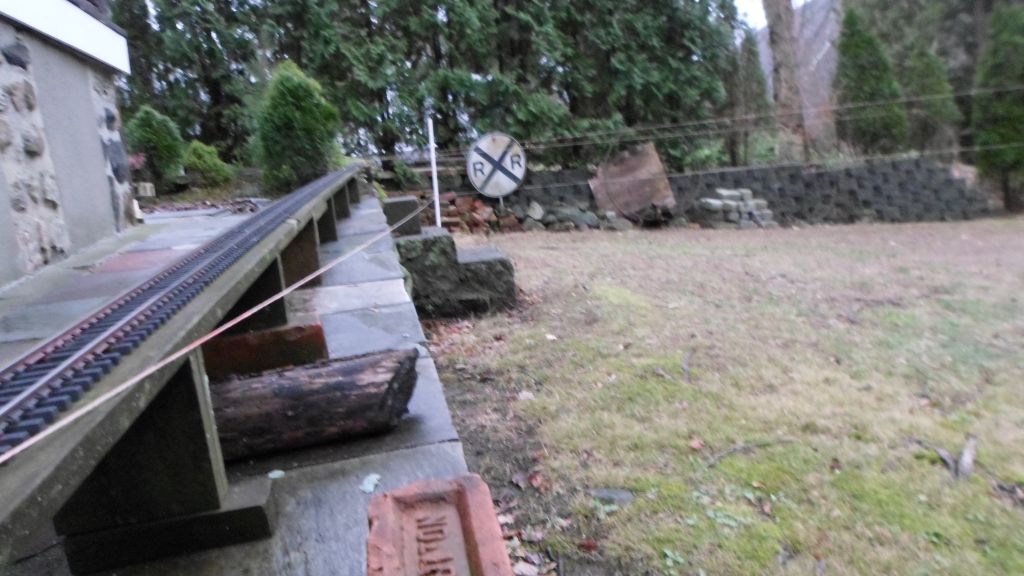
Only trouble is, the tangent track will require re-location of a rock that I use often in photos…

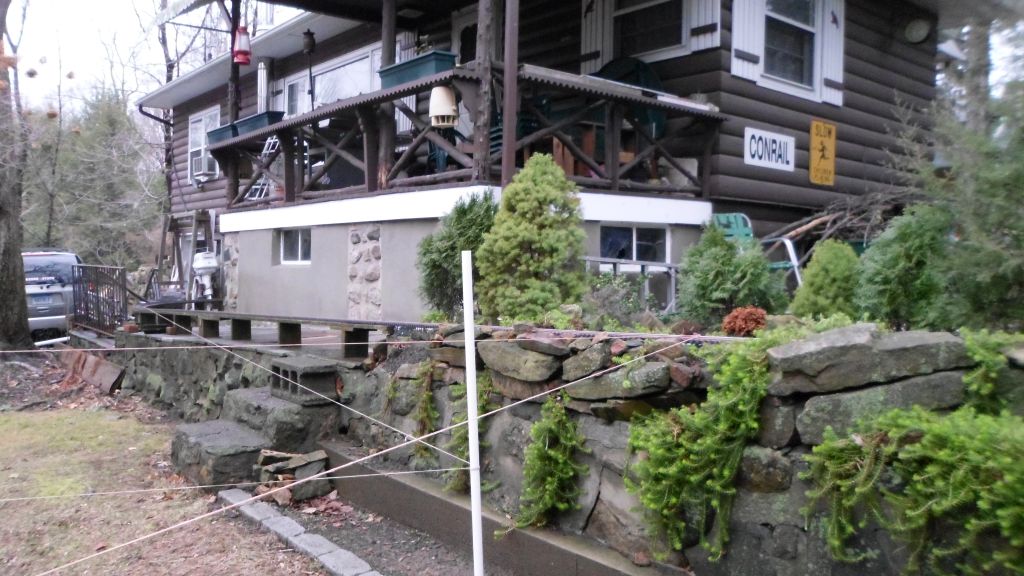
This first shot of the expansion real estate illustrates how quickly the ground falls away to the right of the existing track. The track is about 3 foot above grade at the wall…

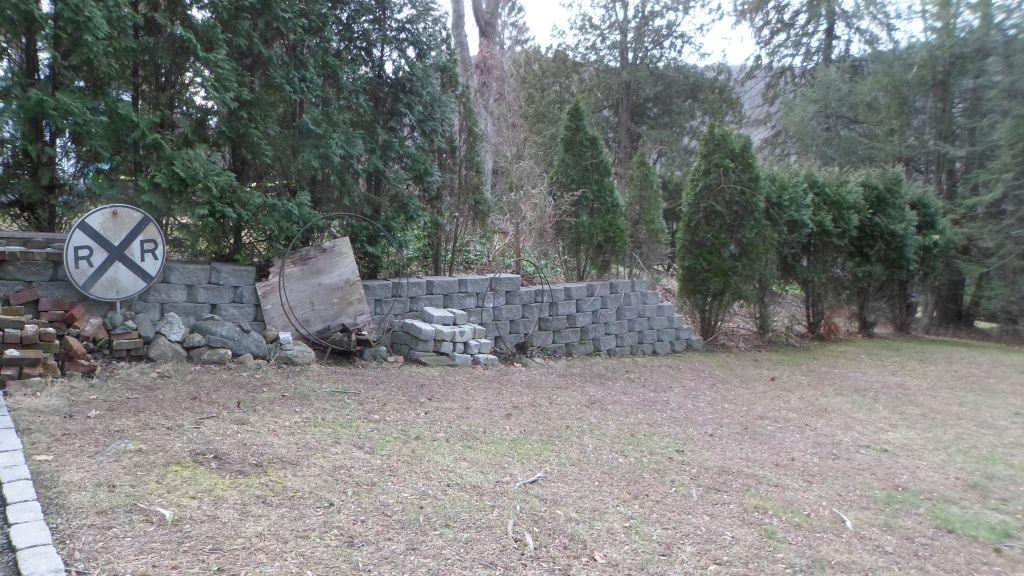
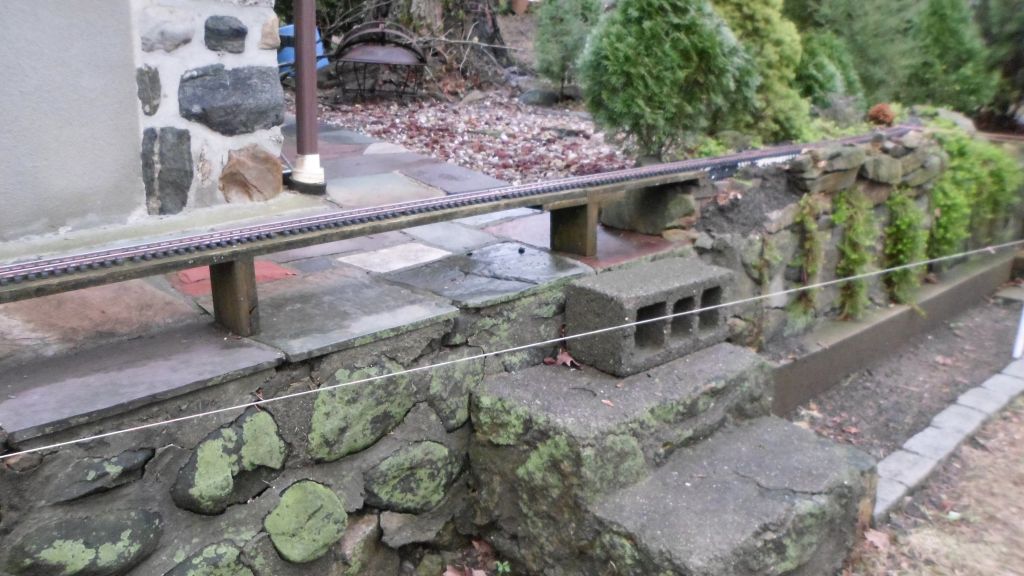
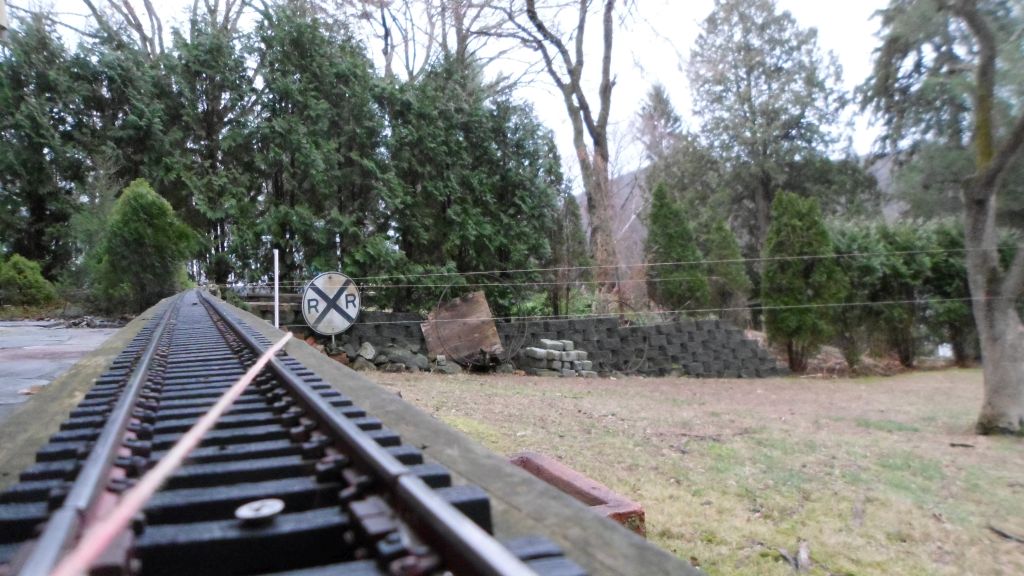
As we pan to the right (West) where the block retaining wall ends, the ground is nearly 5 feet below track level…

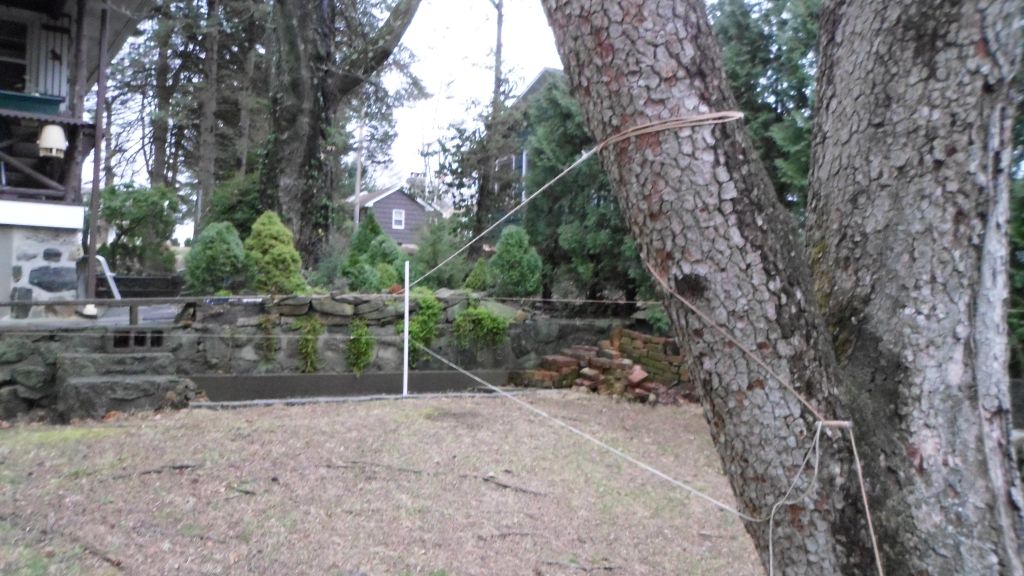
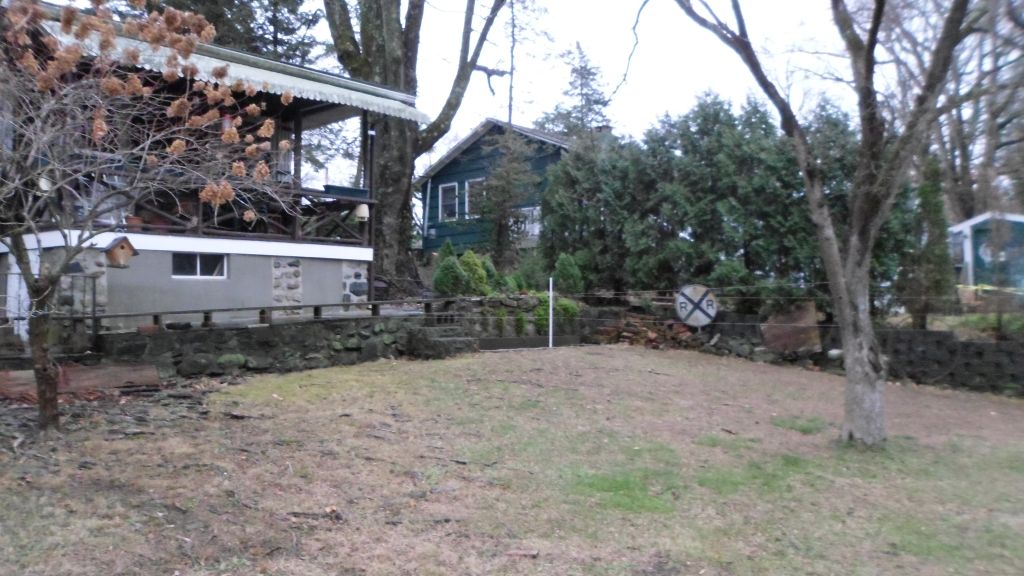
I’d like to build the benchwork nearly dead level, but I want to be able to reach the track as well, so either I build the ground up or change the plan. This long shot shows the tree line at the rear property line. That’s about 60 feet from the existing track…

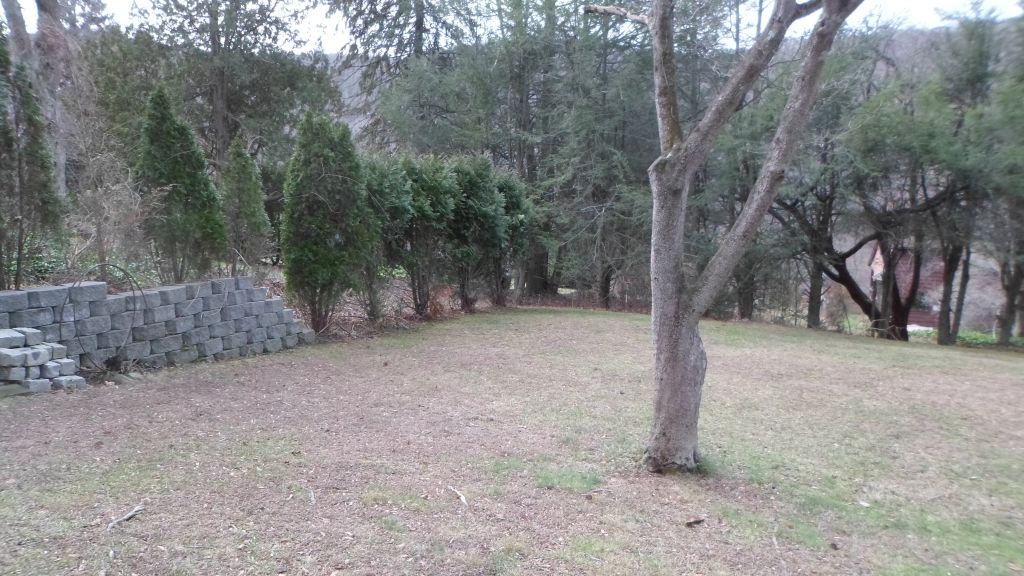
My original plan was to stay along the lot line, where the block wall and shrub line is, but the grade is a big obstacle. I could turn North again before the grade gets too far out of reach. I do plan on putting a reverse loop in this expansion section to allow loop-to-loop continuous running for my steamer.

The survey fills in the “Givens”, here are a couple of “Druthers” that I’ve worked out:

Benchwork accessible from only one side shall be no higher than 40" from grade and no deeper than 30" to allow me to reach everywhere standing on the ground.

Benchwork accessible from both sides shall be no higher than 40" from grade and no deeper than 50" to allow me to reach everywhere standing on the ground.

Single track elevated roadbed shall be no higher than 50" from grade to allow me to see and reach standing on the ground.

I’m sure I’ll come up with more design criteria before I put saw to material next spring and I’m certainly open to suggestions from those who have gone before me.

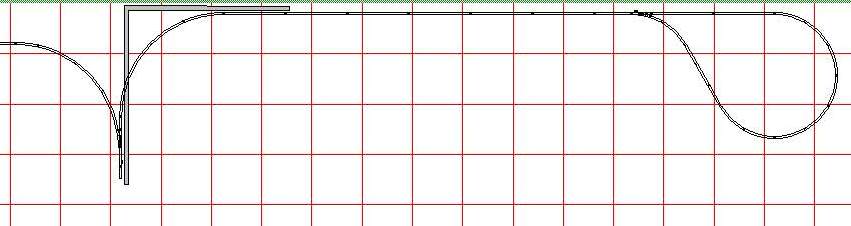
Here is a very preliminary track plan - the view is toward the South lot line, existing railroad curves to the left, expansion curves to the right. The curve after the switch is the same 16.5’ Diameter as the existing main line and the reverse loop is 10’ diameter with a “Wide” radius switch. The grid is 48 inches…

Lot’s to think about while the snow flies

X

Jon,

Put an over and under loop out around that tree with just a running track. That will give you an additional, what?, 50-75 feet of track to accommodate the elevation change you need. Or if the distance is enough, looks like 28-30 feet use a big horse shoe loop with no over and under

will still have plenty of track for elevation change.

Just a thought.

Rick

I’m not sure you want a switch out there. I’d favor an out and back loop and use that switch just before you rejoin your main. Keep it where you have easy access.

Back in little train days elevated walkways helped to cope with double deckers, perhaps an elevated walkway will open up that space for you.

John

Cool!

When will it be finished?

Rick Marty said:

Jon,

Put an over and under loop out around that tree with just a running track. That will give you an additional, what?, 50-75 feet of track to accommodate the elevation change you need. Or if the distance is enough, looks like 28-30 feet use a big horse shoe loop with no over and under

will still have plenty of track for elevation change.

Just a thought.

Rick

Thanks Rick. There is lots of space - 70 some feet from the main to the lot line at the back of the property, and another 60 feet or more from the line where the block wall is toward the tree and beyond before there are obstacles like a driveway. Like you say, plenty of room for grade change and I do want to keep it to under 1% if I can for steamers.

The only issue I have with coming away from the edge of the property is lawn mowing. Any grass that needs to be mowed needs to be accessible by a ride-on. I don’t have a hand mower to get in to tight places. With proper planning and a lift-out that can still be accommodated.

John Caughey said:

I’m not sure you want a switch out there. I’d favor an out and back loop and use that switch just before you rejoin your main. Keep it where you have easy access.

Not sure which switch you are referring to - at the reverse loop? It would still be accessible. The points along the straight between the main and loop will be developed for industries and switching opportunities.

John Caughey said:

Back in little train days elevated walkways helped to cope with double deckers, perhaps an elevated walkway will open up that space for you.

John

That’s a good idea, and something I’ll consider before bringing in fill.

David Russell said:

Cool!

When will it be finished?

Not planning to break ground until spring. Rumor has it that winter is about to begin on Tuesday.

I’m going to build in phases, like Ken is doing. Phase I will be to cut in the switch and get the benches for the first curve installed. I can’t invest a lot of cash in a lump sum, so a weekly Homely Depot run will probably be the plan. If I get to Phase II which will be an industry or two before the end of the building season I’ll be happy. The reverse loop probably won’t happen, unless on just temporary ladder roadbed, before summer 2017.

EDIT to add: I have the #6 and enough track in-stock to get the first curve done. I’m looking at Aluminum track prices. Shipping long sticks seems to be the problem with cheap rail.

Daktah,

The far switch out on the loop, if you run the track level it would be hard to reach and … then I thought of the walkway. Going off the sketch I envisioned a double track mainline along the brick wall and moving that switch to complete the reverse near the original trackage.

John

Jon,

Remember the area very well. Sounds great! Look forward to seeing the progress. Remember Al’s track plans going to the barn/garage from the basement? The planter boxes and bridges would be a source for allowing the elevation change and supporting it.

So reason for expansion, more switching, longer runs, more photo locations, longer trains? Just because?

Wow, a blank slate!

I know you’re just in the early planning stages, but my first thought was, why a straight line along the wall? Long flowing curves would ease the grade somewhat and add a little more visual interest. That was one reason there’s a sweeping curve from Delores going up to Mancos on mine. Then, another curve in that corner moving that reverse loop 90 degrees to the right would add a little more.

Or going with what John suggested, use the trackage along that back wall to get it down to a manageable height, then a Horseshoe curve coming back parallel with that heading back where your industries would be accessible at a lower elevation. And, like you said, you’ve got all winter to think about it.

I’ve found the aluminum flex track very easy to work with. And since it’s lighter, shipping is a bit cheaper.

(Then again, I use Switchcrafter’s weathered aluminum and the Accucraft narrow gauge tie strip. )

Thanks Ken (http://www.largescalecentral.com/externals/tinymce/plugins/emoticons/img/smiley-smile.gif)

It doesn’t need to be straight - I drew that primarily to see how the reverse loop would fit in. And the loop doesn’t need to be so defined; it could just be meandering track that ends up connecting back in anywhere to form a loop. I just need to keep lawn mowing and leaf removal in mind. This area is under a huge Maple. Of course, and grass that I maroon could be removed and converted to crushed stone or mulch cover.

@John - OK, I got you. You were concerned about height. I am too. If I build it that way the track would be no higher than 50" above the ground so I could see and reach everything. An elevated walkway may just figure in somewhere although I’m giving some thought to turning North and not fighting the big grade at all.

Ric Golding said:

Jon,

Remember the area very well. Sounds great! Look forward to seeing the progress. Remember Al’s track plans going to the barn/garage from the basement? The planter boxes and bridges would be a source for allowing the elevation change and supporting it.

So reason for expansion, more switching, longer runs, more photo locations, longer trains? Just because?

Reason - Primarily so I can run my steamer more. I don’t run it a lot because it can derail at some of my switches and when it does it drops the drive-line link. I have a heck of a time getting that back together on the ground. If I use this area to give myself another reverse loop I can have a continuous loop-to-loop run where all of the track is raised, from the indoor layout through the raised trestle to the expansion area. That continuous run is also something I’ve been missing. I tried making that work in the front yard with a loop over Deep Cut, but once I crossed the cut the grade coming back to the main was too steep for the short run I had.

Photo Ops? Perhaps, but there’s nothing pretty out that way - maybe I can work that in too. And jut because? I guess so, because I have the switches and some track that is itching to be used.

Of course, along with a new spur line there will be plenty of places to add industries for switching operations.

Seems like a nice plan… Be nice, if you had a “Y” No 6 switch at the start… would ease that curve a little more… (http://www.largescalecentral.com/externals/tinymce/plugins/emoticons/img/smiley-cool.gif)

Based on the input received here so far and some more dreaming last night I got out there with the string level today and did some move surveying. I realized that the easiest way to get closer to the ground is to not go up in the first place. Let me illustrate.

Here you see several string lines. The two at the top are from track level at the original proposed switch location. The right one heads for that block retaining wall, the left one for the tree. The bottom string originates at track level where my outside grade begins, just past West Es-cap-e…

And looking down the two string lines from the tree…

And the top line where it reaches the end of the block wall. Here the string line is 58.5" above grade - 10 inches over my maximum design height…

Here we are looking back toward the origin of the lower line. If the expansion track where to start here and parallel the existing main, it would arrive at that white post at only 20" above grade…

One issue paralleling the main would be where the track would cross the steps. I think I’d rather head towards the tree than to have to deal with reconfiguring the cement steps…

Looking back toward Coal Dump from the grade origin point…

And finally, a long shot of the entire area…

The area to the left of the tree toward the existing track is a great candidate for lawn elimination, you can probably see the roots from a large Swamp Maple that refuse to stay buried which makes this area of lawn quite useless for anything else (http://www.largescalecentral.com/externals/tinymce/plugins/emoticons/img/smiley-wink.gif)

Looks a lot like what I was doing about 2 years ago. String lines, line levels, tape measures, grade stakes…and a whole lot of pencil marks on the shed wall… and a plan slowly forming in the back of your mind…(http://www.largescalecentral.com/externals/tinymce/plugins/emoticons/img/smiley-wink.gif)

Ah, I just laid out an unusable garden hose in the yard. The only string I used was from center stakes, to trace out the arcs of my curves.

Jon,

couple of considerations to take in account with your extension;

include some industries to justify the expansion, possibly a small yard.

your concern with your shay problems on the aristo switches is noted, have you considered rebuilding with new frogs and points? I seam to recall that you do not have many switches outside at this time, so a replacement program with more “Scale” switches would not be a bad thing considering you are primarily running 1:20.3 stock. I have never purchase from them but BK engineering lists code 332 brass switches

http://www.troutcreekeng.com/bkg.html (this came up as a cashed page)

AL P.

Thanks Al -

A few industries are definitely on the must-have list. In fact, the first phase will most likely just be a dead end spur out to an industry. The reverse loop will be the final phase.

My switches are for the most part trouble free. There is one junction where the main passes through three #6 switches in a row. This can sometimes be a problem if I fail to be sure all the points are seated tight and frogs and flange-ways are clear. When I get a derailment with the live steamer, inevitably the drive link will open up. This is almost impossible for me to set right at ground level so I end up shutting off the fuel and aborting the run. It doesn’t happen every time, but it happens enough that I tend not to run the steamer when a sparky is available.

I’ll check out the switches you recommend, but my budget will probably only allow purchase of frogs for hand-built switches after I run out of stock on hand. I do have a nifty brass stub switch I scratch built many moons ago just to see if I could do it. It’s a little too tight for 1:20 stuff but gave me the confidence to roll my own in the future. With pre-made frogs stub switches are easy.

David Maynard said:

Ah, I just laid out an unusable garden hose in the yard. The only string I used was from center stakes, to trace out the arcs of my curves.

Been there, done that. It failed to show me the grade and when I started to build I discovered it would never work…

True it doesn’t show grade. But I knew the elevation difference between my track into Shannon and the pass through of the rock wall. That made me extend the Shannon loop further over into the yard, once I knew how much hose I laid out there. My goal was 2.5%, and I missed it by .08%