Large Scale Central

CR30 3DPrintMill

I didn’t even know this technology existed until about a week ago:

Creality CR30 3DPrintMill

It is primarily designed for 3d print farms - BUT - it can print VERY LONG PARTS on its Z-axis.

I should be able to print entire Pullman car sides (28") as one piece. I will be able to print my carrier ramp as one piece, and increase its length to a more desirable 24",

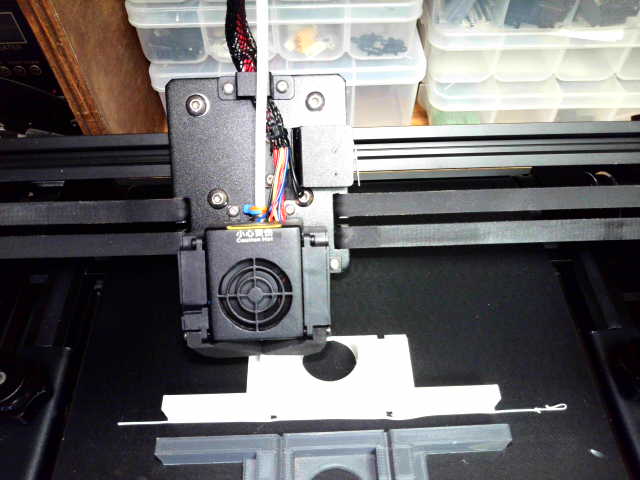
Here it is printing its very 1st test print:

I have no idea what it is, some sort of square cube I guess…

So the goal is to be able to print G-scale rolling stock. I should be able to print a Pullman car in six parts:

  1. Left side
  2. Right side
  3. A end
  4. B end
  5. Roof
  6. Floor/Frame

I plan to use Kaydee couplers and some sort of pre-built trucks.

=============================================================================

I will need help with the following:

  • Painting and decaling techniques.
  • Source of pre-built trucks.
  • many other things, I know so little about this I don’t know what I don’t know…

=============================================================================

On the trucks, I want quality with metal wheels and axles, ball-bearings preferred.

On the paint I need sources of (close enough to) authentic colors such as Daylight Orange, UP yellow, etc.

Want to keep the costs reasonable. Expect to be making a lot of cars once I master the technique, so will want volumes greater that “Tester bottle”.

Sources for prototype decals. Considering the use of blank laser printer water-slide decal paper. Anyone have experience with that media?

============================================================================

Am setting up a new pi with Octoprint as I type this. Once that is working I start playing with some of my own prints.

Printing a 24" ramp, so far - so good

Grey part is the existing 20" ramp printed as 2 parts, the white is whats printed so far of a single piece 24" ramp.

As of 7:22 this am:

Its getting to pucker time, once the part reaches the end of the belt its weight tries to pull it off… there’s an inch of belt left, and another 5 inches of part left to print.

Charles Ro is a source for USA Trains motor blocks. trucks etc.

On our 3D locos, that’s where we get them.

John,

Thanx, I always forget about Ro. Couldn’t find any passenger car trucks there, but I found these at OnlyTrains:

This should be a good starting point. I will worry about ball bearing wheels later…

Print time: 24:00:23

24.75" long

A little deformity on the leading edge, should clean up just fine:

The track test had an issue with the Kadee coupler hook catching the inside web, I just bent it to complete the test. Need to ponder that, I don’t think its a good solution as I want to use the Kadee de-coupler magnets someday… Probably just a short slot in the middle for a few inches, once the wheels are on the ramp it all straightens out.

So, at this point:

  • Printer is working for LONG parts.
  • Have Octoprint set up and controlling the printer.
  • Using IdeaMaker for slicing.
  • Have Blackbelt Cura installed, but no joy with it and the CR-30.
  • Have CrealityBelt Cura (windows/Mac only at this point) running on Ubuntu with Wine. Tested slicing, not actually used yet.

Next step is to fire up FreeCAD and start modeling a Daylight Pullman!

Steve;

Something to consider about uncoupling large scale Kadees. A medium width flat bladed screwdriver does that job just fine. (Insert the blade between the knuckles and twist clockwise.) Many of the folks I operated with seemed to prefer the screwdriver. It’s easy to carry and always ready when you need it. Magnetic uncoupling is good for those way out of reach areas, but people tend to plan their layouts so they can get to any location on them. Just a thought.

Best, David Meashey

David,

Thanx for the tip. My vision of using decouplers is more that of creating a prototype freight yard. In theory, with an optical position detector, I could automate the process where a switcher could build and tear apart consists without human intervention. Even without that level of automation it would be cool to be able to uncouple a complete consist from a loco on an arrival track and then push it to the yard where it uncouples individual cars by my actions using WiThrottle or JMRI commands.

Holy cow Steve, that IS a new twist. “Infinite Z,” or endless production of multiple parts, with that conveyor belt. They say they have the world record on longest 3d printed part (I assume FDM type specifically), at 6 meters. That’s a long print! Steve, I doubt your passenger cars will have any problem!

Are you going to get the roller extension?

Cliff,

Yes, it arrives Thursday. It is insanely expensive (relative to the printer), but I didn’t want to have prints fall off the belt after printing 15-20 hours and almost being complete.

Going thru the “heck, my shop is really ratty, gotta fix things up” stage as I try to make a permanent home for the CR-30. Just finished making a real wood heat box for the CR-10.

Still need to find a descent piece of plexiglass for the front. Looks like I have enough room to the left of the CR-30 to install the rollers:

Very cool. I suppose people sometimes “roll their own” for that add-on, but I get it, why not just buy what’s already figured out.

And incremental shop improvement, IMO, is a fun part of any new tool acquisition. :slight_smile:

So the heated box is because the belt isn’t heated, or heated very well, I suppose?

Steve said:

I didn’t even know this technology existed until about a week ago:

Bill Steele created the “Infinite Z” design about 5 years back. Nice to see it finally made available commercially. I remember watching Brook Drumm testing one he was going to produce but t collapsed when Printrbot went under.

So the goal is to be able to print G-scale rolling stock.

What material are you using?

=============================================================================

I will need help with the following:

  • Painting and decaling techniques.
  • Source of pre-built trucks.
  • many other things, I know so little about this I don’t know what I don’t know…

=============================================================================

Depending on material used you will probably need to work out a finishing technique to get rid of (or at least reduce) the layer lines.

Sources for prototype decals.

There are some custom decal shops that do excellent work - Stan Cederleaf, Circus City,

Considering the use of blank laser printer water-slide decal paper. Anyone have experience

with that media?

I print my own water slide decals with an old HP LaserJet and decal film. I also have a white toner cartridge so I can do white letters, etc. Finding suitable quality graphics (or creating my own) can be a challenge as I am not a Graphic artist.

-Dan

Cliff,

I read a lot of comments on the 3d printed rollers, even the author states that it has “roundness” issues.

The heat box (on the right of the photo) houses the CR-10 V2, not the CR-30 (ie belt printer). I print ABS and other filaments with it that require a heated enclosure.

This is one of the weaknesses of the belt/CR-30 version. It can’t do material like ABS as it has a “less than optimal” heat bed.

The belt is heated, but not enough for ABS. Or so the common wisdom goes. I’ll probably try someday - I have encountered so many things in life that people said couldn’t be done, but when I try I sometimes find out it can be done! A heat box would be difficult as the PS and computer are in the bottom of the frame, and you don’t want to enclose those in a heat box. They would have to be relocated.

Other issues too, but I digress,

I’d rather use the ABS as well, because of cementing.

Re the rollers, I was thinking along these lines, though I don’t know what the specs should be:

https://www.mcmaster.com/conveyor-feet/roller-conveyors-5/

Yeah, relocating those things seems smart.

I guess we know what your fall project is!

Best luck, and I’ll be watching,

Cliff

Dan Gilchrist said:

What material are you using?

I am going to use PLA+ (aka, PLA PRo)

Depending on material used you will probably need to work out a finishing technique to get rid of (or at least reduce) the layer lines.

I’ve have some good luck with this:

https://smile.amazon.com/Smooth-XTC-3D-Performance-Print-Coating/dp/B00PFXK4JY

I’ll probably use gray auto primer for a base, its thick and fills imperfections.

John Bouck said:

Charles Ro is a source for USA Trains motor blocks. trucks etc.

On our 3D locos, that’s where we get them.

Wait…he’s building a locomotive ?

I think he needs to build a high speed “Pickle Car” with HEP cabling and ditch lites!

I vote for a molten chocolate car with a mars light!

Steve, if you’ve not considered it, I’d look into using UV-cured 3DP resin for smoothing:

https://www.youtube.com/watch?v=lcQKHOWmG44

I’ve used XTC-3D, and came up with the same results described in the vid. And I’ve done some resin filling, and so far it’s pretty useful / workable.

Cliff,

This looks like it would be much better than XTC-3D, which is a pain to mix, and wastes any over-mix. My biggest problem with it was surface bubbles forming.

Questions:

  • Do you use elegoo (their sponsor), or some other brand?
  • For sides of Pullman cars would you suggest the ABS-like, or the water washable?
  • Do you use a UV light, or the sun?

On another related topic, I am a very poor finish painter. I am going to experiment with a technique where I print the car side as 3 sections:

  • Top Daylight red section (ie. section with “Southern Pacific” lettering)
  • Middle Daylight orange section with the windows
  • Bottom Daylight red section with the “Daylight” plaque

This would allow me to paint each section separately, no masking necessary! Then after finish painting I would glue the 3 sections together just as you would any other model.

Opinions anyone?

I’ve found a ttf font called railroadroman. I installed it and then opened gimp.

Looks close enough for govment work…

Found a youtube showing how to simply outline text with black by an arbitrary amount of pixels. SO all I should need to do is convert the text to SP “Lettering Grey”, outline in black, and print to waterslide decals!!!

I’ve only done the resin fill a couple of times, but filling resin prints, so I don’t know tons other than the vid.

But it sure worked. I got a uv light like that shown, you can also use a uv flashlight. What’s cool is that it cures almost instantly with a good uv light, which you turn on and off as needed. I wouldn’t bother taking it outdoors.