Large Scale Central

Corrugated Roofing machine

Got a little time to work on the roof roller. I changed my mind on the roller bearings and went with Greg’s suggestion of brass bushings and they got here just in time.

Thru drilled and taped the holes for the top support bar.

With the bearings in hand I turned the dies to size with about .001 clearance for the brass bushings.

The 4 bearing blocks had to be rather precise on there location to prevent binding. Laid out all four to same and took extra care to make sure they were alike.

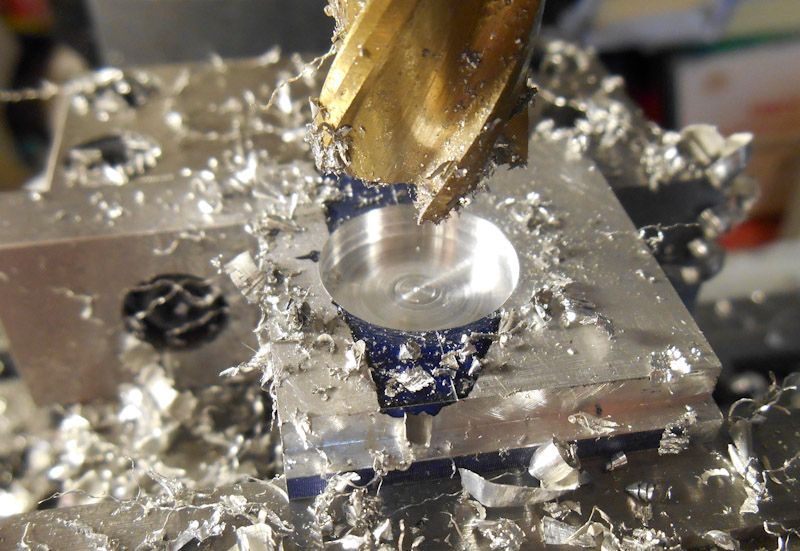
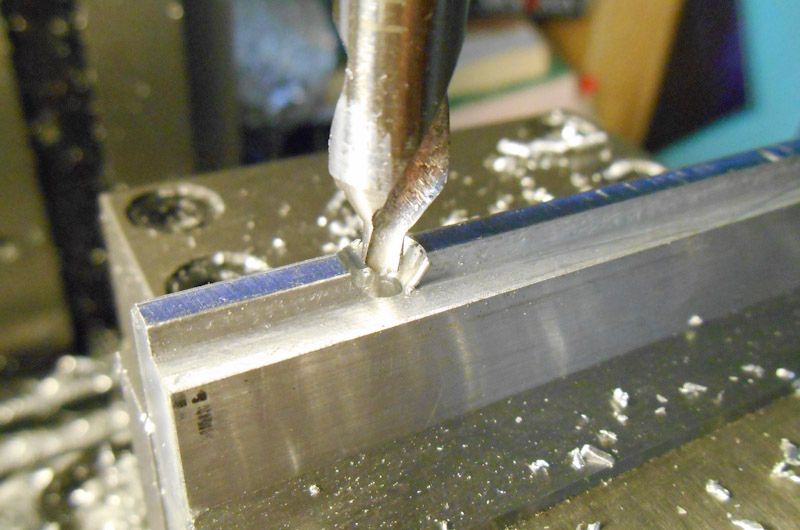
Bored the hole with 5/8 end Mill, lots of cutting oil made it go fairly easily.

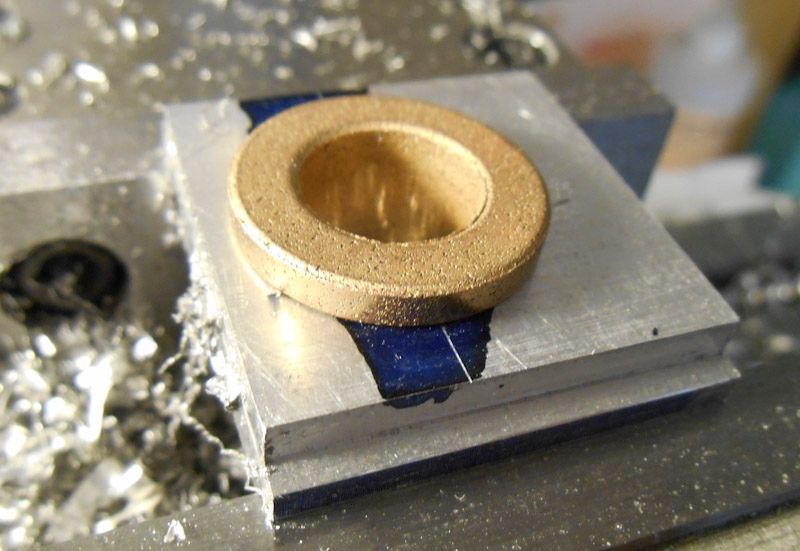
The bushing just fit not drive it in hard but slip in snug.

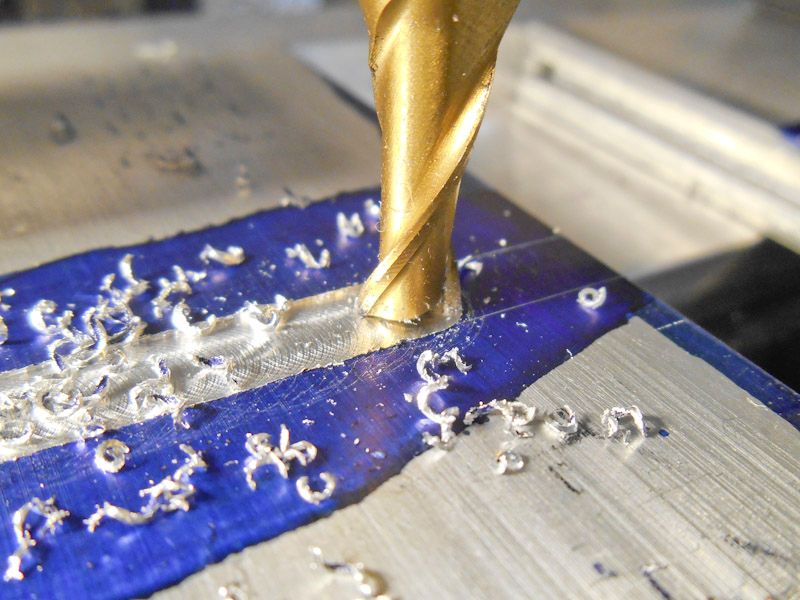
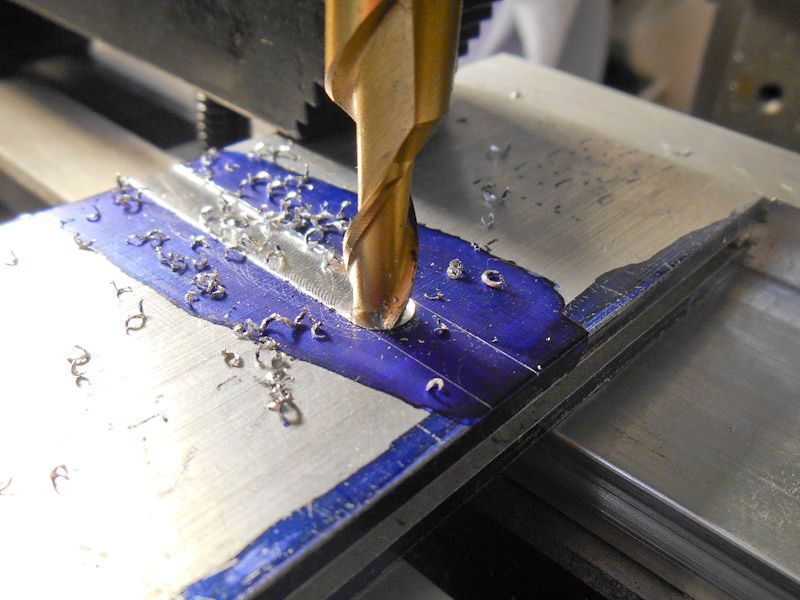
With the bushings in place and the dies set, I could now determine the height of the in/out feed tables. Laid out the placement of the 1/4” slots, and cut. These will be the upper support for holding the two side together. They will bolted in.

Next comes the base, and the feed tables.

I could’t wait to try it. Cobbled the sides together with the dies. Without the feed tables.

Put a small pair of vice grips on the shaft and just had to feel some thin aluminum thru.

Success !!

Yup its crooked cause I don’t have the feed tabled done yet. But it crimped.

I’m pretty happy with the profile, I don’t know if its too tight in the dies or not. I did have a bit of problem getting it to feed. I might have to gear the two dies together. We’ll see.

Tweaking is definitely in order, But it works!

Congratualtions Dave!!!

Looks good. Now to solve the arch in the feed. Or is that gong to be guided into the rollers by the feed table? Definitely got the profile real close.

Bob c.

Thanks Bob. There is very little arch, I think what you’r looking at is the crooked feed.

I was two handing the dies and the press, and the feed went where it wanted with multiple stops and starts.

Pretty cool. You better get your patent paperwork in order!

Dave,

When can I place an order for a 1/29 roller? :wink: Looks a lot better than the paper crimper versions!

Very cool, nice job Dave.

Got some time to work on the in/out feed tables. Finished up the basic attachment with 4 10-24 screws in each table, holding it all together.

Took a couple of pieces of .009 alum. And ran them thru the flame on the kitchen stove, until they went quite limp to anneal and they ran really good. Tried the same with a section of soda can too. Good results.

I now have to figure out the placement and design for the feed guides to keep the stock feeding straight. But with adjustments to place the first ridge where it need to be.

OK you engineers out there, I left lateral end play in the top die, thinking that it would kinda self center on the other die when rolling. Is this correct thinking, or do I need to shim the end play to prevent any chance of the top die from climbing the side of the bottom die? Or don’t worry about it unless it becomes a problem?

Need some technical help Guys.

Here is what I did. I went to Home Depot and got a roll of Aluminum flashing 8” x 50’ for $18.00. It’s .0092 thick. There is no ID on the package that tells me what Alloy it is.

Downloaded that data sheet that Bob suggested and read the data on the alloys. The Annealing temp. from all the Alloys ranged from 630- 780 degrees. I figured that the top temp would cover most everything.

Here’s the stuff: I used my 8” sheer to cut the roll to 12” lengths, and also made a few to 1.375” x8” as that is the size to run thru the dies.

Cut some small pieces for interleaving the stack and folded for Airspace.

Loaded the Kiln with the sheets, and tossed in 5 soda cans cut open.

Set the kiln to ramp up at 1000 deg. per hr. to go to a temp of 780 deg. and hold for 1 hr. and then free cool to 250 deg.

When cool this is what I ended up with.

(http://i1234.photobucket.com/albums/ff403/dave2-8-0/Roof%20rolling%20Machine/Roofroller-43_zps407de869.jpg)

There is some kind of coating on the flashing. One side turned Black and the other Gold brown. The soda cans burnt.

My observations.

The soda cans definitely annealed. there is an very definite different feel to the cans and they kink easily and stay that way.

I’m not so sure that the flashing annealed. It has a bit of different feel to it, but it still feels “stiff”, not soft like I would expect.

I washed off the burnt coating easily in warm water. I ran sone test pieces thru the dies. The soda cans are differently softer, but they are 1/2 the thickness. They did not tear like the un-annealed ones did.

The flashing was “softer” then the original, but did act alot like the un-annealed.

OK. what did I do wrong on the Annealing? Will heating it to hot, be a problem? It did Sag in the kiln, and now the sag is kinda set in. Cooled to fast? Added a slight temper back in?
Does your wife know your using her good ceramic kiln for that stuff?..:wink:

Did you try running a piece thru the machine without any annealing?

With my shim stock, I don’t do anything but run it thru the crimper.

McMaster Carr has a good supply of thin gage aluminum sheeting
Try varius things righting on the sheet with a sharpie, See if one setting is better than the other.
IMHO the two shafts geared together, and top wheel locked from side to side movement, would be my
choice. As years of steel Fab business, steel varies alot as far as stiffness, hardness, when rolling or breaking steel the same setting, will result in a little difference between multiple pieces. One of three will roll a little tighter or looser, if three different pieces of steel are used. So if you can use something straight from the vendor and get satisfactory results, that is the direction I would lean.
Remember your material has to move from the sides as it is rolled.
If you had the very center roll tighter to hold the sheet tight and let each side move in , I am only talking 2-3 thousanths tighter.??? Might Work, Might not.
Thomas Edison made over a thousand light bulbs before he found a satisfactory model.
With my opinion and 8 dollars you can buy a cup of coffee at starbucks
Dennis

Dave,

The two links I provided were for the common alloys used in beverage can manufacture in the US. I am thinking that the flashing you are referring to will most likely be a 6000 series aluminum. If I had to hazard a guess, it would be 6061 or 6063 alloy. I have some aluminum sheeting here that was sold as ‘valley flashing’ and it responds to working like a 6000 series aluminum. Annealing 6061 is a much longer process described here:

http://www.speedymetals.com/information/material6.html

According to another page, a PDF file, states that the annealing process for the 6063 should be the same as the 6061. This might explain the partial success of your experiment. Sounds to me like annealing the flashing might not be cost effective. I would think that splitting a larger number of cans and back rolling them into a near flat state prior to annealing, allowing for a larger number of cans to be annealed at one time.

Keep up the good work, you keep working more and more of the bugs out as you go, and getting better product each time.

Bob C.

Wow that looks really good. I’m no tool maker but your work looks great.
thanks for sharing.
Terry

I’m in Vegas for corporate training till monday night. Bob, thanks for the link to the 6061 page, As I read it, I would need to ramp up the temp to 775deg, hold for 1 hr, and then 5 hr down @ 50deg drop per hr to 500deg. I’ll give it a try when I get home.

The flashing is cheap @$18 for 8"x 50’, the Kiln once at temp cycles on and off to maintain temp, and the cooling down cycles will use very little electricity, I don’t think that the cost will be that bad. If I could put the full 50’ in at once, that would be 500 pieces at the finished size.

I’m trying to stay away from the soda cans, as cutting them up and all for 3 pieces of siding seems like a lot of work for little return.

Thanks for the input on this guys, it is defiantly a learning curve for me.

Dave,

We are all learning at your expense. I for one am very appreciative of your efforts and am only too happy to donate what knowledge and information I can to assist. Thanks for your efforts on our behalf.

Bob C.

Back from Vegas and Corporate training. Damm its good to be home. Yes, it was Vegas, 7 am to 6:30 pm. Not much more time then to eat, sleep and do it all over again.

Took some time to get the feet tables finished up. I mounted 1/4" x 3/8" guides in adjustable slots.

The guides defiantly make it a lot easer to feed the stock squarely thru the dies.

I’m researching on gearing the two dies together. Any help on what I will need will be appreciated.

Tomorrow I’m working on trying to anneal the 6061 sheets. This is my plan. Run the kiln up to 780 deg. hold for 2 hrs, and then start cooling at a 50 deg per Hr to 500 deg, and then open kiln and cool to room temp. Will opening the kiln at the 500 deg mark subject it to a thermal shock and impart a slight temper into the stock? Or am I better off leaving the kiln closed and just let it come down to ambient?

Failed twice… I tried to annealing the sheet alum. Stock that I bought. If it was 6016 ( which I don’t know for sure) then I’m unable to anneal it in the kiln. I ran it up to 780 deg. Held it there for 2 hours. My kiln does not have a controlled down temp ability, So the first time I just let it cool to 225 deg. and that did not seem to have worked.

2nd try was to try and baby set the cool down process, and that proved to be a really big hassle of having to re-program the timer sequence every 15 min.

SO. I found a supplier of 18" x 100’ 1000 series 0 temper alum. Foil @ .005 thick. A roll of this is in route.

After trying to set a procedure to get the stock to feed, I think that I will have to gear the two dies together to get the stock to feed. I can get a great embossing on all the stock, Annealed or not, If I loosen the clearance on the dies, feed the stock thru, and then tighten the dies in several passes to get the full crimp.

It seems to me that the problem is to get the dies to grip the leading edge of the stock and pull it thru. It seems to me that when I turn the top and bottom die by hand that the feed starts much better.

I am Lost on trying to figure out spur gears, Any ME’s or Common folks that understand gears out there that can help me?

Dave, the distance between the two shafts will be the pitch diameter of the gears, figure at the closest together setting, for what you are doing the pressure angle will not mater. pick gears that have teeth big enough to cover the range of travel. try looking @ stock drive products , McMaster or wm berg for gears.

Al P.

Dave, what is the exact center to center distance of the two shafts with the die rollers closed to zero clearance? That is the first and most important piece of information needed before you can go forward. That will get you in the correct ball park on your gears. The major issue you have here is that when you created the die rollers, you put the cart before the horse. Now we are going to have to back into a solution.

Bob C.