Large Scale Central

Composite Boxcar

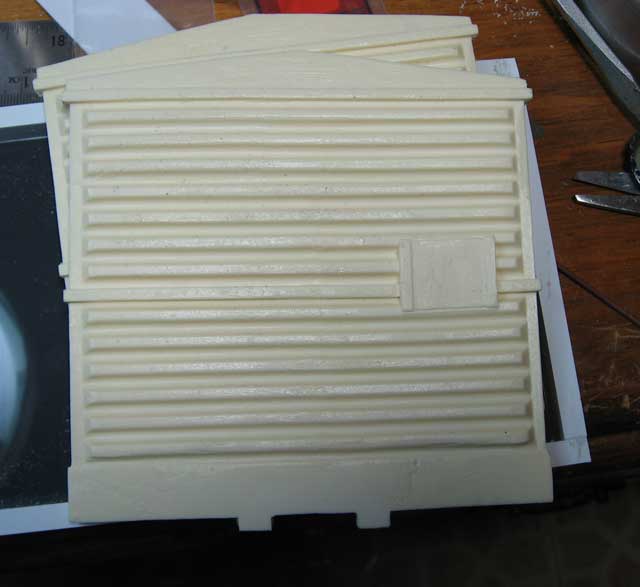
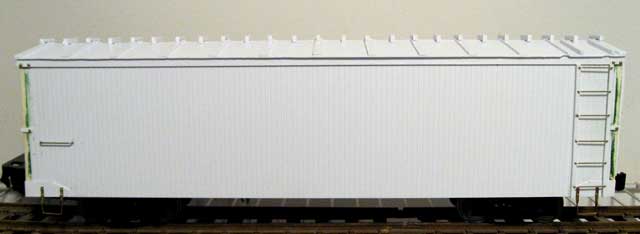
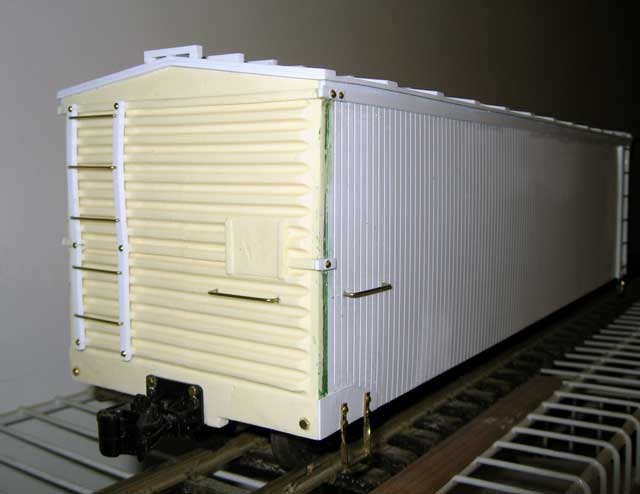
Last spring at York, both Bruce Chandler and I took trips to the PA RR Museum in Strassburg, and were intrigued by the composite boxcar they have on display. Bruce took a bunch of photographs of it.

The interesting things about this car are that it is still wood sheathed, but has metal ends and doors, and a steel frame (read: no pesky trussrods). It lives somewhere between wood cars, and steel cars (see Gary Buchanan’s beautiful EBT boxcar) It is a standard gauge car, but a good target for a “what if” for a narrow gauge car.

It was immediately realized that we would need to cast the ends, but my first attempt at building a master from styrene met with less than stellar results, so the project got shelved for a while. Then, at the American Invasion this past summer, we noticed a boxcar that was markedly similar to the Lehigh Valley car we had photographed. A bit of investigation, and I realized I could use the ends from this car to make a master. I procured one, and set about hacking it up about a week ago. I cut the end off, sanded the back of it flat, attached it, and a door, to a piece of lexan, built a box around it, and made a mold.

Then, I cast up a handful of ends, and sawed them up. I determined the “correct” width and height using an AMS stock car for comparison.

Determining this was correct, I epoxied these pieces to another hunk of lexan, and started filling, sanding, and filing, until I got a good first generation master.

Which I then created a mold of.

This morning, I pulled my first 2 ends off of it, and will send them down to Bruce for critique, and assembly into our first prototype car.

Ack. The pressure is on now!

They look great Bob. Looking forward to it!

So …

You guys are going to make a little side business out of this?? I could see quite a few “kits” getting distributed.

Looking good Bob. We’ve already seen what Bruce can do with sides. I think you’ll end up with a mighty fine car when you are done.

JR

If all goes well, I’ll be selling pairs of ends, and doors. I may have to go to a 2nd generation end if this one isnt quite right…

you guys are too much!

I look forward to what happens here!

cale

I’m looking forward to seeing this in 1:20.3. Now, for those that model in the slightly smaller LGB goofy scale, USAT use to make a very similar car in their American series. You might be able to find them around here there and yonder. Current cars with the steel ends are all steel cars but older versions were both wood side and outside braced with the steel ends. And for those that model standard guage, during WWII box cars made then were composite. They had the usual dreadnaught ends with steel doors but they were outside braced composite. That would be an easy project using the Aristocraft car.

Bruce, ya finished that car yet…?? :smiley:

Oh no! More pressure!

I think Bob sent it on the cheap, so it probably won’t get here for another 2 weeks…or maybe longer. Yeah, that’s my story…

Bruce, since you will be so busy building that car, I’m going to drop by and pick up the box cab and keep it company while you’re building the car. I’ll bring it back when you’re finished…:smiley: That will give me an excuse to see the car in person…:smiley: :smiley: :smiley:

Construction begins, photos soon.

I found enough scribed siding for 2-3 cars, so Ill be building a test one as well.

My basic frame will be wood, with a lexan “box”, with the skin glued over that. I have the frame and floor drying in its jig right now, and once that is dry, Ill attach the sides and ends, and take some photos…

Nice work, guys…

As promised, here are a couple photos of the first build. First photo is of the basic lexan box with ends attached.

Second photo is a close-up of the end and side.

Next up doors, once more RTV shows up. But Ill work on the roof and other details in the mean time.

Just got my pieces in the mail, and they look great. They look even better in person than they do in the photographs. Bob’s done a nice job on these - though I did have to file off that coupler pocket. :wink: 
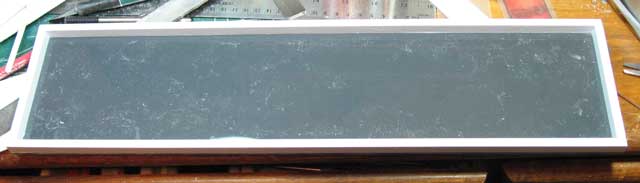
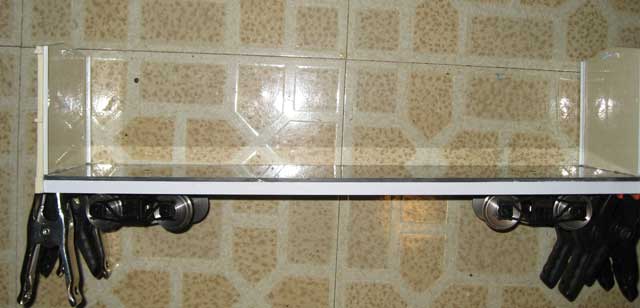
It doesn’t go with my Accucraft couplers.

I cleaned up the flash and then epoxied some angle pieces to the back to provide some support when I glue the sides on. Now that I know the exact dimensions, I was able to cut a piece of plastic for my base as well. I’m not building the aquarium car like Bob :wink: This will be all styrene, using the scribed siding from Evergreen.

Yea, I think my next car will be done similarly… epoxy on some angle, and attach the sides to that. The aquarium look came out a tad too wide, and Ill have to fudge the car corners a bit…

Some shots… First the frame. One of the deals I got from Don Winter last year was for some plastic sheets. I’m using that for a frame, then using some stryene (.25 x .375) to reinforce it.

Here’s some ends, though they look very similar to Bob’s. Imagine that. I have removed the coupler pockets.

Meanwhile, I’ve added some bolsters and put the trucks in place. The trucks are Aristo-Delton arch bar with Sierra Valley 24" wheels. Then I epoxied the ends onto the frame.

This is going to be a nice model.

OK, progress has been made. I’m really enjoying working with these ends. It gives a nice look and makes construction a bit easier, or at least different, than my other steel framed wooden boxcars. I guess it’s almost ready for doors.

It’s been a bit frustrating, as my epoxy will just not stick to the resin ends; I’m having better luck with my MEK. At any rate, I added some lag bolts on the end to make sure it was attached. I decided to go with my “standard” ladders as I find them easy to make and keep aligned.

I keep changing my mind about how the ends should be incorporated. In this final rendition, I’ve filed off the “details” on the sides of each end and then continued by placing some styrene on the sides. Now, I still have to figure out how I want to do the brakes. Some of these cars had the brake wheel mounted vertically, but it would really require a different type of wheel - and I have plenty of the horizontal type brake wheels. I also have to add the coupler lift bars and the brake platform on the end. Oh, and my brake cylinder. Have to add the other coupler - need to cut out a bit more, as the coupler pockets are a bit low for my railroad. Other than that, I guess it IS ready for doors. Anyone got a good idea for the bottom of the brake staff? I know I could order some from Ozark, but I’d like to come up with something easy to make out of brass or styrene.

Looking good, Bruce. I’m using Loctite epoxy gel, 6 minute set time, and it seems to be working ok. I washed the castings, then roughed up the back with some 60 grit sandpaper.

Got a close-up of your roofwalk supports, and some info on them? they look neat, and easier than cutting a notch in 20 supports.

Bob,
Those walks are based upon an idea from Gary Buchanan when he built his neat EBT steel boxcar.

First of all, the carlines are .060 x .250 plastic. So, they’re .060 high.

All of the roof walks are made up of at least 3 pieces. Take some .100 x .125 plastic and cut them into one inch long pieces. Now, take some .060 x .125 and cut them into .125 lengths (basically a square). These are your legs and just glue them onto each end of that one inch piece.

Now, take cut the .060 x .125 strip and cut them into one inch strips and glue them to half +1 of all your strips. These will be the tall supports that are placed between the carlines.

It’s a bit tedious, but doesn’t take all that long - and once glued in place it’s really hard to see that they’re not full supports. I usually take a file along each edge of the support before I put them into place, so you don’t see any of the seams.

How are those doors doing? :wink: