Large Scale Central

Castle Build

Thanks for the input, all. I decided to follow Ken’s and Forrest’s advice and make multiple cardboard templates. (http://www.largescalecentral.com/externals/tinymce/plugins/emoticons/img/smiley-smile.gif)

Here’s more progress

I should probably have named this thread “Castle Build” but too late now.

Yesterday I was in Michaels with my wife and saw a hot knife-type styrofoam cutter for ~$20. I thought I’d give it a try for easier cutting of window and door openings. I managed to cut out the gatehouse opening pretty smoothly, just tracing a line I’d drawn on the surface.

It was a lot faster and easier than using a jigsaw blade, and the edges don’t need to be cleaned up at all.

Because it doesn’t get as hot as a soldering iron, I think that if I wanted to I could also use it to carve stone into the faces of the buildings. I need to think more about this, because if I go that route on the interior buildings, it might look funny if the outside walls are smooth/textured. And if I’m going to texture the walls, I’ll have to be sure that my towers can be textured, too.

could you provide a pic and a brandname for that cutter, if possible? thanks.

Looking good fun project

Korm Kormsen said:

could you provide a pic and a brandname for that cutter, if possible? thanks.

It’s this one

The brand is Flora Craft. I think I’ll have to be a little careful, as the wire is pretty thin. So you have to go slow and steady to avoid bending it, even in the 3/4" foam I’m using.

You can get it even cheaper from Amazon, I think.

On another note: the tip stays cooler than the end near the handle (obviously) so you want to do your cutting down near where the wire meets the handle. But this also means that you can use the somewhat cooler tip to “etch” the face of the foam without worrying about going too deep or wide because of heat. I have a fine-tipped adjustable wattage soldering iron, but even on low it was really taking too much for my taste. I think this will do a much better job.

Also, thanks to Bob for changing the title. I figure I might as well just put all my construction updates in here…

thank you.

i think that will be on my next virtual shopping list.

Michaels sells them for $24.99. They have a 40% off coupon. If you can use that, it would be $14.99.

Tom

Very interesting!

Harbor Freight also sells a hot knife foam cutter. It’s real effective on thicker foam.

http://t.harborfreight.com/130-watt-heavy-duty-hot-knife-61423.html

Of course, the foam stinks to high heaven when you cut it. I use mine outside.

-Kevin.

That is a neat cutter that has got me thinking about a project like this one…

Yesterday I made a base for my Miks build challenge entry and I used plastic board that I scored using a dremel with a rounded tip. Today I will paint it.

Dan I think your castle will be so much more impressive if you carve stones into the structure. It is more work but with a dremel, that cutting tool or a solder gun the chore of scoring will go quickly enough.

Such a neat build. Have you thought of making some of it a ruin possibly the sight of an ancient battle that was never repaired?

Todd Haskins said:

Such a neat build. Have you thought of making some of it a ruin possibly the sight of an ancient battle that was never repaired?

Thanks Todd.

I had thought about making it partially ruined. The problem is that at 30x40 it’s already pushing the boundaries of what will fit in the space available. One of the important considerations for me is to make sure that the layout doesn’t feel “crowded” since it’s supposed to be a village and countryside. And that prevents me from making things as big as I’d like. In fact, the motorcycle factory I made from a Piko Brewery is already way too big. But it’s a focal point on one end, so I’m mostly OK with it. And I’ve already had to scale back plans for a Rigi Duo and some oil wells, as it was just going to make things too busy for my taste.

Honestly, I thought that I wasn’t going to be able to fit the castle, but my wife had an idea for where it could fit (replacing another building). Anyway, it’s right at the edge of “too big” now, so I probably won’t add ruins on the outskirts. Though I agree that would be really neat.

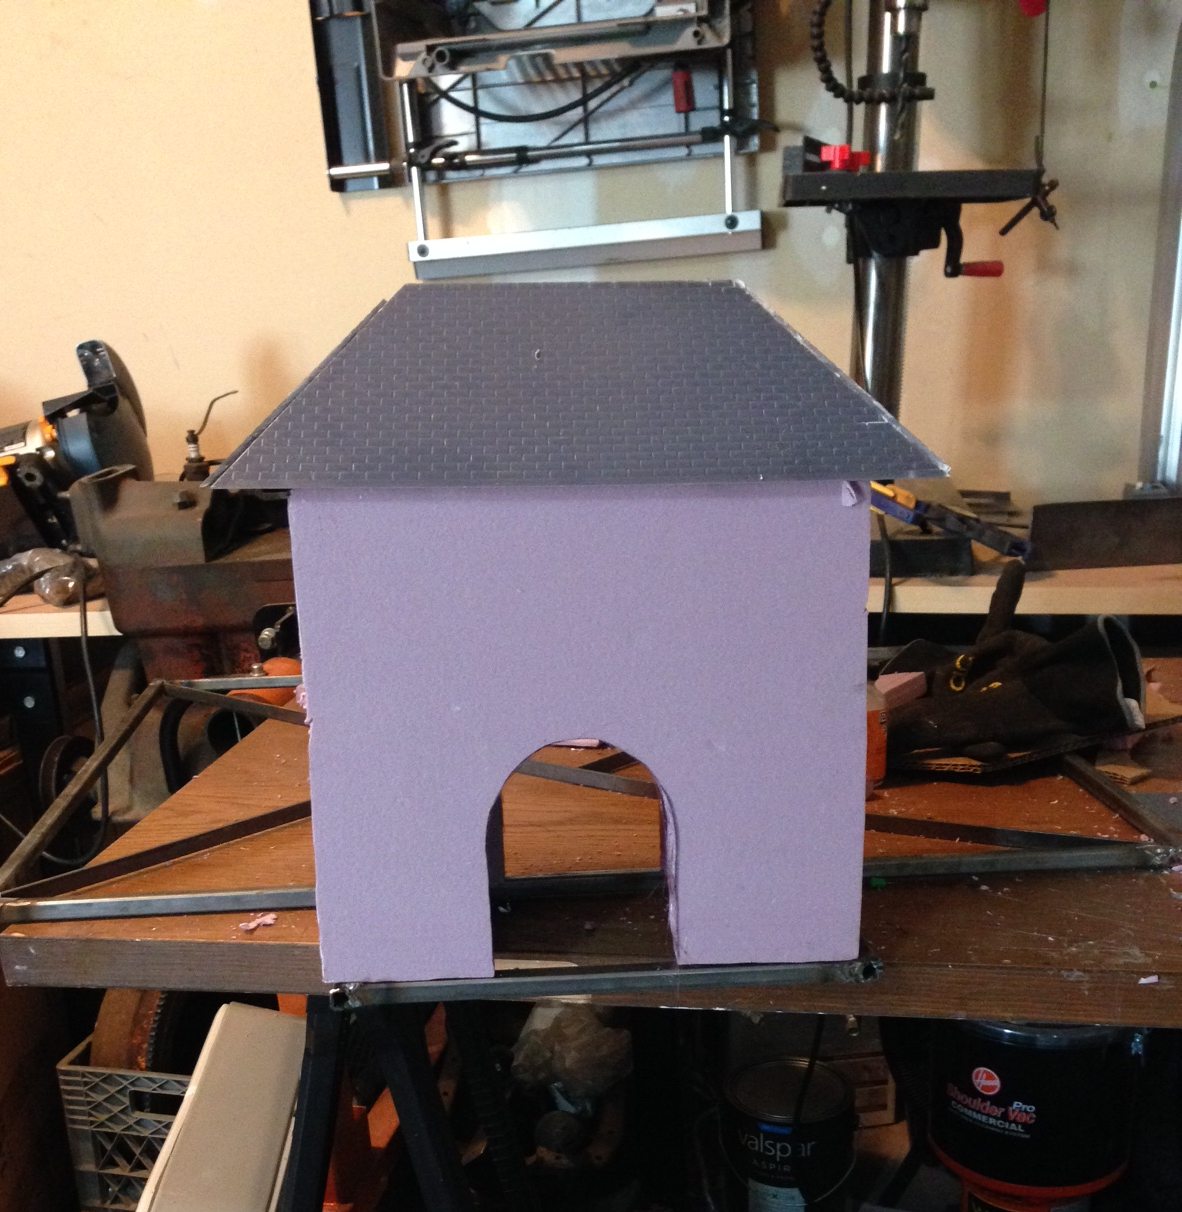
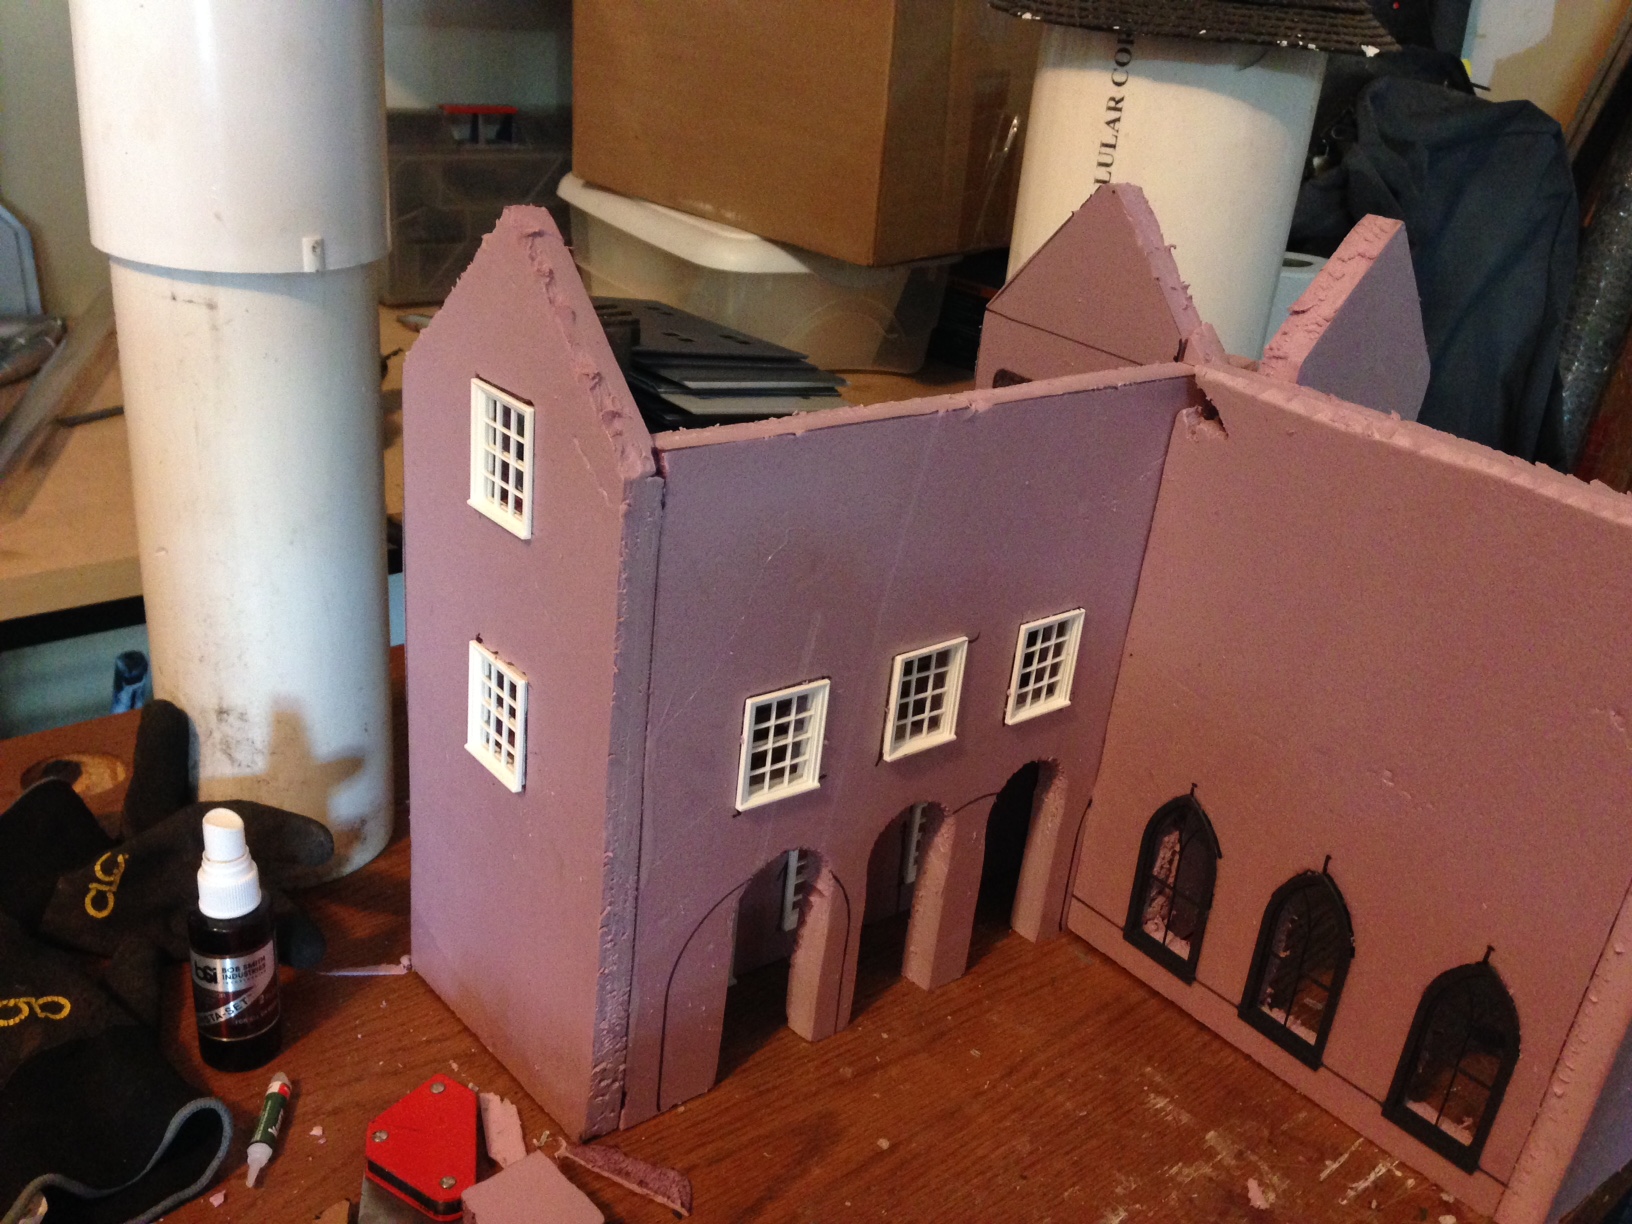
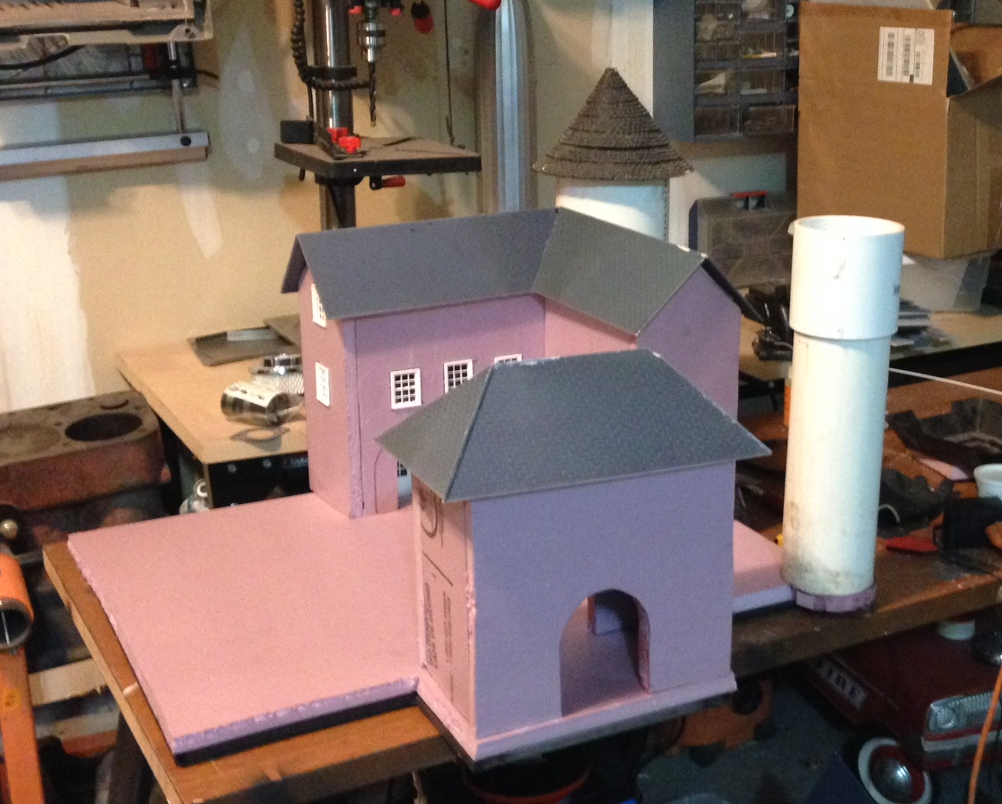
Here’s the gatehouse with the roof roughly in place:

A little more progress this morning…

I think the windows look pretty good. These are a commercial product from Arizona Garden Trains that I picked up off eBay a couple years ago. I think I got three dozen “used” for around $30–someone had bought them and then decided they didn’t need them. The doors are also from Arizona Garden Trains. The arched windows are Grandt Line.

This is going to be an eye catcher when it’s done Dan. Stone or stucco walls will both look good on it (http://largescalecentral.com/externals/tinymce/plugins/emoticons/img/smiley-cool.gif)

So this morning I had another idea…

Maybe I can get away with adding stone texture to the exterior walls and texturing the buildings by making them in a “half timbered” style. I laser cut this guy from styrene and then glued the strips on before painting it:

The only thing that might be tricky is adhering the “timbers” to the foam. I’ve been using Bob Smith foam glue to glue the buildings together, but I’m not sure that will stick to the plastruct “timbers” I was going to use. In fact, Im not sure it would stick to wood… it seems to work by dissolving the foam (like MEK on styrene).

What adhesives have you successfully used to stick things to pink foam?

Here’s a picture showing where I stopped last night. I’ve put the foam onto the metal “base” and put the finished buildings on to check the size/fit.

I’m only going to put one more building, which will go on the left. A smallish structure with a two-pitched roof (sort of the opposite of a barn roof with the upper section at a steeper pitch than the lower section).

The coupling on the 4" PVC will have the topped notched for “crenelations.” I’m also thinking about the picture Steve posted showing a narrower section atop a turret. I could do that with the other 6" pipe if I put a 4" section inside of it. I’ll have to noodle on that more.

Hmmm… I keep replying to myself and asking questions. Probably because there’s nobody to ask within 80 miles :slight_smile:

Anyway, most medieval castles I’m aware of have ashlar construction. The best way to describe this that I can think of is that the stones are cut to rectangular shapes, but are not all the same size. So not like bricks or this year’s Mik’s Challenge stones, they’re built from dressed stone but irregular sizes. Image from Wikipedia:

I’m thinking that scribing this will be both easier than set size and more difficult, as I won’t have to be as precise, but I also won’t be able to just scribe the horizontal lines all in one go…

What adhesives have you successfully used to stick things to pink foam?

I’ve had success with epoxy. I get the stuff from Harbor Freight. It’s the cheapest I’ve found. Especially, if you have a coupon!!! Buy the big tubes.

Castle is really looking good.

-Kevin.

dieseldude . said:
What adhesives have you successfully used to stick things to pink foam? I’ve had success with epoxy. I get the stuff from Harbor Freight. It’s the cheapest I’ve found. Especially, if you have a coupon!!! Buy the big tubes. Castle is really looking good. -Kevin.

Plain old painters latex caulk works quite well also and won’t eat the foam.

Dan,

I was thinking about the turret a bit and had forgotten I helped my son with a quick whipped up castle model a few years ago. What I had him do was paint the turret primer gray then we used black vinyl for window slits. However you could take this “way further” with more stairwell window slits around the turret and also scribe lines (as suggested) for block or even use a sharpie to make block mortar lines if you use textured paint.

If you go the textured paint route I would make my windows first with the black vinyl or a black sharpie then mask over it before painting which should give them the visual depth you are after.

As for the lights you could easily cut slots in the tops of the pipe or place blocks on top then put your roof back on. Placing the blocks on top would also give a nice cantilevered/corbeled finish and you could easily round them off on a belt sander. Then you could wrap styrene strips around the bottom of the blocks to create layers. This would allow the light to shine out the top and also allow Rapunzel to see while she lets down her hair for Rooster to climb up and take advantage of her.