Gophers invading the hills. That’s what you tell anyone who asks.
Thanks guys – always my own worst critic. How come it’s not perfect the first time I try?? 
So, the process (until I change it):
I’ve got each mold numbered, and measured. I put together a spreadsheet that works out the mix volumes based on area and target thickness for the molds selected. It’s just a set of ratios from recipes on the web – they seem pretty much the same to me but I’m sure an expert will say different…

First on is the ‘face’ or ‘cream’ coat. Cement & polymer in a soupy mix. This is the layer that got air bubbles yesterday. I went super carefully today, and bought a new bag of cement.


I mixed the backer coat in an old home brew barrel with a paint stirrer in an electric drill. Not the best but worked ok.

Then chuck (literally) small handfuls of backer mix onto the face coat. It’s consistency is a soft paste and splats nicely to about the right thickness once you get your eye in.


Then a final spread and pack by hand to make sure there’s full coverage. This bit came up short on the first brew.

I did 7 molds in a couple of hours. Took 2 mixes as I wouldn’t be able to lift all of it once. Total area was 1.7 sq m - about 2 sq yards. The mix quantities came up short both times so I’ll add 10% to the area as a fudge factor next time.

Then cover with wet towels and wait… Fingers crossed for this lot.
Cheers
Neil
1 Like
Neil, don’t over worry yourself about what the “experts” have to say.
An old fella once told me that the definition of an expert is; “A has been drip under pressure” and I have come to realize thru the years that he was correct 
1 Like
Did the 24 hour demold after work today. Here’s Big Brother back in the wild with his doppelgänger next to him.

The casting weighs maybe 20 lb.
This is the level of detail that the mold picked up.


I also figured out the ‘air bubbles’ I’m still getting. It’s actually where the is a small gap between the face and backer coats. So when the mold is eased off, the face coat has nothing to stick to and comes off with the rubber.
Bit of pondering needed on that one…
Cheers
N
1 Like
Niel,
REALLY awesome work. The level of detail is magnificent!
Just stunningly exceptional results.
Thanks Jim,
It’s come out way better than I thought. More casting this weekend - then I’ll have a go joining some of them together.
Cheers
N
As Ken Brunt would have said: Ya done good!
The detail level of the casting is really great. I’ve been fortunate to have a large free local supply of rocks to use on my outdoor, but even when using real rock, it’s difficult to get a good look for a large rock face. I’m looking forward to seeing how you integrate the castings into your scenery.
1 Like
Thanks Jon (and Ken - tho I never got to meet you.)
That’s one thing I’ve struggled with too. I have rocks - no problem… But the bush railway that I’m basing the new layout on was sometimes cut into near vertical rock walls in a river gorge. If I’m going to get close to the feel of it I need those non stop 100’ high broken rock faces on each side of the track.
Lol, me too…
Cheers
N
1 Like
Perhaps I missed it but if not could you tell us what bush RR you are basing it on and maybe with some pictures ?
Hi Rooster,
Actually I don’t think I’ve ever said it out loud.
Charming Creek Tramway is what it’s called. Quite a few pics and writeups online but I haven’t located many online digital images. Quite a detailed writeup at the link below.
Dept of Conservation - Charming Creek History
Started as a timber mill, then added coal in the early 1900’s.
Cheers
N
1 Like
Neil you are doing an awesome job. I will very much be refering back to this thread if and when I ever get the gumption to start making more detailed scenery.
1 Like
Roosta loves research …lets see what he comes up with ! 
I’m all ears.
I’m all ears…!

I do love historical research however that is one heck of a PDF already with tons of information. The only thing I can suggest is searching out old newspapers of New Zealand. I looked briefly and did find quite a few but without knowing the area I’m pretty well lost. As for digital images online my “guess” is that PDF is about the best your gonna find. I did enjoy reading the PDF but I don’t know how those guys managed to walk let alone build that line with the size of balls they had!
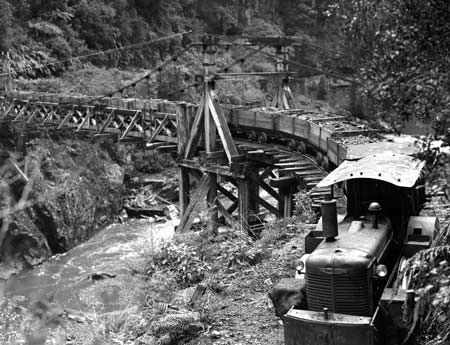
A converted tractor tows coal-filled wagons across a suspension bridge over the Ngakawau River in the 1940s. Coal was transported along this small bush railway from the Charming Creek mine to the railhead at Ngakawau between 1929 and 1958, but in later years it was trucked out through Seddonville.
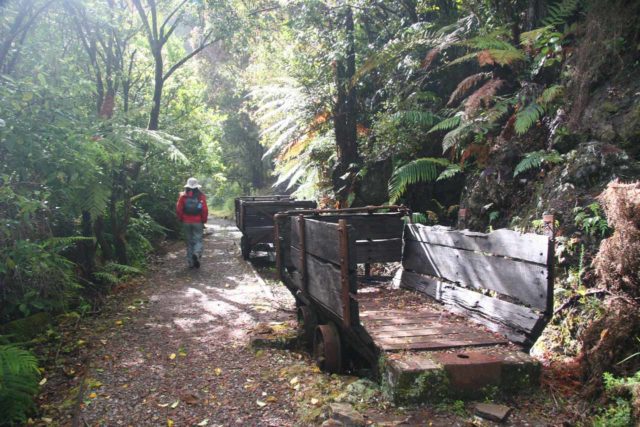


Just doing another quick search and wondering if Neil has walked or biked any of the trail ?
There is a book Reflections on Charming Creek, Bill Prebble - Shop Online for Books in New Zealand
2 Likes
There are some very “charming” pictures of that old dilapidated railroad.
Some of those rails look like they could stand just a tad bit of work.
Nice finds Rooster.
Yes to the book, and yes to walking it - back in 2008 before I really knew what it was.
Digging thru those pics now, will post in a bit.
Cheers
N
Digital archive pics. I’ve included a link to the record if you want to view a full size images -where available.
Cliff’s next model…


Ngakawau Bins 1945

Empty train coming uphill 1945

Heading to work? 1945

Heading home on an empty wagon

Full train on the suspension bridge

Blueprint of the Bridge

Thank you letter to bridge designer & builders

Full train coming downhill

Tipping coal at the Bins
Cheers
N


