Large Scale Central

Casting rocks - An experiment

After seeing the pictures that Bruce Chandler posted of Jim Kottcamp’s RGS railway I got some mojo up to try rock casting. My thinking is the layout I’m planning will be a raised timber platform, but I still like the idea of ‘floor to ceiling‘ rock walls – or a cut down version.

Obviously real rocks are out due to weight…

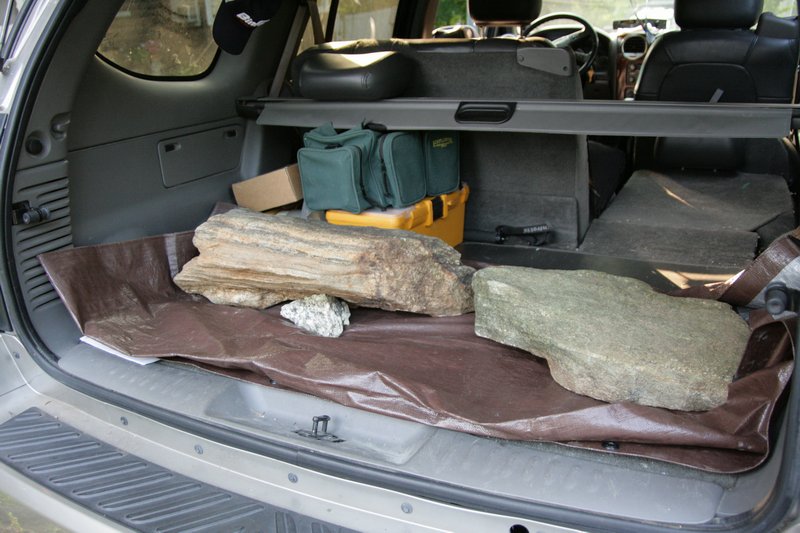
I did plenty of internet research over winter, and the find of a good rock to work on was the final excuse gone. Time to experiment!

The plan is to make a latex rubber mold, a fibreglass ‘mother mold’ to hold the shape, and - at this stage - glass reinforced concrete (GRC) as the rock, That bit is still to come together, but it seems to reduce weight quite a lot - says the interweb.

I applied a sealer coat to the rock even though it probably didn’t need it, then a mold release coat.

First coat of latex next – it goes on pretty thin. Took about 12 hrs to touch dry as it was a cold day.

After that it was 1 coat a day for the next few days, all ‘normal’ latex that wasn’t thickened.

I realised after the third coat I might have a problem where I’d left an overhang or undercut or whatever it’s called so I tried to fix it by breaking off the rock that was sticking out. Time will tell how that bit is gonna end up.

Next two coats were thickened latex. This is where the learning really started. Latex isn’t like the videos I’d watched using SmoothOn 40. It flows, like, say melting icecream…

All attempts to stop the glacier flow in the lower left corner came to nothing. Gravity won.

Main learning was to keep the surface to be coated horizontal, and don’t try and do ½” thick layers. One side effect of the successful thick pours was shrinkage pulled the latex off the surface as it dried. Not a big deal for rocks but no good for other stuff where shape counts.

This is the latex at the end – a couple more not so thick coats of latex, and some attempts to fill in grooves and dents to help the mother mold release.

More to come.

Cheers
Neil

2 Likes

Looks like some messy fun!

this just looks like to much fun

I know, right… :grin:

Devon, I was reading up on your rock casting thread just before I posted. Pics were gone so I couldn’t see how much mess you got into… Fun isn’t it. :grinning_face_with_smiling_eyes:

I ordered the fibreglass stuff last week, and completely forgot to include mold release. Didn’t realise until I unpacked the box to get going. No way I wanted to wait another 4 days before starting so after hunting around I thought I’d try kitchen clingwrap – seemed to be sorta the same as a spray on PVA film in a vague plasticky way.

A small test proved it worked ok. Peeled off the latex, and the fibreglass (mostly) and didn’t melt. On with the show, only a few days late.

I didn’t think clingwrap would do so well on vertical sections so I kept it to the main rock face. I’ll take the mold around the corners with the proper release when it arrives.

1st layer, 450 gsm matting which I think equates to 1 lb per sq yard weight – if that means anything to anyone.

The glacier struck again – even tho I was careful. I tired a pit prop approach to limit the mess this time.

And would you believe the courier dropped off the mold release package just as I finished the second layer. :roll_eyes:

Demolding was simple – came straight off with no fuss.

I did notice that the thicker latex parts of the mold had gone white and wrinkled up, can only assume this is heat related during the glass cure – couldn’t see any damage to the clingwrap layer in these spots so it can’t be chemical (says the beginner…).

Long spring weekend here, I’ll try and get the rock on a turntable and start the ‘proper’ mold in between outside chores.

Cheers
Neil

I’ve been making “rocks” for years, and it is a whole lot easier and quicker than that. I use two methods depending on the intended use.

Make the rock shape out of “wire cloth” (mesh) and cover it with masking tape. Alternately sift hydraulic cement and spray it with water using a spray bottle into the form to build it up. Let dry then remove the tape and do the outside the same way.

OR,

Make the form from styrofoam and alternately sift hydraulic cement and spray to build it up to ~1/4" thick. When the side is done, turn it and do another.

Do it in a cement mixing “trough” and you don’t even get dirty as you never handle wet cement.

1 Like

Hi Todd,

Thanks, I’ve read your posts on MLS and in GR with a lot of interest over the years - esp the rock casting ones :slightly_smiling_face:

I should have explained a bit better - these are going to be rock panels that can be joined up to make large vertical rock faces - not a single rock. The idea is to have say 1/2 dozen different casts to break up the same same look and create something like the pic below. This is one of our club member’s layouts, she used wire mesh and render for the same look.

The grand vision is 6’ high, and maybe 10 to 20 yards long. The next panel to make once I’ve got the method down is around 4 sq ft. I’ve just got to find the right rock in my pile. I know it’s there some where 'cause I took a picture the day I captured it…

Cheers
Neil

1 Like

Well, the turntable idea fell over for various reasons, so I stuck with using the bench in the garage. Applied 2 coats of PVA mold release to the latex, then 2 coats of fiberglass to make the mother, followed by a 24 hr cure.

The de- mold process was a bit of an event. The PVA release worked fine, but I had some pretty good (read PITA) mechanical interference fits and combined with some resin that had run down I wondered if it was ever going to happen without breaking something…

There are a couple more ‘wedges’ on the far side that you can’t see in the pic.

Half an hour of quiet nudging and short word explanations later, and we have the trifecta.
Left to right: the Rock, the Mother and the Latex molds.

The latex is surprisingly tough, and picked up the surface detail well.

I copped a bit of domestic grief for using fiberglass in the garage twice in one week – upshot of that is permission to build a lean to shelter to do this ‘smelly stuff’ away from the house, will be doubly handy for the concrete work as well. :grinning_face_with_smiling_eyes:

Brief intermission while I get that sorted…

Cheers
Neil

I have never made large ones. All of the rock casting I have done is small stuff. Even what little I have done for large scale has been for diorama pieces or indoor stuff. Since changing the over all theme of my outdoor layout to represent a much smaller area I plan to do more intensive detailing including rock work. But I am not making any promises as I tend to ponder more than produce.

I do recall the term ‘Devoning’ popping up a few times over the years… :grin:

I chose this rock to play with because of the fine detail it’s got. I really need to find it’s big brother for stage II…

Cheers
Neil

Hi All,

Turns out I didn’t have enough spare framing and roofing on hand to build a decent lean to, plus install a workbench. Would have seriously eaten into materials I’d set aside for the railway build. Plan B – tidy up the wood shop (gasp) and get a decent respirator for the fibreglass bit…

I was going to start next with just Big Brother rock, but the difficulty in lifting and moving him kinda let me know that moving to lightweight casts is definitely on the right track. I got it to the shop ok, but it slipped off the barrow on the last move.

Combo of 12 yr old daughter and friend, plus a Jenga castle got it up onto the bench.

I spent last Saturday rounding up other rocks that looked good for casting.

There are heaps of screws holding this all together - wasn’t looking for another rock drop… :neutral_face:

And all scrubbed up, levelled (sort of), ready for molding.

Cheers
Neil

1 Like

nice colection of pebbles!

are you going to model Mount Everest?

Great work Neil, and my back hurts just watching, haha!

Lots of ingenuity moving and elevating those, nice.

Neil, it occurs to me that after all that work in creating your “mother” tools, folks might be really interested in buying sets of your latex molds. Etsy store?

If that’s of potential interest, you might consider adding an extra layer or two of the fiberglass to improve the longevity. FWIW…

Cliff

Wow. I know exactly how you feel trying to move those.

I hunt for rocks to use on the railroad around the lake I live by. Getting the big ones up to the deck of my pontoon boat, then down the dock and in to the car can be a real challenge. Then there is the unloading. Due to nearly killing my back on the last big one I brought home I vowed to no longer harvest rocks that I couldn’t lift with one hand!

The worst I’ve had to handle was this:

That gray triangle was sticking up a little in the grass, and one day in 2015 I decided to deal with it. I had no idea it was the tip of the rockberg.

It’s 40x16x10, and at an average weight of rock (165 lb/cu ft), around 600 lbs. I managed to get it to the surface with a come-along and cribbing and pry bars, and there it stayed until a couple weeks ago when I had it moved as part of a front yard clearing effort.

I can’t even tip the thing!

So Neil, I think I’d do a cast-in-place on this one. :grin:

Those seem VERY big for one handed pickup! (Of course, I AM a WIMP!)

Those were one size below the monster that ended my big rock quest a year or so after that shot. Needed a 2 wheel cart to move these.

Hi Korm,

Pebbles indeed - these were the ones I could move. I have a ‘floor to ceiling’ vision - think Gorre and Daphetid - but, being outside perhaps no ceiling will make Mt Everest?? Time will tell… :grin: