Steve Featherkile said:
Warren Mumpower said:
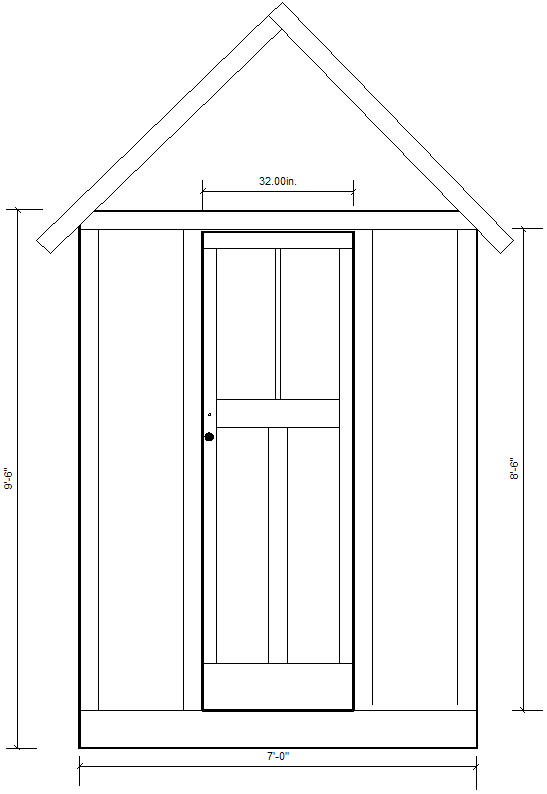
Your door is a bit too small. Doors are 6' 8" tall in the opening. That is a US standard. As for width, generally exterior doors are 36" or larger and the minimum interior door is 30". Granted there are narrower doors to be found. 24" is generally used for closet doors such as a utility closet or linen closet. I would say you can justify a 30" door on the shanty but not any narrower. 6' 8" is a must for height. Also in designing windows..especially on older homes, the top of the window should be the same height as the top of doors. Again there are specialty exceptions but this is a general rule for a standard window.
Warren has spoken, so let it be written,

So he has
I work for a contractor and have done some cad design work for them, so I’m familiar with these rules, but if you refer back to the picture, this little shanty doesn’t follow them.
Notice how low the door knob is. That indicates an odd size door to me/ I agree that 24" is too narrow, but I doesn’t look like 36" to me.
As for windows and doors at the same top height, look at the photo again. The top of the door trim is above the eves. The widow is lower than the door so it remains visible behind the roof line…
Again, I’m not looking to do an exact replica of the prototype, but I like it’s odd dimensions. Gives it character.
Jon

 JR
JR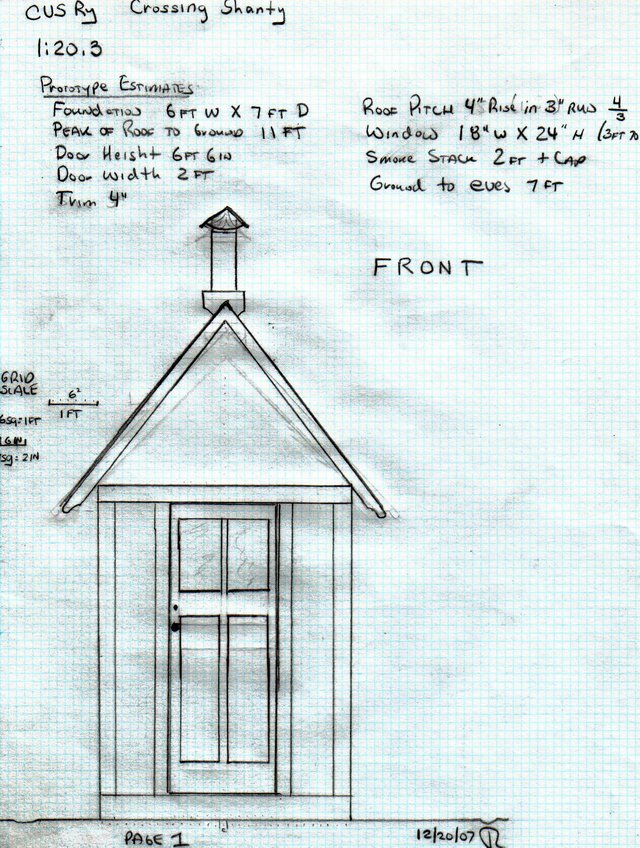
