I got a chance to inspect Bob’s prototype EBT boxcar at ECLSTS. I was very impressed with how strong the box was. Acrylic seems to be as strong as plywood with less weight and simpler fastening. It’s no surprise that acrylic is fast becoming a favorite base material for cars and buildings.
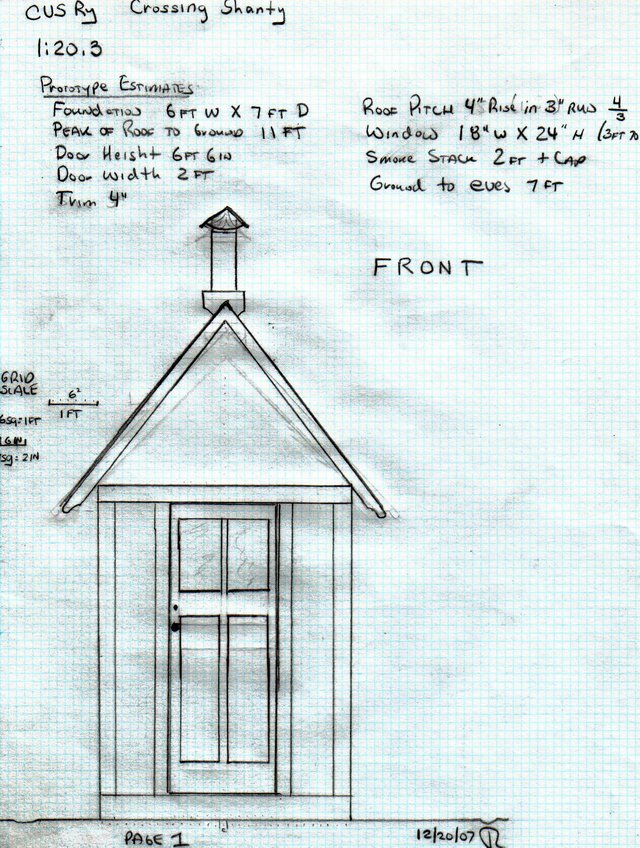
Eventually I will get started building my EBT cars. I am a bit concerned about my complete lack of experience in working with acrylic. I’d like to get some practice with something smaller and simpler - perhaps a crossing shanty or other small structure.
Would someone who has some acrylic building experience answer the following please ?
-
What is the source and thickness of the material used for the EBT box car ?
-
What is the best in-shop method for cutting? I have access to laser for large projects, but can the material be scribed and broken like styrene - or must it be sawed?
-
Is there a “best practices” procedure for gluing? I’ve heard that the adhesive sets up very fast.
Perhaps a short course in building a cube would be in order.
Thanks 
JR