Large Scale Central

Back to 1/29...PS2CD 2 bay hopper

Thanks for the kind words guys,

Rooster…thanks, that helps. I didn’t want to break them for no good reason.

About the Sierra Valley wheels…they look great but I beleive would be too wide for this scale.

Geoff, as for weathering…eventually I plan to weather my rolling stock but that’s down the road a piece.

Brian

You need to remove the end caps on the end of the axles. They pop off pretty easily. Once you get them off, you need to remove the springs on one side. You should be able to remove the brake shoes and then the side frame should slide up and off. Slide out the old wheels and put the new ones on. Assemble in reverse. The springs can be tricky getting back on. I think you can handle it though based on what I’m seeing. About the hopper, looks GREAT. How many hours would you say you have into it? Also, how did you make your grabs. They look really good. I’m getting ready to start into a project. I built one car already but it’s not worth showing. I did learn some things but still need to figure out a couple of techniques. Grabs are one of them.

That is really fantastic work. Thanks for sharing.

Brian Briggs said:
I could have made it prettier but was in a hurry and it does work well.
Hey, doesn't have to be pretty to work well.

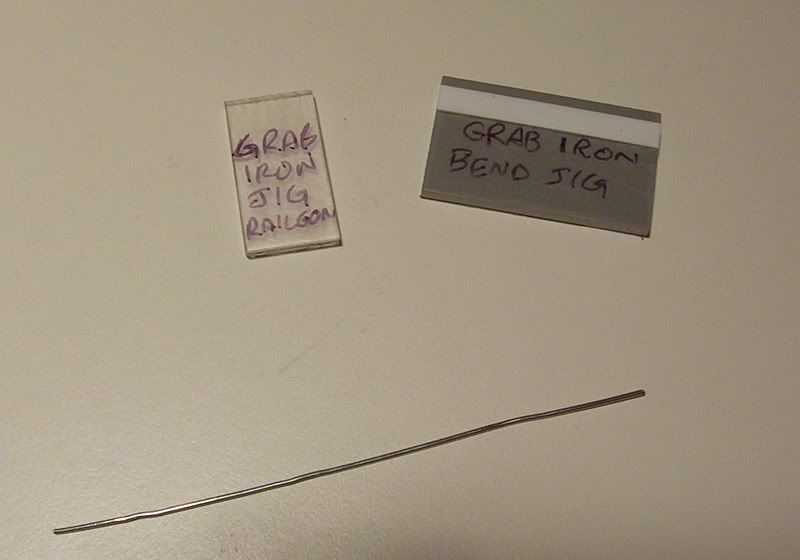
Thanks Ric and Phil, Phil…here’s a tutorial I did on making grabs. It’s how I make consistant width grab irons a pretty easy (and primitive) way. I’ll try to explain with some pictures. This picture shows both jigs (I use that term loosely…more like Primitive Pete tools)

(http://i1044.photobucket.com/albums/b450/DTI973/Modeling%20tips/001.jpg)

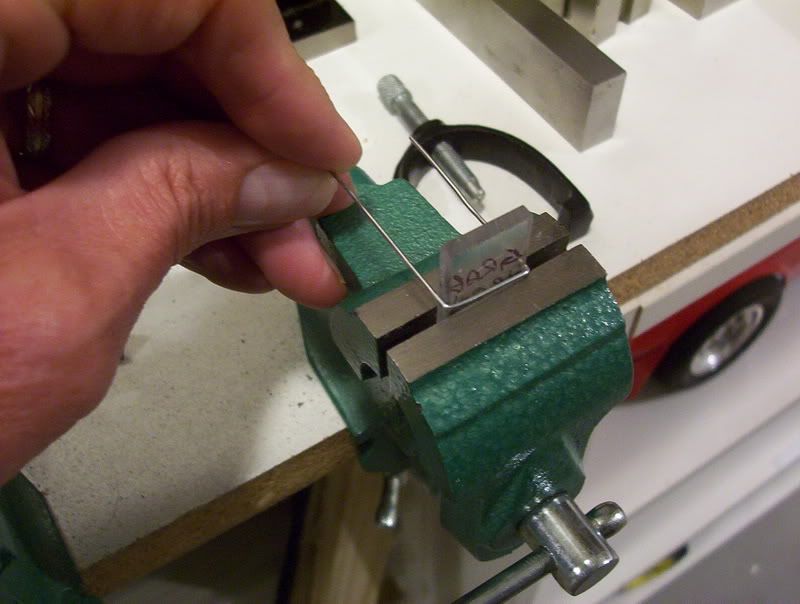
I’m using a paper clip (also in the picture) for this demonstration since I don’t need to bend up an extra brass piece just yet. The clear piece is for the first bends and the grey one is for the secondary (turn down) bends. The white strip is .03 plastic placed the distance down from the top that is required for the second bend. After you establish the sizes you’ll need for your application cut them to meet your requirements. This picture shows the paper clip bent around the acrylic jig. Don’t try to bend both legs at once. Do it one leg at a time. Hold it in place with your thumb.

(http://i1044.photobucket.com/albums/b450/DTI973/Modeling%20tips/002.jpg)

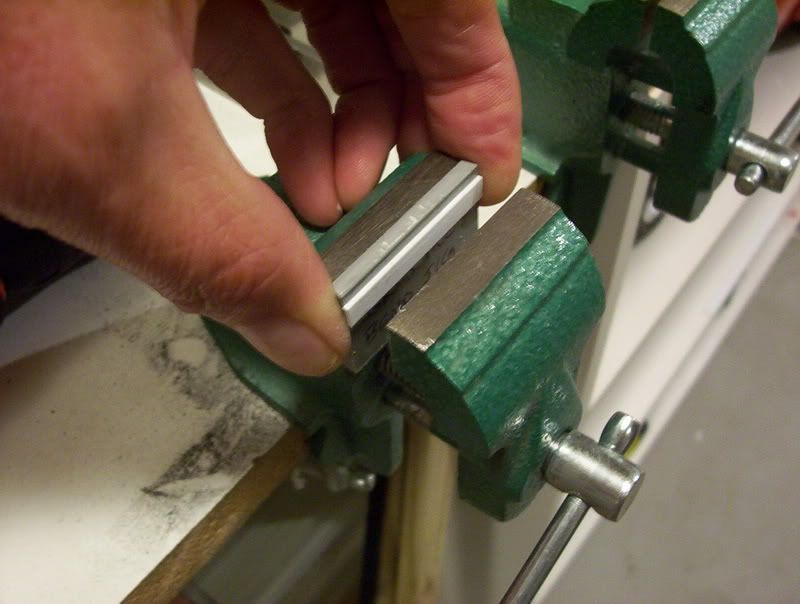
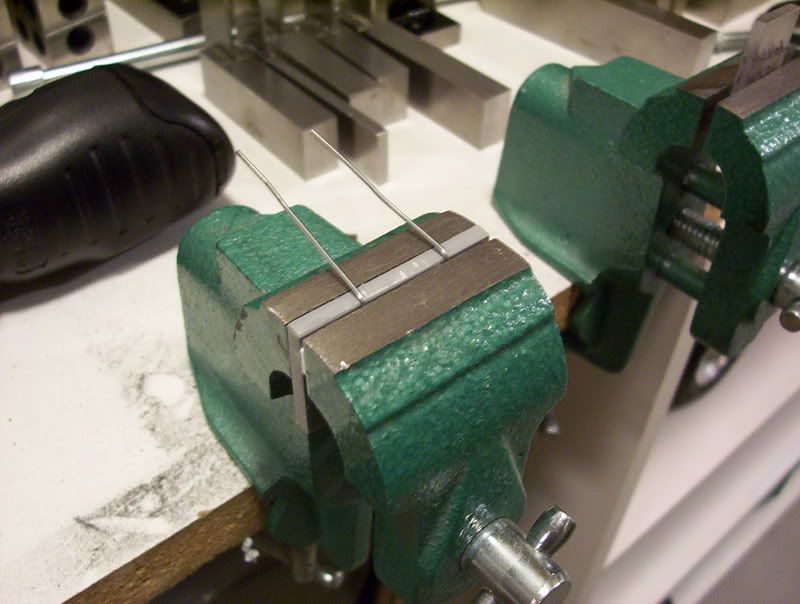
Once that bend is done then that finishes some of the single bend grabs. But for the others with the turn down bend you need the next jig. Here I’m putting it in the vice…lining up the top of the jig with the top of the vice.

(http://i1044.photobucket.com/albums/b450/DTI973/Modeling%20tips/003.jpg)

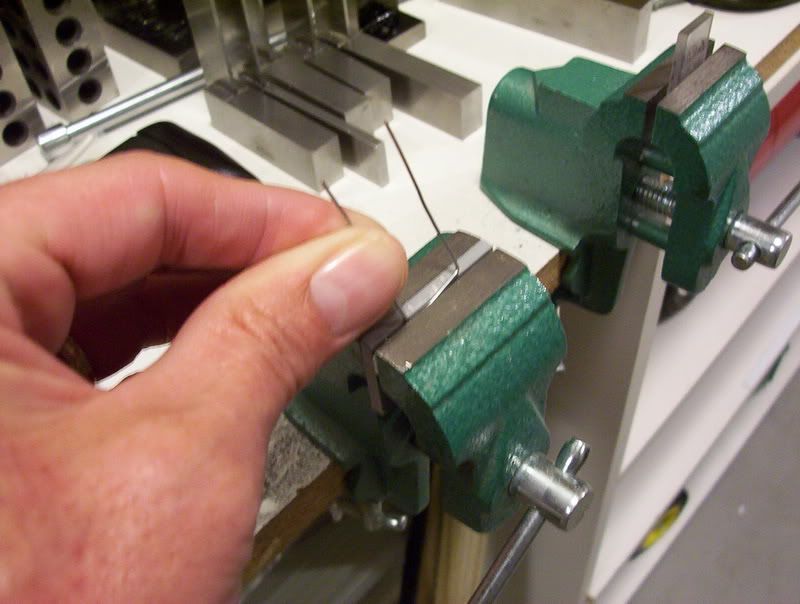
Now feed the grab iron into the slot.

(http://i1044.photobucket.com/albums/b450/DTI973/Modeling%20tips/004.jpg)

Press down on both legs as you push them over.

(http://i1044.photobucket.com/albums/b450/DTI973/Modeling%20tips/005.jpg)

Tah-Dah! A finished grab that will always be the same width as the next one and the same depth of down-turn also.

(http://i1044.photobucket.com/albums/b450/DTI973/Modeling%20tips/006.jpg)

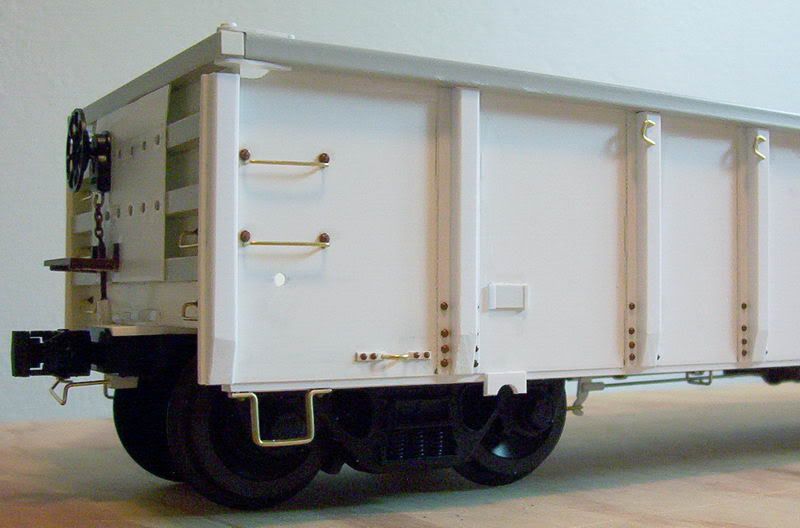
Here’s a picture of the Railgon with both types of grabs shown in the picture, notice the 2 grabs on the side are the one bend type while the end grabs are the double bend type.

(http://i1044.photobucket.com/albums/b450/DTI973/Modeling%20tips/008.jpg)

I hope this helps, Brian

Brian,

Your not going to believe this but I have made almost the exact same jigs. The grabs I am really interested are on the side of the car in the last picture. I take it those are the same grabs you show how to make but I thought you were putting a loop in the end for the nut and bolt. Atleast it looked that way on the covered hopper. So now I have to ask, are those castings and you just glue them on? Also, where do you get the detail parts that I see on the car. I have looked around a little ut am new to scratch building in G and not really sure of good sources for these items. Any more pictures of this car also? Hopefully one that shows more of it. Shows me I have a long way to go based on my first attempt. Truly inspiring.

Phil,
Thanks,

"but I thought you were putting a loop in the end " - I’m glad it looks that way!

What I do is cut a disc using a leather punch and .02 styrene sheet. I make a bunch of discs that measure about .07 dia. (approx. 2" dia in 1/29 scale). That’s the smallest punch on my leather punch.

First I mount the brass grab iron in place. Then, slide a disc up to the grab iron (if you get real ambitious make a notch in the disc so it surrounds the grab iron) and glue it down. Now take a Tichy Train Group .04 dia. rivet and place it in the middle of the disc…and viola’! a completed grab…only ??? more to go!

As for detail parts…good luck, they are hard to come by…ask on these forums for something specific and hope someone knows something…or just scratchbuild it…in our scale many things are possible. If you do scratch something make a cast of it for future jobs (if applicable).

Ozark miniatures offers some parts…not many in 1/29

USA Trains will sell parts for any of thier rolling stock but you have to call them for it. I’ve tried buying parts from Aristocraft and have been told they were out of stock and to try back later…I haven’t had any luck with that.

Hope this helps,
Brian

Brian,

Thanks for the info. It took me a second to understand what you were saying but now I have it. I’ll be heading of to the craft stores this weekend to look for a leather punch to do this.