Really looks good. How did you create the raised seams ?
Thanks guys,
Dave, I put a strip of .01 x .02 styrene on the line I wanted a weld seam at. Did the usual solvent weld application to it. After it had completely dried I then went in with the solvent and soaked them until they softened a bit, then take a small blade screwdriver (or your thumbnail) and push down, perpendicular to the seam, irregularly to simulate the welding puddles that occur during the real seam welding. Doing this is more of an art than a science.
Brian
Brian Briggs said:
Thanks guys,Dave, I put a strip of .01 x .02 styrene on the line I wanted a weld seam at. Did the usual solvent weld application to it. After it had completely dried I then went in with the solvent and soaked them until they softened a bit, then take a small blade screwdriver (or your thumbnail) and push down, perpendicular to the seam, irregularly to simulate the welding puddles that occur during the real seam welding. Doing this is more of an art than a science.
Brian
Neat idea! The consistency it very nice! I totally understand the art verses the science.
Thanks Brian. Yes neat idea and great results 
That looks super Brian. I love the welds and all the small details.
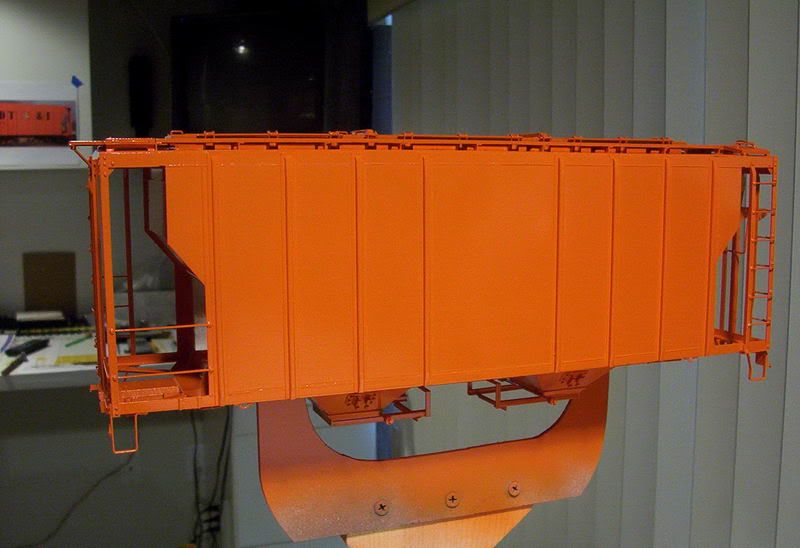
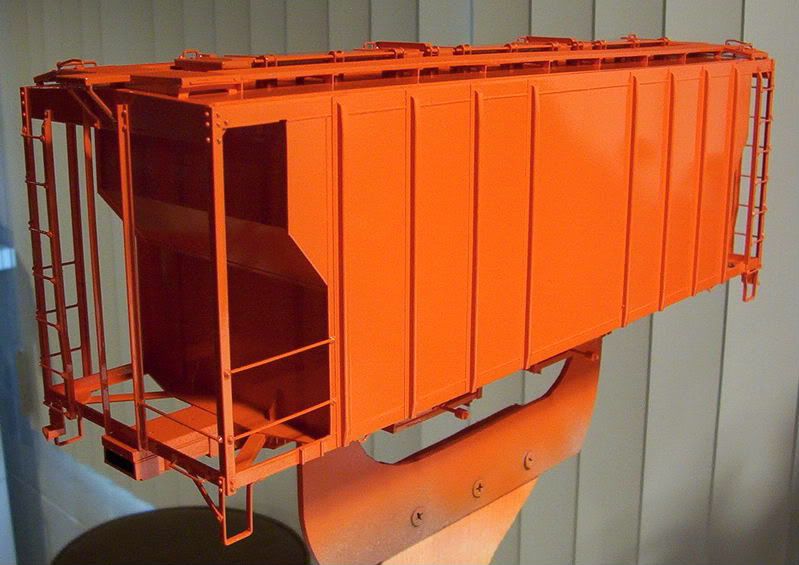
Screw the weatherman! Let the paint fly! I got home Friday afternoon and saw the humidity was down to 63 % (not that that’s ideal but I know it’s the best I’m going to see for some time - a few hours after painting we got 4 " of snow) so I went out to the garage and cranked up the furnace (that helps dry out the air even more). Here’s what she looks like this morning. I’m real happy with the finish…nice and glossy…ready for decals in a day or 2 (always best to let the paint cure thouroghly before applying decals). In the one picture look in the background and you’ll see a picture of the car I’m making this model of.
Brian
I’ve been trying to paint outdoors here in less than ideal conditions. But this weekend’s temps of 50’s should be much improved over the 30 degrees I was painting in last weekend.
Ralph
Hey Brian,
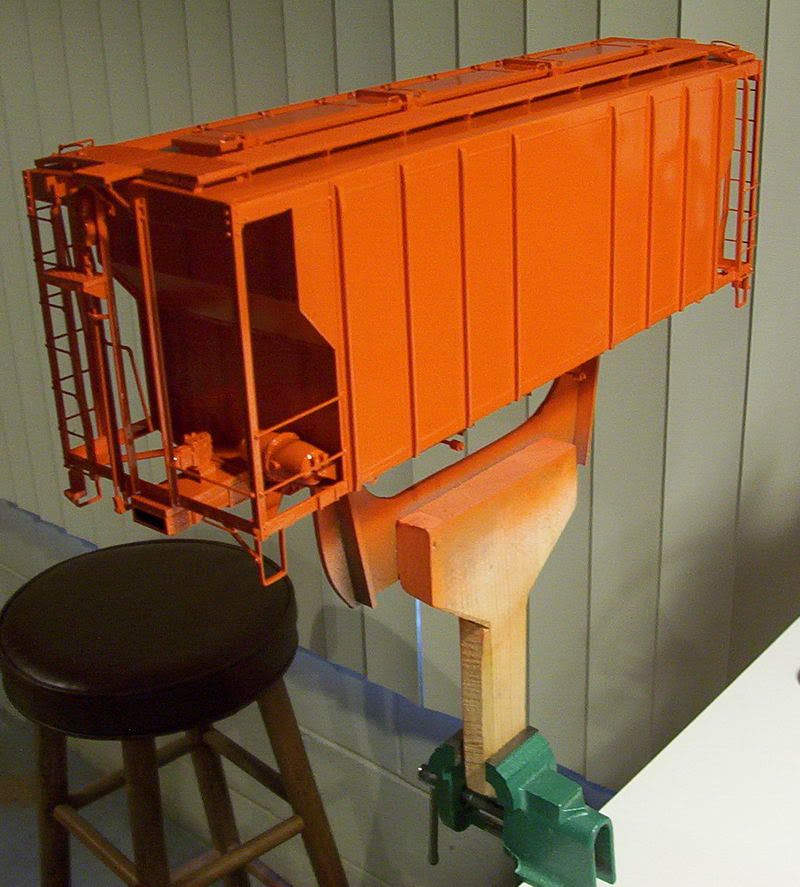
The hopper is looking great, but tell us about the niffty device that we see holding your project for painting. Inquiring minds want to know.
Chuck
Chuck,
Thanks, the nifty device was made for this project but I am already working on my next project and can see using it on that and most all subsequent models. As you can see the handle part is wood (a 1 x 6 piece of pine) screwed to some 1/8" ABS plastic that has feet that attach to the center sill via screws. There are ribs on the ABS for structural support. I could have made it prettier but was in a hurry and it does work well. I’ll be using it for applying decals to the ends also. I’ve been putting it in a vise to hold it while the paint dried, but I have a small clamp-on vise that I can attach to a drawer side or whatever to orient the model for access. I used the fixture for some final detail on the ends prior to painting. It is quite handy!
Brian
Looks great Brian. I like the painting fixture too.
Guys, Thought I’d add a few pictures that may help define the handle/bracket better These shots show the mini clamp-on vise and how it can be used to make the handle/bracket even more versitile
And this one shows the underside of the hopper car with the handle/bracket foot screwed inside the centersill
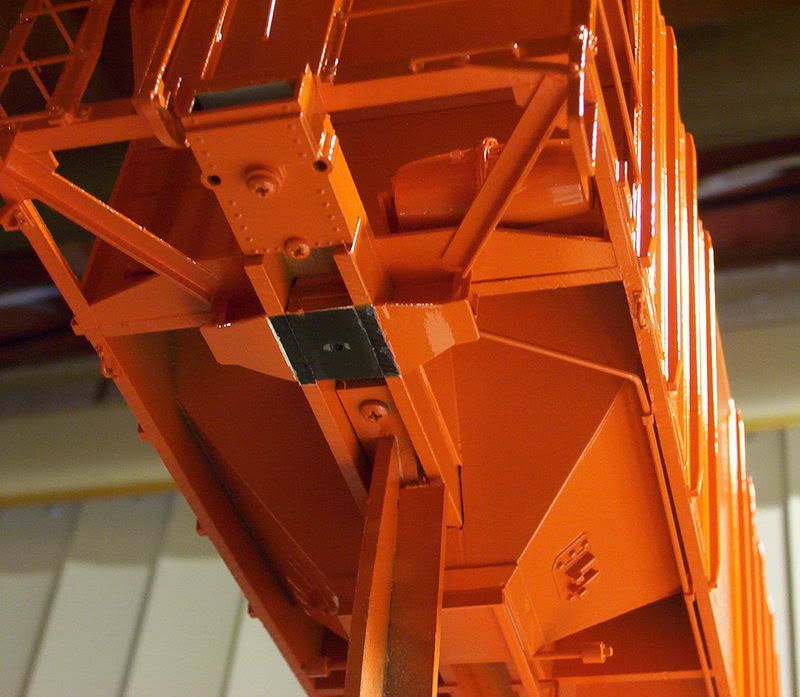
Brian
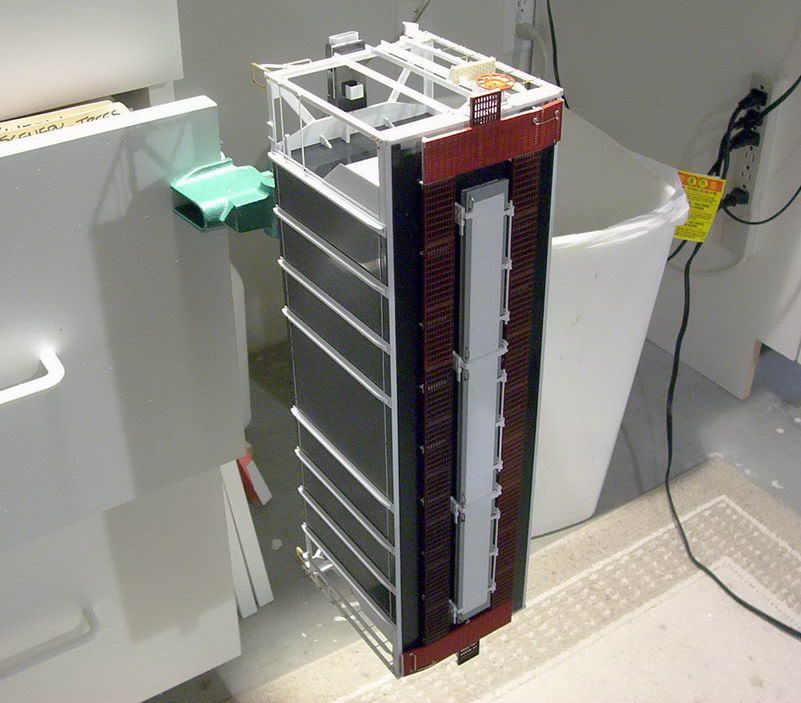
Woo-Hoo… Finally got to the decals today
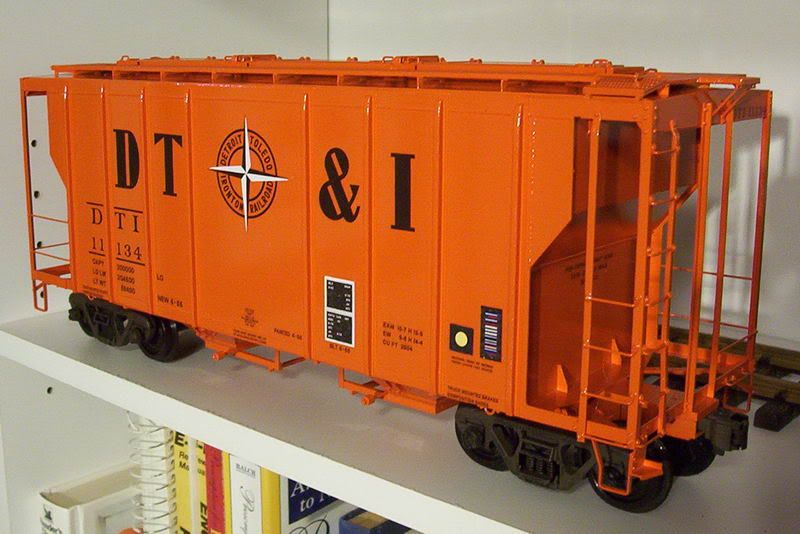
Now, a couple questions: I’m using Aristocraft rollerbearing trucks, how do I remove the wheel sets? Also, I’m planning on replacing them with metal wheels but would like to get wheels much closer to protoypical. I’m changing over to code 215 rail and want realistic wheels…I’m figuring Gary Raymond or NWSL. Any opinions on which work and/or look better? I’m not running outside anymore so that isn’t a consideration. Also, I’m not interested in getting ballbearing wheels. Thanks for any help, Brian
One hell of a job Brian. That turned out great
Awesome
Ralph
Very sharp!
I’m not sure if the roller bearing trucks are the same as the Aristo-Delton ones or not - but I just gently pry out one axle end at a time - spreading the ends.
I’ve been using the Sierra Valley wheels, but I think they are aimed at the 1:20 market.
Thanks guys,
Bruce, these trucks have the endcaps that rotate. I was wondering if they just pry off or is there some other trick.
Brian
Brian Briggs said:
Thanks guys,Bruce, these trucks have the endcaps that rotate. I was wondering if they just pry off or is there some other trick.
Brian
They just pry off…nice looking car!
Brian, beautiful looking car… great job…
That’s beautiful Brian. Great job!
Good Job! Decals look great. Now, will you weather it?
Regarding wheels, I like Sierra Valley … good looks and excellent performance.
Geoff