Large Scale Central

Bachmann Connie Bash Thread. Post your pictures here

Ken Brunt said:

Graeme Price said:

Thank You Ken,

Does moving the pilot wheel further back cause any issues with it being closer the cylinders, like reducing the ability to negotiate tight curves?

On my current layout my Connie has trouble with a tight radius curve, its just on minimum recommended radius, and I am wondering if the repositioned pilot truck might add to the problem. Unfortunately increasing the radius is not an option due to space restrictions.

I can’t answer that Graeme, but I have run it on a few different layouts besides mine and I never had any problems going through turnouts or curves. I had a few Aristo and LGB turnouts and sectional track pieces on my old layout, but I’m not real sure what the radius’ were on those. But looking at the pilot truck while it’s upside down it does have quite a bit of side to side movement. As heavy as that engine is, if worse comes to worse, you could probably eliminate the pilot truck and it would run just fine.

Another suggestion I would offer is if you do have a problem with it on curves, notching out the cylinders so the truck can swivel more would be an option. As it is now, the front pilot can’t be seen anyway so no one would see that. I don’t think you would need much more swivel then what it does now.

Thanks Ken,

An 0-8-0 sounds interesting.

The main problem I have with my tight curve (old LGB track) is I think the wheelbase is to long, my 6 wheel locos go round OK but the extra wheel is what I think is giving me a bit of grief.

Before you do any modifications to it, try running the Connie without the pilot truck and see how it works.

Ken Brunt said:

Before you do any modifications to it, try running the Connie without the pilot truck and see how it works.

Connie is all prepped and I will give it a try in the new year ie tomorrow.

Graeme Price said:

Ken Brunt said:

Before you do any modifications to it, try running the Connie without the pilot truck and see how it works.

Connie is all prepped and I will give it a try in the new year ie tomorrow.

Finally got to run Connie sans front pilot truck and it looks like trackwork will be required. The old LGB track seems to have a guage problem round the tight curves and Connie just jumps the track and drives straight forward instead of following the curve.

She has small issue with another tight radius curve but nothing like the LGB track one and it only appeared after I took the pilot truck off.

I have been thinking that maybe I should just mothball her till I build my retirement layout in 2-3 years time, but I like the look of her running so might persevere with running her, just have to expand the layout a small bit (a land grab in the offering).

Could be the Connie with the gauge problem. B’mann isn’t known for it’s precision wheel gauge…(http://www.largescalecentral.com/externals/tinymce/plugins/emoticons/img/smiley-wink.gif)

Ken Brunt said:

Could be the Connie with the gauge problem. B’mann isn’t known for it’s precision wheel gauge…(http://www.largescalecentral.com/externals/tinymce/plugins/emoticons/img/smiley-wink.gif)

I have a new motor controller (a robotic one by Polulu) and battery (Graphene) on the way for her so while she is in the workshop I’ll check out the wheel guage.

This is my Connie bash which started by removing all the stock electronics, replacing the main control board with a K27 main board mounted in the tender and adding to the Bachmann 4 pin connector a new 7 pin for added wires , added a TAS pulsed smoke unit and a Phoenix PB9 sound unit with on off switch and volume push buttons installed in the new tender water hatch and speakers in tender and boiler. The flickering fire box and ash pan circuits were replaced with a simple set of flickering LEDs and a small bridge rectifier. Added loco running lights and tender marker lights with red and green miniature LEDs. Removed cab back wall, moved cab back 5/8", cut boiler to move back head forward 1/4", replaced pilot with modified K27 pilot, cut front truck assy. down by 3/8", relocated head light, replaced whistle and boiler check valves, replaced all stock piping and added all new lines, added injectors, turret manifold, lubricator and related piping, air compressor regulator, new reversing lever and modified Johnson Bar, new back head throttle, water site glass, steam/air pressure gauges, boiler wash out plugs, ash clean outs, brake valve, sand dome lid, boiler steps, complete full piping for brake system, glad hands and hoses, made tender air tank, added steam and elect conduits to generator, replaced sander lines, made new tender ladder, added coal load extended bunker to tender, cab arm rests and wind screens, steam piping in cab wrapped with tape to simulate lagging, Kadee Couplers, and cab glazing. Still have to add ropes for whistle and bell and DCC.

My Connies, #34 and #37, Full build-log on my website. Most of the mods to the appearance are pretty simple. The real stuff is inside.

Ken Brunt said:

Actually Graeme, it wasn’t all that difficult or involved. The biggest PITA was refrabricating the front pilot truck.

First thing you have to do is remove those support arms. I had to rebend them and shorten them too.

Those are attached to the plate that holds the buffer beam and pilot. That unscrews from the bottom.

That will expose the metal chassis. I cut the chassis just behind the pilot buffer beam in that picture above (about an inch back from it’s original length). Then all you have to do is cut the top plate to fit.

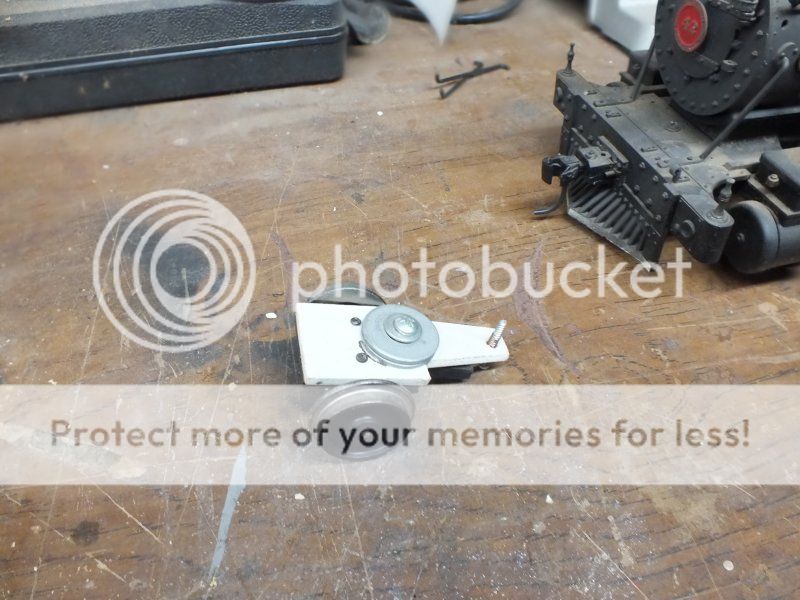
Then it’s just a matter of shortening the pilot truck and making a new mount for it. I left it loose and floppy so it tracks better. Reattach the top plate and shorten the support arms. Rebend them to fit the existing holes and screw them back on the top plate.

Those other holes on the side of the smokebox and on the pilot plate are for the snowplow. It’s a K-27 plow from B’mann. I also added a Kadee coupler to the front and back. While I was at it, I moved the headlight to the top of the smokebox and added marker lights.

I did all this about 10-12 years ago, so I may have forgotten a thing or 2 that I had to do, but that should get you started. I didn’t like that long front end on the Connie, but shortening it was all that difficult.

I am resurrecting this thread in the hope that I can see the pictures.

Ken is it possible to get the pictures re posted please as I want to modify my Connie.

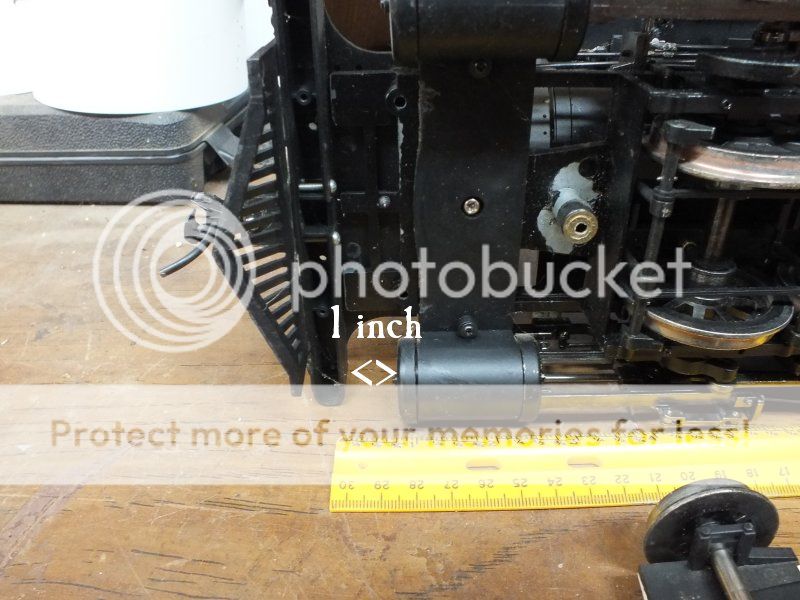
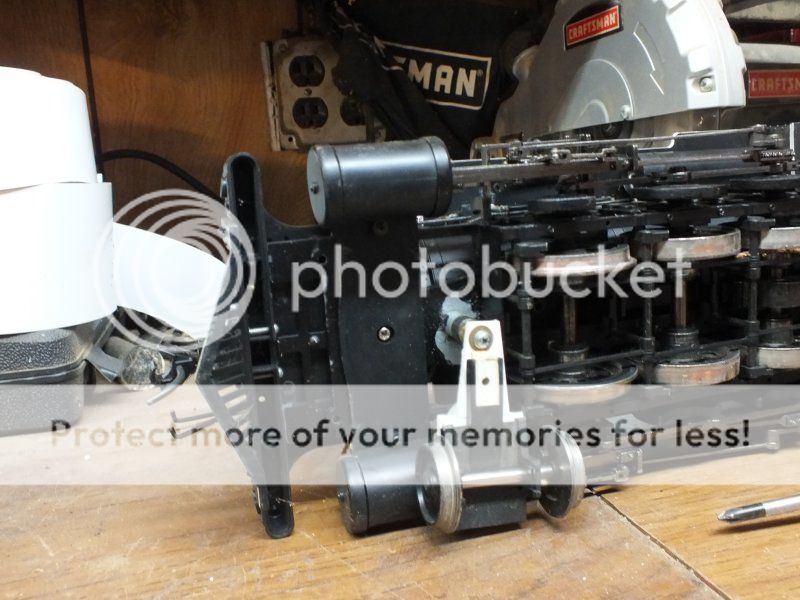
The original pictures are long gone. But I did take some more, so maybe it’ll help you out. After I removed the plastic deck part that holds the pilot beam and coupler,

I cut the metal frame that holds the front deck on about an inch from the front of the cylinders.

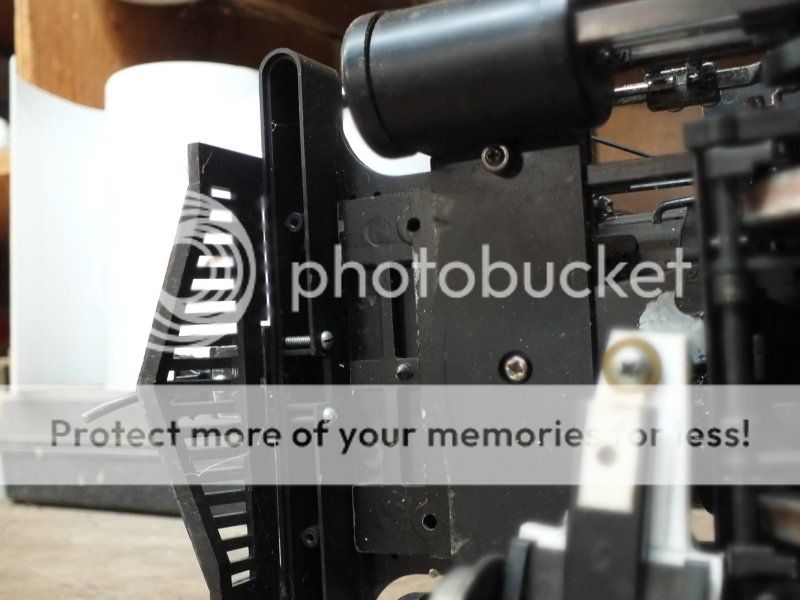
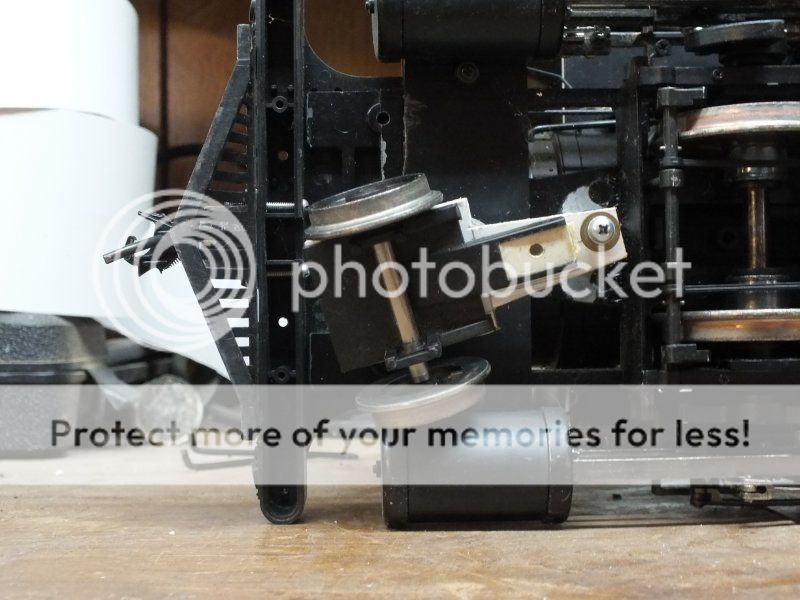
The metal deck has four openings in it. I cut along the front of the forward opening.

Then I believe I had to shorten up the deck to get it to fit. (It’s been awhile)

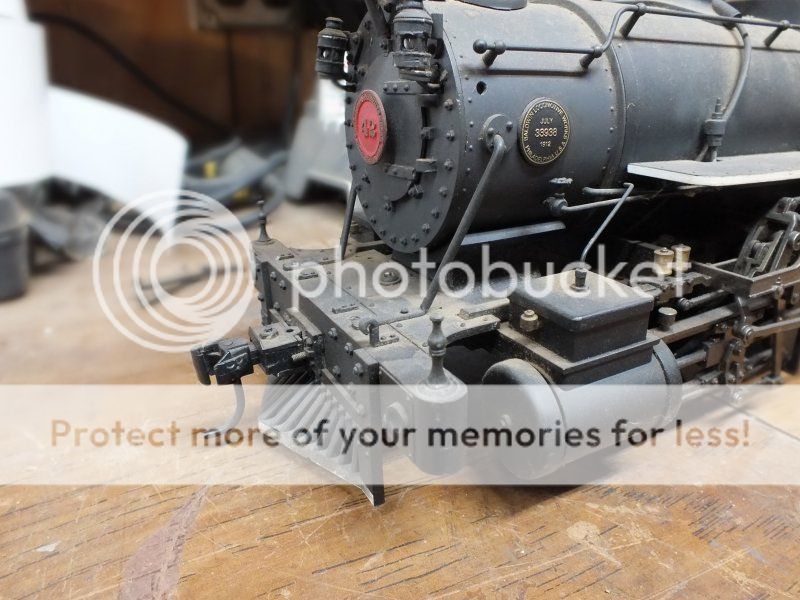
The pilot truck had to be rebuilt. Took me a couple of tries to get it the way I liked it. It also helps to add a bit of weight to it, too.

It goes back where it came off from.

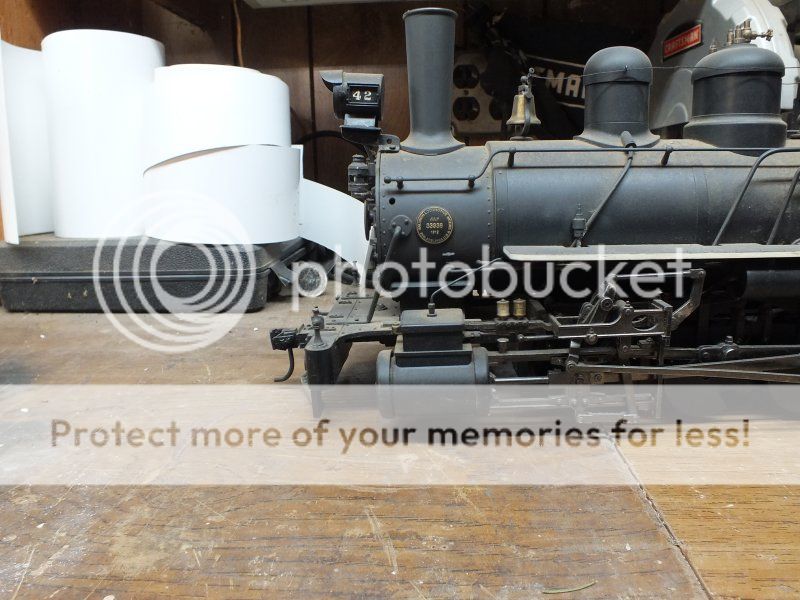
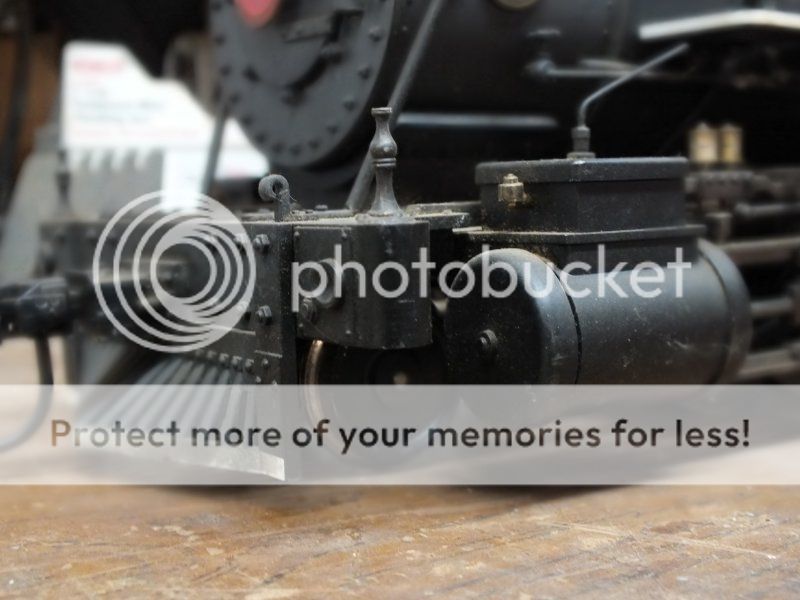
Kind of hard to see, but with the cylinders on the outside of the frame, there’s quite a bit of room for the truck to swivel.

The only reason I shortened it was I didn’t like the looks of that long front deck.

Hope this helps you out Graeme. Got any questions about it, just ask. I’ll try to remember…(https://www.largescalecentral.com/externals/tinymce/plugins/emoticons/img/smiley-wink.gif)

Thanks Ken,

With the pictures and the description in the post above I should be able to do something like that. Here’s hoping anyway (https://largescalecentral.com/externals/tinymce/plugins/emoticons/img/smiley-undecided.gif)

I’m trying to reduce the overhang so that when I put a guard on my trestle the loco does not foul it.

Your welcome, Graeme.

I bought that loco not long after it came out and did the mods to it shortly after that. So how long ago was that?

And now you want my rusty brain to remember what I did…(https://www.largescalecentral.com/externals/tinymce/plugins/emoticons/img/smiley-wink.gif)(https://www.largescalecentral.com/externals/tinymce/plugins/emoticons/img/smiley-cool.gif)(https://www.largescalecentral.com/externals/tinymce/plugins/emoticons/img/smiley-surprised.gif)

I got mine just before a dear friend and fellow G Scaler passed away a bit over two years ago, he said to me that is wasn’t working but as he had no use for it so maybe I could get it going again,

Turned out to have a split gear which I have replaced with a new brass one, I did not have the layout to run it properly so the new one should do it justice.

I am planning to Australianise it a bit so the front has to be shortened and maybe the cowcatcher has to go as well.

Do you have a photo of what your looking to achieve ?

Sean McGillicuddy said:

Do you have a photo of what your looking to achieve ?

The front will end up looking something like this but I’ll use the original buffer beam and there will be no buffers basically the cowcatcher is no longer attached and the length is reduced so the buffer beam does not swing out as wide as it does now.

I don’t think I’ll have to shorten the buffer beam to reduce the overhang as it appears to be the same width as the cylinders.

Same as length as Ken’s and buffer beam similar to Rick Marty’s (page 1) sans board although that may be an option as my Shay has similar boards.

Don’t have a Connie but did do a Big Hauler and changed it into a Prairie 2-6-2 using a LGB Mogul motor block

Here’s mine. Based on/Inspired by Fletch’s 2002 builder logs about building a K27 from a Connie:

http://4largescale.com/fletch/d3c.htm

(this was before the Bachmann K27 existed!)

These bashes were popular in the early 2000’s. I was a little late to the party, I completed mine in 2017!

video:

And the full builder’s log:

https://scotlawrence.github.io/Stonehedge/locomotives.html

thanks,

Scot

Very nice Scot - Where is that indoor layout? Looks very cool.

Mine has been apart for many years to get some cosmetic work. So far I have “lowered” the tender using Kevin Strong’s technique of adding some styrene boards below the deck. It doesn’t actually lower it, but makes it look lower as the wheels tuck in slightly. I’ll try an add a photo of where that is at to this post later today.

To fix the smokebox/pilot I planned to follow Kevin’s lead and extend the boiler tube by about 1.5" using a PVC pipe fitting. I got as far as removing the head lamp from the smokebox door and filling in the holes it left. I plan on a standard door center Baldwin number plate, then move the head lamp to the top of the smoke box.

Somewhere along the line I lost interest, or was distracted by something else and the work in progress got shelved. If I ever retire I will have plenty to do with all the unfinished projects I have accumulated (https://www.largescalecentral.com/externals/tinymce/plugins/emoticons/img/smiley-surprised.gif)

The layout is the Christmas seasonal display at The Garden Factory in Rochester, NY. It was originally built by Peter Todd and Dave Rouse who were also responsible for the layout at Ridge Road Station in Holley.

A few years ago after the demise of RRS the Garden Factory layout was freshened and some elements of the RRS layout incorporated. It is a big draw that time of year in the Rochester area.

And now y’all sparked my (3rd) Connie Bash interest once again!

Jason