Large Scale Central

B&O's Evans City station project

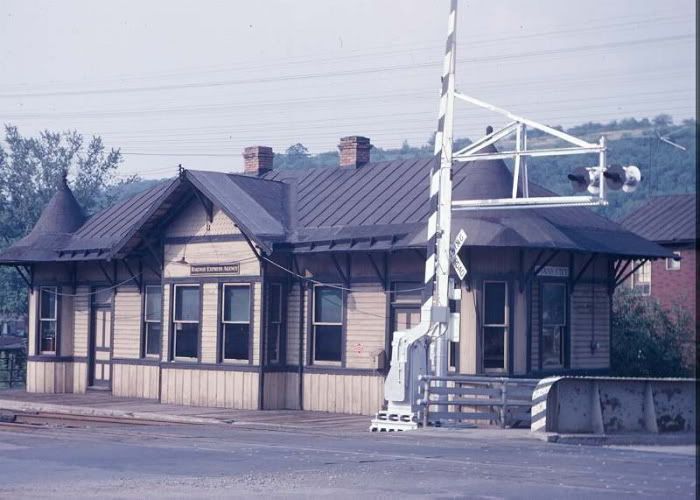
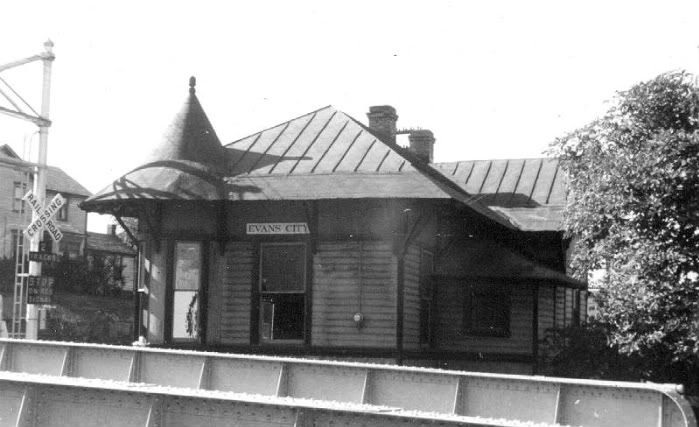
My winter project is to get stuff together to do a public layout at our antique machinery club’s spring show. As part of that I wanted to make several local landmark buildings. The most important one (to me) is a model of the old Baltimore and Ohio passenger station that used to be in Evans City, Pa. This station was actually in Ripley’s ‘Believe It or Not’ as the only passenger rail station built completely over water. The station was built upon steel girders stretching over the Breakneck Creek, because the tracks ran too close to the waterway to do anything else. My grandpa tried, and ultimately failed, to save this station from demolition in the '70’s. Chessie wanted it gone NOW, and neglect, vandalism, and carpenter ants had made it too unstable to be moved.

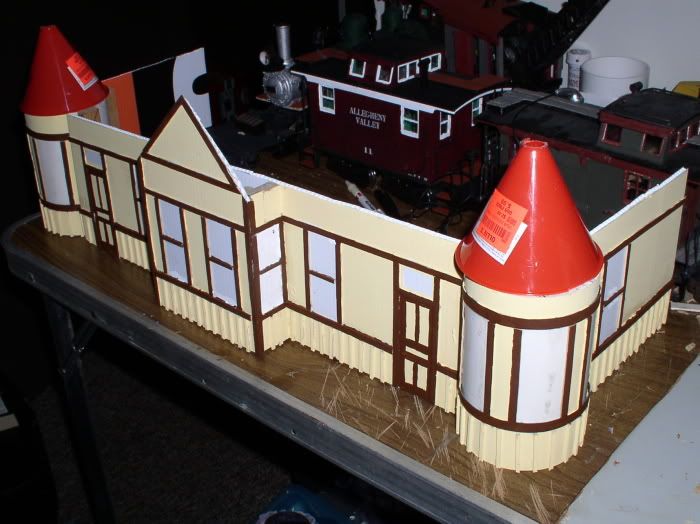
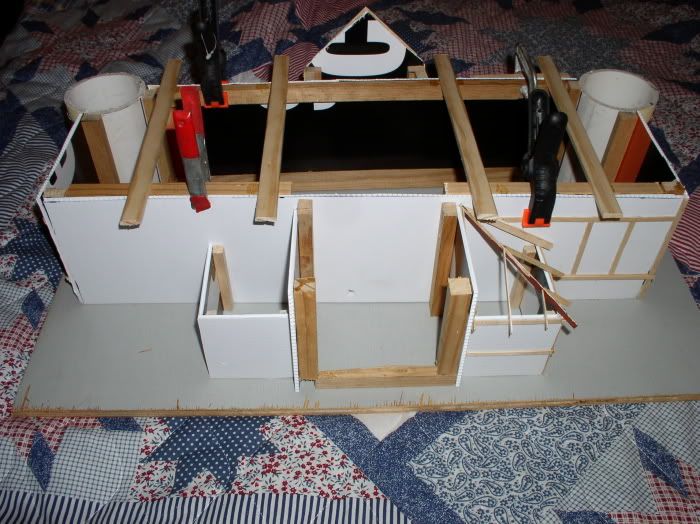
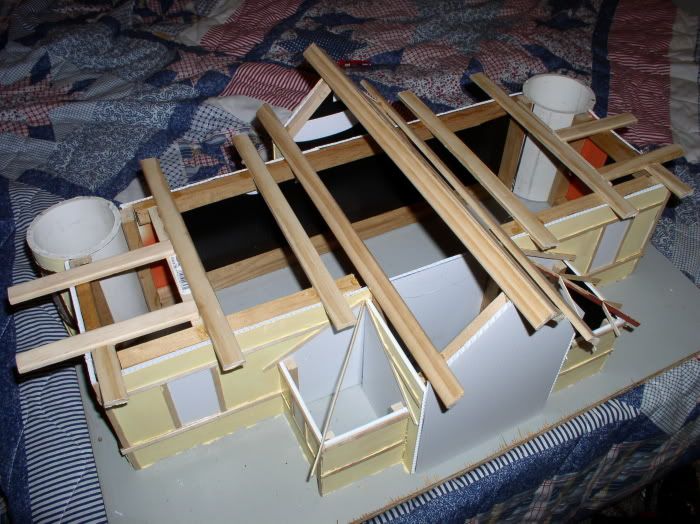
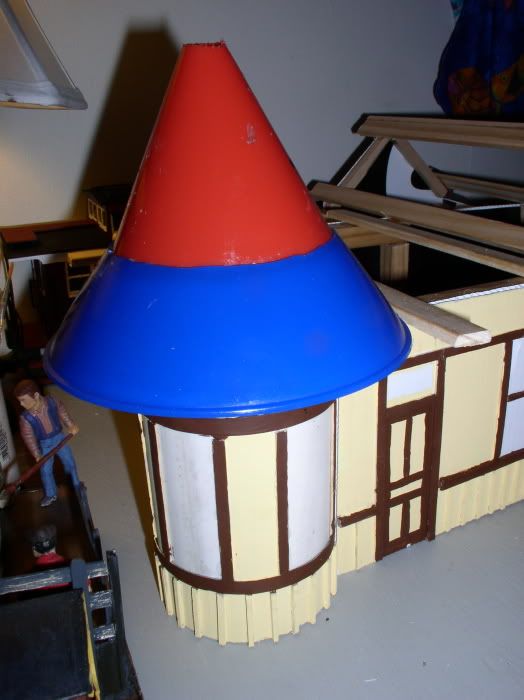
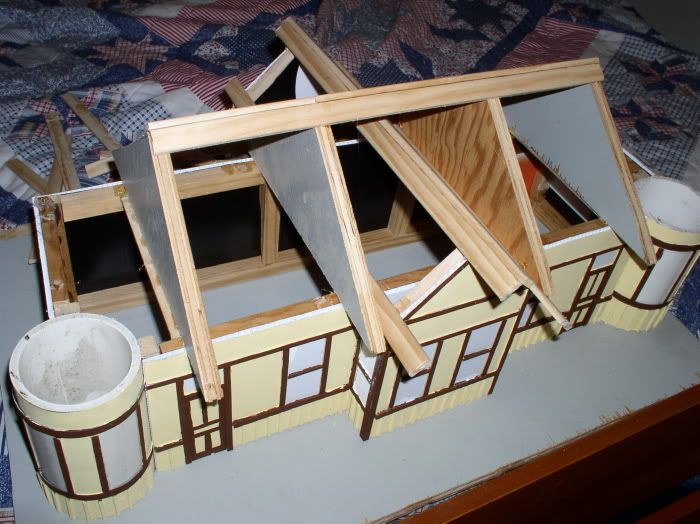
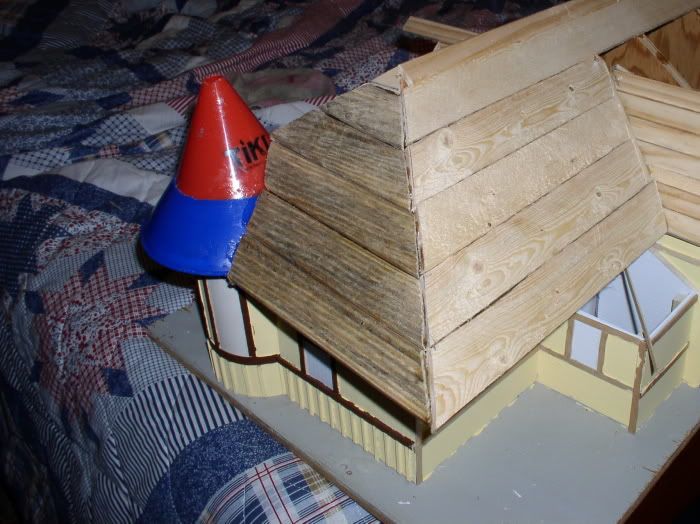
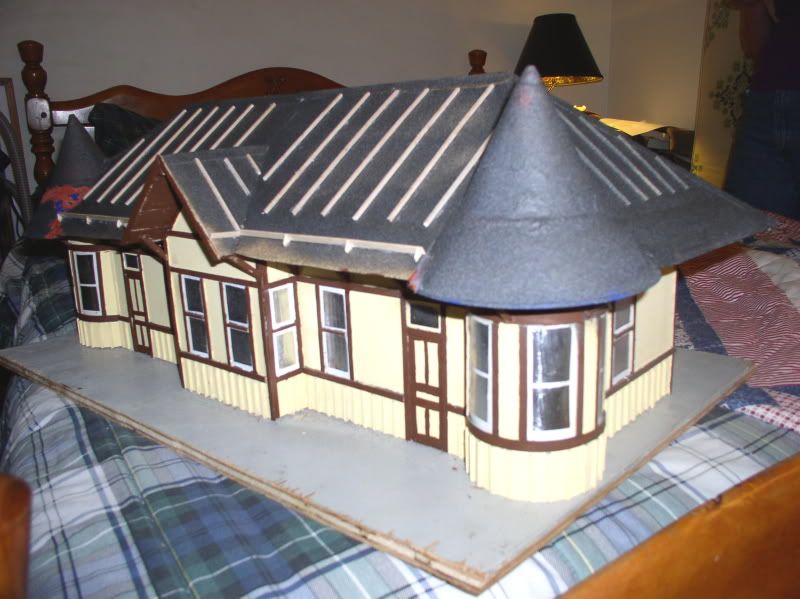
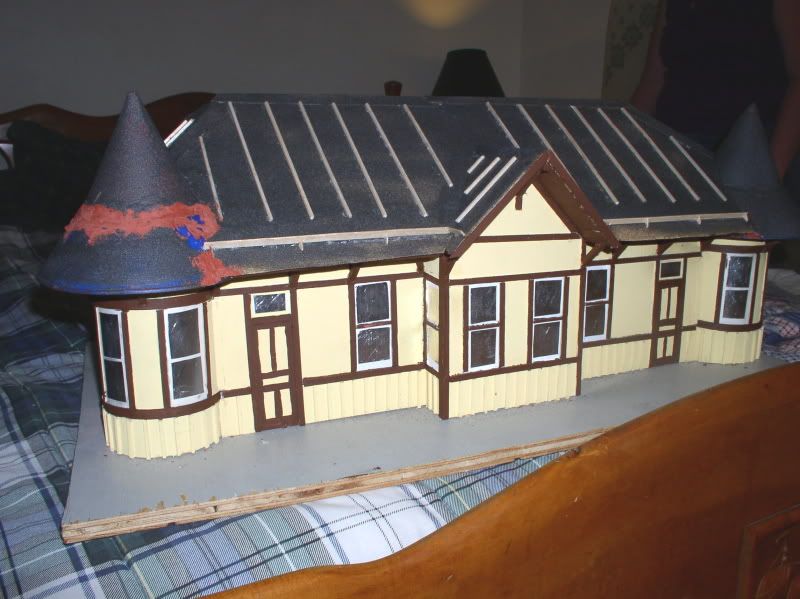
The model is made from a corrugated plastic advertising sign scarfed from work, some 3" PVC pipe, and good old coffee stirrers. This is what it looks like after about 3 hours work.

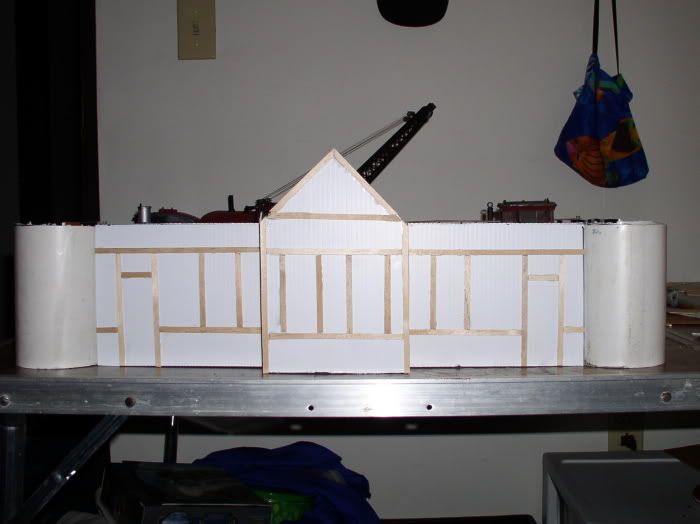
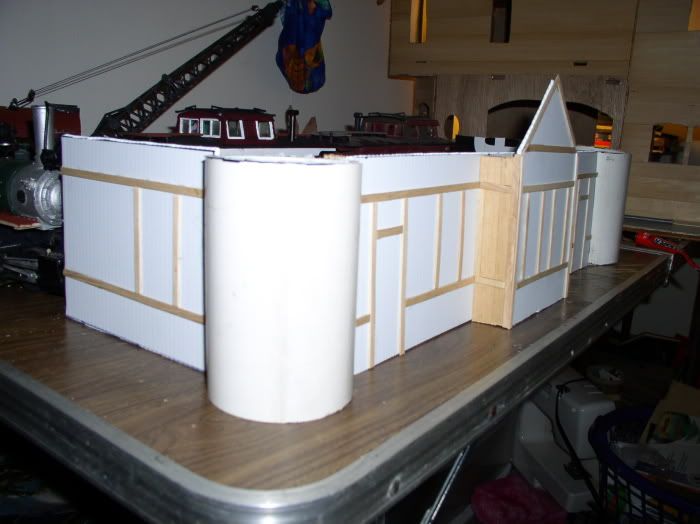
NOW, I’m gonna pick you fellas brains. What is the easiest and/or cheapest way to: 1. continue those two belt lines around the turrets -and- 2. make those stepped cone “witch’s hat” roof pieces for the same. I’m on a real tight budget, so the windows and doors will be painted on with basswood trim, rather than using Grandt type stuff. But I’d still like it too look fairly nice from about 6-7 feet away.

Mik said:
NOW, I'm gonna pick you fellas brains. What is the easiest and/or cheapest way to: 1. continue those two belt lines around the turrets -and- 2. make those stepped cone "witch's hat" roof pieces for the same. .
I'd use real thin styrene (.020 thickness) as it's real easy to bend and use those spring type clothes pins to hold it in place. For the cone type roof I'd use the same thing and just keep forming it until you have the shape you need. Once you have the shape then you can trim off the excess.

Neat prototype to model, Mik.
Too bad it wasn’t saved.
Wonderful that you’ll be “saving” it in miniature.
Ralph

Mik,
I’d get your model on a permanent platform before I’d go much further. Work to complete the cube to build stability. I agree with Ken on the ultra thin plastic and a good plastic welding glue will make it a permanent portion of the structure. Good Luck on your project, you’ve got a great start.

Somebody here posted a link to B&O for a free font that they used.
http://borhs.org/ModelerMag/index.html

The base will be some 1/2" plywood that I scarfed out of a dumpster (Don’t you just LOVE ‘value priced’ model supplies?). I kinda needed to mock it up to get measurements (the back wall, and there’s still a 5" or so gabled section to add back there too.), rather than having to cut it 3 times and still have it be too short… The walls are just tacked to the turrets with about 2 drops of glue at the moment because I think it will be easier to paint the walls flat, then touch up them after final assembly. Matching the yellow will be fun considering I’m not certain how far faded the photo is. I can probably get a B&O paint code, but I want it to look more like it did in it’s final days. I got kinda lucky. I found these two photos from the 50’s which sort of show the rear of the building and bridgework. I also found some pix of the freight shed that stood on the other side of the tracks till the 50’s

(http://i397.photobucket.com/albums/pp52/steamnut1917/bo-evancity-sta-a.jpg)

(http://i397.photobucket.com/albums/pp52/steamnut1917/bo-evans-city-station-a.jpg)

Coming along nicely…Today I added the battens and first coat of color to those 3 walls. Found a couple funnels to support the turret roofs as well. I’ve also cut out some of the back wall pieces (not shown). Tomorrow I’ll cut the plywood base, reinforce the interior, and start making roof trusses.

(http://i397.photobucket.com/albums/pp52/steamnut1917/PA150002.jpg)

Good idea on the funnels. Perhaps you can find a larger one for the overhang. Looking good so far.

More progress! The back wall is taking longer than the front because it’s rather busy. I ASSume the two little add on rooms were toilets… probably with dry hoppers that dumped directly into the creek…YUM!!!

(http://i397.photobucket.com/albums/pp52/steamnut1917/PA250002.jpg)

(http://i397.photobucket.com/albums/pp52/steamnut1917/PA250003.jpg)

Roof trusses started. I ran out of lathe! I thought 20 feet would be enough, wrong.

(http://i397.photobucket.com/albums/pp52/steamnut1917/PA250004.jpg)

This morning’s fiddle project. Every station needs a baggage cart. Anybody know what color(s) the B&O painted theirs?

(http://i397.photobucket.com/albums/pp52/steamnut1917/PA260002.jpg)

dumb connection hiccuped

MIk,
First of all thanks for bringing this station to my attention as I don’t believe I have ever seen it before. I was gonna ask about the plate girder bridge in the first picture but the others tell the story…very cool!
I also like the use of the funnels for turrets (witches cap) but I was thinking the same as Jon on the larger sized funnel for the overhang then cut down the funnel’s you already have to go over top. I personally secure all my builds to a base last as that way I can totally square them up before mounting but I believe it’s a matter of personal preference.
I also agreed on the .020 styrene as suggested and nice to see the use of the coroplastic. Not sure how your gonna do your windows but I used chrome reflective tape or basically the same stuff Jerry Barnes is using on his snow plow build for windows on a station stop I built(my first build at that) . If you lightly sand it to rough up the reflective quality it makes a nice window. However I would lay the tape first then add the mullions or sash details over top.
Very cool build and look forward to progress!
:wink:

Well, I took advice and bought another sized funnel… SAME TAPER!! Grrrrrrr! So I tried to increase the taper on the small one… it cracked. Next idea was to split the large one. It looks OK, but then I find super glue just runs right off this kind of plastic… except for where my fingers were! After I go my fingers un-stuck I went back to good old E-6000… And sat there holding it, afraid to breathe (either because it might shift, or from the stink) for 20 minutes waiting for the stuff to set. Then I cut a coroplast circle to hold everything up. B&O stations had open eaves. This model won’t, for several reasons. Including strength, and laziness… but most of all because it just gives the bees and spiders places to build.

(http://i397.photobucket.com/albums/pp52/steamnut1917/PA260001.jpg)

Mik.
I think it looks great! As for glue try my favorite 3M plastic and emblem adhesive (automotive supply stores) which can be used to fill seams and sanded as well to a degree. As for open eaves I see no need for that as it won’t be seen anyway and looking at the prototype you cannot tell. Just lay that funnel on a sheet of styrene and trace it out for the bottom. Add some simple stick brackety and your fat city. I would like to add for your seamed metal roof please check out my Lemo tower build and my recent Washington Fire company build. Simple way to make it by just scoring the lines. Hope this helps and look forward to progress.
:wink:
Editing to say I re-read again and realized you already sealed the eaves with coroplastic.

Coming together… I WAS going to make real trusses out of lathe, and then I though, “Why bother? Nobody will see it.” So I got out the saber saw and made plywood triangles. Fast, easy and fairly cheap…

(http://i397.photobucket.com/albums/pp52/steamnut1917/PA270001_01.jpg)

Cheapy lathe, $10 for a big bundle… or free if you ask for the broken ones. I like free. Makes a very sturdy sub-roof. I think I’m just going to glue down 60 grit sandpaper on it, add battens, then paint it.

(http://i397.photobucket.com/albums/pp52/steamnut1917/PA270002.jpg)

I also found a picture of a REAL, unrestored, B&O baggage cart, on an ad for an estate auction…

(http://i397.photobucket.com/albums/pp52/steamnut1917/fi9cgi.jpg)

The underneath is a bit different, because mine is actually a model of the one at the Middletown & Hummelstown RR. But how many will notice? Anyway, Colonial Red and Hunt Club Green were close. The steamer trunk is Bachmann, the barrels Lionel O-scale… (they used to ship breakable stuff, like dishes, packed in straw in ones that size)… Preiser baggage cart $10+, this one about $3.50 more or less. And it’s sturdier…

(http://i397.photobucket.com/albums/pp52/steamnut1917/PA270001.jpg)

Looks good Mic baggage cart turned out nice.

Mik said:
The underneath is a bit different, because mine is actually a model of the one at the Middletown & Hummelstown RR. But how many will notice?
My boy and I love that RR and frequent it's bone yard. I still wouldn't notice the difference though! ;)

FINALLY enough progress to be worth showing…

(http://i397.photobucket.com/albums/pp52/steamnut1917/buildings/PB220002.jpg)

(http://i397.photobucket.com/albums/pp52/steamnut1917/buildings/PB220001.jpg)

Classy!!! That’s all there is to it.

looking VERY good! Nice work!

DUDE!