When I started thinking about a stone mill, I decided to build a mock up first so I could better visualize how it might fit in the garden. I used Precision Panels Perfic Panels which can be easily cut with a sharp knife.
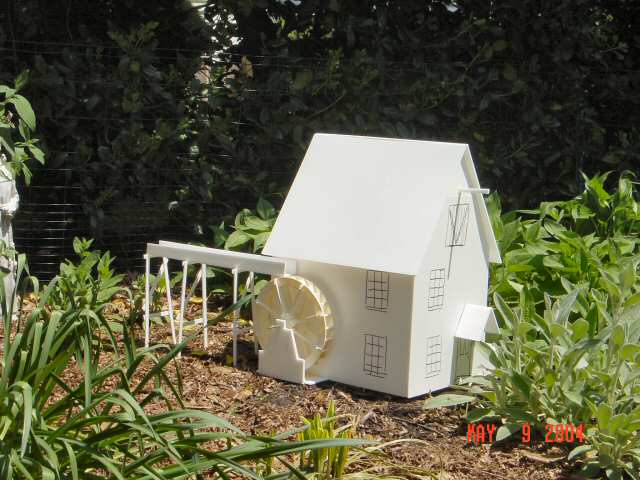
The wheel was bought from Stoneworks. It’s cast in resin and requires only minimal assembly. I think that the roof is too steep, so I’ll reduce the angle on the model. I also think that I’ll skip the roof over the door.

There will be a small pond in front of the mill to take the output from the sluice and wheel. A small hill will be located behind the mill to hide the water return from the pond. A small preformed plastic pond is used for the pool.
My next step was to decide on the stone. Although cut stone is probably more prototypical, I decided to go with a fieldstone look and ordered the stone pieces from Stoneworks, along with some accessories: a weather vane, a grist pulley, and some molded sluice pieces. The stone is shipped in a plastic basket.
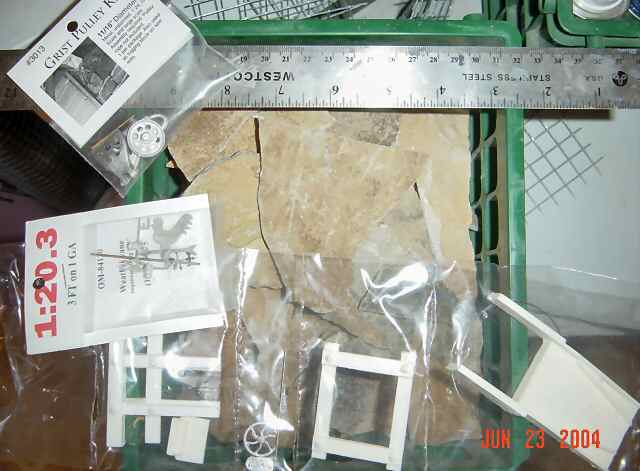
I also bought a stone cutting tool from them: ceramic tile nippers which allow me to cut the pieces to a smaller size.
Since I had never worked with stone before, I first made a small test wall - in this case the outside piece that will support one end of the wheel.
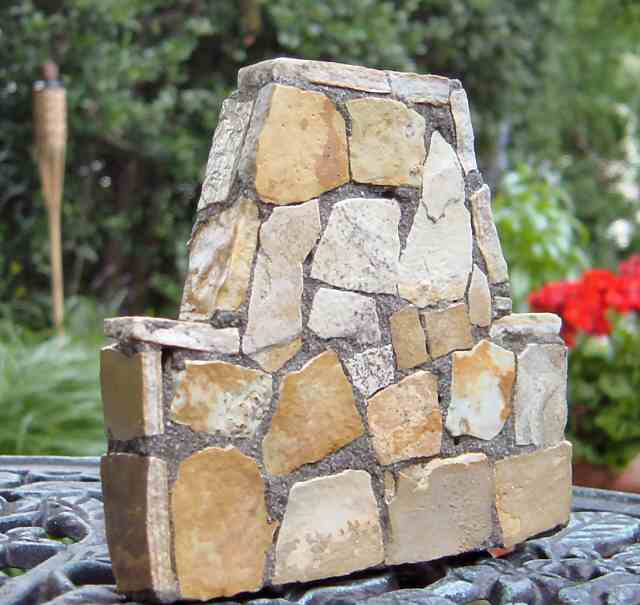
That worked out well, but how did I do it? Let’s take a look at how a wall is created.
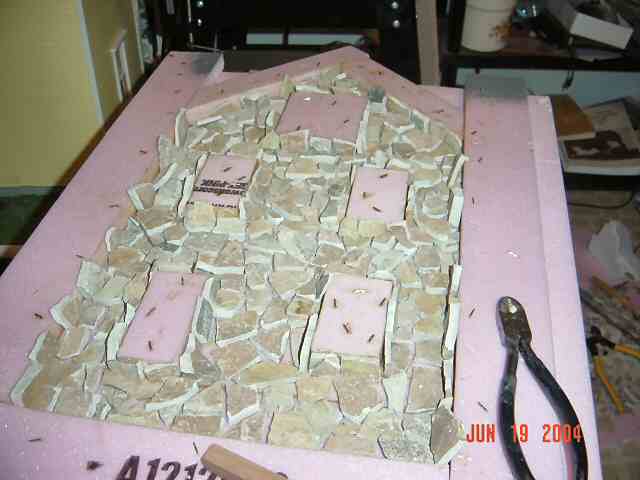
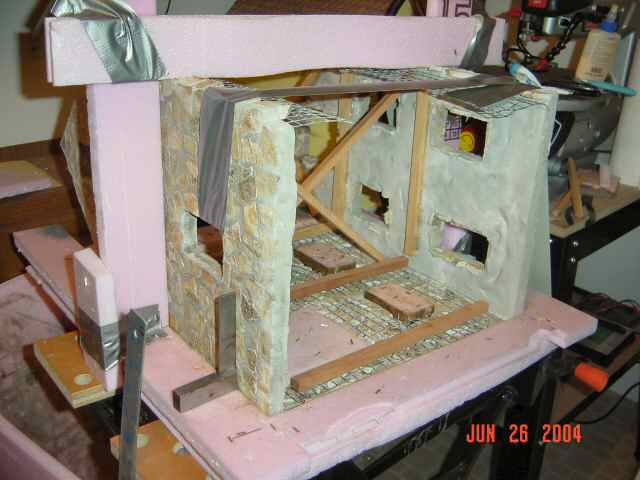
Each wall requires a mold to hold the walls in place. I used the pink styrofoam insulation panels available at places like Home Depot. I cut strips to delineate each wall and used the same foam to make plugs for the windows. The strips and plugs are held in place with “T” pins. You don’t have to make everything watertight, as the cement tends to not slip through the cracks. It’s important to square the strips, as this form will govern the final shape of the building. This is the front wall, so it has a door plug, plus a large plug in the “attic” for a loading door.
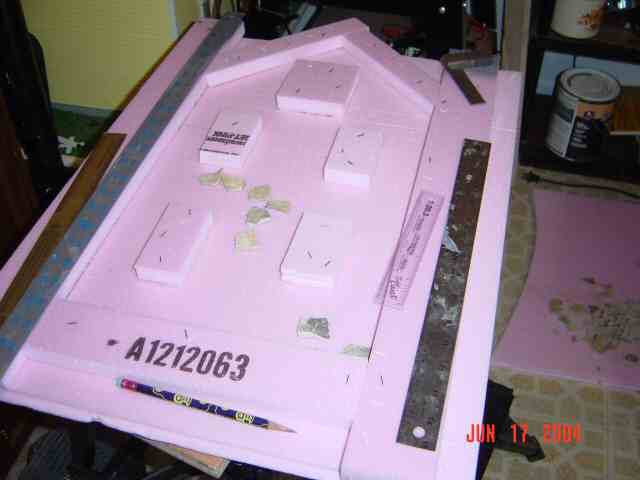
Before proceeding, I sprayed the mold with WD-40, to act as a mold release. The stone comes in slabs about four inches across, but is easily cut to size with the ceramic tile nippers. You can see a few of the pieces cut to size in the mold.
As I continued to fill the mold with stone, I made sure that I put in some vertical pieces around the plugs and the edges - these will from the corners for the openings and the building itself.
Next, I cut some hardware cloth to shape. This acts as rebar and will be used for each wall. Openings are cut in the hardware cloth for each window or door; I left a few inches on either side to help connect the adjacent walls.
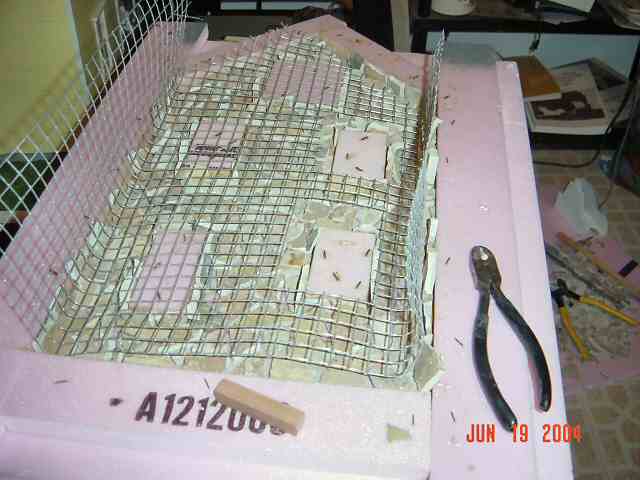
Now it’s time to pour the wall. I used Quikrete Vinyl Concrete Patcher and I mixed it to about the thickness of pancake batter.
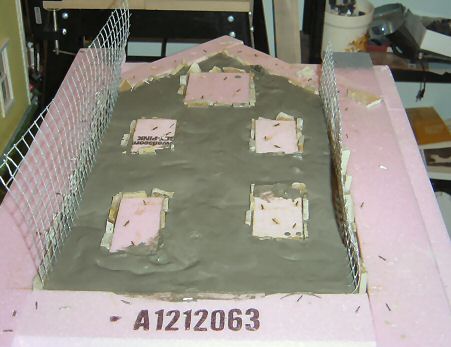
The mix will fill the gaps between the stones. I held a small orbital sander against the foam to help eliminate air bubbles. It is best to let the concrete mix set up for 12 to 18 hours before trying to unseat it from the mold. The concrete is still “green” at this stage. What’s that mean? BE CAREFUL! You can still crack the wall. But, it’s the best time to really clean off all the concrete that ran under the stones you carefully put in place.
Here’s a look of it after it’s been removed and cleaned up. I used a combination of a metal pick and an old toothbrush to clean the concrete off the face of the stones.
Changing a few plugs gives me the mold for the other end of the building.

The wall on the left is not quite as dry as the other one. The walls lighten as they dry.
Now comes the hard part. I’ve got to pour a side wall, while attaching the end walls at the same time.
First, a new mold is created for the side wall. Again, plugs are used to create the openings needed.

I add the stone to the mold and then position each end in position. They don’t want to stay in place, so I built up some braces to hold everything square. Notice that I’ve glued some wood strips on the end walls for reinforcement. The wood strips on the side wall are an attempt to hold down the hardware cloth in place.
That seemed to work. Here’s a shot of how it looks when you first take it out of the mold. Yes, there’s some cleaning up to do. I had to knock out some of the plugs with a hammer.

It does clean up quite nicely.
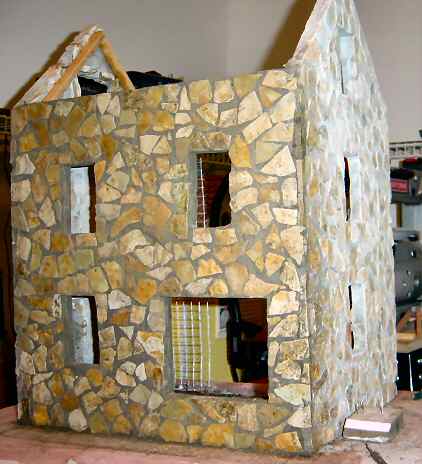
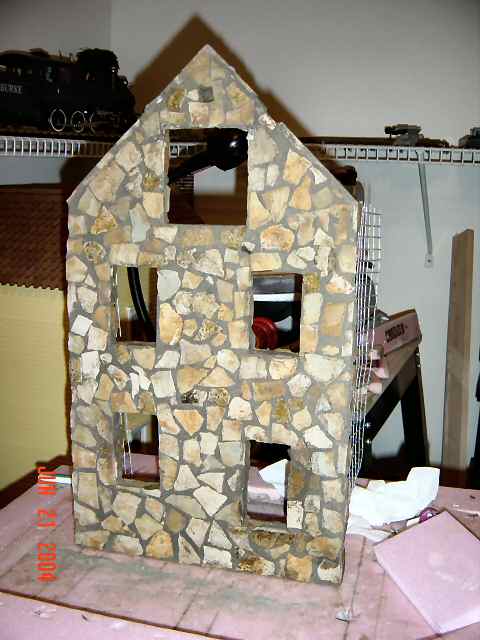
Now, it’s getting harder to move. Not only is it heavy, but I’m still a bit concerned with the corner connections.
The final side is completed the same way, but this time I don’t need to make such a complex frame to hold the walls in place.
Time for a roof. It’s easy enough. I just used two sheets of the Precison Products Perfic panels. They were framed with styrene strips to cover the edges and then glued in place.
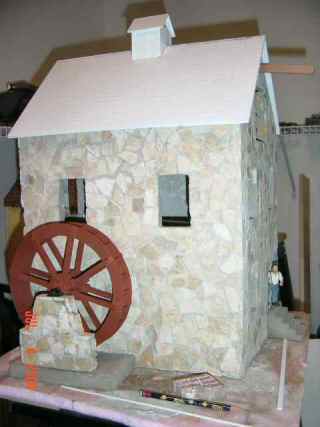
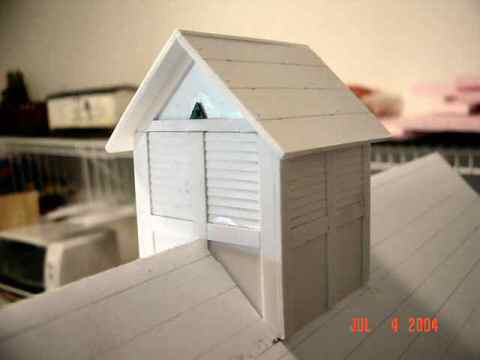
I poured a small slap to support the wheel, and also poured some concrete steps. I built a cupola from styrene. Note that I’ve put lines on the roof to help place the shingles.
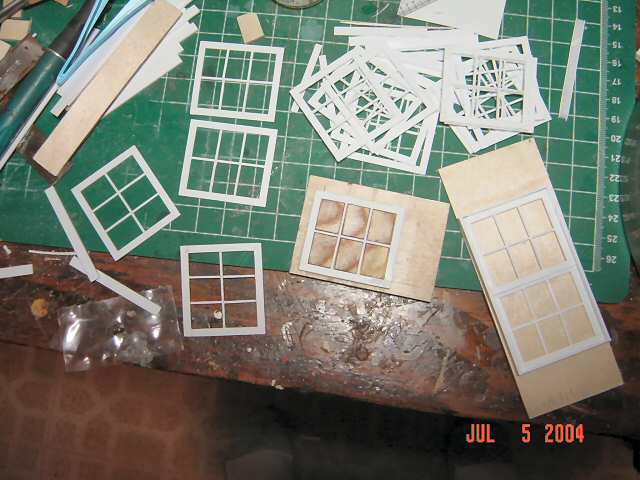
Before I put the shingles on, I decided to build the windows. First, I built a 6-pane jig out of wood. Then I used styrene strips to build up each window. I only needed 22 of these assemblies!
To the right, you can see the assembled window. I built up a frame to hold the window halves. I’ll insert this into each opening and trim around it.
More details are here . They’re easy to make and look good.
.
The windows are glazed and then glued in place. I use silicone adhesive for attaching everything.
Applying shingles is rather tedious. They’re done one at a time, starting at the bottom edge of the roof. The lines I drew earlier show me where to place the top edge of the shingle.

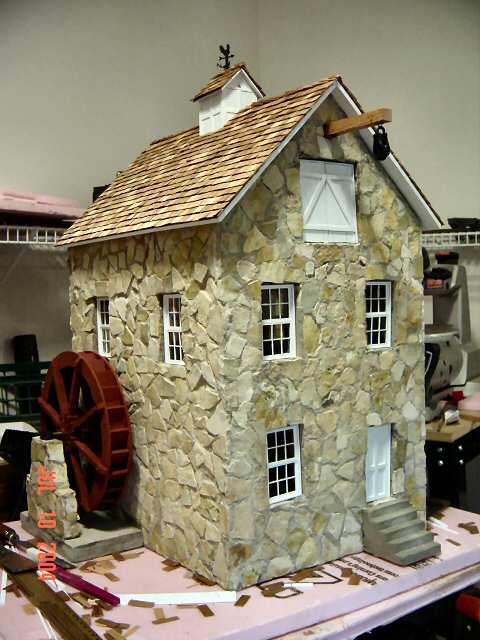
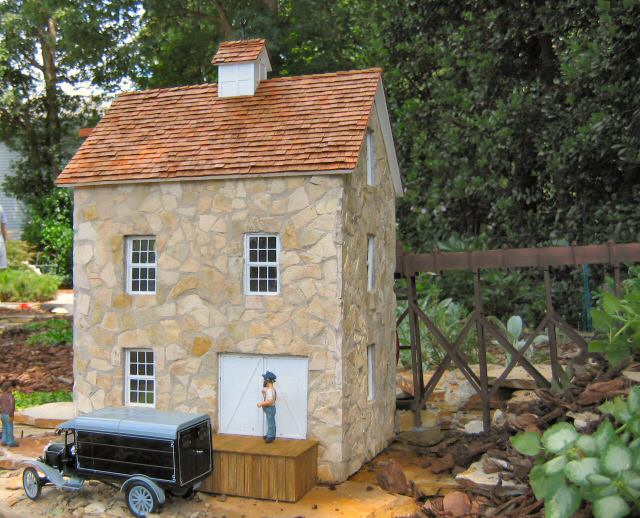
But, eventually it’s complete. The windvane is added on and the pulley is in place. It’s almost ready to put outside.
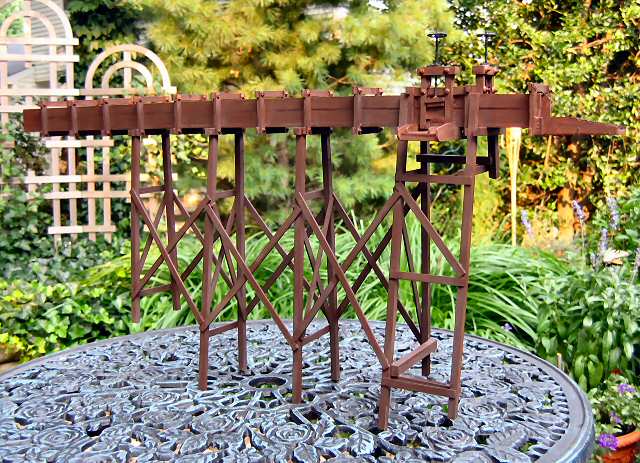
Before the mill goes outside, I need to create the sluice. This will have water in it almost constantly, so I decided to make it out of styrene instead of wood. I bought one frame from Stoneworks and then used it as a master to cast additional parts.
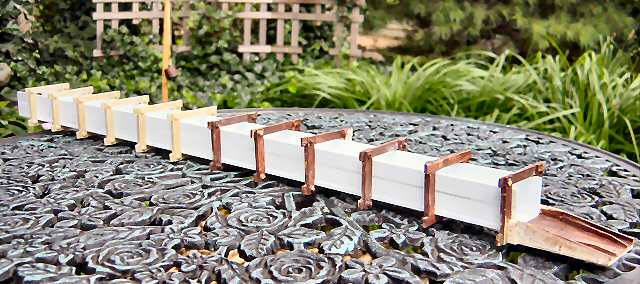
I added a spillway to handle any overflow and painted the sluice. The sluice controls work, but only by sliding the plastic boards up and down - I didn’t bother to thread the rods.
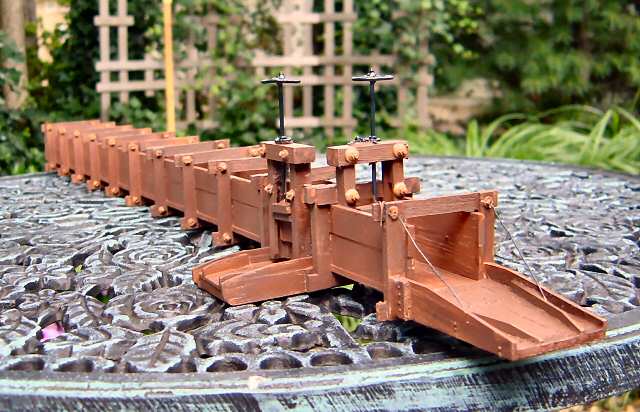
A supporting framework was also built from styrene. It is offset at one end to clear the wheel.
Putting the mill in place also involves a lot of work. I first dug a hole for the pond, making sure that it was level. I used sand to support it. Then I built a small hill from some rocks I had.
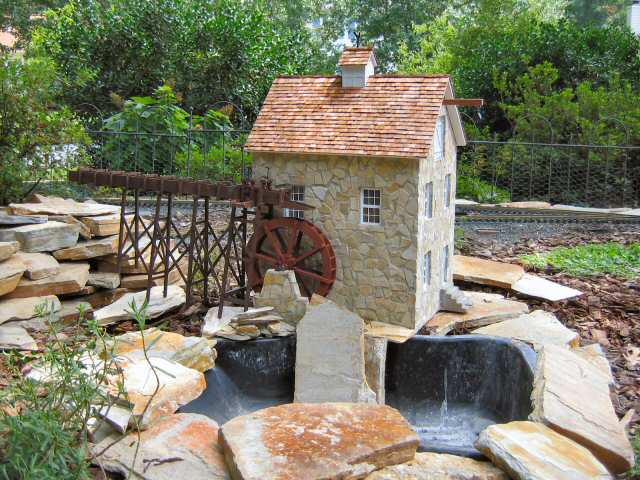
Once completed, it looks like it’s been there all along.
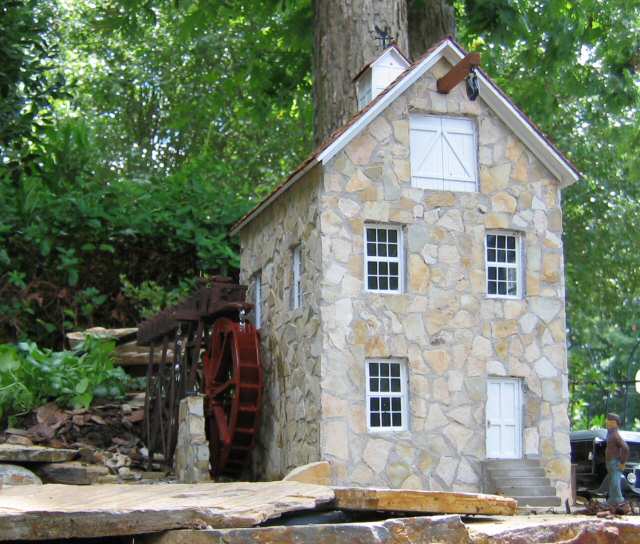

When I rebuilt my layout, I ended up moving the mill so it could have a proper siding. Notice how the cedar shingles have weathered over the years. I have had to replace a few, as they get hit by falling acorns and attacked by squirrels.


