Large Scale Central

Another Strange Beast - Hammond Lumber #17 0-8-0T

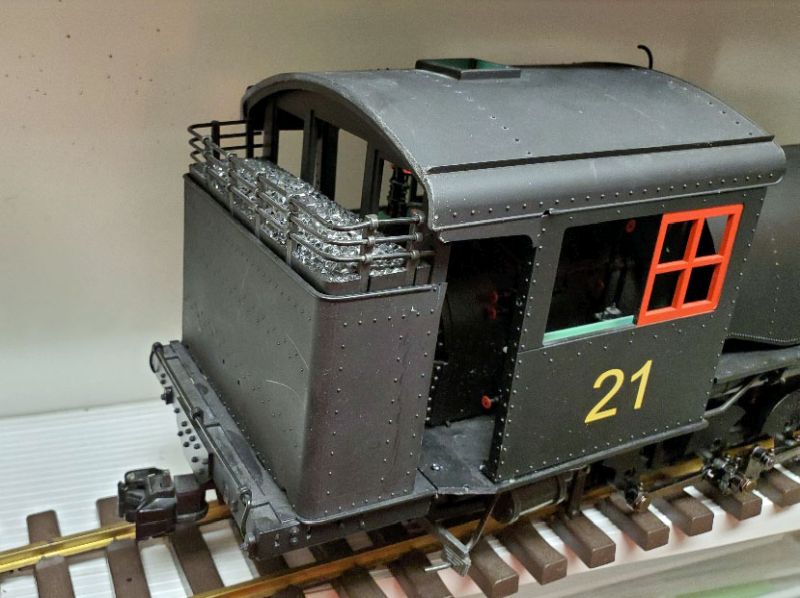
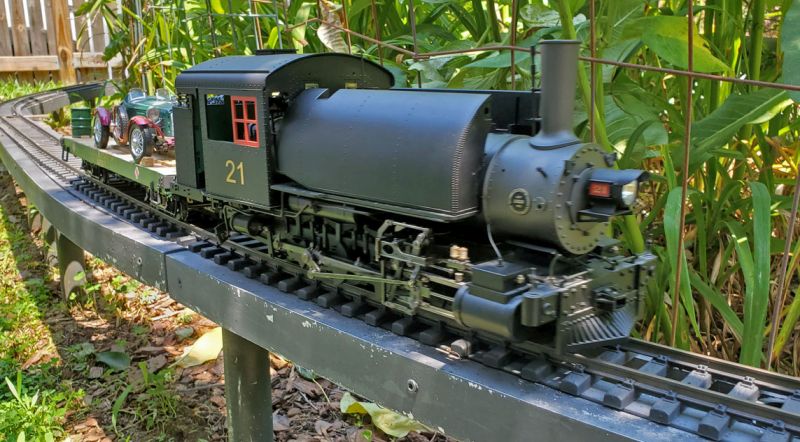
I spotted this unusual construct on FB offered by a guy from the UK. It was incomplete, but looked like an interesting project. I thought it looked like Hammond Lumber #17, which is now running on the Mt Rainier Scenic RR.

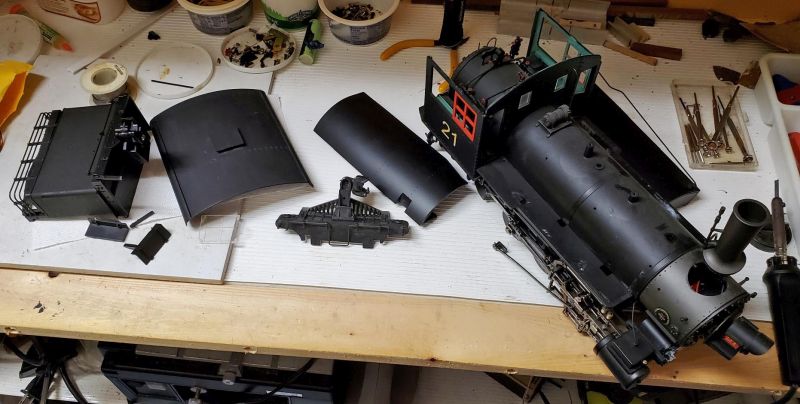
This is what he sold me:

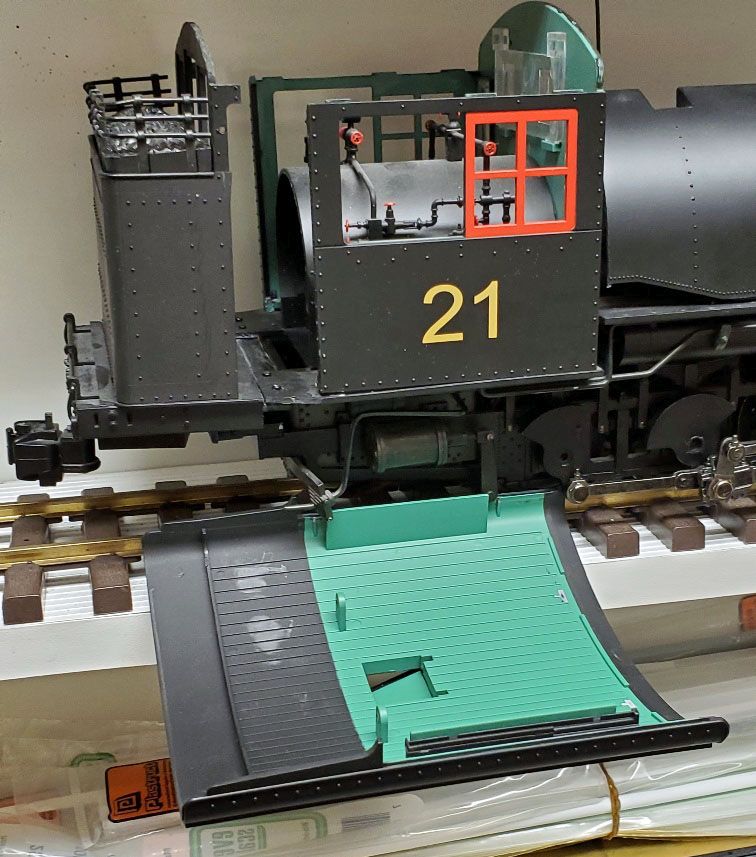
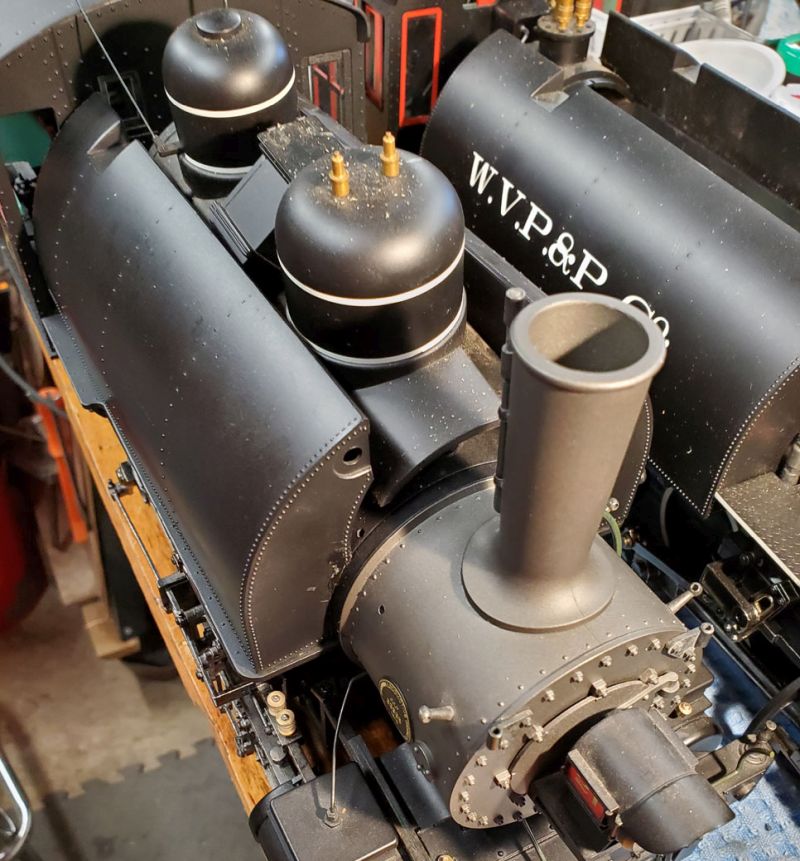
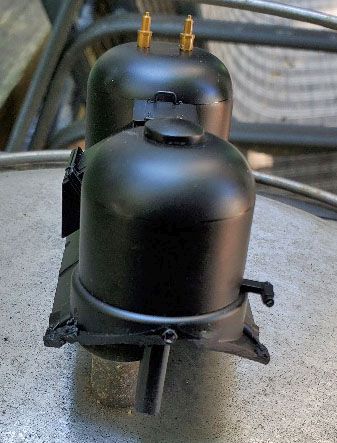
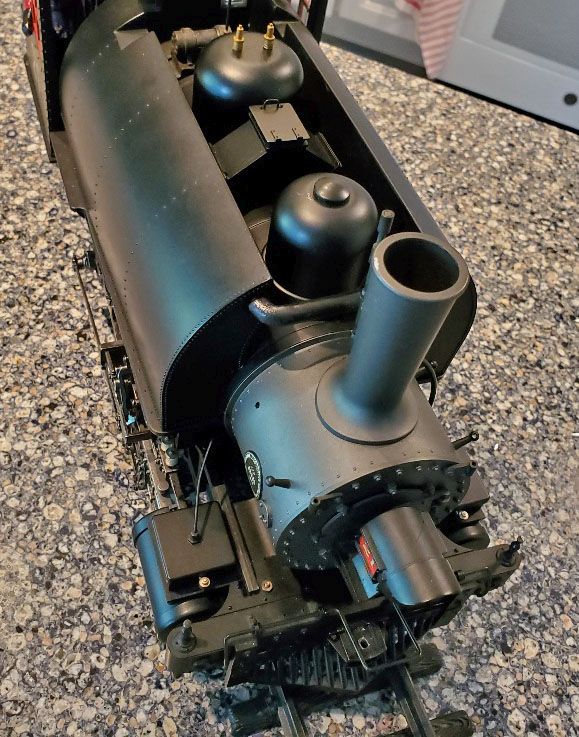
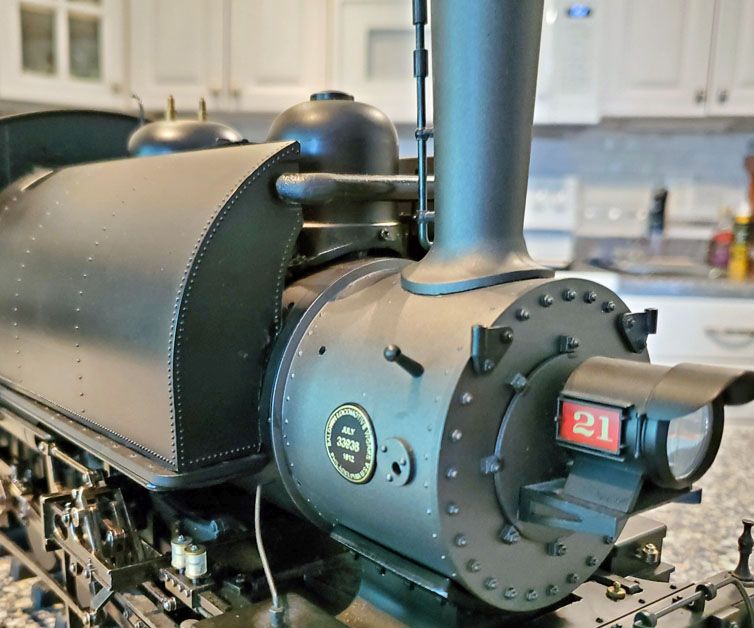
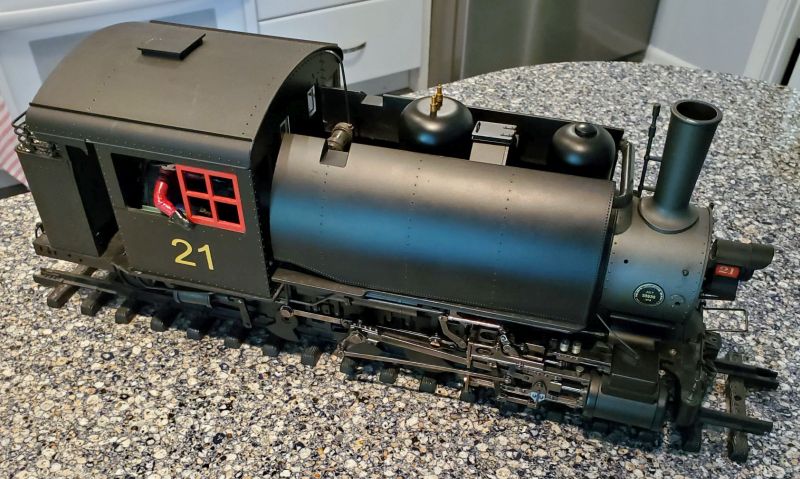
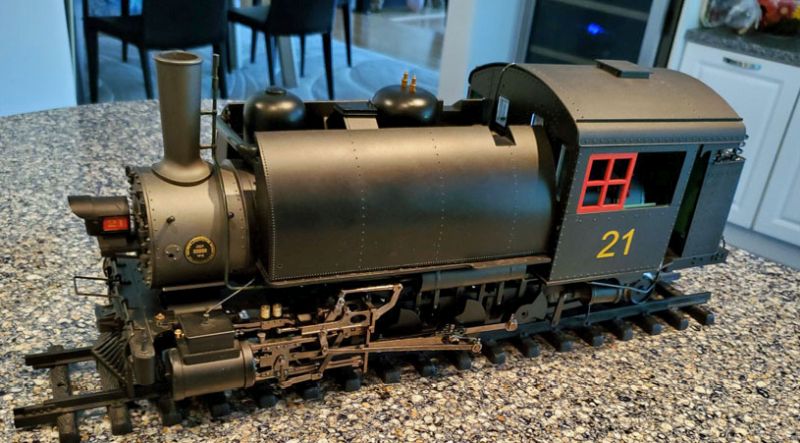
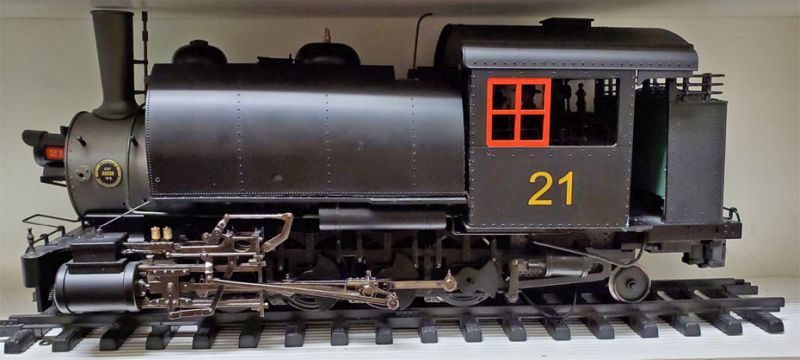
Eagle-eyed viewers will recognize the origins as a Bachmann 2-8-0, The side tanks come from the Baldwin 2-6-6-2, as does the rear coal bin.

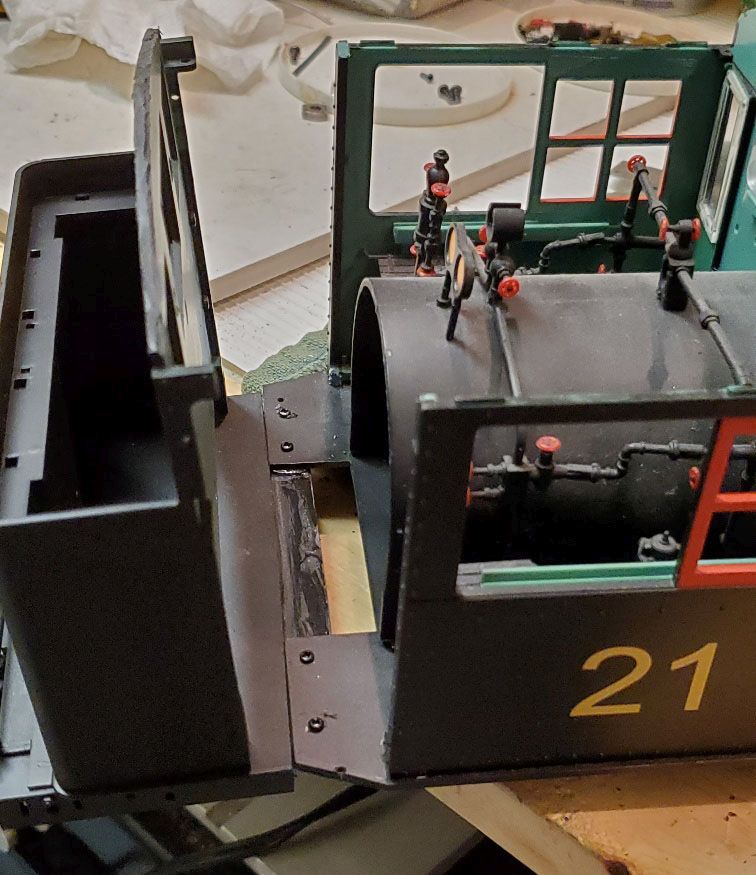
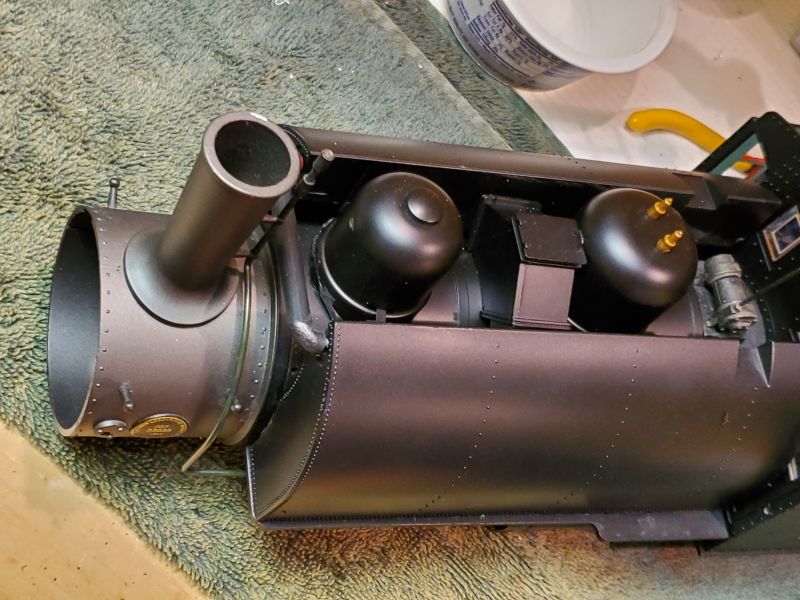
Unfortunately, the seller couldn’t find a cardboard box - this is how NOT to pack a heavy loco for transport:

As I pointed out to him, without an exterior box, the weight of all the other boxes in the truck are resting entirely on the locomotive. And the inevitable result:

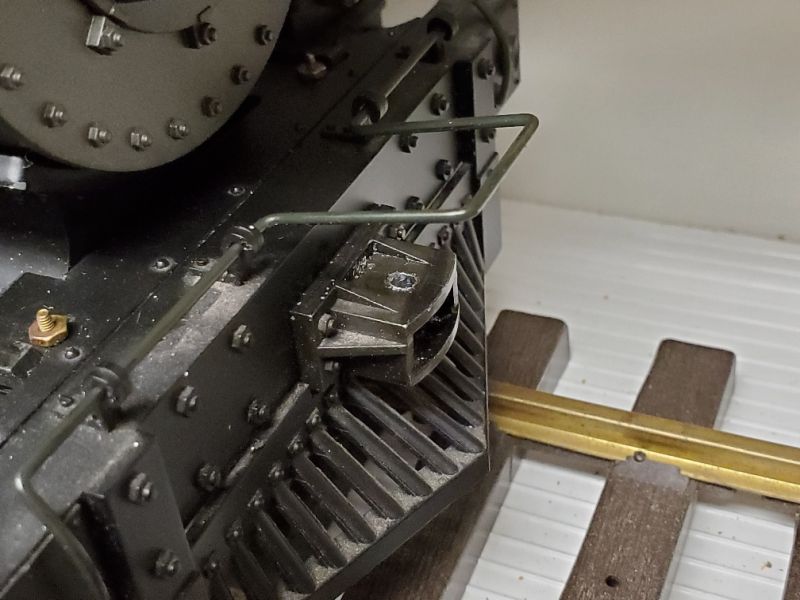
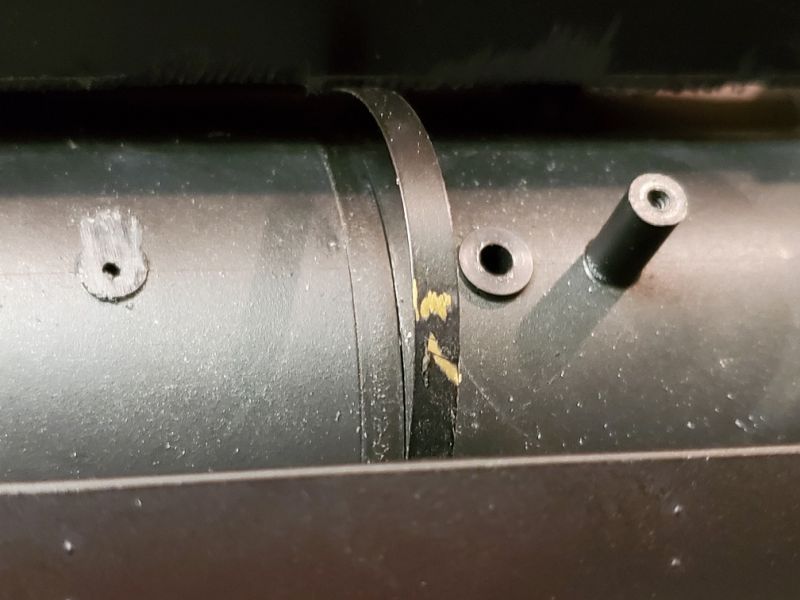
Practically speaking, very little was broken. The rear brakeman’s steps [why does Bachmann always make them so fragile? You’d think they’d have learned to put metal frames/straps on them?] The rest of the parts were things he had glued together - not one glued joint would stick.

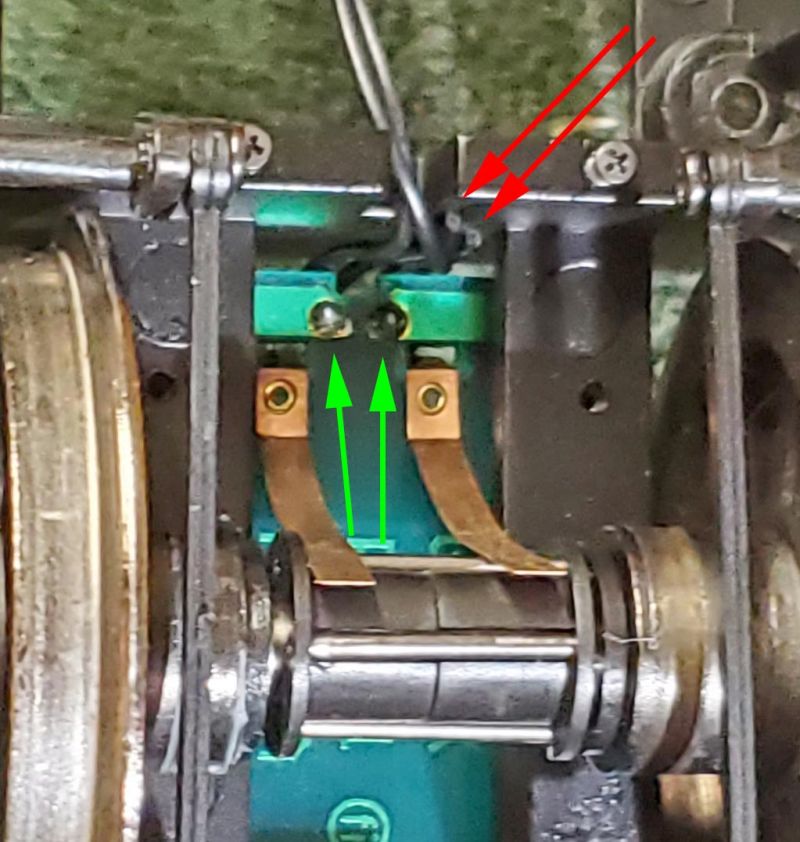
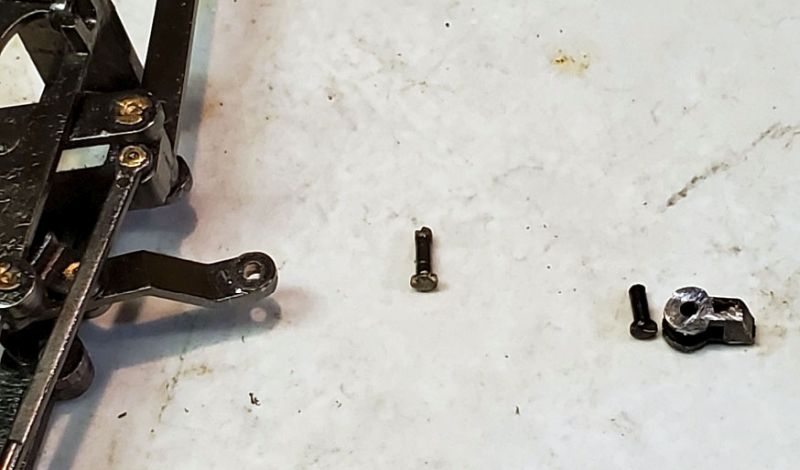
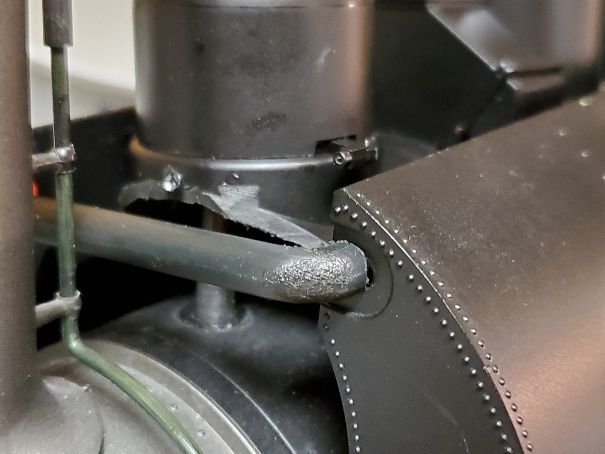
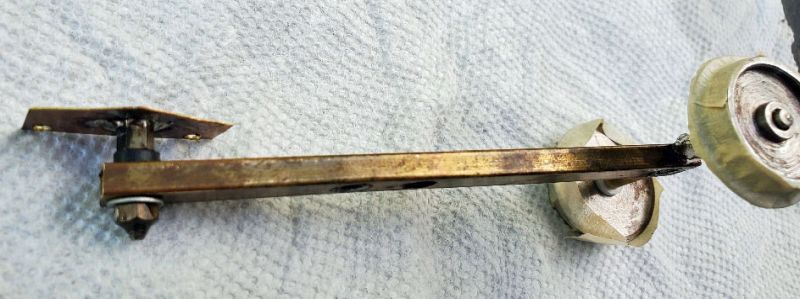
The worst part was that the eccentric crank was broken due to the packaging. Fortunately, Al sold me a spare set of valve gear so it is repairable.

That’s a really cool build, I like it.

So moving on - I tried to glue the rear bunker to the cab twice, using 2 different types of plastic glue, and neither worked. Its a thick plastic - maybe ABS? Anyone know a good glue that will fix Bachmann bodywork?

I have bolted the front pilot on, as he was trying to glue to the diecast frame. I am planning the screw the side tanks on, as I need access if I decide to put batteries in them. The rear bunker will get screwed as well, unless I can find some glue that works!

Then having found the instructions for removing the body of a 2-8-0 (which I didn’t need, as half the firebox, etc., is missing,) I took a look at the chassis. All the wiring and pcbs are gone - just a plug to some flimsy motor wires remained and the chuff trigger plug. I checked the wheel pickups were there but I couldn’t find any place to connect them to the motor. Then I realized the chuff wires weren’t attached to the 2 solder pads I could see, and close inspection showed up 2 snipped wires from the pickup pcb that runs along over the wheels.

This photo shows the snipped wires (red) and the 2 pads (green.) I soldered a new set of wires and put it on the test track and it works.

I never did find a glue that would work. My solution was to make a part from brass and mechanically attach it. (Sorry, not much help there. (https://www.largescalecentral.com/externals/tinymce/plugins/emoticons/img/smiley-foot-in-mouth.gif)). Can the rear bunker be screwed in place? (Have you tried E6000? It’s not a plastic glue per se, but often works)

Looks neat. I like your “rewiring”.

Can the rear bunker be screwed in place?

Yes. It fits under the cab floor, and while the screws will be visible, I am going to use 4 small ones instead of 2 big ones.

I’m sure I could use regular Gorilla glue, but I’m hoping someone has found something that works. Regular plastic glue worked on the small steps, so they must vbe different plastic.

Pete have you given Plastruct Bondene a try?

Dissolves a thin layer of each surface to form a welded joint as strong as the surrounding area. Bonds Styrene to Styrene, ABS to ABS, Butyrate to Butyrate, and Acrylic to Acrylic and most alike plastic combinations.

have you given Plastruct Bondene a try?

Not yet. Star Hobby has a large display of different plastic glues - hopefully they have some of that!

Lacquer Thinner and MEC give the same “Welding” action on Styrene, at much less cost. I use it all the time, and purchase it by the quart at Home depot, at around $6.00 Canadian…BUT try to remove any paint on the styrene before attempting the weld.

Fred Mills

Fred, Methyethylketone (MEK) is no longer available to most of us in the states. The Gubmint has decided it must protect us from ourselves. There is an ‘alternative’ available, but it is not worth a tinker’s damn for solvent welding. Lacquer thinner is in the same genre I believe. There are a few states that have not outlawed those but the numbers are dwindling.

Pete Thornton said:

have you given Plastruct Bondene a try?

Not yet. Star Hobby has a large display of different plastic glues - hopefully they have some of that!

I looked on my shelf and I an using Plastruct General Purpose cement. It works great on styrene and similar stuff. I wonder if the “Bondene” is different. Have to give it a try.

So, onward and upward . .

Al’s valve gear arrived in one piece, so I had to decide how to attach his bits to mine. While working on the frame, the rod had decided to get caught and broke at the other end. So I figured that I could dremel off the back of the pin and pull it out. Which I did.

Then I had to get the new rod free and keep some of the pin so I could squish the back of the rivet to hold it in place. As I had the gear loose, I could support the head of the pin and tap it out from the back. Enough of the end came out that I could squeeze it in the new position on my engine and it is holding nicely. Here’s the new gear on the left, with the long pin in the middle and the old one and part of the rod on the right.

And mounted on the loco. P.S. I did have some masking tape over the gear underneath while I was working on the loco.

At the front, I bolted on the pilot, and you can see the brass nut. A splash of flat black and it will look like all the (fake) Bachmann ones. The coupler pocket had a crude Bachmann coupler at the low level, and I use bodymounts, so that came out and I drilled a hole down through the pocket to let me insert a link-and-pin, Accucraft or regular Bachmann. Or even the original drop shank version. Turned out to be diecast, so it was a pain to drill.

Screwing the cab to the body was easy, and you can see the screw heads in this pic. The bunker droops when unsupported, but there are 2 lugs on the frame that support it when the chassis is connected.

And finally, as you can see in one of the early photos, the cab roof extends completely over the bunker, so I don’t know how they would ever get coal in it. Looking at the underside, there’s a clear extension piece that can be ripped off by the table saw. And the bunker no longer droops.

And there goes the roof extension. While the wife was out this morning, I got the micro table saw out and cut it down. Looks much more prototypical, I think.

The guy who sold it to me tried to glue the bunkers to the footplate, but you saw how well that worked. I wanted to screw them so I started drilling from underneath, and found there is an air tank either side right where I want to put a screw. The air tank seems to be held on by 2 screws but they are almost inaccessible because of the lower boiler curve. I settled for a screw at the front and a peg at the back.

I managed to squeeze in a few hours at Jerry’s, where a couple of big trees fell on his garden in last weeks big storm, but not on the layout, so we ran trains while he waits for the tree guy. The loco ran very nicely, as you’d expect from a Bachmann 2-8-0.

I’m also contemplating the details needed to finish it off. We took it into Jerry’s workshop and parked it next to his Bachmann Baldwin 2-6-6-2T. The domes lift off so we dropped them on my loco. They are still available from Bachmann Parts, so it might be the easy way to add detail between the tanks.

The other thing we talked about was the long overhang on the rear under the cab. The 2-6-6-2T has a rear truck quite a long way out back. The Hammond Lumber loco is a 2-8-2T anyway, sp maybe mine needs some pilot trucks.

I dug in gthe wheels box and found some Sierra Valley wheels that I bought in error years ago when changing my C-16 pilot. What do you think of it as a 0-8-2T?

.

Lookin good Pete, I think I would stretch the pilot deck out a bit to make it a 2-8-2T if it was my engine. Gives it more of a balanced look that way. I also think the headlight would look better if the shelf was raised to the top of the boiler face vs centered, which just looks odd to me on that model. Whatever you do, it looks great! Mike

Mike Toney said:

Lookin good Pete, I think I would stretch the pilot deck out a bit to make it a 2-8-2T if it was my engine. Gives it more of a balanced look that way. I also think the headlight would look better if the shelf was raised to the top of the boiler face vs centered, which just looks odd to me on that model. Whatever you do, it looks great! Mike

Mike, it started life as a 2-8-0 and the ‘builder’ shortened the pilot. What can I say - he doesn’t have any parts, like the domes, front truck, or whatever. I am waiting for the domes to arrive (the set from the 2-6-6-2T seem to fit,) and also some 1/8" ID tube so I can make the rear pilot truck. (Another shortage -all the K&S racks in the local hardware stores seem not to have been restocked forever.)

In the meantime I’ve been playing with my latest steamer - Aster C&S #22, with the strange gas tank system. It runs but needs a few new o-rings - or some quick-disconnects!

Pete,

Playing with that live steamer seems like adequate compensation for the parts shortage required for the tank engine!

Eric

I went back to the 0-8-2T this week while I am waiting for parts for my Aster #22 (broken water glass, and it’s 6mm, whereas I have spare 5mm. Murphy strikes again.)

I had mentioned there were no pc boards anywhere in this beast. Here’s the smokebox front, with 2 switches and a bulb in the headlight. I guess the switches could be useful later.

I also found a Bachmann driver that the Parts dept was selling off at $4, so I gave him a wash of matt paint to tone down his shiny pants and glued him in.

My 2-6-6-2T domes turned up, so I dropped them between the tanks, did a bit of fettlin’ and put a pipe across between the tanks where the original had pipes to the smokebox.

(In trying to get them to fit down snug, I discovered the boiler bands are separate brass pieces.)

There are several holes on top of the 2-8-0 boiler, and the front one is 1/4", so I found a piece of 1/4" plastic (stretchers from a pair of new shoes - never throw away anything that might be useful!) One end is flat/square so it is glued up in the sand dome, and I put a very small screw through the front to hold it in place.

A little paint and some more filing and it is starting to look more finished. I cut the domes base back to the front of the sand dome, smoothed it and gave it a quick splash of semi-gloss black around the cuts.

The joint at the front is virtually invisible when on the loco.

It is only from this close-up angle you can see the dome base and the boiler are not quite the same diameter.

I screwed it back together and here’s a couple of pics of the latest end result.

Finally, I made a rear truck as there was a lot of overhang, but it doesn’t seem to work. There is too much metal frame under the cab to let me put it further forward and it looks very feeble out back on a long piece of brass. Here’s the truck before paint.

And this is what it looks like on the back. As this is an outside frame loco, an inside frame rear truck would be most unusual. In any case it needs springs and other fake running gear! And it really should be a lot further forward. Hmmm . . .

Rear truck version 2. I shortened the pivot bar about 1/2" as it seemed there was room above for the wheels.

The position is now much better, but there needs to be some frame or spring stuff to make it look real.

Pete,

That does look much better!

Eric