Bruce, that is a highly detailed napkin… err… plan… Oh, never mind.
How much will you sell the napkin for?
Bruce, that is a highly detailed napkin… err… plan… Oh, never mind.
How much will you sell the napkin for?
Steve Featherkile said:
Bruce, that is a highly detailed napkin… err… plan… Oh, never mind.
How much will you sell the napkin for?
Sell the napkin? Are you kidding me? Think about all of the hours I have put into that napkin. I couldn’t sell it…mostly because I already threw it away. Man, I’m such a goof.
Bruce Chandler said:
Steve Featherkile said:
Bruce, that is a highly detailed napkin… err… plan… Oh, never mind.
How much will you sell the napkin for?
Sell the napkin? Are you kidding me? Think about all of the hours I have put into that napkin. I couldn’t sell it…mostly because I already threw it away. Man, I’m such a goof.
![]()
![]()
![]()
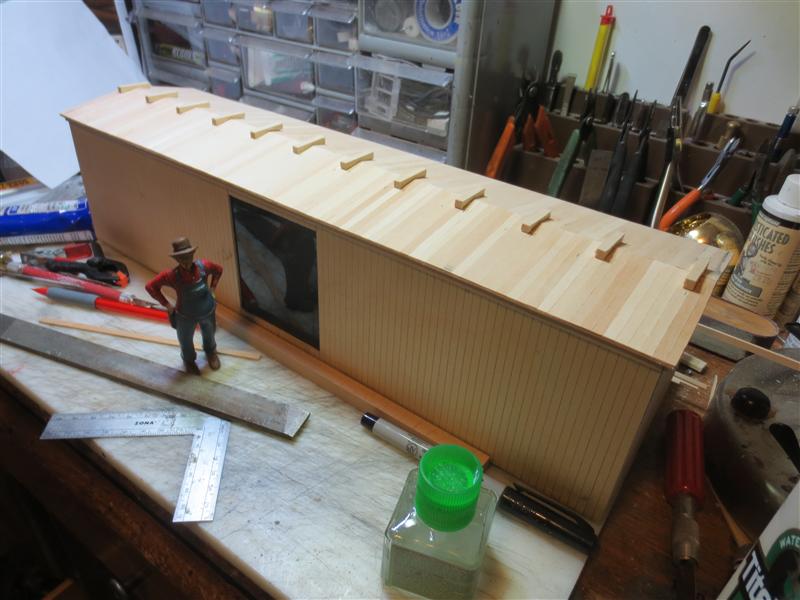
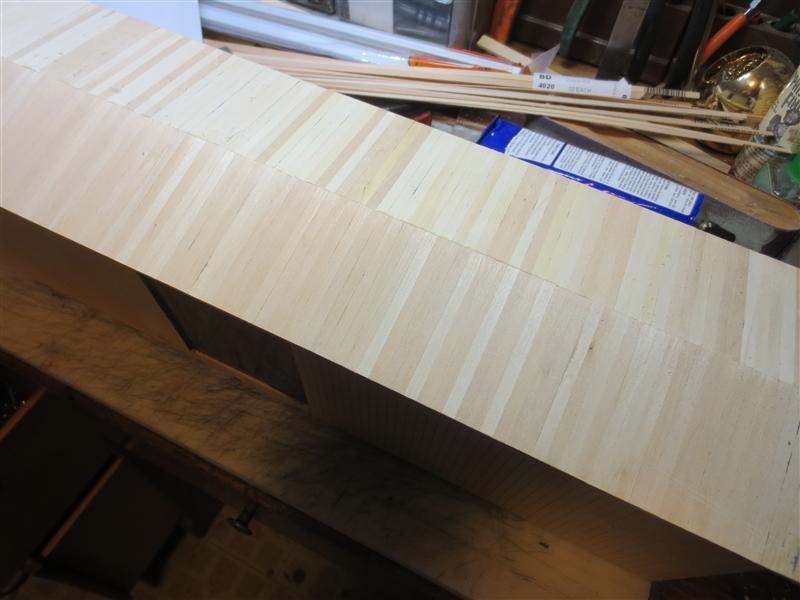
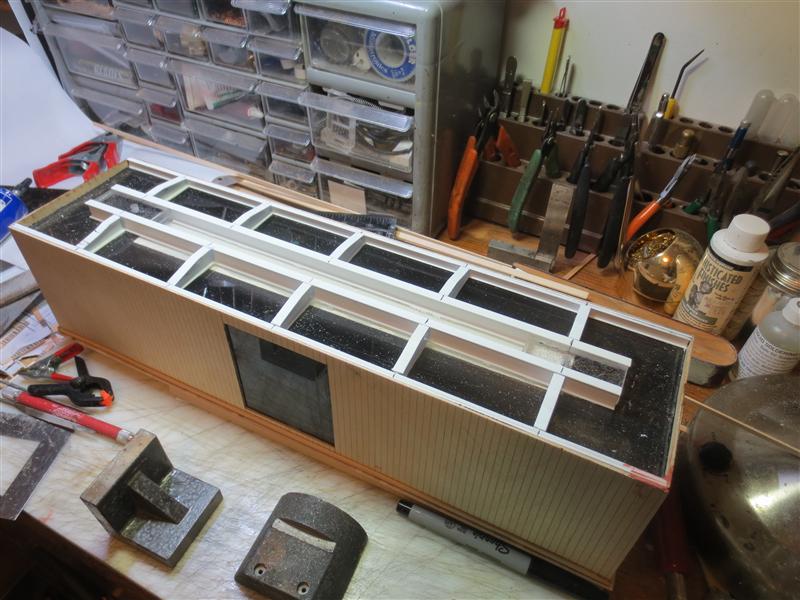
I continued with the roof. It is 2 layers of wood strips, just like the prototype. Here, only one half is complete, the side towards the bottom of the picture. I used 3/16" x 1/32" basswood for the strips.
(http://www.jbrr.com/Pics/RollingStock/Reefers/PortLav/IMG_1688.JPG)
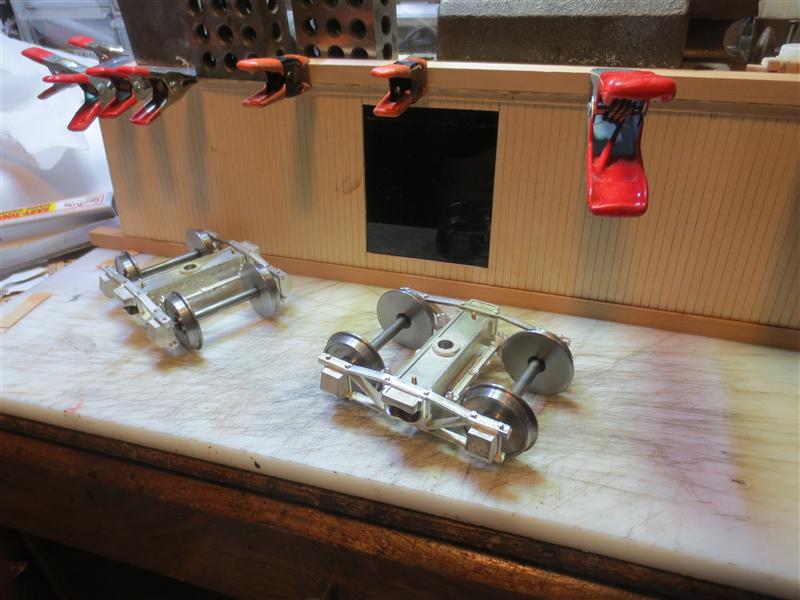
I got a set of trucks from Rodney - very free rolling and very sturdy. I never did have much luck with the Hartford ones; I guess I never assembled them right, or something.
Rodney’s trucks come preassembled, but you do have to glue on the journal lids. However, I will be taking them apart to paint. They are easy to put back together.
(http://www.jbrr.com/Pics/RollingStock/Reefers/PortLav/IMG_1689.JPG)
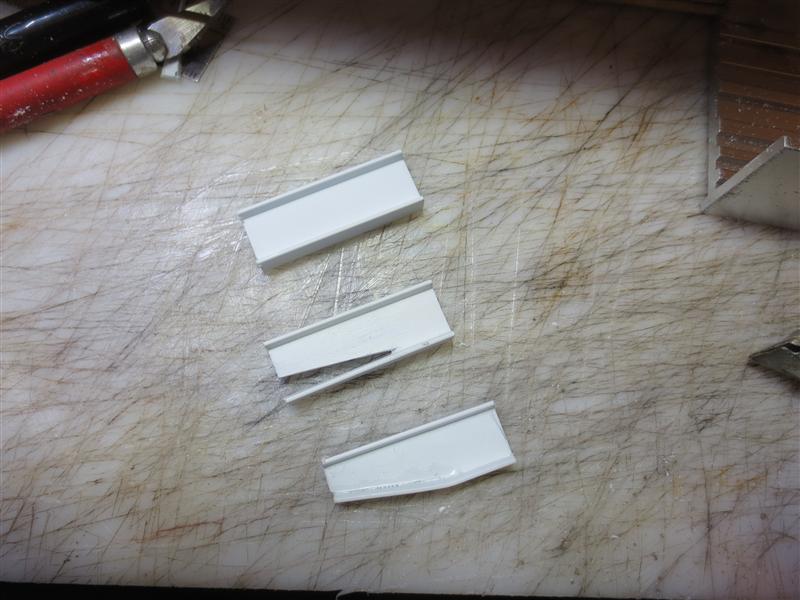
For the frame, I use the same method Bob pioneered on his EBT car kits. A Plastruct I-beam has a section cut out, then is re-glued. Here’s the progression:
(http://www.jbrr.com/Pics/RollingStock/Reefers/PortLav/IMG_1693.JPG)
Once they dry, I glue them in place on the bottom.
(http://www.jbrr.com/Pics/RollingStock/Reefers/PortLav/IMG_1695.JPG)
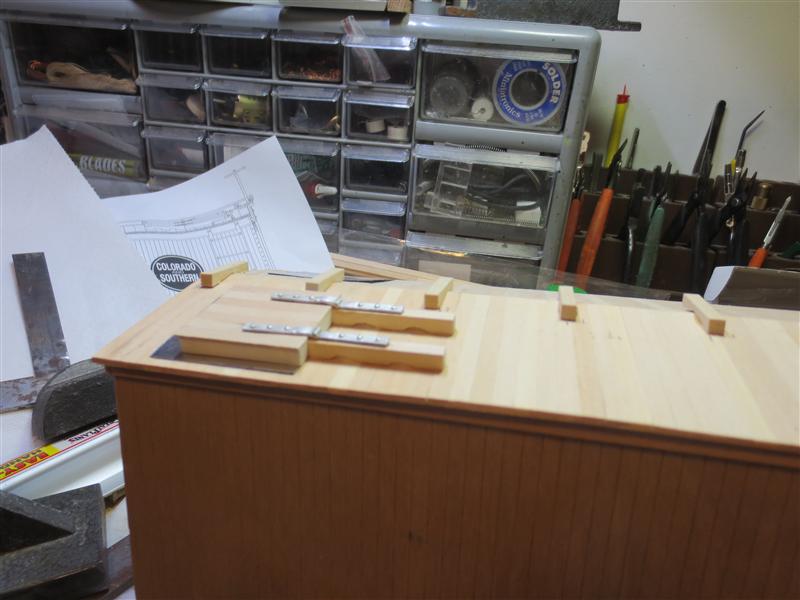
I cut some roof walk supports on the table saw and then glued them in place on the completed roof.
(http://www.jbrr.com/Pics/RollingStock/Reefers/PortLav/IMG_1696.JPG)
Looks sharp!
I am following along closely, Bruce. My reefer arrived in the mail yesterday, and Stan has the decals coming.
Ken, I’m not sure how much my build will help - the instructions that Phil provides are very good. Plus mine is a bit different.
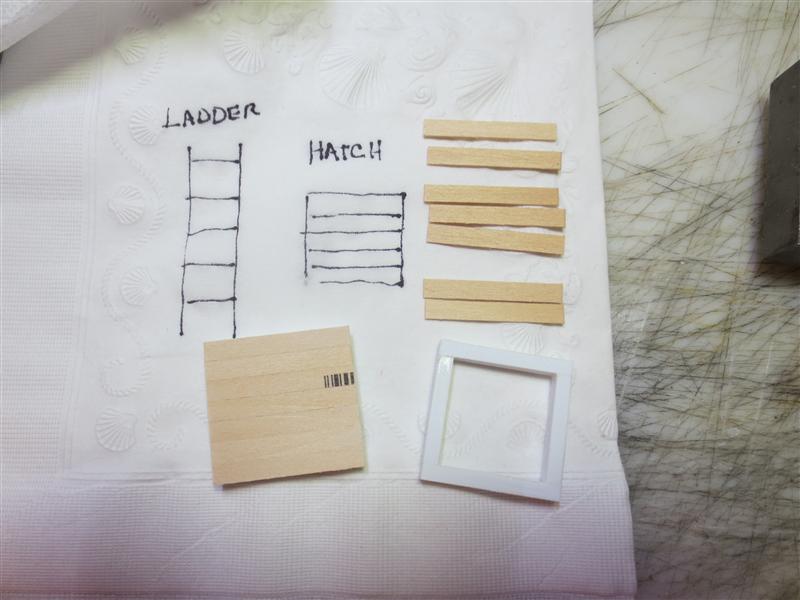
Today I drew up some detailed plans for the ladders and hatches. I decided to start with the hatches first. I formed the base with some styrene, since I want this to look more like metal than wood. I used some more of my 3/16" x 1/32" wood strips for the tops of the hatches.
(http://www.jbrr.com/Pics/RollingStock/Reefers/PortLav/IMG_1697.JPG)
Next, I cut some squares from some tin stock and put them underneath the hatches. I modified the hardware that I got from Rodney to get a little closer to the C&S style hatches.
(http://www.jbrr.com/Pics/RollingStock/Reefers/PortLav/IMG_1698.JPG)
I used a file to get the notches in the wood holding the other end of the hinges.
I’m taking notes , picking up some good tips here . Great looking car .
Keep it up, your gonna need a longer siding at the Produce company…
Ken, No…remember you suggested a brewery on the Oates Furniture spur in town? I’ve got some ideas, but that’s a few more projects away…
But, that will mean some additional reefers…
You’re right! Forgot about that…
The scallop shell signifies that of the Pilgrim who made the long, very hard journey, on foot (except for the sea crossing from England to France), from many places in Europe to Santiago de Compostela in North Western Spain. The shell was hung around the neck and not only being a symbol of the pilgrim it also served as a small food or water receptacle. They travelled light in those far off days. Actually many still undertake this pilgrimage today so it has been an unbroken tradition for over a thousand years. Not everyone is on foot today however.
I guess building superb models, such as this one here, is a form of pilgrimage. Anyway Bruce, great work as usual and many will try to do a similar project I am sure.
Bob McCown said:
Ken Brunt said:
cheap napkins…
But, they have little shells embossed on them. They must have cost at LEAST a buck for 50 of em.
Nice work Bruce. The double roof is a great touch. Would you remind me of your way of cutting the roof walk supports ?
Dave, the roof walk supports were cut completely different this time. I had never made my own from wood.
I cut about a 1" strip off a sheet of basswood - just the width of the supports.
Then I set the saw blade to about a 10 degree angle and 1/2" high. I ran the strip through once, then turned it over and ran it through again, producing the v-cut.
I still needed a bit of sanding to get everything smooth and to fit the roof.
Then I put the blade back to vertical and cut off the roof walk pieces.
It just sounds easier than it was.
It’s just awesome to see what master modelers do. What a great project, Bruce…
Thank you. Don’t you just love getting close and personal with power tools.
Dave, N.B., Marconi said:
Thank you. Don’t you just love getting close and personal with power tools.
Right. I just kept thinking that I wish somebody sold these already cut out in wood…
Bruce Chandler said:
Dave, N.B., Marconi said:
Thank you. Don’t you just love getting close and personal with power tools.
Right. I just kept thinking that I wish somebody sold these already cut out in wood…
I got a bunchovem here already cut out in wood.
Even got a Part #…W-8…
So, I just order them from you, Ken?
Sure…and send cash…