Large Scale Central

3 Shops

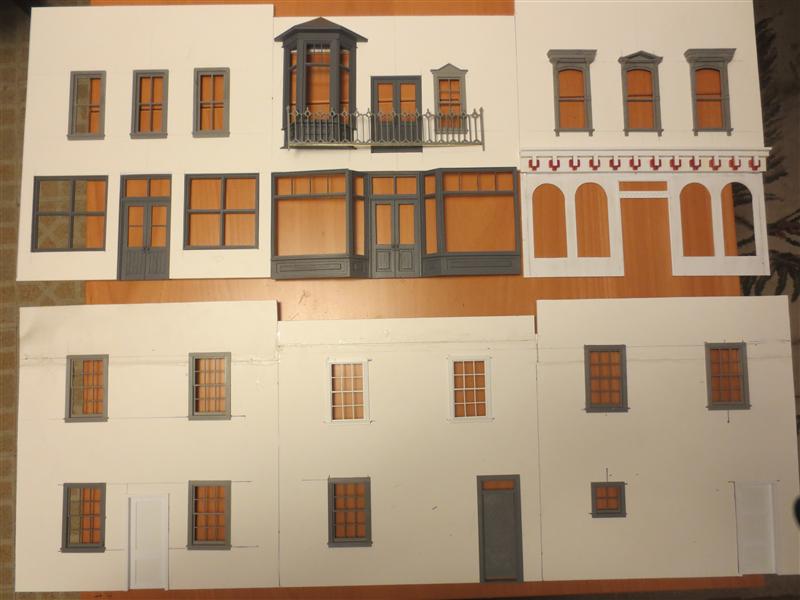
My main street is a bit mixed. I have some old Piko/Pola kits that just look a bit too small, so I’m planning a block of 3 shops to replace them. The new buildings will be 1:20.

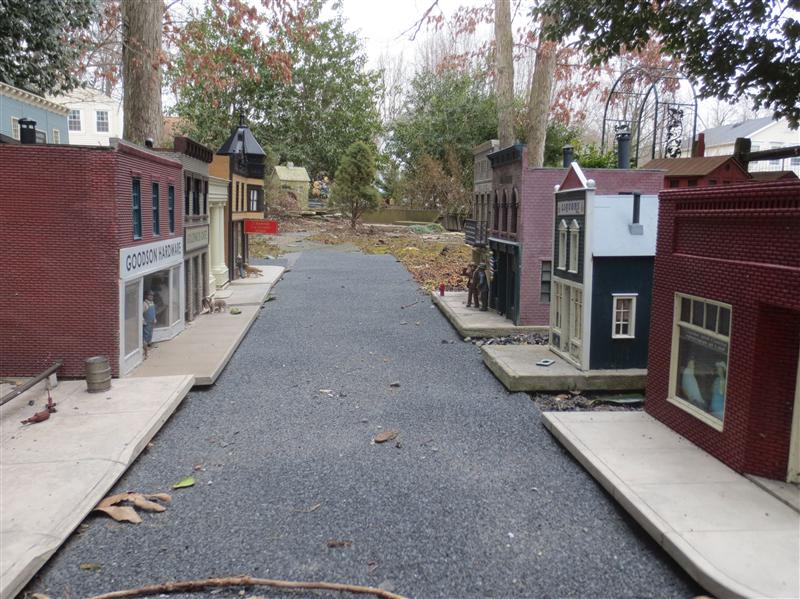
The three to go are on the right - a liquor store then a double building - drug store and barber shop.

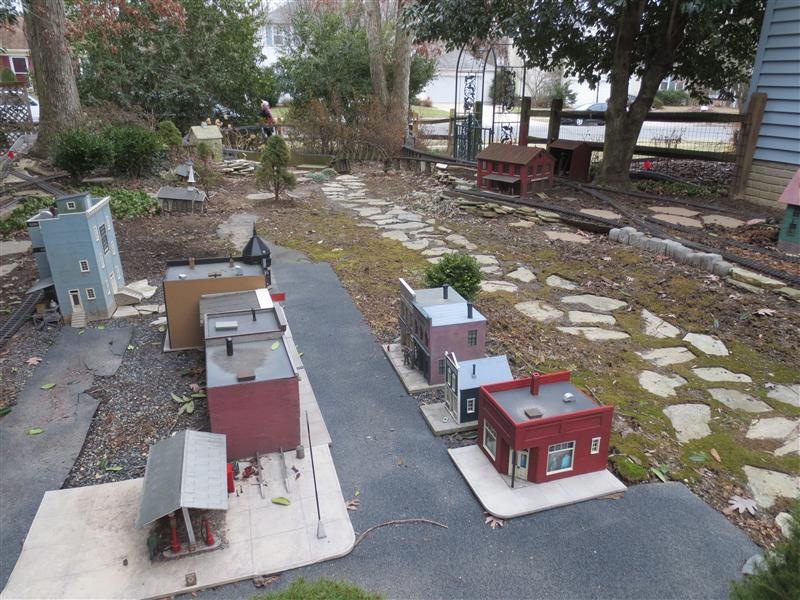
They will end up going one street over, just above the gas station in this picture.

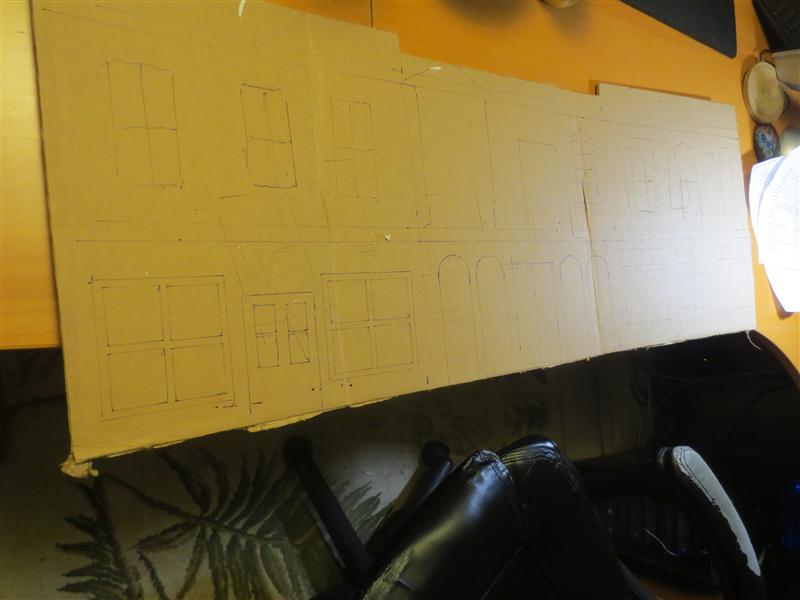
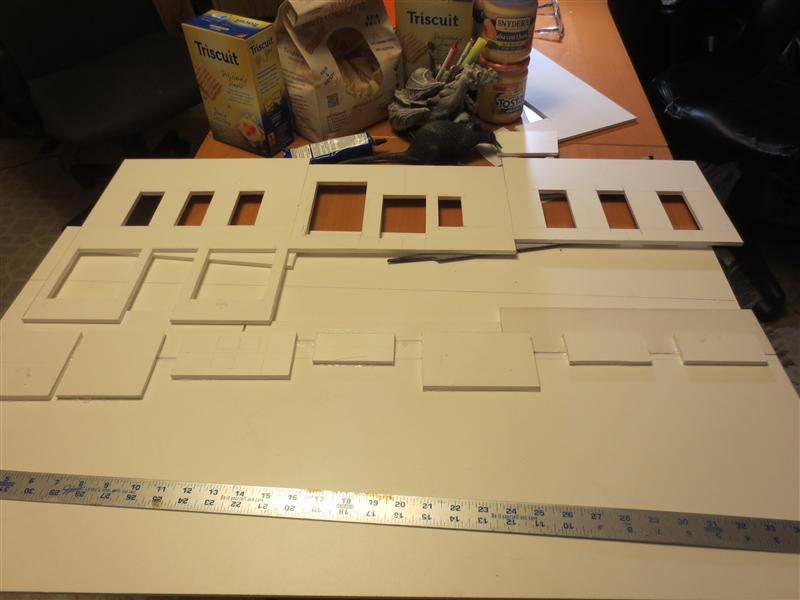
I first did a mock up of what I wanted on some cardboard.

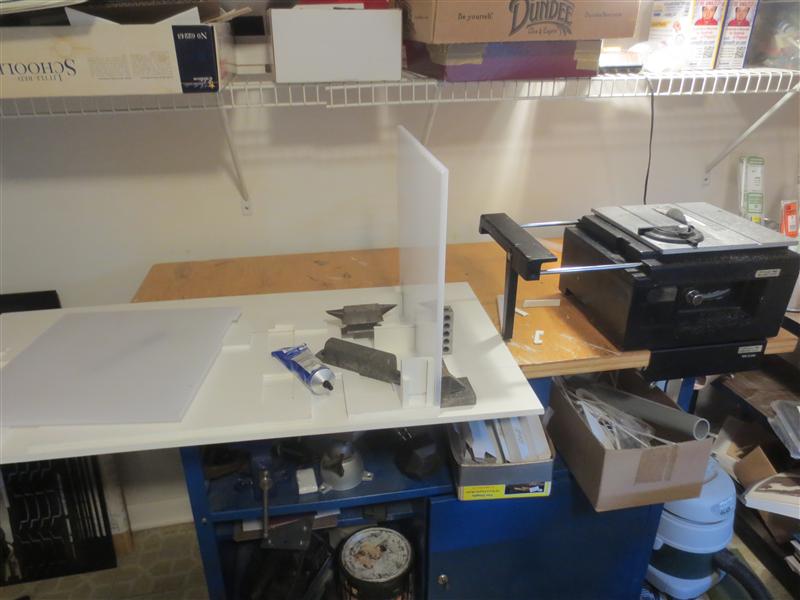
Once I was happy with the layout, I started cutting some 1/4" thick foamed PVC.

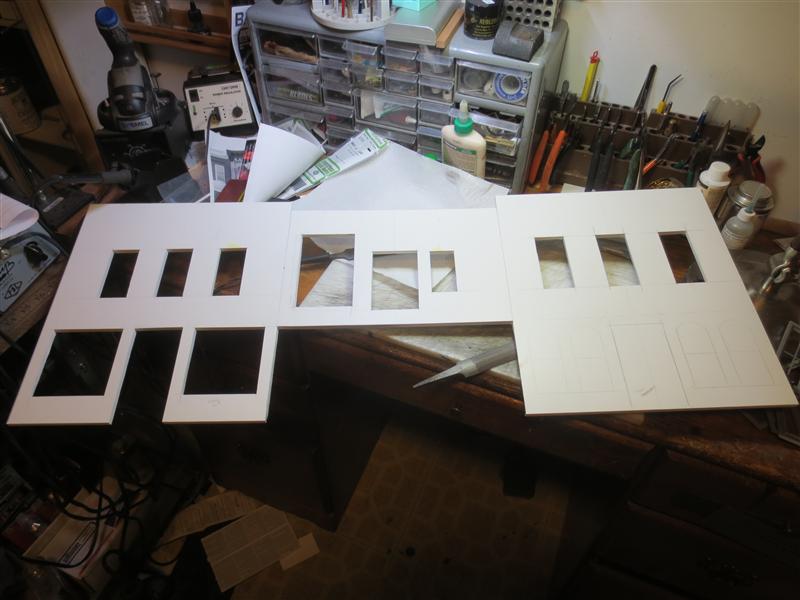
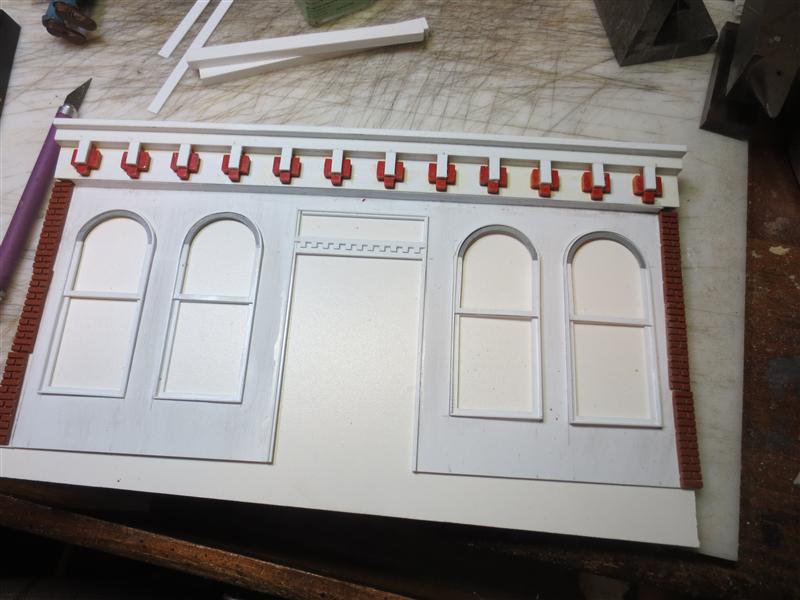
The store bottom on the right has not been cut out yet. I plan to build it up from styrene. The other openings will be filled with some commercial products, specifically Scale Art Parts.

I’m using their bay window, store front set, and the recessed store front.

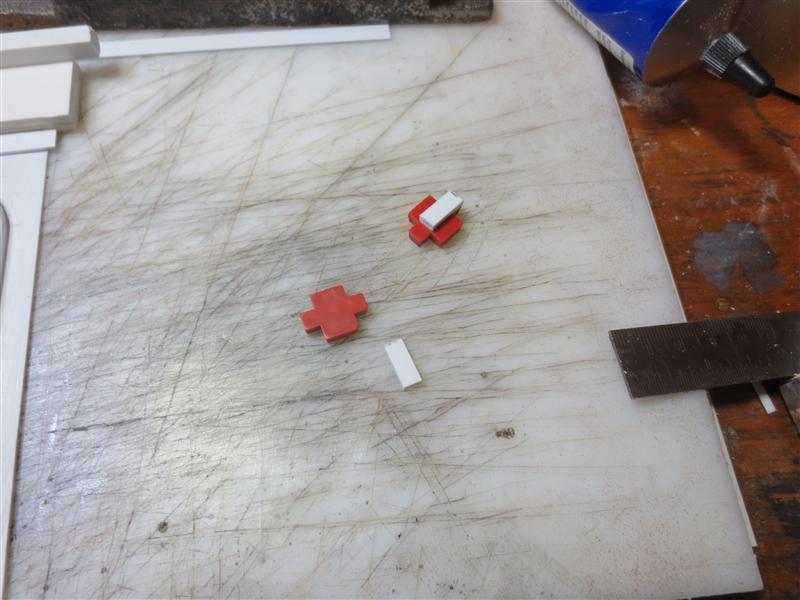
For the lower right store front, I wanted some curved top windows.

I started with a gray styrene tube from Plastruct and cut some sections about .060" thick - the same thickness as some white styrene I had. This is the start of the windows:

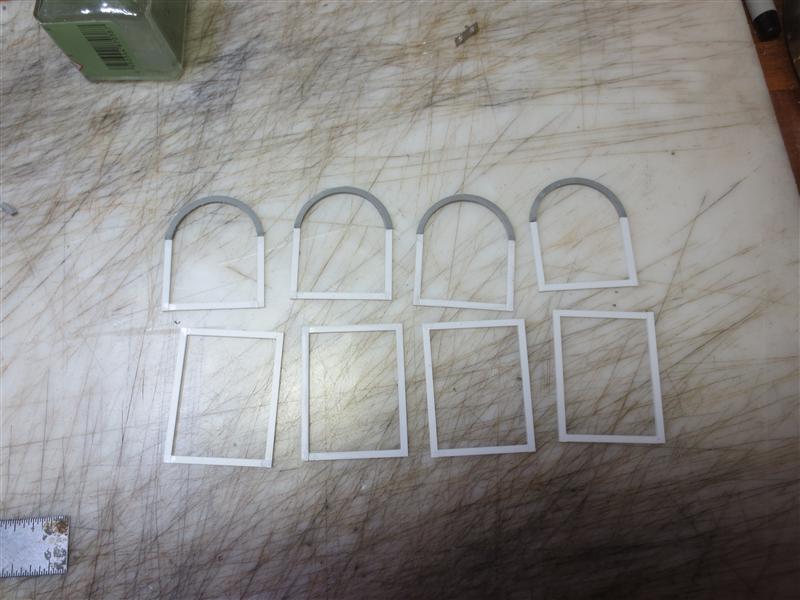
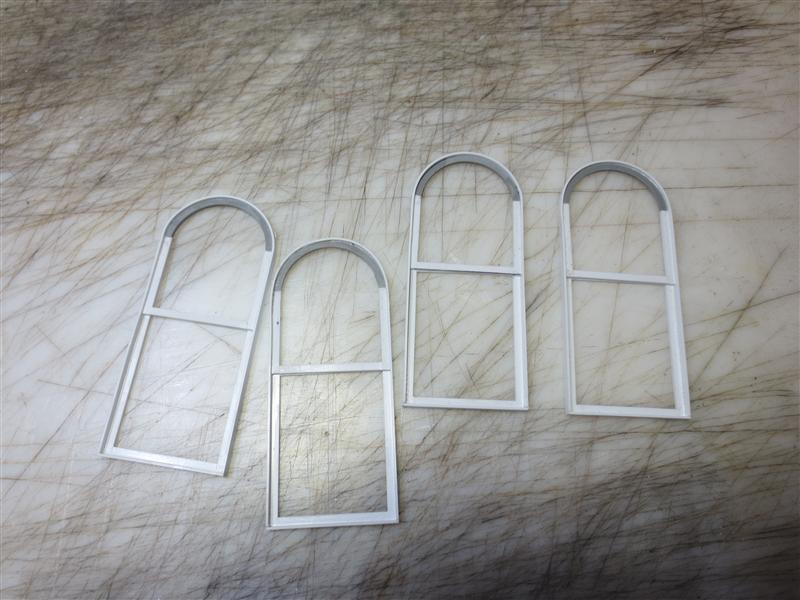
Next, I glued the pieces together and then cemented a strip of styrene around the assembly.

I cut up a piece of .040" styrene sheet to act as the store front.

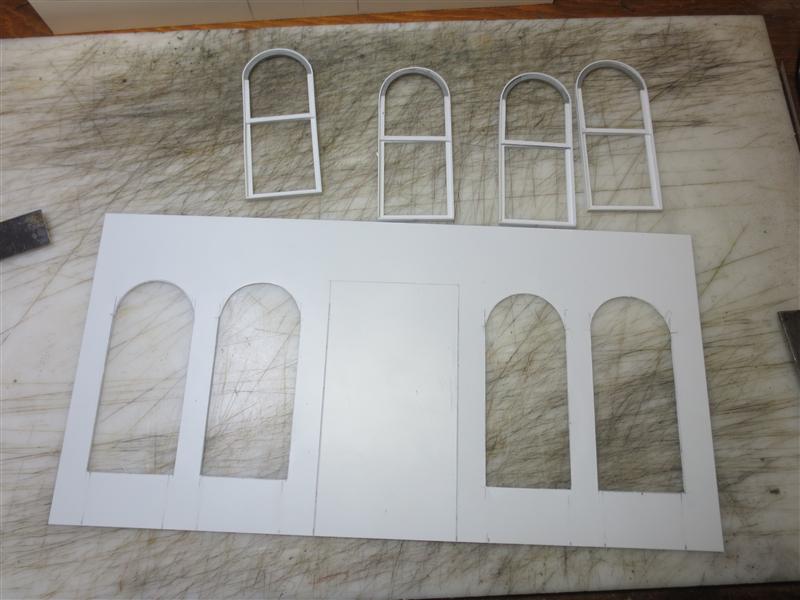
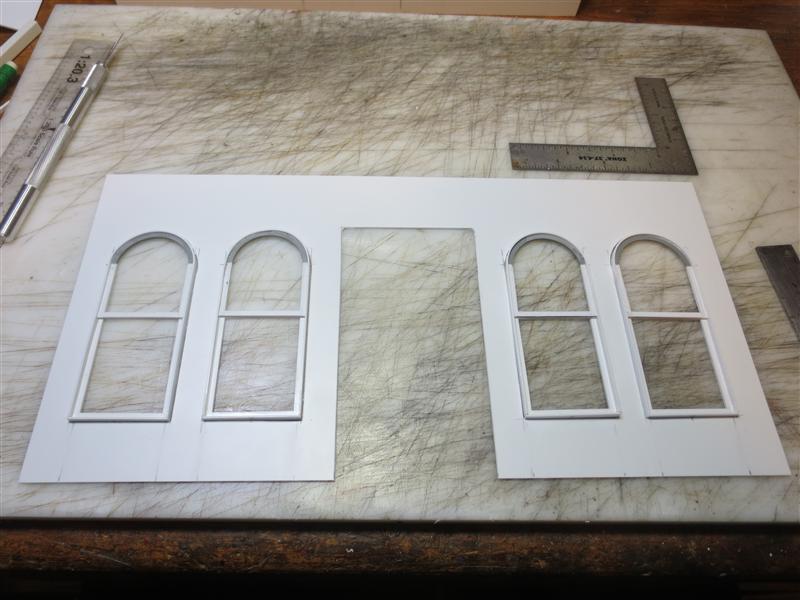
The windows have not been glued in yet. I want to frame them with some quarter-round styrene, but I now have to wait for my order from Hobbylinc.

Bruce that looks great. keep the pics coming.

Bruce, another fasinating project to follow… :slight_smile:

Cool!

Reminds me of Hollywood Marconi’s store front build. I think that is a neat way to build.

I was kinda wonderin what the next project was gonna be. That’ll be neat!

Very cool! thanks for sharing your work.

Terry

Nice project, looks good already.

Wow Bruce, it’s almost a shame to see those go outside. They look great again! Beautiful craftsmanship!

She’s a lookin’ good, Bruce. Can’t wait for the next installment.

Hey Paonessa, isn’t Precision Plastic located in your neck of the woods? Ya know, the ones that make the plastic sheet overlays we all use?

Nice looking build Bruce.

After doing mine and knowing you are working in 1/20th may I suggest you give thought to splitting it to 2 sections ?

An end building and first floor, and an end building with the second floor. You might find it easier to move if needed and the joints will be hidden with the natural seams.

Pins in the top of the first floor with holes in the floor of the second floor will keep them aligned and if needed you could fashion a hidden clip in the side walls with a corresponding catch to keep them tight together.

These will be awkward as one piece if not heavy to boot.

Hmm. Now that’s an interesting thought, Dave.

Of course I do have one that is 42" X 24"; but you’re right, it sure was awkward to get out of the basement.

I’m not sure how deep this one will be; I forgot to write down any measurements of the existing building before the snow, so it will be awhile before I do the sides.

Anyway, I guess I certainly have some time to reconsider this.

Cool, looking forward to the finished project.

This is going to be a fun build to watch. Going to look good.

So, I had a 2’ x 4’ sheet of 1/4" PVC. I cut the front wall from this.

Now it’s time for the back wall, and I have the piece left over, but it’s not quite tall enough. I go through my scraps and cut some strips and glue them in place to make the back wall tall enough.

I never threw out the pieces when I cut out the windows, so I use them to reinforce the joints.

(http://www.jbrr.com/Pics/Structures/3Shops/IMG_1745.JPG)

That should work.

I also started adding some details for one of the store fronts. This is mostly just adding bits of styrene.

Going through my scrapbox, I found some of these red x-shaped pieces left over from some unknown kit. I glued a strip of styrene on the front of them.

Next, I glued them in place on the building front, after adding a few other strips. The top of the door frame was made by cutting styrene strips and just gluing them spaced equally across the top.

(http://www.jbrr.com/Pics/Structures/3Shops/IMG_1746.JPG)

I also have some brick pieces from HouseWorks - and cut them to width; these are not yet glued in place.

Cutting out the window openings is tedious, but it has to be done. I laid out the windows and doors for the back wall and then cut the openings.

I also had to build two doors.

(http://www.jbrr.com/Pics/Structures/3Shops/IMG_1750.JPG)

I put all the windows and doors in place just to see how they would look. Anything in gray is commercial; white is scratch built.

I struggled with the idea of what to do next, since there doesn’t seem to be any instructions. I still have to figure out the front for each shop, and I’m waiting on an order of styrene strips before I continue.

I don’t want to put any siding in place until the walls are assembled, but that means that it will be a bit awkward to cut the window openings through the siding.

Oh well.

I decided to go ahead and glue the side walls to the back. I’m going to avoid gluing on the front for a bit, as it is easier to work on when it can still fit on my workbench (well, sort of fit, anyway).

We’ll see if this was the right thing to do.

(http://www.jbrr.com/Pics/Structures/3Shops/IMG_1751.JPG)

Looking good, Bruce.

No instructions??? I’d ask for my money back on that one…:wink:

Looking good.

I agree, I prefer to work on my walls flat on the work surface as much as possible. Instructions? Oh yea, those are those sheets of paper, that are the first thing I loose from anything I purchase.

Yep, I like working on the flat as well, but this thing is really too long to fit on my main workbench. Of course I am still keeping the front off, since that’s where most of the detail will be.

I am still trying to come up with something for the back - as far as details. I really like the idea of a fire escape, but two stories just doesn’t seem like it’s tall enough.