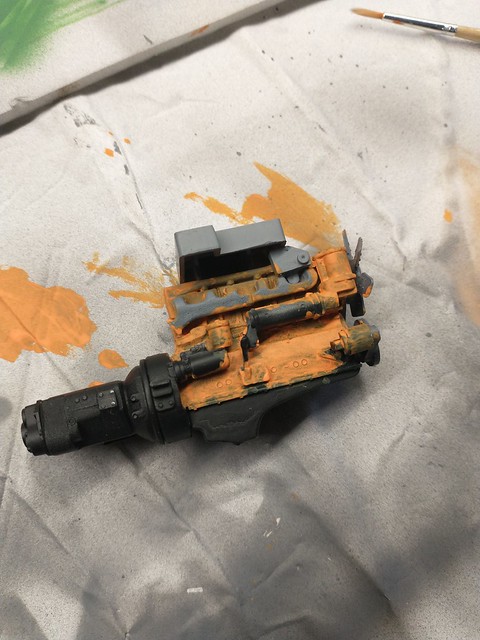
Well what if I’m painting the engine orange? Ha ha.
Well what if I’m painting the engine orange? Ha ha.
Damn truckers
Oh that poor truck, a non turbo charged engine, no power and lots of black smoke. That engine paint works it’s kind of close to Caterpillar yellow and dirty enough looking to be an old one!
For those interested in using raised decals ( rivets, weld, etc) pay attention.
Archer is the original maker of raised decals and are quite good. They are pricey ($17 per sheet, which is tiny) but the decals have a nice depth to them that actually makes them worth using.
Meanwhile, Micro Mark tried to undercut Archer by introducing their own line of raised decals. Much cheaper but lower quality. The decals arent as crisp, details are really low. Don’t waste your money.
Since I had a stash of Micro Mark decals not being used, I added some rivet details. I’ll see how they look tonight after I hit them with a light, light coat of primer.


So I know these decals I’m using are old, but they are really crap. For every three strips of rivets, one falls off after being completely dry. I think my only hope to salvage the rivet look is to quickly get a primer coat on and hope that it helps them stick better. Archer decals the same age didn’t have this problem. Ugh. One more attempt and then the tank is becoming a one piece welded tank from the inside…
If the primer coat doesn’t stick the decals, I’ve got enough to try one more method…
Craig , could you put a drop if CA on the rivets as soon as you apply them to maybe help them stay put? Its looking like a reallly good representation of a Feed truck. Even with the orange engine! LOL
I tried a drop or two of Future on them last night. I’m not a big fan of future as a catch all fix for decals but I’m hoping it works in this case.
Please to tell us what is “Future”?
Lou Luczu said:
Please to tell us what is “Future”?
Ah… I assumed everyone knew… Future is the latest thing that model railroading has “stolen” from the model kit builders ( planes, trucks, etc). Aircraft modelers discovered it probably 25-30 years ago as a way to make a clear gloss coat on aircraft canopies. Then people discovered that it makes an gloss coat for decals. So 5 years or so it hit the mainstream model train press as the latest and greatest trick. I’ve used it and have had mixed success.
Failures: dripping a clear styrene window in it like the aircraft guys. Ruined.
Spraying it via airbrush. Failure. Pain in the butt to clean out. Horrible.
Success: Used it wet to lay old decals down. Decal sets inside the Future as it dries.
Hand painting and then letting dry for gloss coat. Okay.
I’m 50/50 with it. It has its uses but I’m not convinced it’s the cure all to everything.
So what is it?
It’s an acrylic based clear floor coating sold by Pledge. Available now at your local grocery store.
Ah, Yes.
I think we may have used that on our dress shoes in the Army (many moons ago). Also the black leather brim on dress cap.
It wouldn’t surprise me if you used it to have “long lasting boot shine”. I recall my Dad spending his Friday evenings once a month polishing his boots before AF reserve weekend…
Before ArmorAll took over and even after it was an inexpensive tire shine
I used Future floor wax to overcoat flat paint finishes on rail cars to give them a luster probably as far back as 25 years. Works especially well on wood cars.
So I think I have a color scheme…
And the wife and 6 yld both picked out the green from the stash I have.


Can you pick the “right” green?
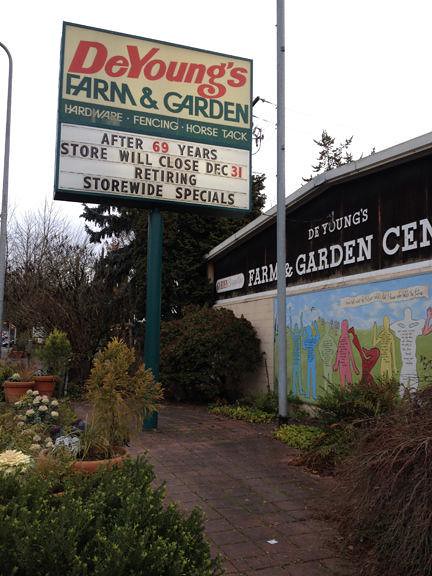
I think I’m going to go with a green cab, and red stripe on the cab. Then the DeYoung decal will be green with a red border.

Marsh green #2 or Crisp green #6, look best to me, if you are trying to match the feed sack
Very impressive build so far. I am also enjoying the research. Always nice to know the why.
So the saga of the raised rivet decals continues…
Experiment #1 of trying to seal them in didn’t work. Then the primer coat also was a failure as well.
Short answer, if you are going to spend the time and money on raised surface decals spend the extra money and buy the Archer ones.
Failure #1…

Failure #2

Failure #3

I could go on but you get the point.
Those rivets look like a real pain in the butt.
I think the green on the far right would be closest to the sack colour.