Large Scale Central

2017 Mik's Build challenge Entrants Photos for voting


PLEASE DO NOT POST COMMENTS ABOUT BUILDS IN THIS THREAD.


Post them in the individual build threads.


This thread is for pictures of the builds for voting. Each participant needs to post his photos and comments of his finished or Un-finished challenge build. Please Identify who you are, and what you built, and any other comment you would want to tell about your build. PLEASE limit the number of photos to not more then 10 total, in this thread.

Please keep this thread clean of comments about the builds.

And limit posting to the participants of Mik's build Challenge 2017

Devon “RevDev” Sinsley building the Dunakin Pass Snowshed. It is a 1:24ish scale model for my eventual indoor layout. The Taylor stones were brought in to build the piers and retaining wall for the shed and a nice sign base for the location and elevation. The “build” is really the entire diorama. Total cost appox 29 bucks and change. depending on how you look at it. Much of what was purchased and included in the price I used very little of. But since I bought it specifically for the challenge I counted it.

The main body of the diorama (base and cliff) are 1" pink foam board. The rest is a hodgepodge of various materials to bring it all together.

The indoor layout will run across the back of my L shaped work bench. A raised section at the back will house drawers and cabinets. The top of this back section is 12"wide. This fits on top of the corner of that raised L section. The minimum diameter for the indoor layout is 30" and this snowshed is built on a 30" diameter curve.

My Lil Hauler fits with mm’s to spare. (thanks to Vic I have learned that Micro layouts don’t follow the rules)

I have a man crush on Ray Dunakin. His modeling is a true inspiration to me and is eye for detail is insane. So this years challenge, thanks to Dave, was dedicated to Ray and as such Ray will be immortalized on the Sinsley Mountain Logging and Minning Co. line.

This tree was done using a new to me technique. It has a twisted wire trunk coated in liquid nails and painted. The greenery is cut to fit filter fabric and the flocking is dried coffee grounds dyed with green paint.

The bear grass is made with hemp rope for the greenery and a twisted wire stalk and sawdust flocking dyed with yellow paint. It is held together at the base with heat shrink tubing.

I particularly like this tree and this photo. The real Douglas Fir in the background shows how well the tree came out. It is made basically as Ty Brown does his. Same coffee flocking as the other and my trunk is a real branch.

Just a shot inside showing off the interior rock wall with the water and ice cascading down.

Thanks to the help, encouragement, and down right nagging from the others on here I made icicles and stop action water effects. I am sure glad I was peer pressured into it as this made the whole thing come alive and be believable. Thanks everyone for not letting me skip this detail.

I just like this picture. The lighting and shadows look real and convincing.

And finally I had to throw this in because I have a feeling management is consorting with GN about a take over.

I want to thank everyone for the complements, encouragement, and ideas. I think this came out great and almost every technique was gained through help or ideas I got from LSC. I also enjoy very much seeing the other builds and am amazed at the talent we have here and how so many different ideas come from the same starting point. This is one of the things I look forward to each year. Hats off to all who participate, even if from the sidelines. Its always a hoot.

Link to build thread: http://largescalecentral.com/forums/topic/26380/devon-sinsley-mik-2017-dunakin-pass-snow-shed

Vic Smiths 2017 Mik’s Challenge Entry - Mik’s Grove Whistle Stop Station.

This is a small country whistle stop on the future Angry Beaver Railroad, its based on a smaller scale kit from Thomas Yorke that itself was based on a John Olsen Mescal Lines original sketch. The source:

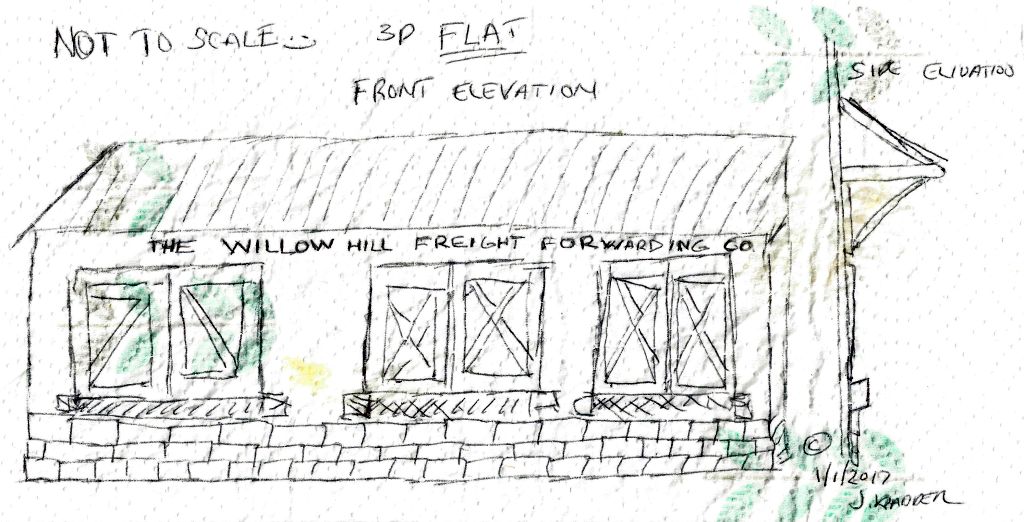
my initial plan drawing and Napkin Sketch:

Final picts,

Lauan plywood walls and roof, Piko windows, Taylor Tin roofing left over from last years challenge, mailbox scratchbuilt, the moped is not scratchbuilt.

Mr and Mrs Largebottom waiting for the afternoon local,as the station master updates the schedule

Purchases? Newly bought operable LGB semaphore arm, plus some basswood, everything else save Taylor Quarry stone blocks was on hand, total expenditure $7.

Link to build thread

http://www.largescalecentral.com/forums/topic/26384/miks-2017-vic-smith-build-mik-s-grove-station?page=1

This was a heckova good confidence builder and fun little building, it really gave my skills a good workout, believe it or not but I still have doubts about my skill level in this hobby, I tend to stick to technics I know and not try new things. Group projects like this are great way for me to break out of that shell and try new ideas. Thanks Dave for keeping this going each year.

(http://www.largescalecentral.com/externals/tinymce/plugins/emoticons/img/smiley-laughing.gif)

My entry for the 2017 Mik’s Build Challenge.

Total cost. 3 for $5 on solar lights, I used one. Thatched roof (hanging plant basket liner) $3. The tall Leprechaun mascot $2 and that was about it besides a tube of E6000 and 2 bottles of craft paint. The finished product… a building I’m very happy with.

The humble beginnings.

.

Introducing “The Lamb and Clover” a fine Irish Pub establishment.

A good crowd showed up for the soft opening.

The solar light is on. A first on my RR.

Thank you Dave Taylor granite company and Thanks to the rest of the participants for the inspiration.

Hi,

I’m toddalin (Todd Brody) and this year our Tortoise & Lizard Bash Garden Railway celebrates 20 years of operation. The Tortoise & Lizard Bash is a lighthearted look at a fantasy railroad based on the reality of things. Due to the prosperity of our mine, we have had to deal with several claim jumpers. In the past, they were dealt with locally at the mine through unauthorized lynching.

For the build challenge, we decided that a proper gallows should be constructed with the thought that this would serve as a psychological deterrent to claim jumping. Of course when the Tortoise Town Aesthetics Committee stepped in, they deemed that the structure should be decorative, serve the community interests, and should be multi-purposed. Furthermore, it was deemed that the residents of Tortoise Town should be allowed to literally take the law into their own hands. To wit, I give you the Ernest & Julio Gallows & Dunk Tank.

The “tongue-in-cheek” structure serves several purposes ranging from public execution to wild partying. When used for execution, people throw balls at a target that will release the trap door to hang the prisoner. Extensive research on the ‘net provided the basis for the gallows, and imagination took care of the rest.

But, for lesser offences (e.g., public drunkenness) hanging is a bit extreme and in these cases the offender is publicly humiliated via the dunk tank. In this case, the trap door is replaced be a wooden seat (and of course the noose is not used). This also draws lots of townsfolk, who love to get involved, but don’t really want a death on their conscience. (But there are those regulars…) Of course, the tank is also used for more pleasurable entertainment including wet tee shirt contests that usually lead to… Finally, the structure serves as a social gathering spot and children delight in whacking the piñata on Fiesta Fridays. (Don’t mess with the Pecos Piñata!)

The Taylor blocks were used to provide the decorative “surrounds” for the gallows stantions, as well as 12 of the 13 steps, and the sides and decking for the dunk tank. The three actual “TAYLOR” blocks were modified into headstones for the impending event. The frames for the decking and stairway are made of 3/8” acrylic while the decking and other assorted parts are 1/8” acrylic. All parts were designed in CAD and cut on a laser cutter.

The framework was spray painted. Each block was hand painted using four colors (black, dark grey, light grey, and white) prior to assembly and the actual assembly utilizes hydraulic cement as grout. Every block was used in the build with none left over. (Just worked out that way.) Figures were selected, modified, and painted to complement the vignette, which will take up residence on the railroad this spring. A piñata (maybe a large-scale first?) was constructed of brass, glue, paint, and pipe cleaners and provides entertainment when the structure is used for social events.

Total cost for the build was $20 for the piece of 1’ x 2’ x 3/8” acrylic sheet. The 1/8” sheeting for the decking and other bits was free scrap and I already had everything else that you see/don’t see. You can follow the whole process at the link:

http://largescalecentral.com/forums/topic/26389/toddalin-s-gallow-s-humor

Ernest & Julio Gallows & Dunk Tank

WEEKY SCHEDULE

Social Sundays – Vanquish a Varmint

Manic Mondays – Kill a Claim Jumper

Dunk Tank Tuesdays – Dunk a Drunk

Wench’s Wednesdays – Two Extra Balls for all Women

Horse Thief Thursdays – Hang a Horse Thief

Fiesta Fridays – Punch a Piñata, Children Free

Summer Saturdays – Dunk Tank and Wet Tee Shirt Contests

Fiesta Fridays

This shows the crew setting up for the impending Taylor Gang Hang. Research shows that weighted sacks were used to simulate the weight of the prisoner in setting rope length and ensuring proper operation of the trap door. Note that there are the traditional 13 steps to the platform and 13 turns in the noose.

Bringing in the Taylor gang.

Of course, like the rest of the Tortoise & Lizard Bash, we can’t take ourselves too seriously. (http://largescalecentral.com/externals/tinymce/plugins/emoticons/img/smiley-wink.gif)

A final smoke for the condemmed man.

“Dead-Eye” Dora queues up. “Dead-Eye” never misses!

Ole “One Ball” Angus goes into his “wind-up” trying to drop Larry the Lounge Laywer in the d®unk tank. Looks like “One Ball” has been “throwing up bricks” all day. But at 3 balls/$1, no one is going to stop him. Eventually he’ll connect… or Dead-Eye will step in.

Finally, here we see a typical Summer Social Saturday where some of the local color endure the tank to expose their… in search of further pleasures. Looks like old Henry is getting an eyeful. (http://largescalecentral.com/externals/tinymce/plugins/emoticons/img/smiley-tongue-out.gif)

Thanks for looking and I hope you also got an eyeful.

I am Eric Schade from Phippsburg Maine.

I have always enjoyed seeing the West Gouldsboro Library as I pass it on the road to My parent’s summer house in the same town.

Thanks to the Taylor Quarry Company, I could use cut granite blocks for the base rather than the field stones on the original. I Added some of my own stone cut from gray plastic deck planks. this style plank seems to be plastic mixed with saw dust and is the same color and texture all the way through. I sawed up the blocks on my table saw.
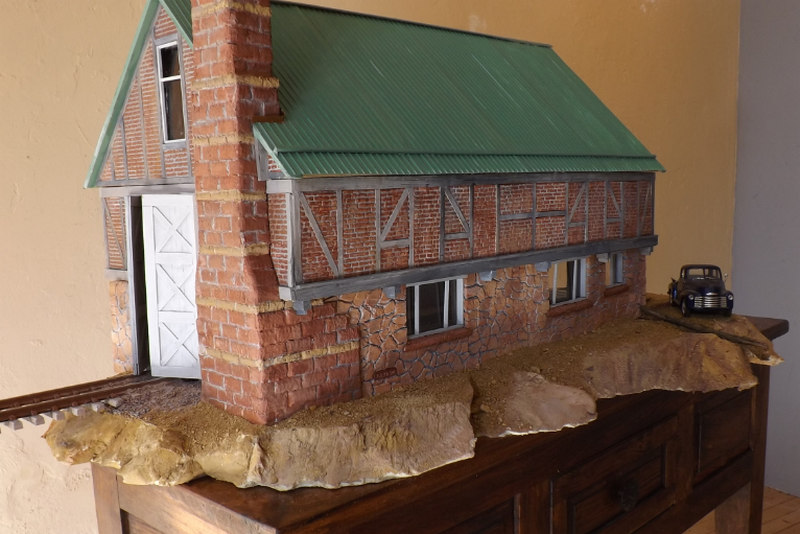
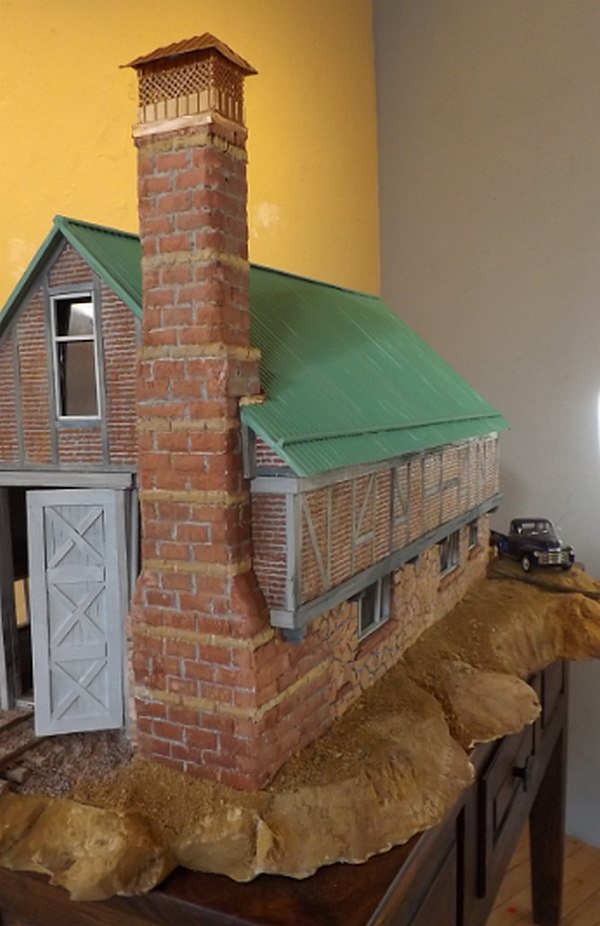
I used styrofoam for the basic wall structure. The Stone is glued to it using white vinyl exterior caulk. The upper portion of the wall on the prototype is Stucco. I used white latex paint mixed with titebond III glue and some wood flour to thicken it. it looks about right to me and should be pretty weather proof, time will tell.

Trim, doors and windows are teak wood which I’ll leave unpainted, hopefully it will last and continue to look good outside.

The building is 7/8" to the foot scale (1:13.7) about 20"x20"x19" tall. The large scale allows me to make a lot of detail which is a lot of fun to do.

I have a lot of stuff in my shop, scrap wood, deck planks, rolled roofing and styrofoam. I only had to purchase the caulk, I got three, used one $3.99 each.

http://www.largescalecentral.com/forums/topic/26418/erics-2017-mik-project

The time has come to post pictures, so I’ll take a deep breath and jump right in.

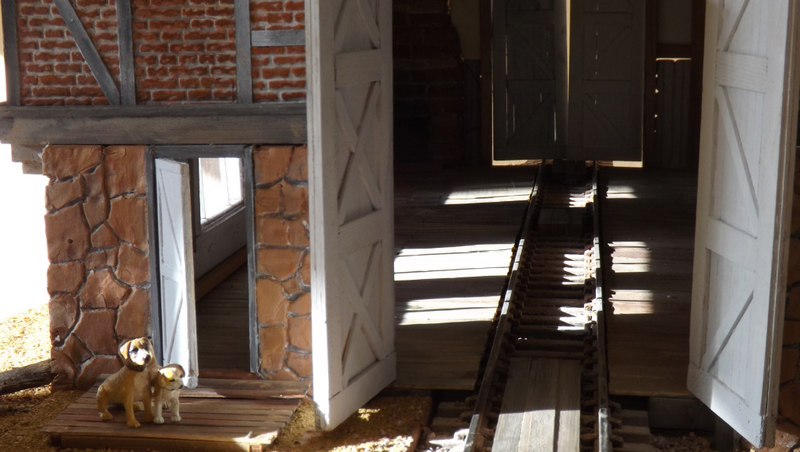
The inspirations for my engine house were the Church on the Rock at Camp St Malo in Rocky Mountain National Park, the Jordon Pond House in Arcadia National Park, both of which buildings have personal memories and meaning to me, and the doors of the Silverton Northern engine house from Dave and which gave me my design theme. John Caughey gave me the idea to put doors on both ends of the house and put a smoke box clean-out station in back (that’ll have to wait) and for the copper standing seam roof. Russell’s pictures of his copper roof project gave me a goal to work for. I appreciate all the other suggestions from the fellas on various stuff.

My cost amounted to two tubes of bonding caulk, $3.99 each plus tax, which Eric Schade inadvertently turned me on to…no way of bonding wood to plastic, NO project—seriously. All the precision cut scale lumber came from Travis, my prize from the last two years. We all know where the stone came from. Everything else was on hand.

EDIT: Vic says to add a link to the build thread, so here it is. Aside from having some fun, I did a lot of whining and complaining there I’m sure you wouldn’t want to miss!

http://www.largescalecentral.com/forums/topic/26383/john-passaro-build-2017

Here’s the pictures. But first things first. This Challenge owes its life to Dave Taylor, and here is my tribute:

Here’s an overview of the back of the engine house, along with two pictures of the chimney. I like the chimney!

And here’s the front. FULL DISCLOSURE: The doors do not function; they are in place for the pictures but have no hinges yet. I wanted to hinge the door in place last night after dinner, but I fell asleep…too many late nights working on this build!!!

Here’s a couple of pictures of the interior, including a picture of the fireplace and hearth along the back wall.

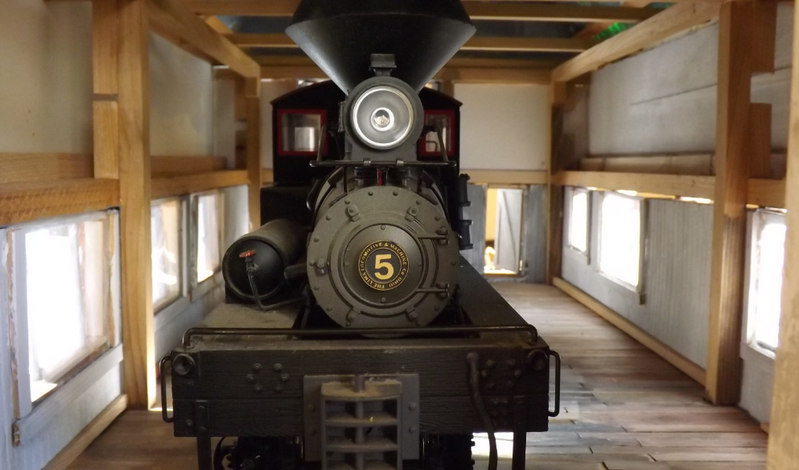
And finally, this build IS and engine house, after all, so I thought it might be a good idea to show a locomotive, which fits neatly inside with plenty of room for the boys to work on it.

That’s it now. Thank you to everyone for following along and more importantly thanks to everyone for taking the time and effort writing about and posting pictures on their builds so I could follow along what you all have been working on.

edit for build link above.

Here is my entry. The Old Mill Winery. http://largescalecentral.com/forums/topic/26403/matt-kirichok-build-2017

Purchased 2 extra sheets of the Taylor stone ($10), 1 can of grout sealer (~$10) for sealing the grout ‘stucco’, and $3 for another tub of glue.

Being forced to redo my outdoor layout, I decided to make room for some industries for some operations. I was toying with building a winery since I like to make my own wine. When I saw the Taylor stones, I just had to do this.

Here are the images…

The roof was made with homemade Taylor tin.

where this is going in the layout, I needed some retaining walls. So I decided to use the lower floor of the building as part of that retaining wall.

Here the crew is getting ready for a wine tasting event. The sugar, grapes, and creates of wine bottles have arrived for unloading.

…and a nod to Dave Taylor for keeping this going and coming up the the item to build around…

(Out in the layout, the track will be a bit higher so the box car openings will be level with the platform)

is a rooster on top (http://largescalecentral.com/externals/tinymce/plugins/emoticons/img/smiley-undecided.gif)?

The windows and doors and weather vane were 3D printed, the roof was homemade Taylor tin, the stucco was sand grout, the core of the building and platform was insulation foam, the platform top was hardboard, the barrels were purchased last summer, crates and barrel racks scratch built from scrape wood, logo on barrels where laser engraved.

This was fun! Thank you everyone.

Build Log link http://www.largescalecentral.com/forums/topic/26438/pete-s-1st-time-build-challenge-the-camb-beer-and-bbq

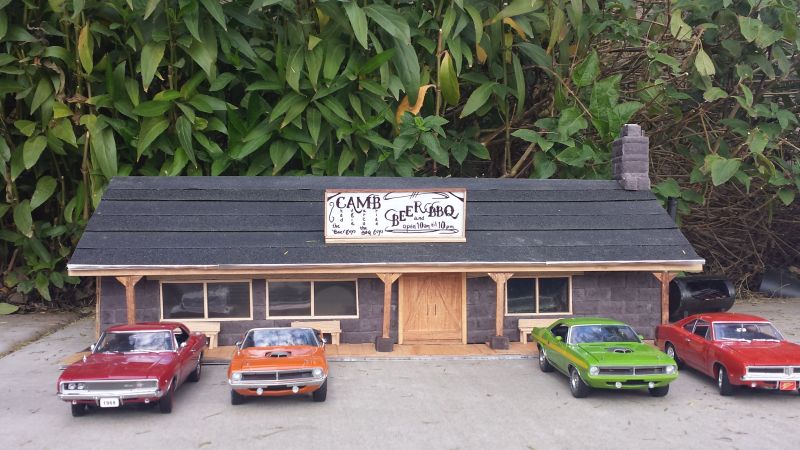
Ok I am Pete Lassen, from Peoria ,AZ and this is my first complete scratch build, this is my first time entering any type of contest. Like a lot of people I am naming businesses on my layout after family and this years challenger is perfect for one buildings so I nervously present to all , the CAMB BEER and BBQ

(bheer) for the kind Friar Fred, A tribute to Ray with the stones from Dave, but a real tribute to the 4 AWESOME son in laws I have. CAMB is their names Chad, Augie, the beer guys, Marco and Brian, the BBQ masters,

The building is Coroplast, walls, base and roof. I used almost all of the fine , easy to work with Taylor stones, the extras were railed to Denver for use in a Loco Shed. The wall above the windows and on the 2 sides is some old pallet wood I veneered and glued to the Coro. Goop and some E6000 were used exclusively and it works great,

The door is made with interior hardwood from the pallet wood, the handles are staples, so I must have bent one somehow cuz its a little longer that the other

The as delivered stones were not painted or treated and I went with a stacked stone look with minimal gaps. Last minute , after some helpful suggestions I made some benches for the long lines of people coming for the fine BBQ and Beer.

since I didn’t have any budget left for some decals , for the time being Shaky Pete’s Sign works made the sign and set it on the roof

The roof ate up most of the budget, 3 rolls of non skid tape, 2 from Lowes and one from HD, the Lowes brand has the shiny sparkly look the HD is duller, so I HAD to alternate them, otherwise it would have really bothered me. Speaking of bothering me, the bad bench leg will be fixed. I made the window frames and the “glass” is plastic from a band saw blade

The smoker is a small V8 can and the “ribs” are some carved up pieces of wood

Thanks for looking !

Total

3 rolls of non skid tape $28.75

political signs free

everything else already on hand

Thanks to all who commented gave me ideas, answered my questions and all the posts that gave me the ideas that I could build something from scratch. This has been a fun month, I am surprised I could finish it on time, I am in awe of the talent this forum has here, Hats off to all!, Thanks, Pete

Howdy fellers, I’m Chris “Chris” Kieffer from Home, Kansas. (Yes, I live at Home) So this i my first time in the build challenge, and the first time I have completely scratch built a structure like this. I have learned a lot, and had a ton of fun participating. So the building I built is intended to be a corner building on my upcoming layout. I wanted it to look like a typical late 1800s mid-west to western stone building. The trim and ornate stone work would be reduced from what would be found back east. I decided the building would be dedicated to my wife, she loves to bake and is a great candy maker. So the building bears her name. (I also got to tell her that I built her a building for Valentine’s Day)

For my budget, I spent it as follows:

I bought 3 extra sheets of stone from Dave @$5 each - $15 (used damn near all of it too)

Roll of ribbon for lower floor curtains, which I used about 50 cents of

Had to buy extra epoxy at $4

Had to buy a sheet of 1/4" plywood, which I used about 1/3 of - $5

Two bottles of paint - $2

Grand total spent: $26.50

Door and upper windows were on hand for a different project. I also had the magic scuplt I used to make the stucco cover on the back. Lower windows, signboards and corbels were lasered by a freind of mine in trade for some stuff of mine.

Now for the pictures:

For now the building is on display at the bequest of my wife. I may have to build a replacement for the layout (http://largescalecentral.com/externals/tinymce/plugins/emoticons/img/smiley-surprised.gif)Future plans are to seal the roof, add an interior and lighting. The building currently has no base as I don’t know how it will sit on the layout yet.

Link to build thread: http://largescalecentral.com/forums/topic/26394/my-first-mik-s-challenge?page=1

In all, I had a blast. I appreciate the kind comments and look forward to doing it again.

Chris

Waverly Southern Railroad

Dan H. Hilyer

Waverly, Alabama

Mik’s Challenge 2017

Water Tank

1:20.3

Build Log

The Waverly Southern Railroad recently acquired a backwoods logging outfit, the Brown Dog Timber & Logging Railway. The BDT&L Ry was in dire need of capital to build additional infrastructure in order to expand into new territory. The first structure required was a new water tank. WSRR’s owner, B.C. Paws instructed his construction crews led by R.E. Mington to construct said tank. Mington surveyed the site and determined that the tank would be built upon a stone foundation. You see, Mington had been admiring the mighty fine craftsmanship of a man named Dunakin and wanted to honor his work by using similar materials as the Dunakin fellow. Mington had previously souced some material from a man named Taylor out in New Mexico and had recently learned that this same gentleman had purchased a stone quarry and was selling cut stone on the cheap. After the masons finished laying the Taylor stones, Mington and his crew got to work building wooden bents upon which they would build the tank. Mington chose to build a square tank that held about 29,000 gallons of water. The tank was constructed of red oak timbers provided by the BDT&L folks. Once completed, the first engine to fill-up was BDT&L Shay No. 5 which is still sporting its Ely-Thomas livery.

I want to take a moment to thank everyone here who has been an inspiration and to those who have provided encouragement and suggestions that have made this a fun project. That is what makes this site so special: the encouragement that we each receive to become better modelers. I especially want to thank Dave Taylor. Dave spends a lot of time coming up with the ideas for the challenge and making sure we all get the starter sets we need to complete our projects. THANKS Dave!!

This is my second year entering the Challenge and I have really enjoyed it each time. This year stretched my modeling ability, but I did learn several new skills that will allow me to make even better models. I tried my hand at resin casting and enjoyed that process very much. Had I had that skill set for last year’s challenge, I could have saved myself about a weeks worth of work building windows. I spent about $28.00 of which the majority was for the spout kit from Wiseman Model Services and the rest was on Goop and Loctite Go2Blue. Ok, here are the rest of the photos. Enjoy.

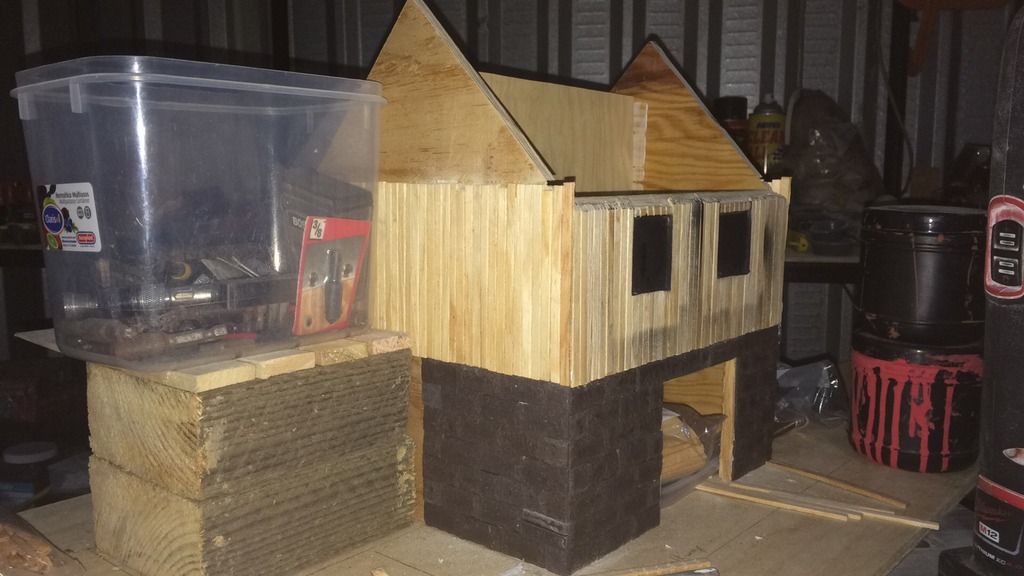
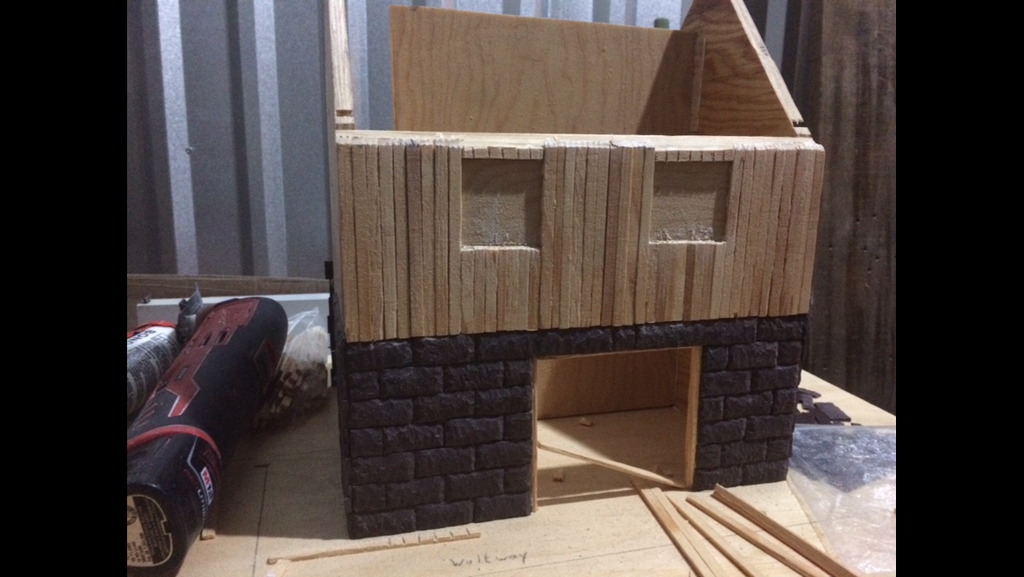
Well this year didn’t go so well from the start… I knew it would be a challenge in itself to get to work on my project, but We always have fun here. So my project which is still in progress is a water mill. I have always wanted to build one and hopefully it will one day be used on our future railroad… So with that being said here are the pictures of what I have done so far… The wheel is temporarily installed and held up on the outside by plywood for the pic. In its place will be a stone foundation with blocks of wood cribbing with a mount for the axle to pass into…

When I finish this… It will have lap siding. It is milled from cedar. I will then stain it with the Steel wool and vinegar type stain to give it the grey look when it does its thing… I need to cut out the window again for the end in the above photo as the post and beam were in the way of the opening. It was cut before I decided to finish the inside. The roof will be finished with shake style shingles and stained a darker color, not sure what yet… So I spent $6.00 Gorilla wood glue… (love this stuff). Luann sheet 1 pc 2x2 for the bottom. $10.00. Everything else was on hand from past projects and scrap. The styrene I picked up originally for the wheel was $8.00 but I decided not to go with it…Paints and other stuff already had it on hand.

So along the way I have had fun so far. Most of all I enjoy learning from you guys and all the great comments and suggestions to make things work or better…Thanks for looking and I will keep posting on the build thread until its completed…T.

Link to build… http://largescalecentral.com/forums/topic/26409/mik-s-challenge-2017-travis-dague

Travis Dague said:

Well this year didn’t go so well from the start…Thanks for looking and I will keep posting on the build thread until its completed…T.

Actually, Travis, I’ll disagree. I think your build has gone very very well right from the start and I’ll be keeping an eye out for updates. I think you were smart not to rush for the challenge deadline.

There’s a couple of other builds that didn’t get finished due to various circumstances, and I for one will be watching for those finishes as well. The point here is to have fun and get stuff finished when we can.

Hi guys, please include a link to your build threads in the judging posts (http://www.largescalecentral.com/externals/tinymce/plugins/emoticons/img/smiley-laughing.gif)

PLEASE POST COMMENTS IN BUILD THREADS,  

NOT IN THE VOTING PHOTO THREAD!!


Thanks

Dave


When I decided to participate this year I knew I was in the middle of a busy time at work and a couple of major projects at home. I had hoped that the decision to make the doors and windows on our CNC Router at work would allow me to get my reasonably simple flat done in a weekend or two. It became clear last week that waiting for router time was going to push me past the closing date. I never got further than a dry fit with block and paper stand-ins for windows and doors.

The idea…

The latest full computer plan. Doors and windows changed just a bit before going into the router queue…

And the dry fit after Dave’s stones were painted…

I’m still committed to getting this done, but yet another project has entered the mix since I started and still no router time. I did however enjoy working with Taylor Stone Veneer and following along with all the great builds.

THIS BUILD IS FOR DISPLAY ONLY

DO NOT VOTE FOR THIS BUILD


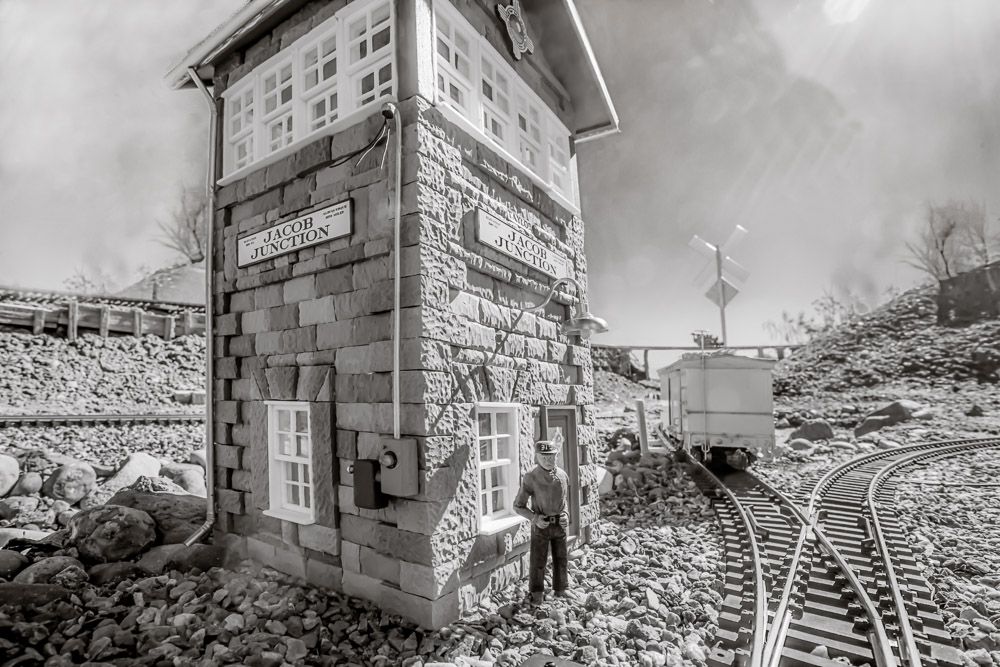
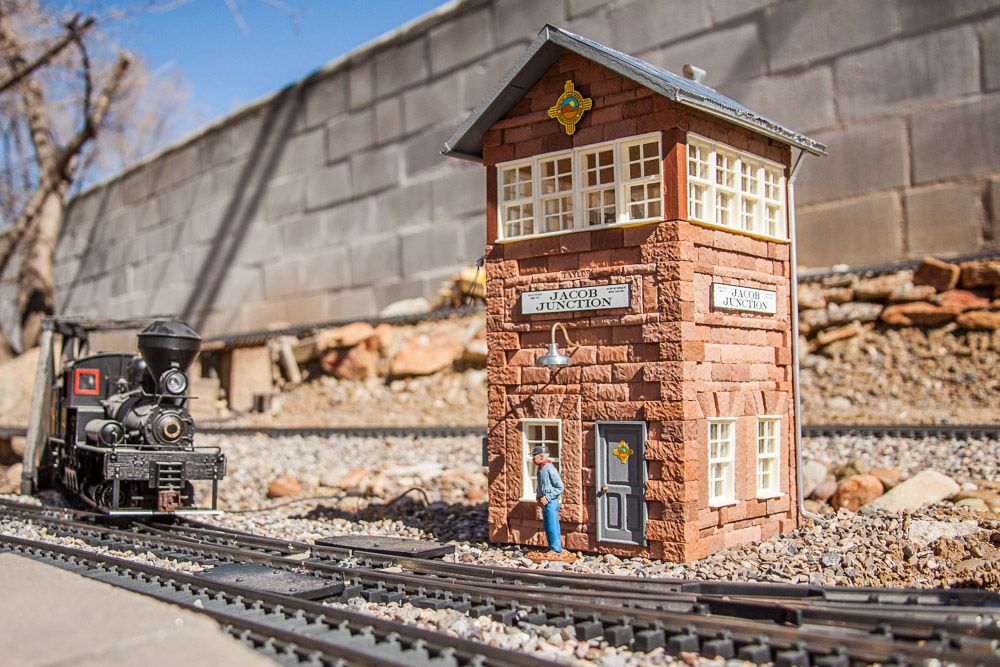
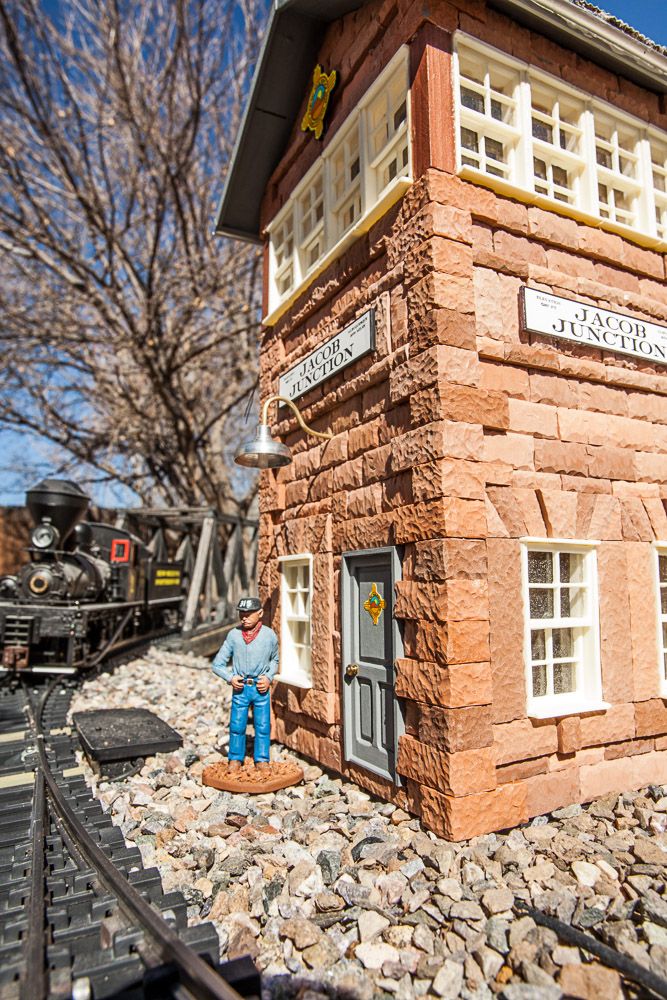
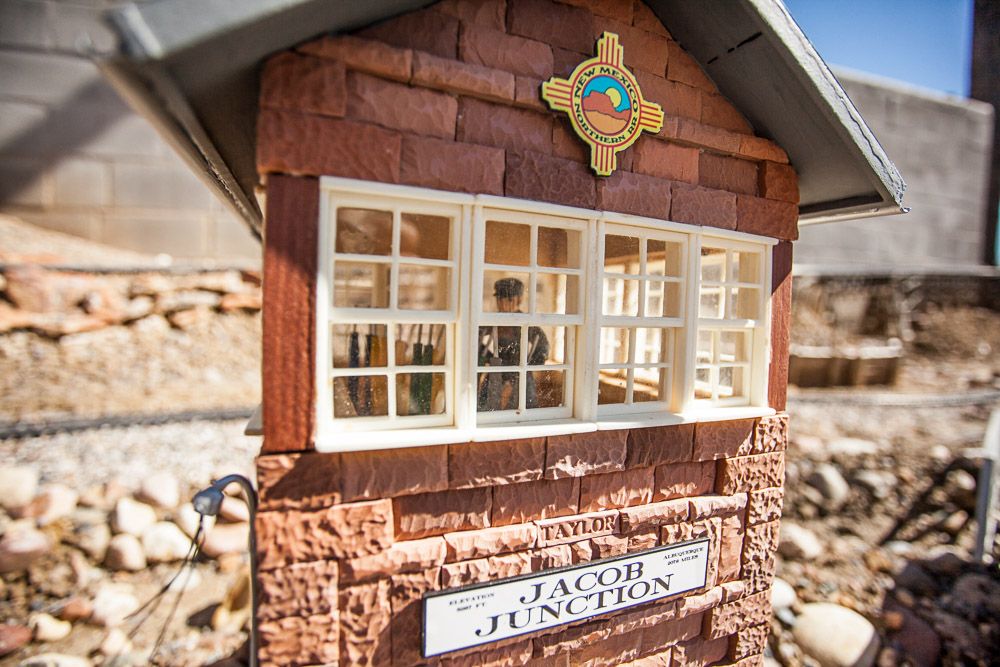
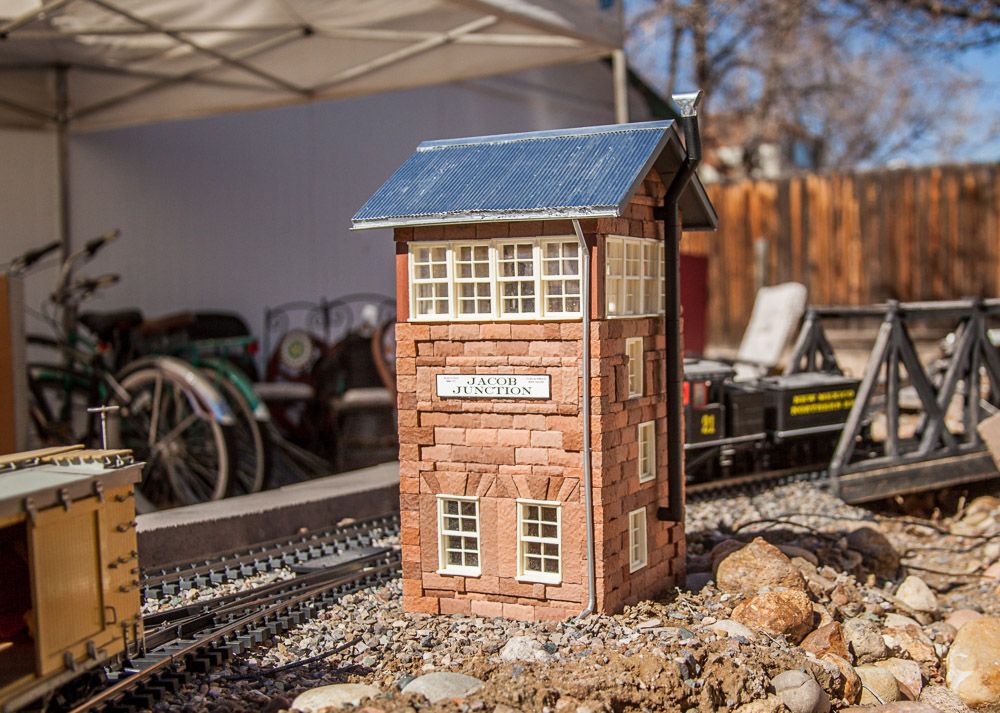
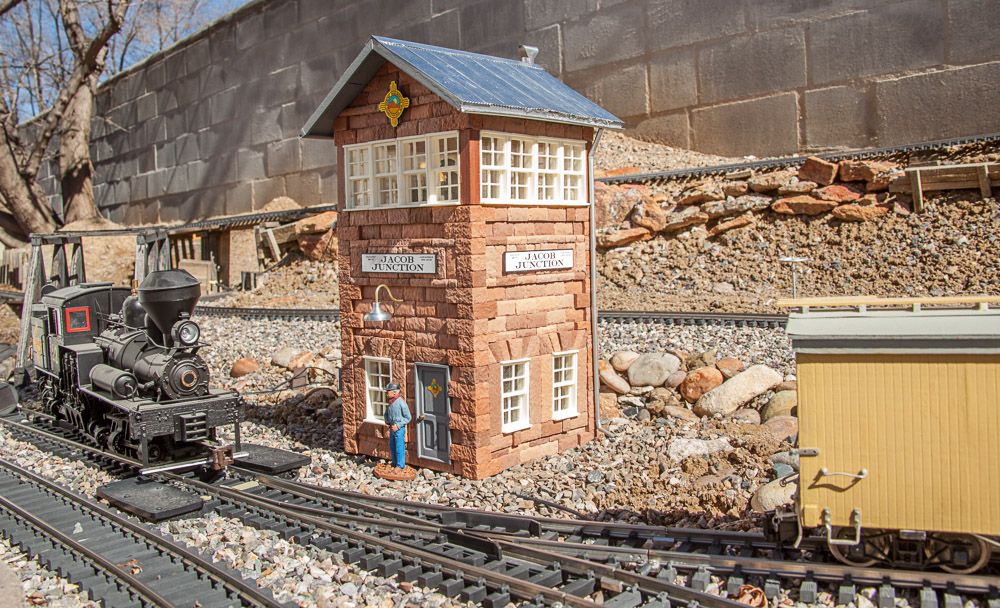
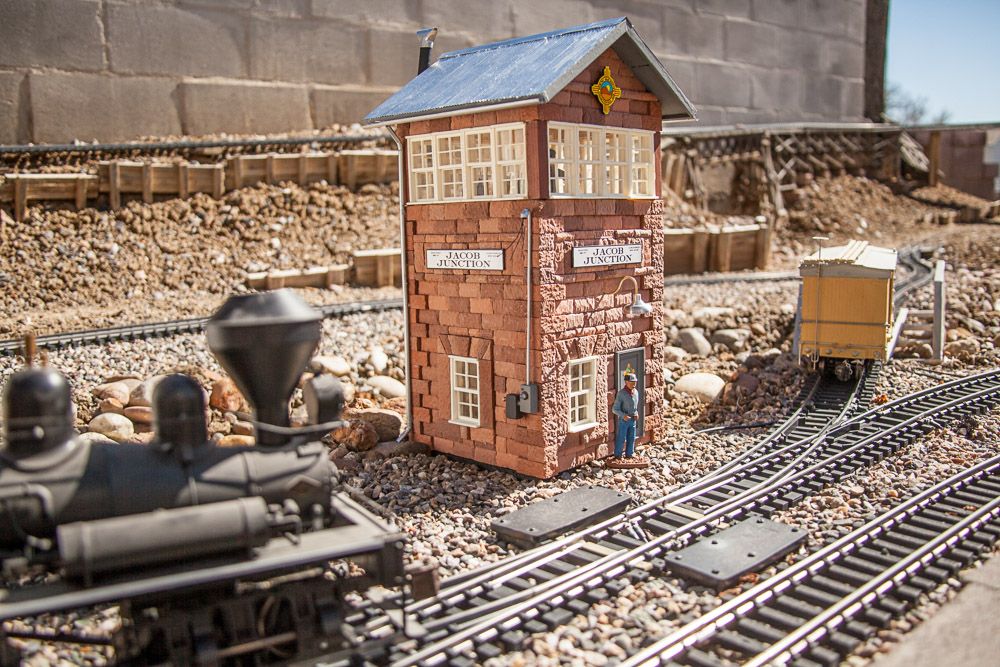
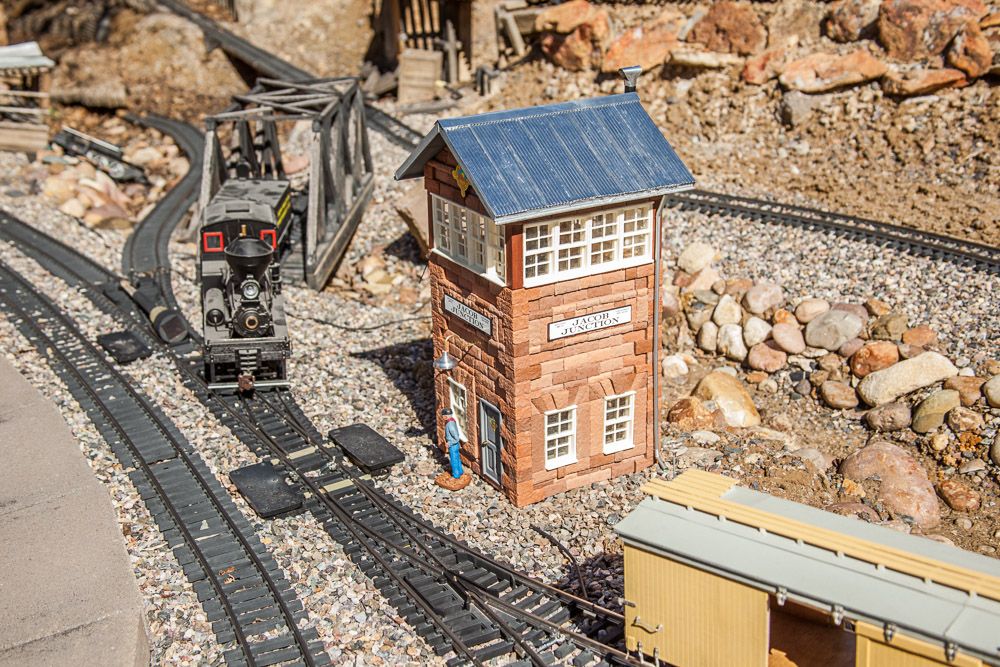
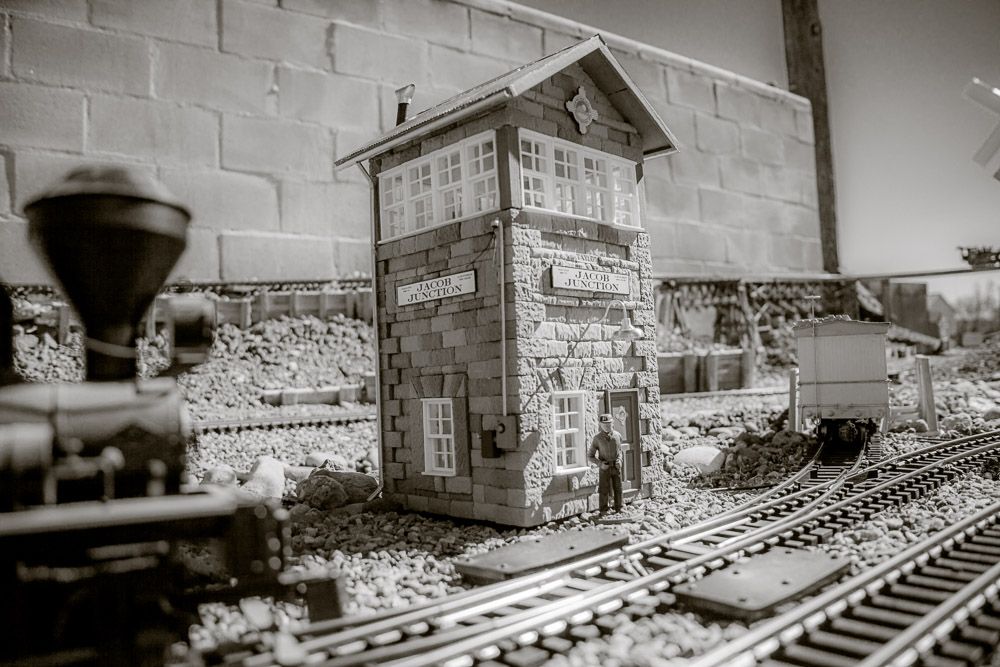
The New Mexico Northern needed a switch tower for the yard. And this years challenge made the decision really easy, as I have been planning this since the fall,  Ya, thats a bit of cheating, but thats why NO VOTING for this.


Here is the link to the build thread:  http://www.largescalecentral.com/forums/topic/26407/taylors-mik-2017-build


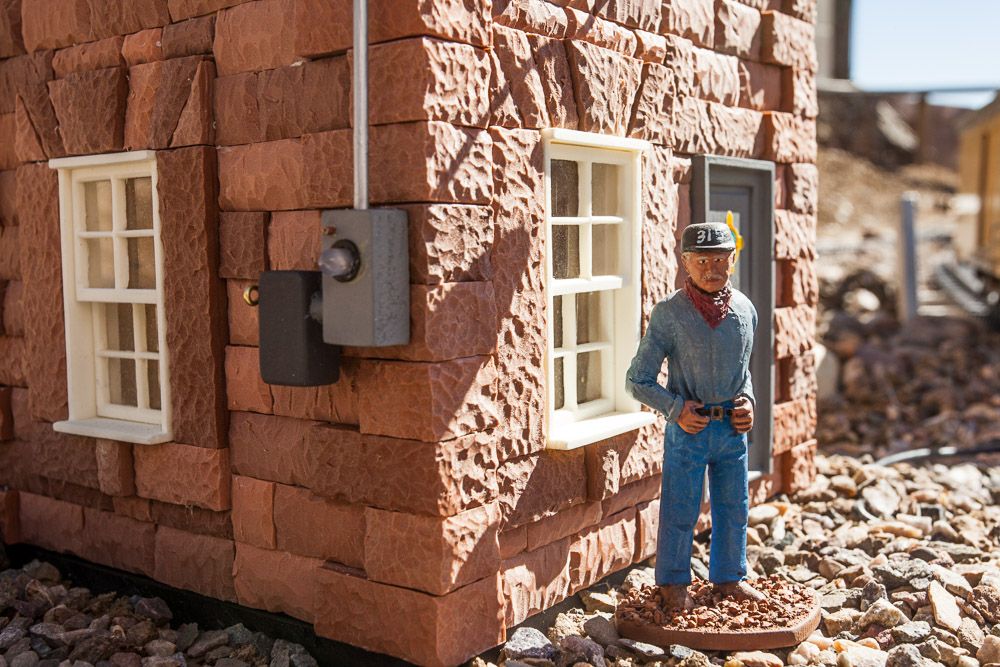
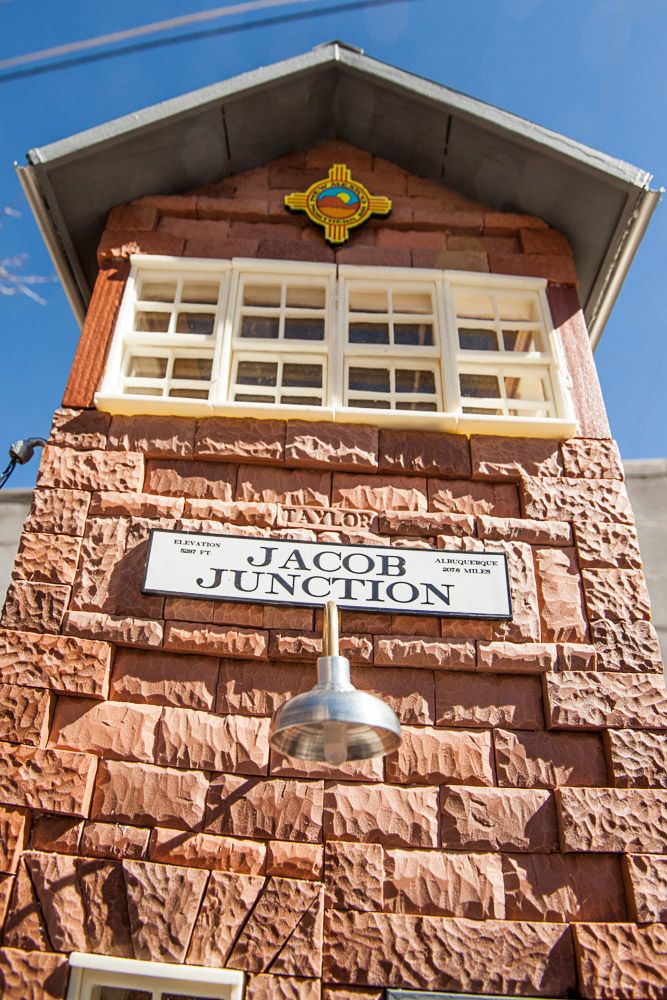
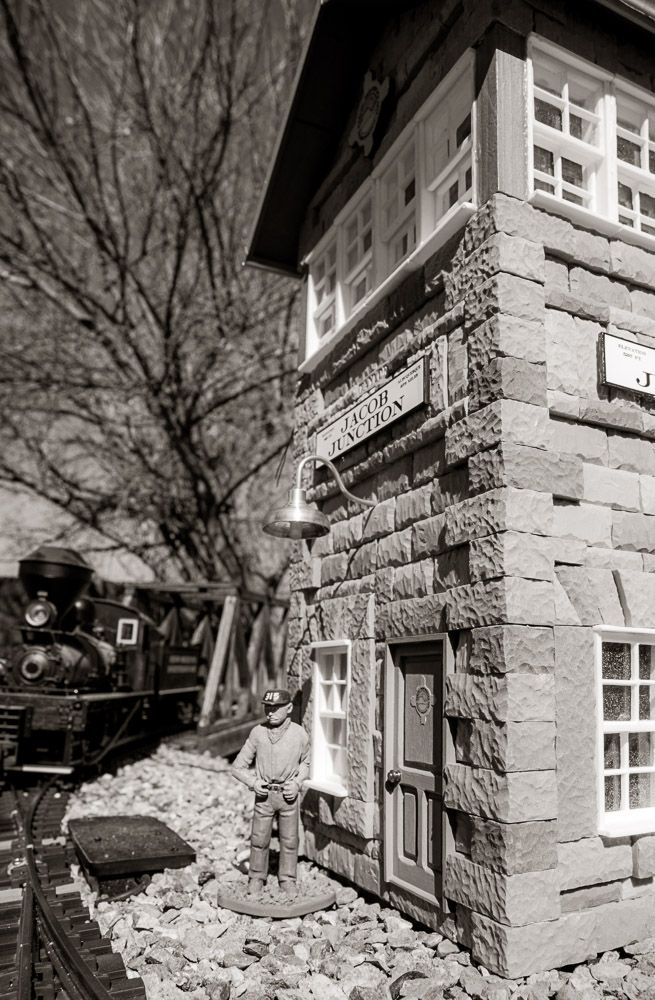
I made all the stones after the start, as I ended up sending out all the stones that I had cast ahead of time for my fellow challengers, and the corner stones and window surrounds added the extra detail.  The 4/4 windows I had started last year, and the small windows are the same ones from last years build, and of course Taylor Tin.


In honor of my 6 year old Great Grandson (who will be a train guy someday) I named it:

JACOB JUNCTION


Had a great time on this build.  BTW: The mini-me is one of Boomers awards from last year, Thanks Boomer...


unfortunately my build is definitely still a work in progress, but here is Boomer’s paper works as it stands right now. Will continue to build and post updates in the original thread

I post these pictures for your amusement. All of the other builds show much more work than I was able to put in.

That being said, it was a beautiful day in the neighborhood…

Golding’s Pretzel Hut was getting ready to open. Ric was making up a batch of pretzel dough.

While Jan was made to pump the water from the well, while The Merry Mailman chatted away.

Backside of the building.

Delivery door and Jan still pumping away.

Trackside delivery of flour. Hmmmm, maybe there should be a boxcar of pretzels going out?

Building was made from the shell left over from a bobber caboose. Everything else was from parts bin. Copper roof was a leftover piece from a roll of sticky back copper foil. Sign from some clearance lettering from Hobby Lobby.

Check out the build and the back story about the sign at:

http://www.largescalecentral.com/forums/topic/26433/2017-mik-s-challenge-lou-luczu/view/post_id/332561

And now something completely different …

I haven’t gotten to the water tank yet … but I have made progress.

The story goes is we is cheep and cheap. We buy the ends of various runs. Uniformity of stone is all we want.

To paint them they were placed randomly and blasts of primary colors were sprayed on in blotches. Then all the other colors were misted on in varying patterns, as well as spinning the low sided box so the paint wasn’t directional. They tie together even when they seem opposites. They went back face down when applying, so I couldn’t influence Randomness.

Funny thing about the Mik Challenge, it usually arrives during my first project of the year, on the pike. At Johnny P’s prodding, I’m making my track appear real(ish). My goal is to make toy train components appear real. Hence the clothespins on the march… there will be more coats over water features …

I’ve painted all my ties because each section of plastic had faded differently and looked funny. With all the track down and secure, I painted in place. I only mention this because the track will be part of the bridge. For the contest, above is where it goes. Sealing with a flat clear coat will remove the tie shine.

I had to lighten the pic to see the colors …

The light and dark stones are the close-out ones, from the box store. I have a full lapidary shop in my work shop. The ends are still too rough.

I did cut a stone foot for the far right side in the next pic…

I had started the other side and I was planning for the connecting arch between the sides … when … this side fell and cracked several stones … I’ve rebuilt it, but I need more quarry stones to finish the bridge.

I post this not for votes, but to show another way to use Dave’s High Quality Quarry Stones from Taylor’s Quarry. Kiss Kiss(http://www.largescalecentral.com/externals/tinymce/plugins/emoticons/img/smiley-money-mouth.gif)(http://www.largescalecentral.com/externals/tinymce/plugins/emoticons/img/smiley-wink.gif)

John