Well, the backwoods shop idea wasn’t working out well, So now onto plan B. Last year I seen a model of The Ogden Salvage Company in an issue of The Modeler’s Annual, and decided I had to try it. Looking it over I decided it would be a good candidate for the imported door.
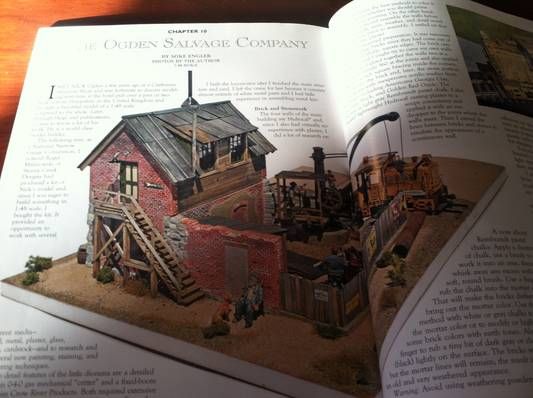
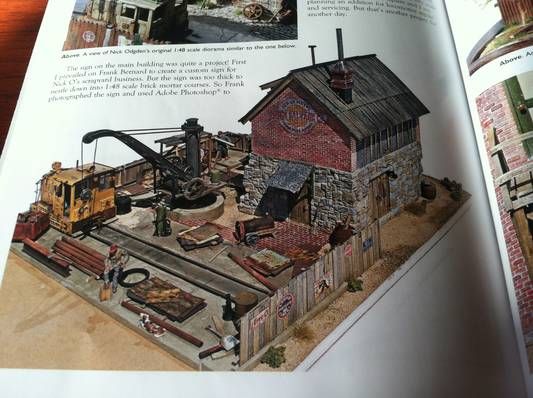
Now its time to look through the shop for materials. More to come soon…
Better get a move on! time is running out!
Terry
Yea I know lol a third of the way through the challenge isn’t the time to realize plan a won’t work lol
Got the crew out searching for leftover material in the shop, told them it was a rush so they had to put in a little overtime (I suspect they will want a bribe for this later lol) before the afternoon was up the walls were cut and stood up. Here is the progress
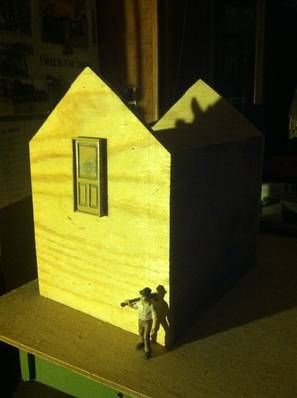
Here the door can be seen about where it will be placed. Watch that step when leaving, its a doozie lol more to come…
Time to cut some stone. this process will take a while, but coming out better than I expected. I hope the dremel holds out long enough to get it all carved
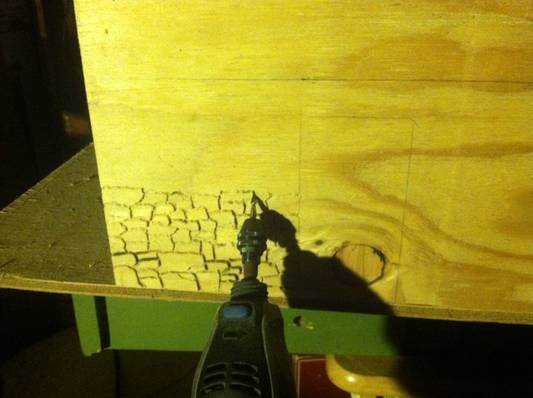
No sh!t! Hand carved looks great!!
Do you have the grout removal tool? It’s a big cone that goes on the dremmel to hold it level. It would be perfect for what you are doing.
Terry
Now that is clever Aaron I never thought of doing that to create the look of stones. I’m planning a stone foundation for my build and was going to burn the lines in since I’m using plastic wood on the that part. Maybe I will try your technique. Luckily my foundation is only 1" high.
Terry, I do have that attachment, and it works pretty good, but I decided it was easier without it for this part, but may use it later.
Todd: it has been working really well, it is time consuming beings half the rear wall and one side wall will be half stone, but coming out well. got the back part done with some primer, gonna do the side and will then post a pic for you to see. if you are only doing 1" high or so it should be pretty quick. Gonna try an exacto and a strait edge to do the brick portion.
Though I am definitely not a stone mason, I managed to get two lower walls carved over the last couple of days. Most of the rest will be brick
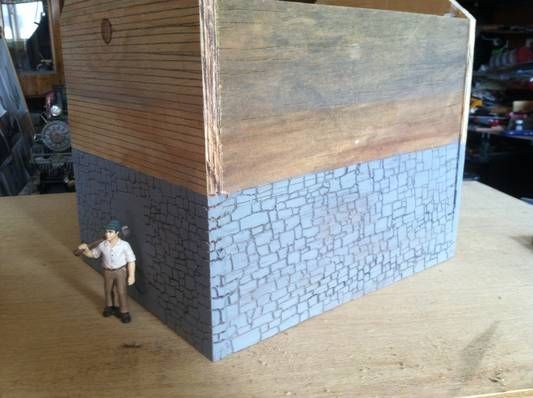
Next will be adding texture and washes to the stone, then on to the brick
Aaron, That is just awesome. love that idea. thanks
That’s definitely a nice job!
Uhhhhh, I think I just figured out how I’m gonna make the NRA Foundation…SWEET idea!
That looks so good and to think it is on plywood!
You are giving me ideas…
How do you seal the bottom edge of the plywood against water? In the past I used to paint several coats on but eventually it does fail and swells up and rots. Once I tried sealing a edge with glue another time I tried burning/charring it but all eventually failed. What I have done with my last 4 projects is to take a 2" piece of plastic wood and used that as a foundation so the plywood never touches the ground to wick up water. I’m using this approach on my challenge project.
Keep up the good work
Aaron, about time you got that crew working again…  lookin good, dude…
Aaron, That turned out really cool !! . I am gonna give that a try sometime…
Time for some brick! I started trying to carve in some brick, but the ply was a little tough to carve it in by hand, then I remembered I had a roll of brick from the after Christmas clearance sales and I started thinking, never a good thing lol
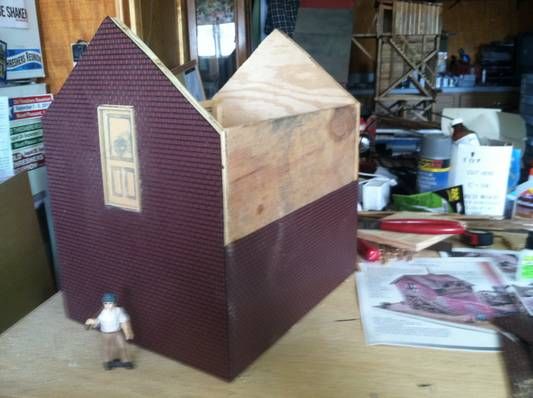
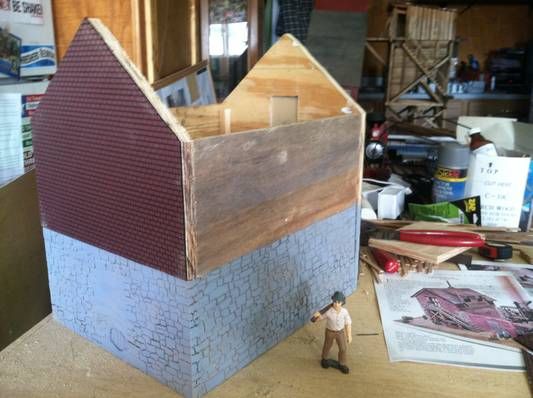
As for a sealant Todd, haven’t done anything on this as it will be part of a diorama, but would use plastic for a base, just carve out stones like I did on this one, and set the structure on top of it.
Unfortunately they weren’t giving bricks away, So I paid about $10 for it, so build cost is now $10 and counting.
So I couldn’t stand the look of the uniform color stone, so I decided to weather it early. So I got my india ink/alcohol mix and got started. Here it is after a couple of washes, I will go over random stones again to add more contrast to them.
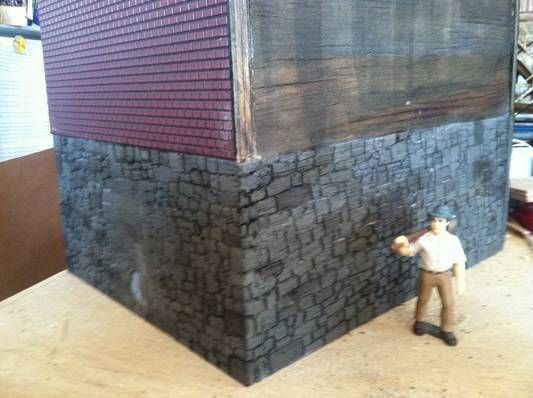
Aaron, that corner closest to the camera looks cool, nice job… 
Really nice Aaron
Thank you everyone! Boomer, I hope the detail of this comes out to half of what you can do.
decided to work on the upper office. I didn’t want to do a full interior, but I wanted something behind the windows. I decided to use a box, and just put in a small office. I was looking through my small boxes and found one that I got from Mik a couple years ago when I purchases some parts from him, so I decided it would be the perfect fit for the project. I started by putting in a door from the parts bin, then just a shelf, and a figure
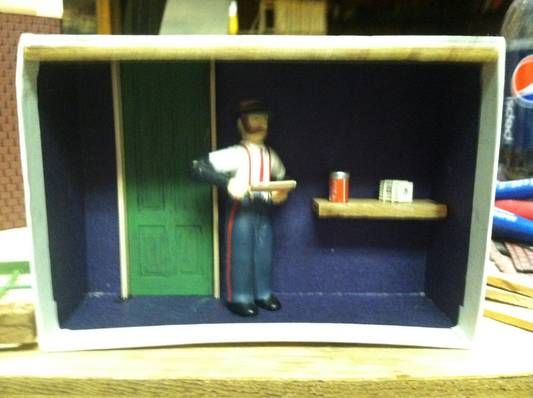
Then I found a couple windows from a birdhouse, so I modified them by cutting the molded on flowerbeds and shutters off, then framed them in the box. here is the result. Not a lot visible, but something to see if looking in
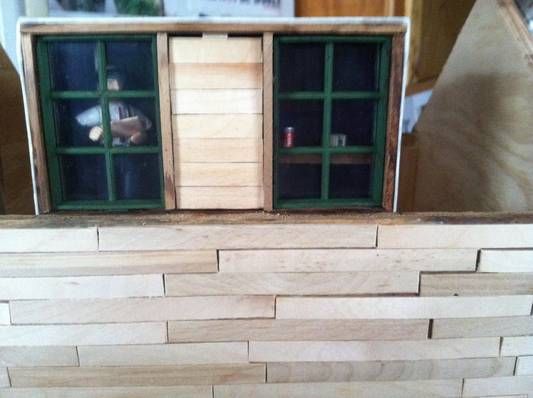
Now on to siding the outside of the box, then on to the roof