Large Scale Central

2011 challenge, Mik's

Seeing everybody else’s great builds got me to thinking, WHAT could I do that’s just off the wall enough to floor you all? I could do “absolutely nothing”… but what is the fun in that? It also had to be something that I could actually USE, either on the permanent layout, or take on the road. We simply don’t have room here for very many dust catchers… I narrowed it down to 3 choices, then wasted nearly a precious week dithering. I’m still not sure that I have quite what I need, or that what I don’t will arrive in time, but I intend to start on it tonight, anyway. (Did I give youse guys a big enuff head start this time? lol!) Without further ado, this is the old Lockwood Lease West Penn field pumping station at Warren, Pa.

The model will be summat compressed, and hopefully just a bit (but not a whole lot) less… disreputable looking. And for those who need drawings to picture what will be actually involved…

I borrowed the pix from pix from the Library of Congress Archive, if yer gonna swipe stuff, ya might as well steal from the best! http://memory.loc.gov/ammem/index.html

Day1: Some may notice that the above drawing says that the engine driving this thing was an Olin. I wasn’t 2 minutes into this project when I took my first “artistic license”— I didn’t have anything suitable here to MAKE an Olin WITH.

(http://www.little-mountain.com/pioneer/Media/showpics/2001bakerphotos/Olin.jpg)

So here’s what I did instead… First, I spent almost 90 minutes cutting up an Ertl diecast IHC famous… and remembered pretty quick why I dislike cutting Zamac!

(http://i592.photobucket.com/albums/tt7/tigerlillie06/His%20Stuff/derrick/P1300018.jpg)

Then, I laid the remains on it’s side and fabricated an engine base, foundation block, and skids…

(http://i592.photobucket.com/albums/tt7/tigerlillie06/His%20Stuff/derrick/P1300019.jpg)

To make a reasonable start on what will hopefully end up looking something like an Evans

(http://i592.photobucket.com/albums/tt7/tigerlillie06/His%20Stuff/derrick/evans2.jpg)

Sure, only oil field trash and old engine nuts might notice the difference. But I’m not gonna bother to lie abut something THAT simple! :stuck_out_tongue:

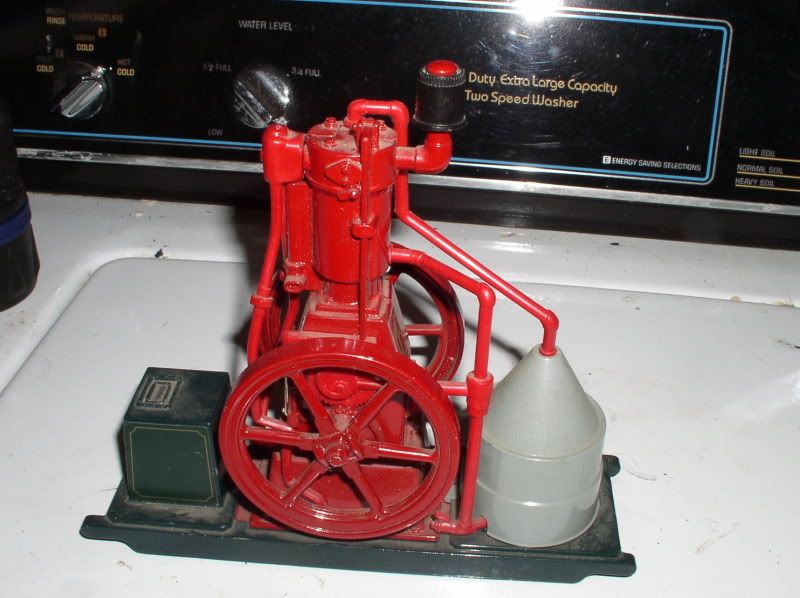
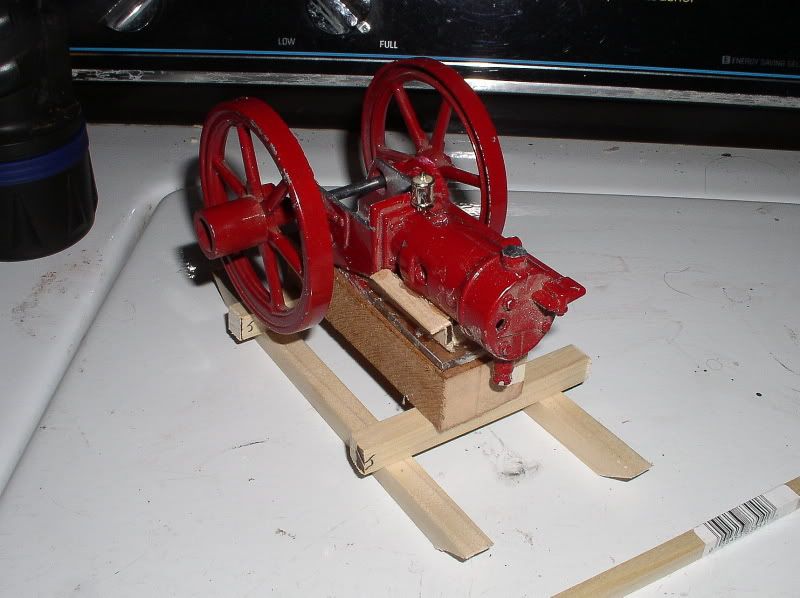
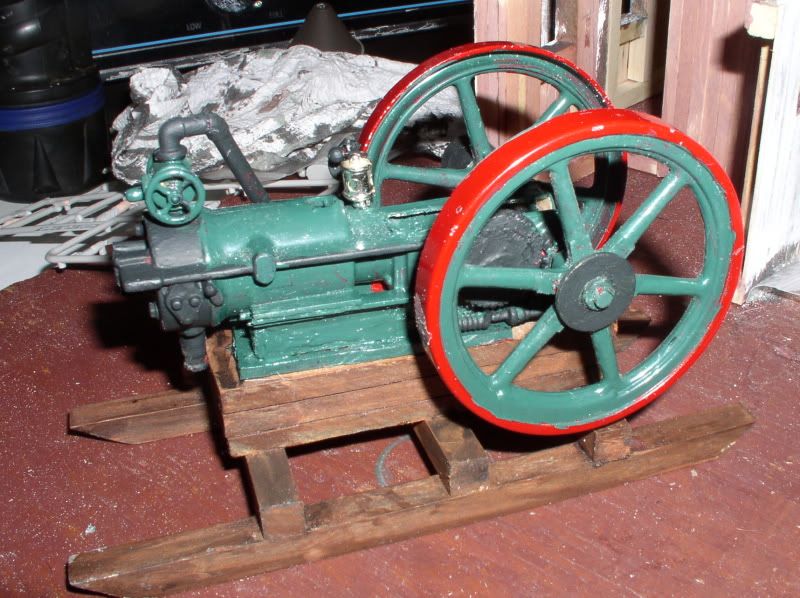
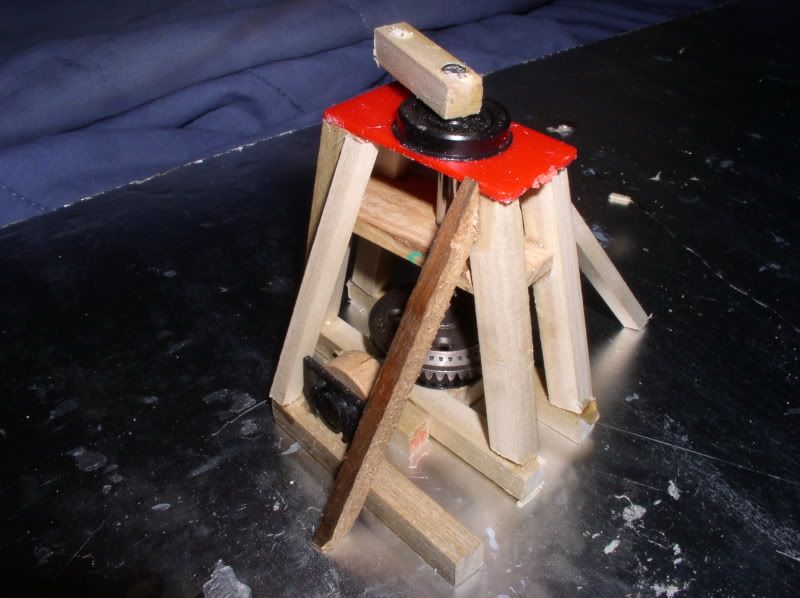
Day 2: Played it kind of lazy today. First, I foodled with the Evans a bit more. It’s not a ‘finescale’ model by any stretch of the imagination… but it’s perfectly ‘fine’ for inside a building. While I was working, I got to thinking… “Why aren’t there any 15-25HP gas engine models on the market in ANY RR scale?” Engines of this size were very common to power machine shops, carriage works, feed mills, water pumping stations and even small town power supplies, etc. (not JUST in the oil fields), back in the days before rural electrification, and in many places even right up until WWII or later… They aren’t ‘sexy’ enough, I guess… (On that note: If one of you semi-commercial resin casters wants to borrow this one after the challenge to use for a pattern, backchannel me. I’m thinking it could actually be done as a kit with only 6-8 castings) Anyway, back to the job at hand I decided not to model the crank and connecting rod, I’ll just make a ‘sheetmetal’ crank guard to cover that area so nobody will notice!

(http://i592.photobucket.com/albums/tt7/tigerlillie06/His%20Stuff/derrick/P1300018_01.jpg)

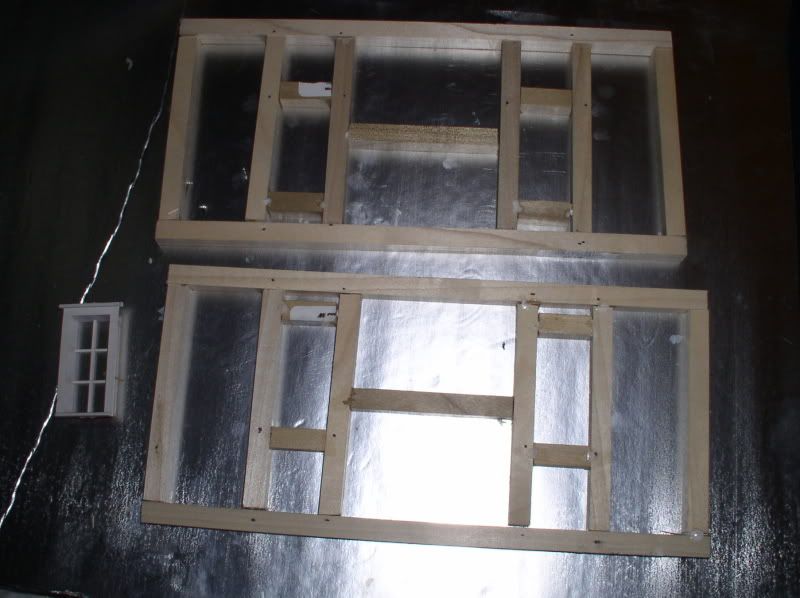
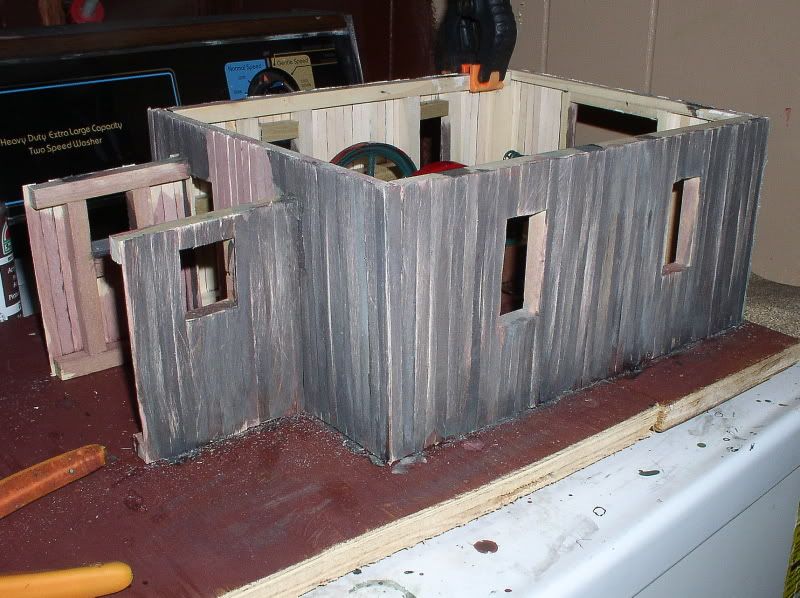
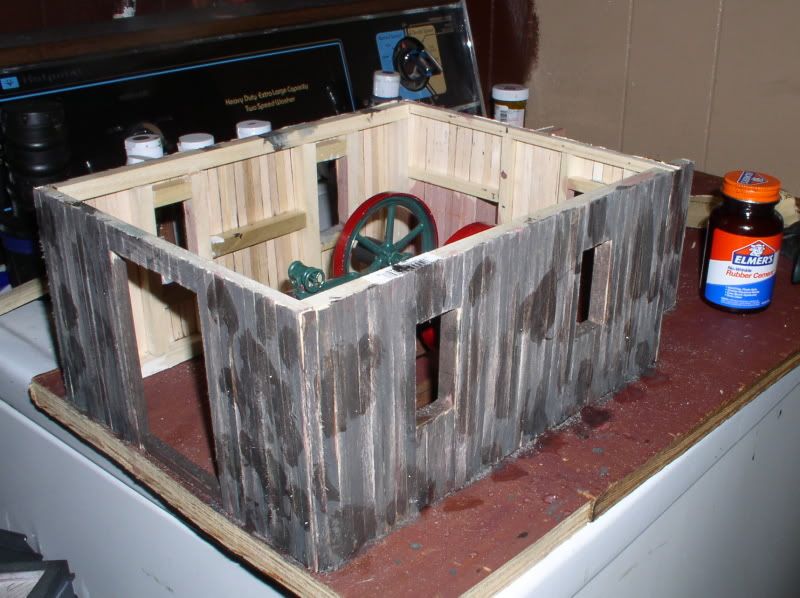
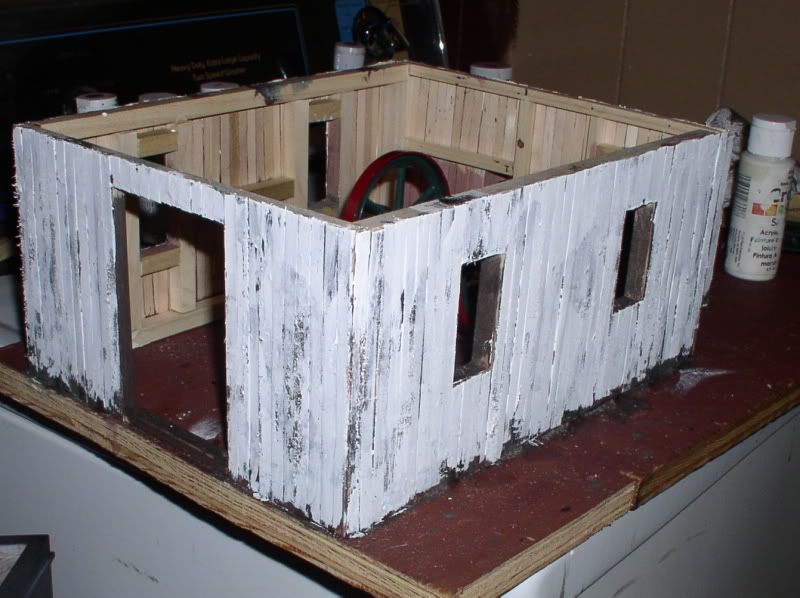
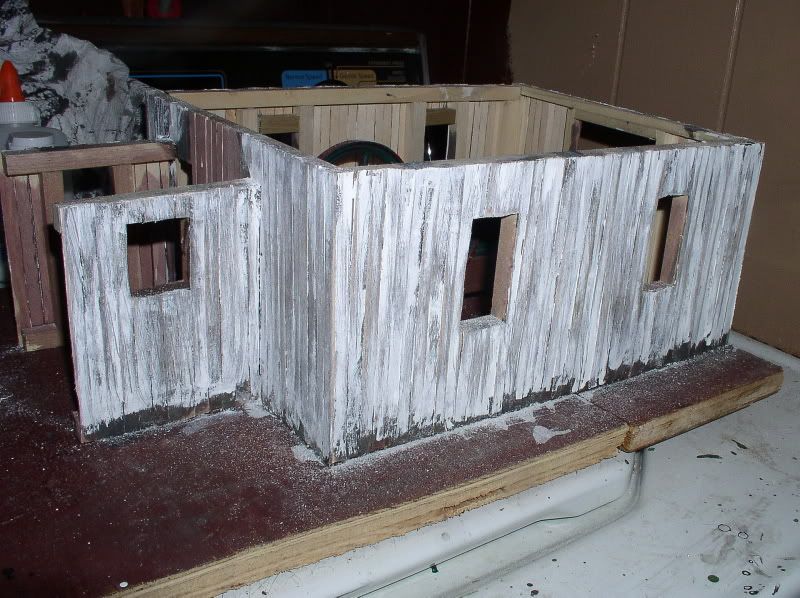
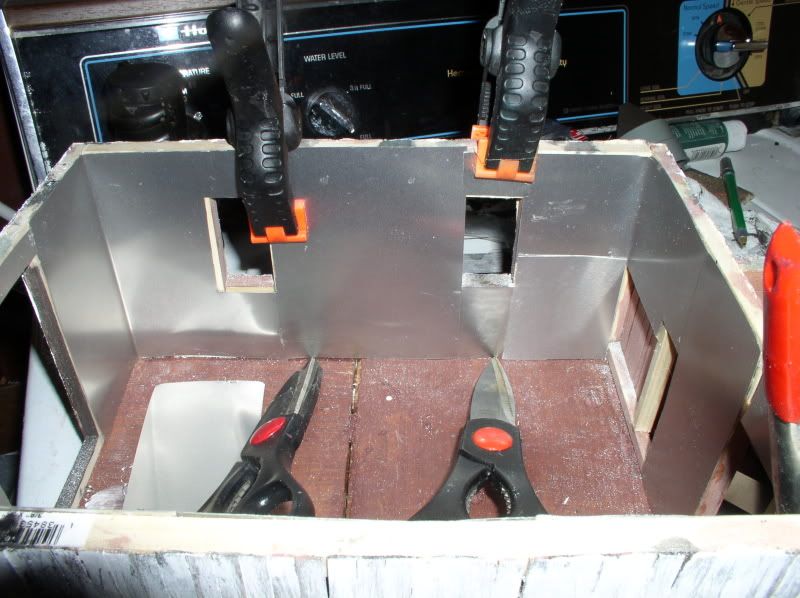
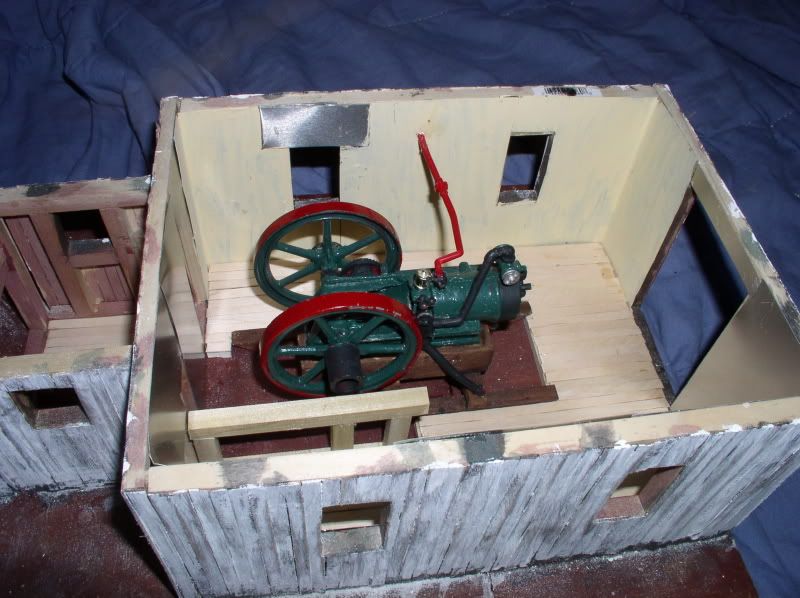
Next, I framed the side walls on the engine house. 3/8" square works out to 9x9s in 1/24, but they were here, and the extra strength to help hold up the roof and resist accidental 1:1 oopsies won’t hurt anything either.

(http://i592.photobucket.com/albums/tt7/tigerlillie06/His%20Stuff/derrick/P1310019.jpg)

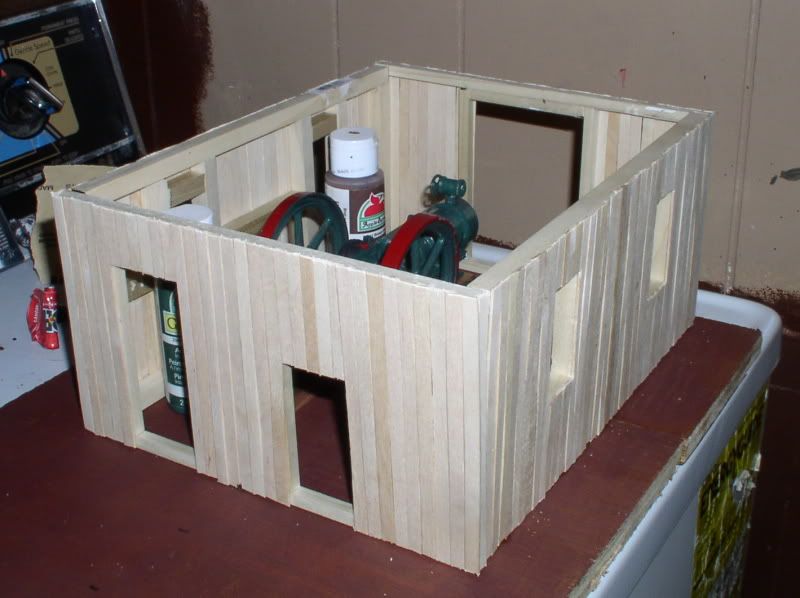
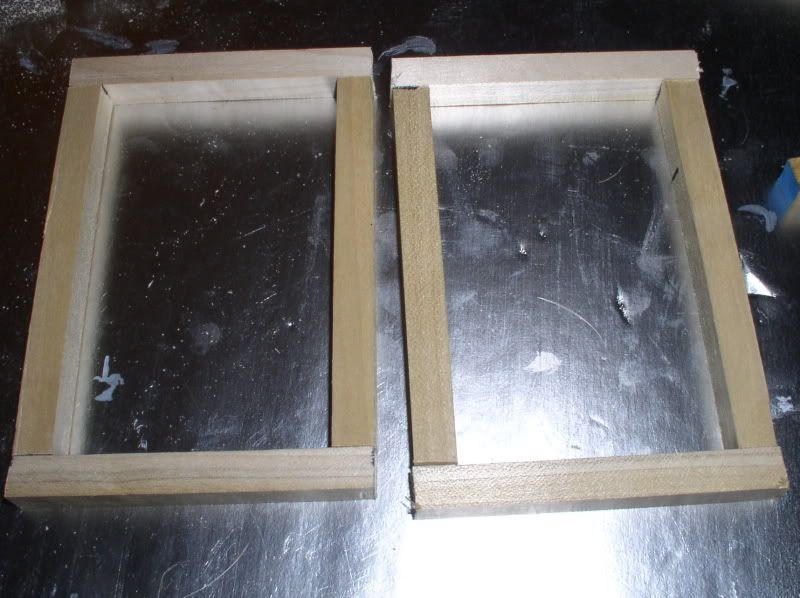
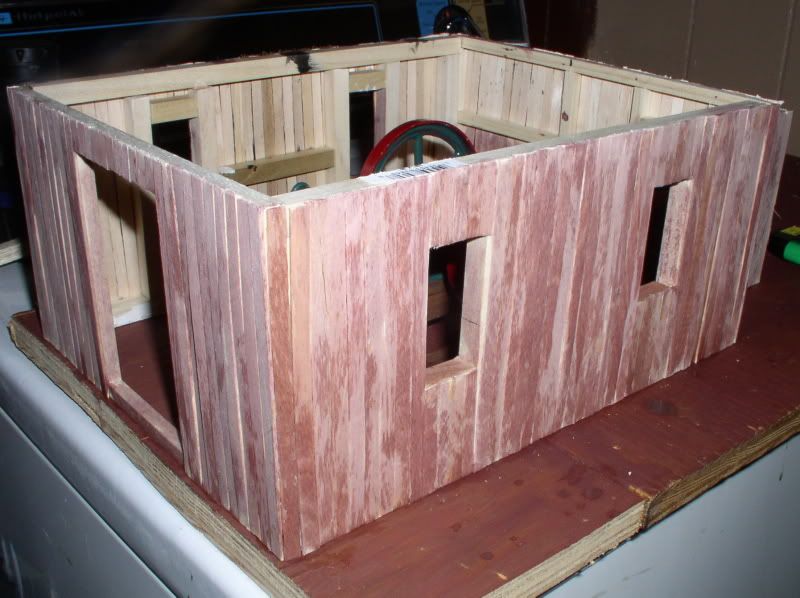
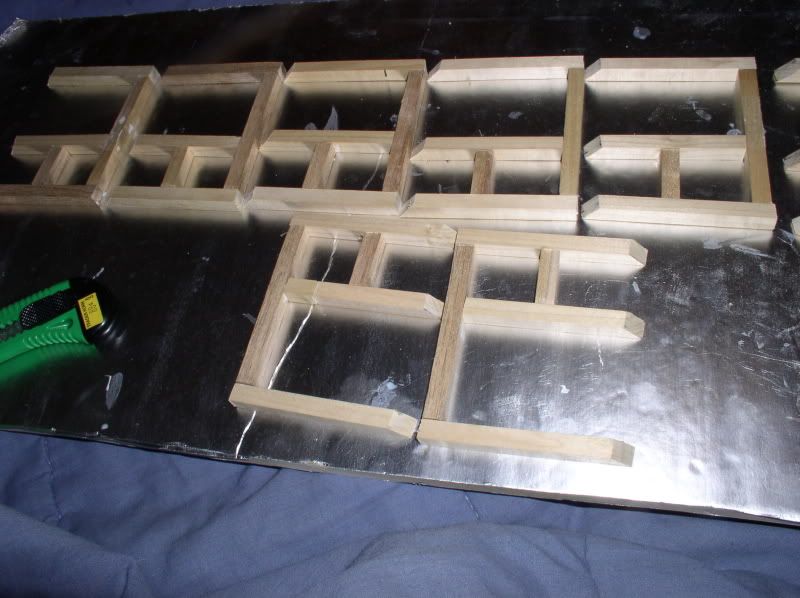
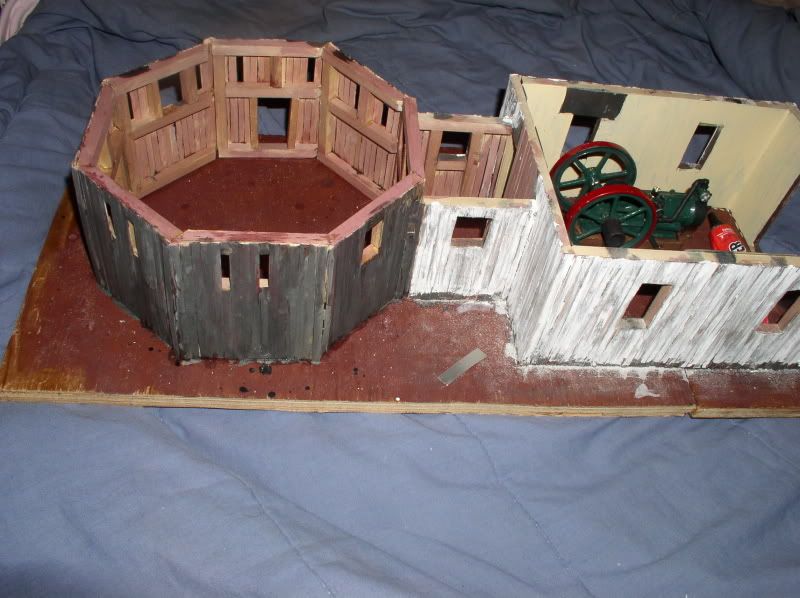
2nd major bit of artistic license, the original was sided with corrugated iron. I don’t have a crimper OR a supply of empty pop cans, so it’s wood sided with coffee stirrers. I WILL probably sheath the inside walls with plain ‘sheet iron’, as per the original because it was a sensible means of semi-fireproofing the structure. The lower part of the end walls were framed with 1/4" square, or scale 6x6s, as they don’t support as much of the structural load. I’m really, really bad at roof trusses, so I’m thinking of maybe using my usual plywood triangles… unless I decide to hinge one side of the roof - or maybe make it partially removable, then I’ll have to do it the hard way… The power end is still not quite finished because I ran out of wood!

(http://i592.photobucket.com/albums/tt7/tigerlillie06/His%20Stuff/derrick/P1310020.jpg)

That’s it so far…

Day 3: SOMEBODY got the bright idea, since it’s supposed to start storming later tonight, that we needed to sally forth this afternoon in search of such grand luxuries as dog food, hamburg, and terlit paper… (we did buy milk, but didn’t need eggs or bread, lol!) So I lost several good hours for work… I ordered the reduction bevel gears for the power off an r/c shop before we left, $6 for the pair… over half the budget. But I’ll now be able to make it “operable”… if they arrive in time. After dinner I finished siding the outer walls of the engine house and pieced together a plywood base. Then I erected the 4 walls and stuck the engine inside temporarily to get a better feel for the layout… IMO it actually looks pretty good!

(http://i592.photobucket.com/albums/tt7/tigerlillie06/His%20Stuff/derrick/P2010019.jpg)

Then I started the condensor/compressor room walls (the part that looks sorta like a breezeway between the two big parts). I’ll side those later tonight. Shouldn’t take more than about 10 minutes since they are a bit over 3" long.

(http://i592.photobucket.com/albums/tt7/tigerlillie06/His%20Stuff/derrick/P2010018.jpg)

Day 4; Rather than start on the power house, I decided to work on the exterior engine house walls some more today. I’m looking for a specific effect that I’ve only read about, but never tried before… This method I’m going to document is experimental as far as I’m concerned, so here goes nothing… First I gave the raw wood a wash of watered red/brown

(http://i592.photobucket.com/albums/tt7/tigerlillie06/His%20Stuff/derrick/P2010018_01.jpg)

Then with watered black

(http://i592.photobucket.com/albums/tt7/tigerlillie06/His%20Stuff/derrick/P2020019.jpg)

The with watered down grey/green

(http://i592.photobucket.com/albums/tt7/tigerlillie06/His%20Stuff/derrick/P2020020.jpg)

I left it dry for a few hours before lightly sanding with coarse sandpaper (60 grit) WITH the grain to cut randomly through the various paint layers and roughen the boards.

(http://i592.photobucket.com/albums/tt7/tigerlillie06/His%20Stuff/derrick/P2020021.jpg)

It actually looked pretty good at this point… but not what I was after. The next step was to randomly lightly stipple (is that the right word) the walls with rubber cement and let THAT dry.

(http://i592.photobucket.com/albums/tt7/tigerlillie06/His%20Stuff/derrick/P2020022.jpg)

The last step for today was to cover the walls with the color it was supposed to have been painted with. An even coat would have just been a waste of effort, so I just simply slathered it on.

(http://i592.photobucket.com/albums/tt7/tigerlillie06/His%20Stuff/derrick/P2020023.jpg)

The next step requires that the present mess be thoroughly dry before continuing, so I have to wait until tomorrow to see if it worked. Patience may be a virtue, but it isn’t one of mine :frowning:

Looking good. I like that little structure could have many uses.

Day 5: I’ll let you guys judge if it worked or not…

(http://i1082.photobucket.com/albums/j371/AlleghenyValley/pumpingstation/P2020018.jpg)

It isn’t a process I’d want to use often, not because it doesn’t work, but perhaps because it worked rather too well. Decrepit, neglected buildings should be the exception, not the rule. Next I went back to work on the Evans. I detailed the head with a new rocker arm and ‘valves’, and started to plumb the natural gas line

(http://i1082.photobucket.com/albums/j371/AlleghenyValley/pumpingstation/P2020019_01.jpg)

I built the governor, re-installed the crankshaft and got the flywheels running pretty true - then realized I had installed it backwards and had to redo it… now they wobble :frowning:

(http://i1082.photobucket.com/albums/j371/AlleghenyValley/pumpingstation/P2020020_01.jpg)

The offside view. Not perfect, but pretty good.

(http://i1082.photobucket.com/albums/j371/AlleghenyValley/pumpingstation/P2020021_01.jpg)

I’ll probably build the clutch later this evening. The main diff between an ‘architectural model’ and an ‘engineering model’ is I get to approximate that stuff without it being functional :smiley:

Mik I like that ‘whitewash look’. A lot of old barns/buildings from my childhood had that same look to them, even the interiors of the dairy barns that i used to milk cows in as a part time job when I was a young 'un.

I really like the look of the building, it look’s like it has been there a long time. It look’s cool.

Day 6: Kim had a doctor’s appointment today… so we tried to go out early… operative word “tried”, driveway is solid sheet ice 2" thick with an inch of powdery snow on top. A perfect recipe for not going much of anywhere. It took us 3 helpers and 45 minutes to get it unstuck from the snow on the downhill side of the driveway… Then Kim just stopped right in the middle of the short hill up to the entrance (WHY???)… So we had to push the bloody thing some more. It took me another hour to start to feel warm again… somebody oughta shoot that lying groundhog!

After the doctor visit she decided that we had to go visit her mom while we were out… So the only progress was that I got myself a bunch of coffee stirrers and $3 worth of aluminum flashing to do the inside walls of the engine house (and maybe even part of the roof) on the way home… Pretty much a whole day lost. Wheee!

In an interesting turn of events, I find myself having to disqualify my entry from my own challenge — The R/C dealer informed me yesterday that the pinion I need to build the Power was out of stock. The only suitable replacement I could find that might be here on time was $10.99 - Putting me way over the limit. I’ll finish the build, but it won’t be submitted for judging. Since it is ineligible

(http://i1082.photobucket.com/albums/j371/AlleghenyValley/pumpingstation/P2070019.jpg)

(http://i1082.photobucket.com/albums/j371/AlleghenyValley/pumpingstation/P2070018.jpg)

(http://i1082.photobucket.com/albums/j371/AlleghenyValley/pumpingstation/P2070020.jpg)

I’ll vote to cut you some slack on the cost of the part if you will cut me and BOB some slack on the size thing. I’m a little over the 2 sq ft size

So is this, if you measure the plywood… it’s up to the rest of the builders. I think the $18 I’ve spent so far is a LOT more than ‘just a little’ over $10… unless you work for the government procuring office. :stuck_out_tongue:

I think we should allow Mik some slack as well. Put it into the judging make a note that it was over limited. Since its suppose to be a fun challenge and you were honest on the cost. I say your still in.

No problem, I’m easy.
I’m probably a little over on size myself. But I wasn’t going to go through the trouble of cutting 1/4 inch acrylic for a couple of inches.
Ralph

Mik looks like your still in this.

considering:

  1. its a hobby, not biz-world.
  2. Mik is shouldering the prizes.

resolving:
Mik can deduct a considerable sum from his budget as compensation for the prizes.

anybody seconding this?

Gears came, walls of powerhouse framed. Geyser brought things to a sudden stop… then a bad case of galloping apathy took over.

Will it be finished in time? Not sure I even care. It’s the “Winter Blahs” on steroids.

Even though I didn’t FEEL like working on much of anything, I decided I needed to do something. If anybody else tried to build an 8 sided structure without fixtures or jigs, I’d question their sanity. But I just honestly didn’t give a rip if it came out a little bit drunk… and it did.

(http://i1082.photobucket.com/albums/j371/AlleghenyValley/pumpingstation/P2120018.jpg)

(http://i1082.photobucket.com/albums/j371/AlleghenyValley/pumpingstation/P2120019.jpg)

Next I started constructing the power… and somehow managed to make it too tall… yes, those are those expensive gears I’ll look into shortening it inna bit.

(http://i1082.photobucket.com/albums/j371/AlleghenyValley/pumpingstation/P2120022.jpg)

(http://i1082.photobucket.com/albums/j371/AlleghenyValley/pumpingstation/P2130023.jpg)

The floor in the engine house only took about an hour

(http://i1082.photobucket.com/albums/j371/AlleghenyValley/pumpingstation/P2130024.jpg)

And that’s it for today…

(http://i1082.photobucket.com/albums/j371/AlleghenyValley/pumpingstation/P2130025.jpg)

I like that octagon building. Did you just use glue to hold the sides in place, or are there also some nails? I guess the roof won’t be removable; it’s a shame to cover up that interior.