Large Scale Central

Waldbahner's Garden Railroad

Hello,

since we moved to our new home three years ago, we’ve a nice garden section behind the house and my wish was, to build a garden railroad there. Unfortunately it’s not a big space, but it would work for some nice “playground” for my trains.

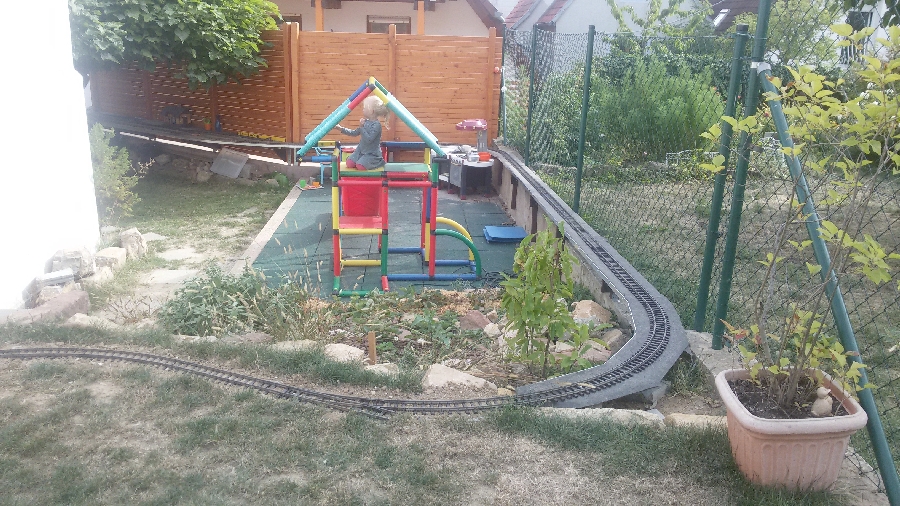
First some details about the topography. The property is located on a slope, so the garden is setup on different levels. So I had to deal with some tricks, which finally also brings some benefits. The main railroad area will be in the upper garden. Due to the highed difference between the upper and lower garden, I can’t run the trains on ground level on both. So I take advantage of a raised station at the lower end of layout, between 3 and 2’ above the ground. The grades on the main line are limited to 3.5%, while I look forward to work with up to 5.5% on logging spurs. All curves are minimum 4’ radius. Here’s the latest plan of the whole situation. In the meantime, I skipped the second terminous station and will go for a return loop at the end of the line. Not shown yet are logging spurs.

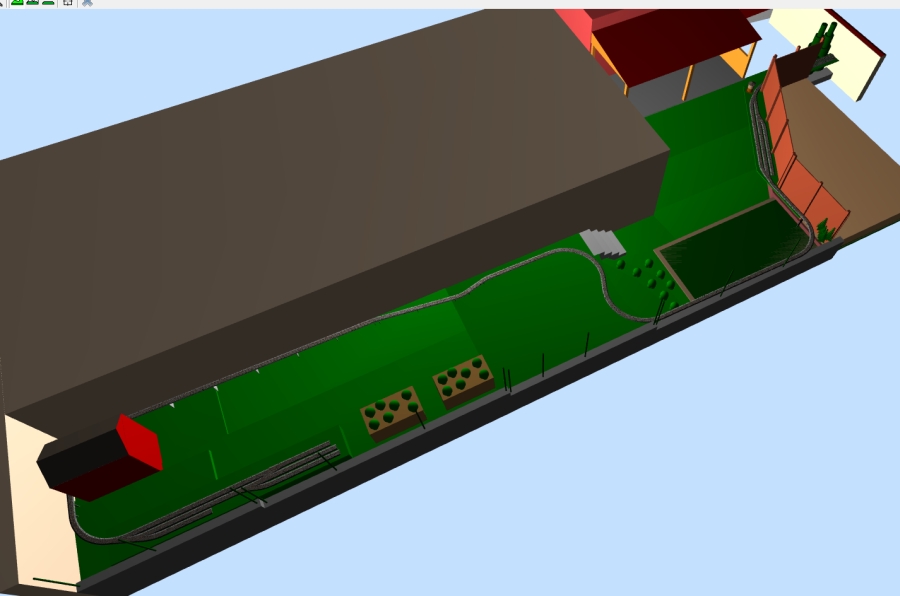
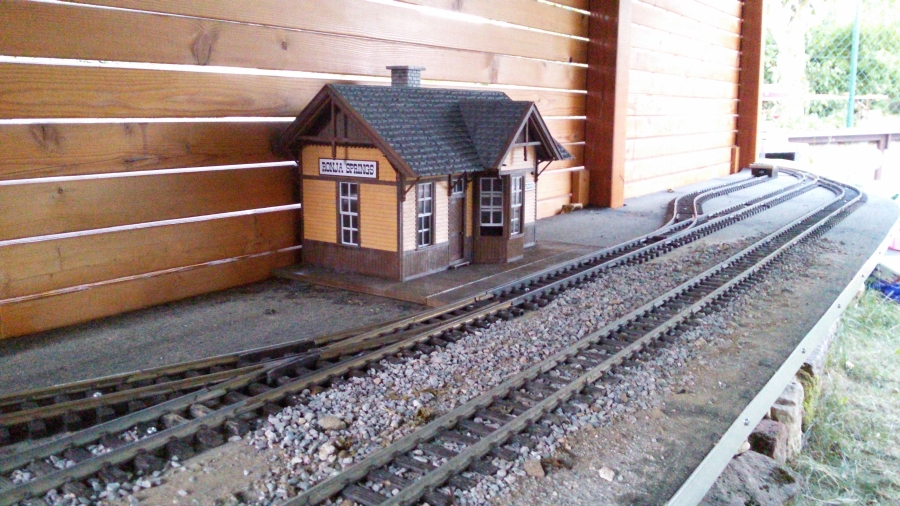
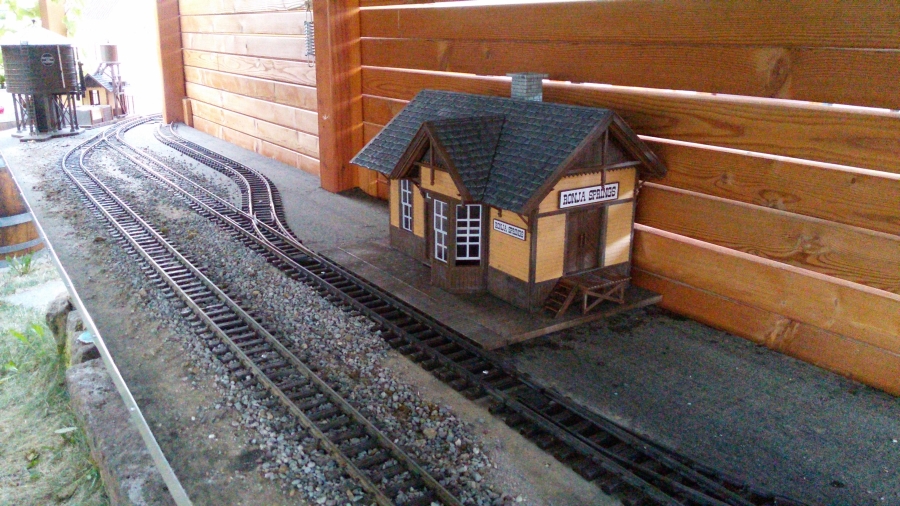
Starting point of the layout is the lower station, which is mounted to the wooden fence. This station will have some sidings for cars and switching and a long passing track for 11’ long trains.

The layout itself will be designed as “operating layout” so there’s no continous running planed. This comes due to the fact that I like operating more than watching. And there are some continous-style garden railroads around which I can use for this purpose. So I decided to focus on the operation-part, which are missing on the roundy-rounders.

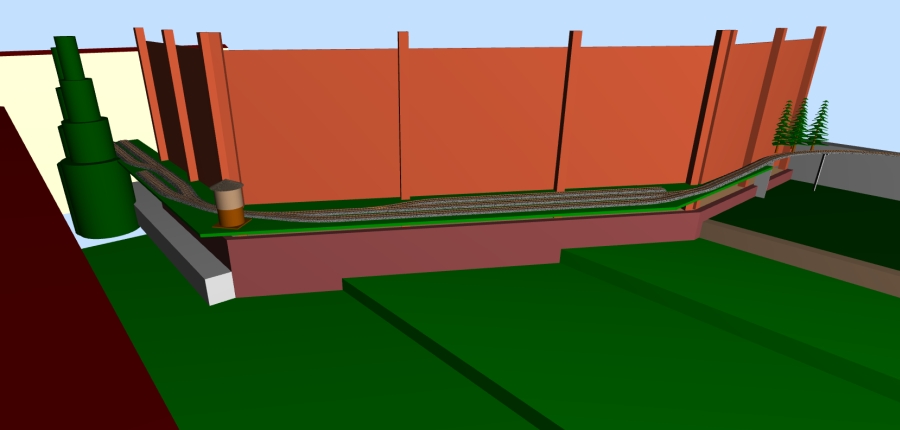
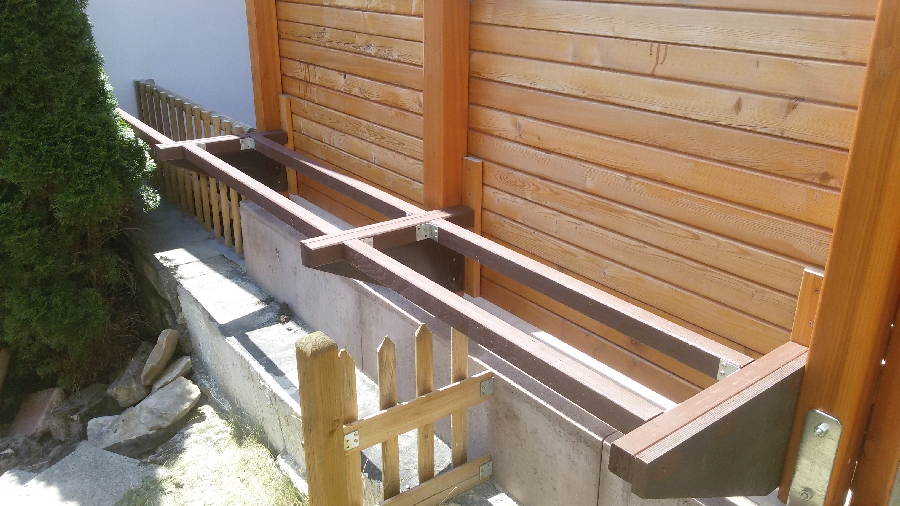
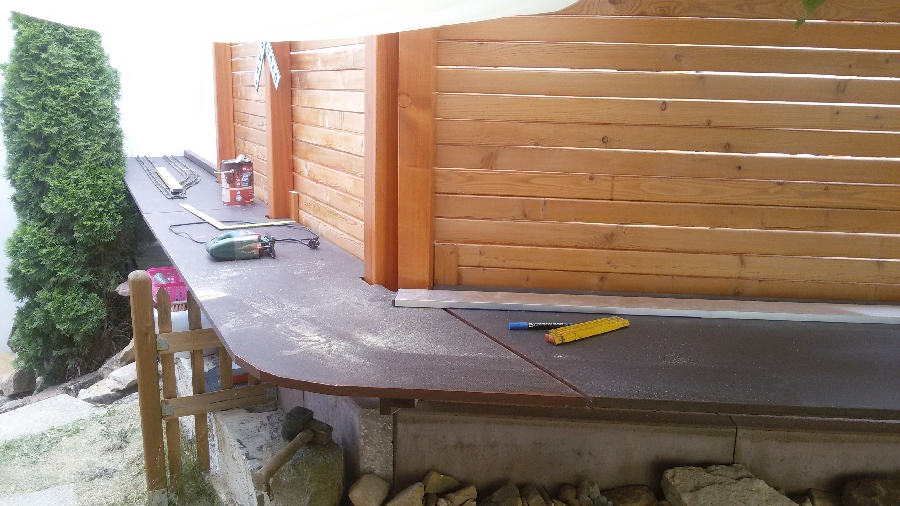
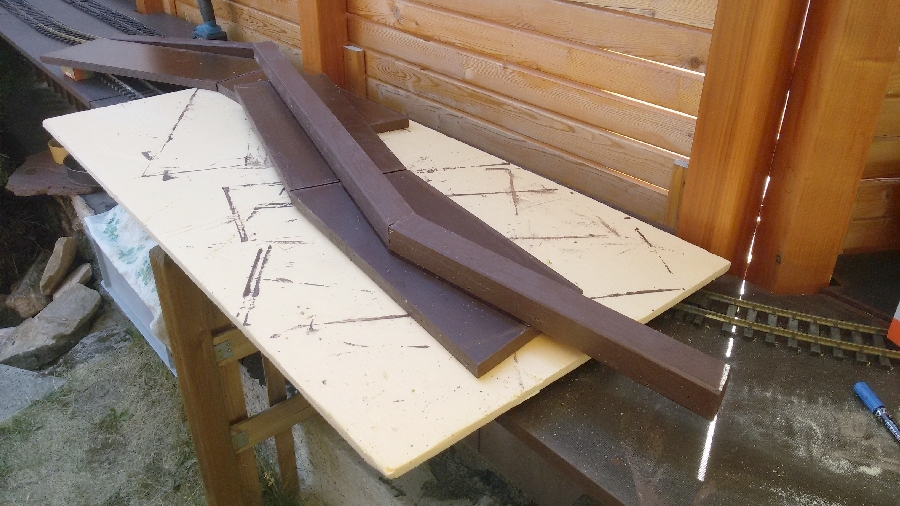
The construction began some week ago during the summer vacation. The raised section of the railroad is set on a wooden base construction, made from weather resistant wood. A cover from roofing felt may help to keep moisture and water away from the wooden construction.

Ready for track laying…

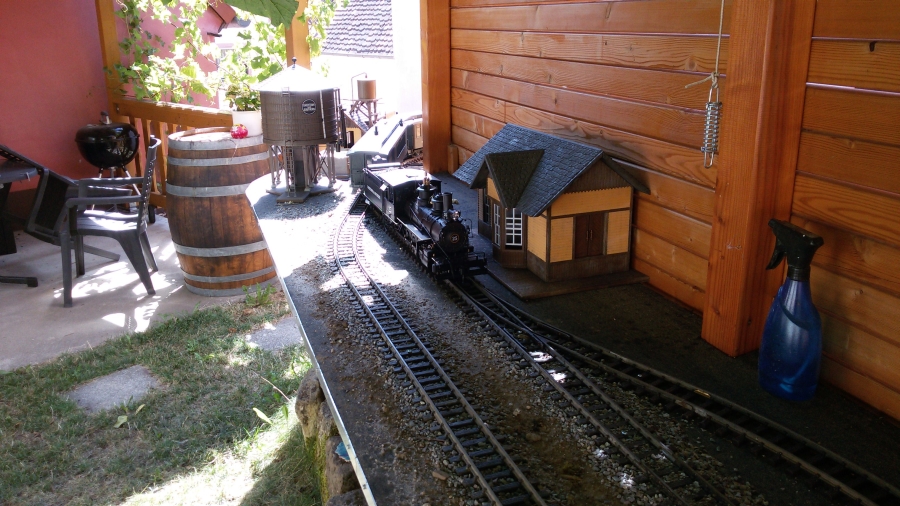
The left portion features two stagging tracks. Each will hold 4 30’ cars. The short track along the front edge is a tieup-track for live steam locos and can be used as caboose track as well.

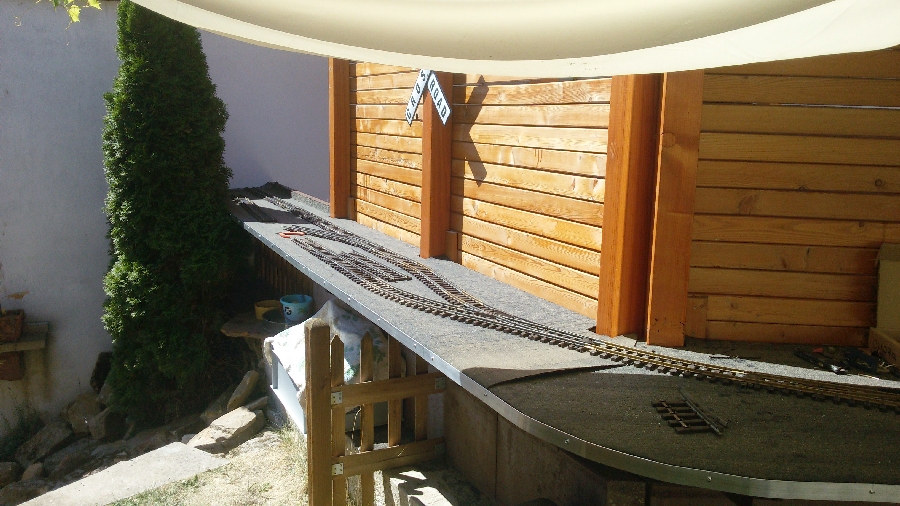
The right portion of the station holds the passing loop and a siding for team track and industries.

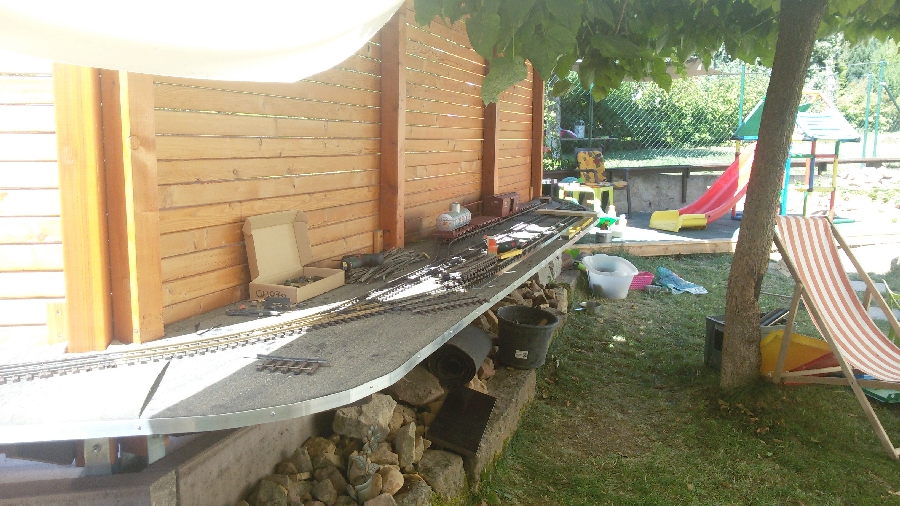
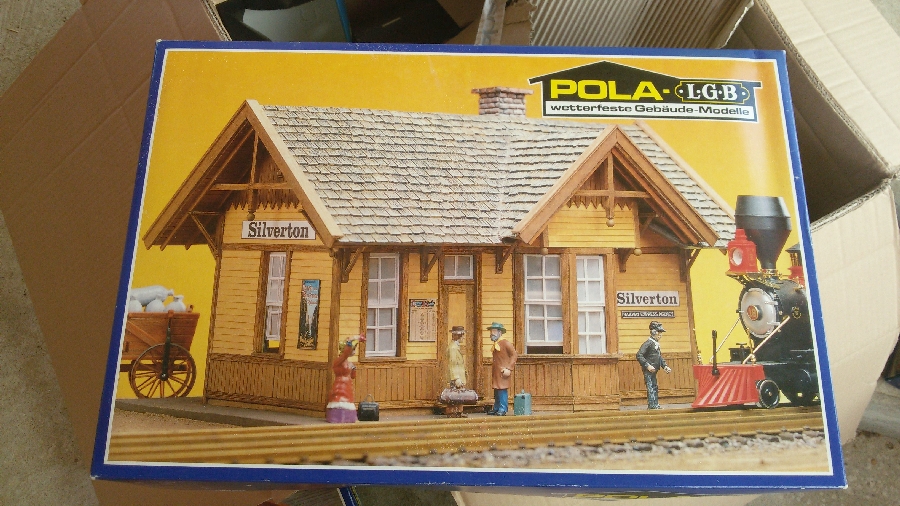
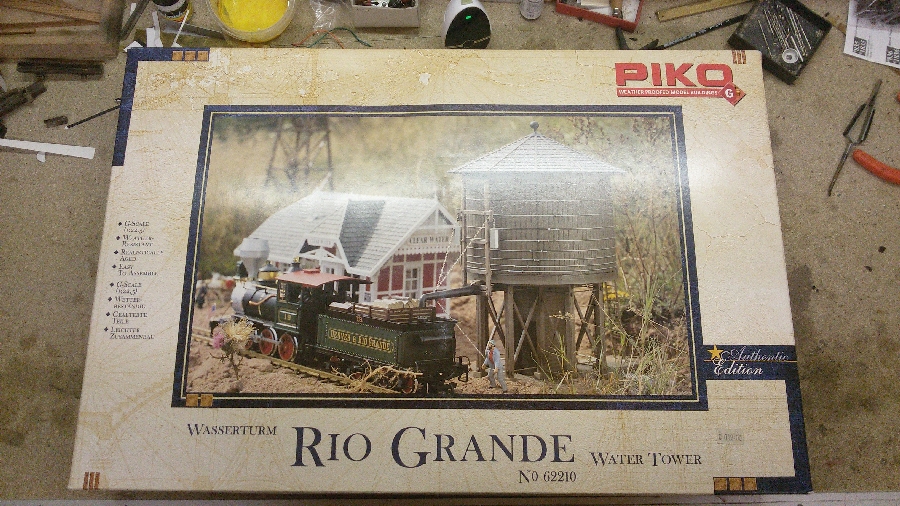
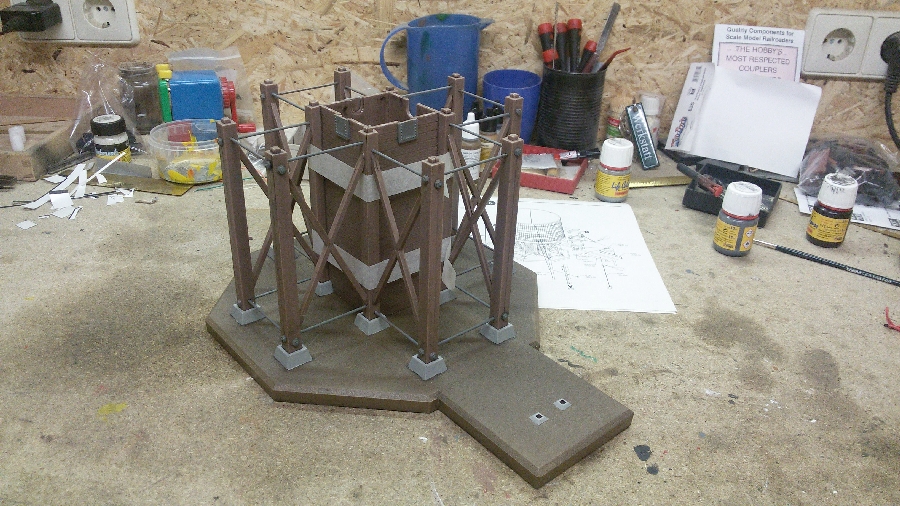
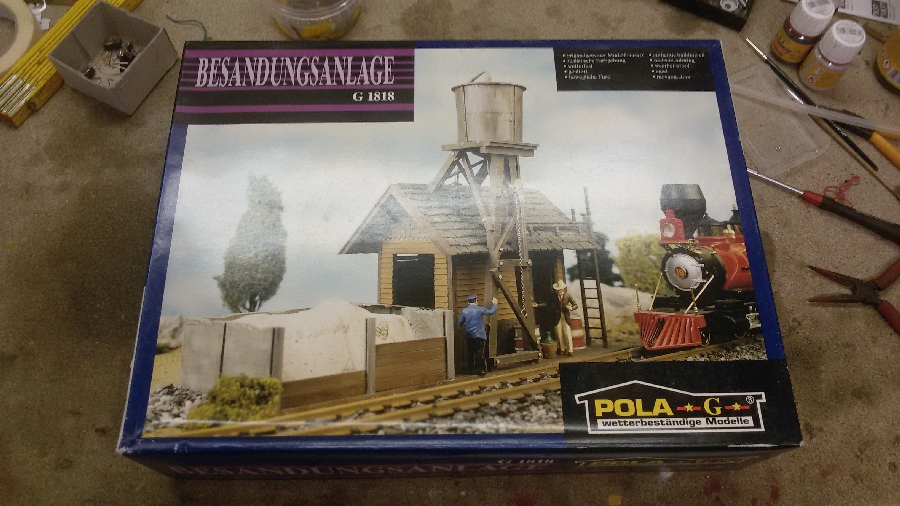
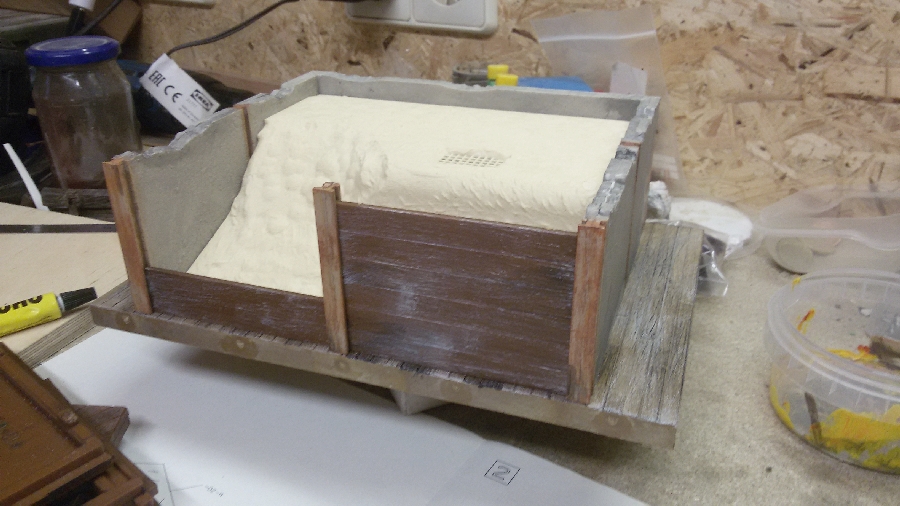
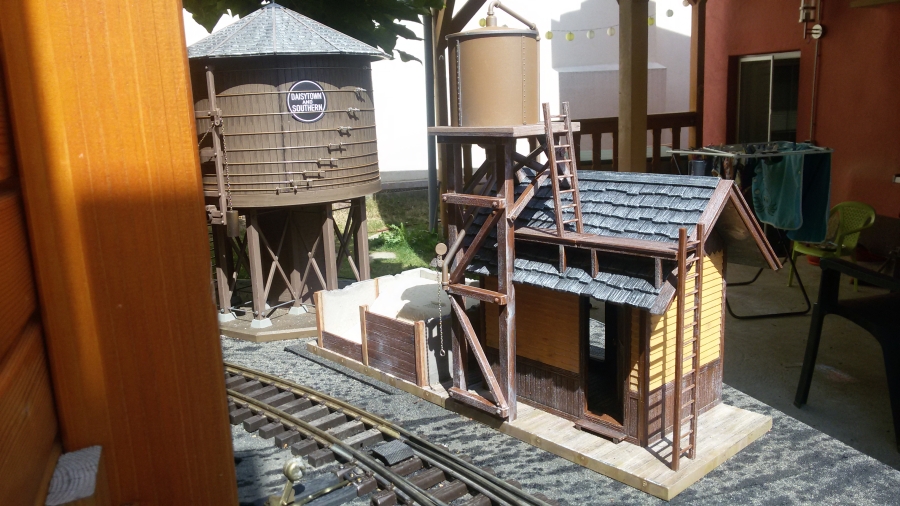
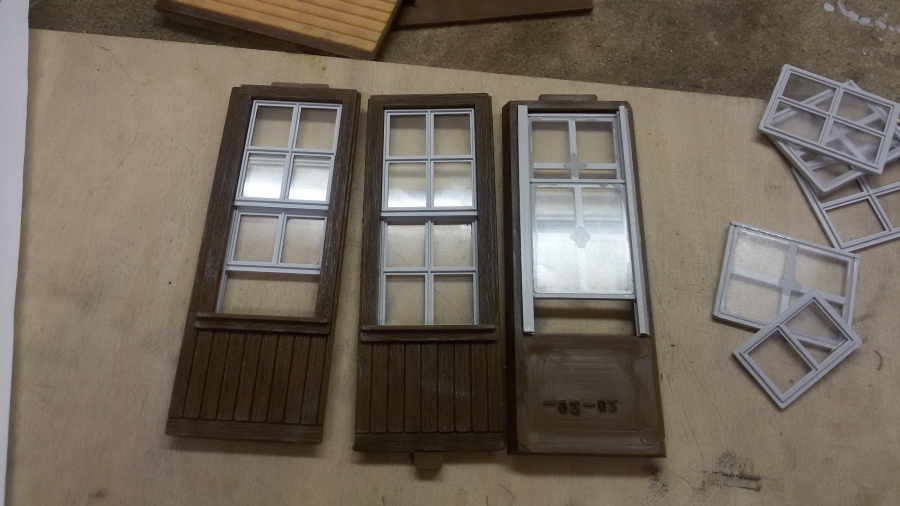
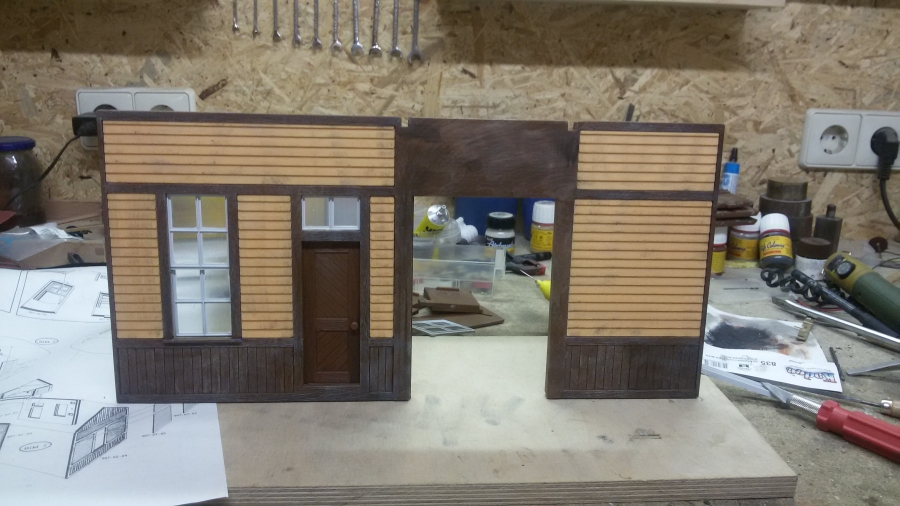
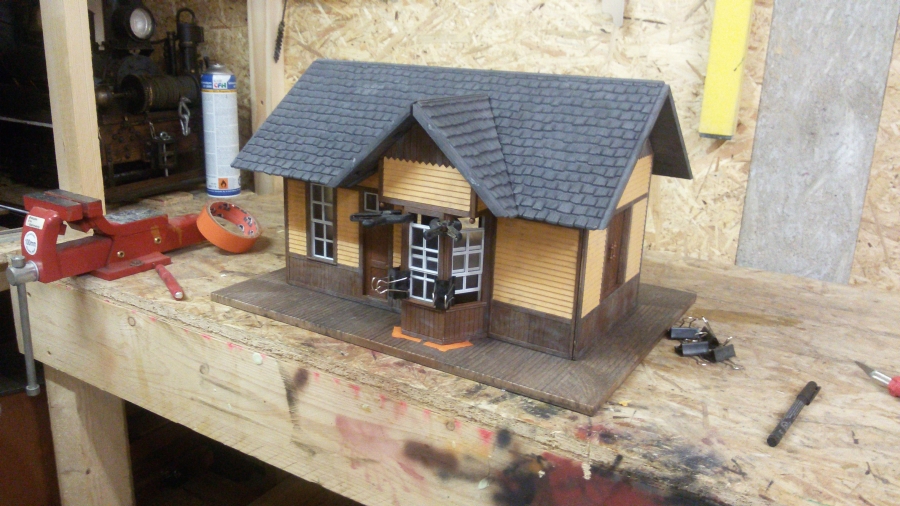
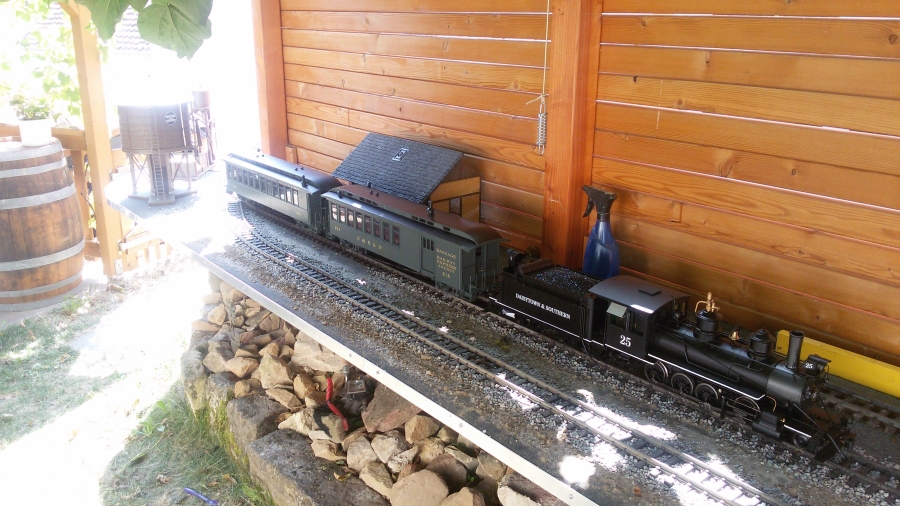
That’s for now. Actually I work on the station building. The sanding house and water tower are already down as you can see in this short preview of a train arriving at “Ronja Springs”.

Regards, Gerd

Great start !

So do you use the slide to relieve stress ? (http://www.largescalecentral.com/externals/tinymce/plugins/emoticons/img/smiley-wink.gif)

Gerd,

Welcome. A fine RR you are building. I am embedding your video so ALL of us can see it. If you log in on the HTTPS all of us can see your video since the site owner made this site a secure site.

Welcome, Gerd, and I agree you have a great start. To me a great starts means there’s aren’t too many limitations on what you might do. The 4’ radius turns may limit your selection of equipment, but you’re way ahead of me in one aspect: your railroad is well off the ground; you will never regret that, never!

The lawn chair is too comfortable, too tempting. Also, would your children mind if you turned their playset/slide into a gold mining district???

p.s…I had to look up Boechingen, just my uncontrollable curiosity…looks to me like you live in paradise!

Hello,

many thanks so far. It’s not the first garden railroad I build, so I was able to test many mistakes on the first one :wink:
@Joe - thanks for the hint about Youtube videos. I’ll take care the next time.

@John - You’re right about the limitation in rolling stock based on the 4’ curves. But as I can run 4-car trains (plus loco & caboose) as a maximum, there’s no need of a K27 or other huge loco. So I guess I’ll be save so far.

Our daugther (which actually is the president of the slide) already operates a “gold mining district” just beside the playground - A strawberry bed (http://www.largescalecentral.com/externals/tinymce/plugins/emoticons/img/smiley-tongue-out.gif)You can be sure, that the harvest will be hauled by the trains in future.

About Böchingen - That’s a wounderfull view of our little village. I can even spot our house there. It might not be paradise, but it’s sure close to it (as we think). Just concider that all the fields around are actually vinevards (http://www.largescalecentral.com/externals/tinymce/plugins/emoticons/img/smiley-tongue-out.gif)

Another very intresting fact is, that there were rails through the village years ago. A overland trolley line once ran through from Landau to Neustadt and the rails where directly in front of our house(s - we first lived in the one to the right, now in the left one)

(https://gerds-modellbahn.de/wp-content/uploads/2017/01/001.jpg)

And while I’m a model railroader, I already made an H0-version of the situation.

(https://gerds-modellbahn.de/wp-content/uploads/2017/01/003.jpg)

Now I’ll go into my workshop and continue work on the station building.

Cheers, Gerd

Fred will love you for the “roundy rounders” comment… already making friends!

Greg

Looking good. Keep us up with the progress you are making!

Looks to be a nice project to watch as the building goes on… (http://www.largescalecentral.com/externals/tinymce/plugins/emoticons/img/smiley-cool.gif)

Hello folks,

time to show you some details on the structures visible in the short video clip above.

The water tank is build from a Piko-kit and represents a “Rio Grande”-style water tank.

(https://waldbahner.de/wp-content/uploads/2018/08/IMG-20180729-WA0038.jpg)

It’s all plastic with some metal chains and weights for the spout. It’s even possible to make it functional for real water, but I did not on my model.

(https://waldbahner.de/wp-content/uploads/2018/08/IMG-20180729-WA0042.jpg)

The spout can be folded down, while the counter weights will hold it in an uprigt position. Here I glued the feeder pipe in place. That’s why the whole tank sits upside down.

(https://waldbahner.de/wp-content/uploads/2018/08/IMG-20180729-WA0046.jpg)

Actually, the water tank is NOT glued to the top structure as well as the roof isn’t glued in place. So one can take the tank appart, place the water tank upside down above the superstructure and store the whole water tank in less space. I installed a threaded road on the layout base which holds the tank securely in place as it’s close to the edge of the layout.

(https://waldbahner.de/wp-content/uploads/2018/08/IMG-20180730-WA0002.jpg)

The next kit is the “Silverton”-style sand house. As usual on model train buildings, they are all a bit undersized, especially while they are made for “G-scale” but I use them for 1:20,3 scale which is approx. 10% larger. On the other hand, I don’t have huge space, so the smaller structures turn out very well for me, especially as I build freelanced railroads at all. So there’s no “real prototype” to compare with.
And I also choosed the plastic kits due to the outside use. The weather can be rough in Germany, so wooden structures wouldn’t last as long as plastic.

(https://waldbahner.de/wp-content/uploads/2018/08/20180730_190354.jpg)

Oh, I also forgot to mention, that I spend a dry-brush on most plastik parts to take away the plastik-shine and to make the structures look better. I also painted the single bricks in the bunker walls of the sand house.

(https://waldbahner.de/wp-content/uploads/2018/08/20180730_194840.jpg)

I’m not happy yet with the original “sand” inlay. Maybe I’ll replace it some day.

(https://waldbahner.de/wp-content/uploads/2018/08/20180730_194826.jpg)

The Pola kit’s are made from very strong parts. The walls of the houses are approx. 10mm thick and very sturdy. I glue them together with UHU plast glue. Actually, the kits includes 2-3 tubes of glue, but due to the age, they are not longer usable.

(https://waldbahner.de/wp-content/uploads/2018/08/20180730_205651.jpg)

Here’s the finished sand house placed beside the water tank at the south entrance to Ronja springs between the “yard” and the “station”.

(https://waldbahner.de/wp-content/uploads/2018/08/20180821_134645.jpg)

Now it’s time to get the station building started as well. I’m proud to got all the “Silverton”-line kits from Pola, so this will become the main station at “Ronja Springs”.

Cheers, Gerd

Hello again,

here’s some progress on the station building for “Ronja Springs”. The double slip windows are functional.

(https://waldbahner.de/wp-content/uploads/2018/08/dep_2.jpg)

The side walls are made from a brown base, while the yellow parts are inlays. Doors and windows will open.

(https://waldbahner.de/wp-content/uploads/2018/08/dep_1.jpg)

While gluing the front cabinet together, I put the roof on for a first overall dimension. What a huge building.

(https://waldbahner.de/wp-content/uploads/2018/08/dep_5.jpg)

Gerd

That makes up into a nice looking small station building doesn’t it,

A couple of signs and some clutter and it will fit right in.

I have one of them. I had to put wood strips into the window tracks to keep the upper sashes up.

Good morning,

David, thanks for the hint. I prefere glue on the windows. One of them I already glued into place to keep the upper sashes up. I also fixed all doors with tape on the back side, as I don’t “play” with the structures. In case of special photo-shootings, the tape can be removed very easy.

When I placed the station where it was original situated, the scene looked to crowded to me. Additional, a passenger train stopping at the depot will block the switch in front of the water tower and therefore the passing siding.

(https://waldbahner.de/wp-content/uploads/2018/08/dep_3.jpg)
(https://waldbahner.de/wp-content/uploads/2018/08/dep_4.jpg)

I also found out, that the long single spur track was a bit boring for switching operation. So I ripped out the two inner tracks…

(https://waldbahner.de/wp-content/uploads/2018/08/dep_6.jpg)

… and rearranged them. The depot of Ronja Springs is now located in the center of the passing siding. The shorter spur track to the right will lead to some industry.

(https://waldbahner.de/wp-content/uploads/2018/08/dep_7.jpg)

To the right is a spur track with 2 spots as team track, one spot will be equipped with a freight platform.

(https://waldbahner.de/wp-content/uploads/2018/08/dep_8.jpg)

Today I met LVLC Shay #5 at the depot. The Louise Valley Lumber Co. sawmill is located in Ronja Springs as well (at the far left end by the small rail yard, not physicaly shown by the layout (yet)).
Both railroads, the LVLC and D&S are using the same grade up to “Feddi Groove Jct”, also known as Strawberry Hill, where the logging spure entres the Louise Valley to the logging camp.

(https://waldbahner.de/wp-content/uploads/2018/08/dep_15.jpg)

Gerd

Looks great to me!

Looks good, much better location for the depot.

May I make a little suggestion? Turn that spur around and have it end near the depot for LCL deliveries. LCL was railroad speak for Less than Car Load. You could embed the track in asphalt/dirt, so trucks could also drive to the dock.

I like what you’ve done.

Hello and thanks for the feedback.

Hohn, your ideas sounds good as well, but will become hard to realize. The right spur is already fixed, as the industry-building is already under construction. Only possibility would be the reverse the right spur. I checked this out, but due to the compact layout space, I may lost one car spot. Another idea could be to build a curved crossover and to add an extra LCL-spur into the existing layout, which might become to crowded in the end.

I guess I’ll stay with the actual track plan for the moment. Since the station actually acts as a terminus, LCL freight may get handled on the main track in front of the depot. But many thanks for the new “railroad speak”, I didn’t heared/read about LCL before.

Gerd

You are welcome Gerd. The nice thing about suggestions is they are optional. Often they get used at a later date…

Hello John,

noted :wink: maybe I’ll make use of it at the second station Feddyville.

Today I’ll show you the first stretch of track reaching from the raised station Ronja Springs to the upper meadow of our garden. The first grade has 3.5% and is 11 meters long. The line leads into the upper meadow and through an S-curve to the right of the garden. This is where the rails end at the moment. In future, the track will continue to “Feddyville” at the end of garden. In the curve where the track hits the meadow, the Louise Valley Lumber Co, logging division will divide from the main line.

The track sneaks along the fence and a concrete wall, rounding the playground. As on the station, I used wood for the benchwork.

20180903_163940.jpg
20180903_164002.jpg

The curved segments are made from trapezium pieces, which were screwed together with 50% offset.

20180724_165350.jpg
20180903_163947.jpg

The rails in the meadow are laid on concrete slaps used for lawn edges. The tracks them self are not fixed to them, but the clayey soil holds them in place very well. I also like the look of this “ballasted” tracks. Maybe I’ll use this technique for the whole layout since the light grey ballast won’t fit into my eye.

20180821_164737.jpg
20180821_173230.jpg

Here’s a 4-car-train climbing uphill towards Feddyville.

Regards, Gerd

Waldbahner said:

Hello John,

noted :wink: maybe I’ll make use of it at the second station Feddyville.

Today I’ll show you the first stretch of track reaching from the raised station Ronja Springs to the upper meadow of our garden. The first grade has 3.5% and is 11 meters long. The line leads into the upper meadow and through an S-curve to the right of the garden. This is where the rails end at the moment. In future, the track will continue to “Feddyville” at the end of garden. In the curve where the track hits the meadow, the Louise Valley Lumber Co, logging division will divide from the main line.

The track sneaks along the fence and a concrete wall, rounding the playground. As on the station, I used wood for the benchwork.

20180903_163940.jpg
20180903_164002.jpg

The curved segments are made from trapezium pieces, which were screwed together with 50% offset.

20180724_165350.jpg
20180903_163947.jpg

The rails in the meadow are laid on concrete slaps used for lawn edges. The tracks them self are not fixed to them, but the clayey soil holds them in place very well. I also like the look of this “ballasted” tracks. Maybe I’ll use this technique for the whole layout since the light grey ballast won’t fit into my eye.

20180821_164737.jpg
20180821_173230.jpg

Here’s a 4-car-train climbing uphill towards Feddyville.

Regards, Gerd