Large Scale Central

Virginia City Flats

I mainly worked on the light boxes today, which began with cementing them up and adding the light tape. The adhesive that comes on the tape isn’t very good, so I usually put 3M VHB tape on first, and put the LED tape on that.

Like Korm predicted, the glow from the white box was too much. The electrical tape seemed to seal the edges of the removable back just fine (the other edges are sealed with the cement, but I’ll probably run some silicone RTV around the interior just to be sure). So I cleaned the box exteriors, painter’s-taped off where the electrical tape would go, and shot them with a couple coats of flat black.

Here’s one of them taped back up with electrical tape and propped against its flat. There’s some shine-through, but it’s minimal, and this is only seen from the ‘backstage’ area. The edge bleed will be better once the box if secured to the foam board.

The box’s interior is around 5/8" deep, so should be enough to put curtains & stuff in there.

Thanks for viewing,

===:>Cliffy

Get a JOB !

(https://www.largescalecentral.com/externals/tinymce/plugins/emoticons/img/smiley-laughing.gif)

Hola guys,

Here’s the built up balconies, ready for some light staining and later install.

Main thing today was assembling the foam (including mounting standoff blocks and joint some reinforcement in the back) and sanding the edges. Here’s the pile so far:

For these foam-to-foam joints, and per Dennis’ recommendation, I used Titebond III and a pin nailer. I did a test a few weeks ago, and you’d have break the foam board before the joint gave way.

I hope to get the priming done during the week, and start painting next weekend, we’ll see.

Cliff

Very nice solution and implementation… of course we expect no lees ha ha!

Greg

Flats or not these will really stand out on your city scene Cliff (https://www.largescalecentral.com/externals/tinymce/plugins/emoticons/img/smiley-cool.gif)

Cliff: Inspiring as usual. Can you elucidate your plan for the nearest building and the blank (filled in) areas? On the nearest building, I find it odd that the top course of bricks are not jutting out a bit to align with the middle brick section (but what do I know?). Also, there are some windows and doors that are filled in. I’m assuming those will have some sort of insert in them? Those purchased or printed somehow? I don’t think I’ve seen those bits yet.

Thanks! And keep it going in your usual thorough, educational, and spectacular way…

David Marconi,FOGCH said:

Flats or not these will really stand out on your city scene Cliff (https://www.largescalecentral.com/externals/tinymce/plugins/emoticons/img/smiley-cool.gif)

Thanks David, I’m pleased that you like 'em. And your plex is going to good use, Buddy!

Jim Rowson said:

Cliff: Inspiring as usual. Can you elucidate your plan for the nearest building and the blank (filled in) areas? On the nearest building, I find it odd that the top course of bricks are not jutting out a bit to align with the middle brick section (but what do I know?). Also, there are some windows and doors that are filled in. I’m assuming those will have some sort of insert in them? Those purchased or printed somehow? I don’t think I’ve seen those bits yet.

Thanks! And keep it going in your usual thorough, educational, and spectacular way…

Hi Jim, I don’t deserve such generous compliments from an at least equally capable modeler such as yourself, but thanks anyway!!

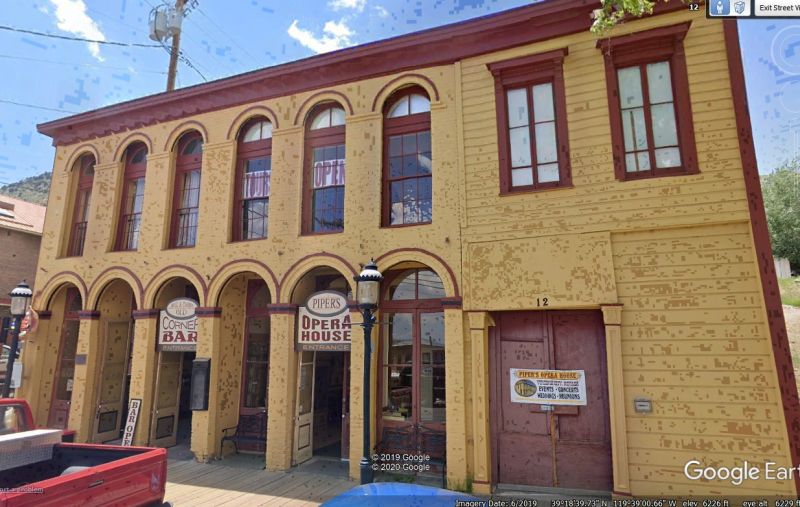
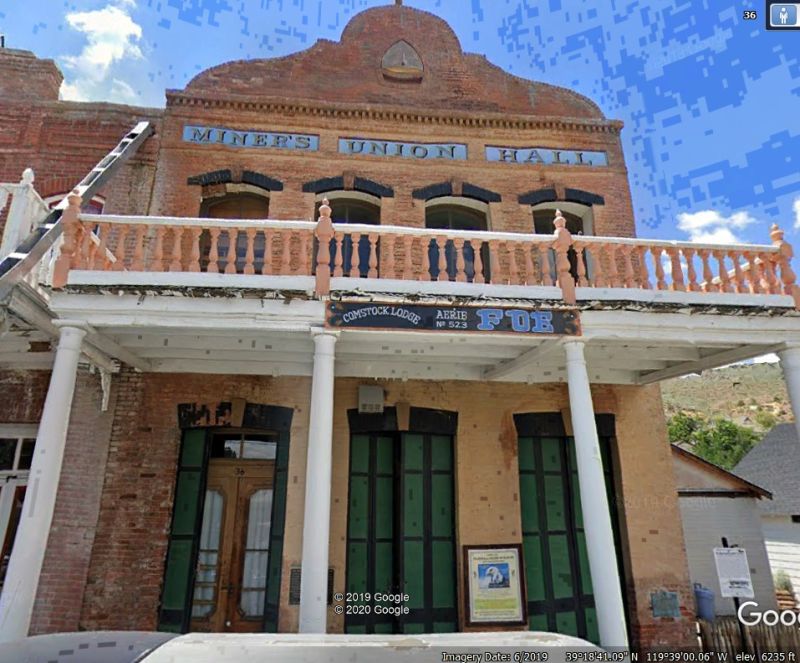
Yeah, that’s Piper’s Opera House, and it’s a confusing one. The upper and more random patterns are shingles, and they’ll be painted in greens or browns to hopefully convey their purpose. For the openings, the lower near ones will be a pain… long story, but I’ll explain when I get to dealing with them.

Otherwise, for all the flats, the through-openings are backed by the light boxes, and will get at least 1 layer of trim (jambs & frames & mullions) added to their fronts (glued to the box fronts). The blank windows won’t be illuminated, but will have a smoke-gray plex layer in back, then trim over that.

Thanks,

Cliff

Those lights seem pretty bright for gas lamps …

Otherwise just another The Cliff job, par excellence …

John Caughey said:

Those lights seem pretty bright for gas lamps …

Otherwise just another The Cliff job, par excellence …

Haha, par boiled more like, but thank you! (http://largescalecentral.com/externals/tinymce/plugins/emoticons/img/smiley-laughing.gif)

Yeah those lights are bright John. I was running them at 10v for that shot, but will probably back it down to around 6v or so.

Speaking of gas lights, I’m tempted to park a couple in front of Piper’s, we’ll see. These buildings will be mainly hidden, so I need to not go overboard. Or at least try to fight the temptation… (http://largescalecentral.com/externals/tinymce/plugins/emoticons/img/smiley-yell.gif)(http://largescalecentral.com/externals/tinymce/plugins/emoticons/img/smiley-innocent.gif)

Are you sure you don’t need to vent those? (https://www.largescalecentral.com/externals/tinymce/plugins/emoticons/img/smiley-sealed.gif)

Seriously cool looking, like the built up layers.

Cliff,

Loved the gas lights in Wellsboro, PA if you wanna research a bit…you can also sand down and mar up the LEDS a bit for light refraction …just saying

Rooster ’ said:

Cliff,

Loved the gas lights in Wellsboro, PA if you wanna research a bit…you can also sand down and mar up the LEDS a bit for light refraction …just saying

Thanks Rooster, I did, and they’re beautiful. Would love to see them personally. And good tip on the LED’s, thanks.

Cliff Jennings said: so I need to not go overboard. Or at least try to fight the temptation… (http://largescalecentral.com/externals/tinymce/plugins/emoticons/img/smiley-yell.gif)(http://largescalecentral.com/externals/tinymce/plugins/emoticons/img/smiley-innocent.gif)

This is Cliff right …Ha Ha Ha

looks like overboard has been passed a long time ago!!! Awesome work Mr Cliff!

Howdy from Maryland, and I hope y’all are doing ok in your hunkerin’ down.

In preparation for the paint to come, I did the priming during week (3 coats).

The paint didn’t come though, turns out my exterior base quarts were special order… and of course the virus thing is gumming up the works there. So I turned to the window & door parts, and finished up the cad work. Here’s the pattern for the brown acrylic bits for Piper’s Opera House. Red means cut, green is engrave.

The parts multiplied like lemmings; here’s the bulk of the pile. I wanted to use scraps on hand, yet sort of color-coordinate with the paint to come. Not sure how it will look in the end, but what the heck.

I got as far as pre-assembling the parts for Piper’s, and starting to fit them up.

Cheers,

Cliff

Always fun to watch your builds, Cliff, and this one is no exception. You are doing a great job of hunkerin’

Hope the paint shows up soonish.

Cliff, that looks grand!

Cliff Jennings said:

Howdy from Maryland, and I hope y’all are doing ok in your hunkerin’ down.

In preparation for the paint to come, I did the priming during week (3 coats).

The paint didn’t come though, turns out my exterior base quarts were special order… and of course the virus thing is gumming up the works there. So I turned to the window & door parts, and finished up the cad work. Here’s the pattern for the brown acrylic bits for Piper’s Opera House. Red means cut, green is engrave.

The parts multiplied like lemmings; here’s the bulk of the pile. I wanted to use scraps on hand, yet sort of color-coordinate with the paint to come. Not sure how it will look in the end, but what the heck.

I got as far as pre-assembling the parts for Piper’s, and starting to fit them up.

Cheers,

Cliff

OMGram !

With all those individual parts I would think is would be very easy to execute a 3 color paint scheme (at the minimum) !

As a reminder “white” was NOT an accepted paint color for the era…ecru and eggshell were along with BONE!

This post has been edited by: ROOSTER