Large Scale Central

Virginia City central mountain project

Hi folks,

This is a sort of continuation of what I started in another thread about making “flats” (fronts) of buildings for my hoped-for modeling of Virginia City, NV. That thread can be found here, and thanks to everyone who contributed their comments and encouragements there.

With that first row of buildings done, it’s time to make their foundation. And… well, it’s a whole nuther critter than the buildings, so I decided to split away with this new thread.

Back in 2014, I made the north and south mountains, with this shot being of the north one in progress, and the city area is just beyond. I made that build thread on the MLS site, but I couldn’t find it, so can’t post it. If anyone runs across that, feel free to park a link here, because it might give a sense of the techniques to be used here. Having said that, I’m generally using same method as Dennis Rayon, who helped me out a lot back then.

Those mountains went fine, but weren’t exactly easy – with 150 bags of mortar involved. The center area of the layout was always supposed to have a short mountain in it as well, and quite honestly, I’ve been enjoying the forgetting of it. But now, these building flats have forced me to deal with it.

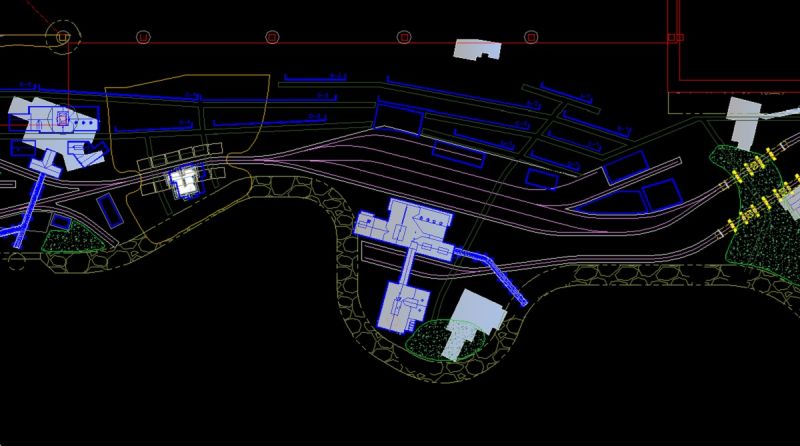
This center mountain is intended to provide the important E Street tunnel in Virginia City, and also a background slope for rows of building fronts representing the city itself. Here’s an old plan view; it’s rough.
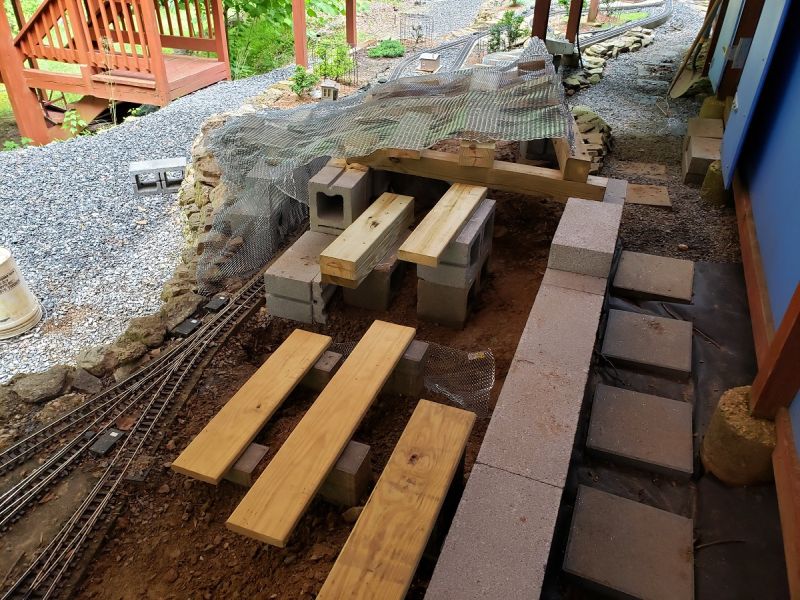
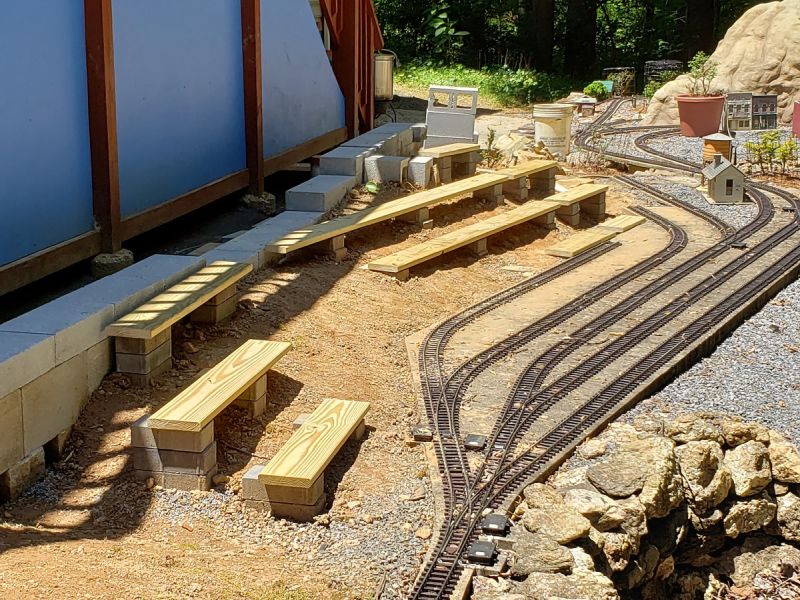
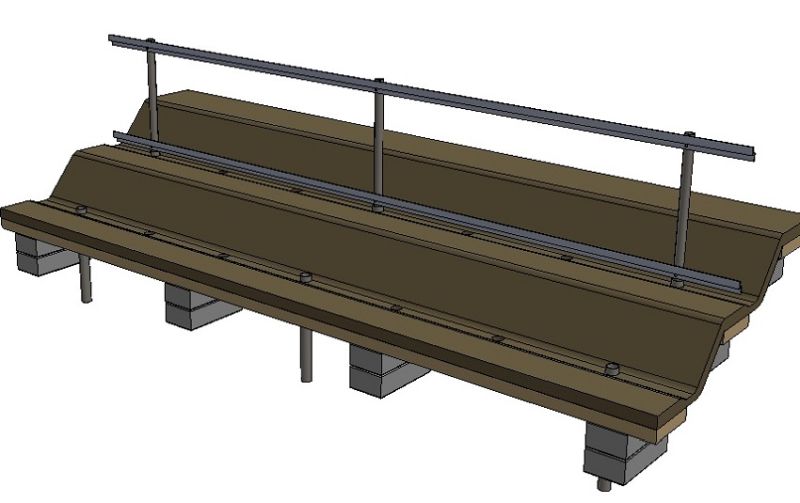
Well, designing in 2D is fine, but the 3rd dimension is a bi… is a bit tougher. And reality is even worse! But I’ll show you my plans for the city building foundations, and we’ll see how it goes. From the “flats” thread, here’s a shot of were I’m at with the building foundations.
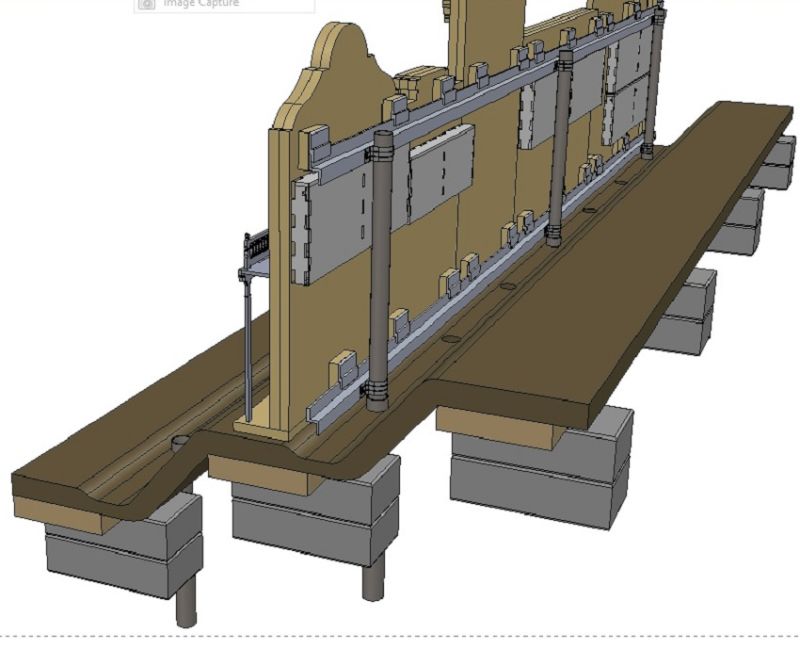
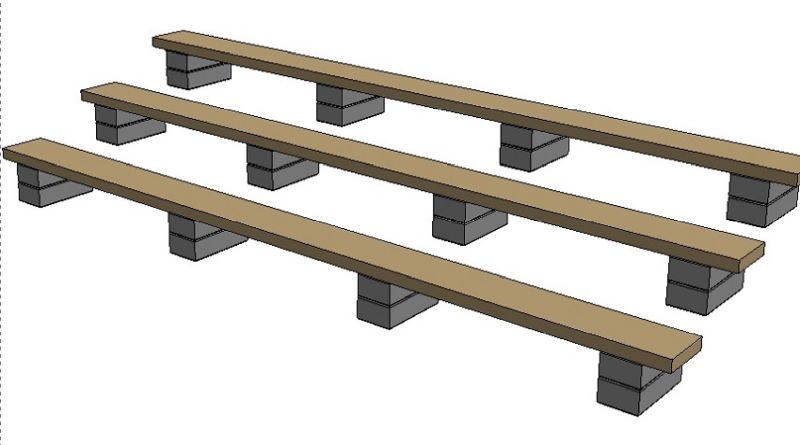
Here’s a 'puter model of the same, in a typical sense.
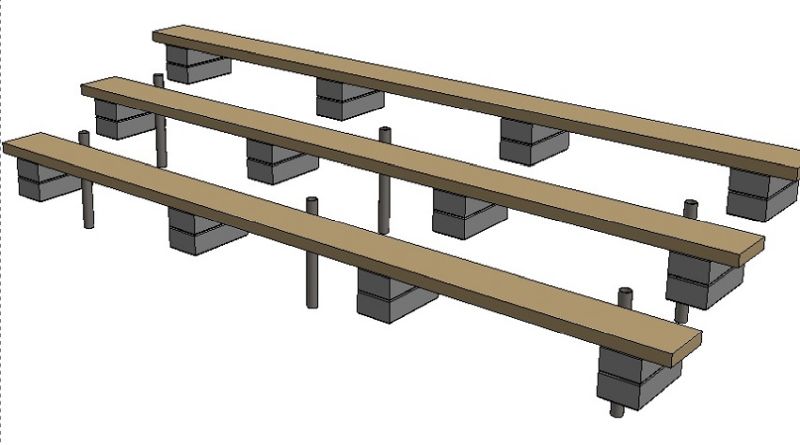
The next step will be to add glue those boards in place, and place short EMT (conduit) tubes, clamped to the back edges of the boards. These tubes will be the sockets for all future rows of flat racks, and though those buildings will take years, I have to get all those sockets in now when the mortar goes on.
After running conduit (plastic corrugated tube) to each row, and forming / securing the mesh, the mortar gets laid on – in nowhere near the neatness portrayed in the following.
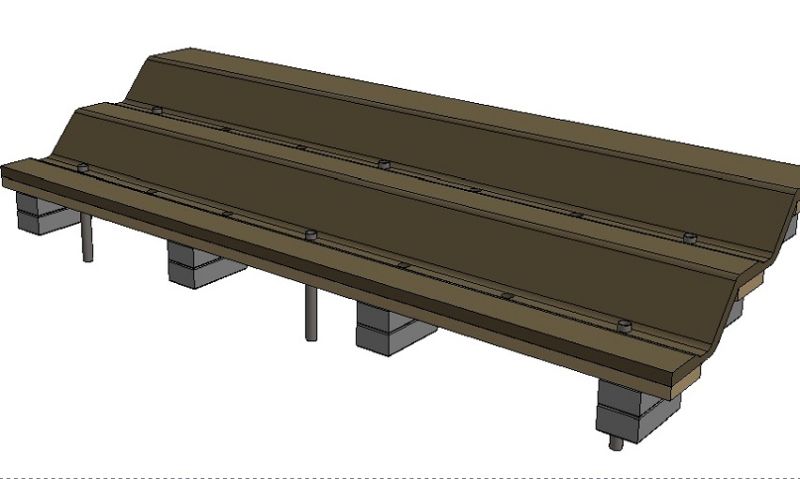
The extra holes represent drain holes I’ll need to punch thru.

When I get around to completing a row of flats (and it may be a long time), I’ll put up removable racks of 3/4" EMT and aluminum Z-bar. Yes, I know about the galvanic corrosion issue, and I’ll solve that as best I can with fasteners / rubber washers between the two. Or not, we’ll see.
The idea here is NOT to have a forest of tubes and bars, in advance of the buildings going in, but only add the racks when needed.

The individual flats clip onto these z-bars.
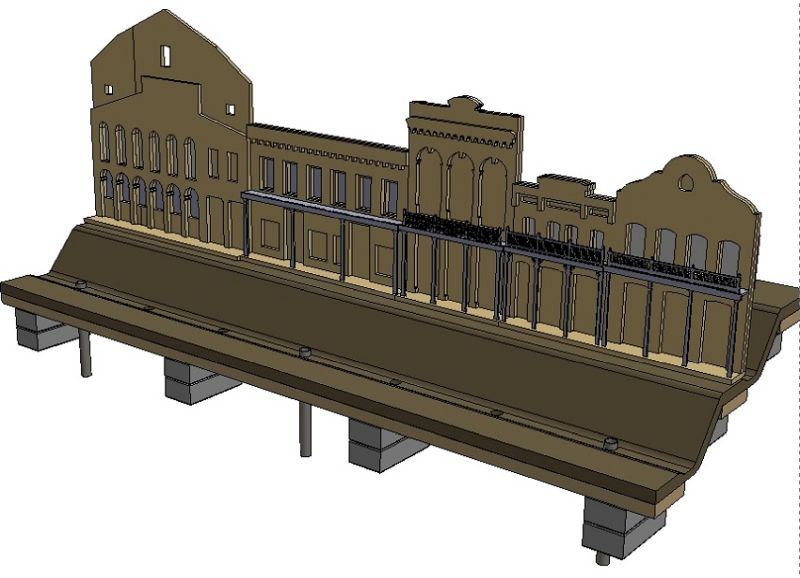
Well, at least that’s the plan. I’ll admit, there’s a lot to go wrong, and a lot of it will. But, WTH, I’m going for it, and the result will be what it will be.

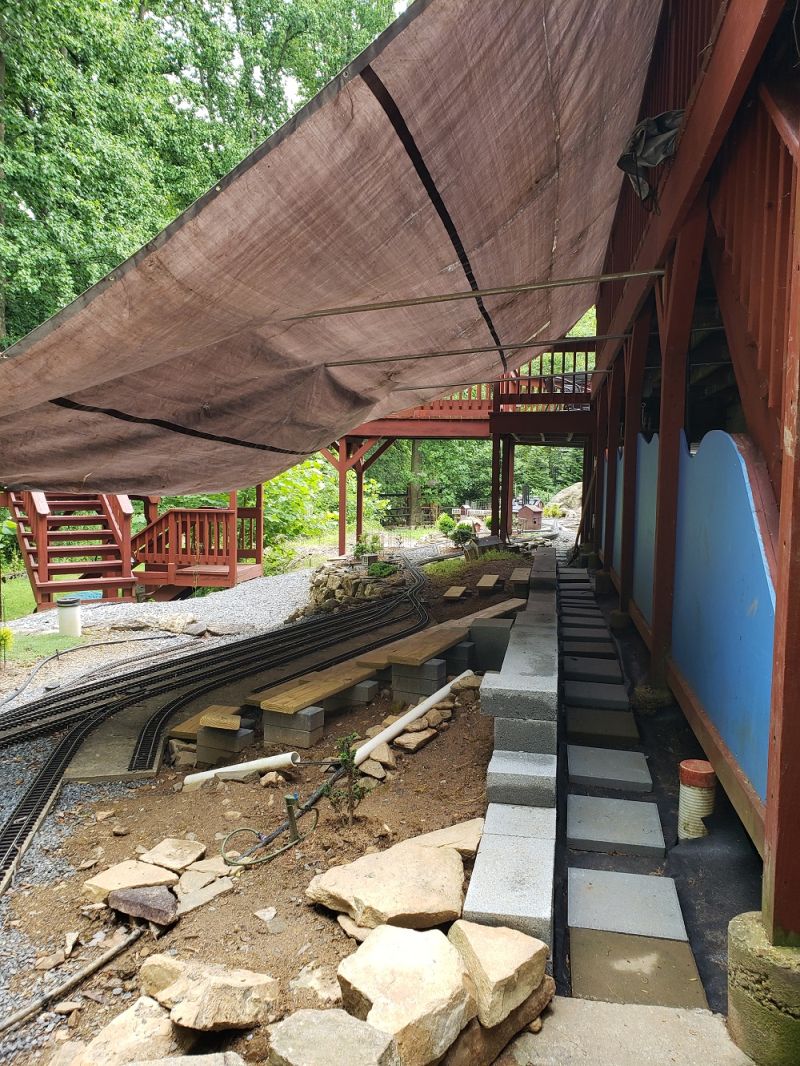
This project will take a couple months at least, maybe a couple more, because the mountain will extend over into the center area. So in the hopes of reducing mud and sunburn, after work today I put up a tarp.
And, since I have an extra week of vacation time available (the V&T conference in Nevada this year was cancelled ), I’ll be taking the next few Fridays off to work on this. That’ll give me 4 work days in between sessions for my back to recover, yee haw!

So, there’s corner I’ve painted myself into, and I’ll report later in the weekend on any progress. Thanks for viewing,

===:>Cliffy
Popcorn. Where did I put that darned popcorn?

Cliff your thoughts here are intense and I see the strength you are going for in the clips. But I see a large number of contact points that given Mother Natures whimsy may lead to frustration when putting the fronts onto the Z bar. As tight as that lap joint is any difference in expansion of the different materials due to different storage areas and having to set two rows of clips on a six foot run may become a chore or worse cause damage to a fantastic build.

Maybe the use of two different lengths of the clip for the top row (instead of 11) because of the shape of the roof line, and one length of the clip for the lower rail will aid in the mating of the structure to the frame?

And set one row to contact it’s Z bar mate an 1/8" sooner than the other row connects.

Just my thought YMMV(https://www.largescalecentral.com/externals/tinymce/plugins/emoticons/img/smiley-cool.gif)

Hi David,

Thanks for all your comments, most appreciated! And I hadn’t thought of the differential expansion, so thanks all the more.

Since the upper EMT upright tubes will be fairly loose in their 1" EMT socket tubes, there’s play there, to permit the Z-bar to grow/shrink lengthwise. But as for the flats themselves, since they are separate, I’ll need to put a gap between them, and let their clips side on the z-bar. May even put some grease on the underside of the clips.

Making the upper row of clips take the vertical load, and the lower row be their for horizontal stability, is a great idea. However, if both rows are nominally and vertically right against the z-bar, I suppose the vertical load would shift from one clip row to the other, depending on the temps. I’ll think that over, but I don’t yet see a downside.

If I’ve misunderstood any points, please let me know. Thanks for your detailed pointers!

Cliff

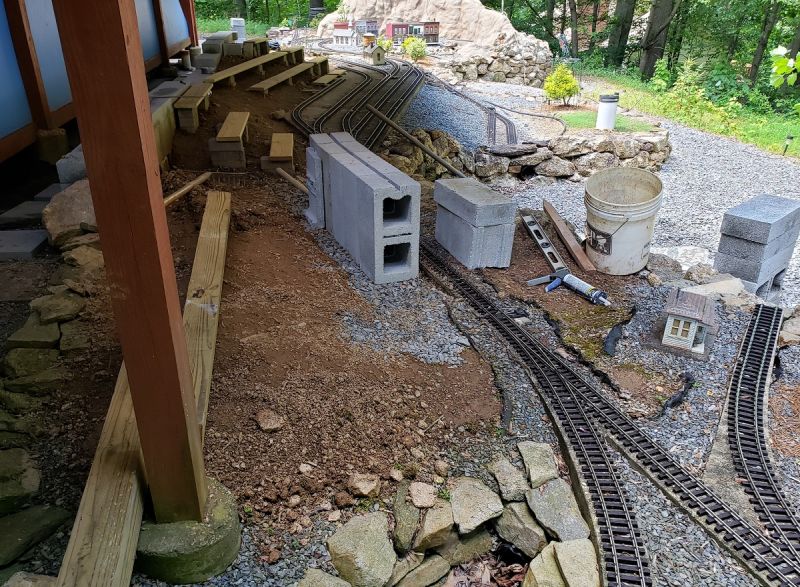
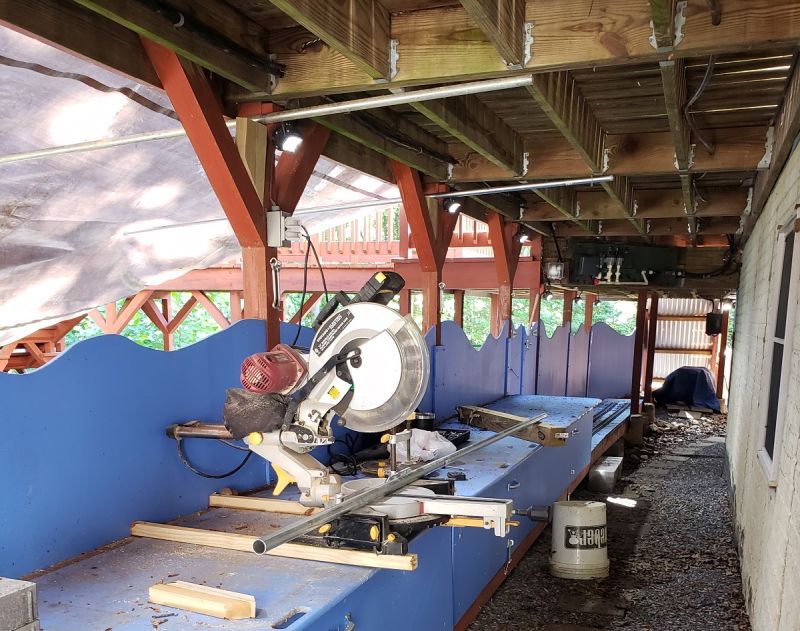
A minor update. I adhered the planks down, and realized I couldn’t touch them till they set (a day). A lot of chop sawing is ahead, so I set up an area under the deck for that, and adjusted the temp tarp overhead to protect the saw.

That was 9 am, and I had the rest of the day to kill. So, I decided to officially bite off the central mountain itself in this effort, and began excavation of that and and tunnel area. This involved deciding on final boundaries of the mountain, relocating one of my wife’s excellent mini junipers, raking out other ground cover, and generally evening things out. Then a small trench for gravel, and a start on the tunnel liner blocks.

Then planned the remaining mountain supports, went to Lowes, got the next load of blocks and a stick of 4x4, humped 'em around the house, and set up for tomorrow.

CJ

May I recommend a little bit of WD40 or such as lubricant while cutting

Rooster said: “LUBRICANT” and has reported himself to the moderator

Good idea on the WD40 Rooster.

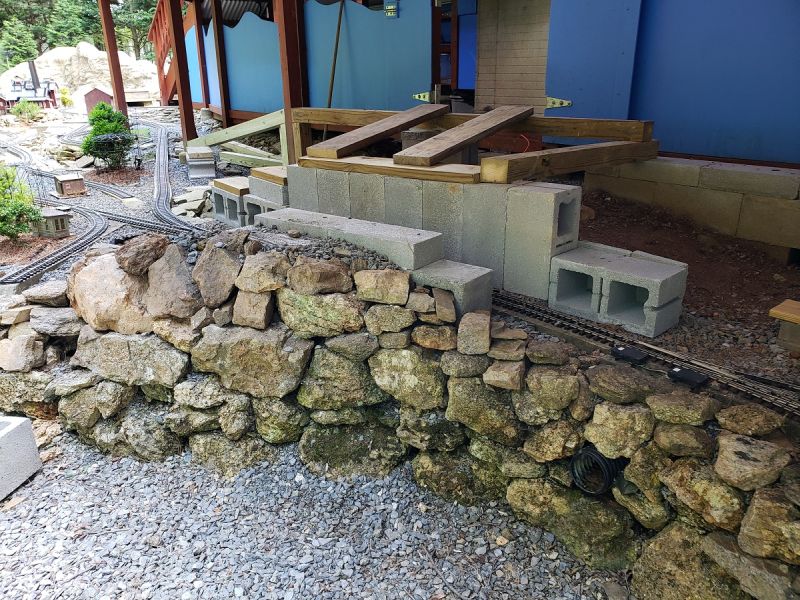
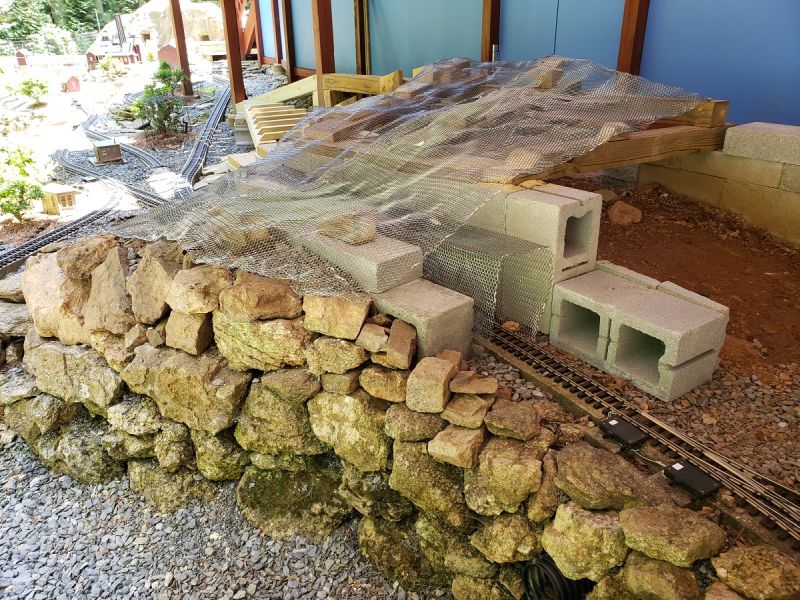
Today was focused on the substructure of the center mountain: finishing the tunnel liner blocks, raising the rock wall over a foot, and starting the armature to support the mortar shell.

We had a nice cool morning here, in the 50’s, lo RH, loved it. Got up to low 80’s later, but still pleasant.

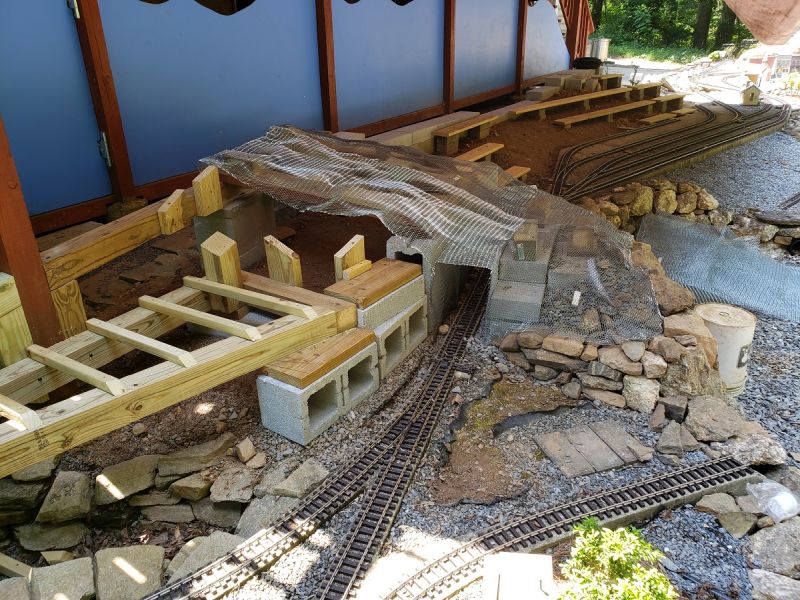
I completed the wood armature for the center mountain, and got a few sheets of mesh material on it.

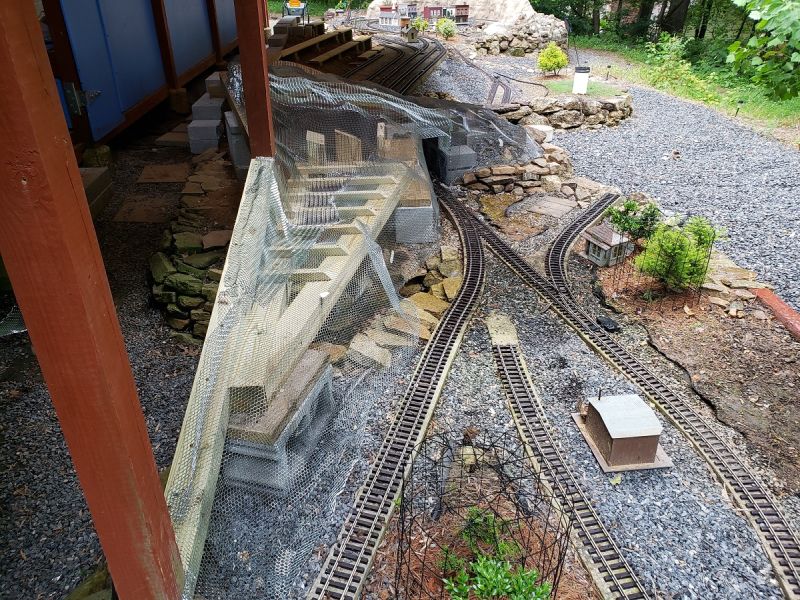
The layout is finally starting to be at least reminiscent of Virginia City! The area to the right (where the 3 pavers are buried) represents the current V&T depot where it stands – and has stood since the 1800’s. The E Street Tunnel, represented at the center, was filled in long ago; but you can still see where its portal was.

The platform thing to the left will support the eventual model of the Gould & Curry mine. But for now, I just want to get the mountain skinned, and move on to the VC streets.

The flat-ish area in the foreground here is for an eventual model of the famous “St Mary’s of the Mountains” Catholic church. Been there since the Comstock days, and is still doing well.

Ok, now for 4 days of office work and rest, haha!

Cliff Jennings said:

Ok, now for 4 days of office work and rest, haha!

Funny how that works. Back to work to rest up…(https://www.largescalecentral.com/externals/tinymce/plugins/emoticons/img/smiley-wink.gif)

Looks good, Cliff! But aren’t you supposed to have higher temperatures in Virginia City? (https://www.largescalecentral.com/externals/tinymce/plugins/emoticons/img/smiley-foot-in-mouth.gif)(What’s this 4 letter word you keep invoking? (https://www.largescalecentral.com/externals/tinymce/plugins/emoticons/img/smiley-cool.gif))

Bruce Chandler said:

Looks good, Cliff! But aren’t you supposed to have higher temperatures in Virginia City? (https://www.largescalecentral.com/externals/tinymce/plugins/emoticons/img/smiley-foot-in-mouth.gif)(What’s this 4 letter word you keep invoking? (https://www.largescalecentral.com/externals/tinymce/plugins/emoticons/img/smiley-cool.gif))

Thanks Bruce, hahaha!

BTW, I used almost all the treated wood you gave me in this, thanks!

Cliff Jennings said:

Bruce Chandler said:

Looks good, Cliff! But aren’t you supposed to have higher temperatures in Virginia City? (https://www.largescalecentral.com/externals/tinymce/plugins/emoticons/img/smiley-foot-in-mouth.gif)(What’s this 4 letter word you keep invoking? (https://www.largescalecentral.com/externals/tinymce/plugins/emoticons/img/smiley-cool.gif))

Thanks Bruce, hahaha!

BTW, I used almost all the treated wood you gave me in this, thanks!

I still have a lot of wood left…(https://www.largescalecentral.com/externals/tinymce/plugins/emoticons/img/smiley-laughing.gif)

Bruce Chandler said:

Cliff Jennings said:

Bruce Chandler said:

Looks good, Cliff! But aren’t you supposed to have higher temperatures in Virginia City? (https://www.largescalecentral.com/externals/tinymce/plugins/emoticons/img/smiley-foot-in-mouth.gif)(What’s this 4 letter word you keep invoking? (https://www.largescalecentral.com/externals/tinymce/plugins/emoticons/img/smiley-cool.gif))

Thanks Bruce, hahaha!

BTW, I used almost all the treated wood you gave me in this, thanks!

I still have a lot of wood left…(https://www.largescalecentral.com/externals/tinymce/plugins/emoticons/img/smiley-laughing.gif)

Yeah, too bad I couldn’t take more off your hands, using my little SUV. You were right though, when you initially advised to “bring a big truck!” But I hope someone else, maybe a neighbor, needs some… Maybe put out a little sign on the street, “Free wood for your new deck, inquire within.” (https://www.largescalecentral.com/externals/tinymce/plugins/emoticons/img/smiley-laughing.gif)

Cliff you need to add something to the walls of the tunnel… flat black paint or castings that would look like hand chiseled rock …

I heard of some using tin foil crumpled and glued the the sides and roof (Video prepping ) (https://www.largescalecentral.com/externals/tinymce/plugins/emoticons/img/smiley-wink.gif)

Sean McGillicuddy said:

Cliff you need to add something to the walls of the tunnel… flat black paint or castings that would look like hand chiseled rock …

I heard of some use tin foil crumpled and glued the the sides and roof (Video prepping ) (https://www.largescalecentral.com/externals/tinymce/plugins/emoticons/img/smiley-wink.gif)

You bet Sean, I do. It’s supposed to be wood-sheathed, but since I’m lazy, I put in lath last weekend (for mortar “rock”).

I look forward to seeing your foil rock. I did that once in a small experiment, using “Cementall,” and it was quite convincing in texture.

Guess I’m kind of lucky we have cinder blocks here that have a rough rock looking face, I will have to look and see if I used it properly on my mini tunnel

Pete, sounds like a good technique. But my unlucky scenario would probably be:

“Pallet of special-order rough-face cinder block: $249.”

“Forgetting to turn the rough side outward: Priceless.”

(https://www.largescalecentral.com/externals/tinymce/plugins/emoticons/img/smiley-laughing.gif)(https://www.largescalecentral.com/externals/tinymce/plugins/emoticons/img/smiley-wink.gif)

I worked on the center mountain more today, with its mesh and supports. This step-thing is a squashedly quasi pseudo representation of the area of the famous (in its day) Gould & Curry mine.

I realized last week that that switch is WAY too close to the tunnel opening, because… well, long story. And the 'crete roadbed ain’t moving to accommodate a fix to that sort of history-based mistake that no one will ever know about or understand… (I actually looked into that concrete roadbed rework last night, just to see what it would entail, and finally said, What the hell am I thinking? That roadbed is NOT moving!!). So thanks everyone for NOT pointing out that the switch is too close to the tunnel portal.

Also worked out today the building / street supports as the streets come over that hill. No, Virginia City’s B, C & D don’t slope that dramatically, but they do slope. I’ll probably have to figure out a stepped approach to sets of flats intended for this area.