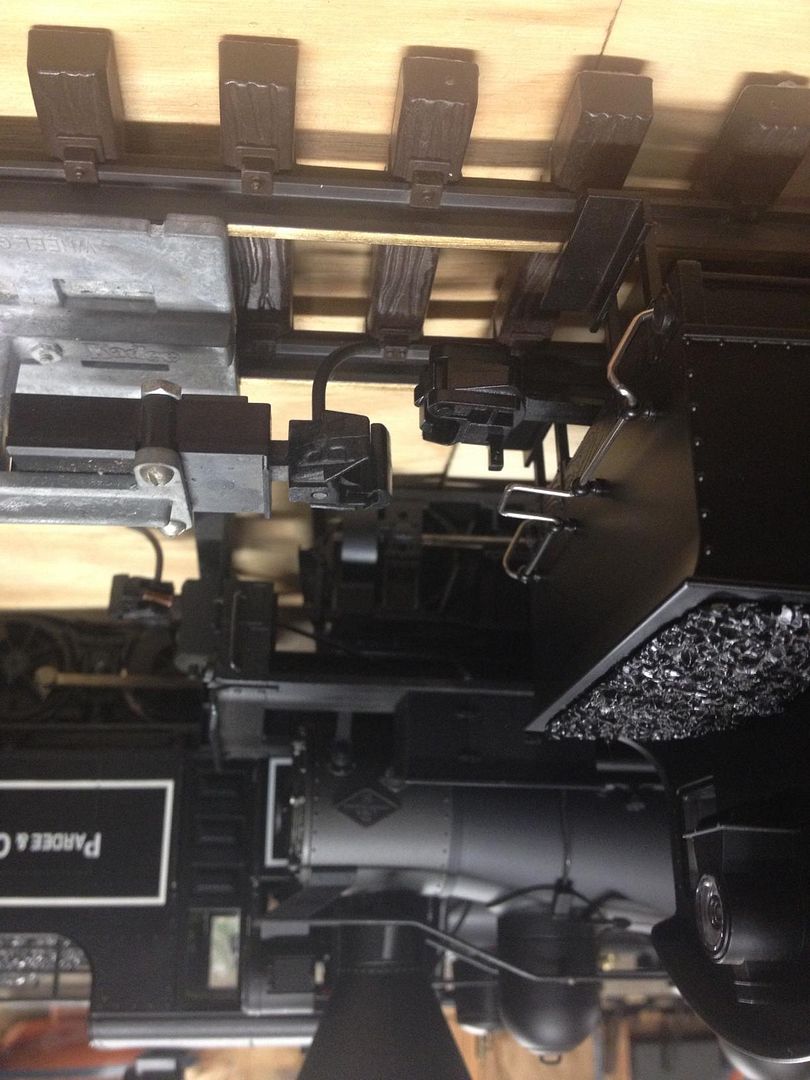
What is everyone else using for a coupler on the USAT Dockside loco?
And…how does it mount?
Why is USAT coupler height always a issue!

What is everyone else using for a coupler on the USAT Dockside loco?
And…how does it mount?
Why is USAT coupler height always a issue!

Sam @ Kadee emailed me and told me they have not done a conversion for the Dockside loco…
Have some things I am going to try…
I think I got it! Might not be the best was, but it will work for me and it was easy.
I picked up a piece of 3/16 brass flat stock. Cut it to fit so that the box assembly of a Kadee 837 coupler would fit right up against the back/front frame of the loco when mounted with a nut & bolt. Simply drilled a couple of holes, one for the coupler and one for the screw that mounts the coupler shaft to the loco and it seems to fit perfect.
(http://i18.photobucket.com/albums/b107/139vinny/Trains/DS2_zps34a3eaad.jpg)
(http://i18.photobucket.com/albums/b107/139vinny/Trains/DS1_zpsc653ea5a.jpg)
It looks like you will have to use a body mounted, G-scale, large offset coupler like a Kadee 903 or 909 to overcome the height difference.
It’s not just USA Trains; a lot of other manufacturers’ cars have Kadee coupler mounting challenges. Over the years I have made all sorts of shims in order to install Kadees on Aristo-Craft and Bachmann rolling stock and motive power.
The Kadee height gauge is a must when installing their couplers. The anvil end determines the thickness of the shim required.
Like Fred I glue pieces of styrene together to get the proper thickness of the shim. I test mount the shim and coupler using thin, double-sided carpet tape. Taping the shim and coupler also allows you to use the holes in the coupler box as a guide to drill the holes in the shims and frame for the mounting screws.
I often find the Kadee screws are the wrong length, so I replace them with 4-40 machine bolts of the proper length. Drilling 3/32nd inch holes in the styrene shim and frame allows you tap the 4-40 machine bolts in place.
I used to use 1/8th inch thick styrene in some of my shims. But to get a clean break it has to be measured precisely and scored on both sides. Now I just glue 1/6th inch styrene strips together. Fred uses CA but I prefer Testors plastic cement.
I found that a metal yard stick is about the same width as a large scale Kadee coupler. I clamp the metal yard stick and styrene to my work desk, ensuring the edge of the yard stick and styrene are flush. Then I make a couple of passes with a hobby awl on the other side of the yard stick. I found the groove helps stop the X-Acto blade from wandering. After a number of passes with the A-Acto blade, the styrene can be released and the strip snapped cleanly.
I used to use my NWSL Chopper to cut the strips to the proper length, but often found it did not cut squarely. I then had to use my NWSL True Sander to square up the ends, but that changed the length of the pieces.
Now I used my INCRA scale and hobby awl to place marks along the strip at the appropriate lengths. Then using a square, awl, and X-Acto knife, I score a line across the strip at the marks. The pieces can then be snapped off clean and square. Using this method is quicker, easier, cleaner, and all the pieces end up the same length.
After the pieces have be glued together and drilled, I clean up the edges and ends with my NWSL True Sander before painting them with Krylon Satin Black. They blend right in with the Kadee coupler.
Worked out okay for me, even is pretty close in height to my MTH 1/32 cars which I think are the perfect size for this engine.
(http://i18.photobucket.com/albums/b107/139vinny/Trains/cp2_zps0b46ea95.jpg)
I applied the same concept using the same coupler on my Bachmann Porter loco.
Mounted exactly the same as the dockside.