Thank you all for your warm welcome I appreciate it. Ill try to show some pictures of how I built the turntable. The pictures aren’t great, and I may have resized them a bit small, but I can’t go back and unbuild it to retake the pictures so this is what I have! The turntable was built out of 2mm styrene sheet. I bought a 2 foot by 4 foot sheet, and had some left over when I was done. First I cut the sides out, then I made the top, which is a rectangle the same length as the sides, and 1/2 inch wider than the distance between the sides when assembled. I glued the sides to the top, leaving an overhang of 1/4 inch on each side of the top, making sure that the sides were square with the top. Then, I glued in 8 braces. These are the full width of the turntable and are glued to the sides and top, but are only 1 3/8" in height.
(http://www.lscdata.com/users/bdavies/_forumfiles/0817091215are.jpg)
Once all of this dried, I cut another rectangle of styrene, the length of the turntable and the same width as the inside distance between the walls. With the turntable still upside down, this piece was glued to the top of the braces, and the walls of the turntable, basically turning it into a rectangular box with internal braces. This made the 2mm thick styrene, which is quite flexible, very rigid, yet still light. I then glued in more braces of the same style, these reach to the bottom of the sides, and are in approximately the position that the bracing would have been on the real turntable. The real table was braced with riveted angle iron and plates, not flat sheets of metal. I put details on these braces to approximate the prototype. I’ll explain this more later. Finally, once these braces dried, I glued a 5/8" wide strip of 2mm styrene along the bottom of each of the sides, keeping an overhang of 1/4 inch on the outside.
(http://www.lscdata.com/users/bdavies/_forumfiles/0818091300re.jpg)
The brace detailing on the sides of the table are made up of 1/4", 3/16" and 5/32" styrene angle. The 1/4" angle is glued at the top and bottom of the sides (that is the reason for the 1/4" overhang I mentioned earlier. The other styrene angle pieces, along with some .5mm strips in places, make up the vertical braces. The Orbisonia turntable has some interesting rivet detail and bracing at the center of the table, to help hang the table on the center bearing. I replicated this with pieces of .5mm styrene and Many embossed rivets. All of the angle work is embossed with rivets too, well over 1,000. These were embossed on a jig I made to use on a sewing machine. I rounded the end of a sewing machine needle and inserted it into the machine. A piece of styrene with a dimple in it is used under the piece being embossed, to make the shape of the rivet. Basically, the styrene die is taped to the sewing machine table. The piece to be embossed is placed on this, and the sewing machine needle is pressed into it. The results are really nice and very much worth the time involved. It actually goes pretty quickly once you get the hang of it.
(http://www.lscdata.com/users/bdavies/_forumfiles/2009_0825AZa.jpg)
Under the table, the internal bracing was simulated with 1/8" styrene angle, and .5mm sheet. These were also embossed with rivets where appropriate.
(http://www.lscdata.com/users/bdavies/_forumfiles/0826092016re.jpg)
The turntable sits on a 3" lazy susan bearing attached to a piece of stained and polyurethaned wood. The bearing is screwed to a box made of styrene that snugly fits between the two center braces on the turntable. This allows the table to be lifted off the base very easily. If I wanted to I could attach the turntable to a layout by screwing the bearing down to the layout, and fitting the turntable over it.
(http://www.lscdata.com/users/bdavies/_forumfiles/0822092203are.jpg)
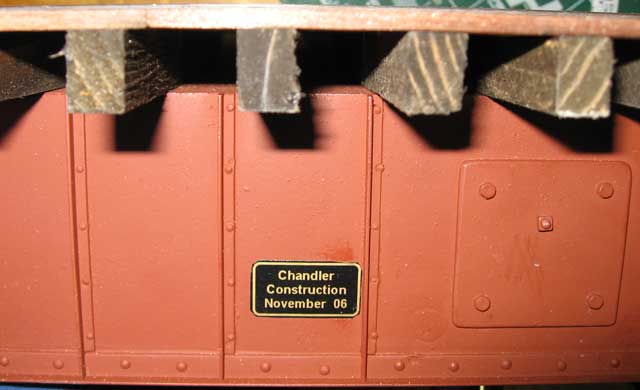
The turntable was painted red, however part of the top was painted black. The prototype has an open top, and the black paint, when the ties and planks are installed, gives an open effect to the top.
(http://www.lscdata.com/users/bdavies/_forumfiles/0825091352bre.jpg)
The ties and planking were cut, and stained. The ties were epoxied on, and the rails were spiked down to them. I used Llagas Creek code 250 nickel silver rail. I soldered a wire onto each rail, and inserted them through drilled holes through the turntable, hiding them inside the box that the bearing is bolted to. That way if I ever put it on a layout, I can easily power the rails. The rails were secured to the table with spikes inserted into pre-drilled pilot holes.
(http://www.lscdata.com/users/bdavies/_forumfiles/0903091614re.jpg)
The planks were secured to the ties with epoxy. I cut the planks from stripwood, at mostly 20 foot scale lengths. Then I staggered the joints at the end of the planks, and cut smaller pieces to fit where necessary.
(http://www.lscdata.com/users/bdavies/_forumfiles/0904091341re.jpg)
The poles used to push the table were made 9/32" tubing, 3/8" square tubing, and .5mm styrene sheet. Epoxy filled in the hole at the end of the tubing, forming a rounded end. The other end of the pole was cut at a 30 degree angle. The triangular box the pole is inserted into is made of 3/8" square tubing, cut at a 30 degree angle, in such a way that all that remains is the top and both sides, the bottom is cut off. It’s easier to cut than it is to explain. The pole is glued into the box, and the box is filled in with epoxy for rigidity. Then a base of .5mm styrene is glued onto the bottom. After it is painted, this piece is epoxied to the planks on the turntable. Thats about it, and my hands are tired from typing all of this in one shot. Maybe this will help someone else build one of their own. Its really quite easy, just keep everything square, and have fun with it.

