Large Scale Central

⛏️Trying to be a Poppet Master (A Build Log of Sorts)

Build Log: Transmogrifying a Poppet Head Plans.

For a long time, I have admired the work of the talented modellers in LSC who can look at a prototype, take a handful of measurements, gather some raw materials, and somehow transform them into something that looks like it has always belonged on a railway.

The gap between admiring those builds and attempting one myself is rather large — and this build is where I am about to discover just how large that gap really is.

The good news is that I finally have the tools. The workshop is starting to look less like an empty space full of possibilities and more like a place where things might actually get built. The bad news is that tools do not automatically come with the years of experience, intuition, and modelling knowledge that so many LSC builders have developed over time.

This build represents my first serious attempt at adapting plans rather than simply following them.

The project started because my railway scene needed something a little different — a structure with a sense of history, industry, and a story waiting to be explored. A poppet head seemed like exactly the right addition. It has that wonderful combination of engineering, character, and industrial charm that makes a railway scene feel like a place rather than just a collection of models.

The original plans were drawn for 1:20.3 scale, which seemed like a perfectly good place to start. However, it did not take long to discover that the plans were really intended for a display diorama rather than something that needed to live outdoors in large scale.

I mean, seriously… how exactly does one cut 3/32" stock without questioning life choices? And don’t even get me started on imperial measurements. They seem to have been designed for people who looked at dividing by ten and thought, “No, let’s make this more interesting.”

Converting these plans into something suitable for large-scale outdoor use is proving to be far more involved than simply enlarging the measurements. In reality, most of the plan needs to be rethought, redesigned, and in some cases completely replaced.

A drawing does not tell you how materials behave. It does not tell you whether a joint will survive weather, whether a beam will sag over time, or whether a component that looks perfectly reasonable on paper becomes impossibly fragile once built larger. Suddenly every decision becomes a compromise between scale accuracy, structural strength, available materials, and what can realistically be achieved in my workshop, uh, by me.

What I originally imagined as a quick proof of concept has already started to become something much larger — not necessarily in physical size, but in the amount of thought, experimentation, and problem-solving involved.

So this build log begins with the very first step: taking a set of 1:20.3 plans and attempting to transmogrify them into something that could potentially survive outdoors in large scale.

This is not a masterclass. This is a learning journey. This sooo not wiki material.

There will almost certainly be mistakes, redesigns, and moments where the original plan meets reality and loses the argument. There will probably be side quests in search for the best baindaid brands and using kindling held together by Titebond glue. But hopefully that is also where the fun begins.

Let’s see where this goes — and whether I can Devon things out…

By the way… Devon, where the heck(la) are you? I’m going to need advice.

With the plans in hand and the decision made to stick with 1:20.3, it was time to work out how to actually build the thing.

I’ve relied on kits up until now, often using my Byrnes Model Machines table saw to modify parts along the way. Building from plans is a rather different proposition. There’s no bag of conveniently sized parts waiting to be trimmed and assembled.

The Brewer plans from Canada are a great starting point. The Rico Mine plans are detailed and informative, but some of the specified timber sizes quickly had me reaching for the calculator and a magnifying glass.

When the plans call for 5/32" planks attached to 7/16" boards and supported by 5/8" posts, you begin to appreciate the metric system. Then the question became less “What does the plan say?” and more “What can I actually make?”
Do I really need to drop a beam by 3/32inch.

I decided to keep the scale but simplify the construction wherever I could. There seemed little point in faithfully reproducing a dimension if doing so produced a component too fragile to handle—or something that would spend its life outdoors disintegrating at the first opportunity.

That meant making some decisions about timber sizes, joints and construction methods before making any sawdust.

The first step was therefore to work through the drawings and translate them into something practical.

And this is where I discovered that building a model from plans involves rather more than simply measuring twice and cutting once.

Sometimes you measure twice, cut once, and discover that you should have thought about how the next bit was going to fit first.

Progress.

Even though I am a US native, I always use metric when building in Fn3. Many moons ago, Kevin Strong pointed out that since 45mm track = 3 Foot gauge, then 15mm = 1 foot. Inches get a little iffy since 15/12 ends up with 1.25mm = 1 inch, but to my eyes, for small stuff, 1mm per inch works for me.

1 Like

Roosta what is this gobley goop John is saying :thinking:
The first time i was intriduced to metric when I had a 1978 -1/2 F250, the hardware was all mixed…

Sean,
I cannot answer any of it because I model by eye. If it looks good to me then measurements matter not. So I just sit and read/learn while only putting natural products into my body like barley, hops, wheat, tobacco and hemp. However I’m starving for a good “pop up” book these days.

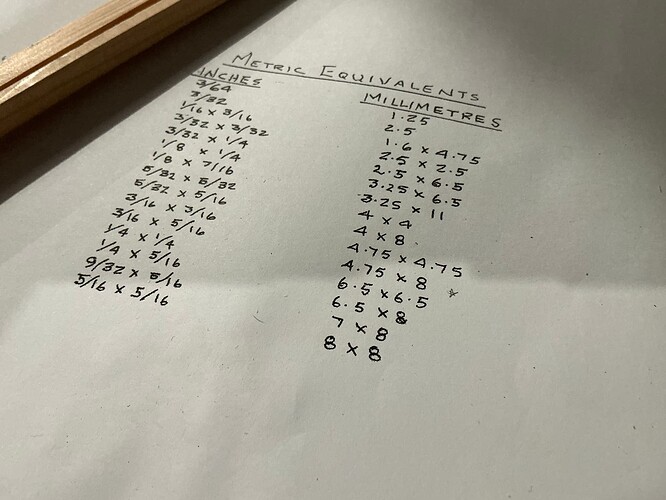
Sean, I have found this chart quite helpful to convert most LargeScale Centralian size measurements into metric.

For those using LWU*, you no longer have to search for Pete’s post. Here is the conversion.

Of course, if you’re wondering why only Myanmar, Liberia and the USA still use feet, inches, furlongs and barleycorns in the first place, it is because they can.

The furlong, for example, is a genuinely ancient unit. Its name comes from furh (furrow) and lang(long), and it was essentially the length of a furrow in a standard acre. An acre was traditionally defined as a strip one furlong long and one chain wide — hence 1 furlong = 10 chains = 660 feet = 201.168 metres.

And the wonderfully named barleycorn wasn’t invented in a pub. English tradition defined it as the length of a barley grain, with three barleycorns making one inch. The barleycorn was eventually given a legal definition of 1/3 inch and became the basis of the traditional English shoe-sizing system.

And then there are the genuinely useful units that you didn’t need until today…

The Poronkusema — a traditional Finnish measure of distance based on how far a reindeer could travel before needing to stop to urinate. (Reportedly they can’t go on the go) It’s roughly 7.5 km and presumably the original definition of “range anxiety.”

The Sheppey — the distance at which sheep cease to be picturesque, generally given as about 7/8 of a mile. Extremely useful for scenic railway photography.

Beard-second — the distance an average beard hair grows in one second, approximately 5 nanometres. Or as I have discovered here on LSC, the distance a Bachman Shay can run before needing a replacement gear. :grinning:

Volume, weight and other things you probably didn’t know you neded:

A butt is not merely a convenient unit for LargeScale Centralian freight calculations. It is an actual historical measure of wine. A butt was traditionally two hogsheads, although the precise capacity varied depending on what was being measured and where you were. A wine butt could hold roughly 126–132 US gallons.

So when John says he has a butt-load of spare parts, he may actually be using a perfectly legitimate historical unit. …and for those who model (or drink) more efficiently, here is a handy butt-load conversion chart.

A Batman was an old Ottoman unit of weight used in trade. Its value varied by time and place, but one commonly cited value is around 16.7 lb (7.6 kg). I think we can all agree here that Adam West was the best Batman pound for pound.

And then there are the precision culinary units I’ve learnt from those who like to cook fun foods: @Devon_Sinsley

  • Smidgen — 1/32 teaspoon
  • Pinch — 1/16 teaspoon
  • Dash — up to 1/8 teaspoon

Finally, we have units which have clearly escaped from the laboratory & kitchen.

The Millihelen — the amount of beauty required to launch one ship, based on Helen of Troy. Thus Helen herself represents approximately 1,000 millihelen.

The Micromort — a real statistical unit representing a one-in-a-million probability of death. Probably best not used when calculating the reliability of my latest scratch-built poppet head.

The Garn — a NASA-derived unit associated with motion sickness and space adaptation. One garn represents complete incapacitation by nausea. This may have applications in assessing the ride quality of some tourist railways.

Banana Equivalent Dose (BED) — an informal way of expressing radiation exposure by comparing it with the tiny amount of naturally occurring radioactive potassium in a banana.

So there you have it.

Just remember:

  • If it’s difficult to measure in a confined space in a museum, measure it in LWUs.*
  • If it’s bigger than a smidgen, use a pinch.
  • And if it’s way bigger than that, it’s probably a butt-load.
  • But if you only want to divide by multiples of 10, it’s metric.

* LWU = Lovely Wife Units (exactly 1.6 standard meters)

1 Like

Bill;

Thanks, but scosh and spritz are missing. Since I grew up in Pennsylvania Dutch country, I was accustomed to the spritz, meaning like a splash or spray (a small amount of liquid), but my wife is from Indiana.

Once way back when we were dating, she asked me if I wantrd something to drink, My reply was, “Oh, I’ll just take spritz of something.” She looked puzzled and replied, “What is a spritz, is it like a Sprite?”

I think scosh is a similar Scottish term for a small amount of drink or food.

Regards, David Meashey

Bill;

I thought of another unit of measurement, but it’s somewhat nefarious, It’s so bad that I can’t even type it here. I have heard this unit of measurement because over my working lifetime I have worked with some very rough-spoken folks. Since I cannot type the actual term, I will use the more clinical term “female pubic hair”.

It is used in phrases like: “It’s off by a (female pubic hair).” or “It’s out of balance by a (female pubic hair).”

Not a very polite measurement, but I must admit I have heard it frequently, especially when I worked at Hershey Park and in a weaving mill.

Regards, David Meashey

Thanks Rooster, I was really touched by that.
Enough so to find this ‘sister’ video.

Yeah but it’s not “Master of Poppets”

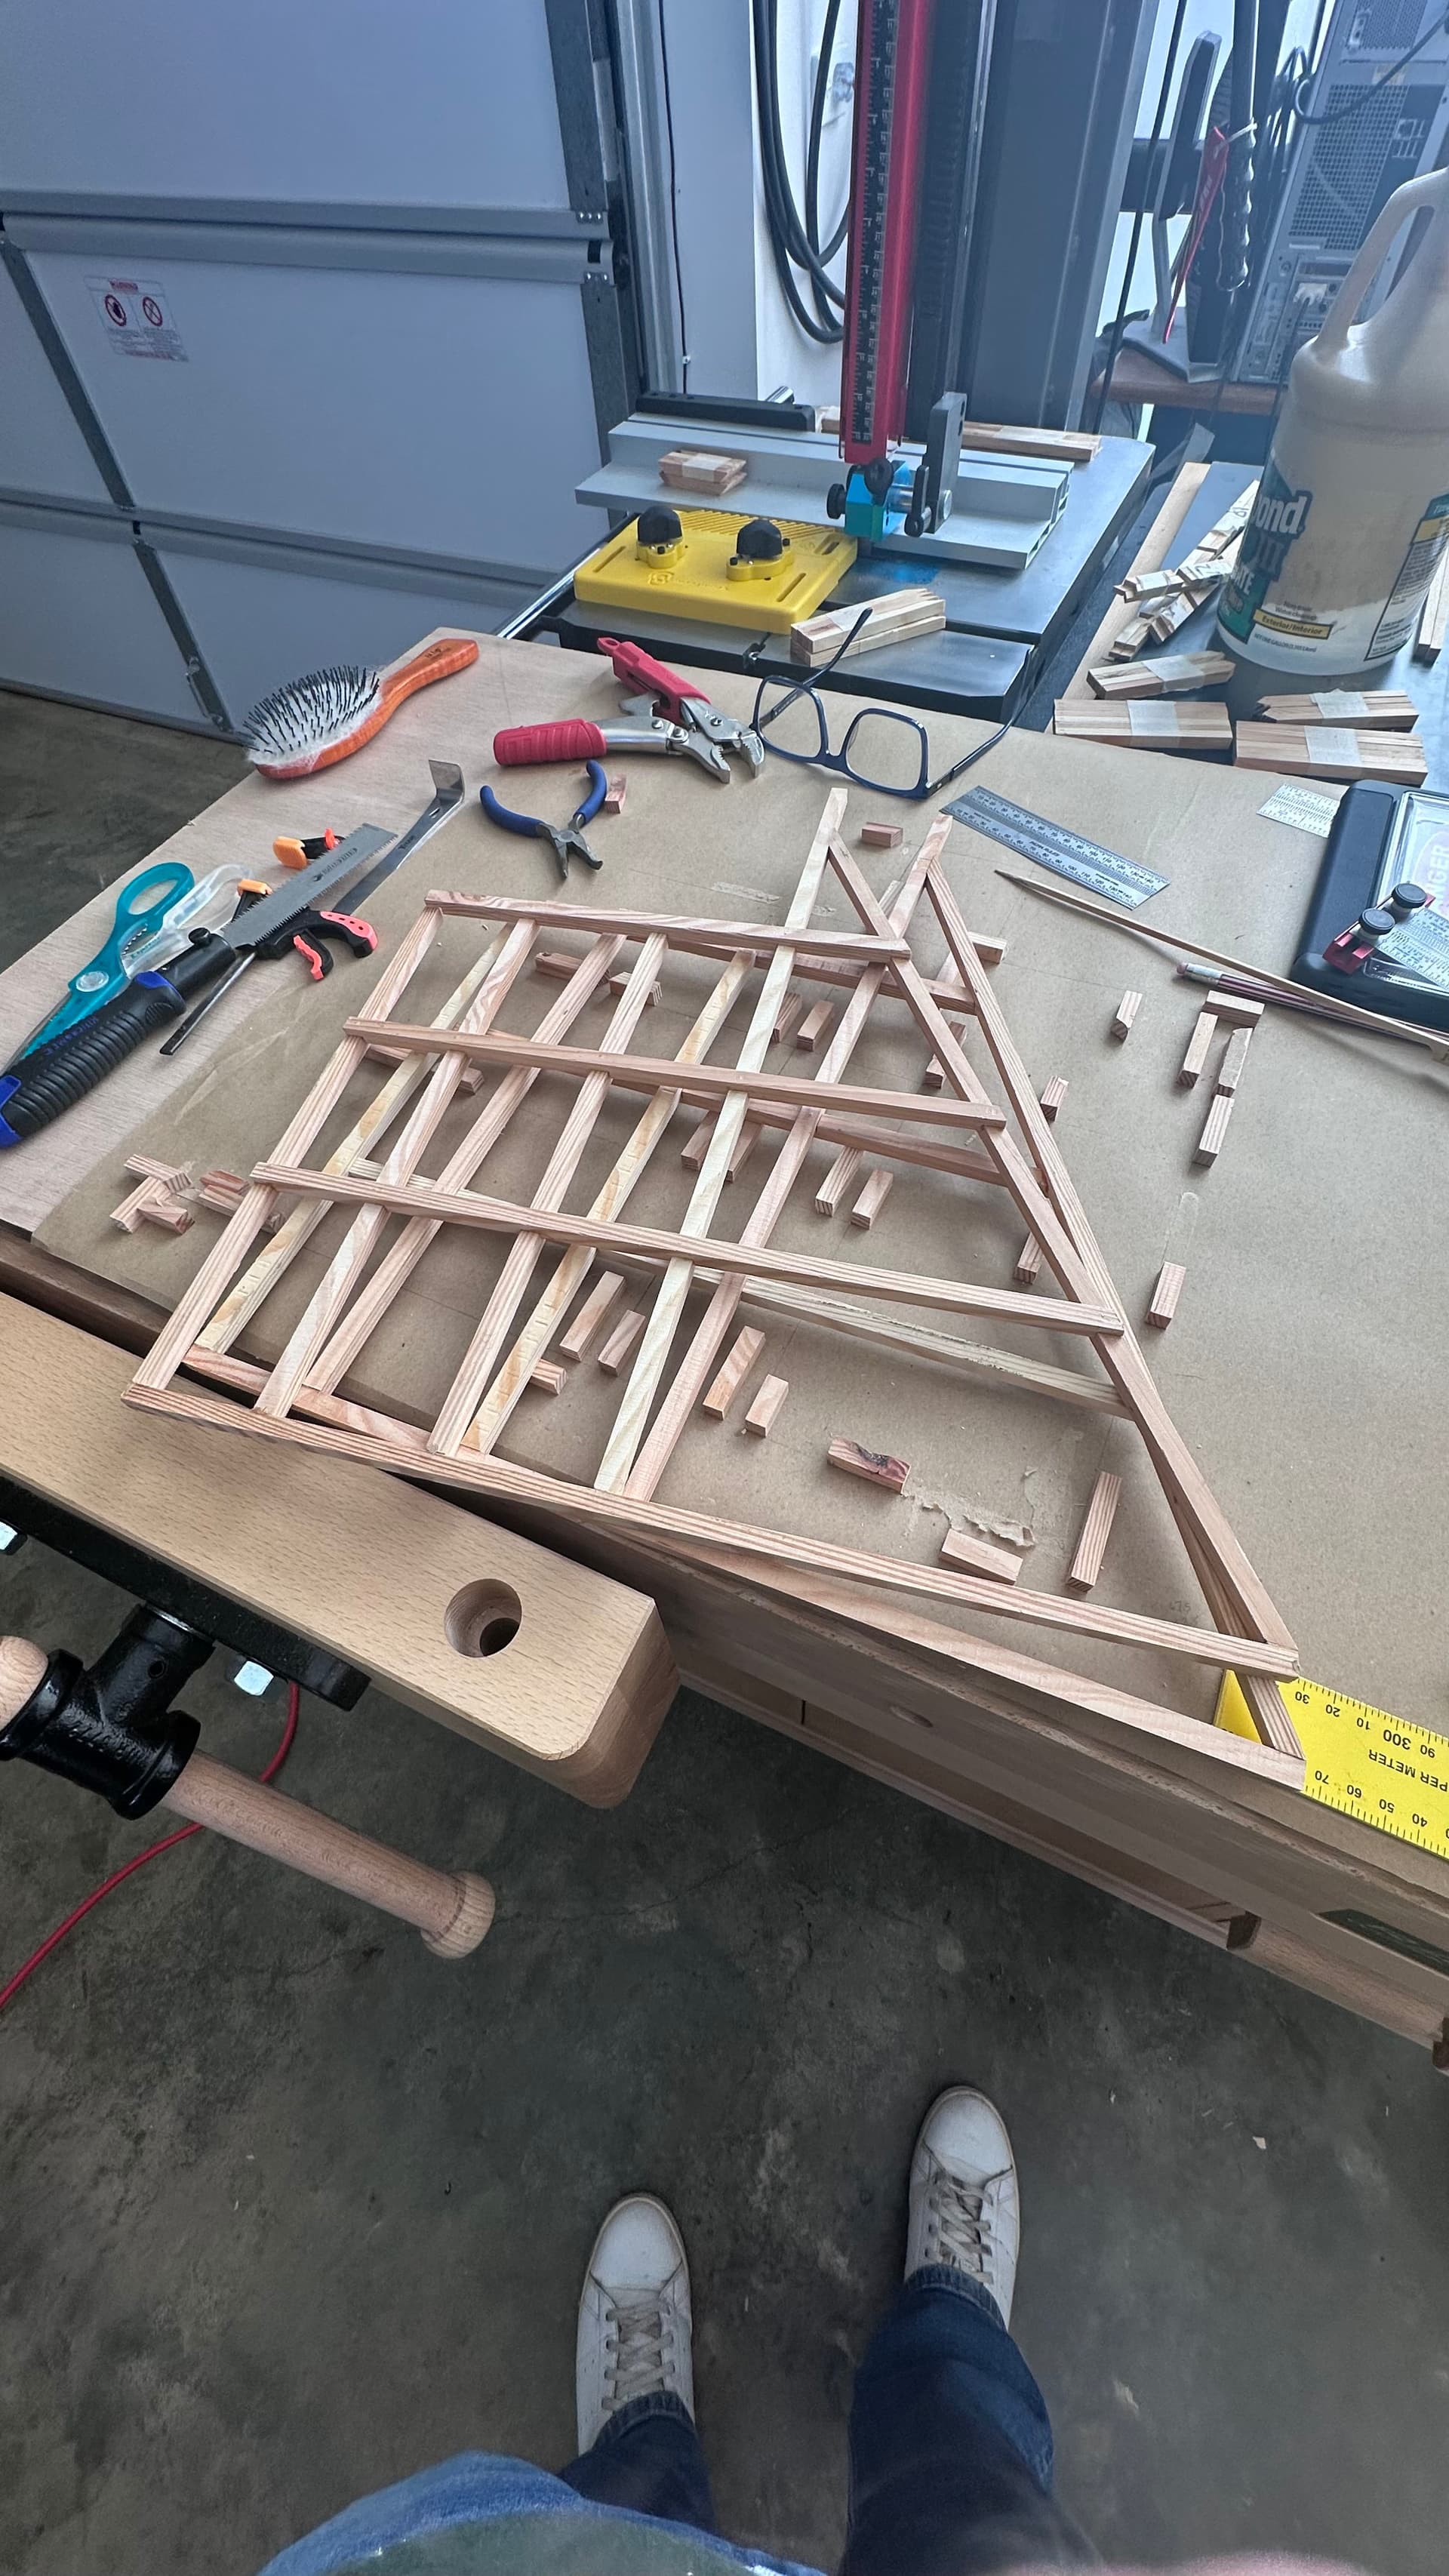
Step One - Measure the reformatted blueprints & transcribe.

Step Two - measure the posts and beams for fit.

Step Three - discover that new-in-box glue that’s 10 years old has gone off… sigh.

Step Four - find Titebond III and check for final fit. Glue.

Step Five - show work, 8 fingers, 2 thumbs :heavy_check_mark:

Step Six - create the mirror image (build in reverse).

So far, so good.

1 Like

Looking superb, Bill! I’ll bet you’re having fun with this.

I’ve not seen orange TBII, interesting. Some special formula, or is that a property of “going off”?

Cliff, it had turned orange, smelled like vinegar and had the consistency of a dense rubber glue adhesive.

Interesting. Did you… sample it? :grin:

So, one could say it became similar to Walthers Goo, except for the odor.

Just my observation, David Meashey

My guess is it was stored in the non climate controlled garage from the pic. of the garage door. The ingredients break down with the temp swings causing the color and consistency. However in your application if you stirred it up you could probably use it.

If you want to play around, mix it up then take some scrap pieces apply the glue and clamp them together. After proper dry time break them apart by hand and see if it breaks at the glue joint or into the grain of the wood.

Besides the glue joints will be the least of the worry once outside. You probably have enough titebond to build 500 coffee tables.

BTW…in case I missed it what type of wood are you using cause I really don’t read much just look at pictures.

How did you make the kerf’s and what is the reasoning? Also how are you doing your overlapping framing notches?

The wood has a southern yellow pine appearance so again I am interested in the type of wood used and of you picked that up from the U.S. or if it’s something native down under.


Rooster,

The timber is almost entirely recycled/reclaimed: pallets the new tools arrived on, Oregon from the old house, and some Tasmanian Oak a neighbour was throwing out. So no, I didn’t import Southern Yellow Pine from the US, but who knows where the palate originated… China?

The kerfs were made with multiple passes on the big table saw. I chose that approach because, frankly, I didn’t yet have the confidence or skills to put the necessary cuts into every individual board. In the spirit of JFK, we chose to go to the moon.

image

The overlapping framing notches were also cut on the table saw, using multiple passes and sneaking up on the final dimensions rather than trying to remove the whole section in one go.

And then there’s the glue.

It had been stored in a cool, dark place, but it was 10 years past its use-by date . My excuse is that Masters Hardware (the Australian Lowe’s/Woolworths venture) closed down and had some very good prices. At the time we were living in rentals, and my table saw had a footprint of about one square foot, so I stocked up on Titebond. The Titebond III was still usable; this old bottle of Titebond II had simply reached retirement age.

I even contacted Titebond Australia. Their response was essentially, “Sorry for your loss, but the glue can’t be resurrected.”

This year, however, Herself finally got tired of accompanying me to Carbatec while I drooled over table saws, bandsaws and other proper woodworking machinery and said, “Enough… just get some proper tools, so you can use up your glues!”

So I did.

And now I have the tools and the pallets they came on.

That pretty much sums up this build. The timber is recycled, the tools are finally being put to use, and the whole thing is really an experiment to see whether I have the skills to build something from scratch that I’ll be happy to put on the railway.

1 Like

How do you get 90° on all 3 Axes?

Here is where I discovered that perhaps I should have measured three times, instead of two.

After gluing each side together, I found I hadn’t actually allowed for one of the posts. So I went back to the plans, remeasured everything, checked it again, and then promptly perfectly placed the post in the wrong spot.

Ironically, the wrong spot actually made placing the 45° angle floor of the ore bin much easier.

However, because I hadn’t run everything through the thickness sander first, I’m now noticing significantly more variation between boards than I’d like.

Aaargh.

And, of course, that’s going to affect the inner 45°-angled hopper as well.

Getting everything to fit took another five attempts.

This is one of those jobs where a fraction of a millimetre here and there suddenly becomes a much bigger problem once all the pieces come together.

At this point I’m thinking, “If I don’t tell anybody, no one will know!”

Unfortunately, I’ve been making duplicate pieces for a friend as I go.

Oops.

But then I remind myself of Rooster’s Useful Rule in modelling: if it looks right from 3.08 metres away, it’s probably right.

And yet, at ten feet, it looks even better.

So far, so good…

1 Like