Large Scale Central

The Pola Slum Kitbash Thread (Revived)

Once again I find myself reconstructing old threads. This is a summary of a group of buildings made from what most people would throw in the trash.

Several years ago I acquired a large number of used Pola buildings in various states of collapse. For the most part it was several boxes of debris. Sold as 1/22.5 scale the buildings are much closer to 1/20.3. All that is required is to raise the top of the door frames by 1/4″ and you’re in business.

Most of the Pola kits are based on European styles, but they did offer an extensive line of American western style wood buildings. Typical of the mid to late 1800s they all feature four pane double hung windows. To update these to the early 1920s and beyond I decided to recast single pane windows that would fit the original openings.

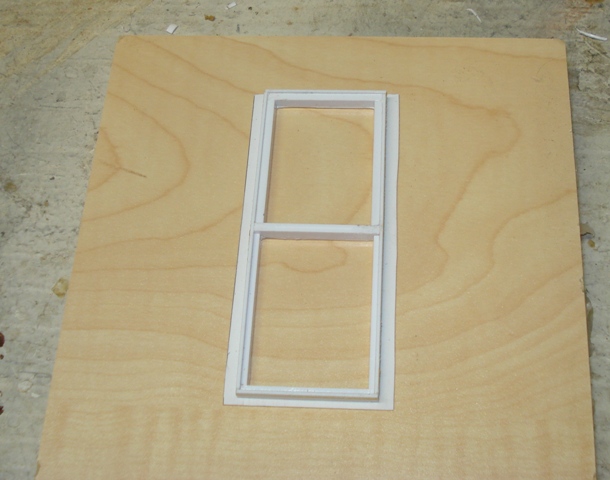
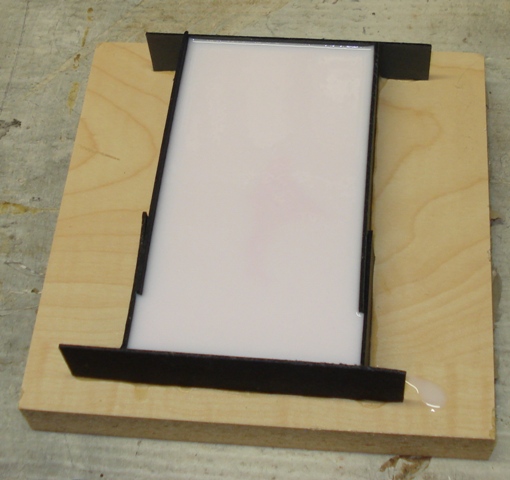
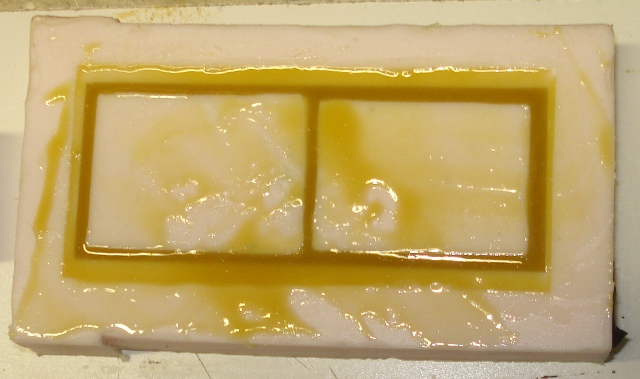
A master was created for molding the new windows in resin. Using a wall section from another kit as a guide I cut styrene pieces and fitted them in to create a master for the new single pane window. This insured a good fit and created a lip on the inside that would help hold it in place. Once the master was cured I glued it to a piece of old veneer counter top and built a low dam around it about 1/2″ high. Using RTV from Allumalite (High Strength 3) I covered the master and let the silicone cure for several days. When it was ready I peeled the mold off the master and poured it full of two part epoxy resin also from Allumilite. I have since switched to Smooth-On products.

Before it gave out I was able to make 80 windows from this single mold. These windows are usable across the entire series.

slumoff7

slumoff8

slumoff9

The first victim is this shell of a small depot. It will be the office at the mine.

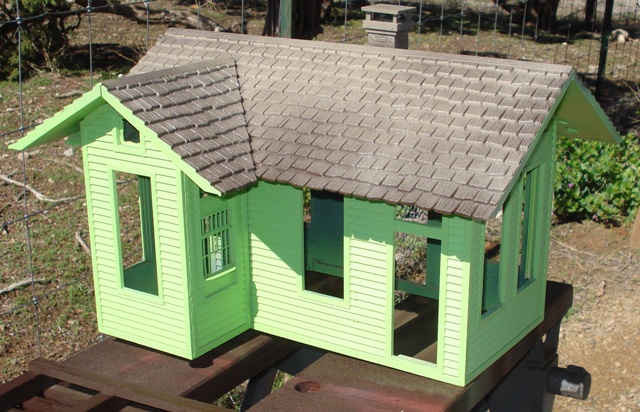
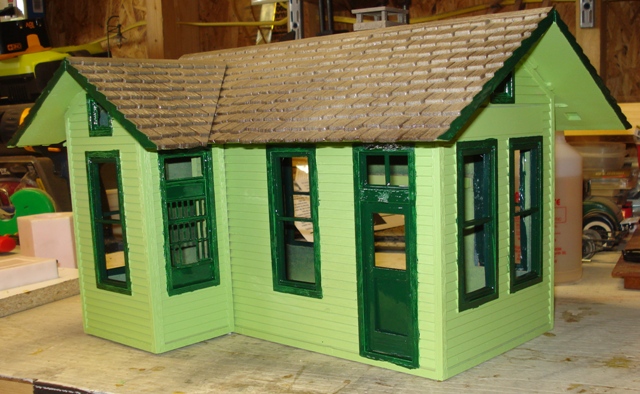
I began by sliding the vestibule over to the far left side. This covered the second door and created a space that suggested a paymasters office. I built a barred window out of left over pieces from the bank kit for use on pay days.
slumoff2

I painted the building with its base color of Apple Green (Krylon).
slumoff4

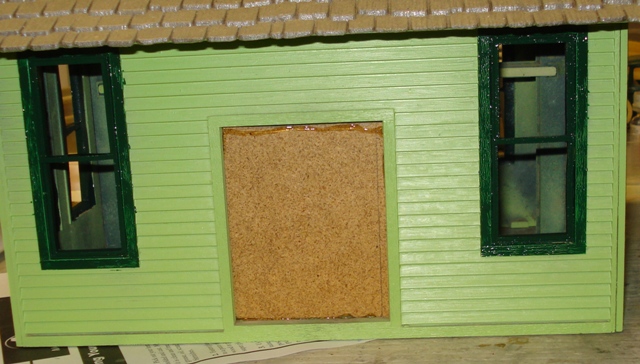
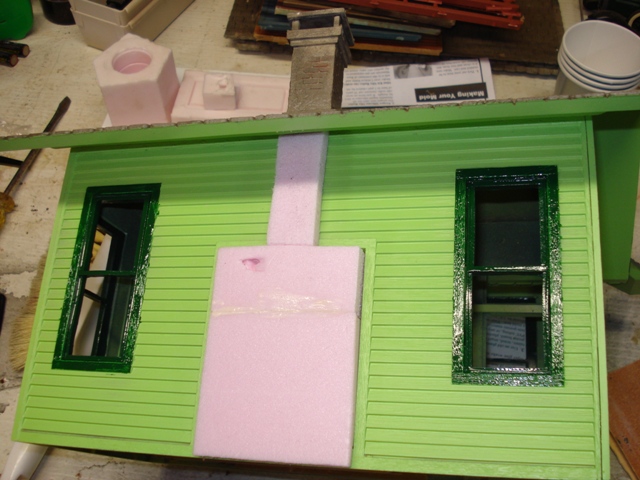
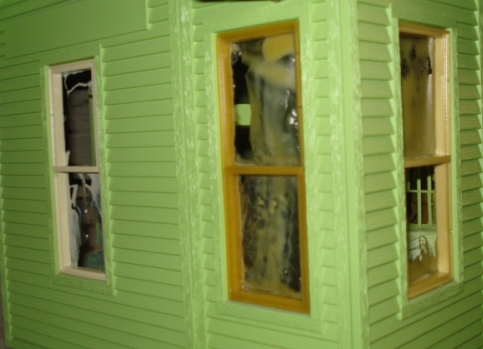
Once the windows were cured I cleaned up the flash and inserted them into the building using E3K. The front door was made from styrene and glued in at the same time. What had been a very low freight door in the rear was closed off with a piece of hardboard and a fireplace shaped insert made from construction foam. The fireplace was covered with tile grout and painted gray. The trim and window frames were painted forest green using Rustoleum oil based paint.
slumoff11

slumoff13

slumoff19

slumoff20

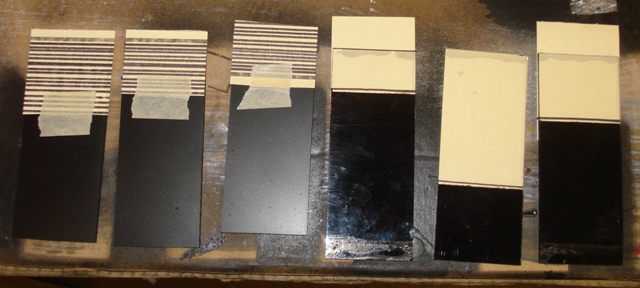
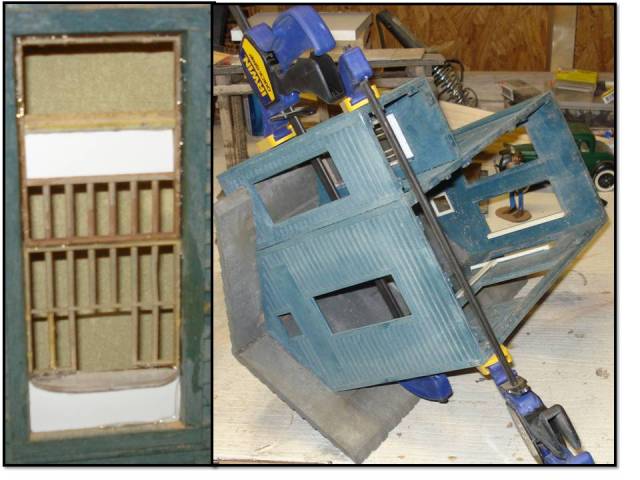
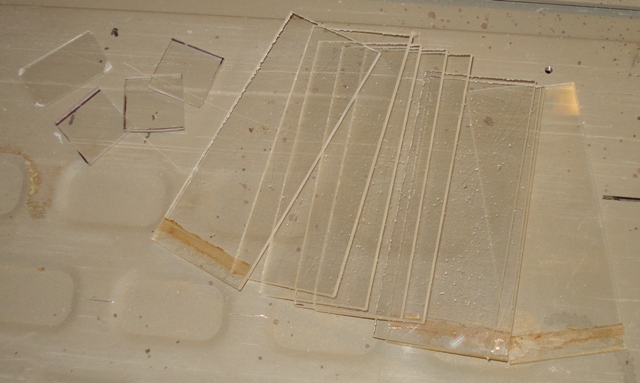
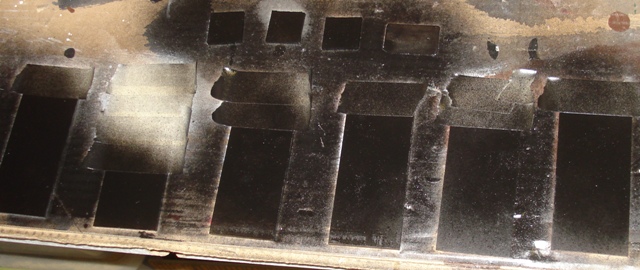
Window glazing was cut from 1/16 thick plexiglass painted black. It was blocked off at different heights using tape and scrap card-stock to leave different amounts of clear space. These spaces then had pieces of card-stock with horizontal lines, glued in from the inside to represent blinds and draw shades. The glazing was then glued in behind the window frames using clear silicon sealer.
slumoff15

slumoff16

slumoff17

The rest of the details were painted and the office was attached to a painted plexiglass base using screws in case future removal is needed. You can see from the picture what I mean by the scale of the buildings. The figures are 1/20.3 while the car is a 1/20 scale Hubley kit.

Below: Red McEntire shows George Breece where the road off the Mining Company’s property is.

More to come.

6 Likes

Your window technique is super effective, especially with the shades. I’ve not seen that before.

I agree. I’d not seen the use of black before. Usually just frosted if no interior, but the black with the card stock shades looks very realistic.

Sure you have, works well with Amtrak… :laughing:

Next up is some more low hanging fruit. Simple repairs and some paint. This engine house is large enough for number 5. Since I got an extra end wall with doors I decided to make the structure double doored.

After cleaning off the dirt and gunk I glued the building together.

The cross supports on the base will have to be removed to let the track drop low enough for the engine to clear the door.

There was no roof for this building so I made one from 1/8 plywood. A length of scrap wood reinforces the ridge line.

slumeng4

slumeng5

Strips of 1/8 cedar make up the trim.

slumeng6

Next the entire roof gets a coat of green Rustoleum.

slumeng8

Rows of corrugated metal are added for the steel roof.

slumeng9

To complete the roof I attached the vent and covered it in the steel material. All I need to do is install the doors and glue the base on.

The steel sheet material is 3’" galvanized weather strip.

I cut it to length of about 8-10".

It then got run through this crimping press built by a machinist friend of mine.

From there the strips were cut into 2 1/2" wide sheets with metal shears. They were slightly distorted but not to bad. They are glues on using E3K.

…and now for something much more involved.

Most of this junk pile was side walls from the story and a half or two story rectangular buildings. I purchased a fine tooth blade for the table saw and proceeded to cut them up as needed.

This first project is made from four of the one and a half story building walls.

This will be a billiard hall. “Easy Betty’s, Hard Eight”. First some inspiration.

slumpool1

The back wall had a door. All I had to do was run through the table saw to get it to the correct height.

The front wall needed large windows. I t was cut on the band saw.

The building will be flat roofed with a stepped facade.

Once all the walls were cut and cleaned up the sides were glued together and the whole thing attached to a styrene base with internal supports.

Some old ties were laid out front for a board walk.

The tops of the walls were trimmed out with bass wood strips. Supports for the roof were attached inside.

After framing in the front windows and doors I added these multi pane steel frame from the parts box

The windows and door are framed. Trim and cornice work is finished.

slumpool5

A piece of shower surround was cut and glued in for the roof. After caulking it tight I painted the building blue.

slumpool6

The roof is painted with texture paint base and then three shades of gray. A lot of taping went in to keep the rest of the building clean.

The trim and window frames are painted with a darker blue.

The windows are done in the same manner as the Mine Office. Signs and advertising finish the job.

1 Like

Great work. They look marvelous!

It worked so well I didn’t know that was how you did it! It just looks right.

On deck for the next build is “Foster’s Radiator” and service station.

The inspiration:

1930rwbpaint

It begins with a rough idea with no detailed plans. Seems like that is how these things always start.
Yep good enough for government work.

slumrad1

Work bay meets the table saw. I used the Hubley Ford measuring device to make sure the size is right. A stray piece of roof is glued up for the island. Cut out the old window frames and door.

slumrad2

slumrad4

The entire building is attached to a base of styrene.

slumrad5

slumrad3

Now the real work can begin.

I framed in this door from a vacuum molded details set.

slumrad6

The supports for the driveway cover are made from cedar. The bottom of the door space needs to be filled so I cut a piece to fit, from a broken wall section. The remaining openings will be hidden behind the sign so all they need is sealing shut.

slumrad7

slumrad8

Hardboard does the trick. Caulked from the front to help weather seal the structure. I also put a piece behind the garage door with some caulking to stiffen the plastic. The other miscellaneous roof section covers the garage. Sort of ties the buildings appearance together. Almost as if someone planned it that way. Of course we all know better.

slumrad14

slumrad12

Slim Foster looks on with quiet disapproval.

slumrad10

Scrap wood supports glued in. Another section of the shower liner is fitted for the roof and sealed with E6K.

slumrad15

slumrad16

slumrad18

slumrad19

slumrad20

The day of glue and clamps. I use the cure time to eyeball some details. Slim still seems unimpressed.

slumrad21

Painting day has arrived. I make all of these buildings so the bottom comes off rather than the roof. Helps keep them weather proof. Although it does make working the interiors more difficult.

The base gets a concrete color with oil, dirt and tread marks.

slumrad22

The building is painted with white spray paint. Blue and red stripes are hand brushed in Rustoleum oil based paints. The metal roof sections are done in green and gray.

slumrad25

Signs are designed and printed on full sheets of adhesive vinyl paper. This is the stuff they sell for making your own bumper stickers. To make sure the sign matched the building color, I painted a section of the adhesive sheet before printing the sign in black.

slumrad13

DSC02927

The signs are cut out and applied to styrene sheet These are glued on with E6K.

slumrad29

slumrad30

The false interior pieces are shadow boxed. The small windows get the same treatment as the other buildings.

slumrad27

slumrad28

Then come the details. Pieces of junk and supplies weathered to different degrees.

slumrad26

slumrad31

slumrad32

And it is done.

titg14s1

Hmmm… is it me or does Slim have a slight smile of satisfaction on his face?

2 Likes

Another great job, Boomer. Are all these “resurrected threads” or are you doing some or all of the final work in the present, or…?

I spied your vintage Workmate. I still have mine from the 80’s, with spray and glue all over, but still has its original dogs, just like yours it seems.

Really nice job.
Whatever needed for minimum characters.

Revived, revisited, resurrected … who cares. Another superb build Boomer.

Cliff these are old projects. Abbreviated versions were posted here and on my old WordPress site. Trying to get this stuff into one location. Got one more week of the GS visiting then I will be back on new builds.

Wonder what I will do next. :thinking:

images.jpghsh

7615809964_740492958a_n

Here is the last building from the old projects. It is not a Pola kit but one of the hydrocal casting sets from “Gifts To The Garden”. It was part of the boxes of debris previously described. It is a model of a stacked field stone building typical of northern New Mexico. I only got four walls in very poor condition so it is going to take a lot of work. When done it will resemble the building center frame below.

slumstone1

The broken walls had to be glued back together and reinforced with some hardboard and strip wood. Once that was dry I glued the four sections at the corners.

One wall had a missing section. I could not find the missing part, maybe it was the dust in the bottom of the box. In any event I repaired the window frame and then glued in rough stones from my driveway. The mortar is un-sanded grout.

slumstone3

Doors and windows were cleaned up and painted black. The new roof gables are 3/4" plywood with wooden coffee stirs for the battens. They were painted black as well.

slumstone5

The building was strong enough to lift so I attached it to a piece of cement fire-board. It is very heavy and crumbly. I will never use it again. The roof is made from 1/8" plywood. The portal is made from strip wood. The window coverings are manila folder cut to look like curtains. While the paint dries I made signs. Once again printed on adhesive vinyl sheet.

slumstone7

Back to more steel corrugated roofing.

slumstone8

Final assembly. This building is an exception from the others as it is permanently attached to the base with a removable roof. I could not do it the other way as it was to fragile.

All I need now is some drovers waiting for the train to load and Mitford Livestock Shippers can open for business.

Okay I stand corrected. These two structures were refurbished for the “New Mexico Garden Railroaders” a GR club in the Albuquerque / Santa Fe area. They were donated and needed to be rebuilt so that they could be transported to various public displays.

The first is the small water tower from Aristo Craft. Repairs and a repaint.

The second item is a Pola coaling tower. It was in sad shape and multiple pieces.
I decided the lifting buckets were to exposed and damaged to save. A new enclosed hoist was added and dump area under the tower for coal. This made the footprint of the tower smaller and kept it within the confines of the base.

First it was taken apart.

The new elevator was added.

slumnmgr3

The base was cut to make a recessed area for the coal pit. Envisioning this as delivered by truck.

The grate is built out of wood. Styrene would have been better but this what I had at the time.

The tower nests into the redesigned base.

Time for paint. A solid coat of flat black is usually a good start. The footings get painted as concrete.

slumnmgr7

The coal grate gets painted as a mixture of concrete and steel.

Tread-ways are added and a little Woodland Scenics ground foam goes on.

The tower is spray painted black. Three tone dark brown with a little redwood is applied. The roof is done in forestry green.

slumnmgr10

It would benefit from a little dump truck delivering coal. If it were mine I would make that happen. Oh well the club members are so heavy handed it did not take them long to break both pieces. This is why we can not have nice things.

:pleading_face: