Large Scale Central

STMA GP-9 Chop nose.

Craig,

I hadn’t even realized I forgot them until you mention it. But after having to fill and file and sand I am kinda glad I did. They would have made that tougher. I can print them up and glue them on.

And as for taking the supports off before the final cure I am glad you all set me straight. It’s much easier taking them off first. I thought they needed the support until cure was complete and a lot less excess resin.

So a little more progress. I got the windshield wipers designed and printed to replace the broken and missing ones. Got the front cab filler filled in and sanded flush. I added a box on the back side of the cab below the window. All of the STMA locos have this I was told it was a cab heater and blows through the louvered vent in the door. I got the winterization hatch done by adding a screen and some supports to the screen and then glued it on and filled and sanded. And finally I designed and printed some of those step thingies that are on the side of the truck that I have no idea what they are but I was missing all of mine. So I am making progress.


Devon Sinsley said:

And finally I designed and printed some of those step thingies that are on the side of the truck that I have no idea what they are but I was missing all of mine. So I am making progress.

“It don’t mean a thing if it ain’t got that swing!”

The part is a swing hanger,

See:

https://www.railpictures.net/photo/475168/

and

cross section diagram at http://ibls.org/mediawiki/index.php/Diesel_Trucks

You might find, with a minimum of research, that those truck parts are possibly called “Spring Hangers”…

I hope this helps.

Fred Mills

Sure looks like Swing Hanger on the diagram Fred

And from the looks of things it supports the plate the spring sets on not the spring itself, which would allow a swing motion in use. But YMMV

These parts should be available from “Charles Ro Supply” at very little cost…

Thank you, David, for your confirmation.

Fred Mills

While the Americans are getting all greasy with swing hangers on the truck frames, the Russians are getting all stylish with swag hangers and picture frames in the cab,

https://www.railpictures.net/photo/761194/

Fred I tried to order them but they were out of stock. So I gave it a go with the printer and am very happy with the results. One of the things I am learning to love. Parts on demand

Well since “minimum research“ has been done and “Charles Ro Supply” is all out , I’m wondering if for a small charge you could print up a pair of step thingys. My CN GP38-2 is missing one and I believe a F3 is too.

The file is made so printing is easy. If you and anyone else needs some sub par unresearched step thingies let me know. I’ll send you some

Okay. So summer is over. I am done fishing for awhile. (Although I am in the process of making a couple of new fishing rods, a new 9’ 3/4wt fly rod and a 7’ 3 piece ultra light rod). Time to get back to model railroading again. I have the hobby room all cleaned and organized. I have so many unfinished projects I had a hard time choosing which one to throw on the bench. I have also started a new project but that is a secret and won’t be revealed until probably after the first of the year as it is a Christmas present.

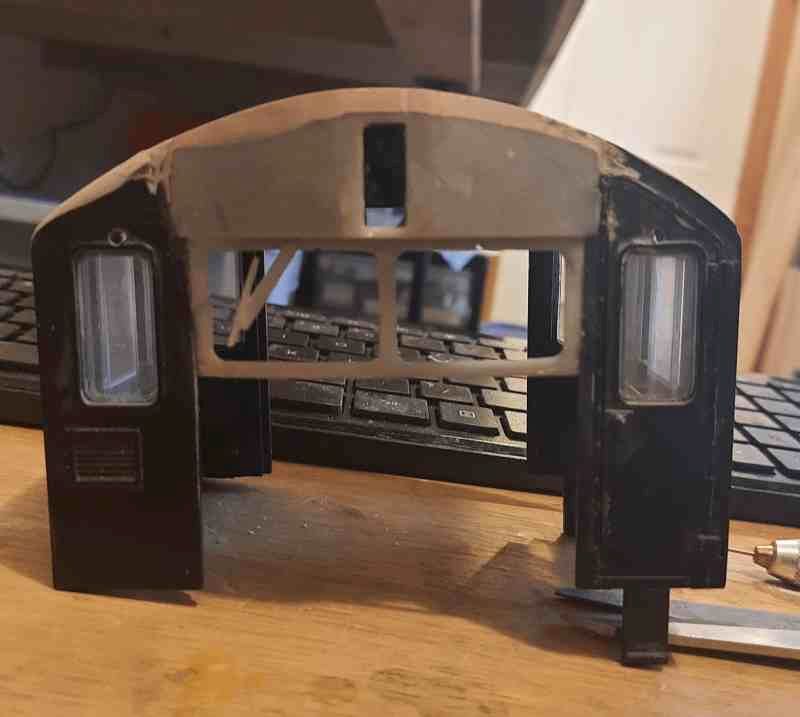
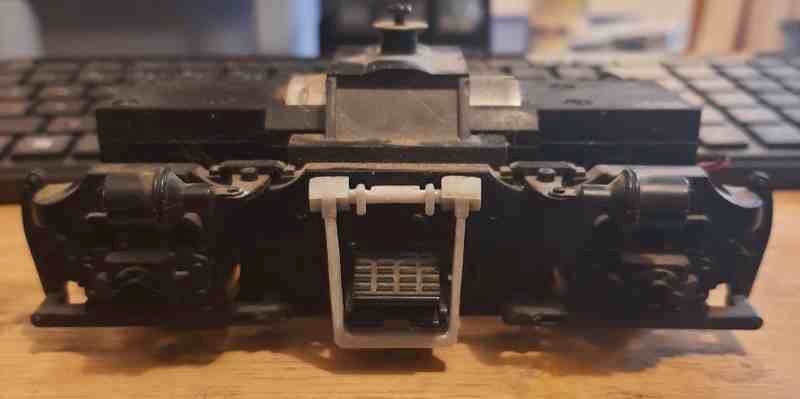
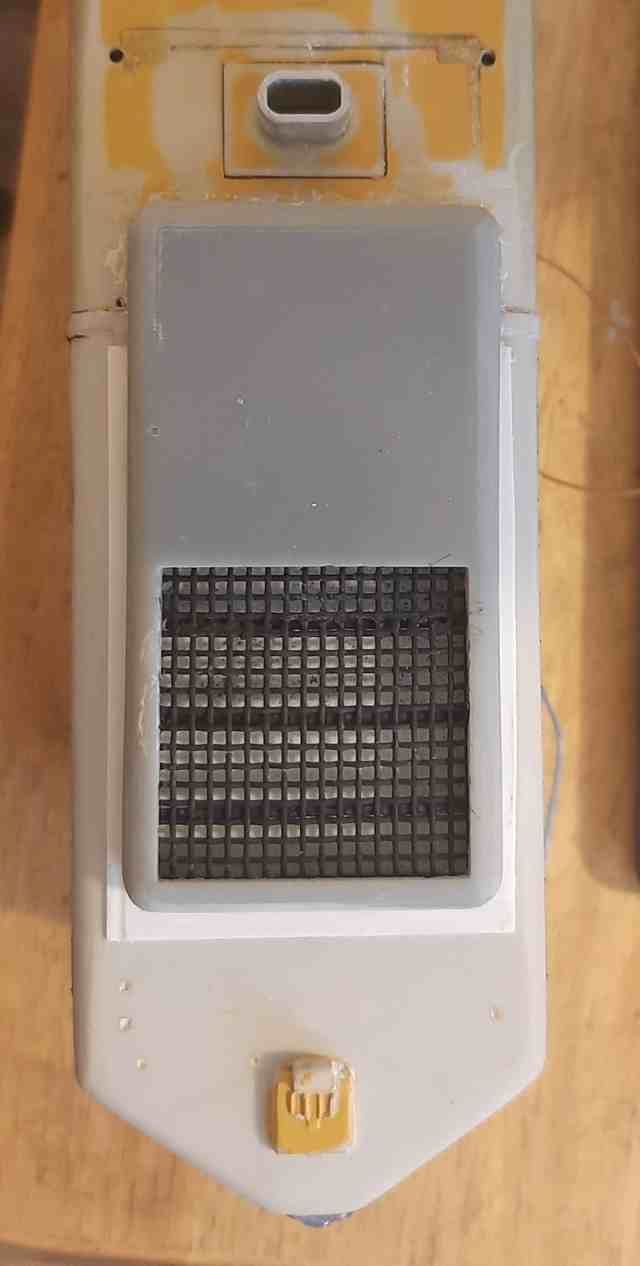
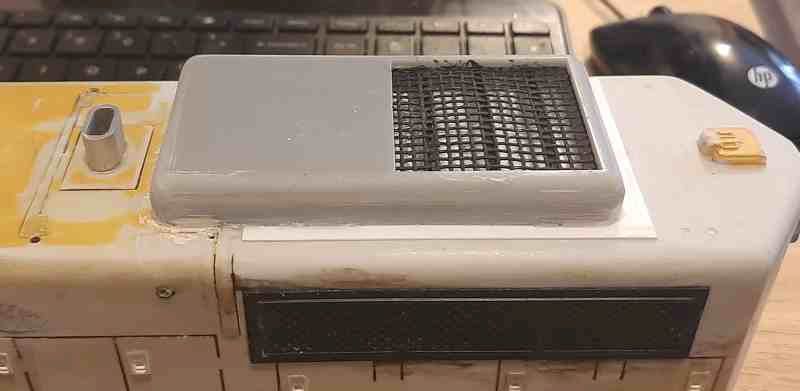
But, anyway, as I was cleaning the project that was in the way the most, and thus grabbed the most interest and attention, was the Geep. So it got thrown back on the bench. Where it sits is that it needs all the louvers and door hinges replaced from my sanding efforts. I have chosen to go the route of using quarter round styrene for the louvers and half round for the hinges. I already have all that so its just a matter of sitting down and getting it done. I need to get some bolt and washer details for all the roof lids and some light wire fishhooks for lifting eyes. Once I do these details it will be ready for paint. I finally acquired all the paint I should need to mix the colors up to match the STMA.

I can’t remember, and am to lazy to look back), but I acquired one of the late Steve Featherkyle’s GP 7/9s to make a matching pair. I am not going to begin this one until the other is finished but I bring it up because I have decided on how to pair them. I know I have had discussion on how exactly one should pair them. After ruminating on it and discussing it with my local electronics guru Mike Williams I am going to make them a mated pair where one has the electronics and the other has the battery. Both will have power to the trucks and run off a single receiver and a single set of batteries. Since I am not a diesel guy and this is a purpose built locomotive to represent accurate operation of the STMA there is no need to separate them since they almost always run them in tandem long hood to long hood. So for my purposes keeping them coupled and tired all the time will be the best option. I will just build a long carrier that holds them both. I will be able to disconnect them easy enough if I need to but I really just don’t see in my operating them where I need to separate stand alone locomotives. By doing it this way (keeping both powered) they could easily be separated and electronics put in the one and batteries in the other should I ever decide to get rid of them. So this first one will get the electronics and then I can run a battery car until I build the second loco.

Thats where we sit. I will start posting progress shortly.

Glad to see you back in the modeling workshop, Devon. Look forward to your continued progress.

Devon Sinsley said:

Thats where we sit. I will start posting progress shortly.

We want pictures !

Rooster said:

We want pictures !

Soon. I am thinking i will get some bench time with it this weekend. And will update the progress. I am dreading all the individual louvers I need to glue on. But a few uninterrupted hours at the bench and i should be able to have all the louvers in place as well as the hinge pins. That puts it very close to paint. I might even have enough Bolt washer details on hand to get that done. If I do then the shell should be ready for paint. Wouldn’t that be cool.

Here is the latest. I have become a complete and unabashed 3D printing fan. For someone who not long ago though it was cheating, I love it and am addicted. So cool to have exactly the part you want on demand.

So for this project I removed the rear manual brake lever as it was a very low detail piece. I wanted something with a bit more detail. No one makes (that I know of) a lever style brake handle like the ones on my prototype.

brake photo

So I did a bunch of googling until I came up with the name of this thing and it is a Peacock model 200 or at least it is a very similar brake lever. I found measured drawings of it and designed one in 1:1 that is pretty close. I reduced it so it is 1:29 and then had Mike Williams print it for me. (still waiting for my new screen to arrive). He printed me 4 of them. Here is what we came up with.

20211025_135310_resize_46_crop_3_compress7

3 Likes

Well I spent yesterday home from work with a head cold. Thank goodness it wasn’t COVID but just a good old fashion head cold. But at any rate between coughing fits I was able to get all the louvers glued on. It wasn’t as bad as I had thought it was going to be. The only thing left to do before paint is to get the bolt details in place on the plates where the fans are mounted and add lifting hooks to the same. That should do it for body details.

I am getting pretty excited about this its really starting to take shape. I will order the new electronics I am going to experiment with and build a temporary battery car (It will take some time to make the paired GP9 that will serve as the permanent battery car) and then it should be ready to run. Sadly I have almost NO modern rolling stock to build up a nice looking train. I will have to get my butt busy and build up at least a few log cars to put behind it. I think I have a total of 5 Aristo flat cars that will all be converted to skeleton log cars.

One of the problems with the entire STMA roster I want to build is EVERYTHING is a custom car. The log cars were all shop built cars and so will mine have to be. The other thing this line hauls a lot of is center beam cars and thanks to Dan G I have the files to print some of those. I want to build their rib sided caboose. I was able to crawl on this caboose and measure it so I should be able to do a decent job making one.

And then they have SW1200 switcher that I have a USA trains NW2 that I will bash into a reasonable representation.

So much to do before I will be happy with my STMA train. As a steam guy this will likely be the only modern train in my line up.

1 Like

Just because, a well known rail photographer has been posting St Maries power over on his Flicker.
Recent samples,
Early autumn along the St. Joe by Mike Danneman, on Flickr

Going back home by Mike Danneman, on Flickr

Nice to see the 101 back in action. The last few times I have been down to watch them it has been the 102 and the 103. And the very last time I went down they were only using one Geep (can’t remember which one) and then had one of the switchers in the middle. I was beginning to wonder if they were dying and not being repaired. So it makes me very happy to see that maybe the entire roster is running again.

1 Like

These pictures are a perfect example of what I am after with this Geep project. They always run two, long hood to long hood. They do this because they can’t turn them so they just switch locos and run them down a siding to swap ends. Other than very rare occasions will you see it any different. So this is where the idea of having a pair that is permanently attached comes from. Dividing electronics and batteries between the two but operating as one.

1 Like

Getting some details done and getting closer to paint. Got the louvers on and the bolt details on the roof panels.


Next up is the lifting eyes and the door hinge details.