Large Scale Central

Simulate Concrete or Pour a Station Platform?

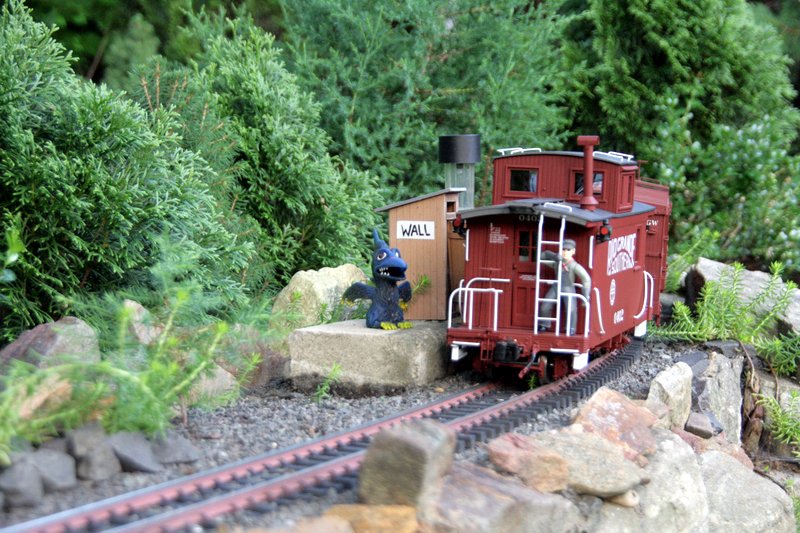
I’m getting ready to place the new Wall Station (see this thread for details) out on the layout. The old Wall Station was an empty raised platform with an outhouse…

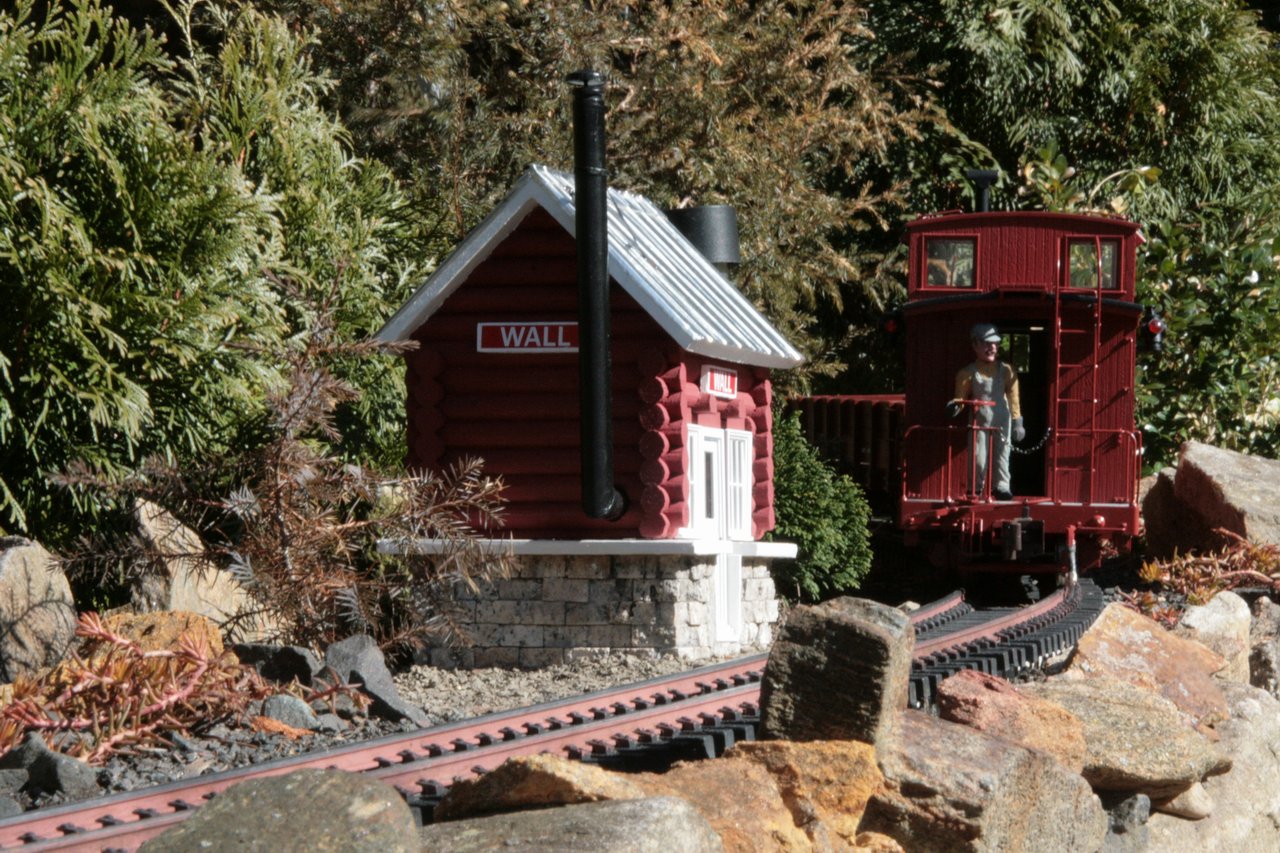
The new station will have a track level platform with the new station building and a to-be-constructed platform shelter sitting in this same area. It would be a simple matter to cut a piece of 6mm PVC to fit nice against the curved track then paint it gray with a yellow stripe at the track edge - OR - I could excavate a few inches of the existing ballast and fill, and pour a platform from topping mix and/or mortar mix.

The PVC option is quicker - I could probably have it finished tomorrow, but I really like the look of real concrete. This area is the #1 photo location on the railroad, so it begs to be done right. The other advantage of concrete is that I can make spots to sink the platform shelter timbers enhancing the realism of that structure as well.

OK - You’ve talked me into it. I’ll probably just place the station on the ballast for now until it’s warm enough to pour concrete.

Cut it out of styrofoam and coat it with hydraulic cement ala my sift and mist method. It’s really quick and easy, takes practically no time to set and move on, very clean, and it is real cement.

Great idea Todd, Thanks. I don’t know how well that would hold up here in the Great White North (http://www.largescalecentral.com/externals/tinymce/plugins/emoticons/img/smiley-smile.gif)The section of track, besides being my mainline, is a thoroughfare for local cats and tree rats, so there is that wear and tear to consider as well.

Nice thing about the foam is that it doesn’t swell/contract with temp or warp as wood would. Even a 1/4" - 1/2" thick layer should support animals as heavy as large dogs.

Hmm, Todd, I’ve been pondering the material I’ll need to mount my track on, once I move outdoors. The track will run in a flat, ex flowerbed, so I’m not too concerned about bumps and stuff, because those 5-foot lengths of Aristo don’t flex. My concern is turnouts (switches), which need to be pretty flat, especially where they join up with the rest of the track. I’ve contemplated various material like Hardibacker board, which is a Bee Scratch to cut and eats up blades, I’m told. Also, Kevin Strong once wrote that it delaminates, but maybe that’s in Colorado. So your idea, Todd, may be the ticket. BTW, the flowerbed will be covered with decomposed granite (the super wants gray, not brown), which will prolly take a set once the sprinklers hit it.

Questione: tell me again about the “sift and mist method.” How’s that go?

Joe Rusz said:

Questione: tell me again about the “sift and mist method.” How’s that go?

I’ll second that request. I checked out your website, but didn’t see it mentioned.

For now I decided to just plant the station building in the ballast while I wait for warmer weather and make a decision on method…

This image is 1280x853 - Use your browser’s View Image feature to see full size.

Daktah John said:

Joe Rusz said:

Questione: tell me again about the “sift and mist method.” How’s that go?

I’ll second that request. I checked out your website, but didn’t see it mentioned.

My article was published in Garden Railways Magazine a while back.

Get a 10# tub of Quickcrete Water-Stop Cement, a kitchen strainer, a small dish/ashtray, a water misting bottle full of water, and a plastic concrete mixing tub to contain any runoff.

Carve your platform, structure, faux rock, or whatever out of Styrofoam. An electric knife makes it easy and gives nice clean cuts.

Place the piece in the mixing tub so that the surface you want to coat is near horizontal (<~30 degrees). You can use pieces of Styrofoam to prop it in place in the tub while you work on it.

Use the ashtray to scoop some cement out of its tub and into the strainer. It is best to reseal the tub after each scoop as it will readily absorb moisture from your spray and out of the air and loose effectiveness.

Hold the strainer over the area you want to “work” and lightly shake/tap it as you move it around to make a nice thin, level layer on the Styrofoam. If you are not happy with this first layer, and everything is still dry, you can just shake or sweep it off, or level it, with a paint brush. Don’t worry if the coverage is not perfect at edges as it improves with the subsequent layers once the piece gets wet. If the piece is irregular in shape (e.g., a faux rock to cover a sprinkler head), it is best to first mist it to get the cement to instantly stick to it in the nooks and crannies.

Lightly mist the cement with the spray bottle so as to saturate the cement. If the layer is too thick, the mist will create a “surface shell” leaving the underlying powder dry and the area will be weak. So do several layers alternately sifting and misting until the shell is ~1/4 - 1/2” thick.

This stuff hardens fast and you can “handle” it to do another plane(s) later that same day.

I would vote for Todd’s method. Hardiboard does de-laminate here in the mid-Atlantic states.

Jon-

As an alternative to Todd’s method I’ve used hydraulic paint to coat blue/pink insulating foam board for foundations. One brand is Drylok. I used the latex version. It comes in various colors- grey, tan, etc. Paint it on and let it dry. Quick and easy. It has held up well here in your former home town of Buffalo. Just a thought.

-Kevin.

I was given some black granules, that when mixed with the adhesive, will make a permanent surface. So far I have only used it to simulate coal loads - quite successfully in my view - but have yet to use and evaluate it as a road or platform. This is a project for later in the month. It is the ‘springy’ type of ‘tarmac’ used (in the UK anyway) around childrens play areas.

dieseldude . said:

Jon-

As an alternative to Todd’s method I’ve used hydraulic paint to coat blue/pink insulating foam board for foundations. One brand is Drylok. I used the latex version. It comes in various colors- grey, tan, etc. Paint it on and let it dry. Quick and easy. It has held up well here in your former home town of Buffalo. Just a thought.

-Kevin.

Kevin…is this the Drylok masonry water-proofer material? Is it textured and does it look like cement? Thanks.

I’ve used the technique of covering blue foam with a thin layer of concrete also. Below is a culvert I added to my RR about 8 years ago and shows no sign of deterioration. I suggest that you also cover the remaining sides with the Quickrete liquid crack filler (I brush it on). I have found that, if you don’t take this extra step, ants will eat away at the foam until there is nothing left but the concrete shell.

Doc Watson

John Passaro said:

dieseldude . said:

Jon-

As an alternative to Todd’s method I’ve used hydraulic paint to coat blue/pink insulating foam board for foundations. One brand is Drylok. I used the latex version. It comes in various colors- grey, tan, etc. Paint it on and let it dry. Quick and easy. It has held up well here in your former home town of Buffalo. Just a thought.

-Kevin.

Kevin…is this the Drylok masonry water-proofer material? Is it textured and does it look like cement? Thanks.

John- Yep, that’s the stuff. It is basically paint mixed with hydraulic cement (I’m sure there’s more to it than that). It’s mostly used for sealing leaky basement walls. It comes in a gallon can and has a rough, cement-like texture when dry. It is very thick, like cake frosting but not as tasty, so you’ll want to mix it quite a bit before applying (note: do not apply to cake).

It is tintable. To me the premixed grey looks slightly darker than newly poured concrete. The tan looks a lot more like aged concrete. Your mileage may vary.

-Kevin.

I’ve been using a ‘mud’ mixer chucked in my drill to mix concrete in small batches. A long shaft with fins on the end. Found it in the dry wall section. I tint with stucco tints, dry powders.

If you use Todd’s method, keep your layers thin, I found the mist didn’t penetrate very deep, saturations tended to run off…

John