Large Scale Central

Remote mounting of a Bachmann switch stand

Thanks for those insights, Rooster. I hadn’t considered running the cable into the unit, and maybe that’ll help.

However, the external coupling is the only means of releasing the bare cable through the various components, and the final means of fine adjustment. So, making a direct connection inside would imply a permanent (?) termination on the cable… but maybe not.

The BM stands sort of explode when you open them up, making reassembly on the layout, after making fine adjustments, kinda rough. But, again, I’ll think about it with all your suggestions in mind.

For now, I’ve put it all in a cardboard box, which is safely in my “Indiana Jones warehouse” of future / failed projects.

This is partially because after looking at my track plan, I’ll need at least 2 8’ remote cables, and that’s not gonna work with this cable arrangement: too much resistance. And way too much internal cable slop for the BM to overcome.

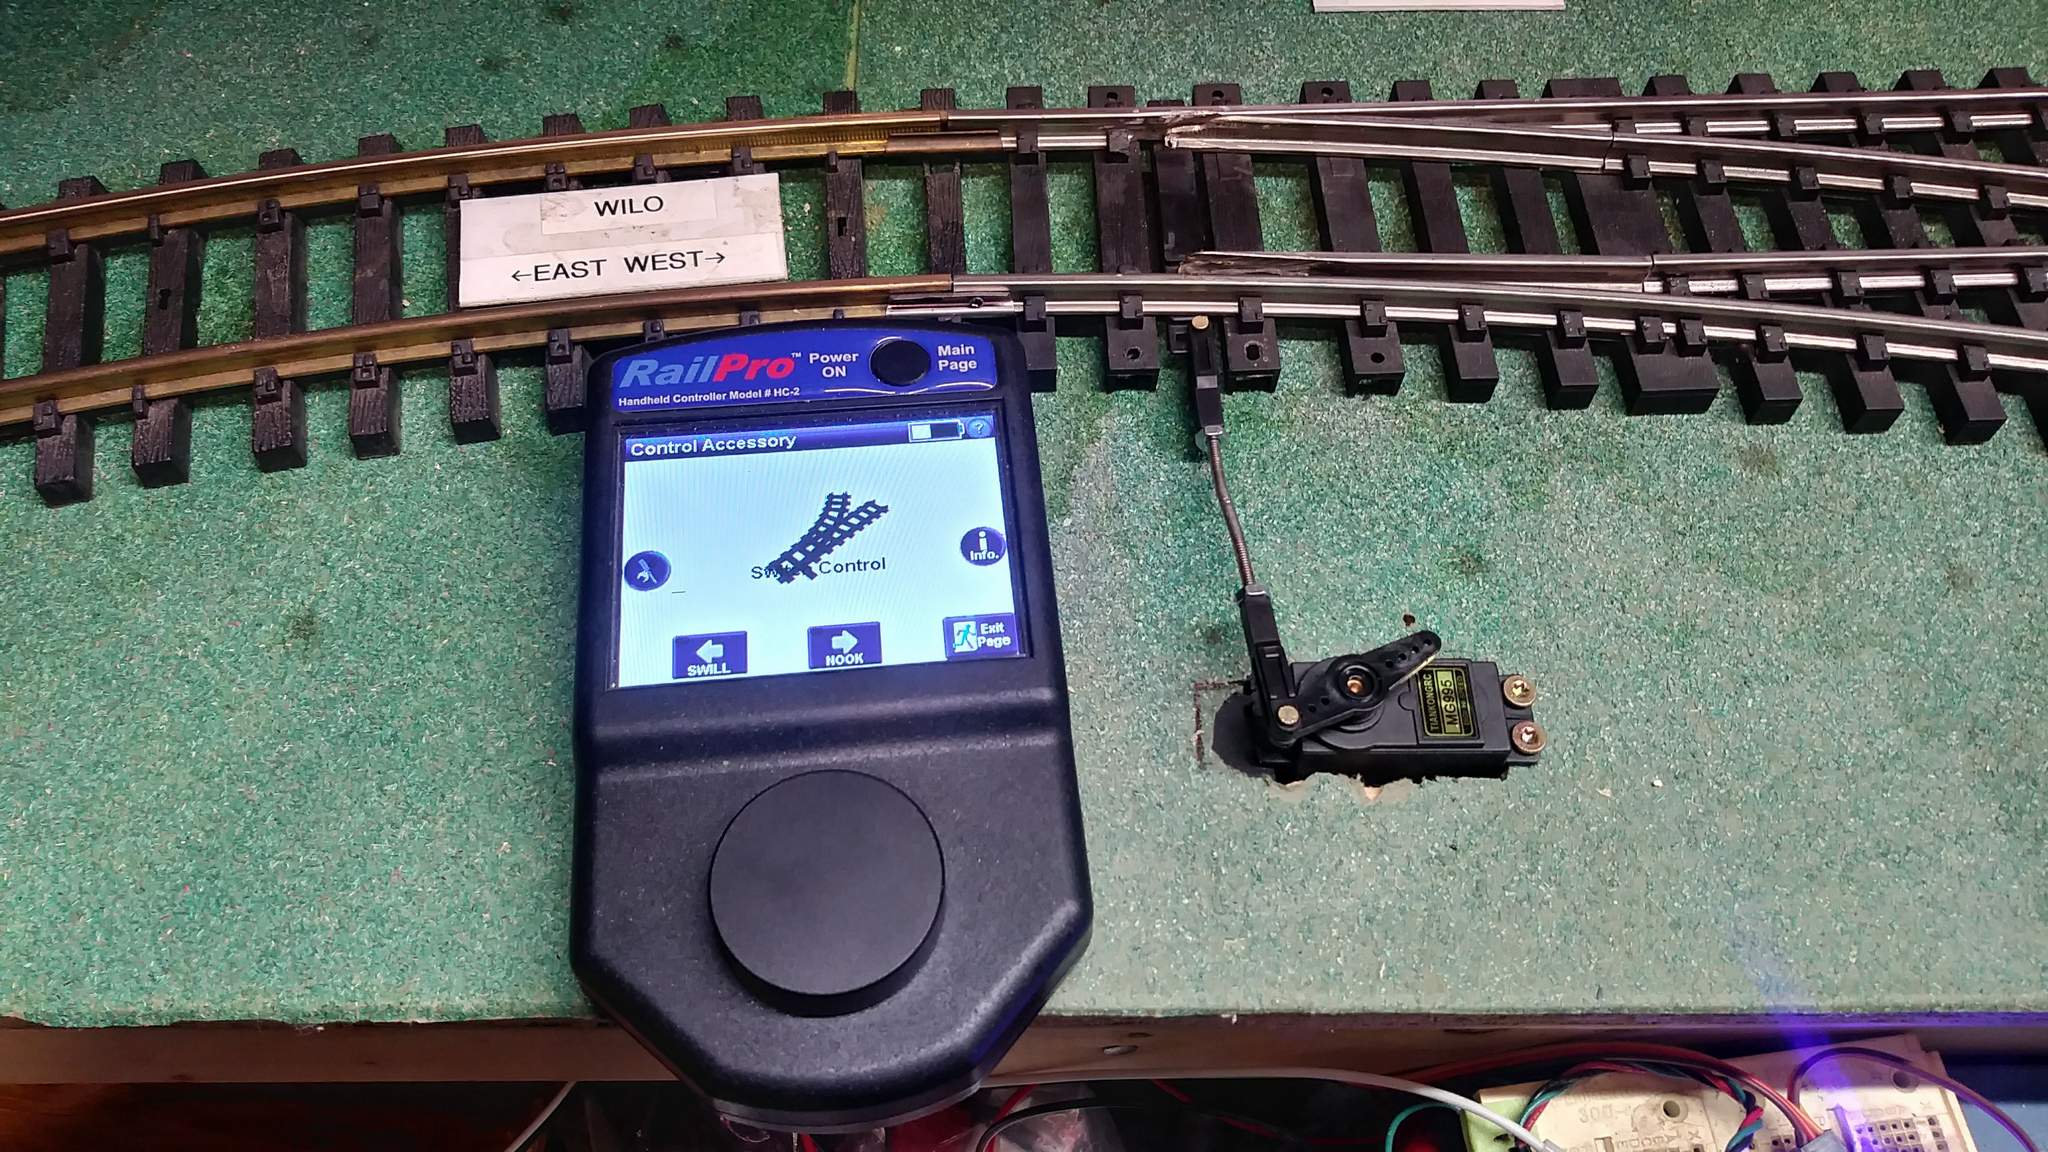
It’ll be far easier, now that I see all the issues here, to go back to my servo-actuated machine project, where there’s a local op button, and only an electrical cable needs to be strung to a remote waterproof pushbutton for actuation.

And Rick, if you think this manual adapter was over-complicated (and I can’t disagree), you ain’t seen nuthin yet!! :grinning_face_with_smiling_eyes:

This looks like the perfect clinic demo for ShedOps 2024

Maybe 2026? :grinning_face_with_smiling_eyes:

Cliff;

Just wondering how far from the edge of the layout the switch stand can be before becoming awkward to stoop down and throw?

My reason for asking has its roots during the 1978 BRAC strike, when I was stationed at the hump yard in Bellevue, OH. The arrival yard had one manually thrown switch where the stand could not be beside the points (other track too close). The solution was to mount the stand one track away with a throw rod going through a conduit to the switch (and under that track). I have done something similar using a tubular coffee stir stick with a brass rod inside (on an English style OO layout). Perhaps some aluminum tubing and a good stiff brass throw rod would serve? Best of all, it’s prototypical.

Yours, David Meashey

Yep, that’s a little far for anything flexible. There are two other remotely operated switches on my indoor where I am using servos with short straight solid rod connection to the points and controlled by a RailPro Accessory Module. They work great!

EDIT to add some photos…

1 Like

Nice! And yeah, you’ve done LOTS with servos, Jon, great work!!

My design is wrapped around a Tam Valley Singlet controller, which senses automatically where it ends its servo throw based on resistance. No longer in production, but I bought out all the stock of them I could find, a few years back. I have 3 proto circuit boards, v4.1 for this project, ready to solder up. Just need to get to it.

I need to remind myself why I spent so many months on that project, but never finished it. Oh yeah; it can be activated in many ways, power signals & etc., and I can make it all in-house… At least, that’s the theory.

A bunch or work travel coming up for me, but I’ll hit that hard afterwards and revive the thread on it when I can.

I use a universal choke cable.
Not perfect , but it works more often than i do.

1 Like

what is the distance from the switch to the lever?
if it is not more than a foot, just use one of these (pic) elongated with a bicycle spoke.

weichenhebel

1 Like

IMG_9630

Ooh! Ooh! Ooh!

Cliff!

Then you can get some switch lever handles for the deck or shed and hook that up to the universal choke!

You’re welcome…:crazy_face:

1 Like

Cliff, I thought you had a 3D printer. Update the shortcomings of the commercial and print a better version.
I am looking ad a similar project.

1 Like

Hi Bob, yes I do. The resin printer makes finely-detailed parts, but they’re relatively fragile. I could rework and print the metal throw-arm casting inside the switch stand, but it wouldn’t last I think.

My other FDM printer prints some pretty tough ASA parts, but they’re kinda rough. I don’t think the gear teeth in the throw-arm would come out wonderfully… but heck, it’s a good idea.

If Shapeways were still around, I’d be tempted to have them print it in nylon and see how that lasts.

Good thoughts,
Cliff

Cliff, what about using inexpensive throttle controllers? You could print or build a limiter and attach to the cable or handle so you wouldn’t stress the switch.


Interesting ideas, Bill. The operators are big, but maybe with mods they could be made to look like 1:1 switch control levers.

If your creative like I am and did at one time fly R C airplanes and then you will find there is a lot of R C stuff that will work with your model layout. Remote hookups of switch machines using R C control stuff is probably one of the best for doing that, The biggest advantage of using this type of control is it’s flexibly. Looks like many post above use this type of installs, good job.

I am late to the party, but I am working on a more prototype looking switch mechanism. The main body is a 3D printed part, the rest is all materials purchased on McMaster-Carr.


1 Like

Bob
I am now struggling with 6 throw mechanisms that are or have failed, can you provide more info on your throw idea including the appropriate McMasters part numbers and if you are interested in printing the body and of course the price. The BSRR is here in the Bay Area, outdoors with temps from 30-110F.
Mike

Bob, thanks for posting on your excellent design. I love how it combines the simplicity of the “Tenmille” ground throw with springs – which can be adjusted in their force. Wonderful piece of engineering.

Mike,

This started out as a 3D Printing class final assignment to create or improve an existing design. I sent some of the preliminary design ideas to Cliff as his issue was partially the inspiration. One test print of the original design found some flaws, and this is the final design. I don’t have any plans to market the design therefore I never made drawings. Give me a couple weeks to get some drawings put together and I will share them and an STL file for the housing. The drawings will contain all the necessary McMaster-Carr part numbers. I did discover they will be a bit pricey relatively speaking but am hoping the durability and function will offset the sticker shock. With the holidays upon us it may be after the first of the year before I get this all put together.

PM me your email address so I can send the goodies. Keep in mind that the design is open to anyone who wishes to make their own variation. The only caveat is that the test subject is printed in PLA, not the best for outdoor use. From my class there are some filament materials that will do well outdoors, but they are on the pricey side.

1 Like

I like this design, I’ve been a big fan of the Tenmille throws, I have a bunch of them, and they just work. And using off-the-shelf components for the guts is fantastic. What’s the appx cost of the purchased bits?

I would point out that, outdoors, they collect dust and sand in the rotating cylinder and eventually grind to a halt!