Large Scale Central

Question about twin water towers......

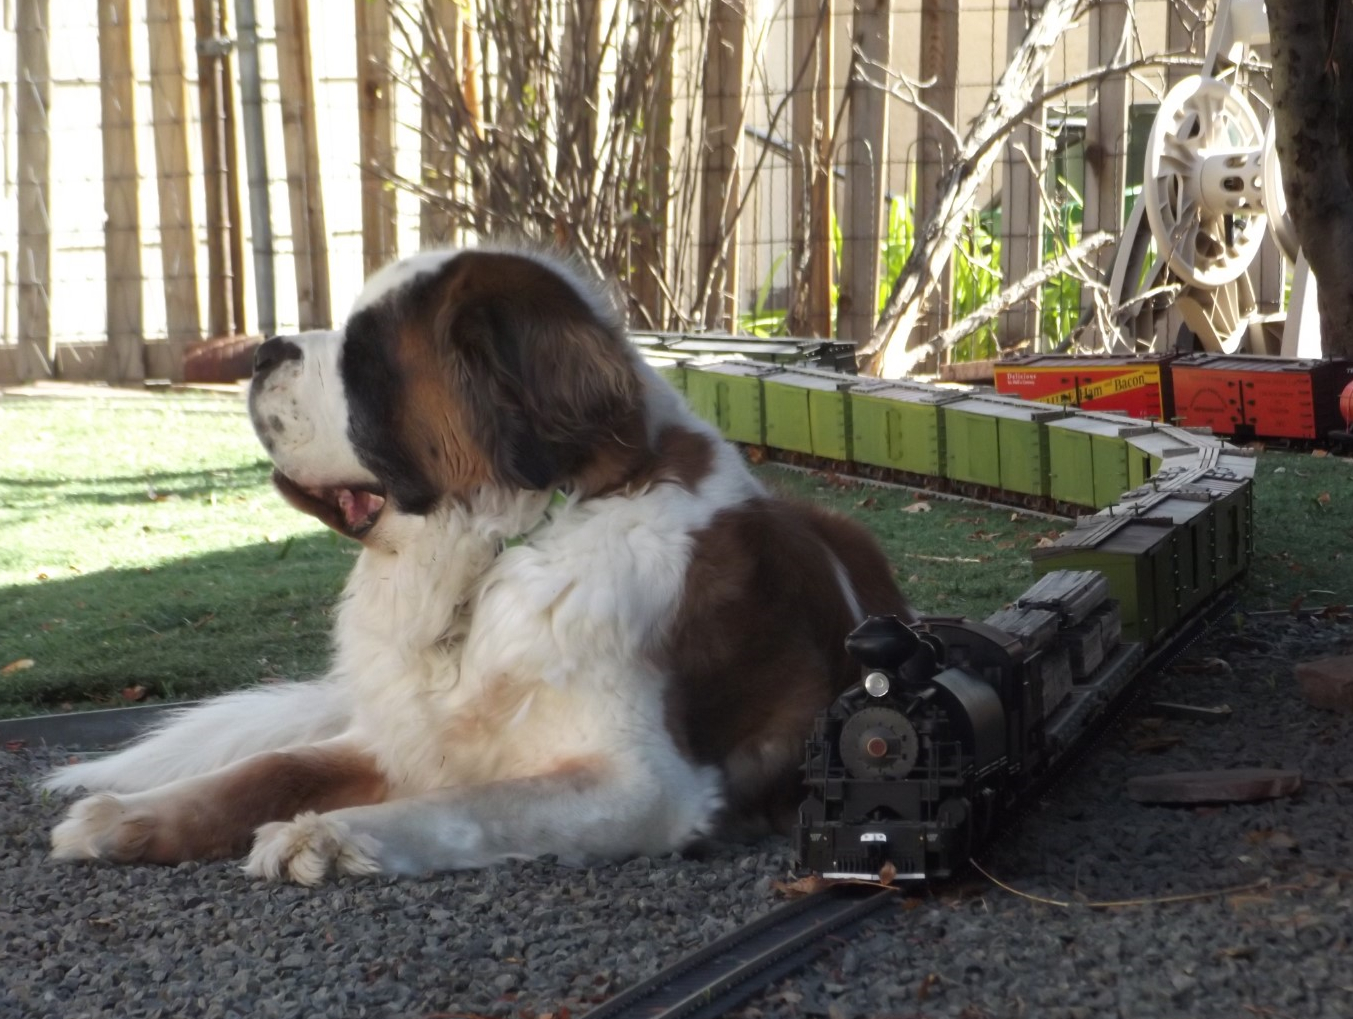
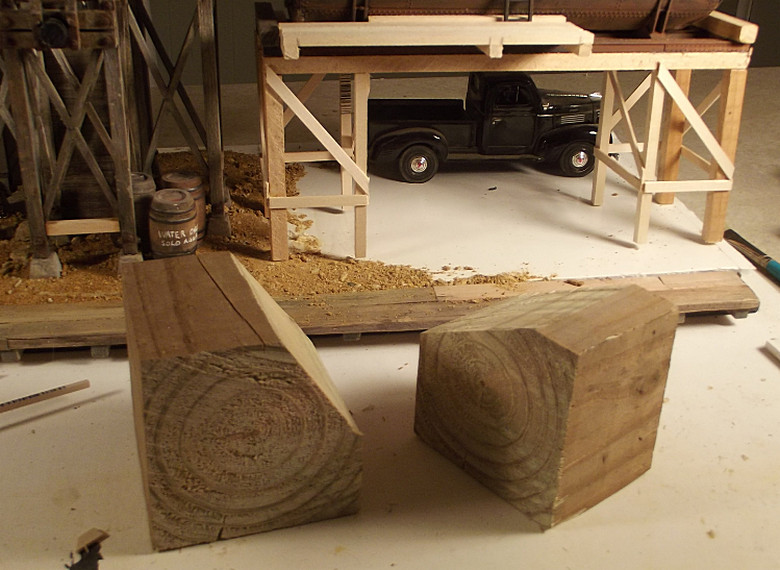
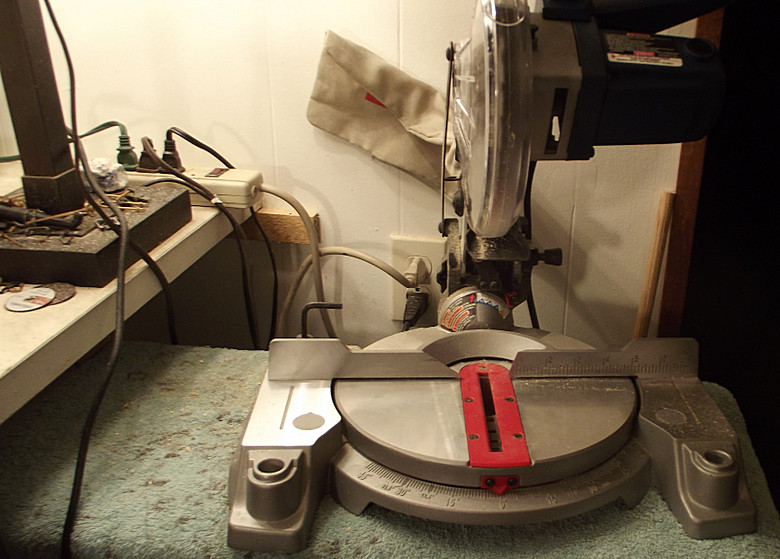
Okay, having learned more than I thought I would ever know about water tanks and pipes pump houses (including how the dang water gets into the water tanks in the first place) and frost boxes and freezing, etc. etc etc., and taking the suggestion to use a simple box to build around, although I used scored heavy cardboard instead of a 4x4 piece of wood, here’s how things have gone, and I really hope I’m not boring anyone to death with all the pictures:

(http://www.saintfrancisrailroad.com/images/p2.jpg)

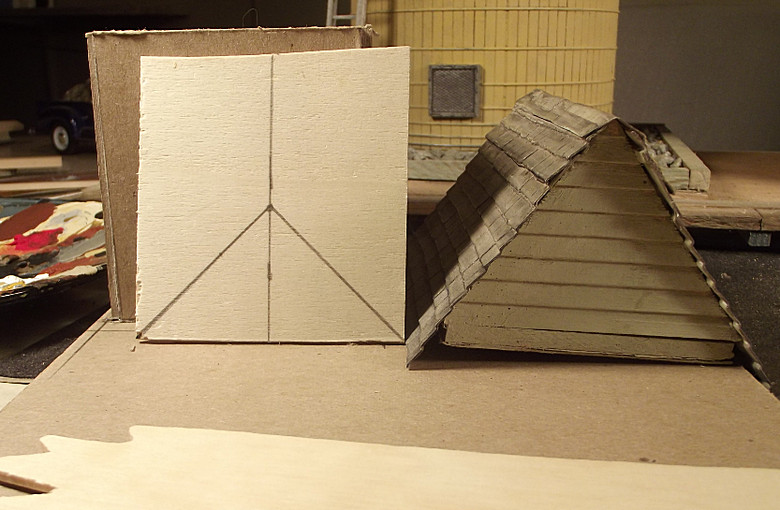
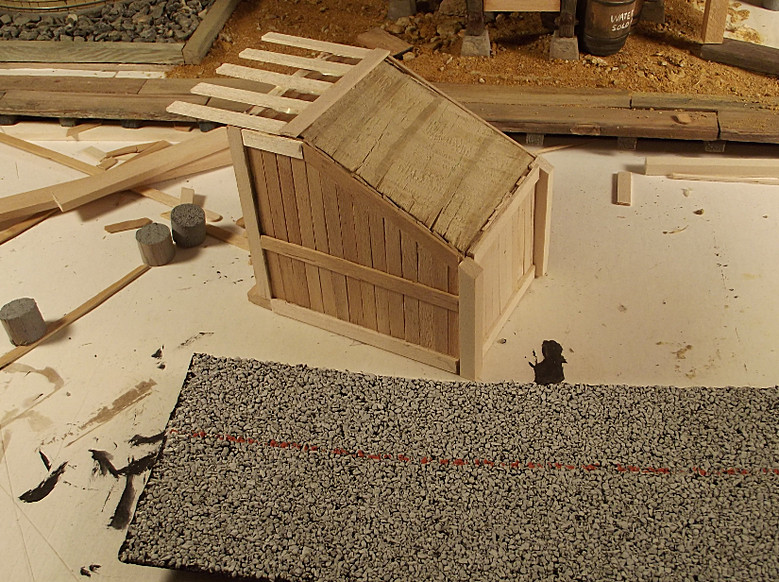
My original idea for the roof was to use the first one I built for my yard office, which I built too small and had to completely re-do to the right size (geez, it’s a miracle I got that build finished in time for the deadline the way I had to do so much twice to get it right), but I decided it didn’t look right, that it was too steep and too big, so I cut my own:

(http://www.saintfrancisrailroad.com/images/p3.jpg)

So I replaced it with a better roof prfile and decided against shingles, use corrugated roofing instead:

(http://www.saintfrancisrailroad.com/images/p4.jpg)

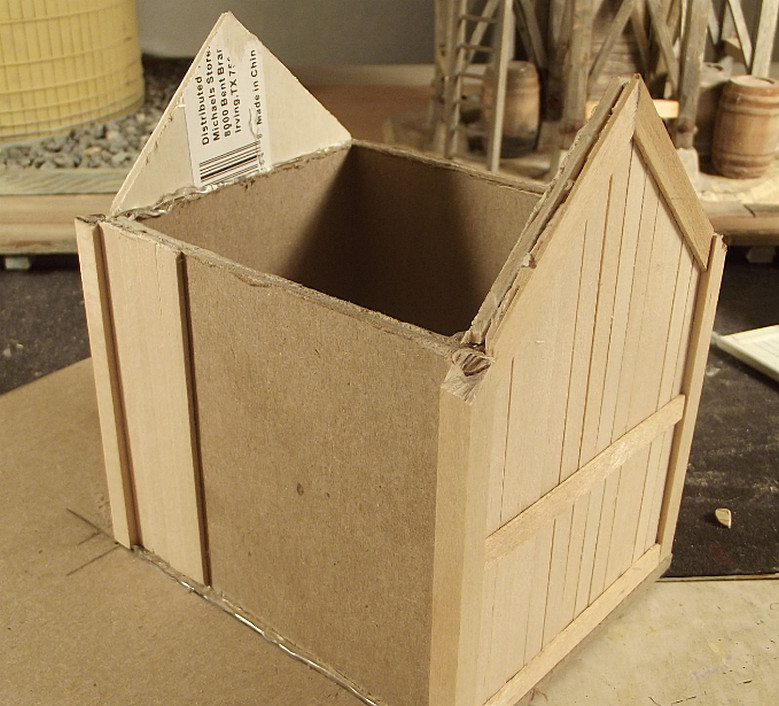
Then I started laying stick by stick, and this is about the point here where I thought I must be crazy to be doing this like this:

(http://www.saintfrancisrailroad.com/images/p5.jpg)

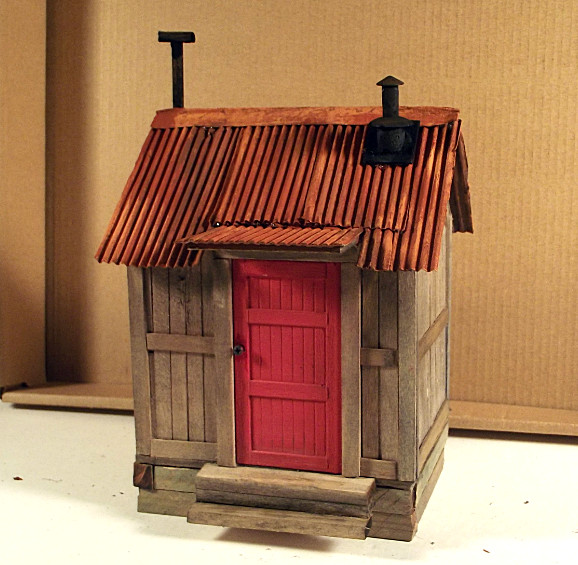
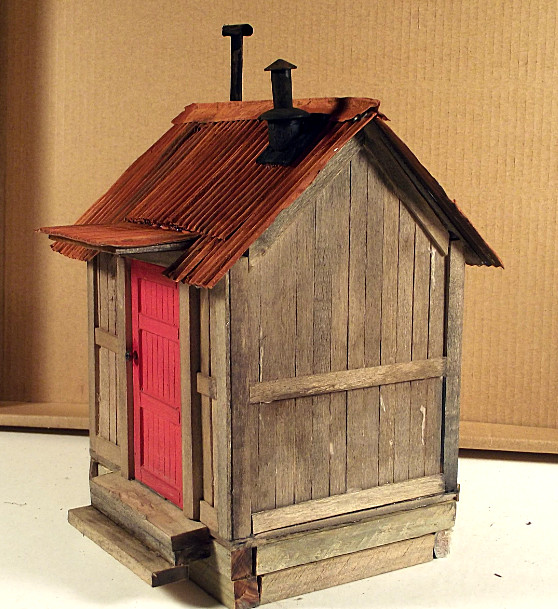
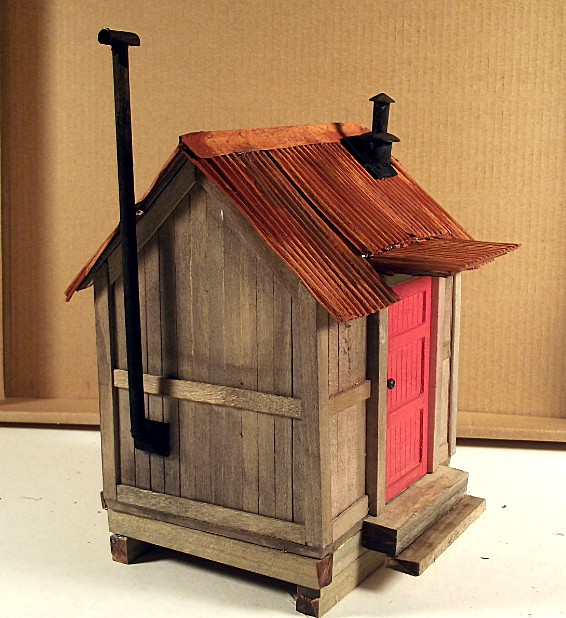
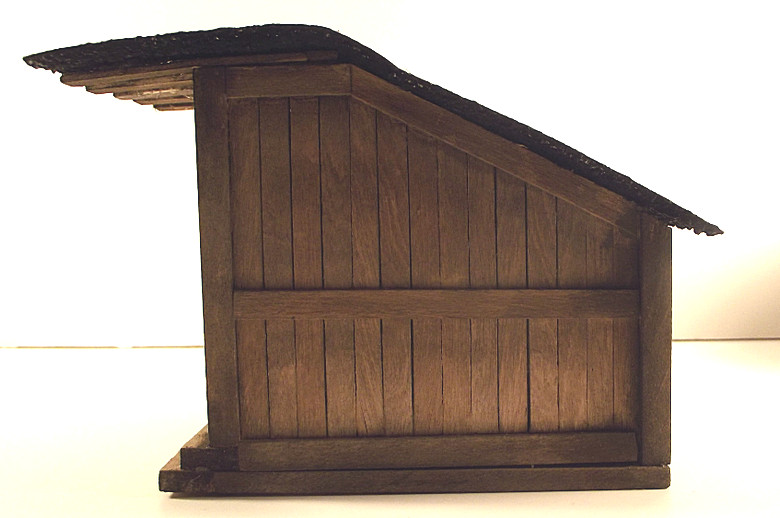
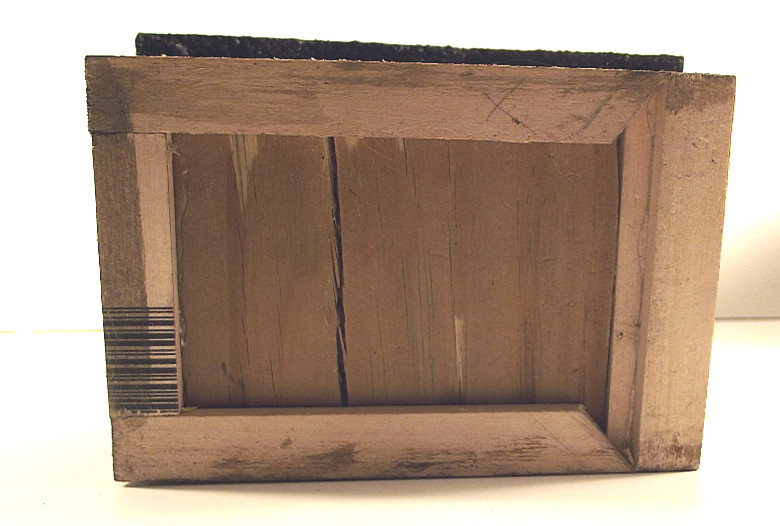
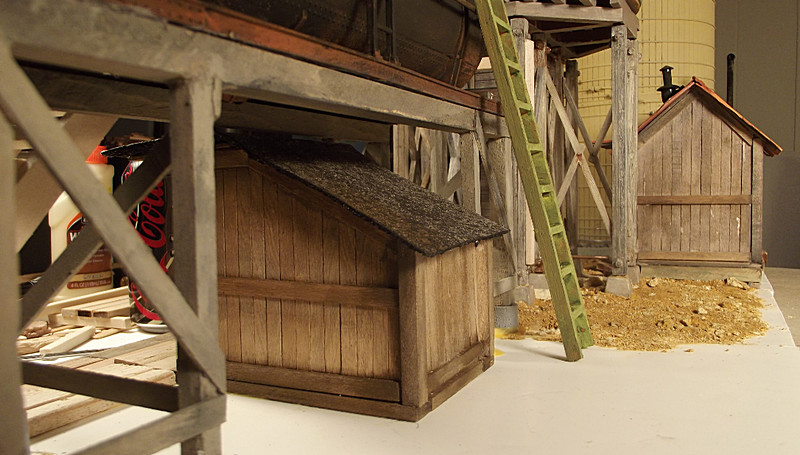
But anyway, after all, here’s the more-or-less finished punp house:

(http://www.saintfrancisrailroad.com/images/p7.jpg)

(http://www.saintfrancisrailroad.com/images/p8.jpg)

(http://www.saintfrancisrailroad.com/images/p9.jpg)

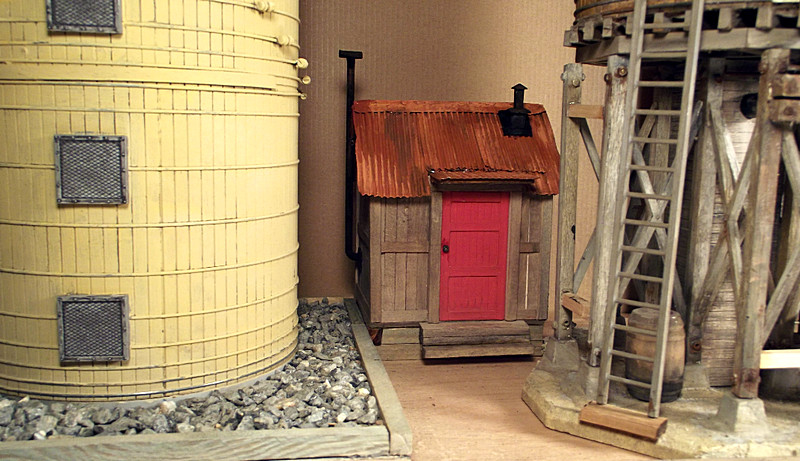
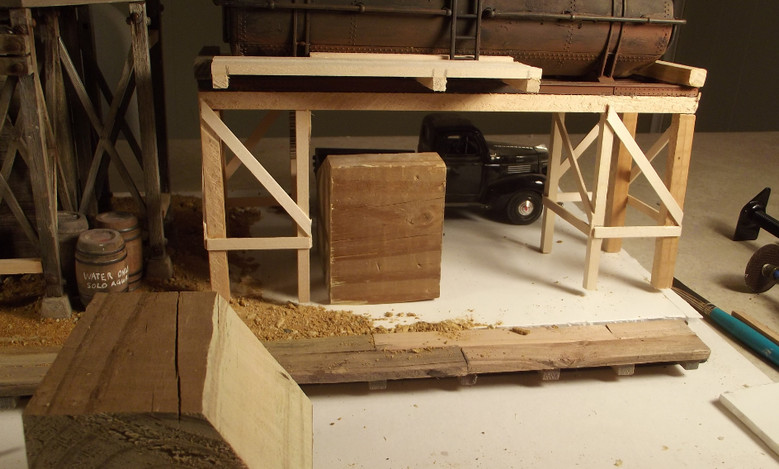
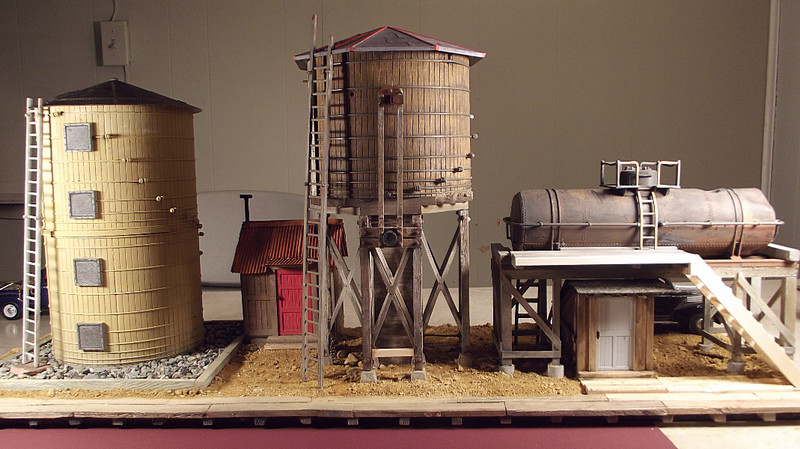
And here’s how it fits in between the two water tanks…

(http://www.saintfrancisrailroad.com/images/p10.jpg)

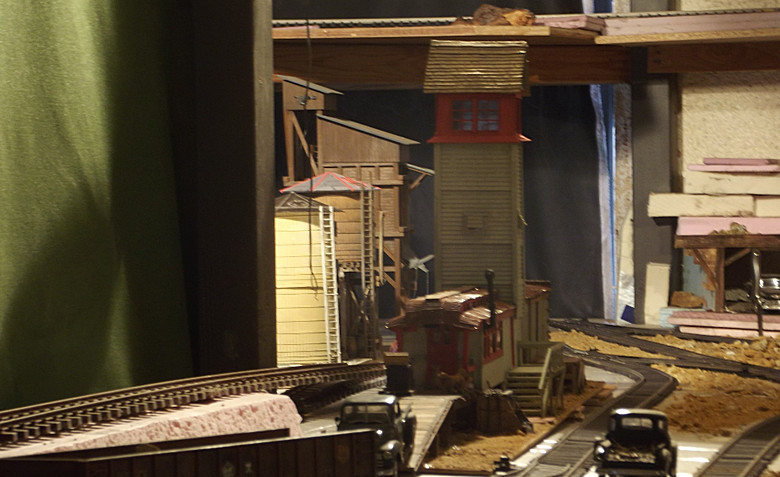
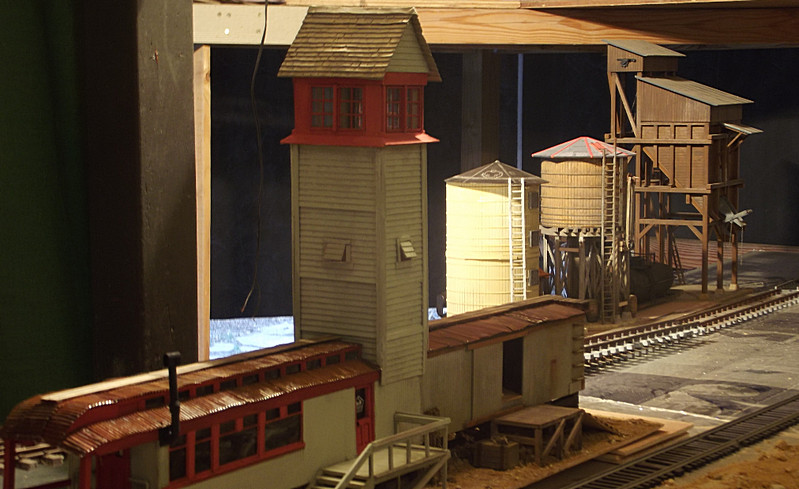
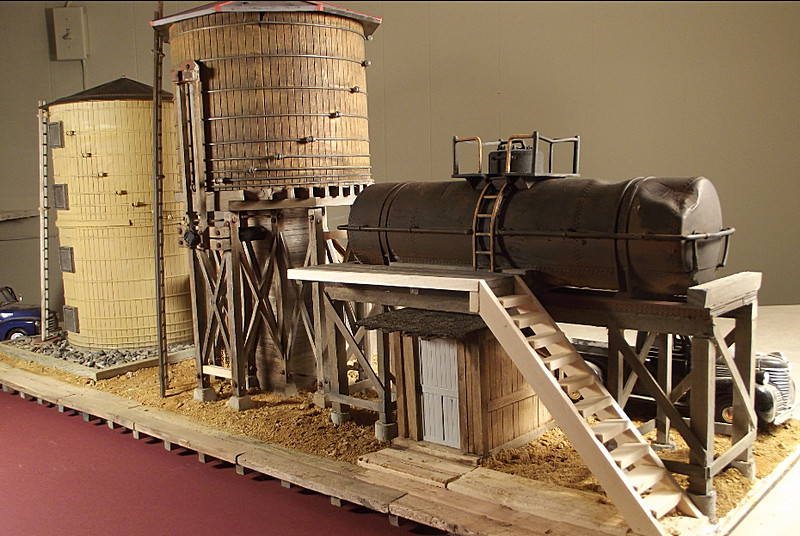
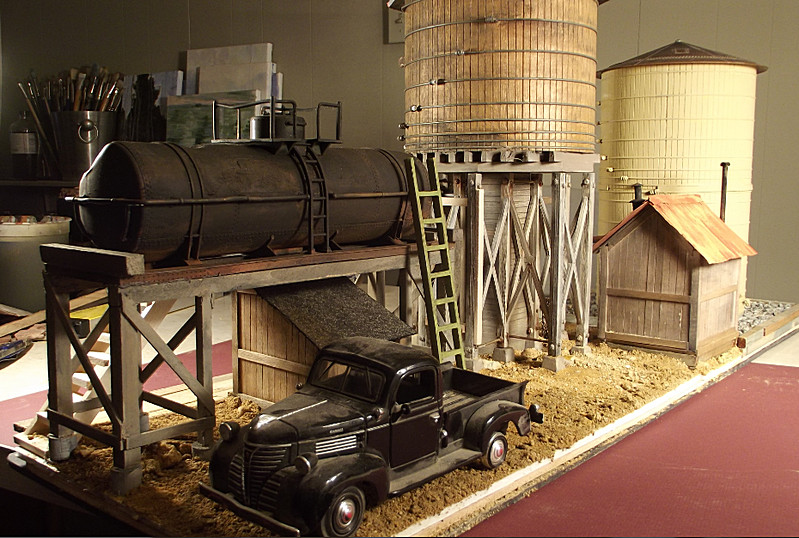
And here’s how it fits into my preliminary placement in the yard:

(http://www.saintfrancisrailroad.com/images/p11.jpg)

(http://www.saintfrancisrailroad.com/images/p12.jpg)

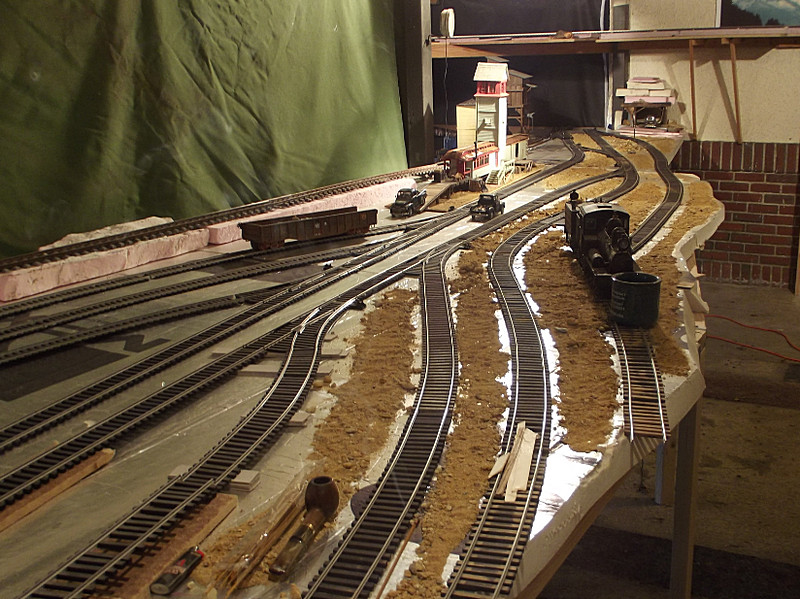
And let me impose to show one more picture, because this one I’m really proud of…my 13-year-old daughter is laying in all of the preliminary ground cover (mine tailings) and gluing it in place with watered-down white glue, spraying first with water and detergent of course. She’s doing a surprising good job, and once she gets going she seems to enjoy herself. (I give her railroad jobs for her to pay for her half of the monthly charges on that damn I-phone thing I got her for Christmas.)

(http://www.saintfrancisrailroad.com/images/p13.jpg)

That’s a nice looking scene you’ve got going there John. I like the end of track device.

John Passaro said:

and I really hope I’m not boring anyone to death with all the pictures:

Never happen, pictures save us 2 f, h&p typers a lot of time. And explains it a lot easier.

The scene looks real good!

Your pump house looks really good and fits right in with that fine yard tower. I like that the roof on the combine is the same as on the pump house and the red doors. It ties them together.

Cool pump house.

And I agree, the red accents on the tank roof are quite fetching.

Dave, N.B., Marconi said:

I like the end of track device.

Thanks for the comments men…

Dave, at first I thought you were making fun of my tracks running off the cliff to nowhere!! Ha! Then I noticed the coffee mug from the Greeley Freight Station Museum in front of the Shay. I didn’t realize it was there in the picture until you said something.

They say there’s a prototype for everything, but I’ll bet fifty bucks not this time!

John, that pump house is not bad, actually its quite good. And I like your yard scene too.

Thanks David…I’m keeping an eye out for somewhere I can use that roof system of yours.

Really like that little pump house, finished up nice and fits very well with your tanks.

Good job.

Rick

Okay, then, so continuing on with my water and oil tanks (sanding will have to be across the tracks from this because I’m out of room with the coal bin next to this collection), I have the line-up nearly complete. I still have a little painting to do, some detailing especially various pipes going in and out of the two pumphouses, not to mentioning put\ting pieces on the water tank and the oil tank (spouts, for instance).

Taking Terry Burr and Todd Haskins suggestion to heart, I started the oil pumphouse out of a scrap 4x4 and took it from there. (I made two and decided on the smaller one as a better fit:

(http://www.saintfrancisrailroad.com/images/f1.jpg)

(http://www.saintfrancisrailroad.com/images/f2.jpg)

And here’s a picture of my latest BEST FRIEND (BFF as my kids text!) a small, good chop saw that I wish I’d bought a long time ago, man is it nifty:

(http://www.saintfrancisrailroad.com/images/f3.jpg)

So, I plastered the 4x4 board-by-board, and the door I took off the mow car which was in the first few pictures:

(http://www.saintfrancisrailroad.com/images/f4.jpg)

(http://www.saintfrancisrailroad.com/images/f5.jpg)

The roof IL made out of scrap gravel roofing material I happened to find laying around in my gartage…this picture about is the gravel side, which is way out of scale; but what I discoverd is that the OTHER side makes a great asphalt roof and I’m betting down the line it might make good asphalt paving for road or a parking lot:

(http://www.saintfrancisrailroad.com/images/f6.jpg)

And here’s pictures of how it all fits together…again, I know this has more work that needs doing, espcially I need to paint and weather the steps leading up to the tanker platform, and I hope I’m not boring everyone to death.

(http://www.saintfrancisrailroad.com/images/f7.jpg)

(http://www.saintfrancisrailroad.com/images/f8.jpg)

(http://www.saintfrancisrailroad.com/images/f9.jpg)

(http://www.saintfrancisrailroad.com/images/f9a.jpg)

(http://www.saintfrancisrailroad.com/images/f10.jpg)

Does anyone know how to represent the 90-degree joints on pipes, the pipe fitting, without spending any money? I’m getting hung up on that, plus I’m determined to bend drinking straws despite the good discussion going on about how to bend brass tubing without kinking it, but I’m not having luck bending the straws. If I could find a good pipe fitting recommendation or think of an idea, maybe I could fit the straws into the bend.

p.s…the green ladder is green because I liked the color complement, but also to make communication easier on my yard supervisors: if they want the ladder all they have to say to the guys is, “Go get the green ladder.” Ha! No confusion.

Joe,

I will chime in here and add great build and nice layout scene. Now for some assistance. For your pipe elbows, I don’t know of a free source, but Plastruct has what you need and at very reasonable prices. Give them a look.

Now for some help on the construction. I will convey how I use my chop saw to cut small parts for the hobby without the tear out you are getting. First I use a plywood blade instead of the usual carbide tipped blade. The plywood blade has much finer teeth, are usually hollow ground a bit and produce very fine cuts. Second I add a vertical fence in addition to the factory fence provided with the tool. This fence is attached in one piece through the cutting plane. Then I slowly cut down through the fence with the plywood blade. This provides good support behind the cut and minimized tear out. Makes nice clean joints. The caveat is that the more you angle the blade for special cuts, the larger the gap becomes and the less supportive it is. I usually do my odd cuts by hand, leave them a bit long and clean them up with my belt/disc sander.

Bob C.

Bob Cope said:

Joe,

I will chime in here and add great build and nice layout scene. Now for some assistance. For your pipe elbows, I don’t know of a free source, but Plastruct has what you need and at very reasonable prices. Give them a look.

Now for some help on the construction. I will convey how I use my chop saw to cut small parts for the hobby without the tear out you are getting. First I use a plywood blade instead of the usual carbide tipped blade. The plywood blade has much finer teeth, are usually hollow ground a bit and produce very fine cuts. Second I add a vertical fence in addition to the factory fence provided with the tool. This fence is attached in one piece through the cutting plane. Then I slowly cut down through the fence with the plywood blade. This provides good support behind the cut and minimized tear out. Makes nice clean joints. The caveat is that the more you angle the blade for special cuts, the larger the gap becomes and the less supportive it is. I usually do my odd cuts by hand, leave them a bit long and clean them up with my belt/disc sander.

Bob C.

Thanks Bob…as soon as I read your comment this morning, I hopped on ebay and I now have a 7" plywood hollow-ground blade on the way. Should be here by Thursday. I’m not into complex cuts yet, I’m just esctatic I’m not cutting with a dremel disk any more!

I’m not quite getting the fence idea; if you get a chance some time would you post a quick picture?

Thanks,

John Passaro.

I was going ot post a photo of my solid core shacks but your shack puts mine to shame. Well done.
How did you get that dent in that tank? Did you use a heat gun?

A mitre / chop saw is a great tool. I use a regular blade to cut most things but like Bob wrote use a fine tooth blade for more delicate pieces.

How big or thick do your pipes need to be? You could go solid again and use brass rod, brazing welding rod or thick wire. In the past I have used ceiling insulation support wire. It is tough stuff, hard to cut and bend but it is workable. I just used some for handrailings on a triple dome tanker bash.

Nice work.

John Passaro said:

I’m not quite getting the fence idea; if you get a chance some time would you post a quick picture?

Thanks,

John Passaro.

This what he’s talking about,John.

(http://www.saintfrancisrailroad.com/images/f3.jpg)

See how wide the throat is on the saw?

The fence would eliminate that wide throat.

Here’s a fast and dirty example of what he means.

Thanks Ken, that is exactly what I was describing. I would take a pic or two, but i have loaned mine to my son to do some trim work in his house. Will be back in a week or so.

Bob C.

I had to do the same thing with the Radial Arm saw. It had that wide throat for the same reason the Chopsaw does.

Todd Haskins said:

How did you get that dent in that tank? Did you use a heat gun?

How big or thick do your pipes need to be? You could go solid again and use brass rod, brazing welding rod or thick wire. In the past I have used ceiling insulation support wire. It is tough stuff, hard to cut and bend but it is workable. I just used some for handrailings on a triple dome tanker bash.

Well I’m an occasional pipe smoker and I used my lighter. A little experimenting and I got the hang of how how to heat the plastic, at what distance to hold the flame, how long to let it cool down before denting, and then I used whatever sharp, hard object was handy for the dents (I th ink I used the back of a small C-clamp for that dent on the end). I found the heat sometimes does funny things to the surface, but a light sanding removes the little bumps.

My theory for the tank was that no railroad is about to use a perfectly good tank for storage, so one that got in a couple of accidents might not be good enough for federal railroad inspectors but would pass county inspection for re-use in my mountain yard.

So far I’ve been limiting myself to the thickness of various straws (Slurpees, fast food, Safeway, dollar store) for pipes, but since I’m not looking to use a lot of it, I may relent on the cost and head to the hardware store and hunt down some of your suggestions there. Maybe finding and salvaging will only get you so far!

THANKS for the pictures! Now I get it.

I just might have to try heating up a old tank to see if I can give it the dented look. When I first saw yours my first thought was that the tank car was in a crash and since it was not good for rail service why not use it as a stationary tank. Good idea and a good story for your RR of how and when it happened.
When I played with HO trains as a kid I used to actually light one on fire then used the resulting black smoke to weather other equipment. It sure made them dirty looking.

When you head to the hardware store look in plumbing dept. for a 1/4" plastic tube usually found in 3-4’ lengths for a few dollars. They are stiff but maybe you could cut a wedge on the back and bend them ?
You could also try wooden dowels. On that triple dome tanker I just made I used a dowel to form the vent tube. It is a little work and lots of sanding but you can make them have a nice 90 degree bend.

I’m sure you will figure out something that will look great.