Large Scale Central

Next Conversion: C.V.S.Ry. M-11 to RailPro

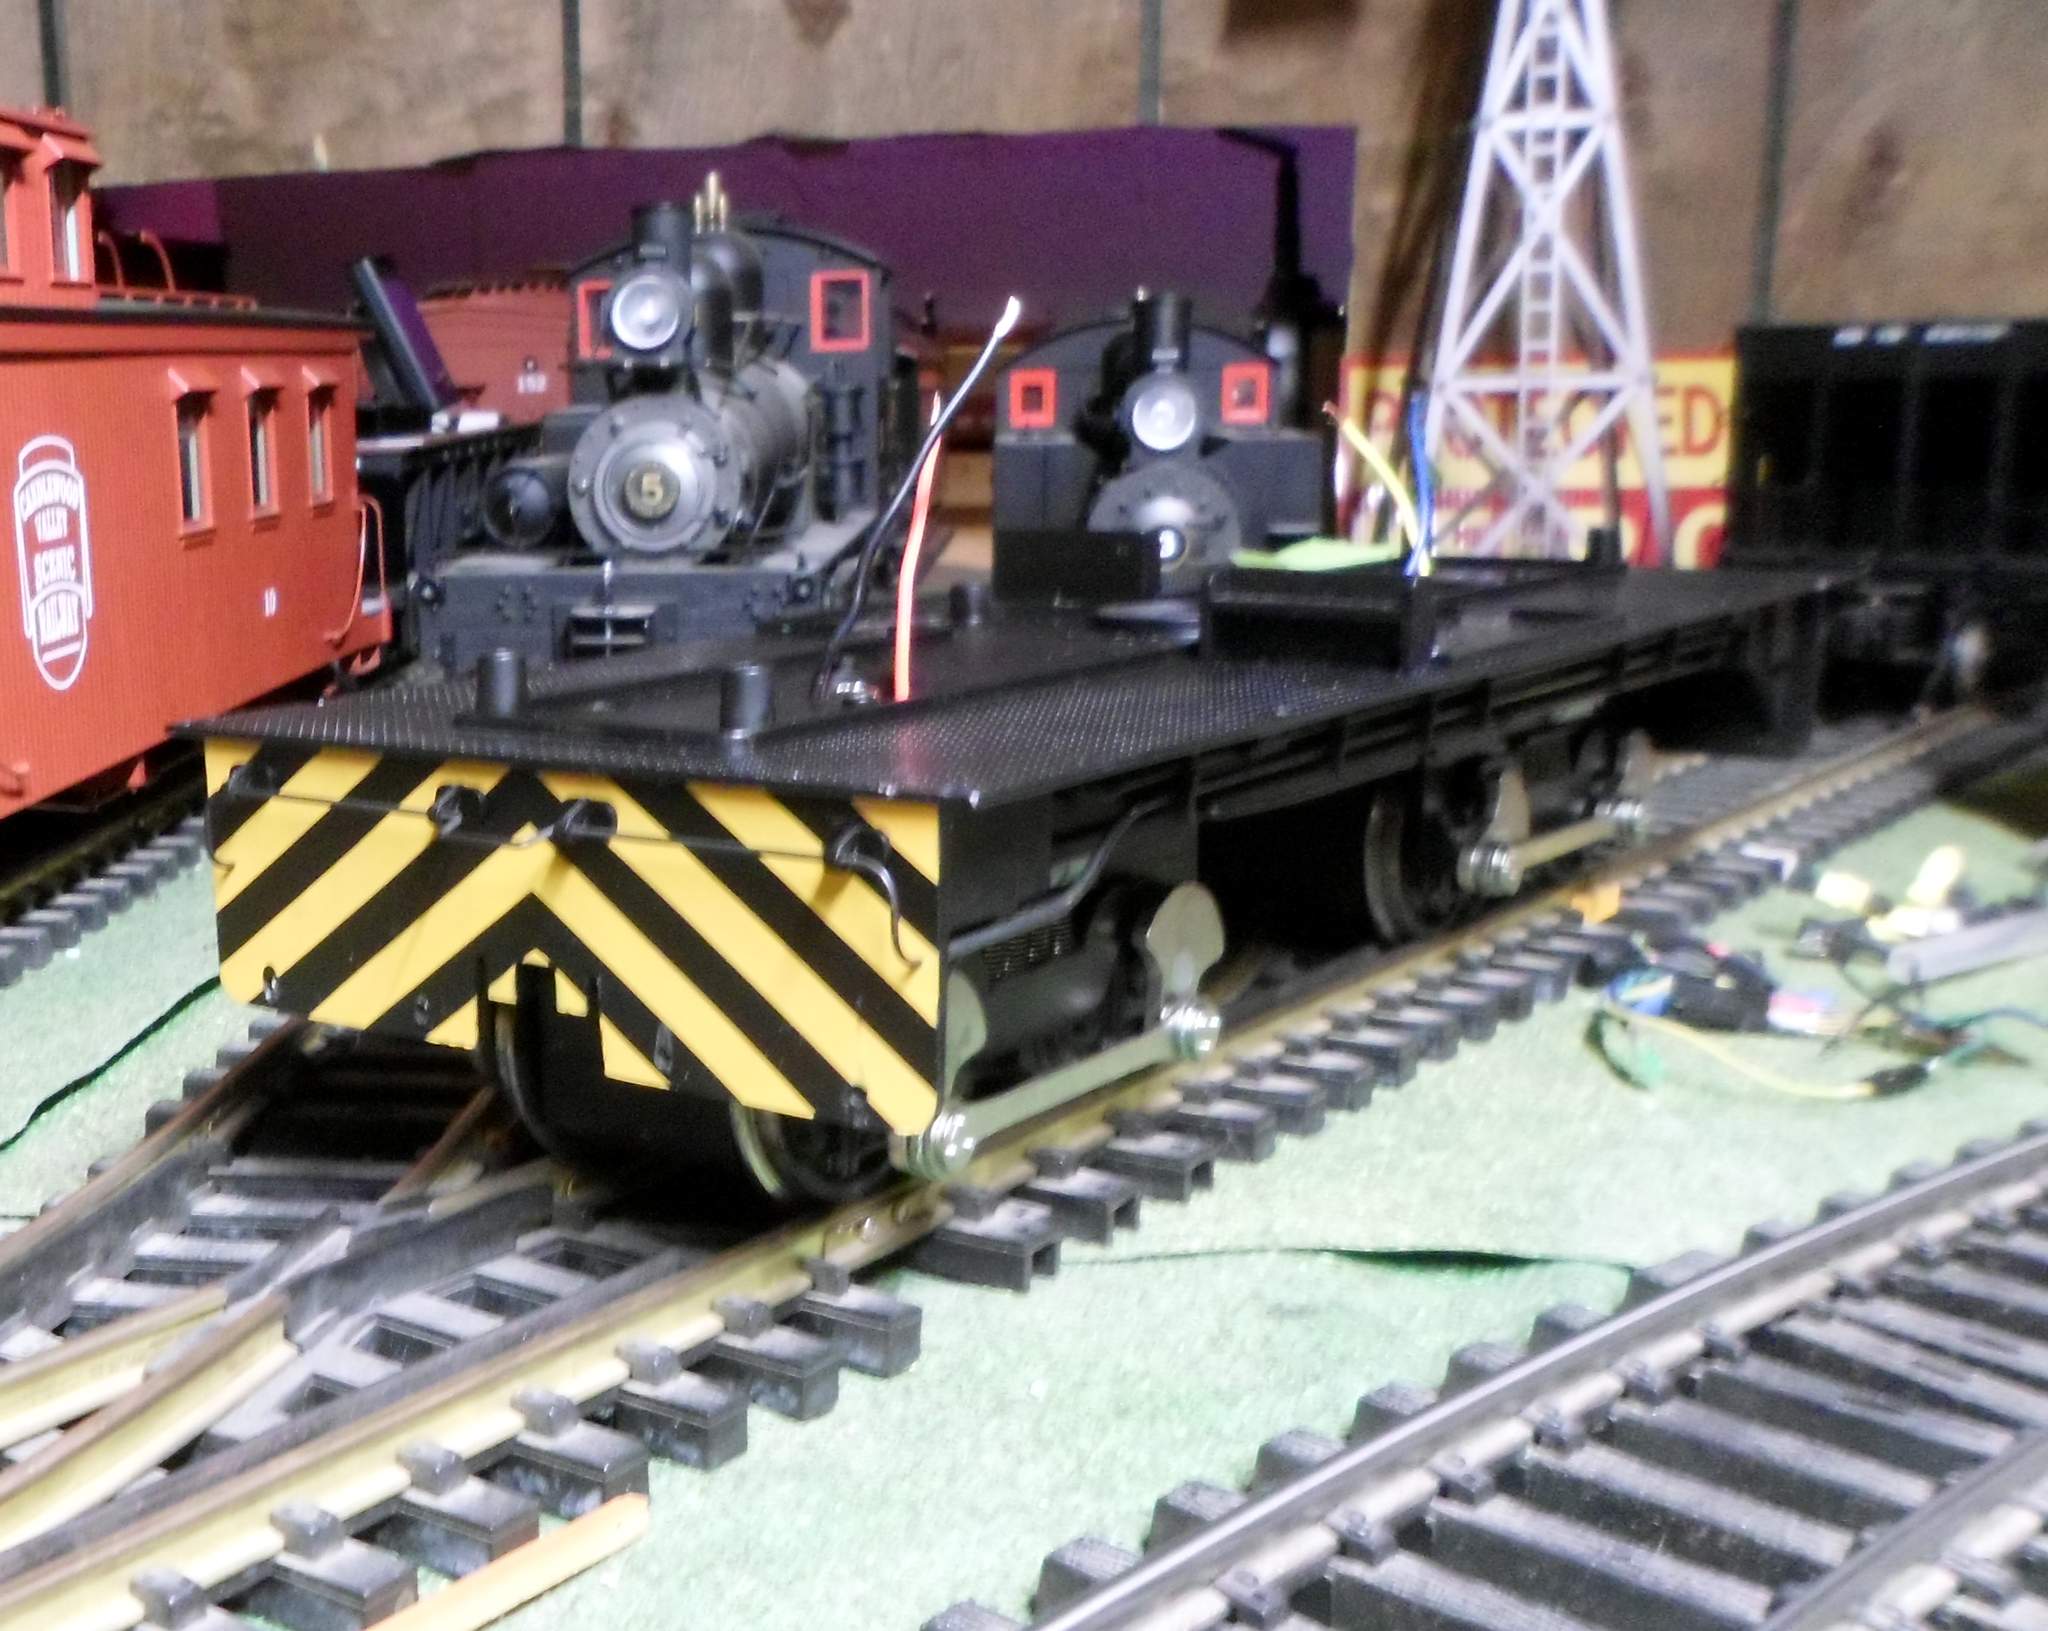
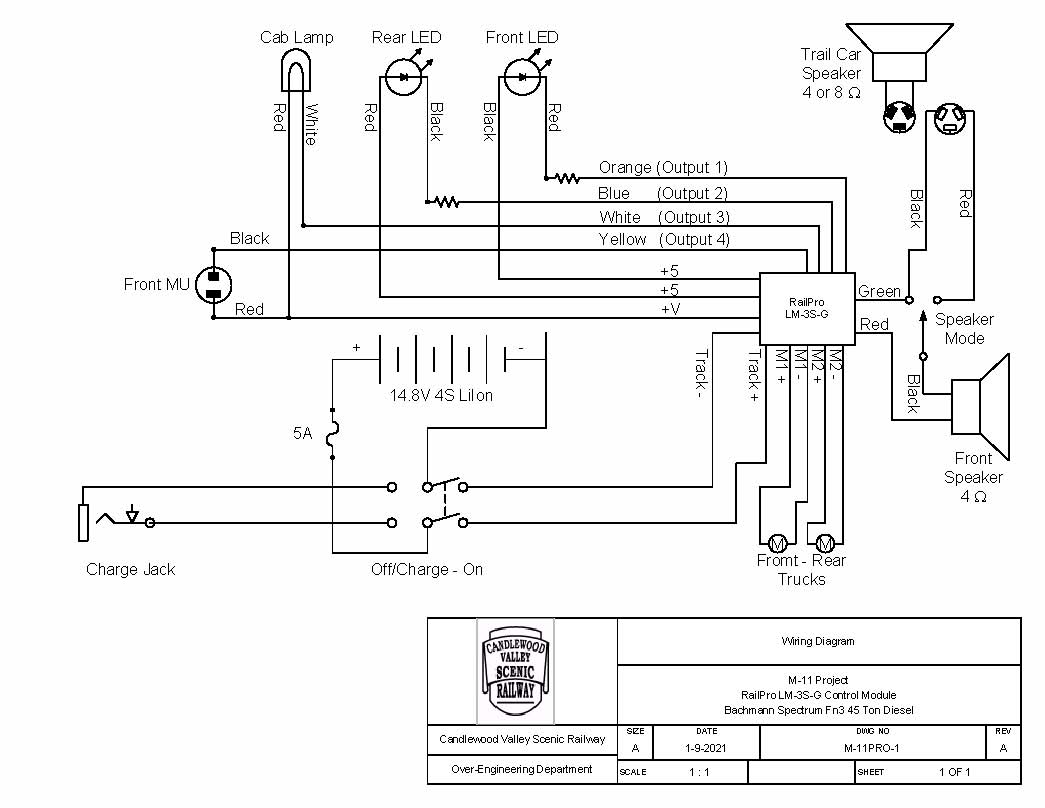
It’s been nearly 9 years since M-11 got it’s last electrical rebuild in March of 2012. At that time it was wired as selectable track or battery power (via trail car), Headlamps were upgraded to amber LEDs and a speaker was added under the front hood. Cabling was included to to connect power and sound lines to my sound/battery car “Shorty”. Here a a few shots from that major rebuild…

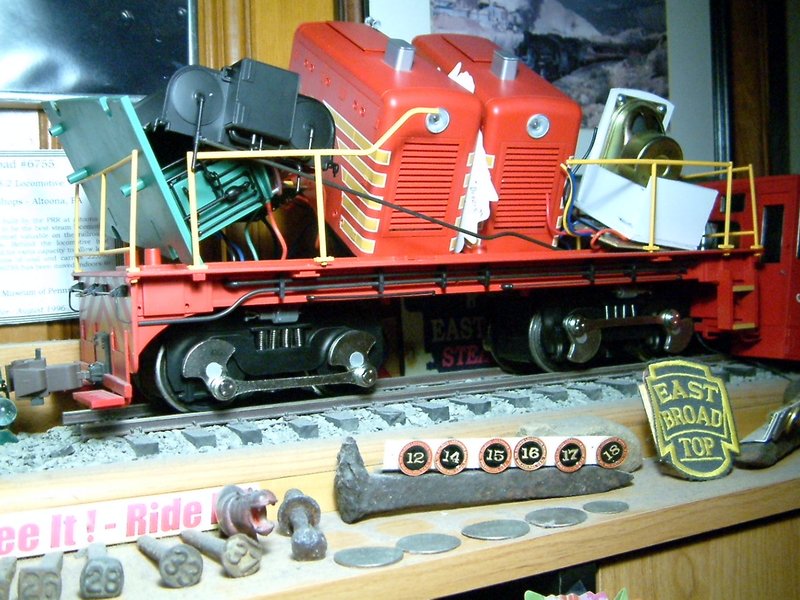
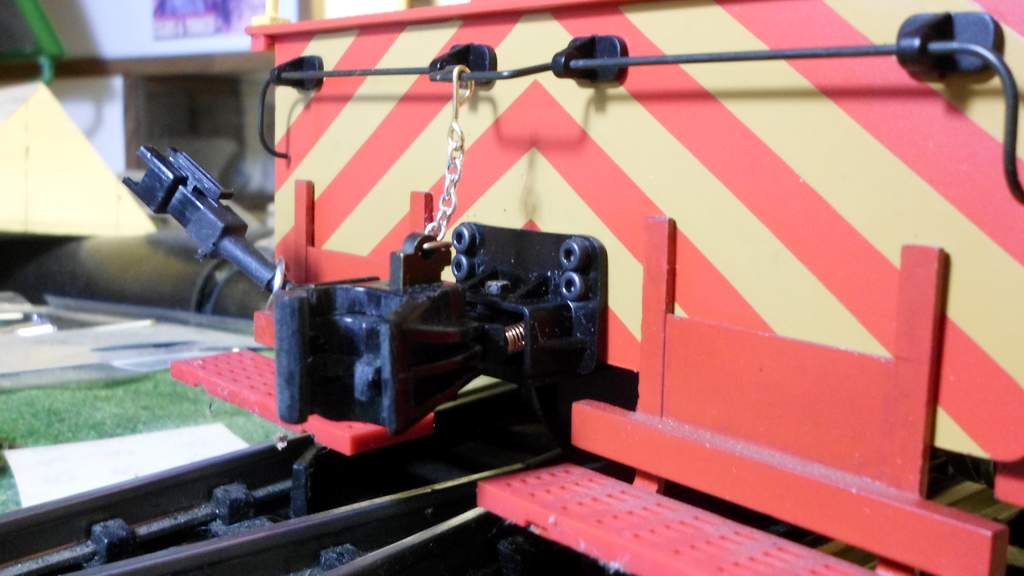
Four years later, I upgraded the couplers to Accucraft knuckles with a mounting method I fabricated in the shop from brass flat stock…

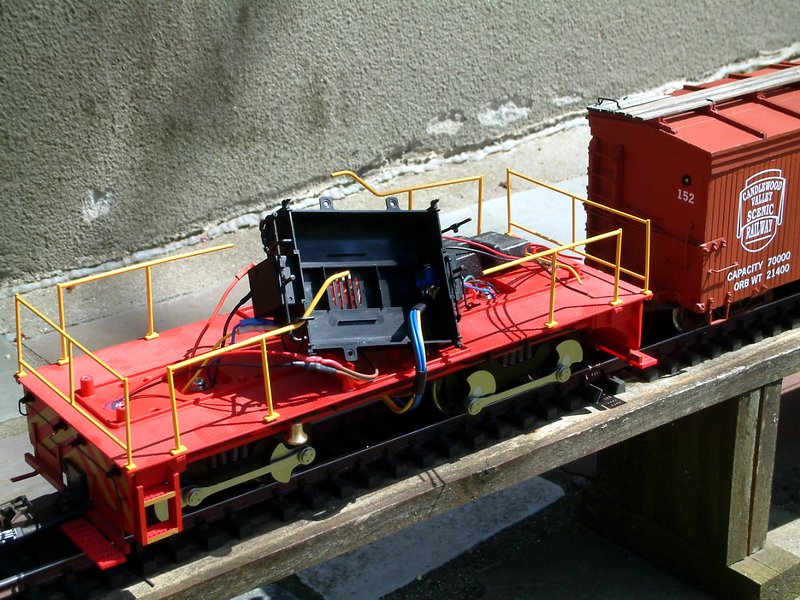
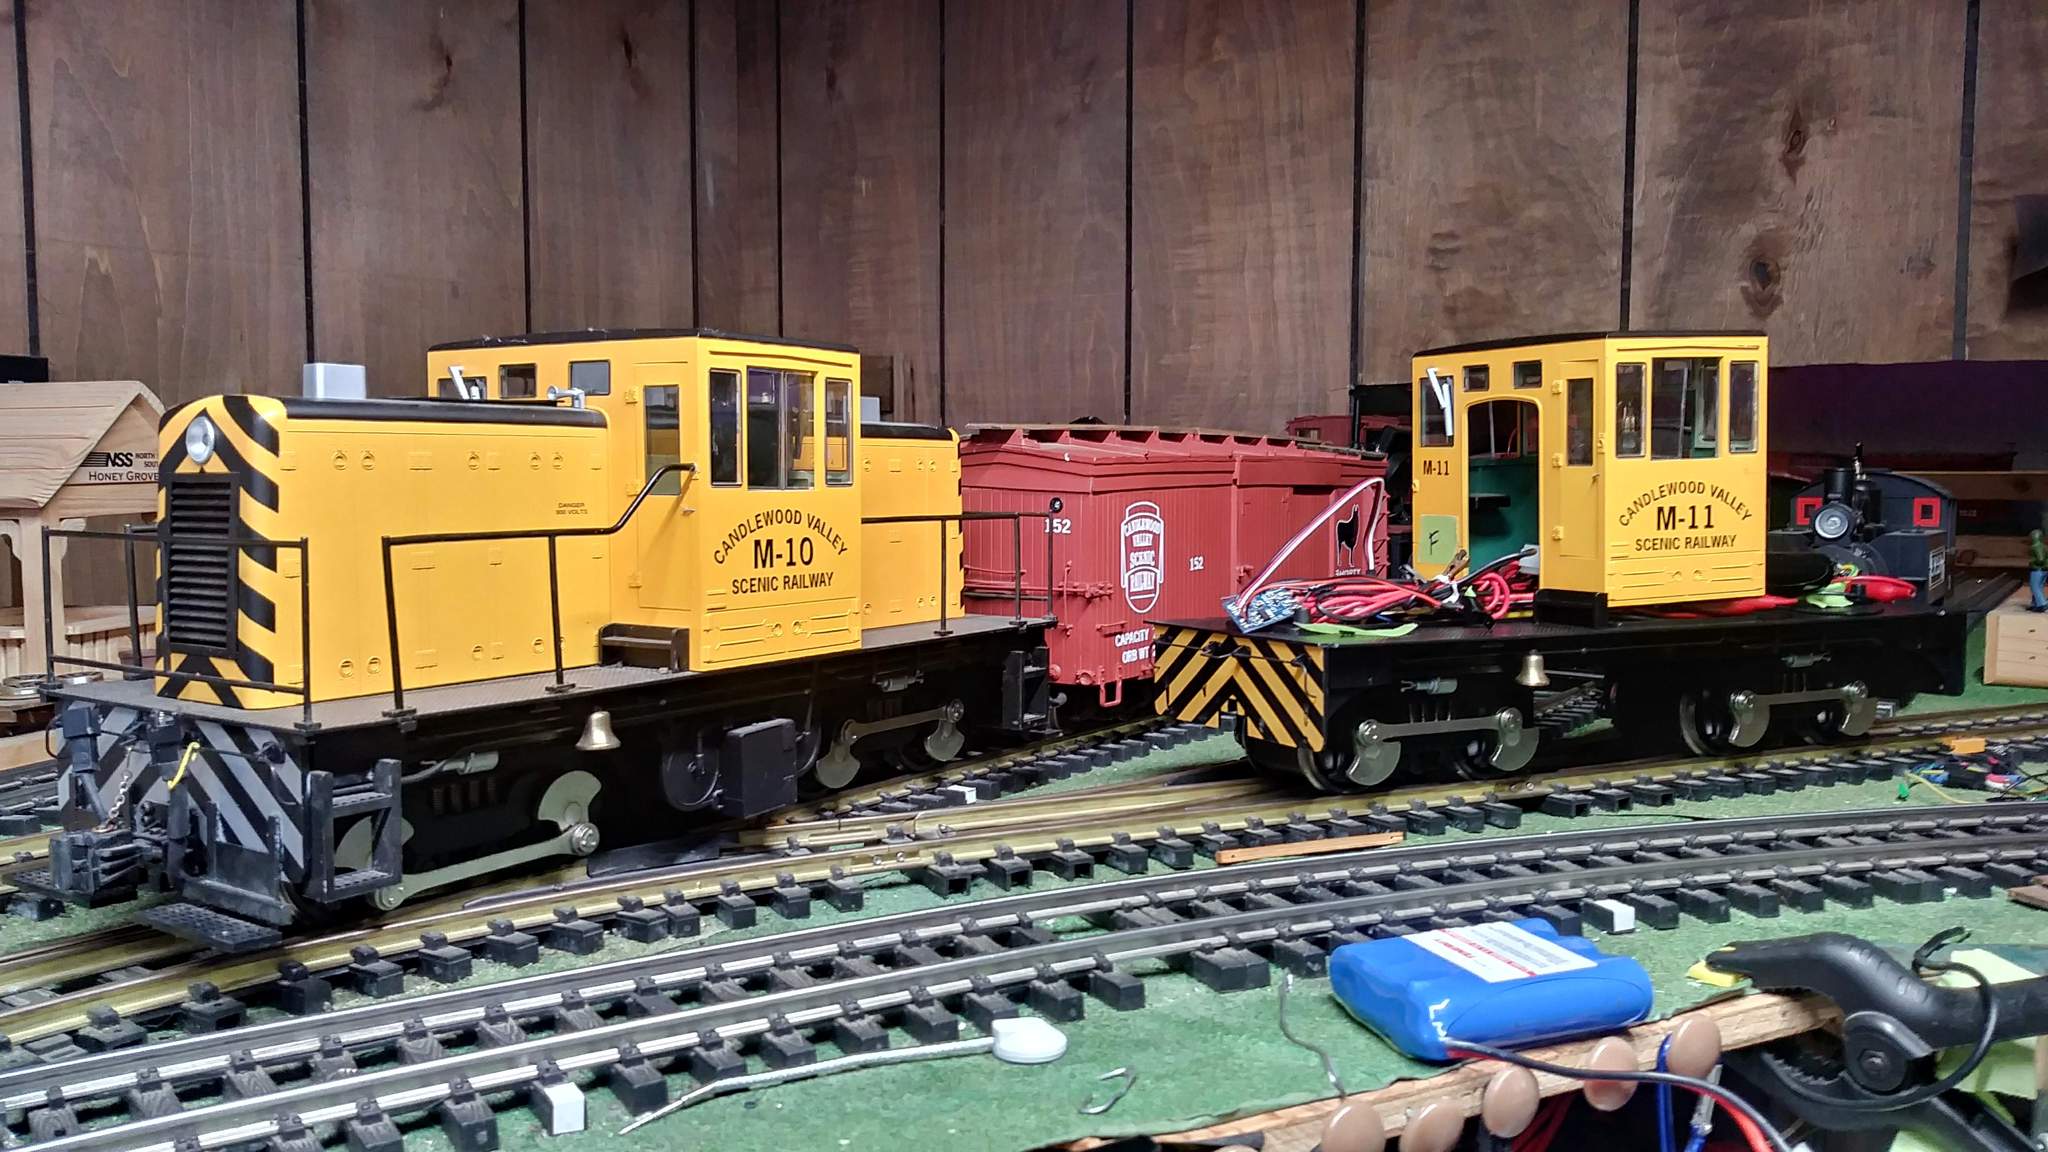
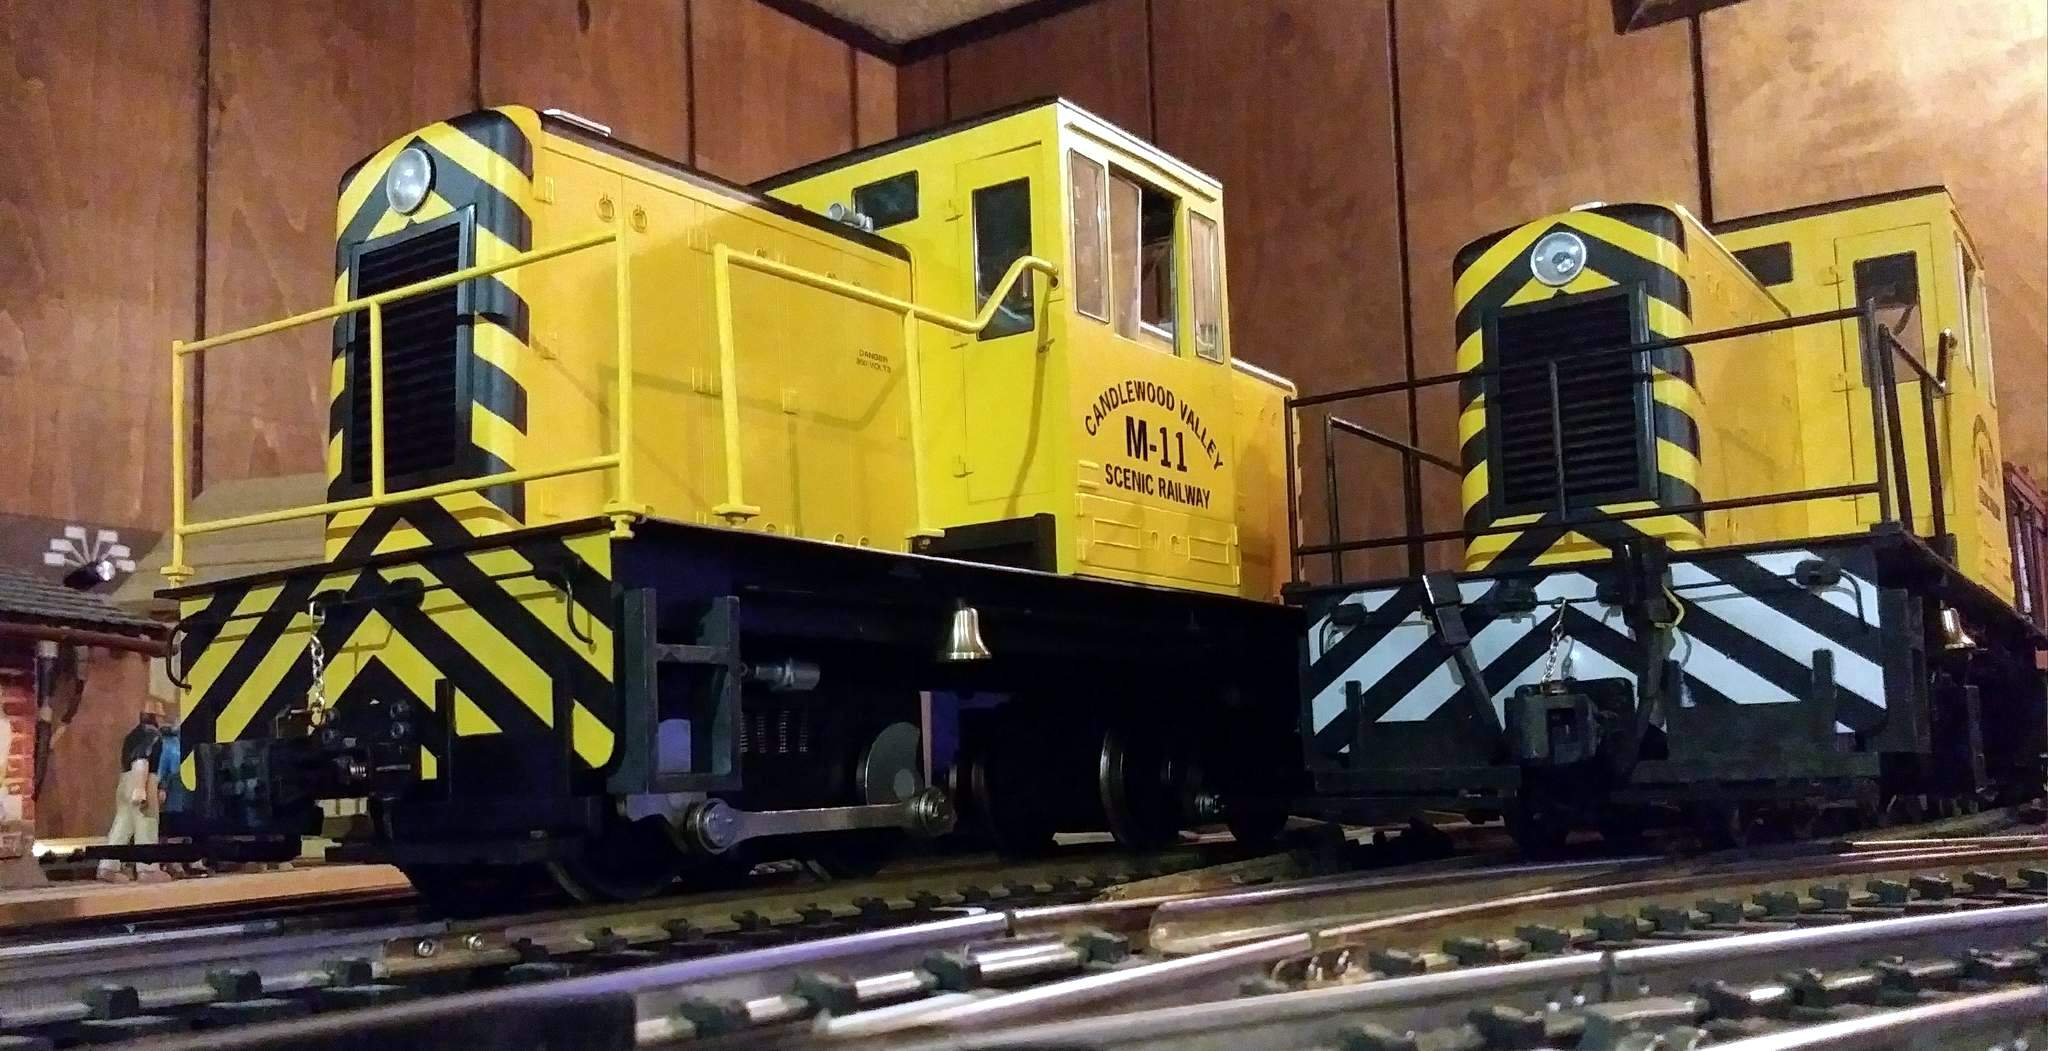
M-11 has been in service since, but doesn’t see a lot of action because I really don’t like the red color. I picked up a yellow cab and hoods years ago, probably from John Bouck, but I was lacking a black chassis. I advertised ISO a black chassis on Facebook’s G-Scale Swap & Shop group and Kevin Strong came through with a black chassis in great condition, but missing most of the removable details like ladders, steps and railings. This chassis has been sitting on my To-DO pile for several months, until now.

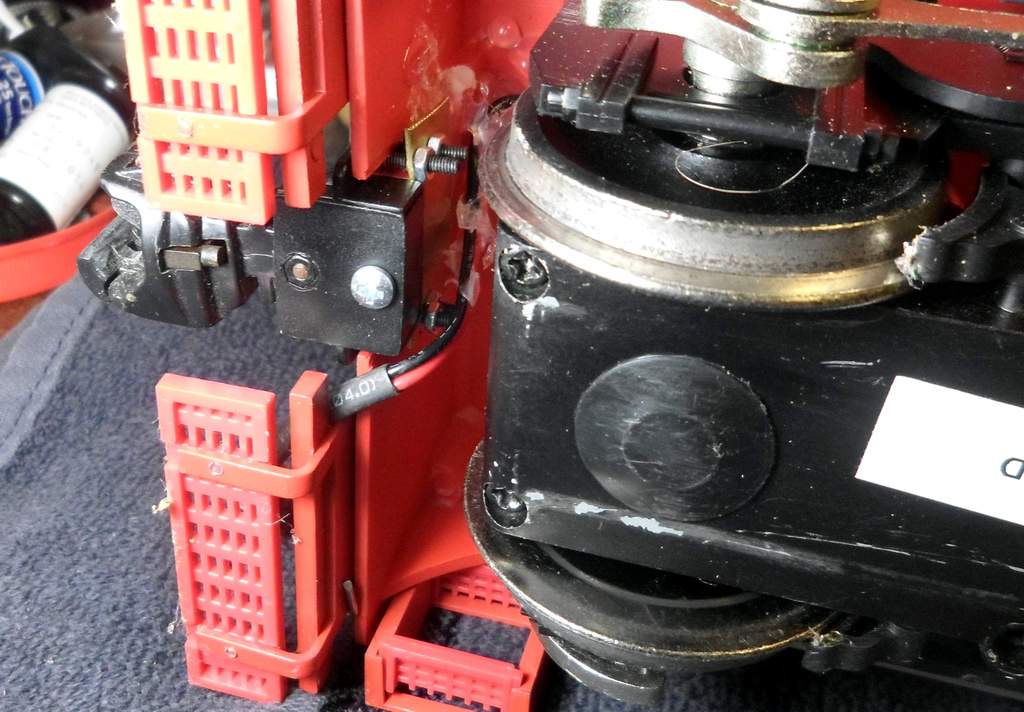
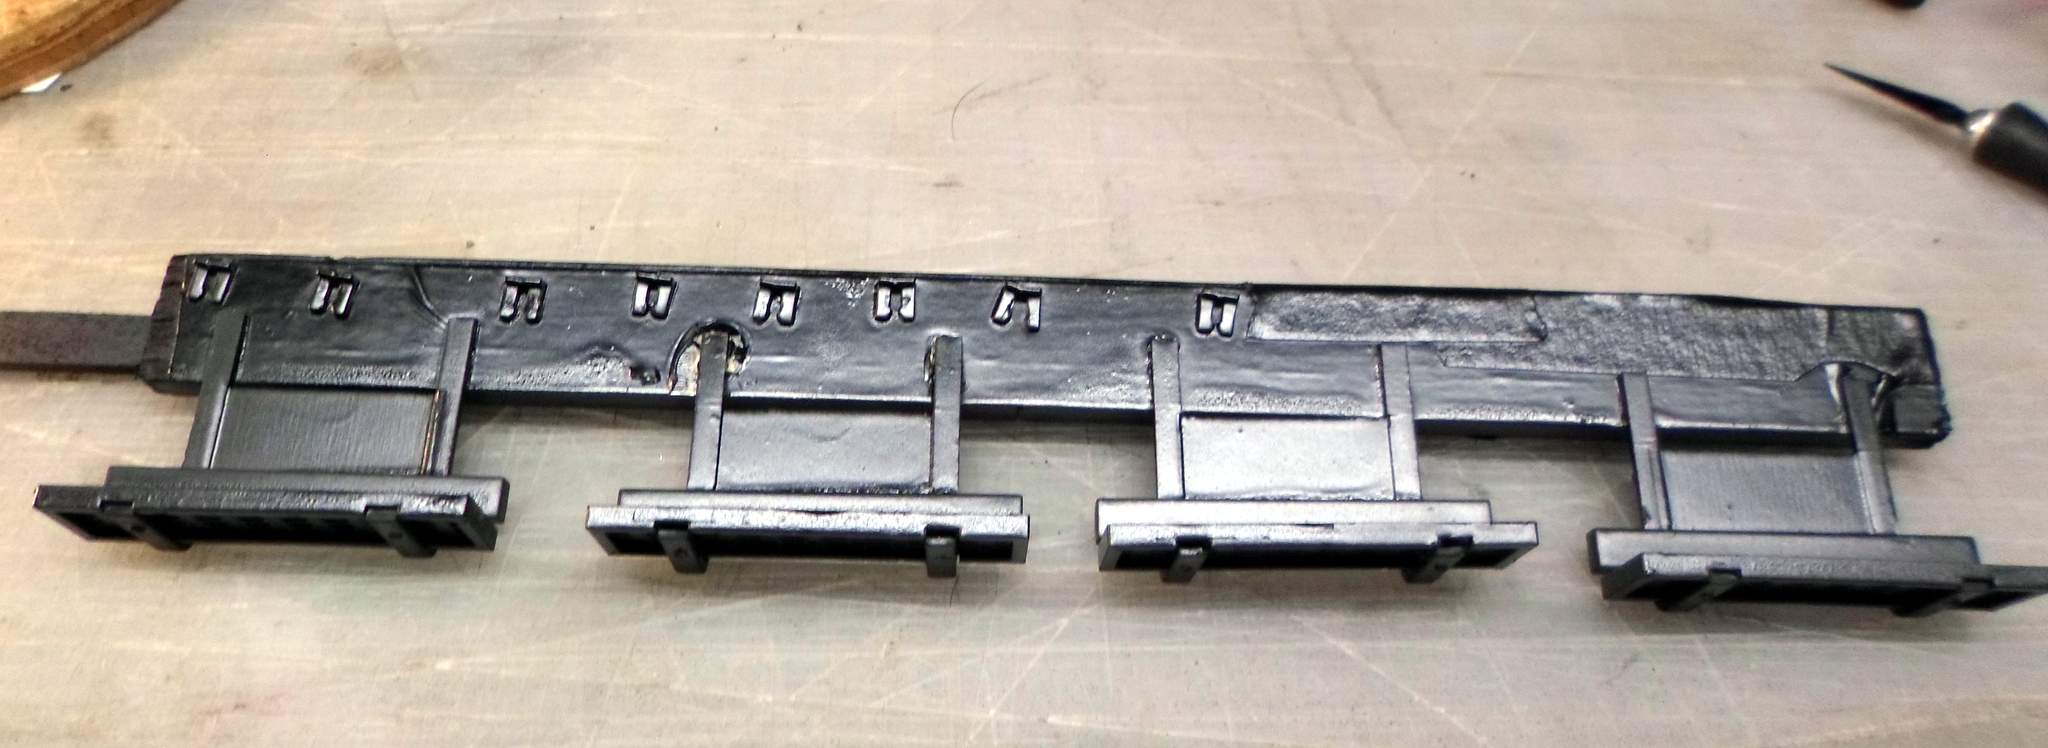
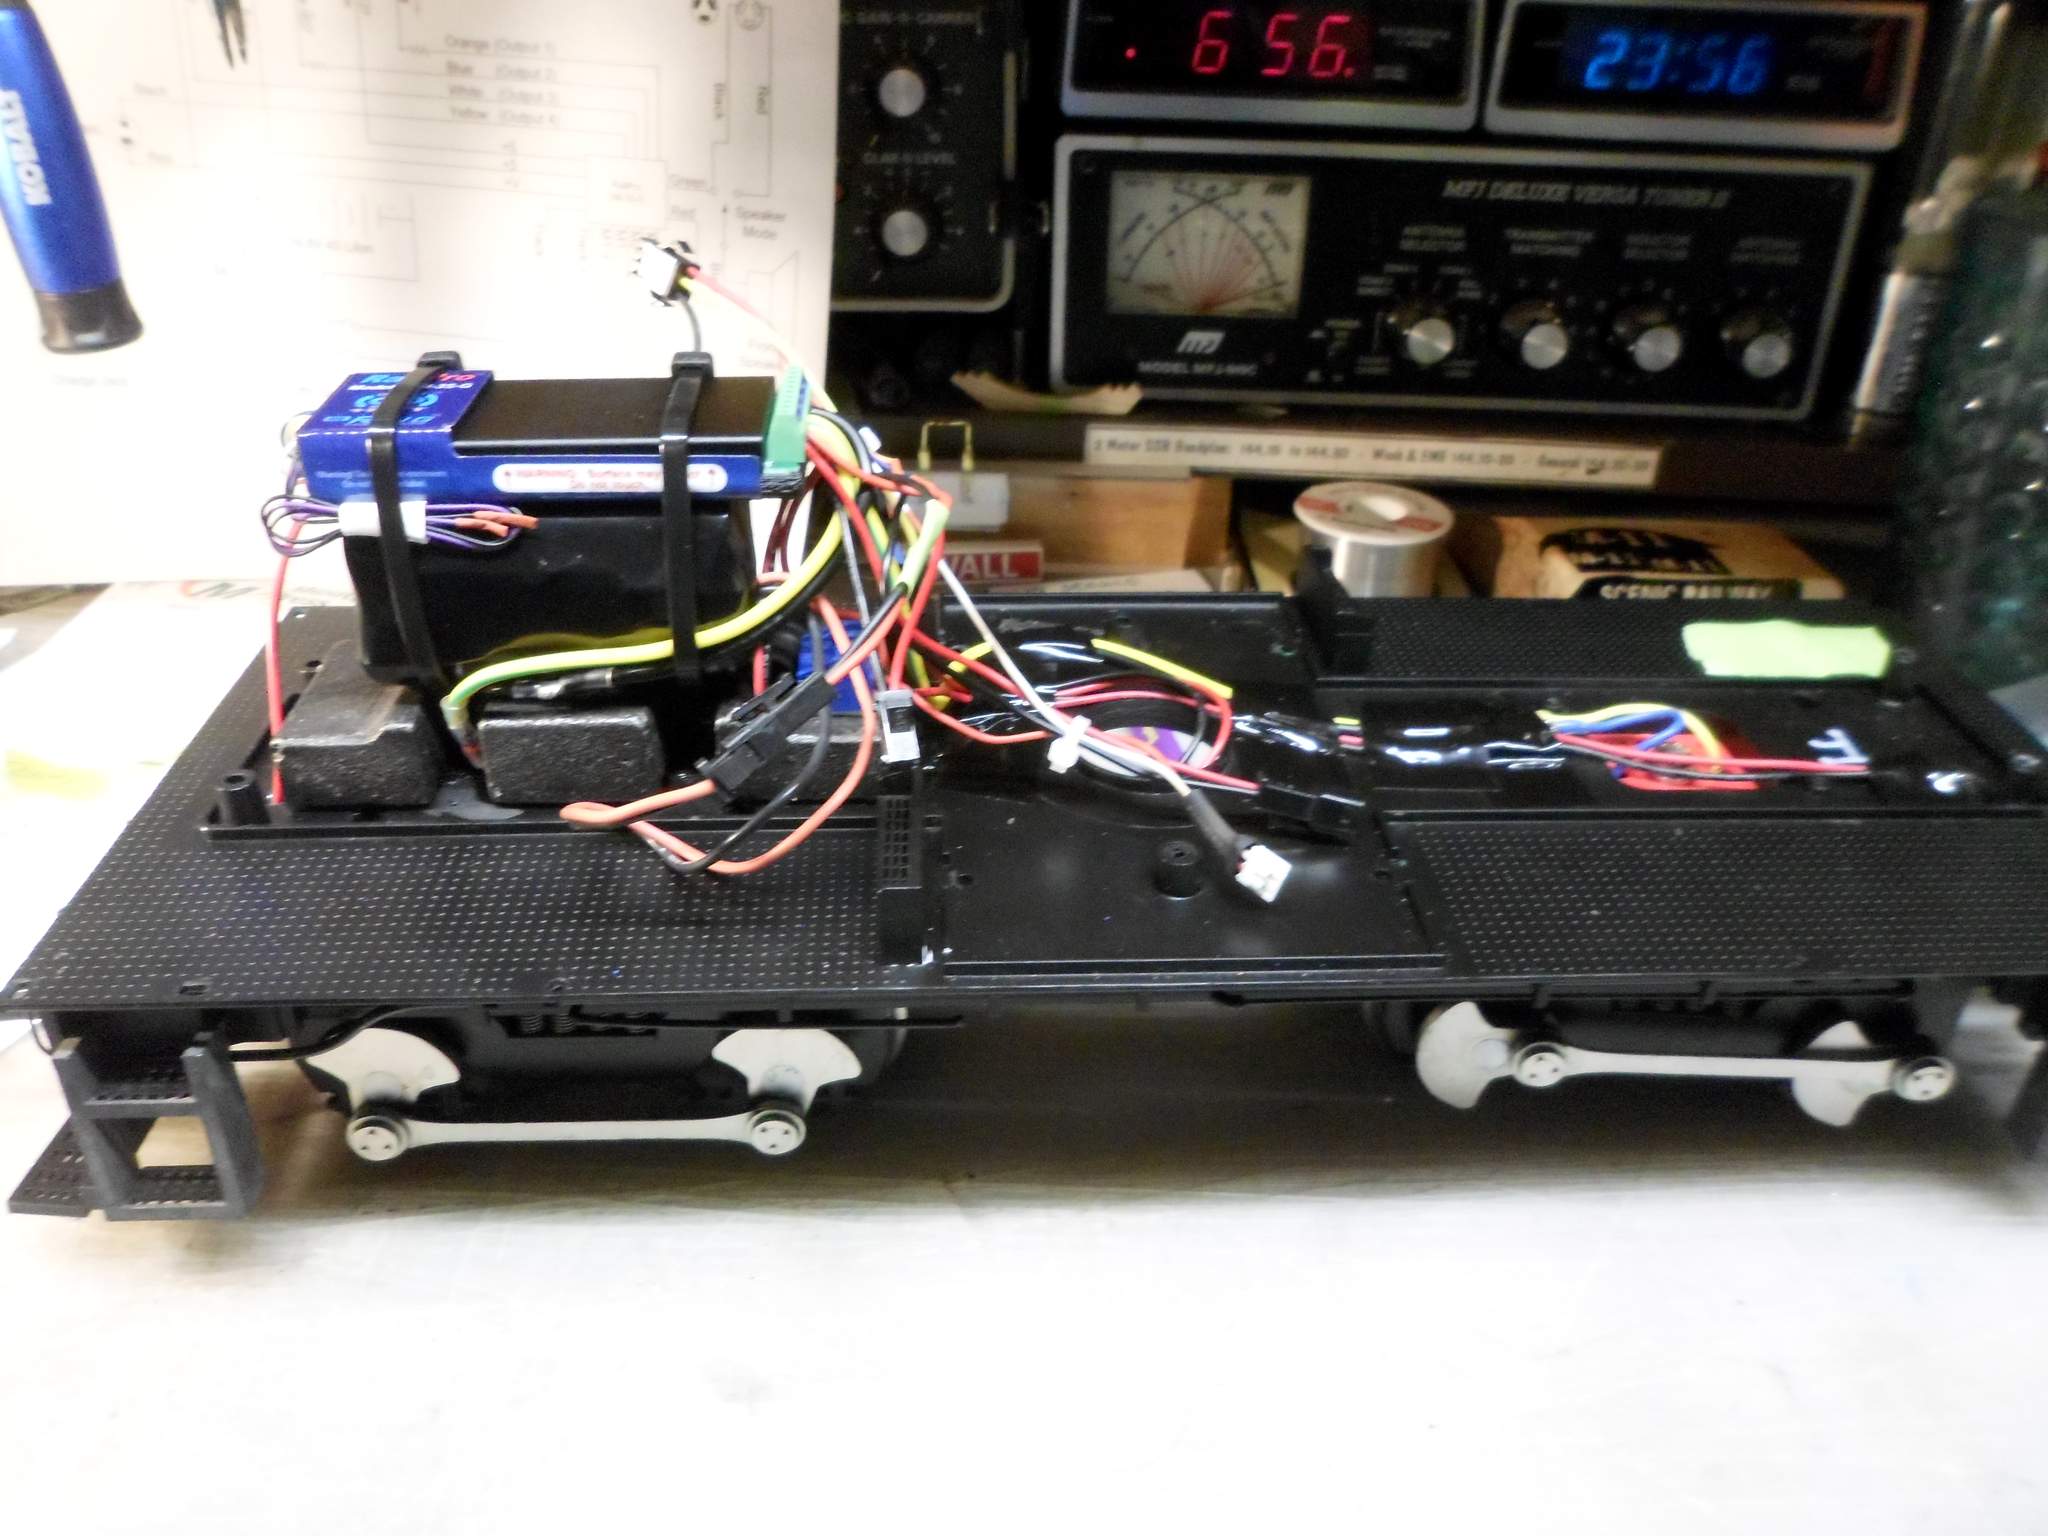
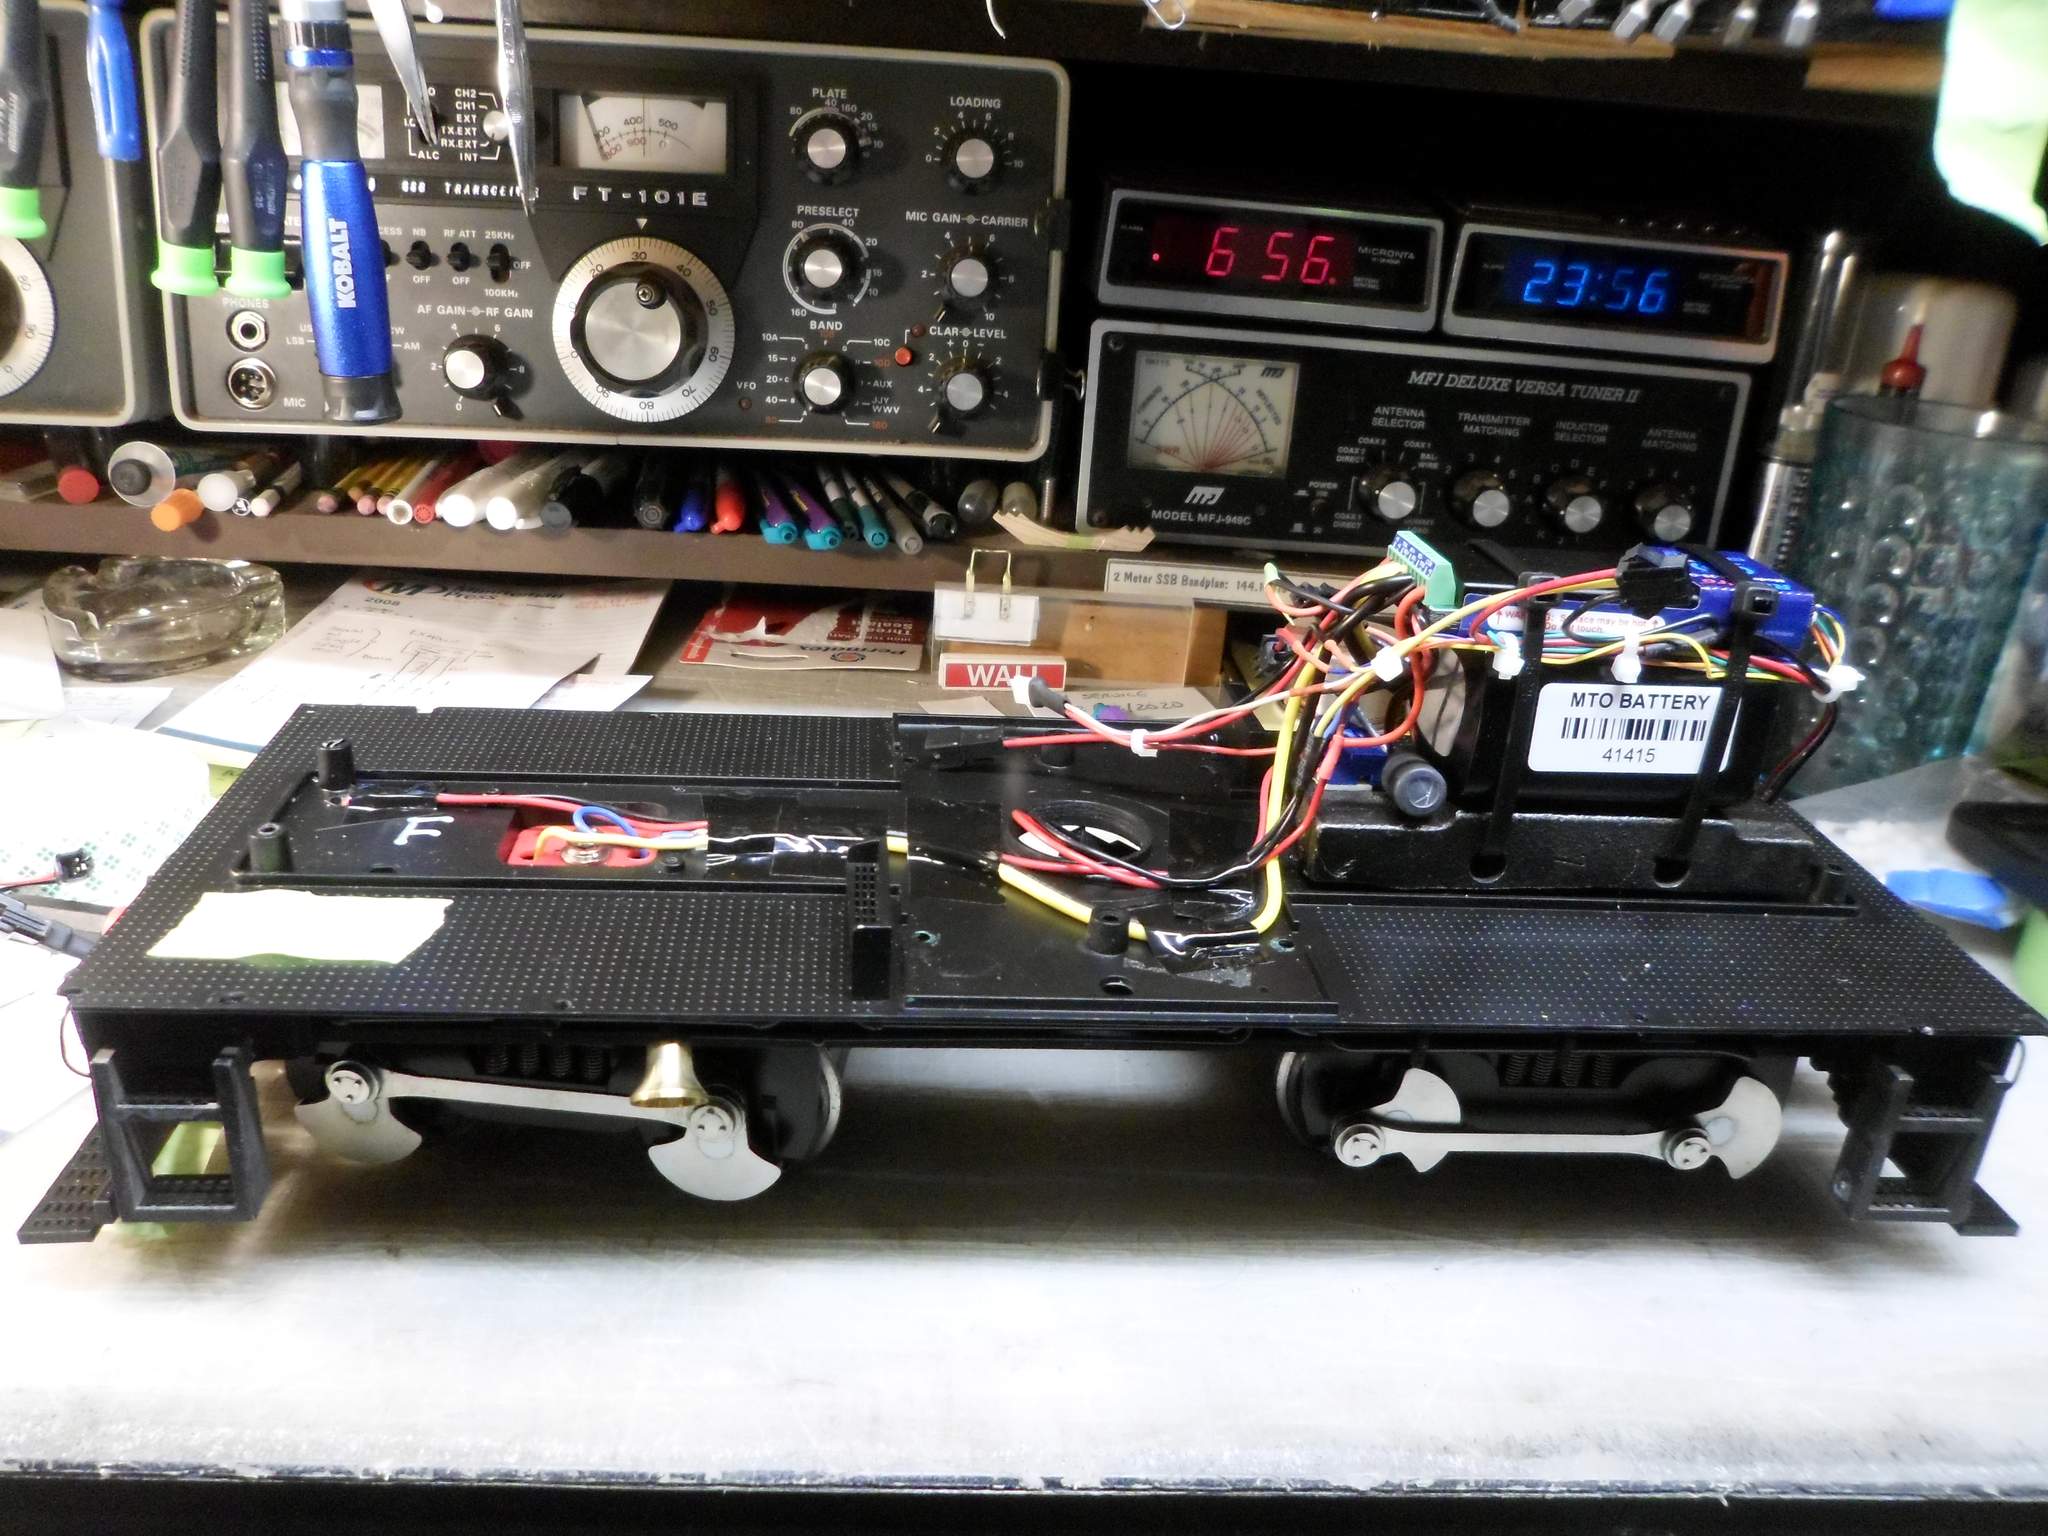
M-11 was completely disassembled, wiring cut out and parts organized. I replaced a few missing details on the trucks, then removed just the wire I had added from the track pick-ups. The trucks were then mounted on the black frame…

I have black ladders in stock, but no steps. The red steps were painted satin black using a method I use a lot at work for small parts: A wood scrap was coated with double faced tape, then the parts were stuck to it. The stick is long enough to hold outside the spray pattern and allows spraying from any angle. Lucky it was 50 and sunny today! This is what the steps and railing clips looked like just after painting…

Red M-11 had yellow railings. M-10 has black railings. I don’t want the hassle of painting rod, so they will stay yellow, at least for now.

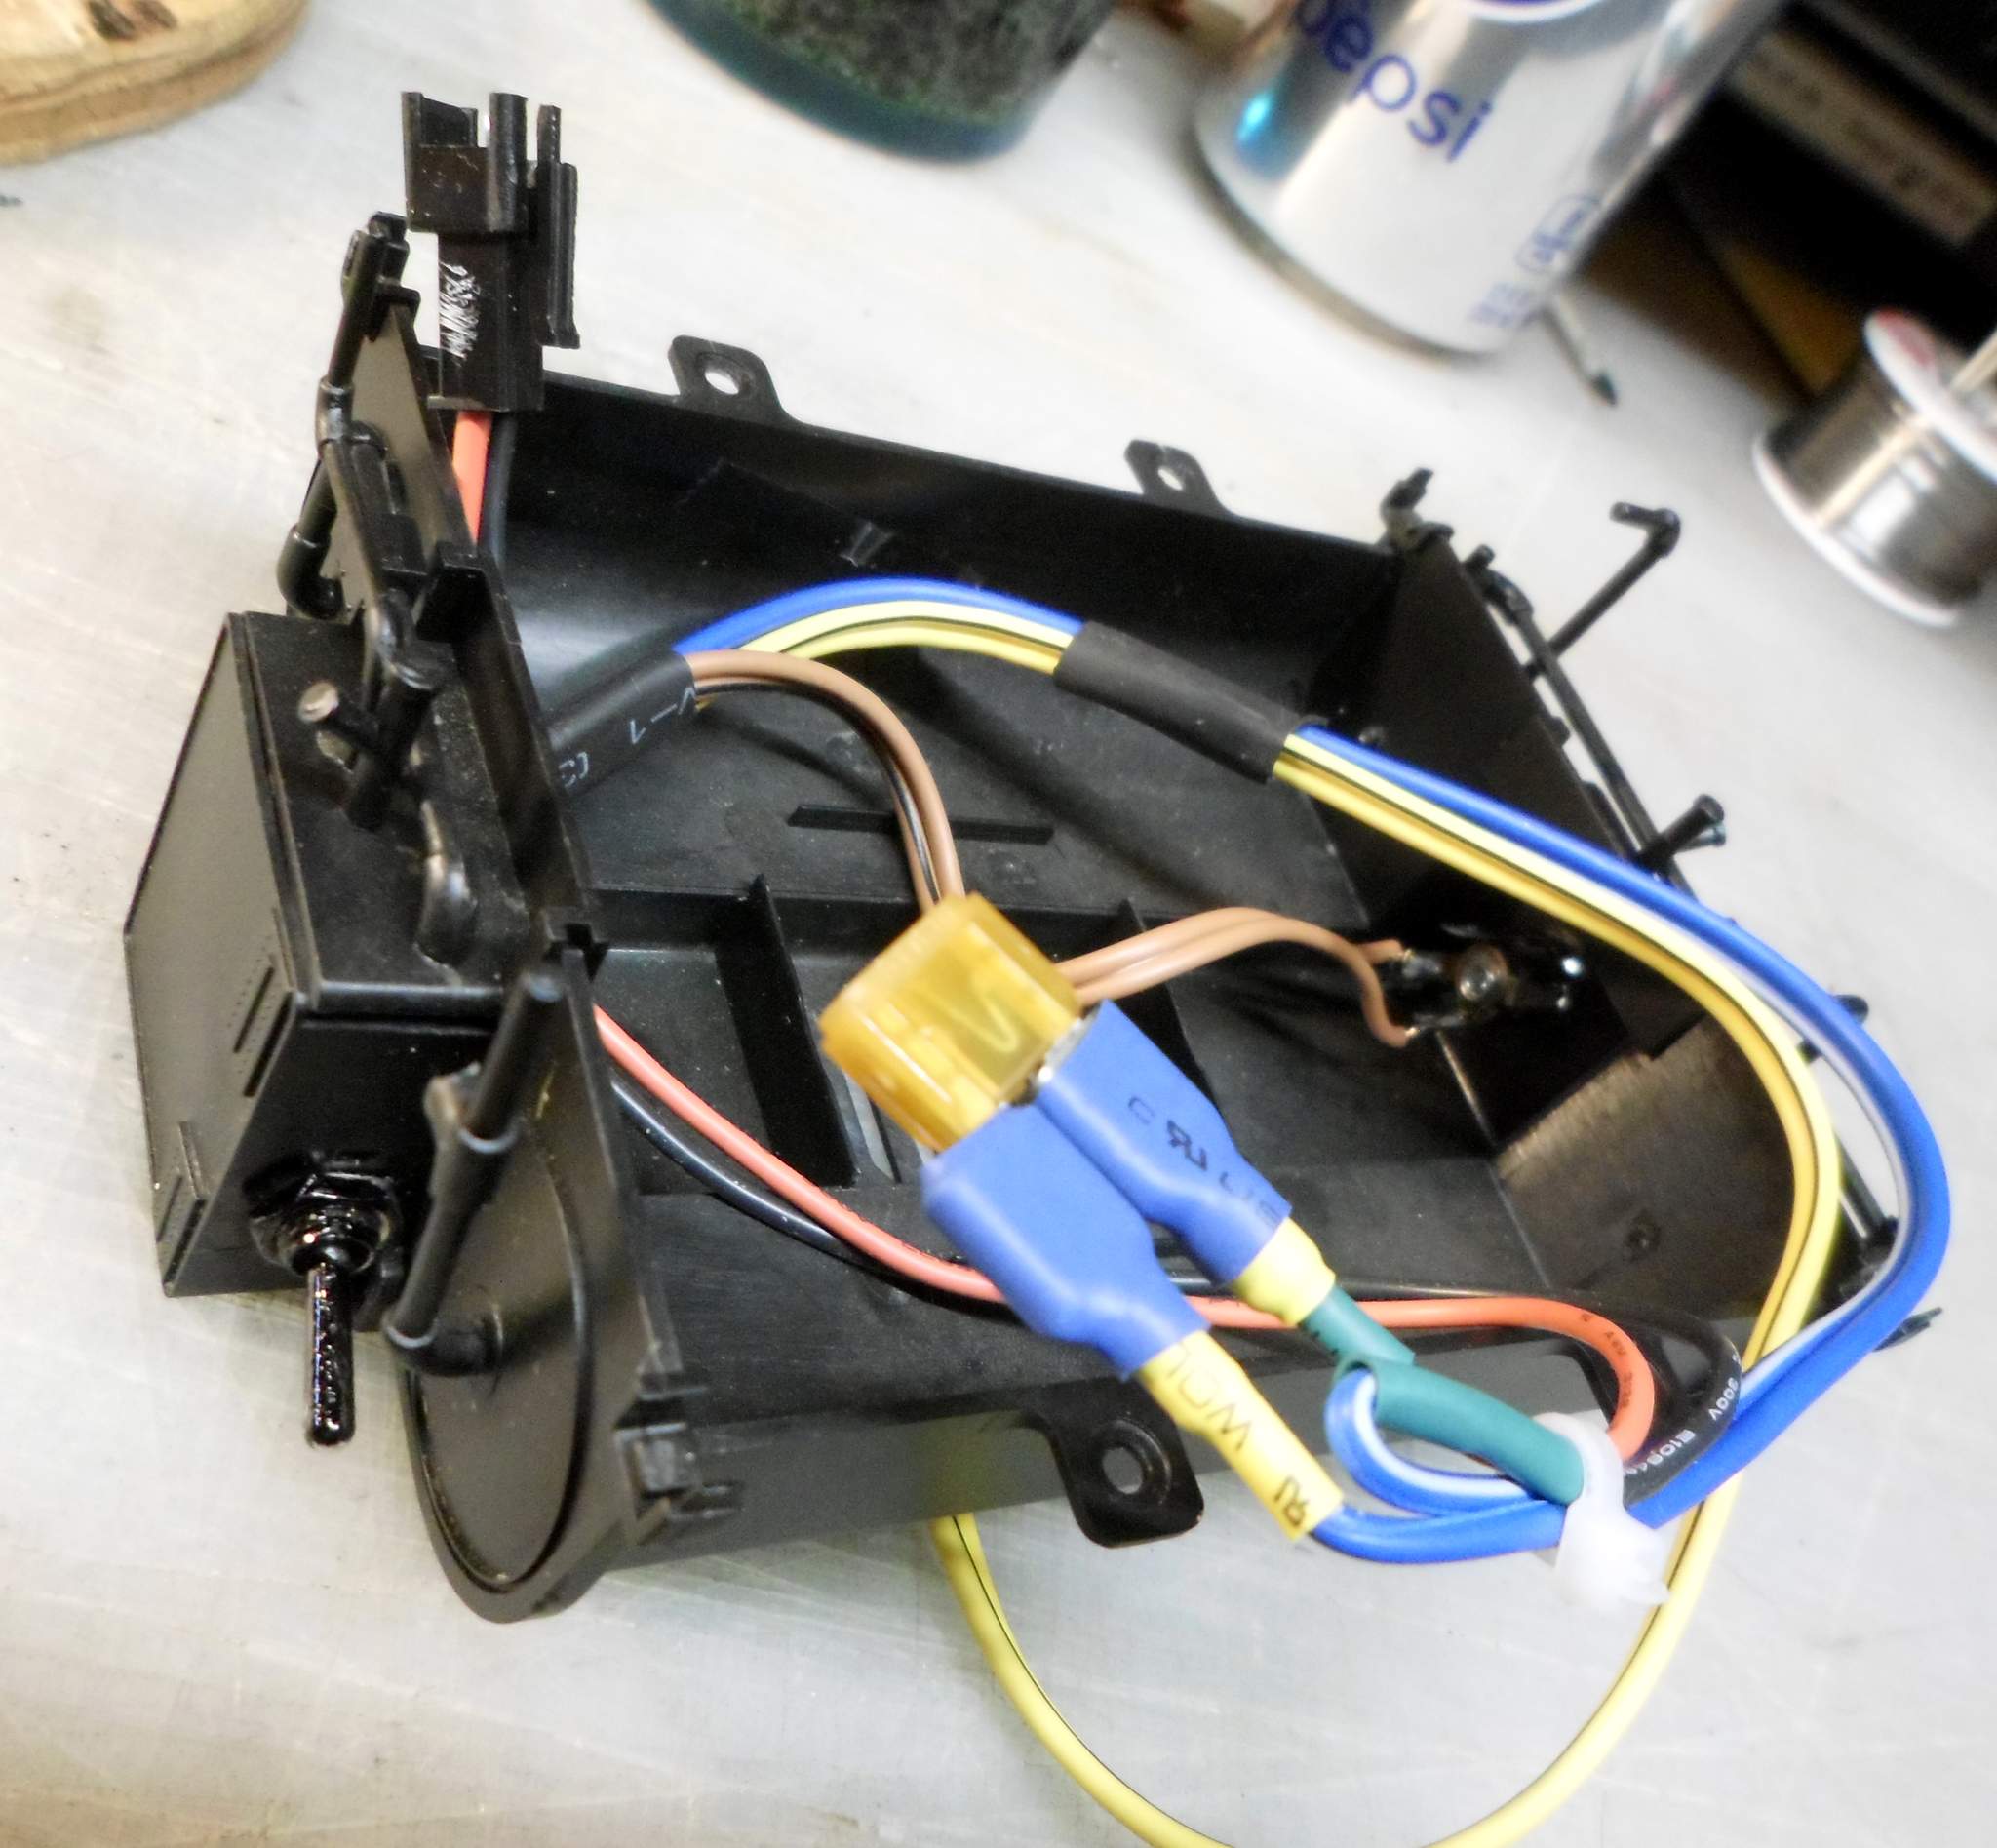
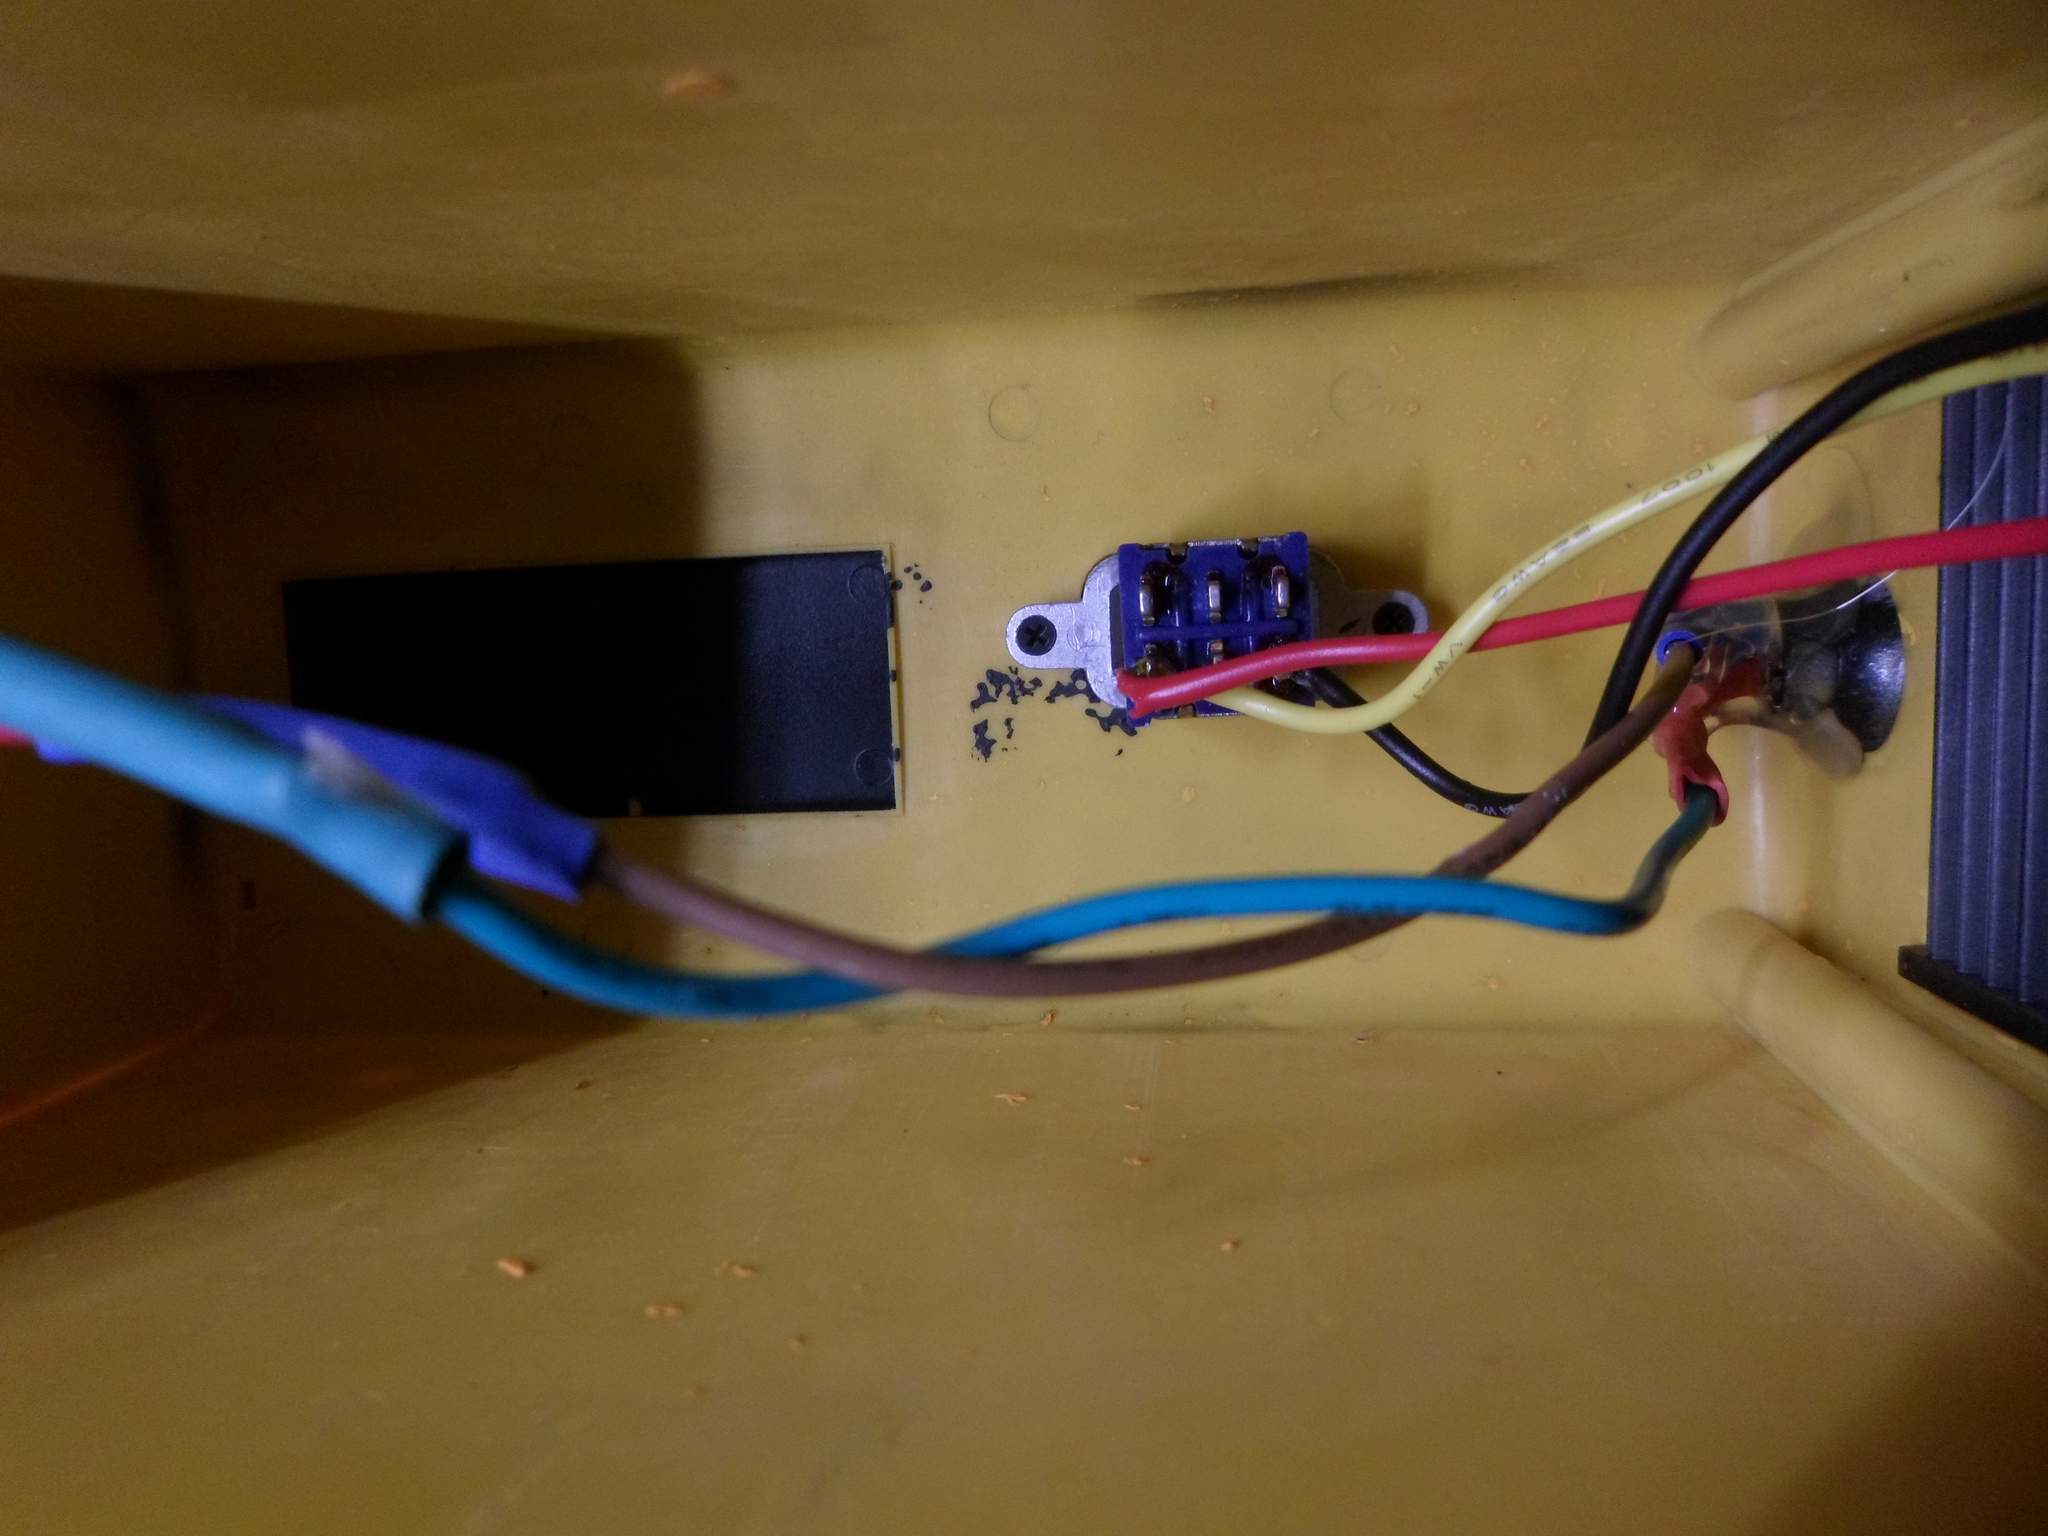
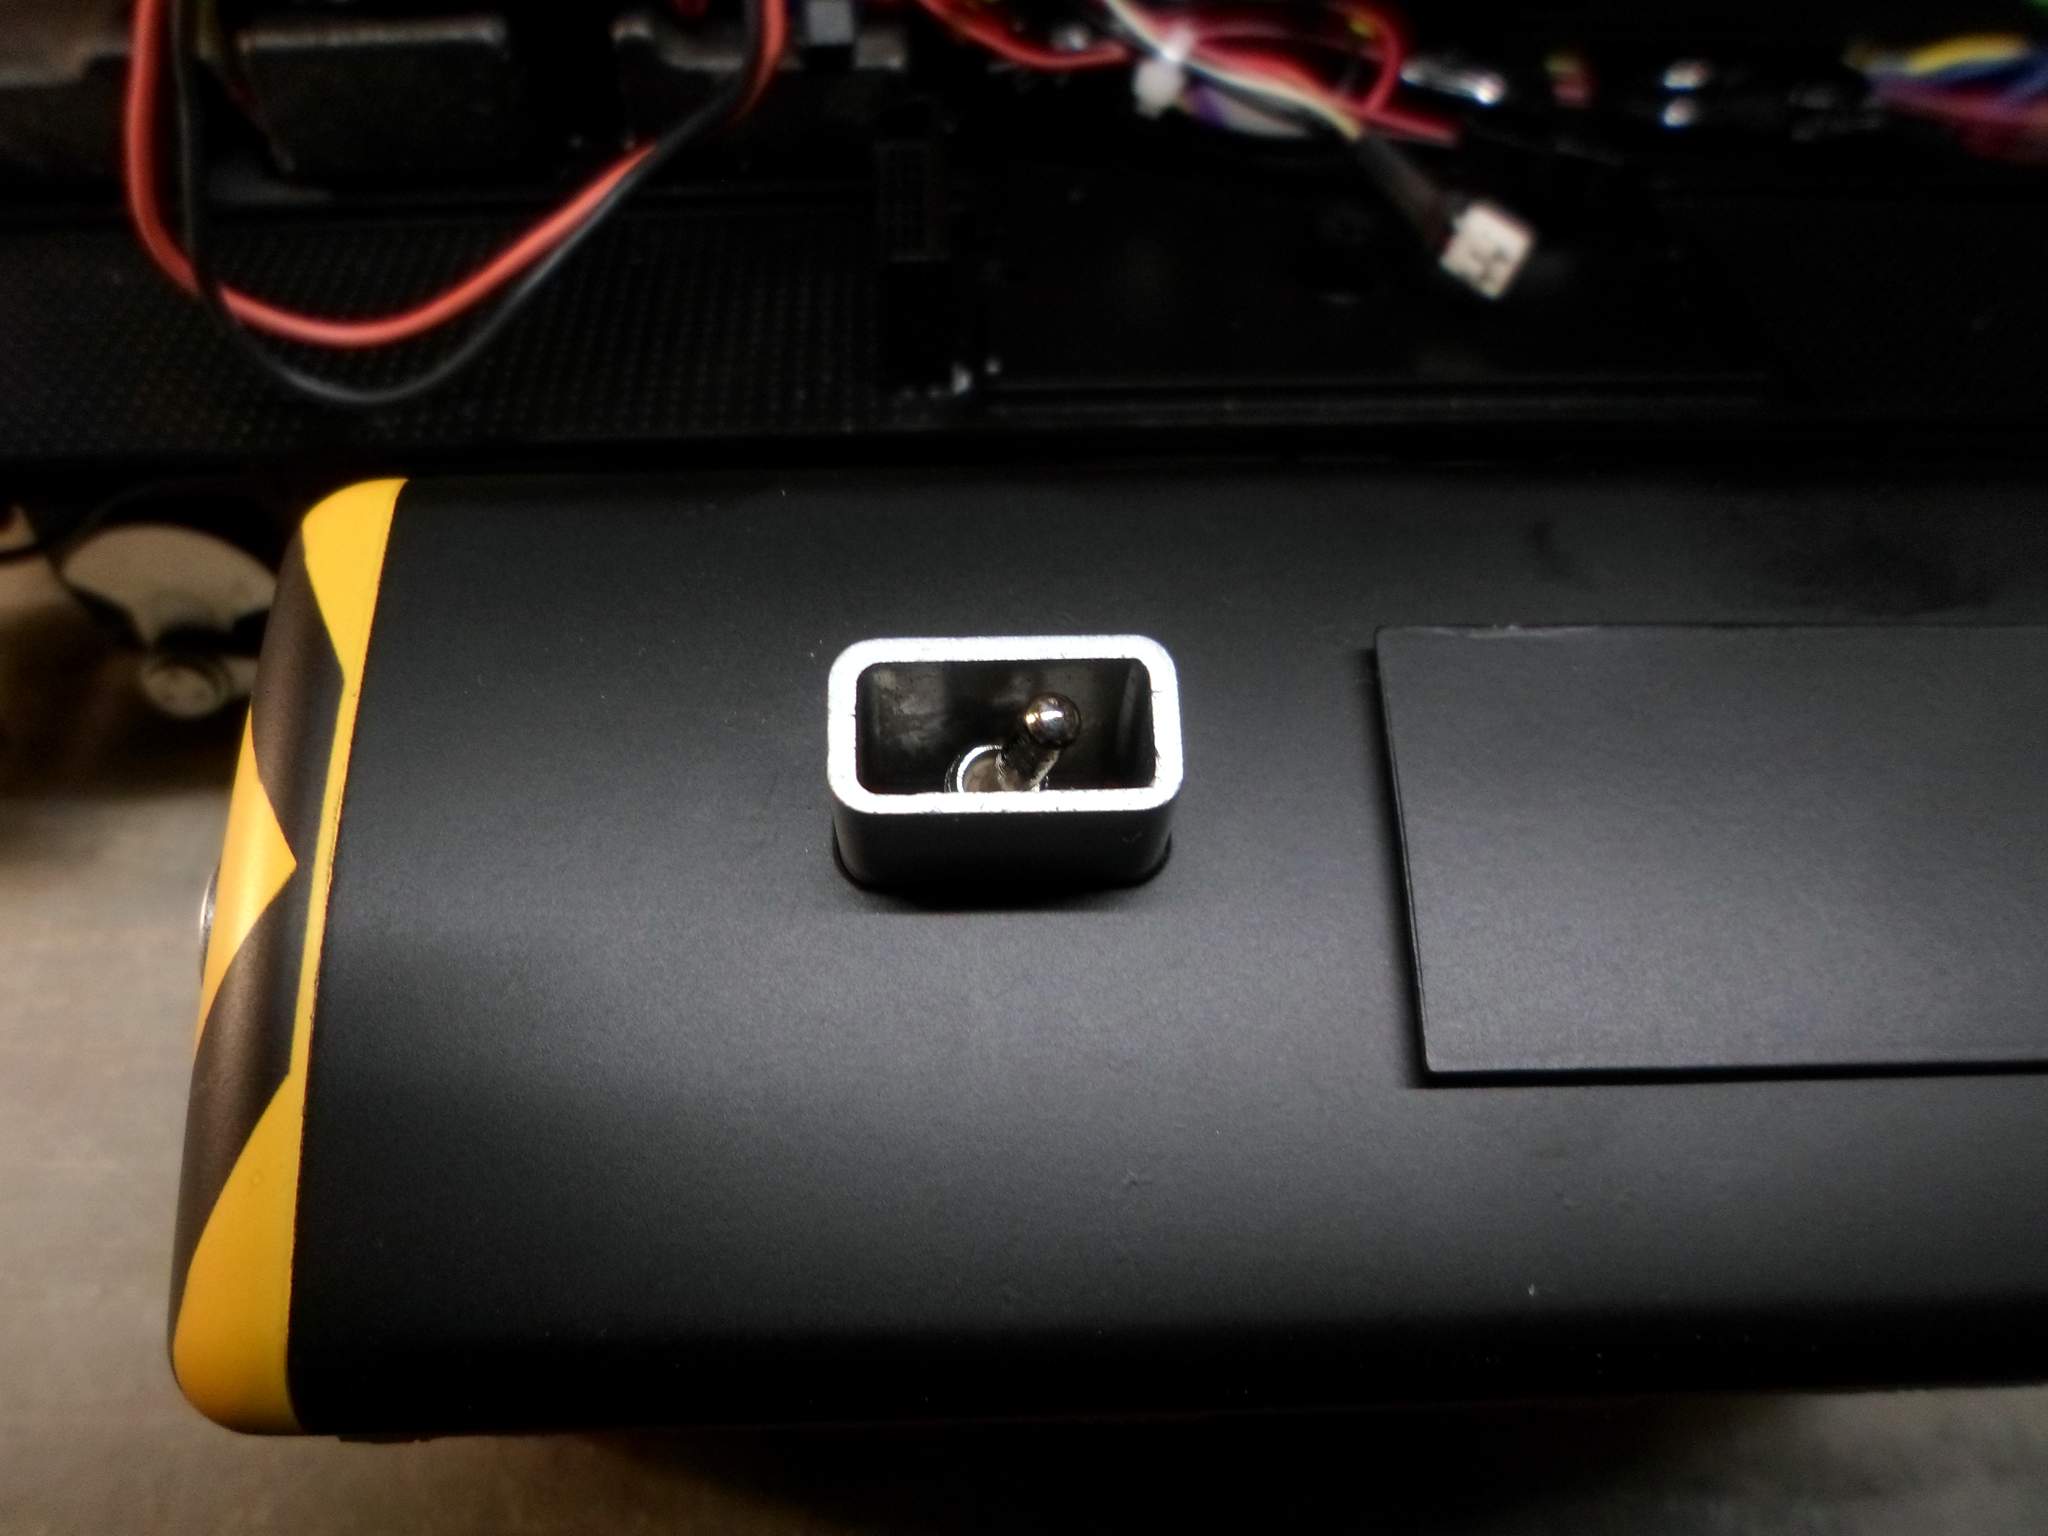
I was able to re-use the track/battery switch as a On/Off-Charge switch. Not finding an easy to access place for the charge jack, I opted for center of the fuel tank…

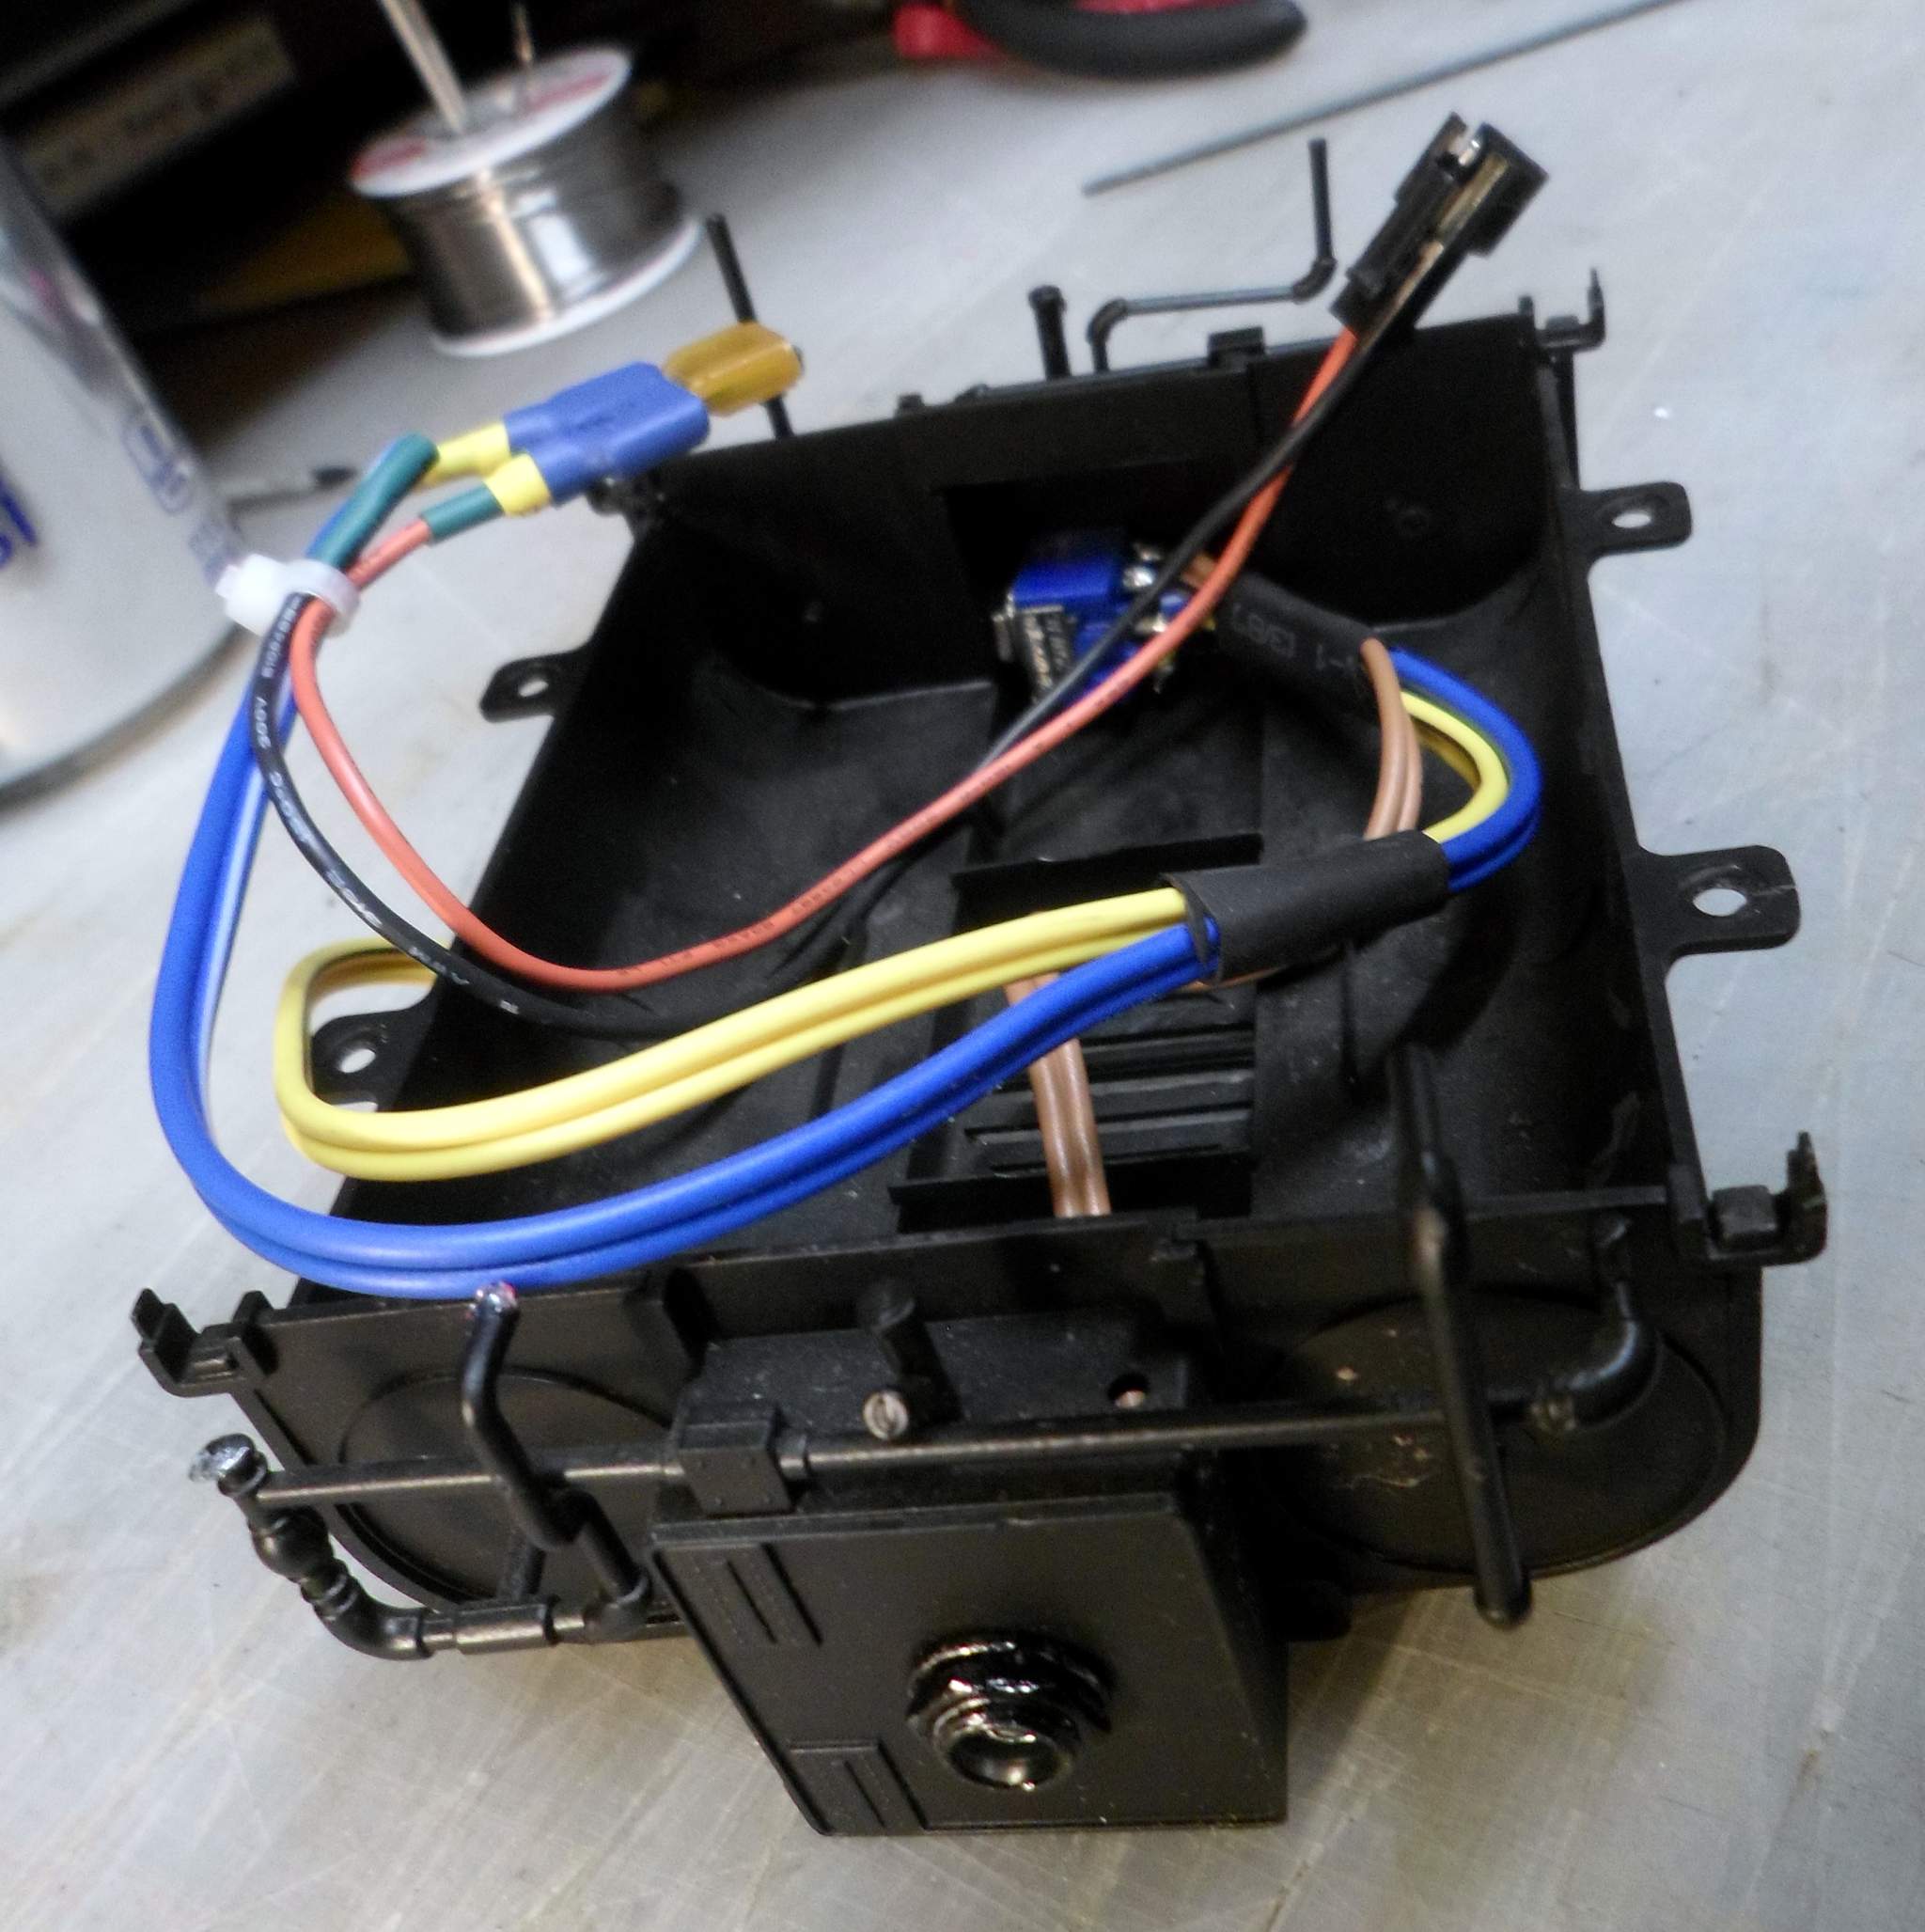
A 5 amp fuse and MTO battery connector cable complete the wiring. The Yellow wire will carry battery power to a RailPro locomotive module. Looking at the other side, the original switch was maintained in it’s original location, just re-purposed…

There is still plenty of work to do. I haven’t ordered the RailPro module or battery yet so it will be at least a week until the chassis is running under it’s own power. Stay tuned!

Mean while just south of the Radder plantation.

This post has been edited for : post count

Jon,

Maybe you should have left that fanning your C19.

George

A little progress to report. The cut vinyl I’ve had in storage for 10 years turned out to be in fine shape. It was stored with no application tape. It’s the tape that goes bad rather quickly. So last night, the yellow cab got lettered for the Candlewood Valley.

I’ve not run M-11 much in recent years, so I wanted to be sure the trucks were still working well. I cobbled up a simple R/C ESC to the trucks and a small DSM2 receiver so I could run the chassis around the layout checking for glitches. After a few minutes break-in time the trucks are doing great. It is dead smooth at a crawl on level track.

Here she is sitting along side M-10 with the cab just placed on top of the mess of wires…

To further this along quickly, I invested my stimulus check, and then some, on a a 14.8V battery, a few more RailPro locomotive modules and a spanking new hand controller (https://www.largescalecentral.com/externals/tinymce/plugins/emoticons/img/smiley-laughing.gif)Doing my part to support small business!

Since road trials were successful, I stripped out the temporary R/C gear and went to work on the chassis. I got all the the details back on the frame; couplers, ladders & steps. The fuel and air tanks go on last since they hide the cab screws. Being this close I really wanted to see where it was going. I mocked up the body and a few pieces of railing, then staged M-10 next to it for comparison. I think I can live with the minor differences in frame striping and railings…

My order from RCS of NE showed up on Thursday and I spent most of Friday soldering up the output leads of a locomotive module. That’s one of the few complaints I have about the RailPro LM-S3-G. I’d much rather have screw terminals for everything, not just the higher current lines. It would make installation faster and wire management easier.

I couldn’t resist doing a road test with just the battery and LM on the frame. The low speed performance blows me away. With each truck wired separately, it appears that the LM does load management between the two trucks as well as it’s low speed enhancement which I think is a form of PWM. I can get the chassis to absolutely crawl on level track. You can barely see the wheels and rods moving, but they are moving! I’ll do a demo video once the body is installed.

Today, while I rooted on my childhood home team, The Buffalo Bills “won, not done” to a nail biting victory over the Indianapolis Colts in the first round of the NFL playoffs, I worked on the final wiring diagram. This loco will have a few unusual features. It wouldn’t be mine if it didn’t (https://www.largescalecentral.com/externals/tinymce/plugins/emoticons/img/smiley-cool.gif)First, the front mounted on-board speaker, which sounds great by itself, can be augmented with a mini bookshelf speaker in a trailing car for unbelievable bass. Second, a 14V switchable connector will be available at the front of the locomotive to power the LED array on the front of my wedge snow plow.

Here is the schematic. Not shown is that all body mounted components have plugs in thier wires so the body can be easily separated from the chassis for service…

Jon, I am enjoying this saga of your M-11 conversion to RailPro. I am finding it very informative and entertaining as well. I have most of my equipment set up with Airwire and Phoenix sound boards but you are really tempting me to give RailPro a try. I will most definitely stay tuned. Thank you for sharing, Mark

Thanks Mark (https://www.largescalecentral.com/externals/tinymce/plugins/emoticons/img/smiley-smile.gif)

I was a dyed-in-the-wool Phoenix Sound fan from my first Big Sound 97 board in a GP-9 about 20 years ago to my latest install using a PB-11. I even have several trail cars with mini bookshelf speakers in them to enhance the sound. If you haven’t figured it out yet, one of my hot buttons is sound. I needed to retire my former system because the manufacturer no longer makes the system I was using. It was Rail Boss with a 2-stick aircraft style radio. Big & bulky, but I found the sticks very easy to use.

Airwire was on my short list because (I think) you can use it with sound decoders like the TCS WOW. I’ve not heard TCS’s steam sounds, but the diesel sounds I’ve heard are fantastic. I’ve had hands-on experience with the Airwire hand piece and while I’m sure it’s just a learning curve thing, I found the buttons a bit confusing, but I like the knob for throttle.

I’ve also had hands-on with several versions of the Revolution system. I’m not a fan of buttons for throttle and combine that with the generic sounds offered it wasn’t for me.

Don Sweet has been trying to sell me on RailPro for years. I finaly dipped a toe a month or so ago then jumped in with both feet last week. What has sold me was #1 sound quality, #2 ease of use, #3 functionality, especially consisting, #4 simplicity of install / programming, #5 cost per loco. The more I get into it, the more I find I like. I’m also looking forward to automating a few hard to reach switches on my indoor someday soon.

More progress today. Almost ready to start putting the body back on. Only a small bit of wire management left to do so everything will fit. One of the items that slowed me down was adding the capability to power a larger speaker in a trail car. Because my on-board speaker is 4 ohms, this scheme required a switch to change from parallel to series wiring for the speakers. I searched around a while for a good spot to locate the switch. I finally came up with gluing it to the bottom of an exhaust port with structural adhesive. Interior and exterior views of the switch install…

And here is the chassis with the RailPro LM and battery tied on to a weight with zip ties. The weight is attached with high temp hot glue. All of those plugs hanging around connect to components mounted in the body like the speaker and various lights…

Tonight I’ll work on getting all that wire to fit in the small spaces that are left inside the body. Hopefully tomorrow will be button up day.

Got it completely buttoned up today. It was tight, but the body went back on over all that stuff!

The last step is to put the railings on. Originally I thought I could live with the yellow railings, but after looking at that comparison picture for a few days I decided they do need to be black. It’s too cold to paint this week, so I’ll take them with me to work where I have a paint room. If I’m lucky, I can start putting them on tomorrow evening. Once it’s fully assembled I’ll take some video.

I ran some road tests tonight and was happy to learn M-11 will negotiate R1 switches and pull short cars from sidings in R1 territory - even with body mount couplers! One car that was buried on an R1 siding was my camera car with LED flood lights. It was designed to carry an 11.1V battery, but I had adapters already made up that allowed me to connect it to the switched 14V at the front of M-11. It worked perfectly (https://www.largescalecentral.com/externals/tinymce/plugins/emoticons/img/smiley-cool.gif)I’ll show that in the video too in a few days.

Here are the completion photos and a short demonstration video.

Only a little deck repair to do in just a few spots where the railings mount and minor pint touch up. I might actually get that done soon, but right now I’m having to much fun running it around the indoor layout.


RailPro Demonstration in Bachmann Fn3 45 Ton Diesel from Jon Radder on Vimeo.

I personally think it’s photoshoped and not completed as the completion times do not match! Zulu time is 6 hours off from EST time ?

Just saying ?

I should have checked your math before I double checked the time offset, cause I was pretty sure EST is UTC-5.

Compare the sound in the above RailPro video to the sound in this video taken in the spring. The sound you hear in this video was a Phoenix P-8. I used to think Phoenix was the best sound out there. Not anymore (https://www.largescalecentral.com/externals/tinymce/plugins/emoticons/img/smiley-cool.gif)