Large Scale Central

New Deck Girder Bridge for Indian Hill

Jon, ya know, and speaking of bridges, I have been fantasizing, which is what I do best, about running some track in the good part of our garden (my wife’s flower part) where I envision the track crossing over a trestle. I peeked at Bridgemasters site, and they have a curved trestle which holds two, 8-foot diameter track sections. Each trestle costs $89 and I’d possibly need two. BM also sells individual bents at various prices. Since I don’t own a table saw, I’d probably be better off just buying ready-to-wear. But I’ve got my Porsche restoration project (I’d like to get the air cleaner, cooling ducts, and rear deck lid hinges painted), plus my camera stuff (I just got a camera with Wi-Fi), so guess how much track will get laid? Still, seeing my trains running through the garden would be cool. And it would piss off the racoons!

Meanwhile, good luck with your endeavour. Lookin’ good.
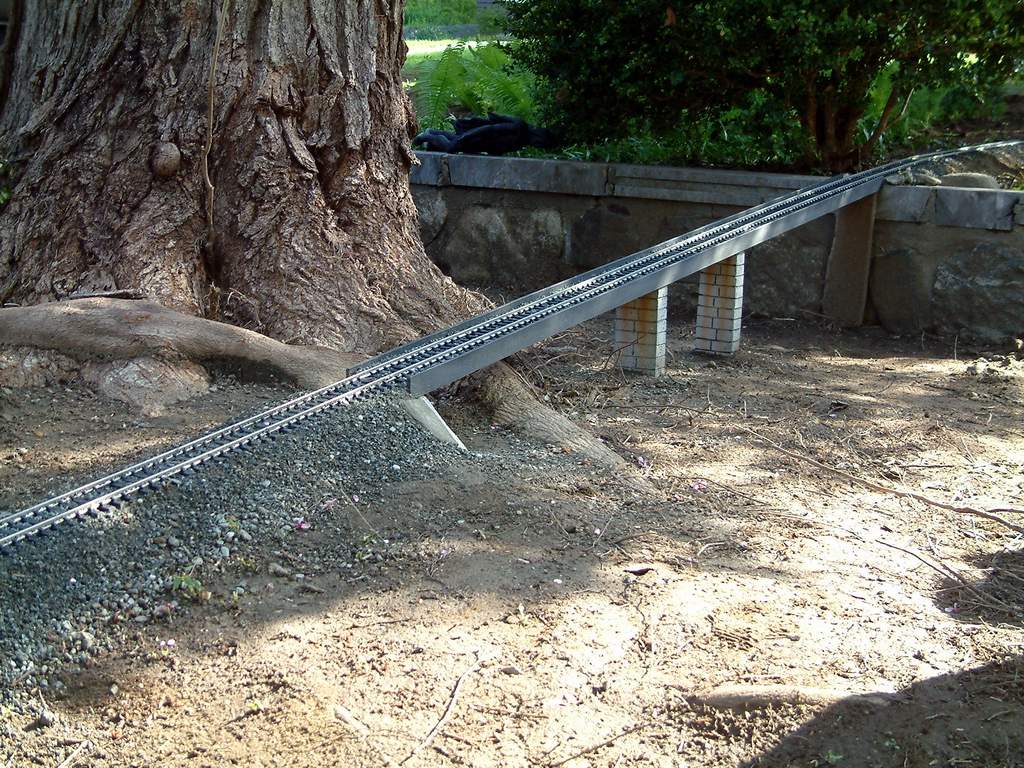
Finding time to work on a project, and keeping the mojo going are major factors for me getting things finished. If I could afford a pre-made bridge I’d go that route, but with 8 feet to cross it would be pricey. I would have loved to be able to put one of those beautiful Garden Metal Models bridges here.

Although from certain angles this design looks real; on close inspection you quickly see that it is not plate girders at all since you can’t see daylight through the bridge ties. It’s what Bart would call Operations Quality (http://www.largescalecentral.com/externals/tinymce/plugins/emoticons/img/smiley-wink.gif)

I might sand up the “girders” in preparation to start gluing on parts tonight. First I need to be sure I have 3" of clearance below the rails to the highest obstacle (tree root). That could kill the project before it begins. That is the spot I had to saw away a portion of the root last year to clear the current bridge that only hangs an inch below the rails…

Daktah John said:

I have all of these home-made accessories including a zero clearance throat plate that I made from plywood. I didn’t use the feather boards on this project (probably should have) because they don’t attach easily to my cheap Sears saw.

I do use push sticks; one in each hand and always keep my eyes on my hands and the blade while cutting. By the time I was ripping the last few sticks I was getting tired, which is when accidents happen. If I ever feel that way again I’m walking away from the saw to take a break. I LIKE my fingers. I’ve had a close encounter with the stopped blade on a chop saw that took a chunk out of my hand. Don’t need to get to know a moving blade at all!

I have a cheap sears table saw also. There are a couple options for feather boards. You can get fairly inexpensive feather boards that attach in the miter groove of you can also get magnetic ones. And for vertical ones on the fence I through bolted a piece of wood to my fence then you can screw a feather board to that.

http://www.harborfreight.com/feather-board-with-angle-finder-36697.html

And Woodcraft has a bunch

http://www.woodcraft.com/search2/search.aspx?query=feather%20board

One upgrade I want to make is to get an extruded aluminum tube to make a new fence that has t slots.

I offer this only because I like your fingers also. Be safe guys.

Thanks Devon.

I have made a wooden fence extension that I can attach to the back of the fence. It allows me to clamp on a home-made feather board to keep a workpiece down against the table. I also cut slots in a piece of wood that I can shove in the miter groove to help hold stock against the fence / blade. The sideways feather board is great when making many of the same cuts from the same size stock. I guess I would need to change my production method to cut multiple sticks from the several of the same size board. Now I just keep feeding the same piece through until I have used it up. With a feather board in play, I’d need to run each source piece through once, then adjust the feather board and do it again, rinse and repeat until the source boards are all used up.

There is a cheap plastic feather adjustable board at work. No one ever uses it (probably don’t know what it is). Maybe I’ll borrow and see if it fits my miter slot.

1 Like

John, the rinse and repeat method I have used, but I try to cut all of my larger dimension (thickness) first, then reset the fence and cut my thinner dimension on the second set of passes. I have to figure out how many finished boards I can get from each “blank” and that has to take into account the 1/16th inch of wood that is turned into sawdust with each pass. That way I can figure out how many blanks I need (boards ripped to the larger thickness), plus 10% for “oopses”. I always try and cut more then I need, and what I don’t use goes into some trays I built. Then, when I need one of a certain board, for some project, I usually have one in my overages trays.

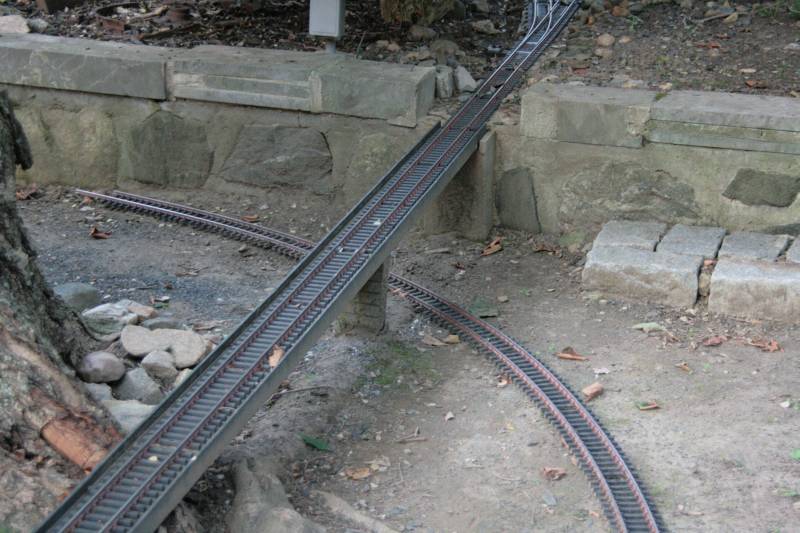
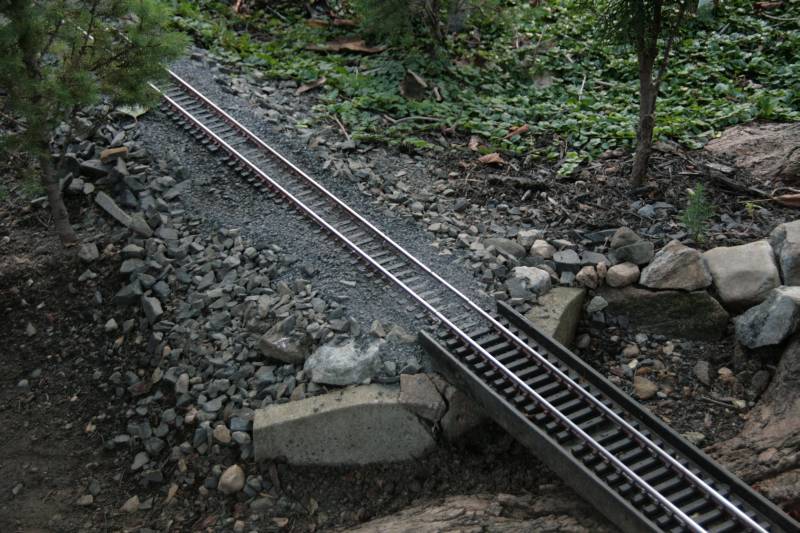
I’ve been busy with other outdoor non-rr projects, but I’m still gathering materials for this bridge build. The original bridge is 8 feet long in a single span. This picture from when first installed probably 10 years ago or more…

That crazy grade was eased a few years later and new abutments poured as seen here…

My original plan for the new bridge was to build it in two 4 foot sections. I was going to pour a new center pier and leave a prototypical gap between sections and try and model chairs for the girder to set on the pier. The more I thought about this the more I thought it would be better to retain the single span for strength and stability. I’m going to experiment with some 2x2 Aluminum scrap to see I can slot the sides on my saw to represent the gap between girders without weakening the structure too much. The 2x2 I am using is an extrusion with extra parts inside the square. I’ll try and post a cross-section picture along with the gap experiment soon.

I managed a few minutes at the table saw today to try the slice experiment. This is the profile of the tube I will be using. It is positioned the way I will be using it in relation to top, bottom and sides…

I made some test slices on the table saw to represent the break between sections of the bridge. I only did one pass over the blade. I can make it wider with multiple passes if desired…

I didn’t measure, just eyeballed and didn’t get the cuts lined up exactly, but close enough for a bend test…

This piece is about 2 feet long with the cut approximately in the middle. I clamped one end in my bench vise and inserted a pipe in the other for leverage, then attempted to bend it at the slices. My workbench moved, but no noticeable change in the tube. Test passed!

So now I need to determine how many sections I want. The span is 8 feet or about 163 feet in Fn3. I’m thinking three sections would be practical in the real world.

A twist of fate has brought this project to the front burner again. A power drill accident at work resulted in the need for hand surgery tomorrow and two weeks out of work. Assuming I recover fairly quickly from the surgery the plan is to try and make some major progress on this project.

First up will be re-pouring the low side abutment. You can see in this photo that the non-reinforced concrete failed…

In the process I’ll lower the footing under the bridge deck to accommodate the girder and leave it open so the girder end will be in view. I’ll also start assembling the bridge ties and guard timbers. I need to pick up some TiteBond III to use along with either brads or headless pins. I think I used short brads in the first version.

I brought home a bunch of scrap .030 styrene sheet to simulate the top and bottom rails of the girder (horizontal parts) . I’ll need to wait a bit for the vertical angle detail on the girder until I can get a bunch of styrene angle.

Gonna clamp down your work?

I like pins in small dimension wood, my brads tend to split the wood too much. The wrong ‘once’ is too much!

Looking good and take care of yourself.

John

ps; the pins don’t hurt as much.

Thanks John. Unfortunately I didn’t have an option to clamp the work - it would require bar clamps that we do not have in the shop. I use a lot of my own tools because the shop tools are a mess, but I didn’t bring in large bar clamps. In hind sight I should have. Usually I don’t known about projects in advance and I can only carry so many tools in my car.

I looked at the old bridge today and I did use brads there because I wanted the extra holding power, but that was PVC which is more forgiving. I agree with you that the pins are less risky. And yes, I have pinned myself and they don’t hurt that much (http://www.largescalecentral.com/externals/tinymce/plugins/emoticons/img/smiley-wink.gif)

I completely understand, the kid-size back seat in my pick up is my tool box.

More oil, less pressure?

I hope you heal cleanly.

John

Jon,

Sorry to hear of your accident, hope you heal quickly and cleanly.

One thing about power tools, they are unforgiving.

Thanks Rick. By this time tomorrow I’ll know the result of the surgery. At the initial exam the surgeon gave it better than 75% chance to heal completely. Good news is that I haven’t lost any movement, just some feeling in one side and the tip of my thumb.

John - I can blame myself. I had made an error drilling some pilot holes in aluminum. I had to re-drill 8 of them and was rushing, probably using too much pressure. I know better and the power drill just needed to remind me.

Jon- Bridge looks great, your hand… not so much! Hope you heal soon.

-Kevin.

Jon, hope the surgery went well, and you heal quickly…

Bridge looks good…

The surgery did go well. They did find that I completely severed a nerve and a piece was missing. They rejoined it with a tube and hopefully it will grow back together. About a two-inch stair-step incision. That hurts significantly more that the original injury - but this time they did give me drugs. Hand is in a splint and large bandage for 5 days, so typing is a challenge :slight_smile:

Good to hear the surgery went well Jon. Don’t push the healing part. and 3 sections seems like a workable build (http://largescalecentral.com/externals/tinymce/plugins/emoticons/img/smiley-cool.gif)

I’m glad to hear that your surgery went well. Did they use a general anesthetic or local? Get well soon, and type with the other hand. (http://www.largescalecentral.com/externals/tinymce/plugins/emoticons/img/smiley-smile.gif)

Local with an IV sedative that put me to sleep. My hand was totally numb for about 6 hours.

Glad to hear your on the mend. It’s a scary moment when things go wrong. I just think of all the things I won’t be able to build without that eye or finger or… Don’t over exert the wound working on the RR now. (http://www.largescalecentral.com/externals/tinymce/plugins/emoticons/img/smiley-wink.gif)