Mike,
Try letting the water soak for a while before chipping. Again, of you let the paint fully dry its a lot harder to chip. I’ve heard of people using 70% IPA instead of water, but not sure how that works.
What you’ve done so far looks good.
Craig
Mike,
Try letting the water soak for a while before chipping. Again, of you let the paint fully dry its a lot harder to chip. I’ve heard of people using 70% IPA instead of water, but not sure how that works.
What you’ve done so far looks good.
Craig
I kept it wet and the yellow finally loosened up . Its all chipped and rusted now going as far as I want with the hairspray . Here is a picture as of today . Next i’m gonna do a chalk / alcohol wash. That should blend it all together . Then I am gonna airbrush some grime concentrating on the roof and fuel tank area. Its getting there , I will keep tweaking it .
ready for action!!
looks great
It looks like the effort payed off Mike (https://www.largescalecentral.com/externals/tinymce/plugins/emoticons/img/smiley-cool.gif)
John K. Saunders said:
ready for action!!
looks great
Almost looks like its ready for the scrapper’s torch. I really do like that look.
That’s great!
Are you sure that old hulk is worth any more work?(https://www.largescalecentral.com/externals/tinymce/plugins/emoticons/img/smiley-wink.gif)
Thanks for bringing this method to light.
Thanks all for your comments ! I finished the locomotive last night and am very pleased with it. I learned a few things about the hairspray weathering technique. Craig was right about the order you follow if you do multi color layers . The way I did it still worked but I had to let it soak longer and it took a little more rubbing. I love the smoke unit , and being wireless off and on should make it fun to play with. Its definitely heaver than before and should increase it pulling power , however i’ll have to check and see how the side frame bushings hold up. I’ll get a video of it soon in a train and post it .
Hehehe…freaking fantastic work as always Mike !!
I love it !!!
Mike, I would get a hypodermic and squirt moly grease in the journal bearings on a regular basis, easier to do than disassembly.
These bearings wear quickly since they get exposed to dirt and grit. You may know you can turn them 90 degrees every so often and quadruple their life… you grab them with pliers and rotate, not remove… if you wait too long, the wear makes it so you can only turn them 180 degrees.
Greg
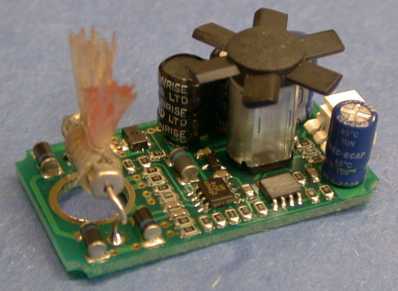
Just an update on the smoke unit . I have found out the hard way the ins and outs of having a giant smoke unit in a relatively small space. Its not that it doesn’t fit cuz it fits real nice . Its not that the smoke unit doesn’t put out giant clouds of smoke because it does . The problem is that the ceramic heating element gets so hot that it cracks and self destroys . It is going on its 4th heating element . I talked to someone at Harbor Models and he was very helpful. I have solved the problem of the cracking heating element (my fingers are crossed) I hope . The last time I had the smoke unit disassembled I made sure every part of the ceramic heater unit was covered by the wick. Where the wick was exposed to the air was where the crack occurred. I’ve run it strait for over a hour and its running great but the downside is dramatically less smoke. I thought I would pass on these little bits of info for whatever it worth.
mike dorsch said:
Just an update on the smoke unit . I have found out the hard way the ins and outs of having a giant smoke unit in a relatively small space. Its not that it doesn’t fit cuz it fits real nice . Its not that the smoke unit doesn’t put out giant clouds of smoke because it does . The problem is that the ceramic heating element gets so hot that it cracks and self destroys .
Mike,
In my experience the Harbor Freight smoke units that I own (which is absolutely none) as I do not own one or never have. I am aware of their existence but never played with one as I’m too busy playing with myself as most think. However if you check out my website you might find others that have but I doubt it.
What perplexes me Mike… the above paragraph that you wrote?
That freaking locomotive has TONS of space(volume) for heat dissipate. Put a fan in the fuel tank and blow it upward. The USA fans work quite nicely while running with directed air moving over them at the proper angle (understand?) Not sure if that has ever been accomplished before but it’s something I have played with other than myself (on and off) for a few years but never discussed.
Basically I’m saying put a working fan in the fuel tank that runs off 12v…Doesn’t matter whether it’s track powered,DCC,Pulse Width or battery. The key is to regulate it with a rectal amplifier .
You are underthinking what you should be overthinking Mike and sometimes a simple solution is right under ones nose (understand?)
The Parables of Rooster
This post has been edited by: Fred Mills
I did consider putting a fan sucking the air in from the top. There are two diagonal vents on the roof that another fan would fit . I guess i’m just getting tired of messing with it for now and am just happy its working . I know what its capable of and someday i’ll “play” with it.(http://www.largescalecentral.com/externals/tinymce/plugins/emoticons/img/smiley-wink.gif)
Mike, with the huge volume of smoke you have available, I bet dialing down the current to the heater would make a big difference in how long it lasts. It will still be impressive, and still way more than the prototype.
Kind of like a car, run it at redline it won’t last long, run at 75% of redline and it will last a long time.
Greg
I’m trying out a different heating element and will see how it performs. I picked up a cheap hair dryer and am using the heating wire that’s inside of it. I’ve been doing some experimenting with the wire and have learned a few things . First is that with the wire as a heating element it CAN start the wick on fire ! The shorter the wire the more amps it draws and the hotter it gets. It was glowing orange when it went up in flames. I think I got the wire dialed in now and am waiting for a fan and some fiberglass wick that I ordered so I can finish a new box i’m building . The wire is now at the length where it gets real hot but does not glow. It’s drawing less than 3 amps and i’m glad about that . I will be using a aluminum box I found online that is normally used for making guitar effects pedals. The Harbor Models box is plastic and if the wick caught fire it would be the end of the #189 . At least being metal I would have a little time to grab a fire extinguisher and shoot it down the stack. I’m gonna run the new box out of the locomotive for hours to put my mind at ease before it gets put back under the shell and screwed together. Here’s some pictures . These are the original heating elements
The nice thing about running with MTH DCS in command is the way the power is sent to the motors, lights, and smoke units. All of those draw less amps as they are pulsed. I have to imagine that helps them from overheating too? I haven’t has anything melt yet.
Take a look at the very end of this video and look closely at the amount of smoke coming out.
I hate trying to post stuff on this site. Everything crashes?
go to 2:19 into the video. I’m done trying.
With heating elements, pretty much watts is watts… pulsing is actually a bit more problematic in the final analysis, but not so much that it really makes some difference from a practical point of view.
MTH DCS is “calibrated” to the MTH smoke units and the settings are part of the firmware, not tunable. If you were using a DCC decoder, like a Zimo, you basically have infinite control of the “voltage” and also idle, and different settings for at least run, medium and high I believe, I will defer to the Zimo expert Dan here.
The harbor models unit really has no “intelligence” to let it be modulated from the outside world.
Greg
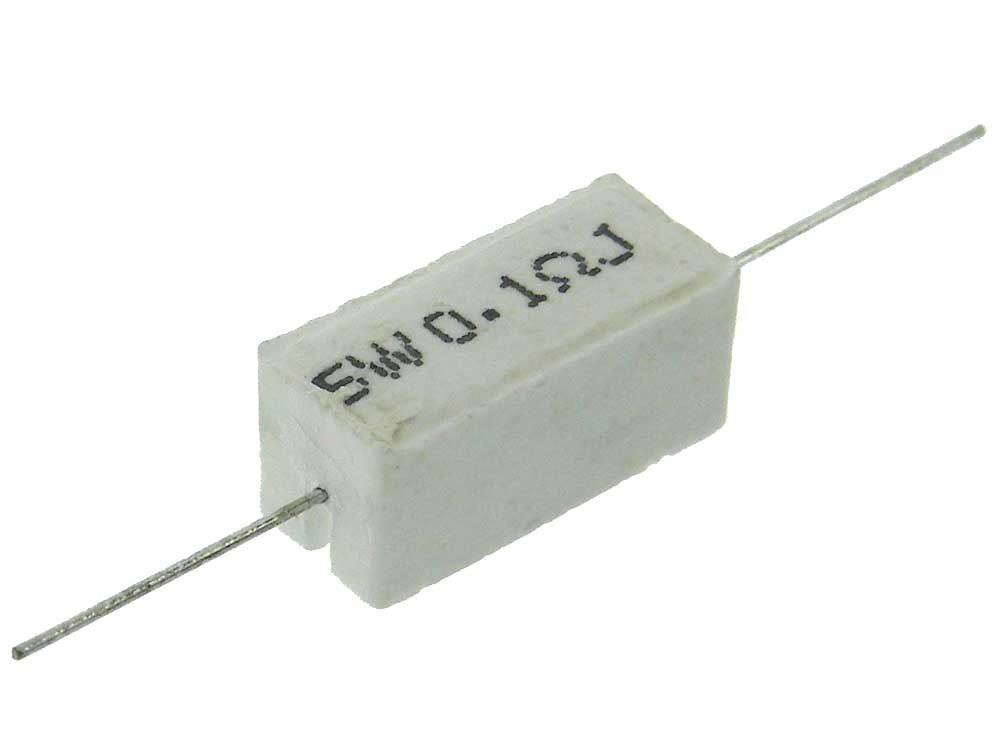
Does anyone know by looking at whats left of the heating element in the picture what it is ? It looks like a wire surrounded by a ceramic or plaster casing. I really don’t like the exposed wire heater.
Easy, it is a wirewound resistor in a ceramic housing… pretty standard units

Inside there is usually a coil of wire that is the actual resistor… then the heat generated radiates to the wick on the outside.
So, your picture shows one of these resistors HORRIBLY OVERLOADED beyond it’s rating, such that it fractured from excessive heat.
It looks like about a 5 or 10 watt resistor, hard to tell without dimensions… and different values have different lengths. Normally this is somewhere between 1/2 ohm and 5 ohms.
most other smoke units use a wirewound resistor that may have a ceramic center but the wires are exposed:
(Aristo shown)

Lionel:
In my opinion and from my experience, putting a wick on the outside of a fully encapsulated resistor would need the resistor to run way hotter… and running it too hard should fracture the outer ceramic body, as shown.
Greg
Thanks for the info Greg. Lets just say electricity is not my forte.
mike dorsch said:
Thanks for the info Greg. Lets just say electricity is not my forte.
Me either Mike …but I sure like to play around with the “light stuff” that only makes you soil yourself when you make a mistake.
You only have one mistake with the “heavy stuff” though unless your are cat (which I am not).