Joe, I don’t know anything about the mechanics of derricks, but this build is getting off to a great start. Maybe that’s what happens when you start with good plans and actually follow them!
Todd Haskins said:
Your derrick and pulleys look terrific.
When I built my crane I started off trying to use nylon washers, spacers and even checked out pulleys that are used in sliding closet doors but I settled on stacking 2 different sized fender washers.
Do you have a cable in mind? I used the thickest black line they had at my local fishing shop. I believe it is 80 pound test and it looks pretty good.
Is the band wheel another pulley? I bet you could find something to use in Tru Value. I was roaming the aisles the other day at my local hardware store and a clerk asked if he could help. I told him what I was trying to do (putting a valve into a tank so I can drip solution from my track cleaning car) and I think he was sorry he asked.
Yea, I would bet that I was talk of the local TruValue. But that location closed.
Great build Joe. I have one of these in the planning phase. I will be watching your thread with rapt attention.

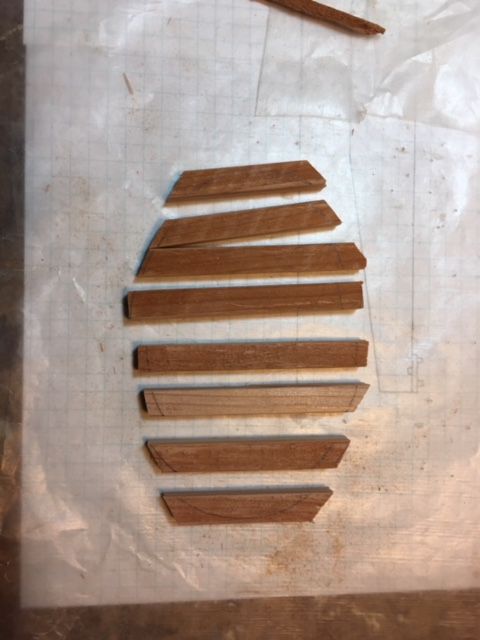
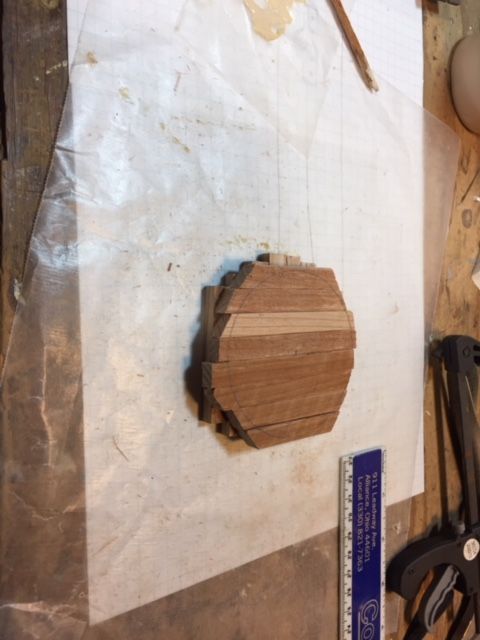
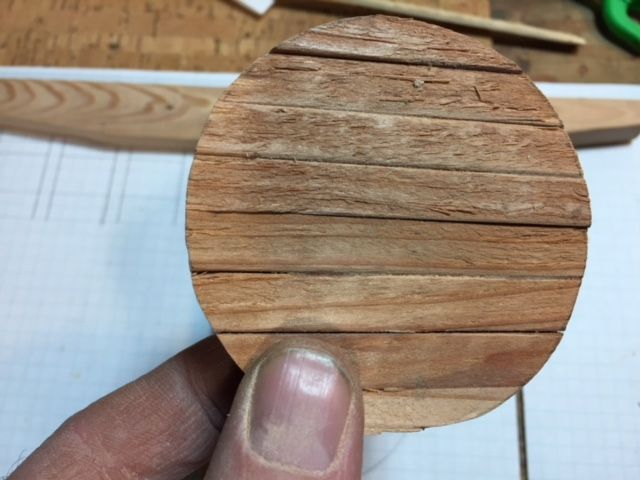
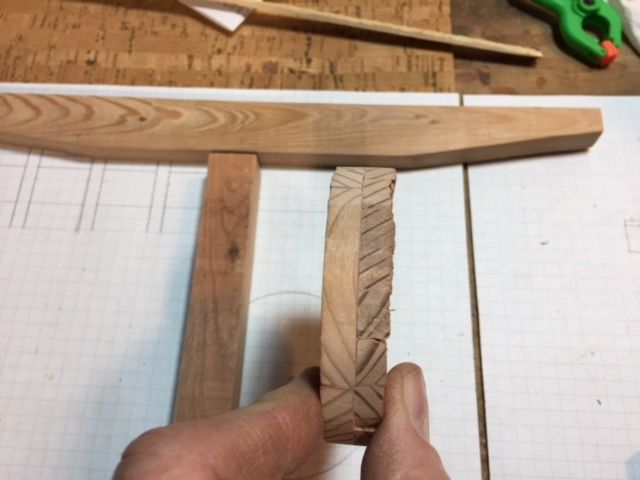
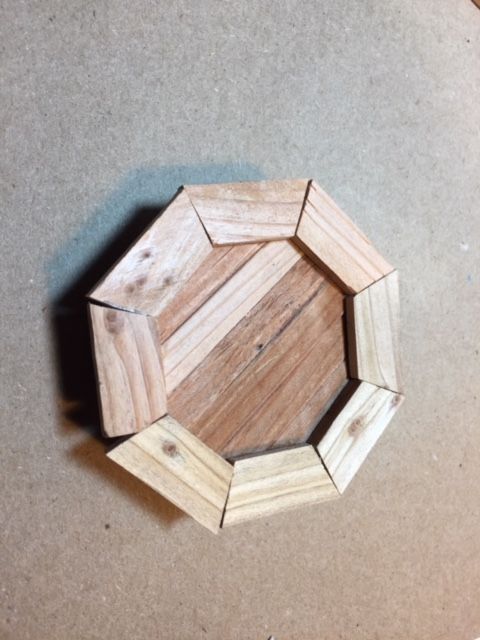
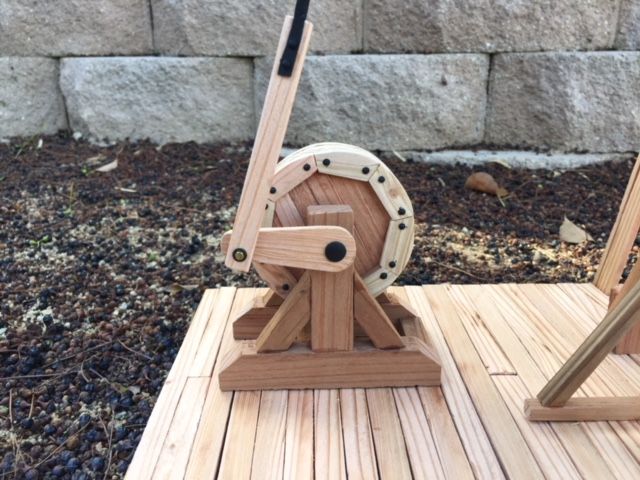
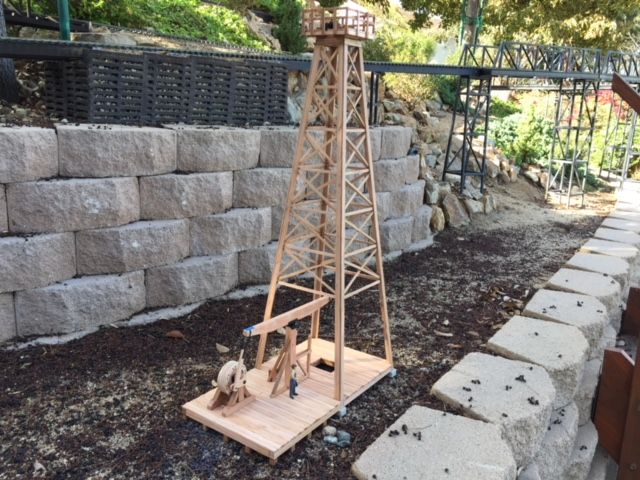
Well, I’ve been plugging away at the oil derrick. One of the primary components to construct was the band wheel which powers the walking beam. Here’s some pics and comments.
Cutting lumber to the approximate size:
(http://largescalecentral.com/FileSharing/user_2932/Big%20Joe’s%20Pics/IMG_1047.JPG)
Gluing to rows together:
(http://largescalecentral.com/FileSharing/user_2932/Big%20Joe’s%20Pics/IMG_1048.JPG)
After the Blade Runner and belt sander:
(http://largescalecentral.com/FileSharing/user_2932/Big%20Joe’s%20Pics/IMG_1051.JPG)
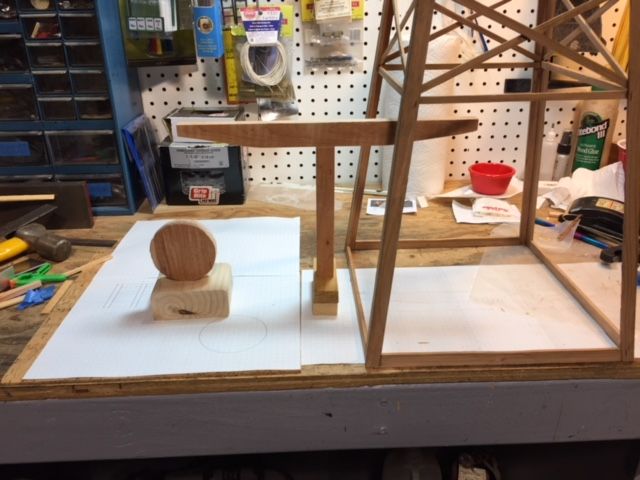
Walking beam in background:
(http://largescalecentral.com/FileSharing/user_2932/Big%20Joe’s%20Pics/IMG_1050.JPG)
Early fitting:
(http://largescalecentral.com/FileSharing/user_2932/Big%20Joe’s%20Pics/IMG_1052.JPG)
Applying the outer rim:
(http://largescalecentral.com/FileSharing/user_2932/Big%20Joe’s%20Pics/IMG_1055.JPG)
The easiest way to “round this off” was with the belt sander.
More coming up in the next post.
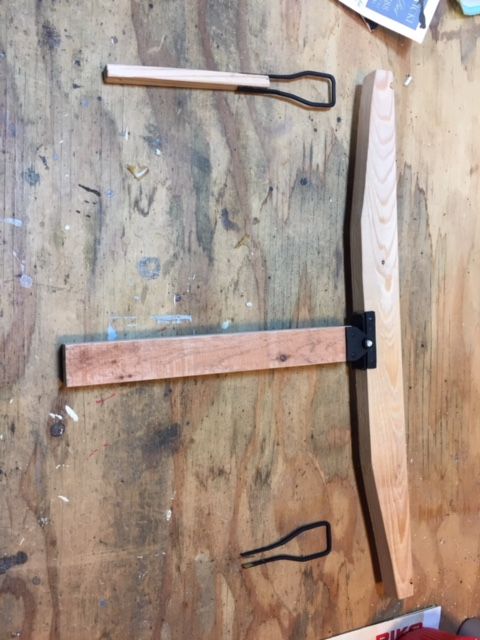
Here are some pics of the walking beam construction.
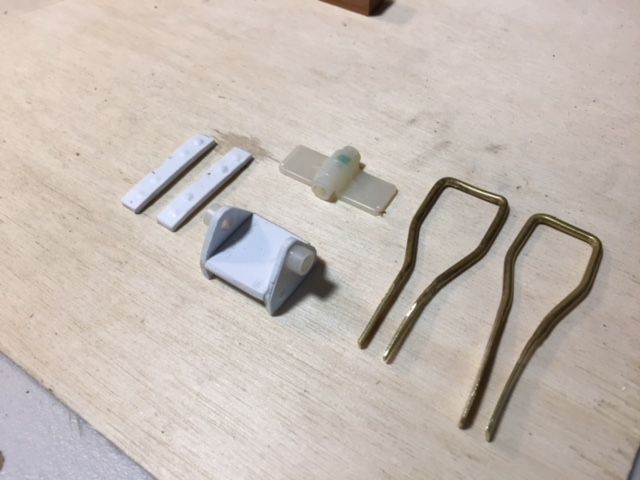
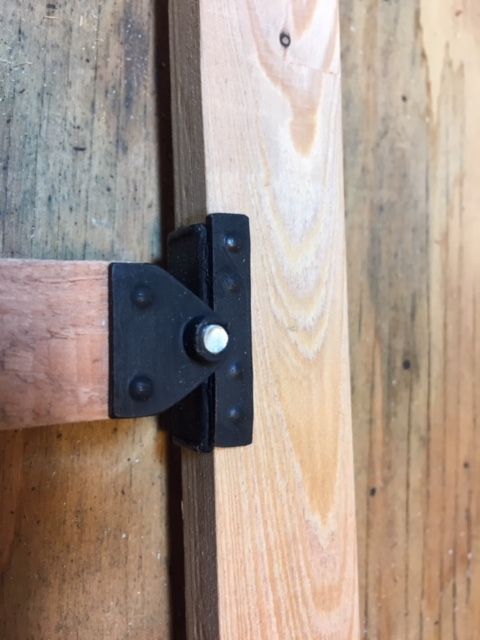
Brackets, joints and stirrups. The stirrups are made of brass rod. I pounded the ends flat with a hammer and anvil, then used two sets of plyers to bend them to shape. I made the rivets with a hole punch and hammer. I had to test it a few times to figure out how hard to hit it without puncturing the plastic.
(http://largescalecentral.com/FileSharing/user_2932/Big%20Joe’s%20Pics/IMG_1056.JPG)
Early beam assembly:
(http://largescalecentral.com/FileSharing/user_2932/Big%20Joe’s%20Pics/IMG_1065.JPG)
Close up of joint:
(http://largescalecentral.com/FileSharing/user_2932/Big%20Joe’s%20Pics/IMG_1066.JPG)
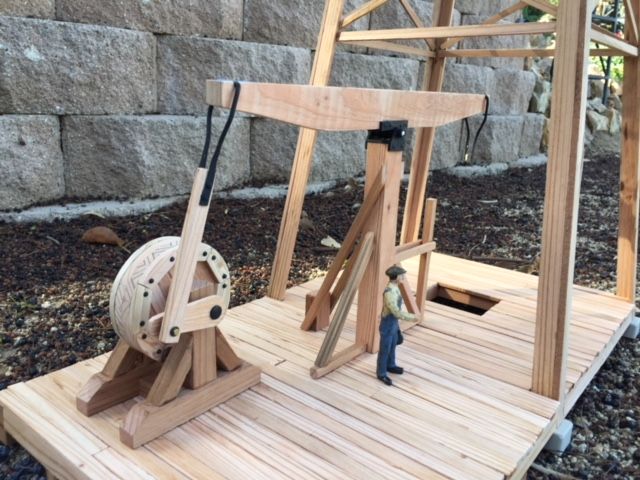
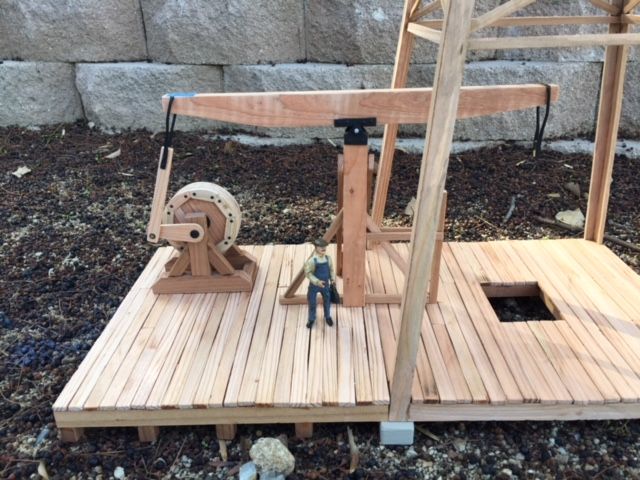
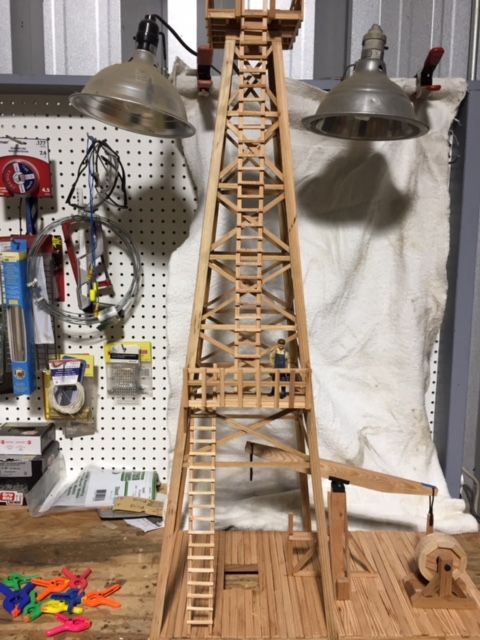
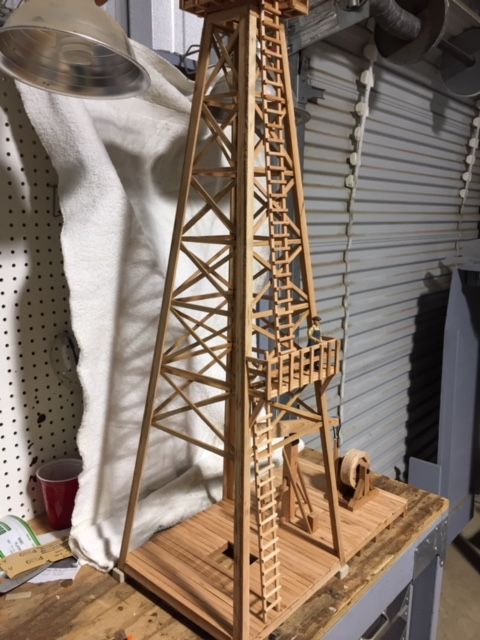
I built the base and floor boards and mounted the band wheel - walking beam assembly. I’m pleased with the results.
(http://largescalecentral.com/FileSharing/user_2932/Big%20Joe’s%20Pics/IMG_1072.JPG)
(http://largescalecentral.com/FileSharing/user_2932/Big%20Joe’s%20Pics/IMG_1069.JPG)
(http://largescalecentral.com/FileSharing/user_2932/Big%20Joe’s%20Pics/IMG_1070.JPG)
(http://largescalecentral.com/FileSharing/user_2932/Big%20Joe’s%20Pics/IMG_1075.JPG)
Spectacular! The details on the band-wheel and walking beam assembly are terrific. I love the contrast between the lighter wood and the black metal parts.
You planning to weather this or just let mother nature do her thing?
Thanks Jim. I’ll lightly weather it. Enough to take the shine off. Weathering is not my strong suit so I usually go pretty light on it. Some dust and sun will help.
I can tell you, ( from living in the oil & Gas country ) that the deck (floor) would be highly dirty, gunky stained.
Wow! Very nice!
That is looking really cool!
Chris
Now this is my kind of build. I love the custom hardware. Looks great. But I am with Dave time to make it look like a used oil derrick.
Your detailing is really making this build shine. That was a very clever way to make rivet heads and that wheel came out nice.
I agree with the others that you should dirty up that deck. You could mix up a solution of india ink with water or alcohol and use a squirt bottle to do the derrick and deck and then use a dry brush technique to add layers of grime around the hole.
very nice! I love the pulley wheel!
Beautiful woodworking Jim. It’s all about the tools and knowing how to use them. You appear to be a master of that!
Joe, the craftsmanship and detail are spectacular. It’s great to see someone who knows what they’re doing. Everything seems just right.
I’ll weigh in on the weathering. I’m a big fan of weathering, but my gut feeling here is telling me your initial thought to just do a little light weathering is the right one. I know the guys are right about oil rigs getting all grimy and slimy with, well, oil, but in this case I’d rather see the model as the main character so to speak.
I have an idea…why don’t you grey it down some with an alcohol and india ink solution, then post some more pictures and let us in the peanut gallery evaluate? You can always leave it or add more weathering at that point.
Thanks for the great feedbacK. I’m leaving a few days at the end of the build for weathering. I’ve still got quite a bit of construction left to do. Most historical photos show a shed housing the steam engine (no need to model the actual engine) plus various types of overhead covers above the drive belt, band wheel and sometimes the walking beam. I also need a steam boiler, winch, bull wheel and ladder. Good thing I’m retired!
Joe Bussing said:
Thanks for the great feedbacK. I’m leaving a few days at the end of the build for weathering. I’ve still got quite a bit of construction left to do. Most historical photos show a shed housing the steam engine (no need to model the actual engine) plus various types of overhead covers above the drive belt, band wheel and sometimes the walking beam. I also need a steam boiler, winch, bull wheel and ladder. Good thing I’m retired!
Oh goodie…there’s more to come!
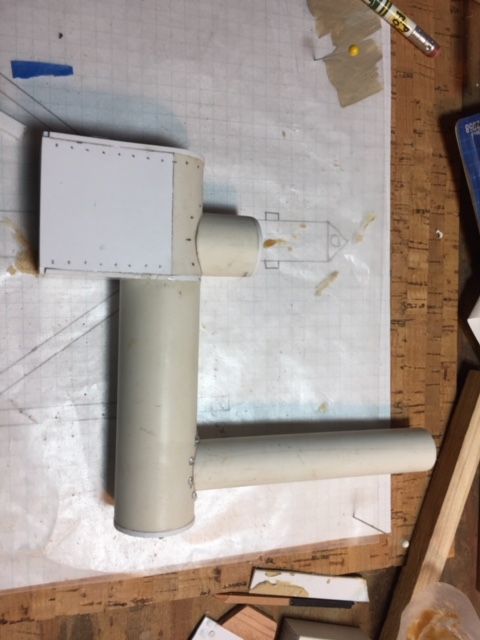
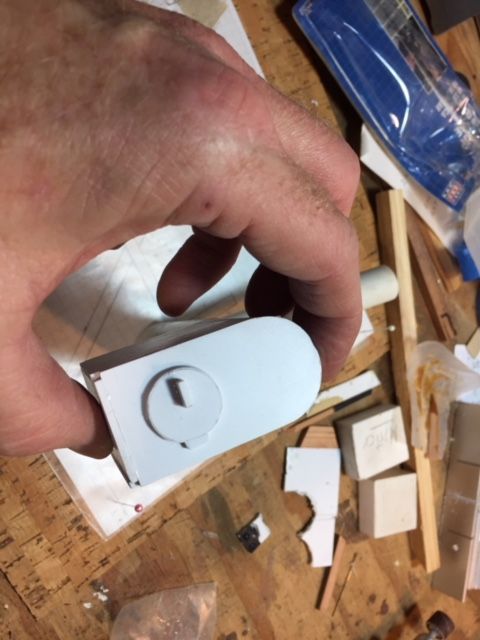
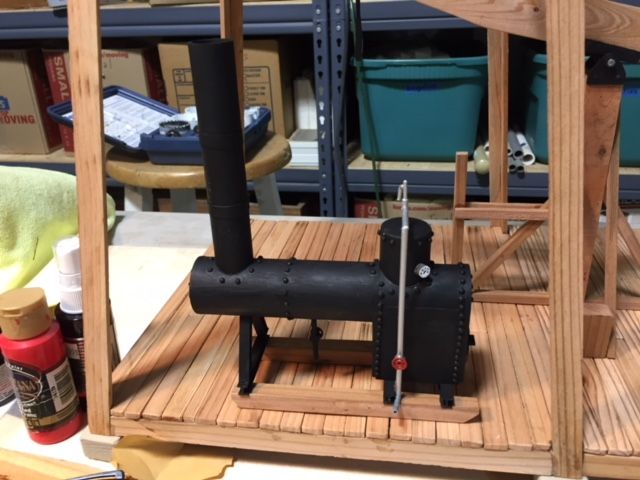
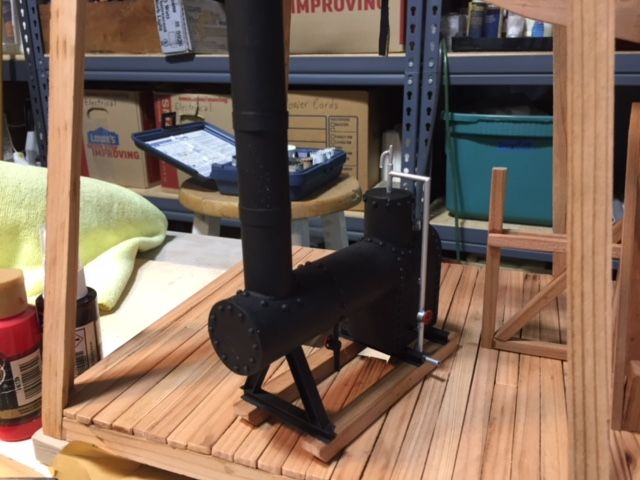
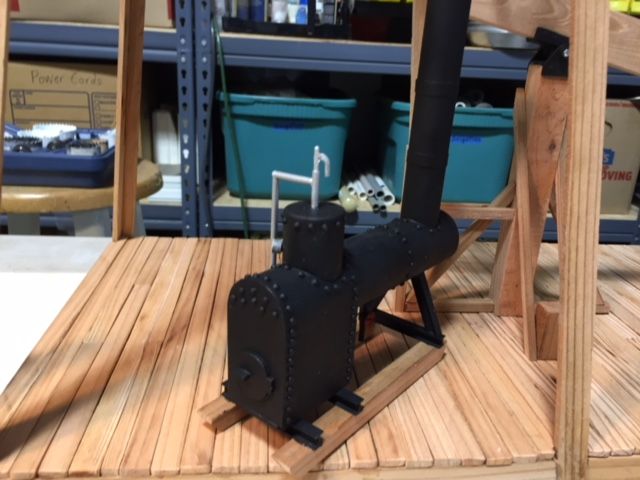
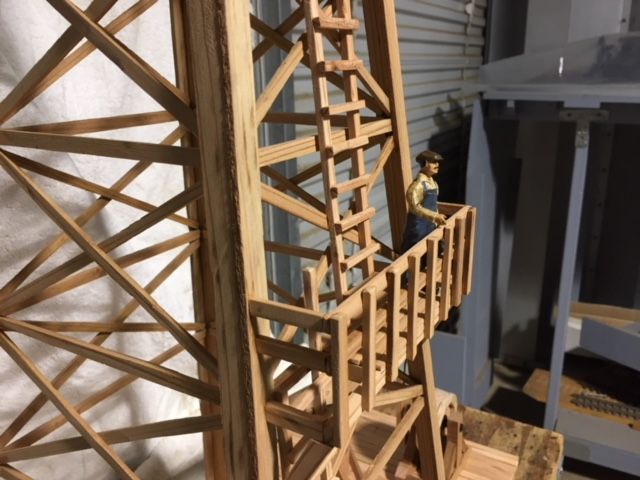
Well, I’ve been obsessing over this for the past few days. I managed to complete the ladder system to the top of the derrick, build a steam boiler and start on the pump house. I’ve run out of lumber so I am now officially over the limit. However, I’m having too much fun to stop. Here are some pics.
I was fretting over the boiler but finally channeled my “inner Mik” and dove in. I raided my irrigation supplies and dug up scraps of PVC pipe (1.25", 1.00" and 0.50" diameter). I added about a half-sheet of styrene and some bits of other plastic. I’ll price out my parts list, but I guess it cost around $5.
(http://largescalecentral.com/FileSharing/user_2932/Big%20Joe’s%20Pics/IMG_1077.JPG)
(http://largescalecentral.com/FileSharing/user_2932/Big%20Joe’s%20Pics/IMG_1078.JPG)
(http://largescalecentral.com/FileSharing/user_2932/Big%20Joe’s%20Pics/IMG_1092.JPG)
(http://largescalecentral.com/FileSharing/user_2932/Big%20Joe’s%20Pics/IMG_1094.JPG)
(http://largescalecentral.com/FileSharing/user_2932/Big%20Joe’s%20Pics/IMG_1095.JPG)
The ladder system took longer than I anticipated but turned out okay.
(http://largescalecentral.com/FileSharing/user_2932/Big%20Joe’s%20Pics/IMG_1099.JPG)
(http://largescalecentral.com/FileSharing/user_2932/Big%20Joe’s%20Pics/IMG_1100.JPG)
(http://largescalecentral.com/FileSharing/user_2932/Big%20Joe’s%20Pics/IMG_1101.JPG)
Joe, I’m not sure how I missed all the updates, but I am simply amazed. Your ability to make something out of bits and pieces is to be envied. I would not be surprised if this rig didn’t actually produce oil. Guys, I think Joe plans to let the first oil strike weather the rig for him. Great work, Joe. Thanks for sharing your talents with us.