Large Scale Central

Mik 2018 - Outside the Box - Jon Radder

Jon,

I have quietly followed along with the build and it has really turned out great! It made a huge difference to the looks of that area.

Have you considered using foam board to cover the wall next to the portal? You could carve it to look like a rock face.

Steve

Steve Borges said:

Jon,

I have quietly followed along with the build and it has really turned out great! It made a huge difference to the looks of that area.

Have you considered using foam board to cover the wall next to the portal? You could carve it to look like a rock face.

Steve

Thanks Steve, I hadn’t thought of that. My scrap materials source also discards 3/4" and thicker HDU foam than can be carved and I have an order for several signs to be made from it soon. I’ll be looking to liberate the scrap from that project! I’ve not tried carving rock faces yet, so there will be a learning curve, but it’s fun to experiment. If I can’t get rocks to look good there is always large cut stone blocks.

Put some ballast down over the weekend. Was testing photo angles & lighting with my pocket camera and the pictures came out better than expected so I’ll share a few here. Just wish I had thought about using a bit of weathered stainless or aluminum here before I ballasted it all in.

Morning Jon,

Those pictures did turn out good. Thanks for sharing.

Nice John

I almost jumped out of my chair to get out of the way of that train! WOW!

Thanks. I’ve been working on the scene a bit more this week. Need to break out my airbrush and see if I can get some of that grass mat I have heat shaped to look more like a hillside backdrop to the rock outcrop and maybe come up with a sheer rock wall for the left side from carved foam. There won’t be time to paint all of the backdrop scenery which is good, because I’m still deciding on methods so I can continue it around the outside wall. South Willow Hill is starting to look like a busy little town.

I asked our designer at work to cut me a few vinyl signs. I was met with “you wan’t me to design them too?” Mind you, these are simple one and two word signs in a standard font. Not much work to design, but he is being difficult! I usually give him ready to cut files, but when I upgraded to Windows 10 from an XP computer I lost my Adobe Illustrator install - the licensed copy I have is now too old to install (https://largescalecentral.com/externals/tinymce/plugins/emoticons/img/smiley-frown.gif)

He might design you a real nice bill — for free!

He might design you a real nice bill — for free!

Well dang! Now it looks like I will have to build my own mountain to properly showcase my nowhere near as nice as yours portal. Oh well I had fun building it and with all the great builds this year it will be hard to pick any single one as a winner. Can you come take pictures of my portal Jon?

Thanks all. I decided that Billy needed something to back him up. The grass mat I’ve been using (I think it’s Woodland Scenics) has a thin styrene backing that can be shaped with heat. Here is a scrap showing the back side and a little mound I made to play with forming it…

The backside of the test mound…

I took a triangular scrap I had, placed it behind the rock named Billy and began to randomly heat and bend it until l I got something that looked remotely like a hillside. I didn’t take a picture prior to beginning to weather it. As a tribute to Mik I dug out a scrap of a long gone kitchen counter top that fits on top of the washer to make a work surface…

Where I used 3M spray adhesive to pretty much coat the grass side of the mat, then sifted some very dry ballast (stone sand) over the sticky surface. I took this shot after the first pass…

Hit it with adhesive again in a few spots then dumped on some of the heavier stuff…

Here it is roughly in place…

And a pull-back shot showing the entire area and revealing that so far this is a diorama for tight shots only…

Pictures are back. Problem at my host.

Well that’s weird. There were 7 pictures when I saved the thread. They all disappeared, a few at a time, before my eyes in a flash of the screen. And yes, I am n the HTTPS site, but my pictures are not on a secure server.

Jon that grass mat stuff is cool. Thanks for sharing.

If you ever need any of that stuff without the grass on it, Lowes has in the roofing section under “Flashing”, right next to the metal flashing.

I’ve been using it behind the buildings for the back drop after I paint it a dark gray or black. But what your doing with it has given me some other ideas…(https://www.largescalecentral.com/externals/tinymce/plugins/emoticons/img/smiley-wink.gif)

I’ll check it out Ken. To form it, you use a heat gun. I have a small and very hot one my wife bought for crafting and no longer uses. A standard one would probably work fine. It’s best if you drape it over something then heat, adjusting the shape as it begins to droop. For the ‘mountain’ I bent it in place, starting with it vertical an then slowly heating and bending in small steps trying to get it to form around the rock. Some of the folds look a little un-natural as-is but maybe will a little foliage down the road it will look better.

Jon as always I think you need a special award for photography. You take the best shots. I was looking back at the shots of the locomotive in the tunnel and they are just great forced perspective shots.

Jon Radder said:

I’ll check it out Ken. To form it, you use a heat gun. I have a small and very hot one my wife bought for crafting and no longer uses. A standard one would probably work fine. It’s best if you drape it over something then heat, adjusting the shape as it begins to droop. For the ‘mountain’ I bent it in place, starting with it vertical an then slowly heating and bending in small steps trying to get it to form around the rock. Some of the folds look a little un-natural as-is but maybe will a little foliage down the road it will look better.

That’s what I had in mind. I used the heat gun forming the porch roof for the depot in Porter. It came with the soldering station.

That is one great looking portal. The weathering and rockery work brings it all together. The photos of the engine emerging are really good.

Today I got back to work on the background scenery. I cut to fit several pieces of black 6mm PVC board then glued and nailed them to the walls. Then I cut some carvable Urethane Foam board to fit around the block walls. Here are some long shots of the area. The foam is just dry fit for now. The white on the PVC is construction adhesive. It will need to be painted over…

I wish I had the tools and the talent that John P. has for carving a rock face from foam. I don’t, but I remembered a technique Yogi Lawrence taught me for simulating concrete. The grout line on these blocks was cut with an exacto knife then shaped with some of my wife’s ceramic tools. Yogi taught me to use a heavy wire brush and push the wires into the foam in all kinds of random ways. Once that was done I did some color tests. One end with the India ink and alcohol wash, the other with the patented rust solution with a little alcohol mixed in…

While I was experimenting with tools I came up with this which is pretty plausible for 1:1 scale wood…

I have a lot of block to carve so I’m not sure how far I’ll get. I need to decide on color. I’m leaning toward the grey.

Got busy today getting the retaining wall blocks carved, detailed and ready for paint. I thought there might be some interest in the process, so I took a bunch of progress pictures. I am using HDU signboard foam because I can get scraps for free, but pink or blue foam from Home Depot or Lowes would also work. First, the block is laid out on a sheet of foam. A fat pencil line will help in the next step…

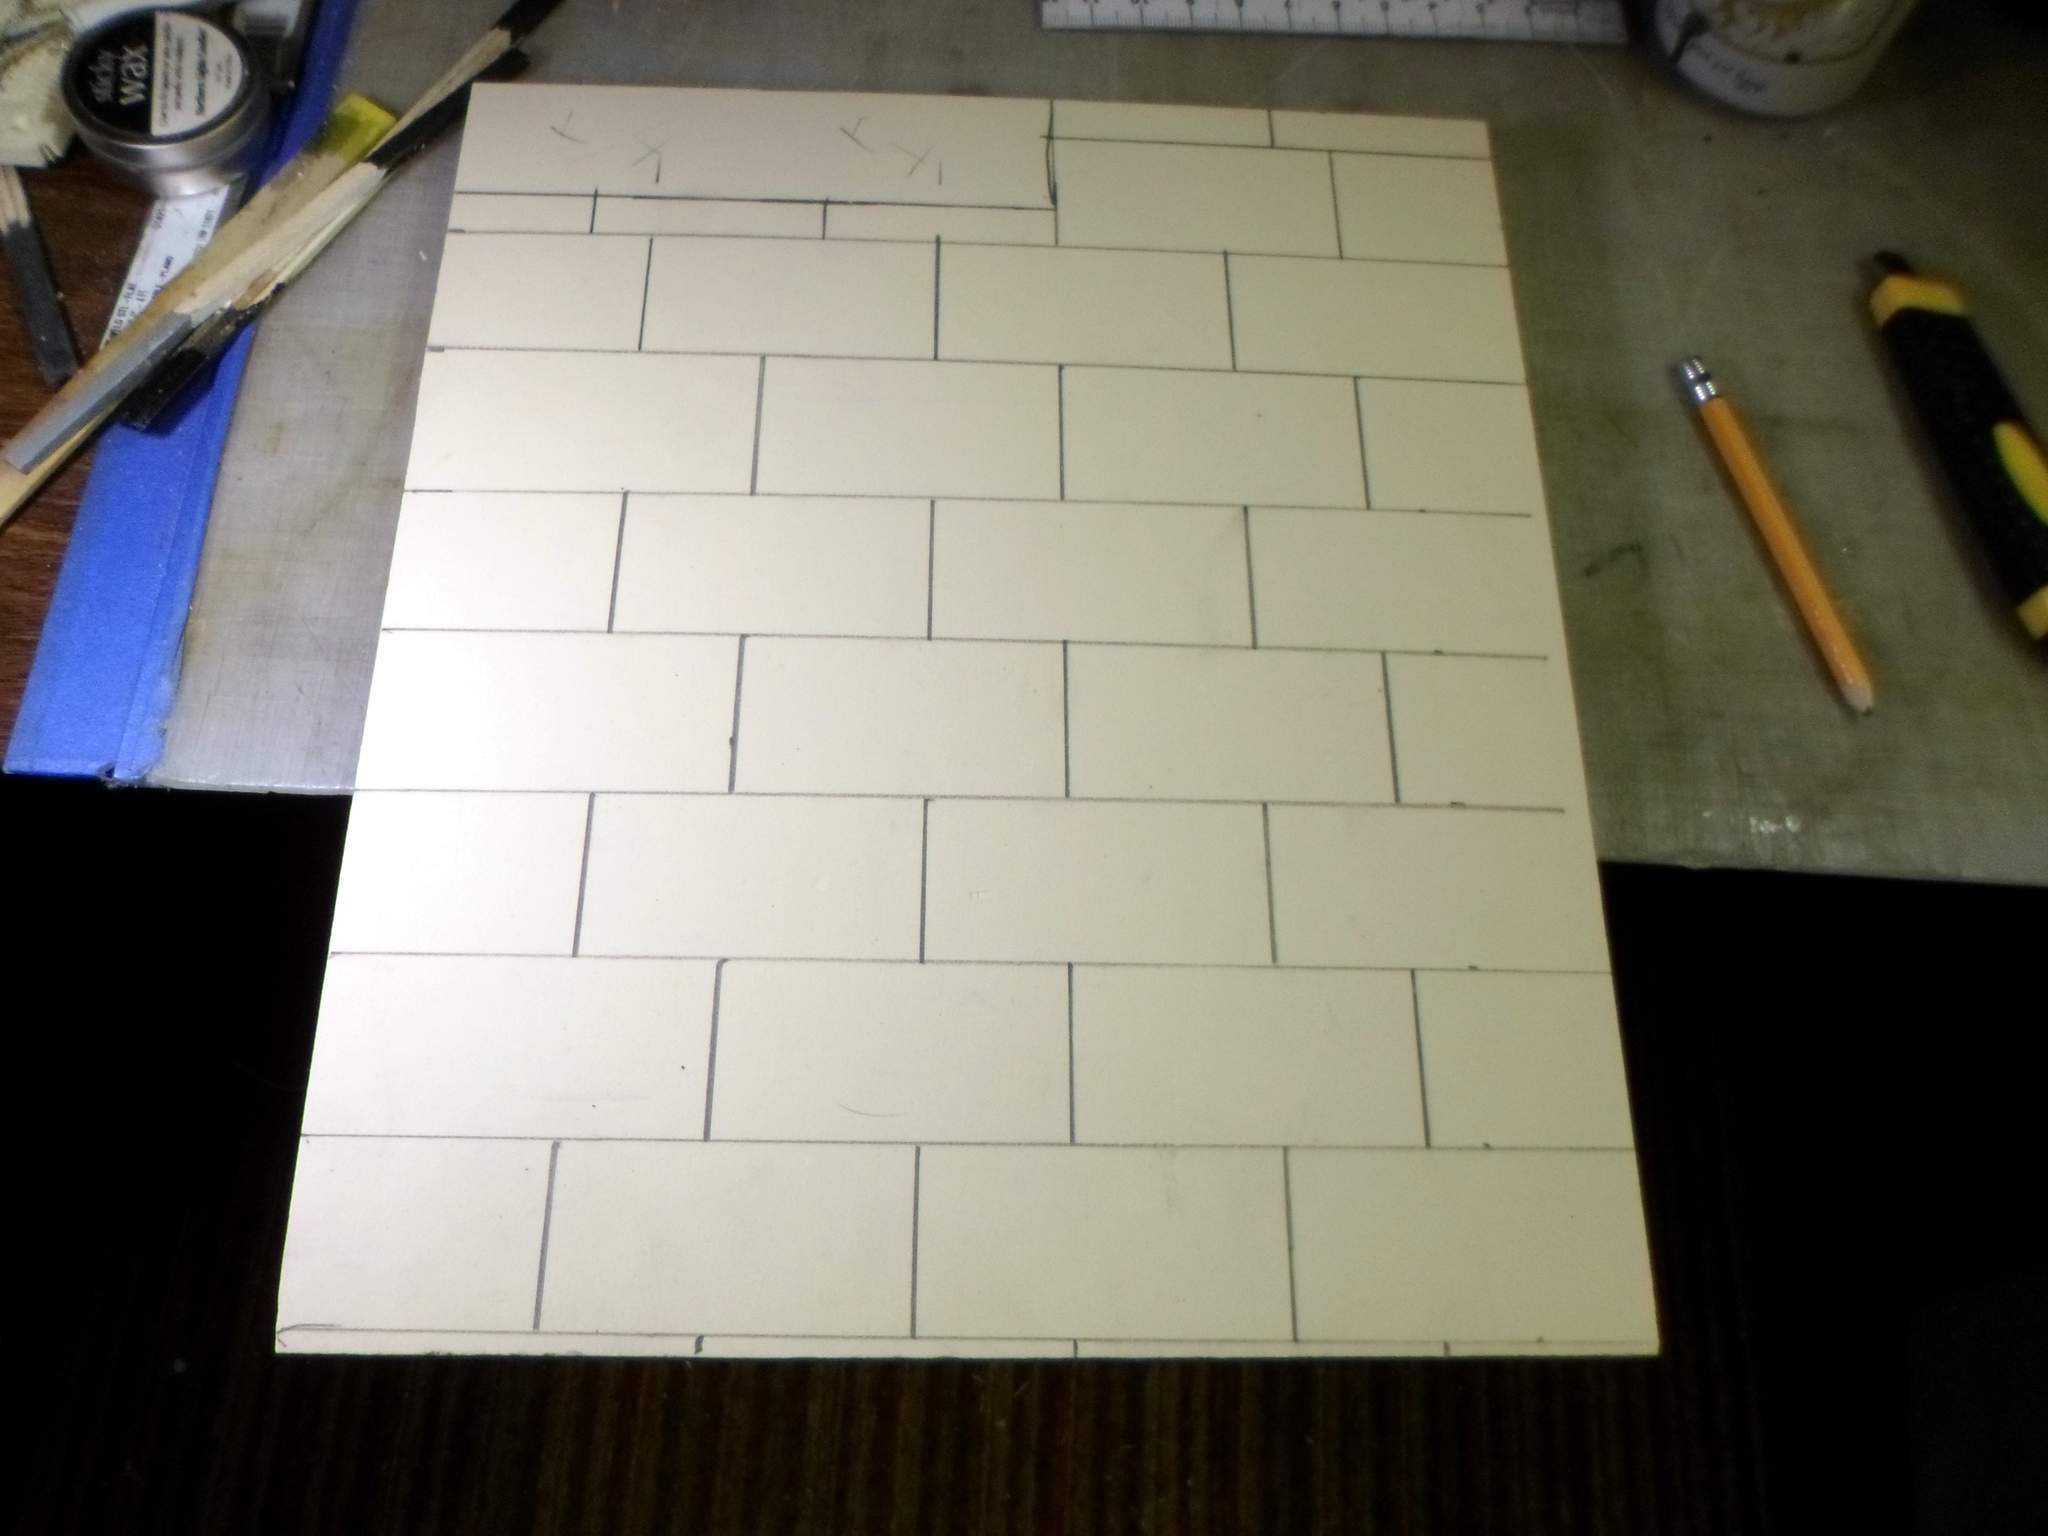
I got specs off the internet for block size which is 30" tall by 30" deep and 60" wide. I liked the big size as I didn’t need to carve as many lines. Next, I use an razor knife to slice each side of the pencil line at an angle…

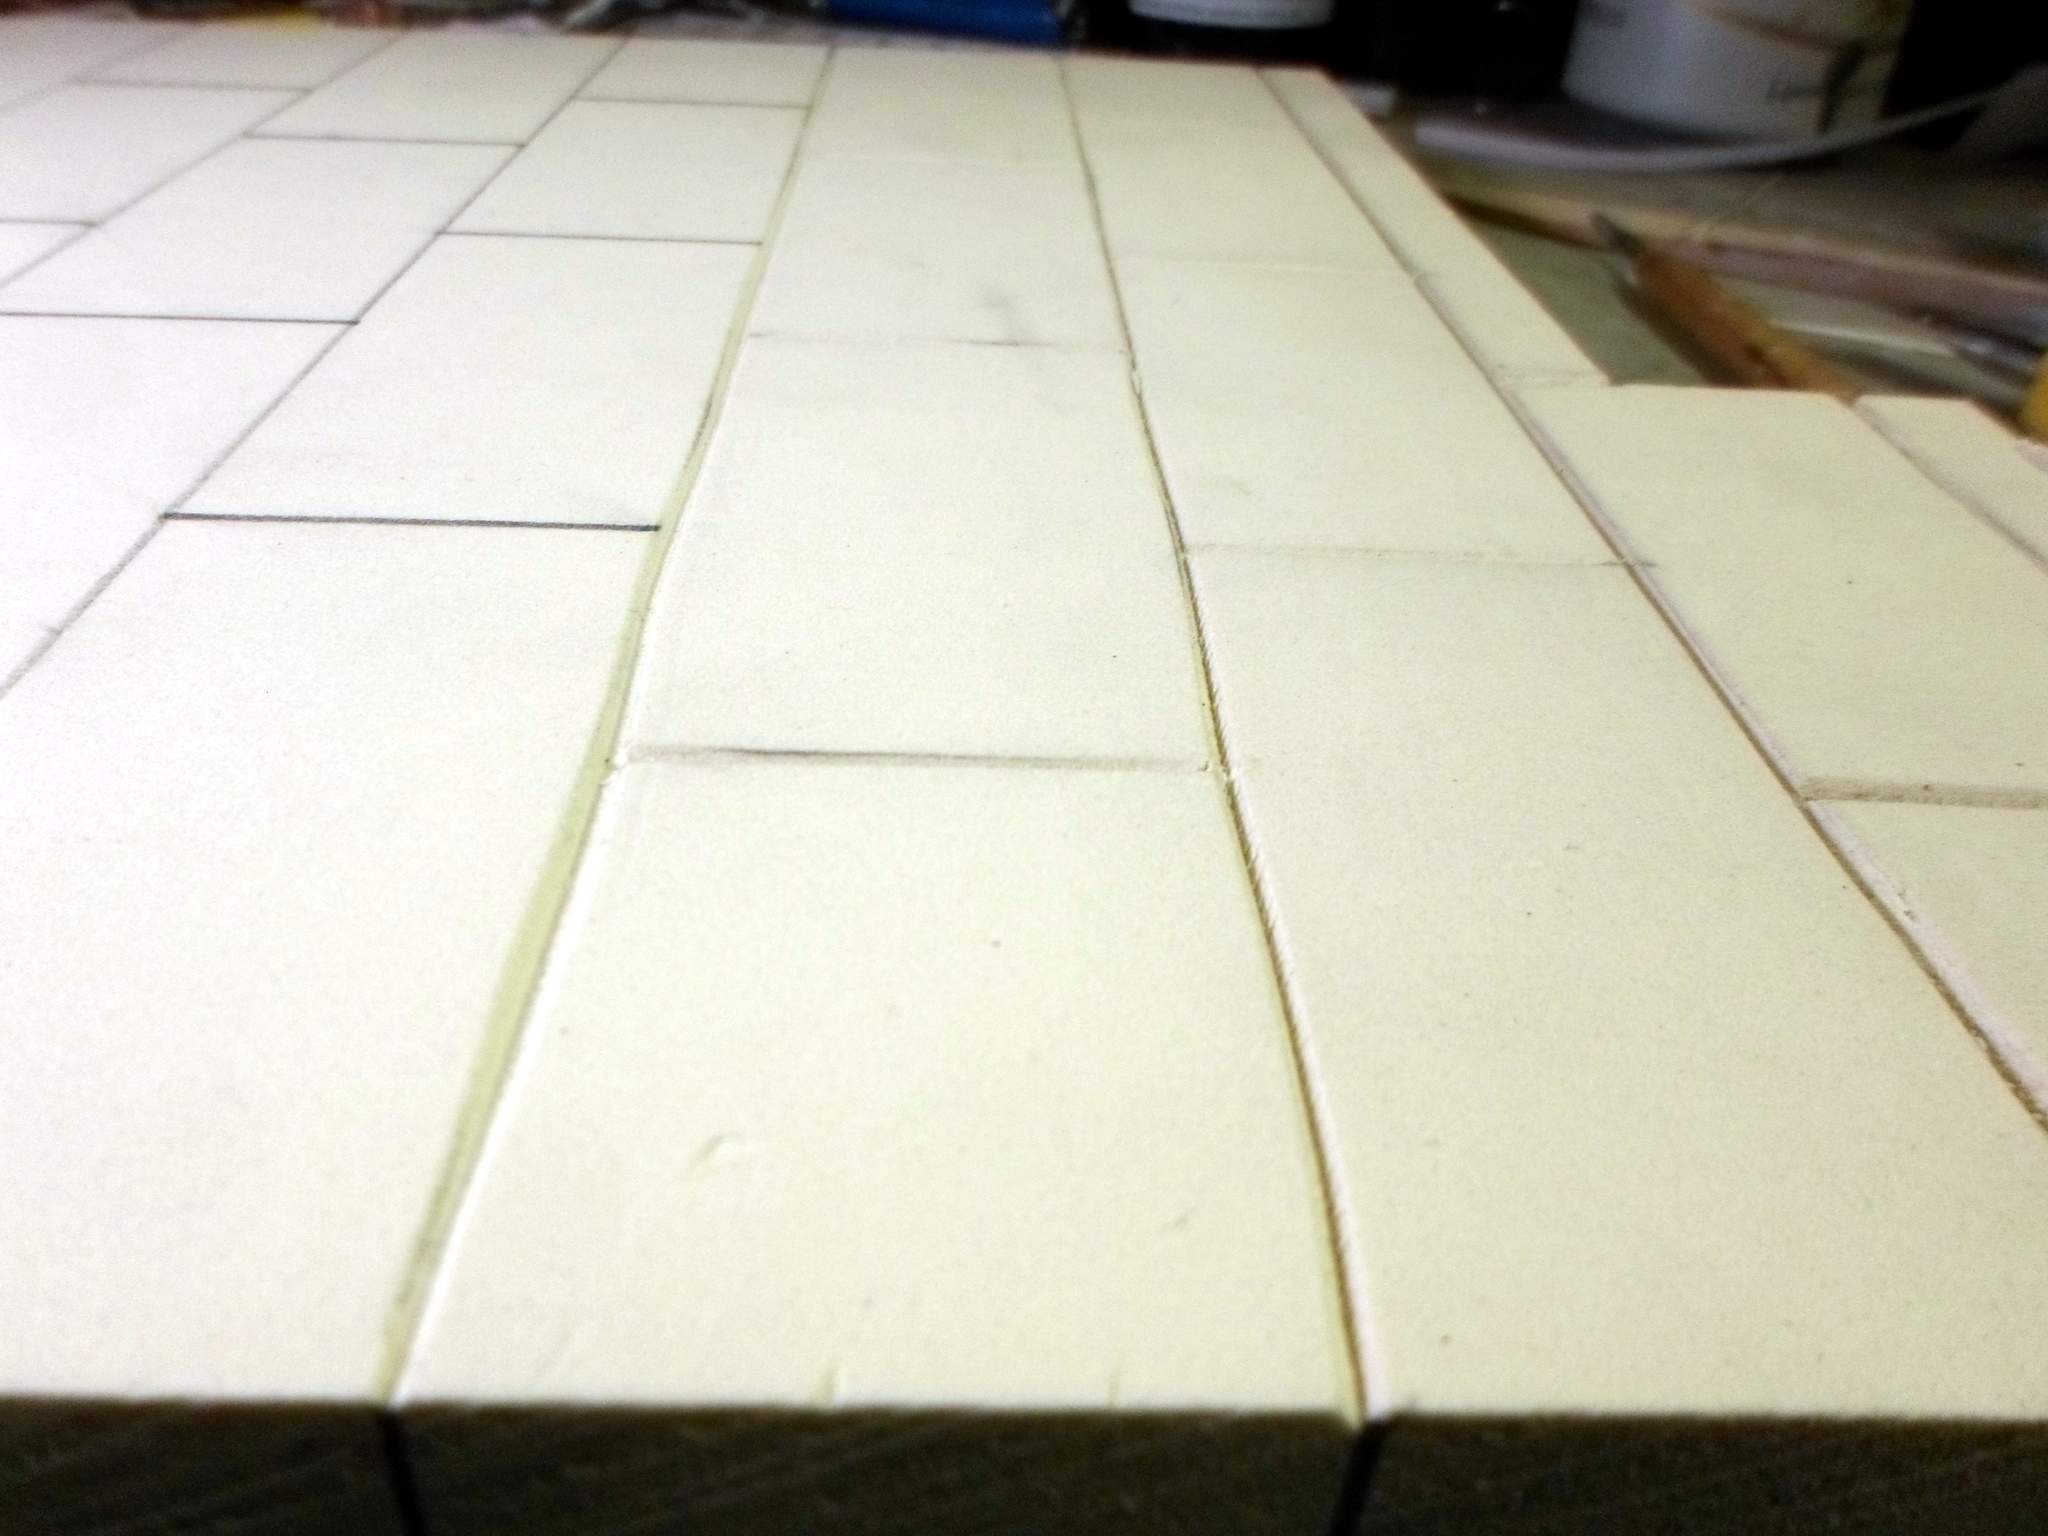
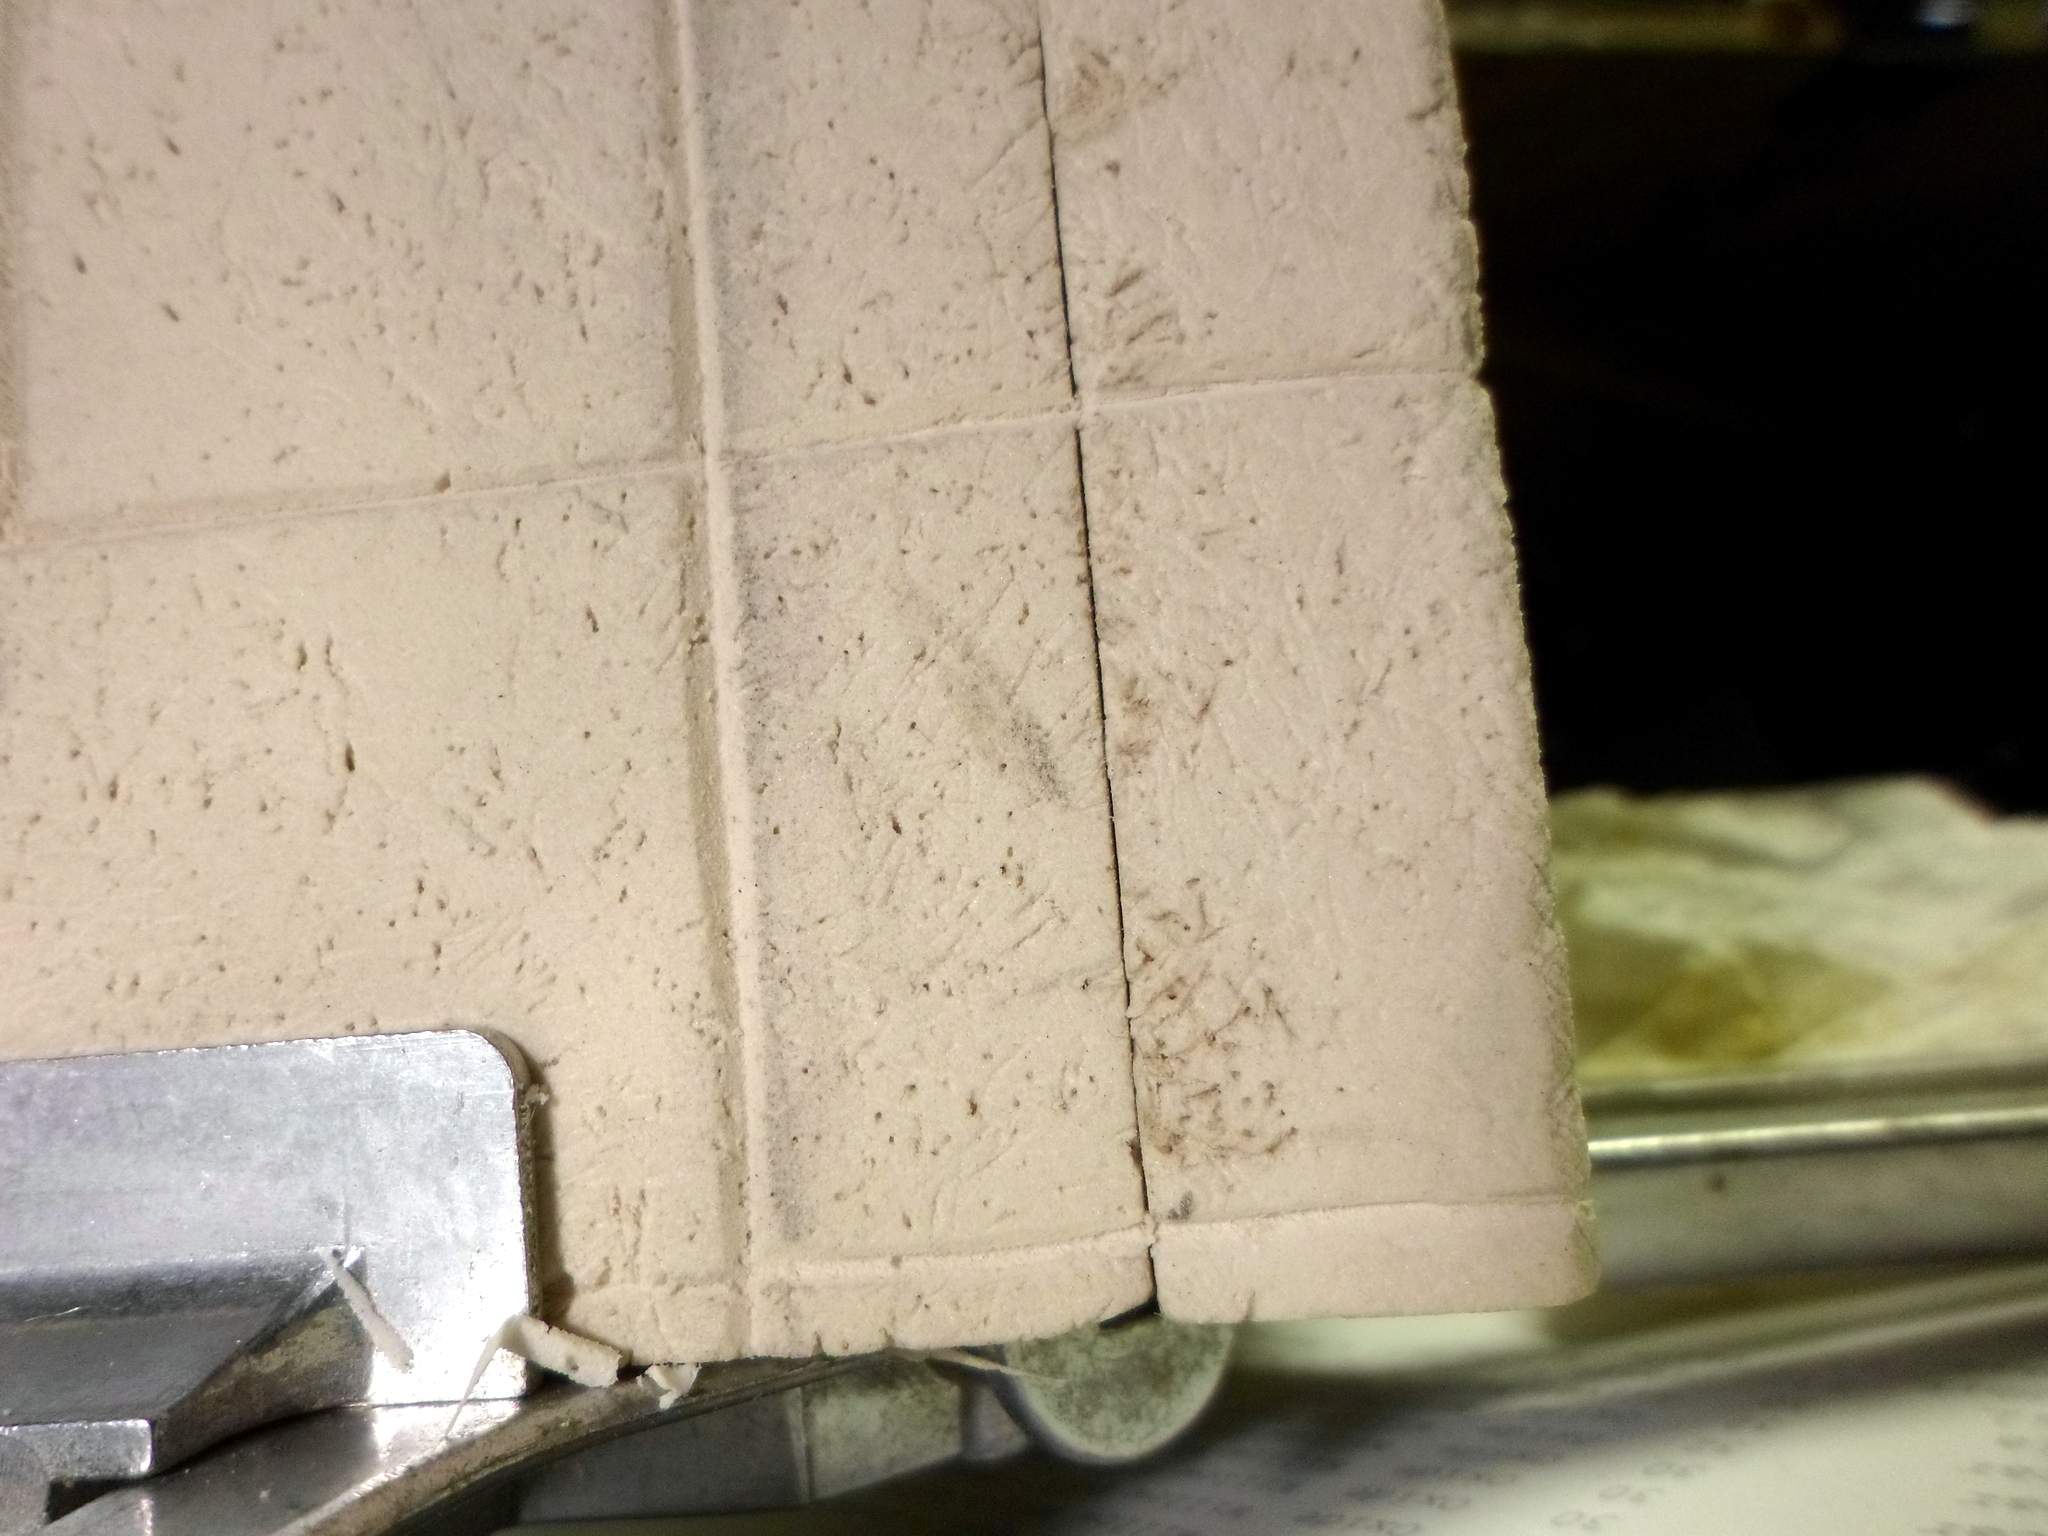
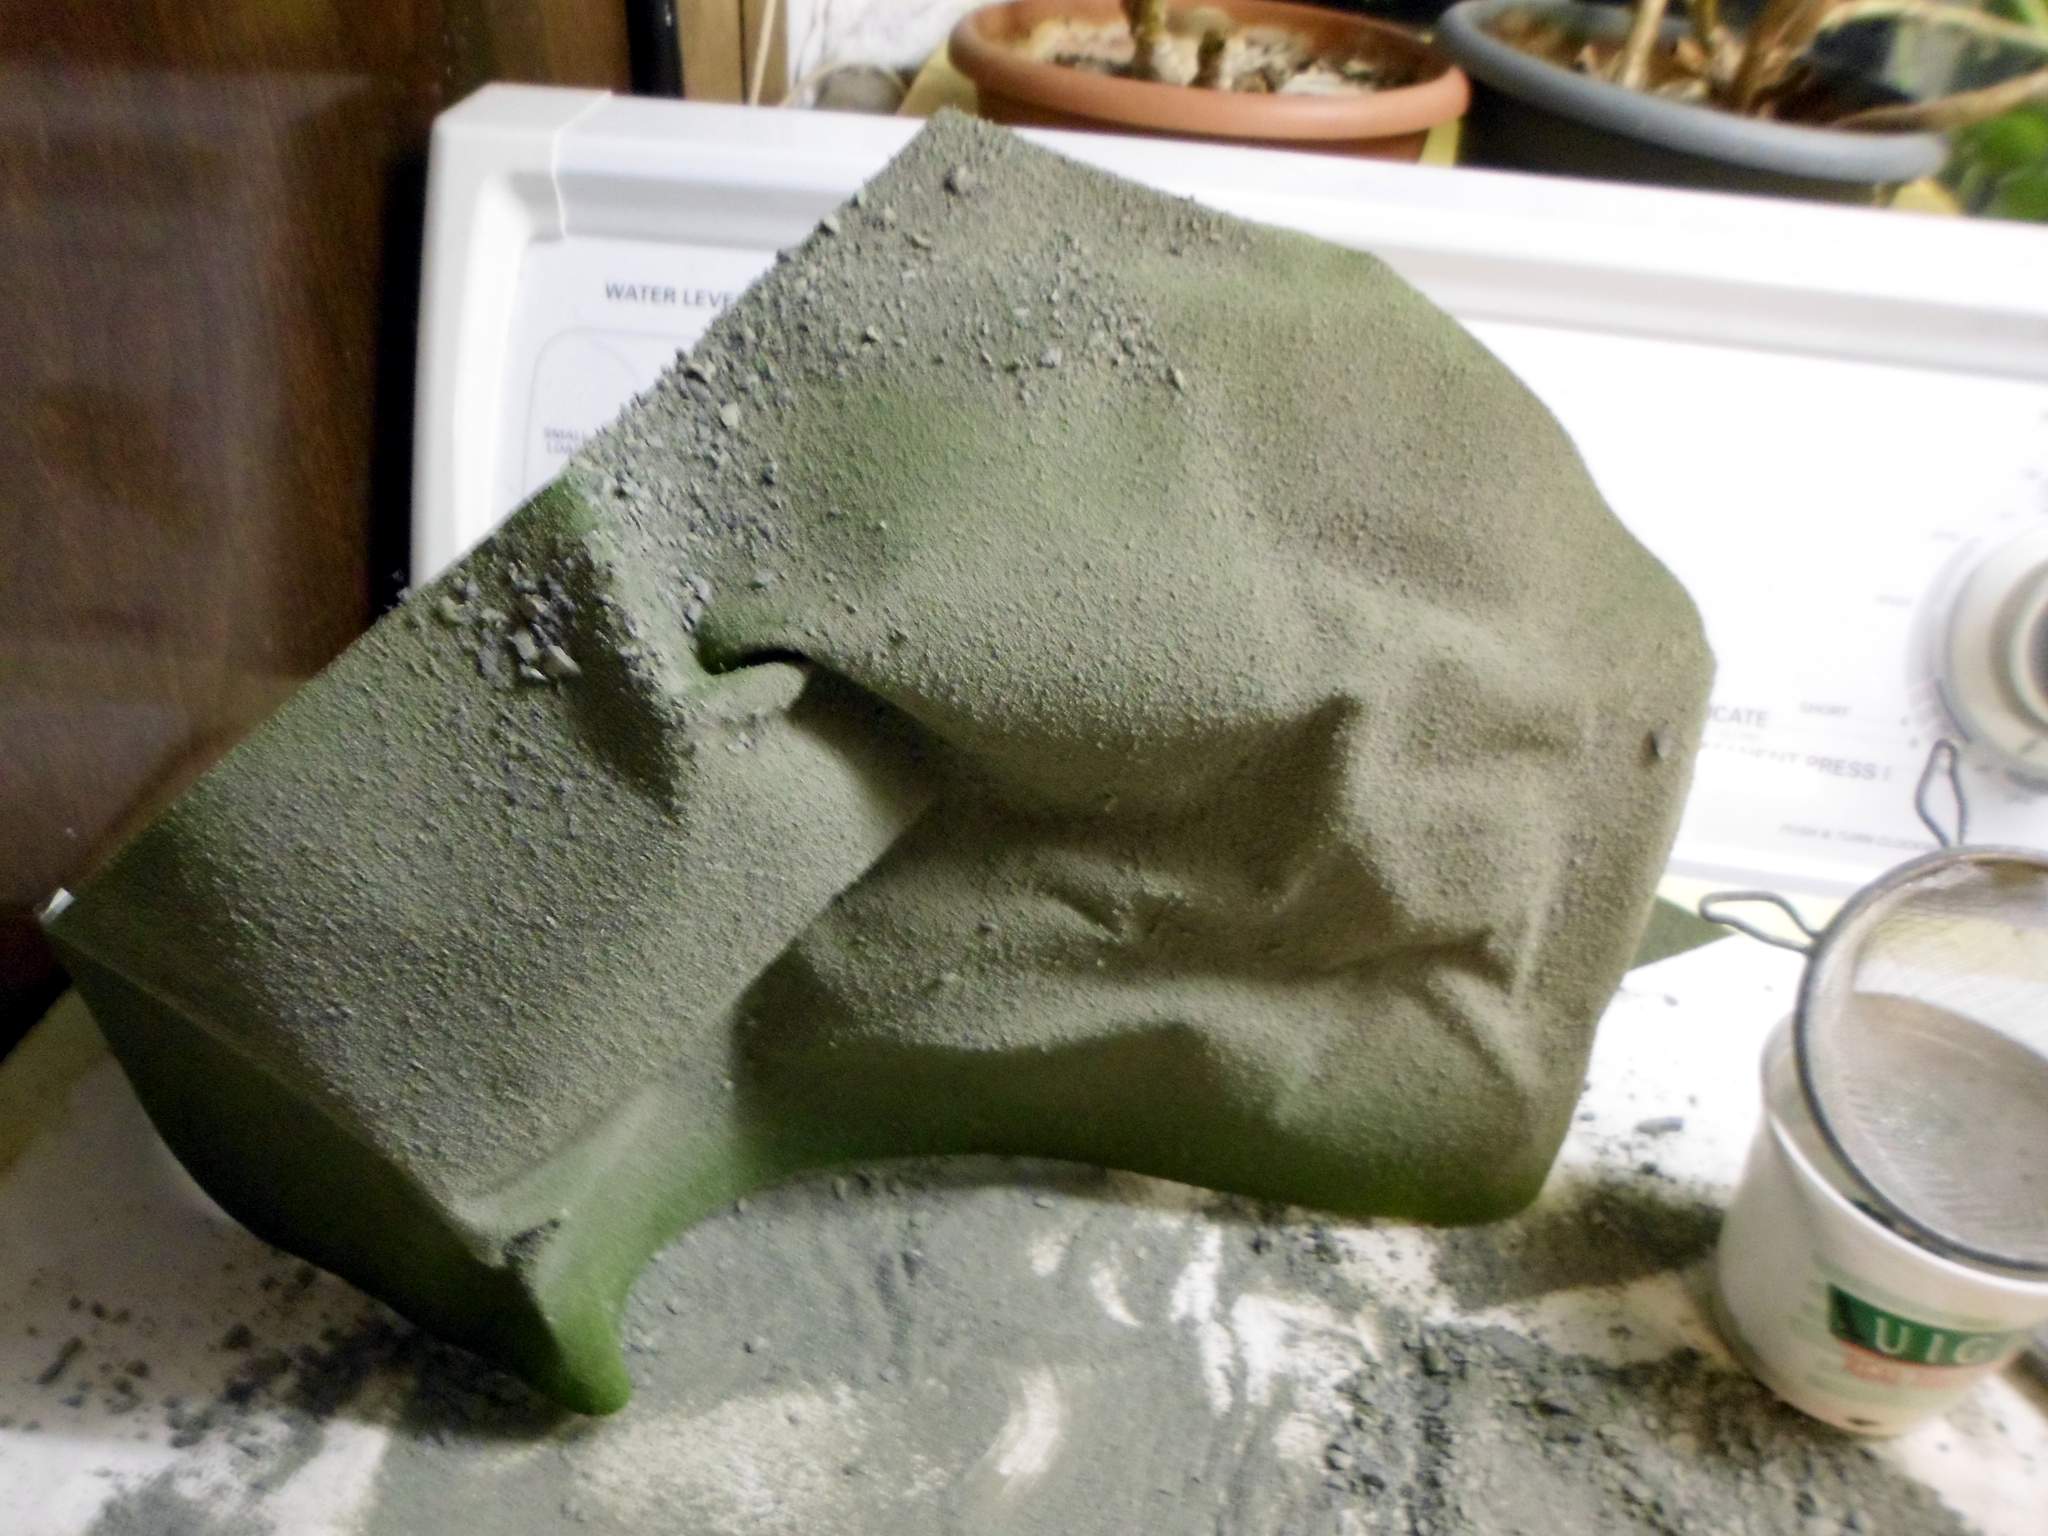
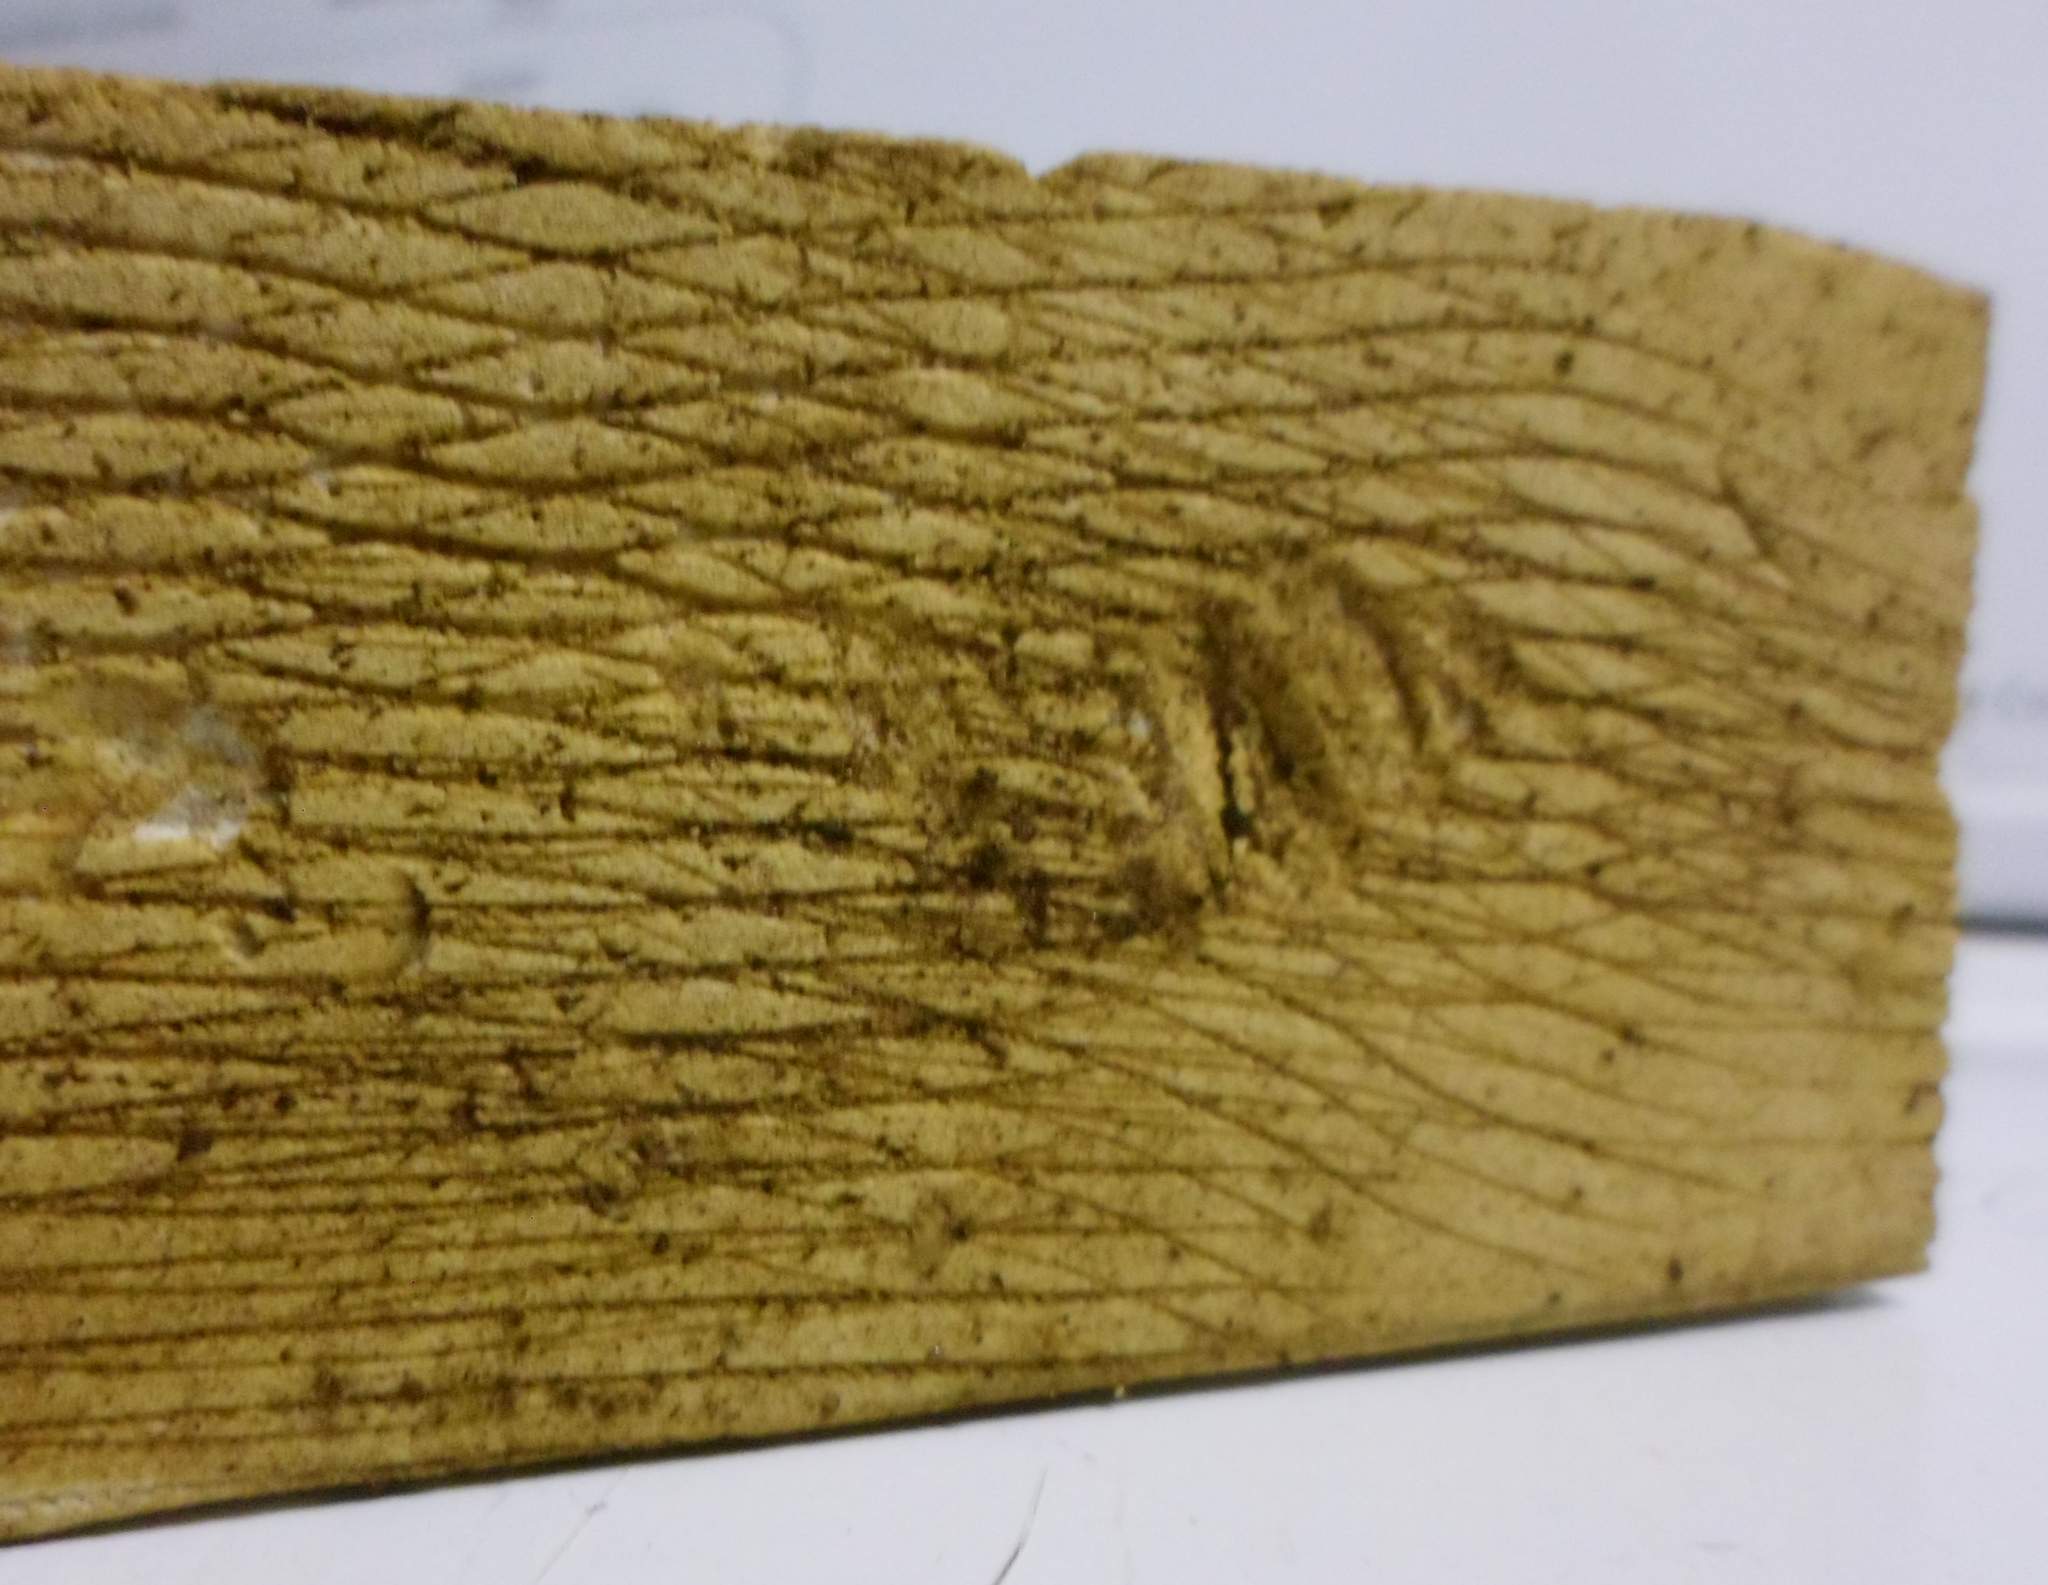
I cut the lines free-hand. I thought about using my metal ruler, but that made it harder to get a good angle. Once everything was carved I used a ceramics tool to deepen the cracks just a bit. The HDU does not compress easily, thus the cut was required. Once all the lines have been carved, the surface is textured using an old wire brush. The nastier the better - this one has been in my garage for maybe 20 years…

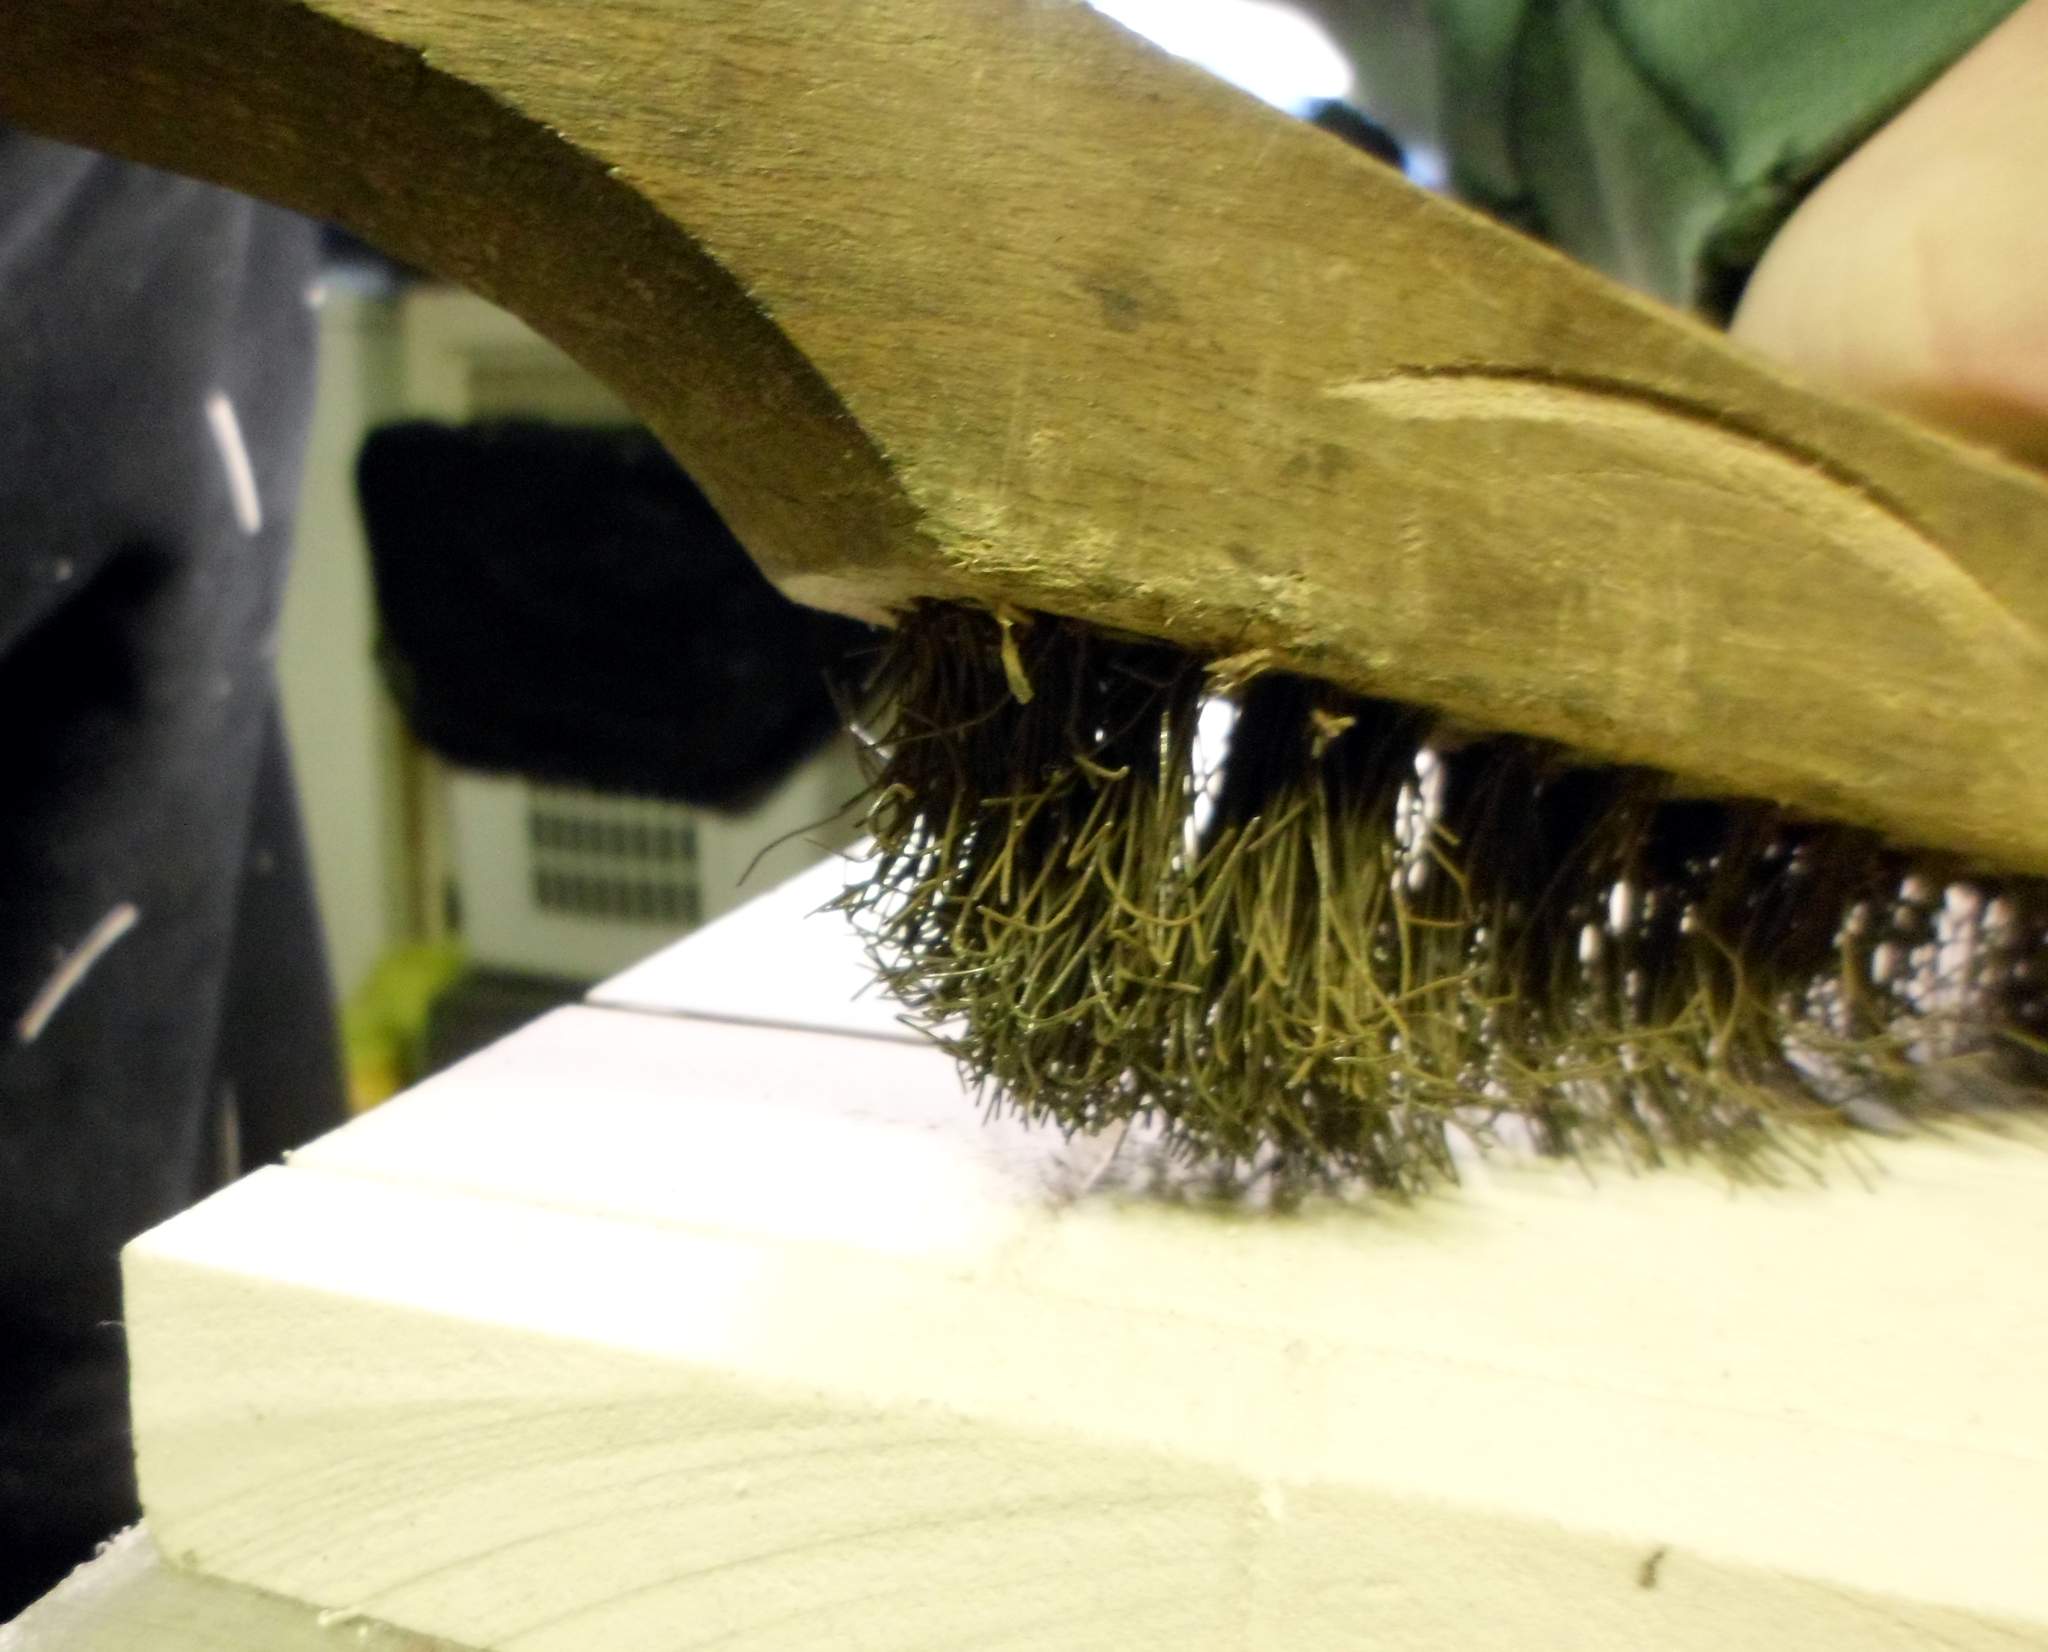
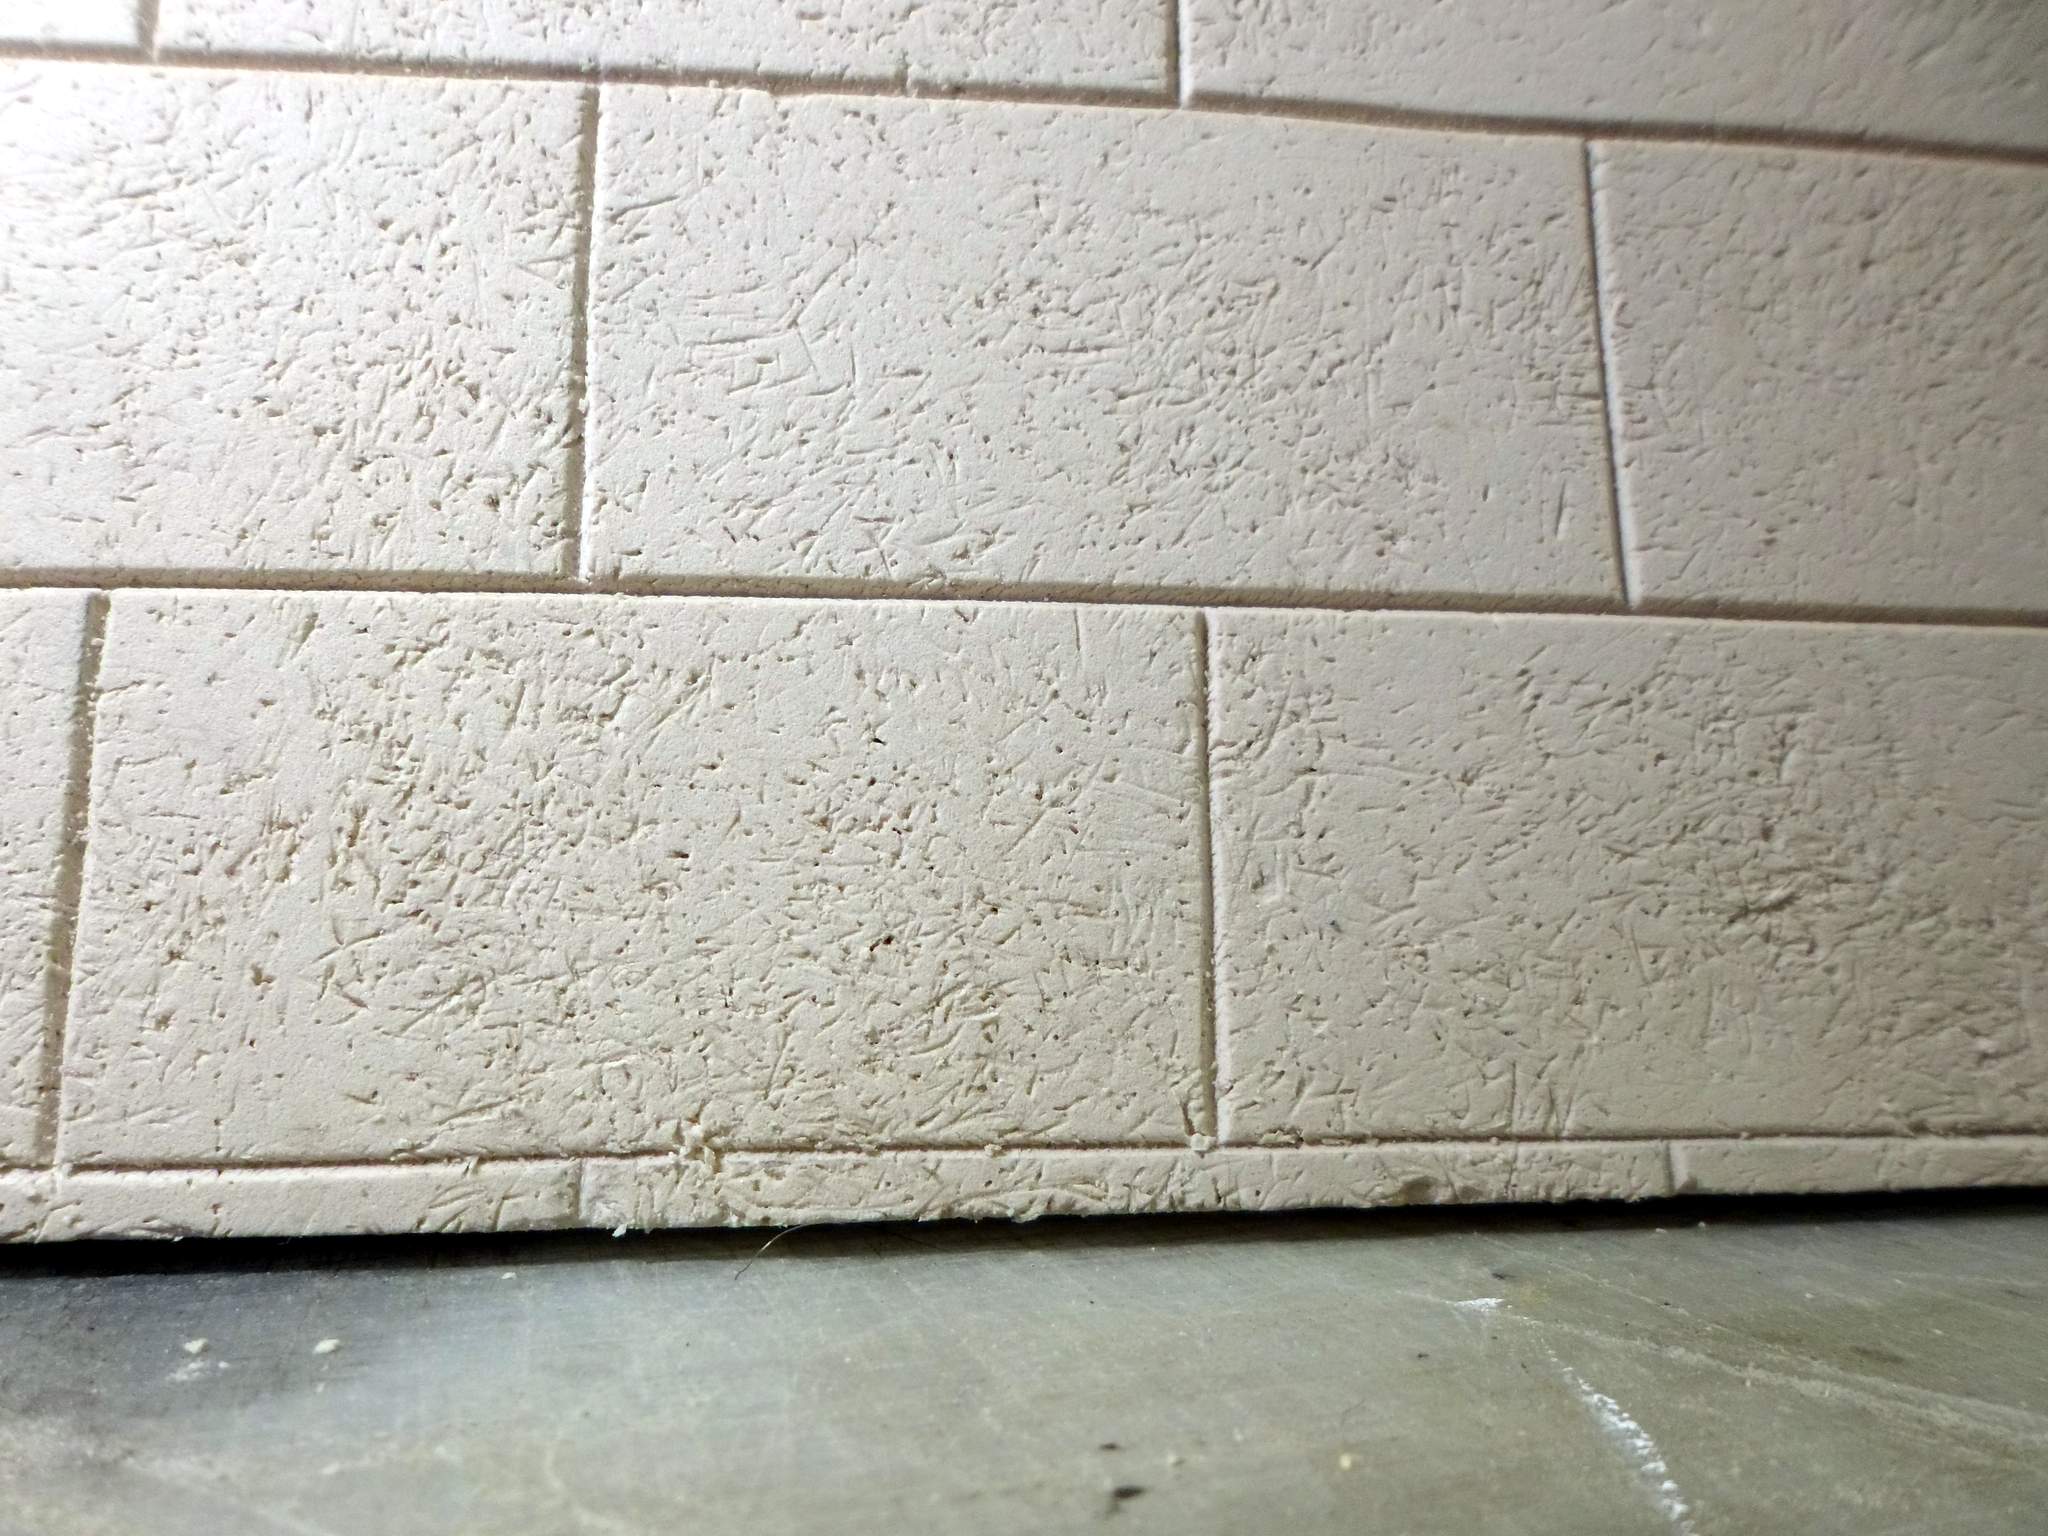
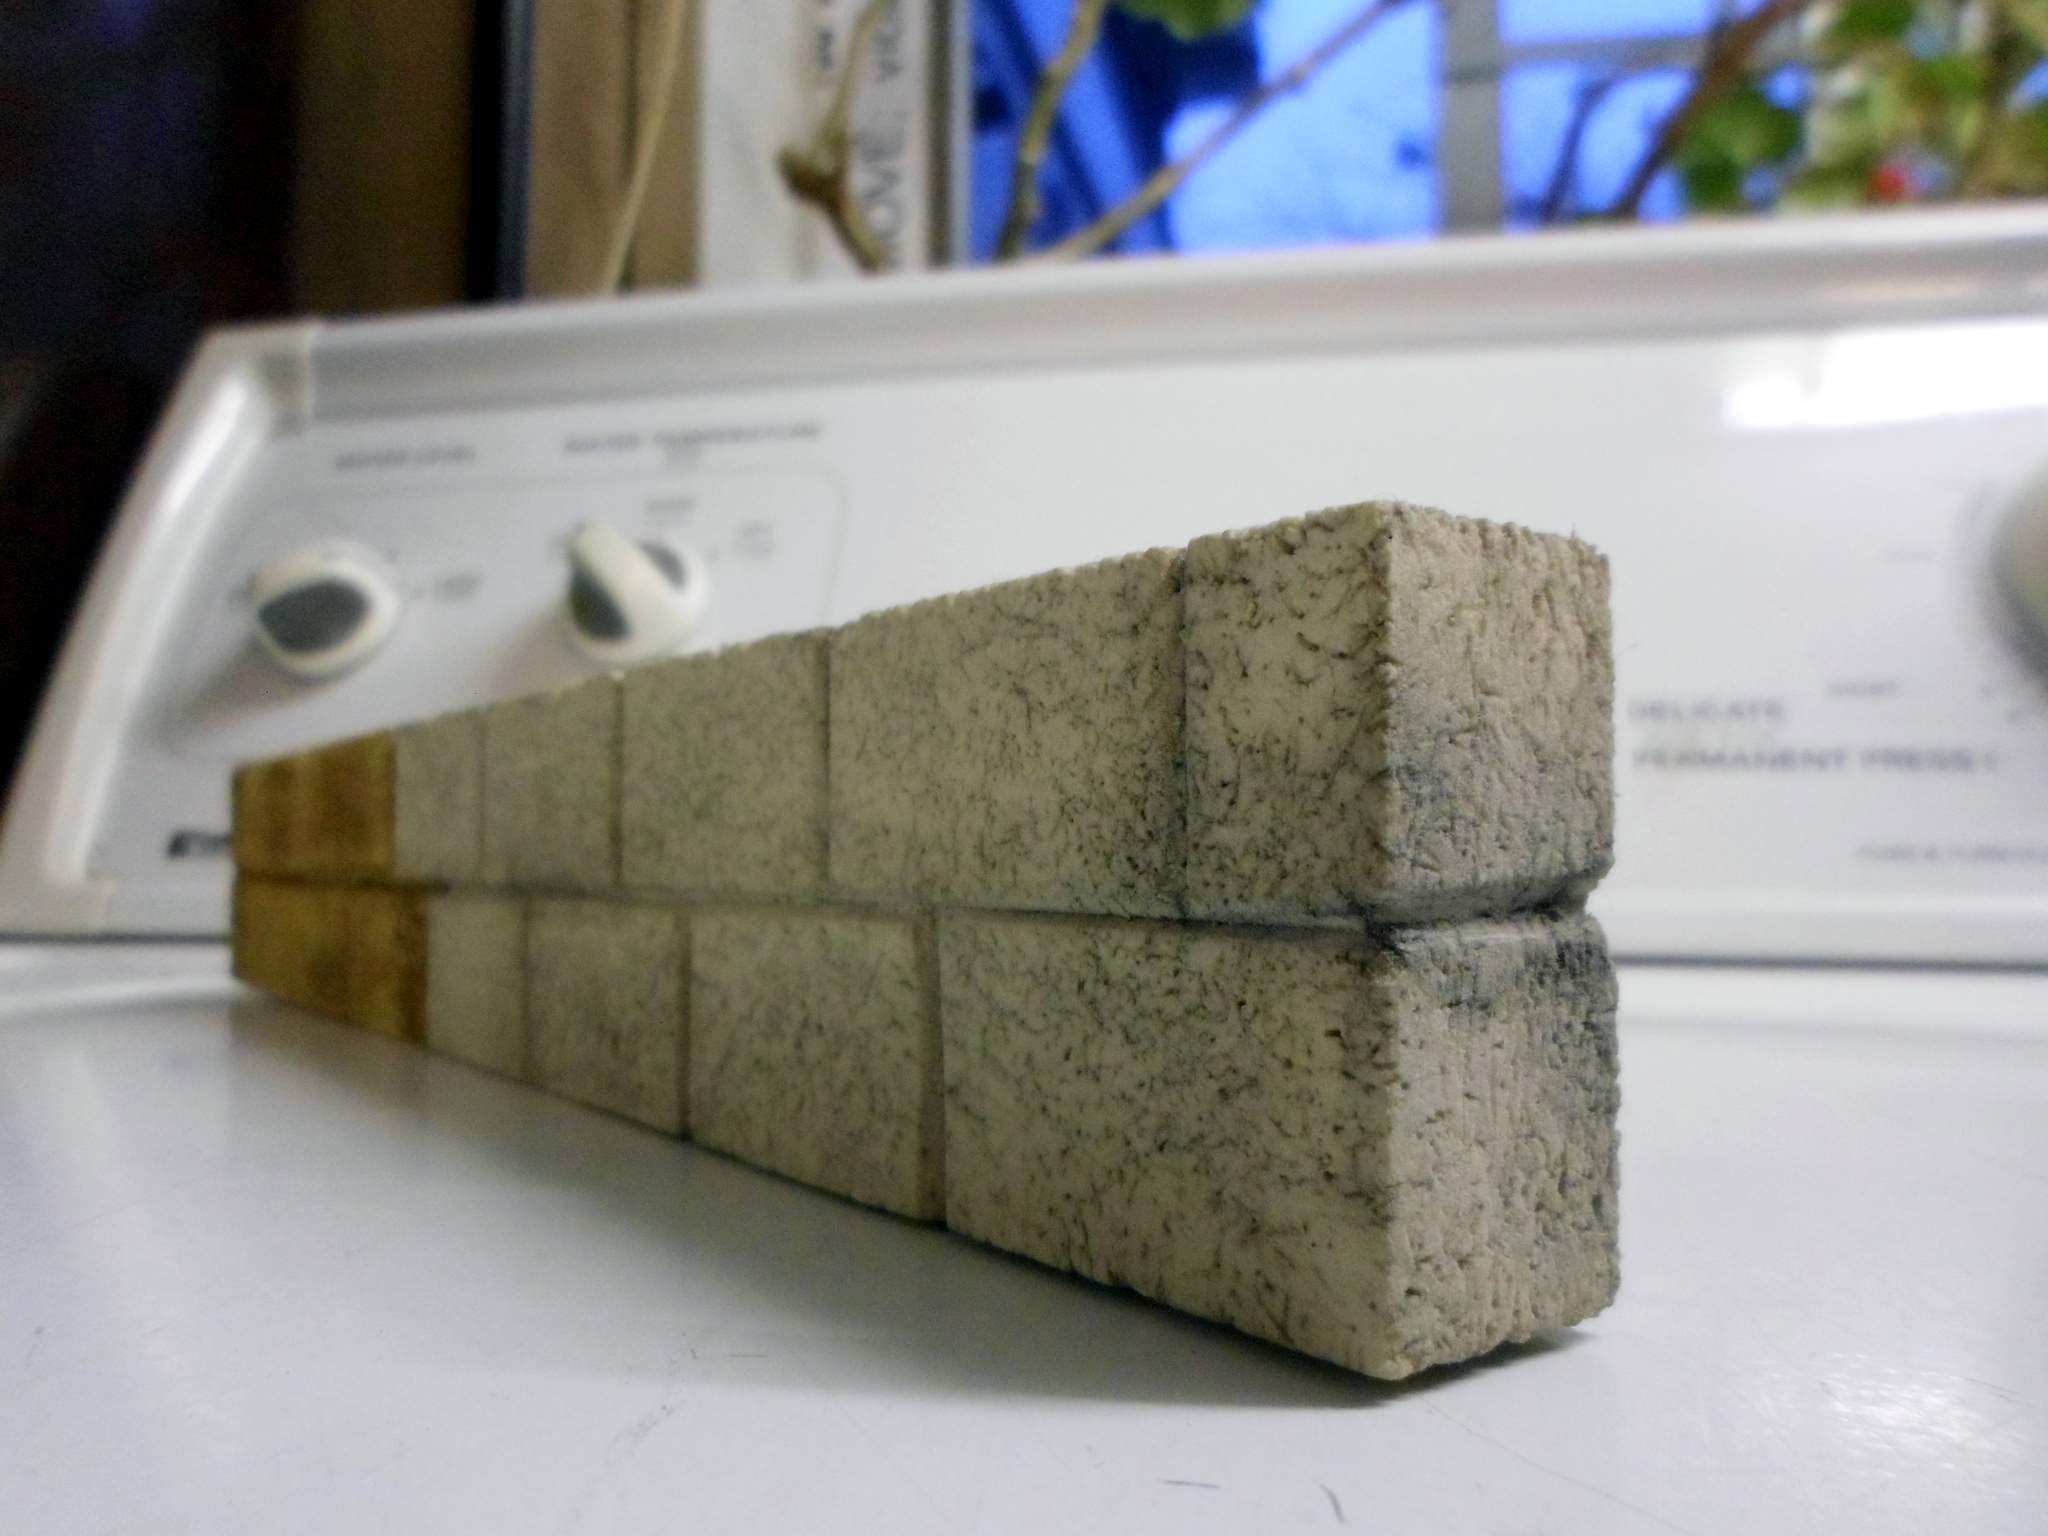
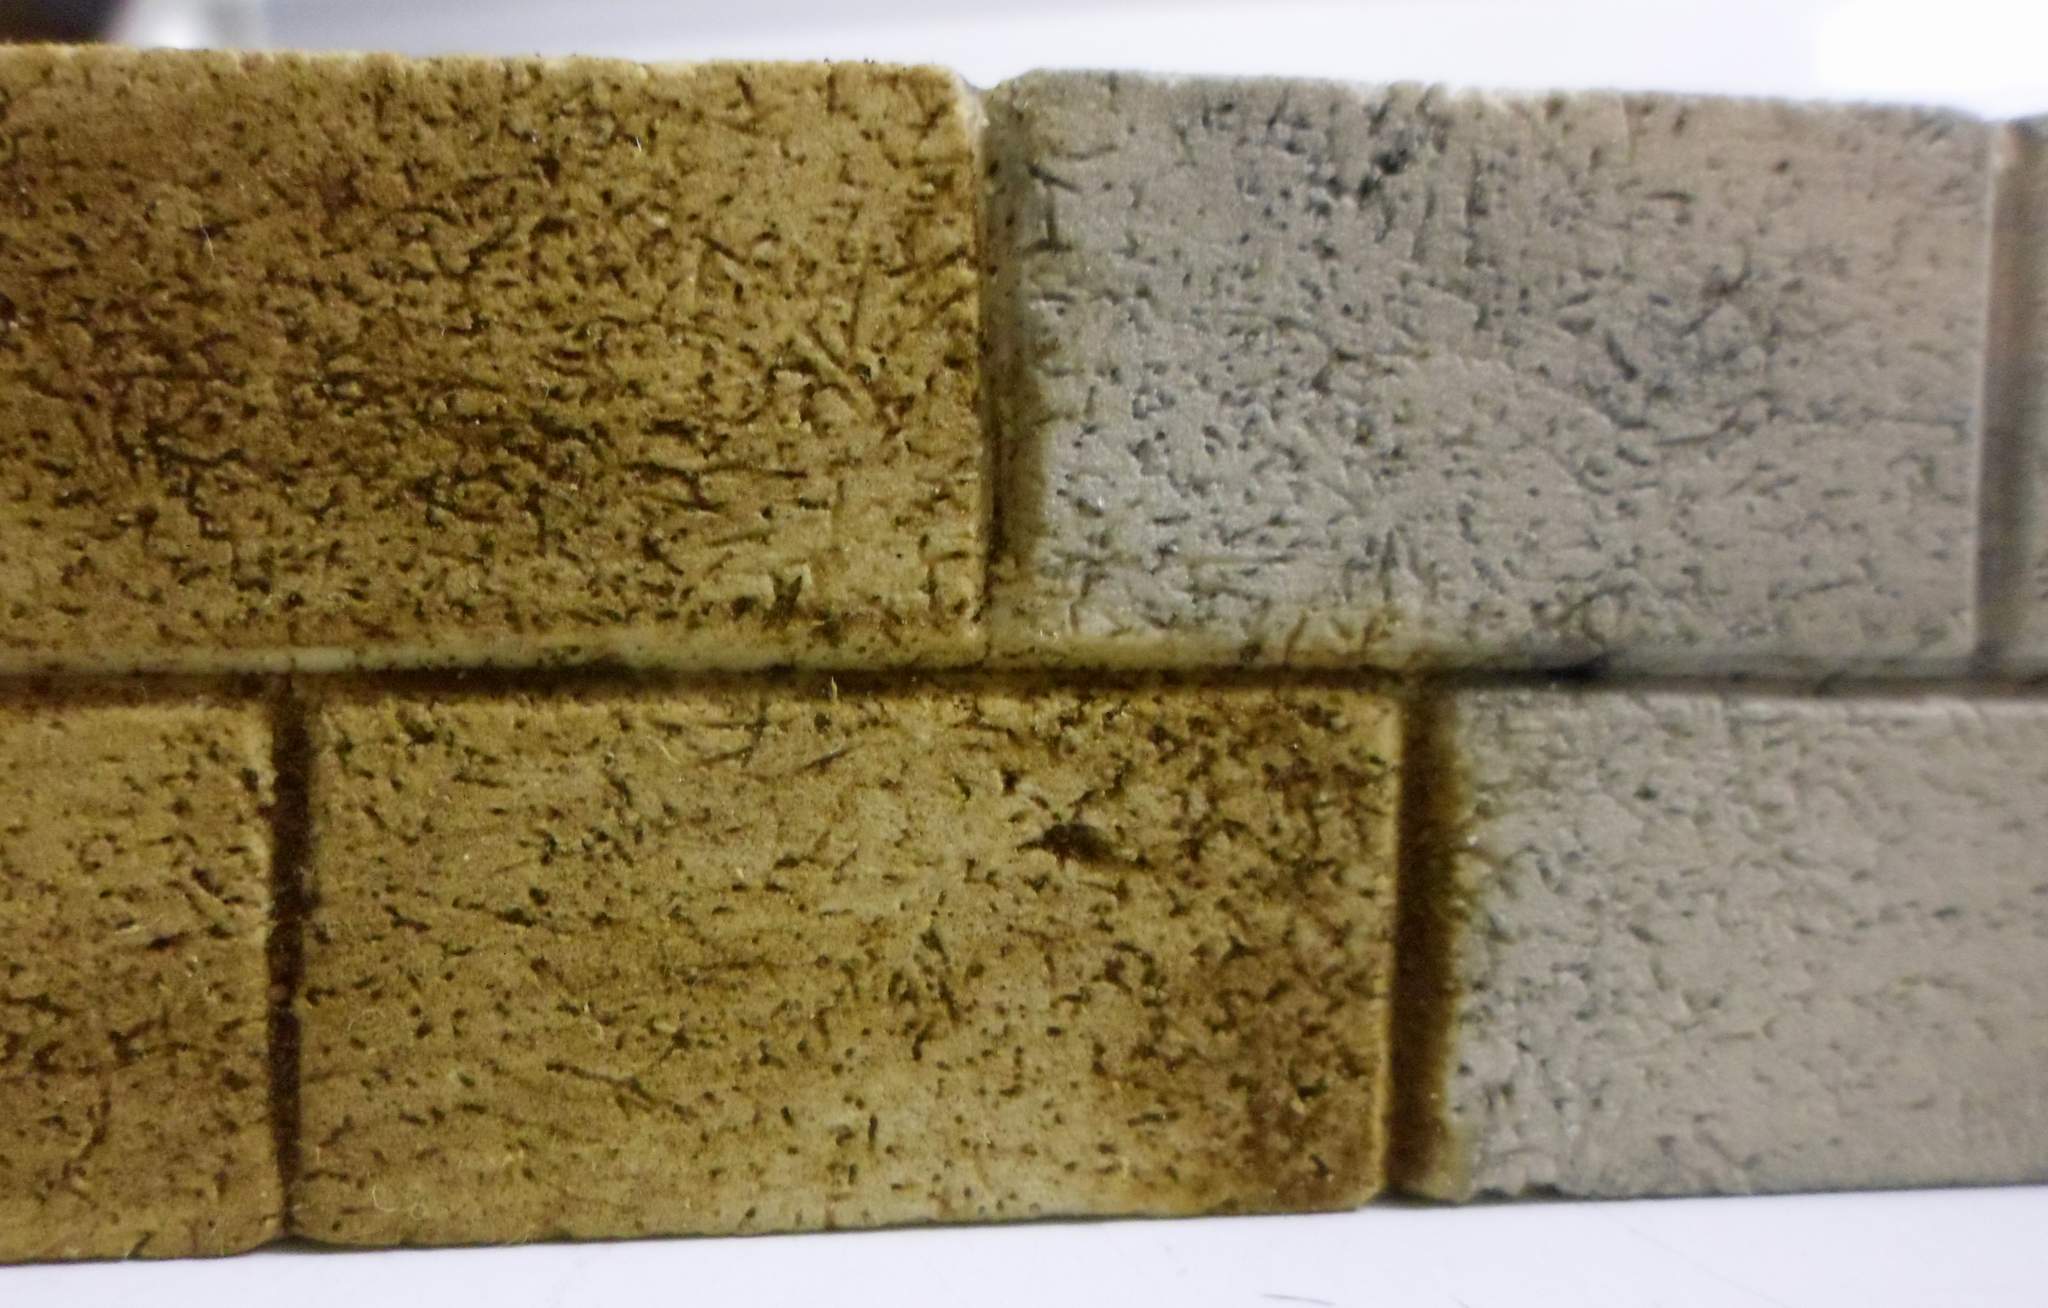
Bang, push, scratch randomly all over the surface to simulate an imperfect concrete surface. A close-up of the result before stain…

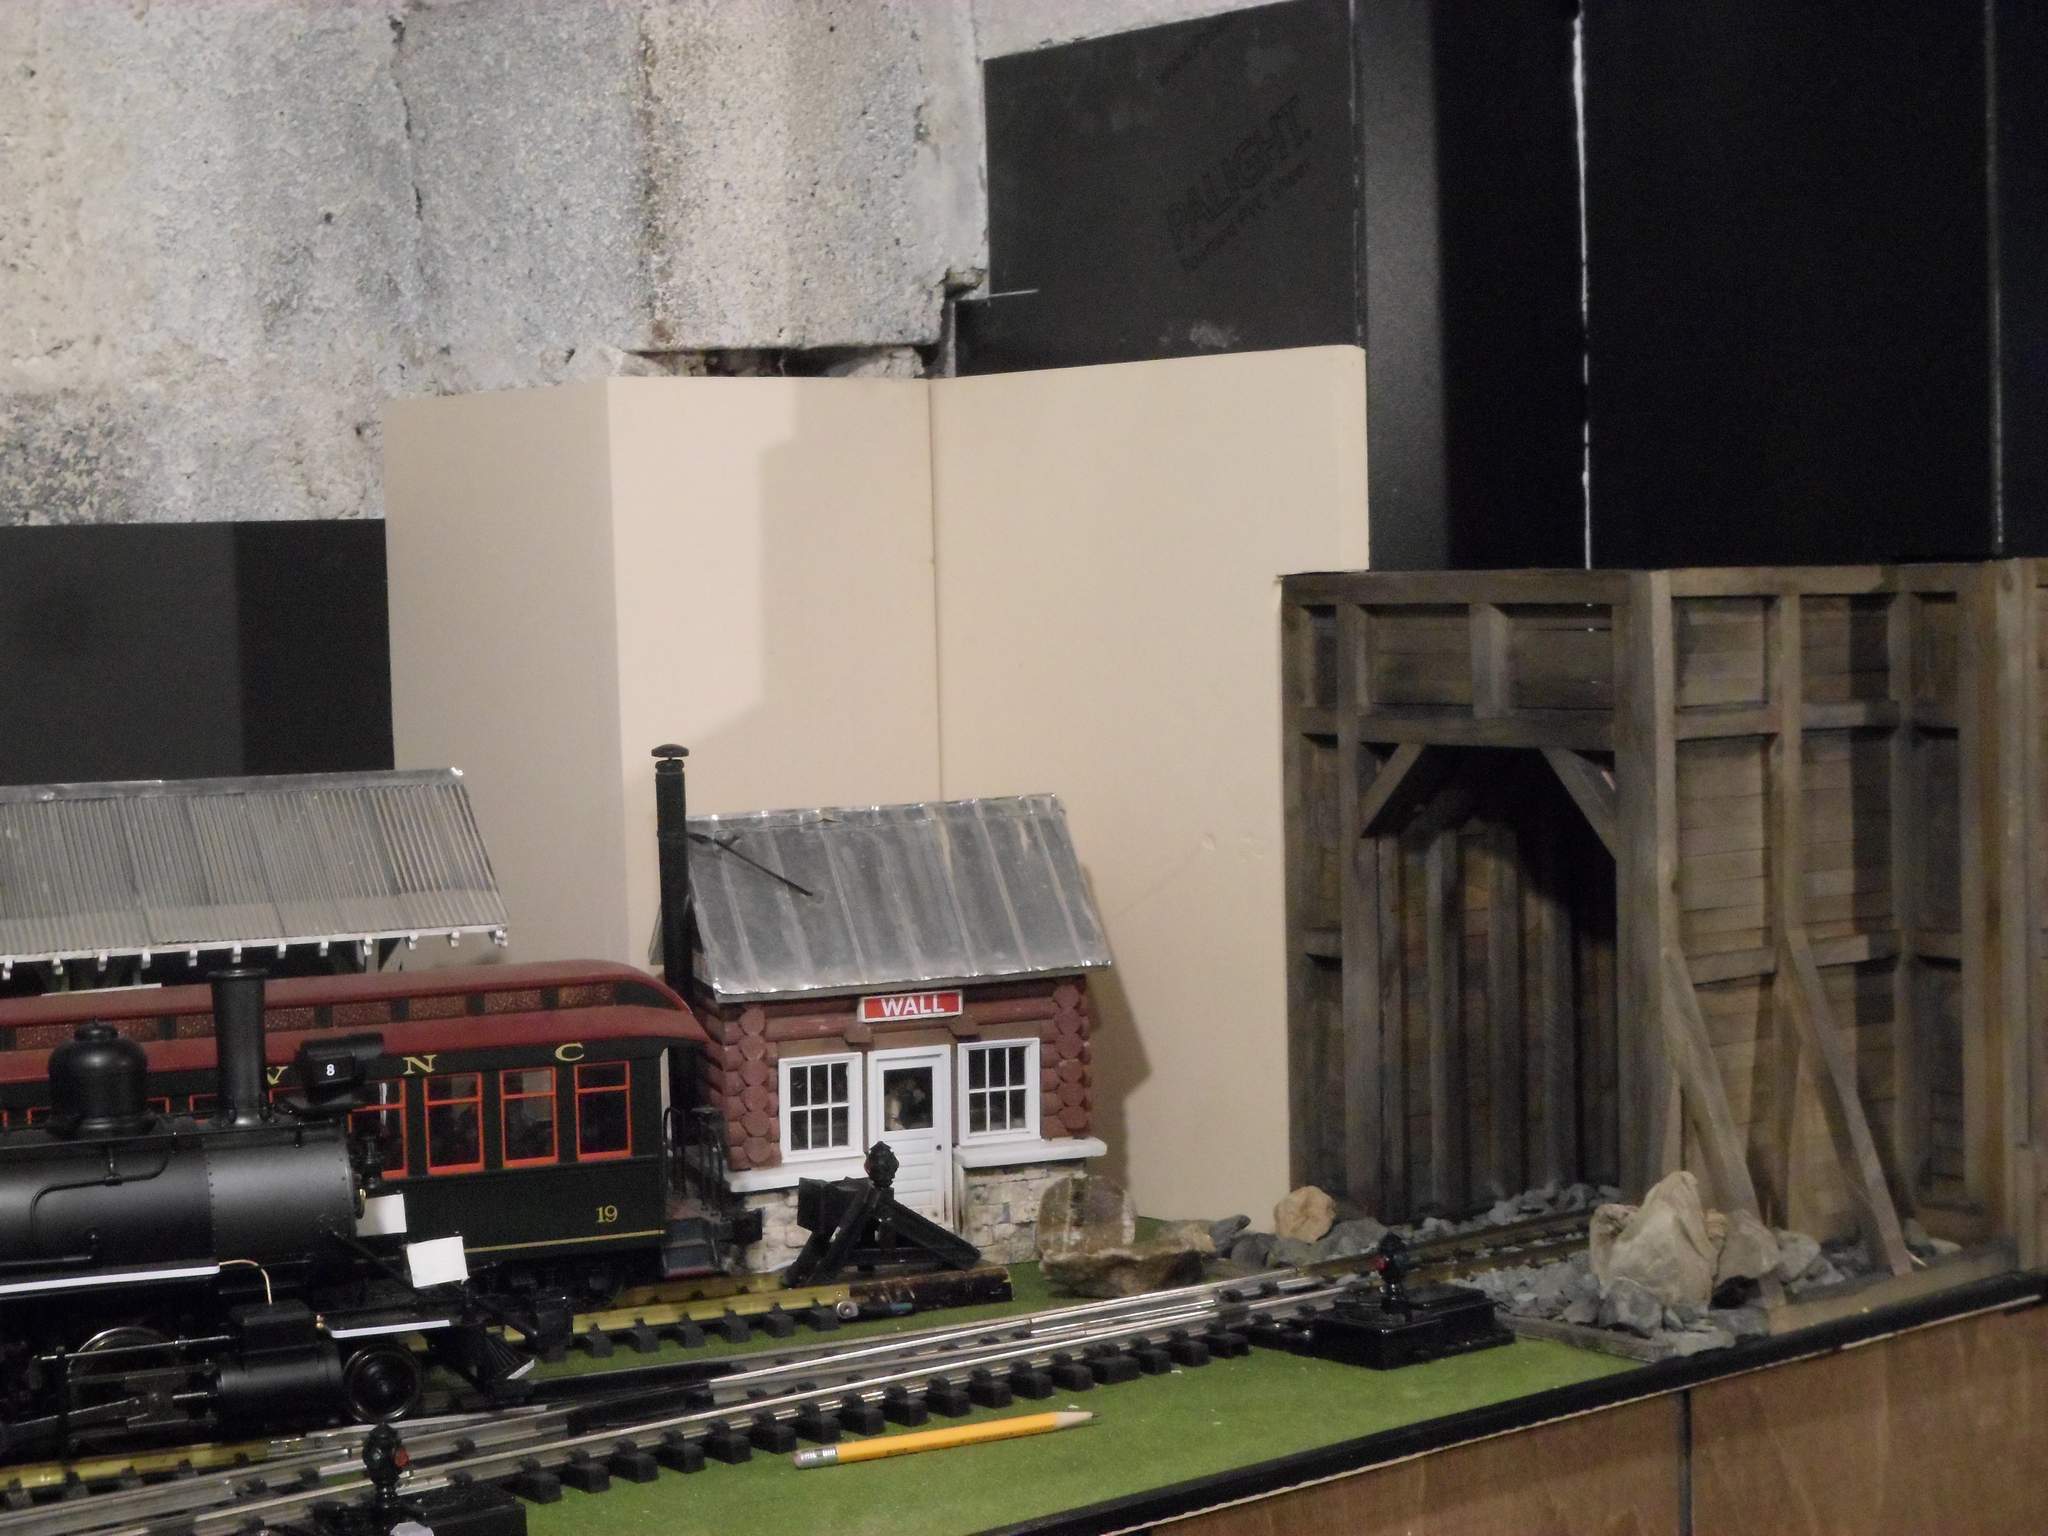
I did my best to get the blocks to align while changing directions…

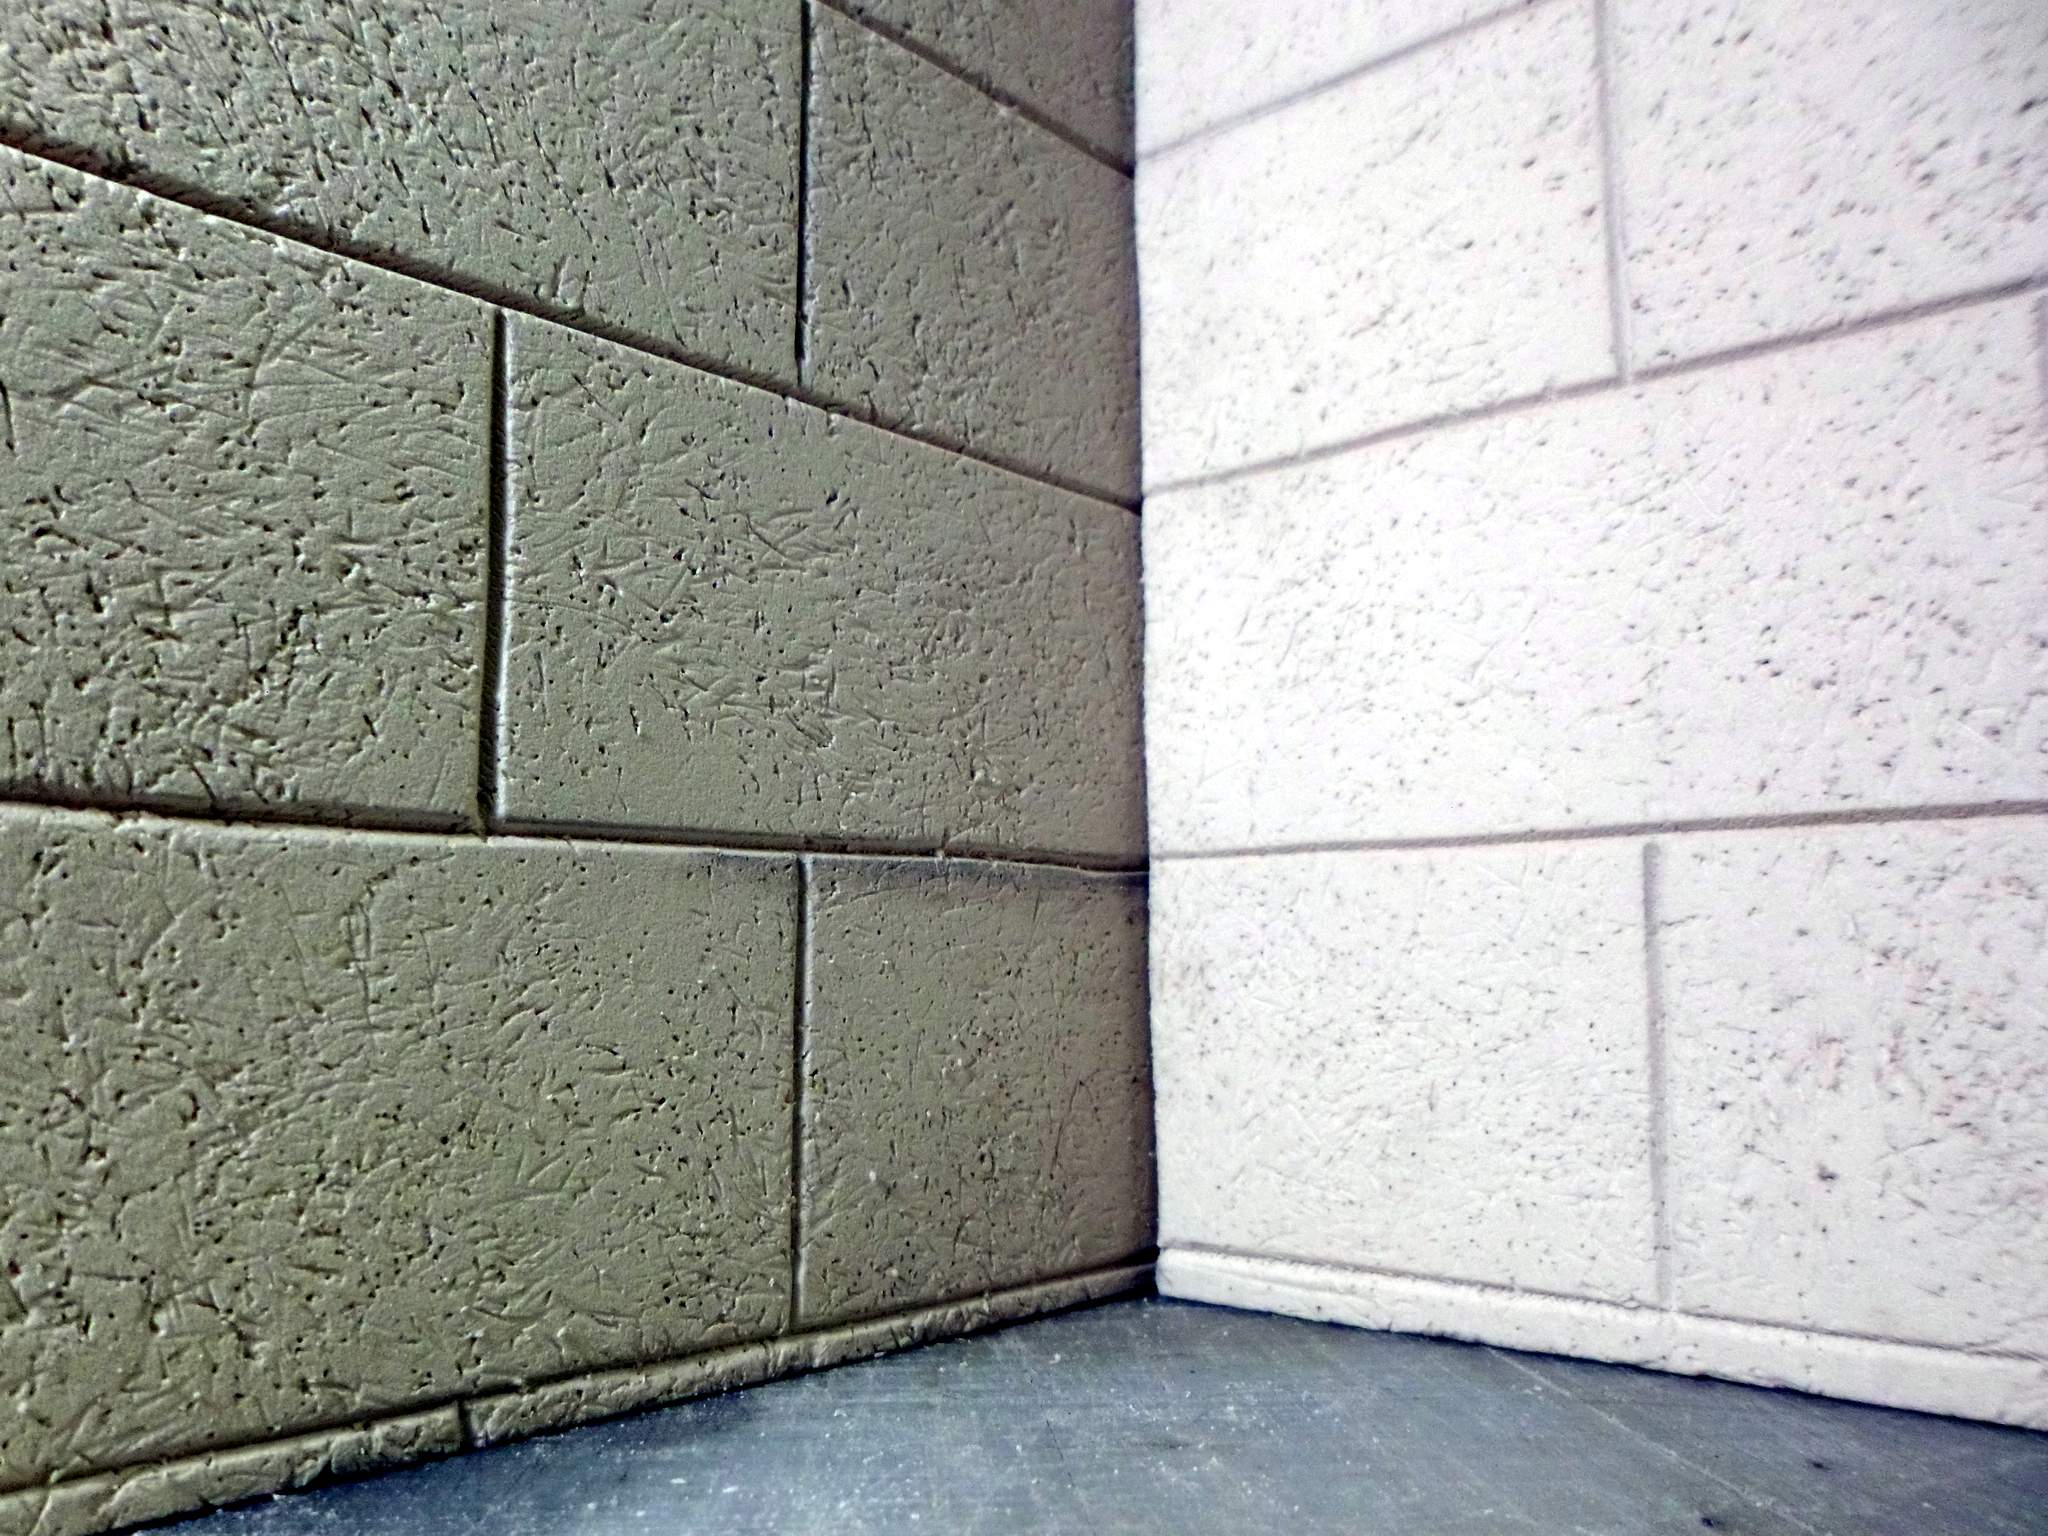
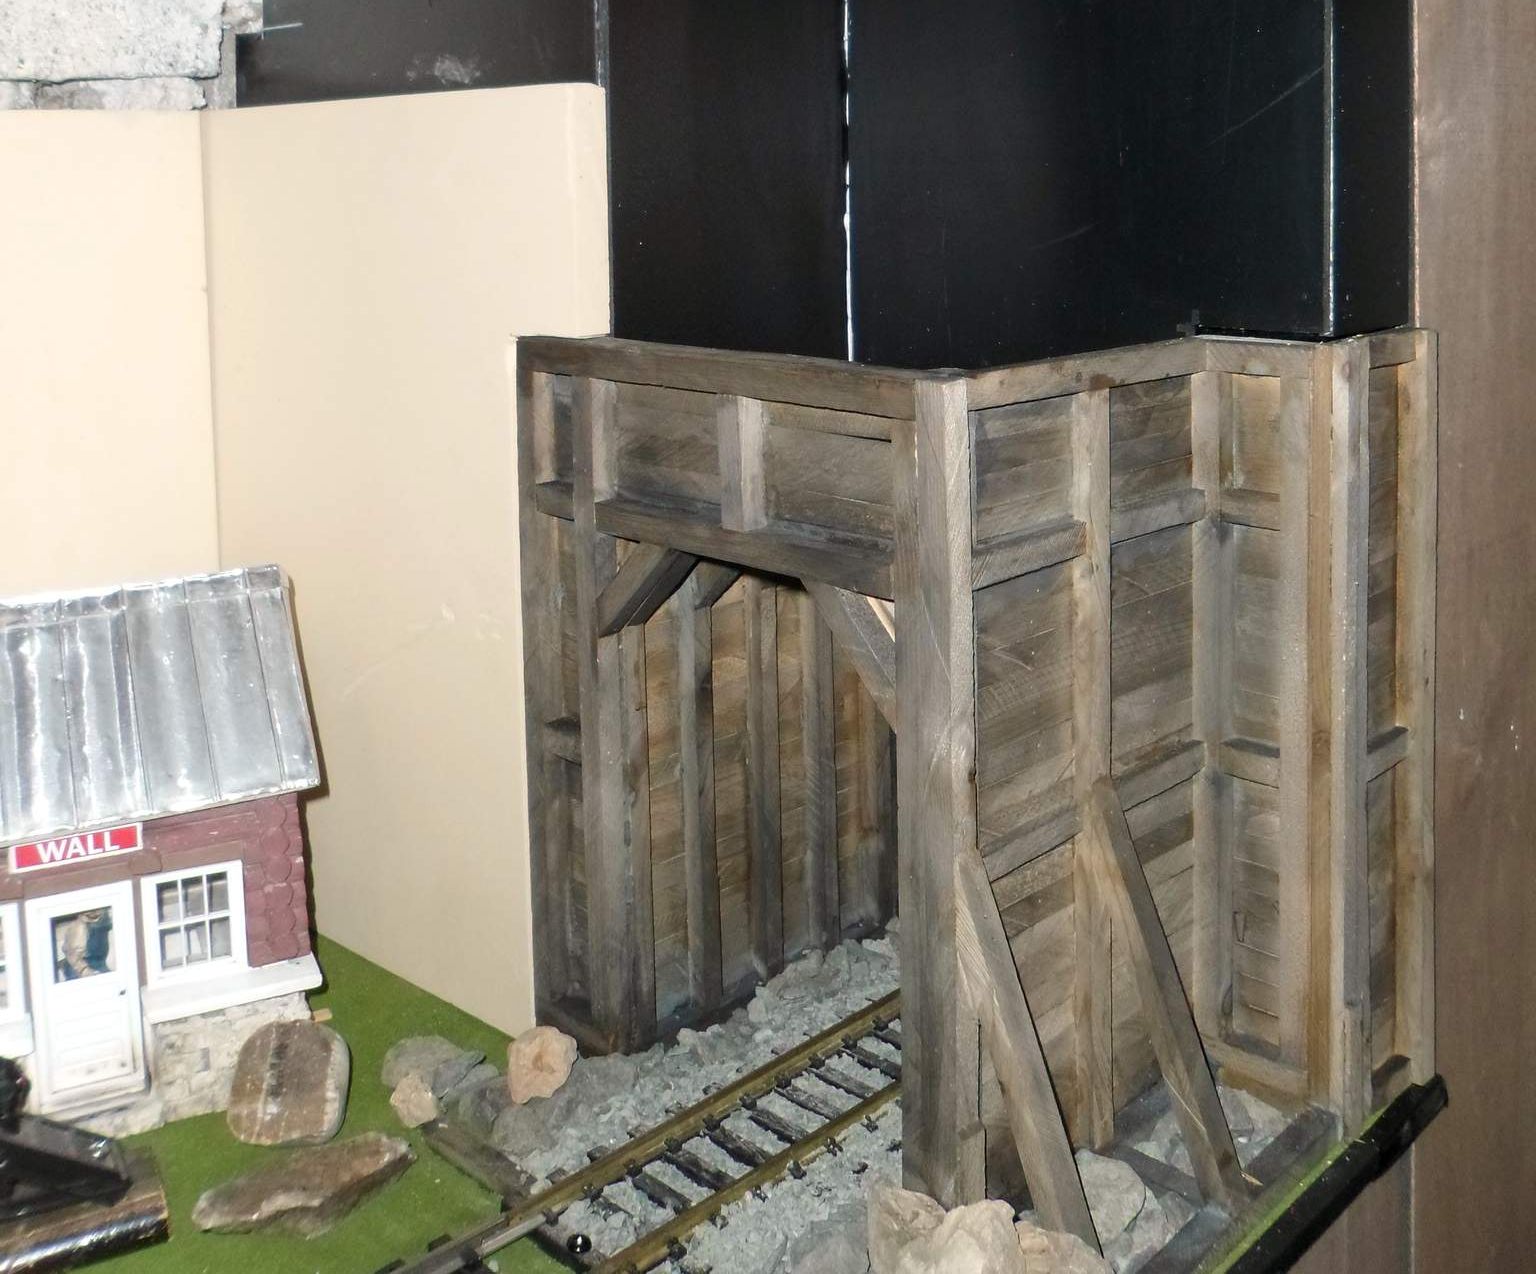
On the outside corner the 30" depth of a block spans the joint between two 3/4" foam pieces…

I may try and fill this gap after the pieces are glued; or I might just ignore it…

Presently I am waiting for glue experiments to dry. I want the three sections to be joined together before I stain so that the color will be uniform across the joints. Gorrilla Glue is recommended as it us Urethane based, but I don’t have any. I am trying E2000, but I don’t like the 24 hour plus cure time. I have also tried a 5 minute 2-part epoxy which fully cures in 1 hour. I will know how that works in about 30 minutes. Hopefully it will be good and I can move on to stain this evening.