Large Scale Central

Mik 2016 Buld Log - Daktah John - CVSRy

David Maynard said:

Devon, no, not really. But the bead just doesn’t look right to me, so I would try and camouflage it. Again, this all just my personal opinion, my 2 cents worth as it were. And my 2 cents worth aint worth a plug nickle. But he asked.

The architectural details I was referring to are not found on buildings

Here ya go,. Not as symmetrical as I thought. Original on left…

OK… I have “my honest opinion” if it means anything? I am factoring in a few things like the cove and as Maynard stated the bolts(you don’t need them but they were there because the corbels were also for structural support of the cantilevers). I am especially factoring in other hobbies of macro photography as well!

So my vote is to with the 2" on the right and move on as the clock is ticking!

Devon Sinsley said:

David Maynard said:

Devon, no, not really. But the bead just doesn’t look right to me, so I would try and camouflage it. Again, this all just my personal opinion, my 2 cents worth as it were. And my 2 cents worth aint worth a plug nickle. But he asked.

The architectural details I was referring to are not found on buildings

Devon, if you are going there, I like things filled out nice kinda a bit lower. Not too filled out, but…

Thanks all for the input. I did some trimming with a razor saw to bring the right one in Dave’s post above a little closer to the post. Doing that and fixing the angles should get me where I want to be. Firing up the rock saw in the morning to make some dust. Supposed to be near 50 here tomorrow - I can cut outside (http://www.largescalecentral.com/externals/tinymce/plugins/emoticons/img/smiley-smile.gif)

Rooster - I’m getting to like this little POS Samsung (or is it PAS) camera. It does do a pretty good job with Macro, hand held in fairly low lint. Thanks for noticing.

Daktah John said:

Firing up the rock saw in the morning to make some dust. Supposed to be near 50 here tomorrow - I can cut outside (http://www.largescalecentral.com/externals/tinymce/plugins/emoticons/img/smiley-smile.gif)

I sure hope you got a new blade!

As predicted, the weather is beautiful. Sunny and near 50F. Rock Saw was dragged out into the driveway and commenced making sawdust. New blade? No, but a different one from the rock experiment (http://www.largescalecentral.com/externals/tinymce/plugins/emoticons/img/smiley-surprised.gif)

This one is a bit dull from cutting aluminum tube, but the Cedar is soft and it cut just fine. I think I have all the wood dimensions for the build covered with plenty of extra for mistakes. I’m happy to report that all 10 fingers are still intact.

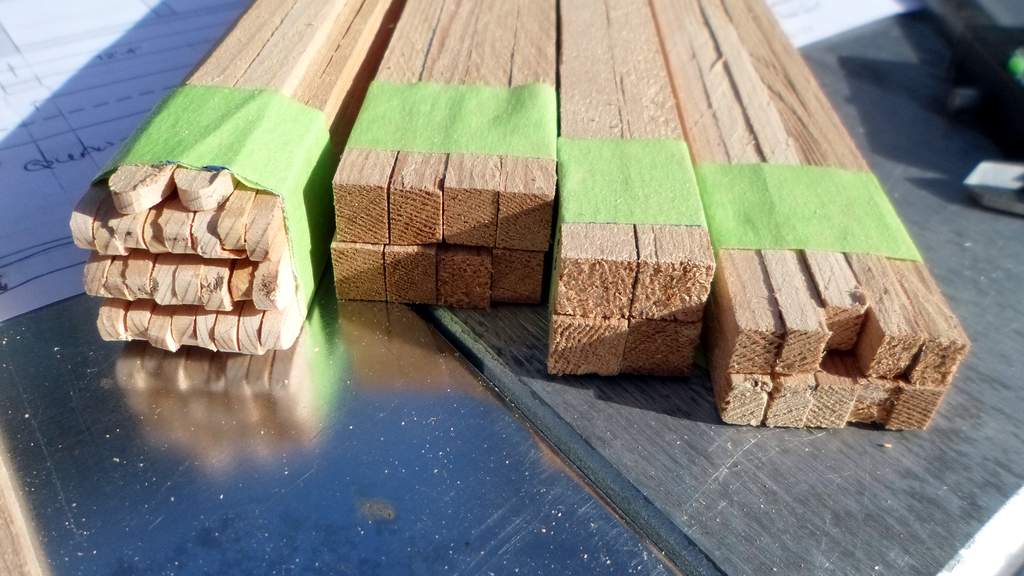
Here they are all bundled up for shipment to the assembly crew…

Like most lumber mills, my finished dimension isn’t exactly the same as the marked dimensions. I use Foamed PVC board as spacers to set my fence, so that 2x6 that should be milled to 2.5mm x 7.5mm is actually milled a little big at 3mm x 8mm. My source of PVC is in 3, 6, 12, 19 and 25mm thicknesses. For F Scale I use 12" = 15mm and have an Excel calculator that I plug in real world inch dimensions and get F Scale metric dimensions out.

L to R 2x6 Roof Joists, 6x8 Main Beams, 8x8 Uprights and 4x6 for the Roof Frame…
Using John C’s advice, I cut the 6" dimension of the 2x6, then rounded the ends before slicing the 2" width. I used an air powered DA sander with 120 grit paper to round the ends. The soft material fell away rapidly. If I owned a router I would have rather used a round over bit to get better consistency, but I don’t so this will have to do…

Of course there is never an even number of cuts in the board, so there are lots of odd size leftovers to go in the spares bin…
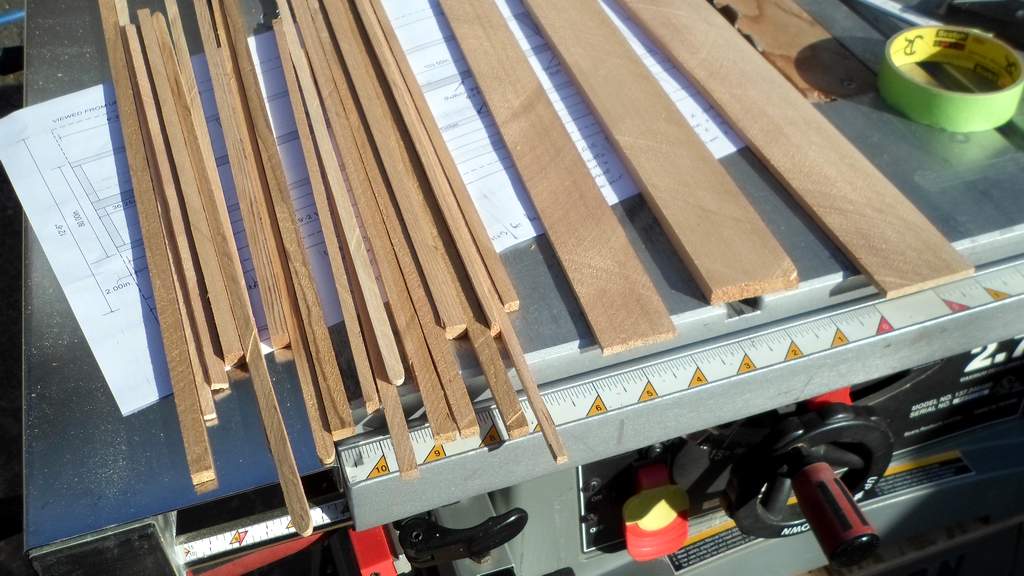
Let the construction begin!

Assembly has begun. First up; set the posts. In the garden the platform will be poured concrete, but for assembly and display, a piece on 19mm foamed PVC board with holes drilled to accept the posts does nicely…

Next, because it was simple, the roof base frame was assembled with glue and pins…

Next I began working on the main center beam. Initially I cut it like the prototype, with each arm as a separate piece, but I wasn’t happy with the alignment and the strength, so I went with interlocking dado joinery. The notches are pretty easy to carve out of the soft Cedar…

My shortest pins are 1/2" - a little longer than the height of the beams, so I went with clamps for assembly…

The two ends are joined at the center. Hopefully I didn’t glue the beam to the wood that it’s clamped to…

While waiting for the glue to dry I experimented with 3mm PVC sheet to be used as the roof under the tin. By scoring and carefully bending the score until it opens up, I think I can get the roof angles while maintaining a single sheet…

You are too organized with that milled lumber … I mean come on, stacked, banded and labeled. What are you running, a lumber yard or something!! I just cut it all and pile it up and then re-measure each piece when I need it. My way is much slower (http://www.largescalecentral.com/externals/tinymce/plugins/emoticons/img/smiley-laughing.gif)

Now I know what you mean by “hand cut”. Those notches look mighty fine. I like the way you cut the roof out of the PVC board. this will be a good looking shelter when completed. I’m loving all the architectural details you are including.

progress!!!(http://largescalecentral.com/externals/tinymce/plugins/emoticons/img/smiley-smile.gif)

Dan Hilyer said:

You are too organized with that milled lumber … I mean come on, stacked, banded and labeled. What are you running, a lumber yard or something!!

Well, kind of. I always cut extra for every project. Someday I’ll get it all organized so maybe I can start a project without running the saw.

I just cut it all and pile it up and then re-measure each piece when I need it. My way is much slower (http://www.largescalecentral.com/externals/tinymce/plugins/emoticons/img/smiley-laughing.gif)

Now I know what you mean by “hand cut”. Those notches look mighty fine. I like the way you cut the roof out of the PVC board. this will be a good looking shelter when completed. I’m loving all the architectural details you are including.

Thanks Dan (http://www.largescalecentral.com/externals/tinymce/plugins/emoticons/img/smiley-smile.gif)

My left over “standard sized” lumber goes into some small drawers I made. So when I need a scale 2x4 I can just go grab one out of the drawer. For larger builds, I need to mill what I need, plus some for cutting waste and breakage. Left overs go into the proper drawer.

I do not know if I would insert ceder into concrete. Concrete is porous and the ceder will rot. I set my ceder trestle onto a concrete pad, and even though the ends of the trestle bents had been soaked in sealant, they rotted away after a few years.

Or you can oversize the concrete holes and provide bottom drainage from each. Put the post in the holes and back fill with stone dust, just don’t go overboard

Thanks for the advice on the concrete - Or I might just use some 1" PVC board I have and not worry about it.

A little set back in the construction shop. Apparently I was not lined up as square as I thought I was when I glued the two halves together. In order to get in to lie flat I needed to break the center joint and re-glue. So, while I am waiting another day for that to cure I’m back to experimenting with the braces.

I think it was David Maynard that said he wasn’t in love with the bead. I have to admit that I’m not either, so I gave another go at carving it off. While I was at it I added another step to give it more interest and help with the scale transition from 1:1 moulding to 1:20 braces. This is where I ended up…

And here is a comparison with an original with the bead at the bottom. I think this angle is too flat…

So I rotated them 90 degrees (and flipped them over). This puts the new heavy end at the bottom and makes a much sharper angle…

And for fun, one of my earlier attempts with the new one (left) to show some symmetry…

Looks like I have a little carving to do.

Daktah John said:

Well, kind of. I always cut extra for every project. Someday I’ll get it all organized so maybe I can start a project without running the saw.

I will cut extra in the future. This is my first scale build so I have concentrated on trying to just cut the lumber to the dimensions I need. Lot of experimenting with sizes. I believe I have a better understanding of the typical sizes I can/will use for other structures now so I can cut lumber in my spare time… did I say spare time? I have heard that term before but never knew what it meant. Sounds good anyway.

much better I am in love with the brace now

I like that

When I said that I cut extra, I try and cut more of whatever dimension I am cutting then I need. For some reason I can never properly calculate how many board inches I need, so I try and cut extra to cover my math errors and what is lost in cutting. I need to run off more 1/8 x 1/4 for my Derrick, and so I plan on making one extra blank, that translates into 3 extra boards, just in case.

Still moving forward, but in baby steps. I attached the roof base frame to the main beam tonight after correcting some length issues with the arms. Found that it as still not flat, so before the glue dried I clamped it to the base hoping it will flatten out. If not, I may have to wet it and clamp again. Shown here clamped to the temporary base next to the uprights ready to accept the assembly…

While I was waiting for that to dry, I carved up another 11 of the braces to match yesterday’s test. I created a bunch of nice little wood chunks (http://www.largescalecentral.com/externals/tinymce/plugins/emoticons/img/smiley-undecided.gif)

Of course, doing repetitive tasks like that gives me time to think up more bad ideas that will make the build take even longer…

Beefs up the look and adds some protection against breakage. Once it dries I’ll look at it on the test T and decide if I’m making 11 more.

I also had a really bad idea that may push me well beyond the deadline. I remembered that I have a nice stock of pre-cut Cedar planks about 3 foot long. I was going to simulate the roof planks by scoring a PVC roof, but the more this comes together as a wood structure the more I’m thinking to keep it 100% wood except the tin roof. I have a hair brained idea to use self-adhesive vinyl on the back side (under the tin) to hold the planks together while I glue on the rafters and ridge board.

That’s a bummer about the warped wood John. The roof members may serve to help keep it flat too once you attach them. Starting to look good. Just don’t get too derailed. Only 10 days left! I hear there is a line forming at Wall station already.

Nice wood working so far Jon. I would go with all wood for this Jon.