Large Scale Central

Might have to re-think the loop expansion

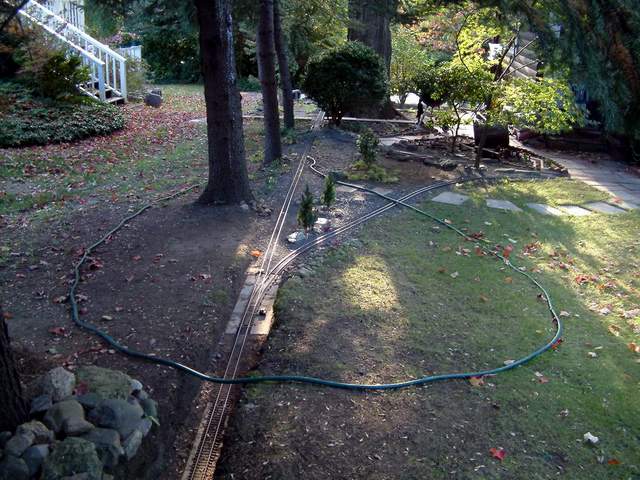
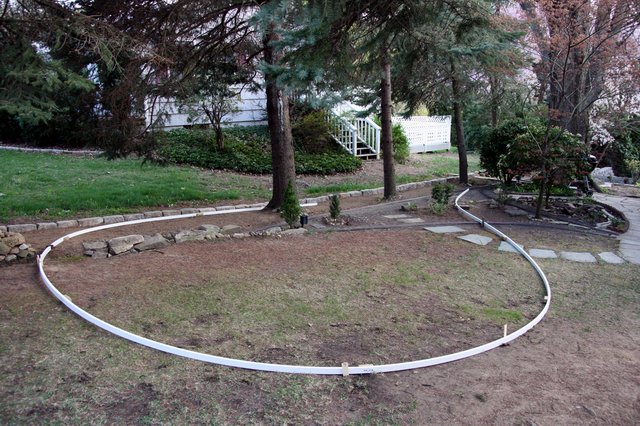
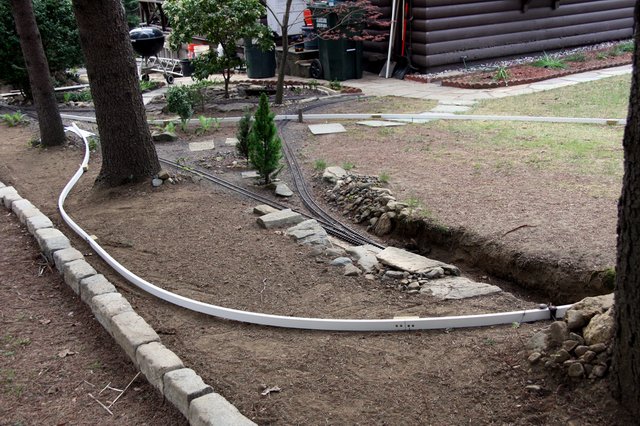
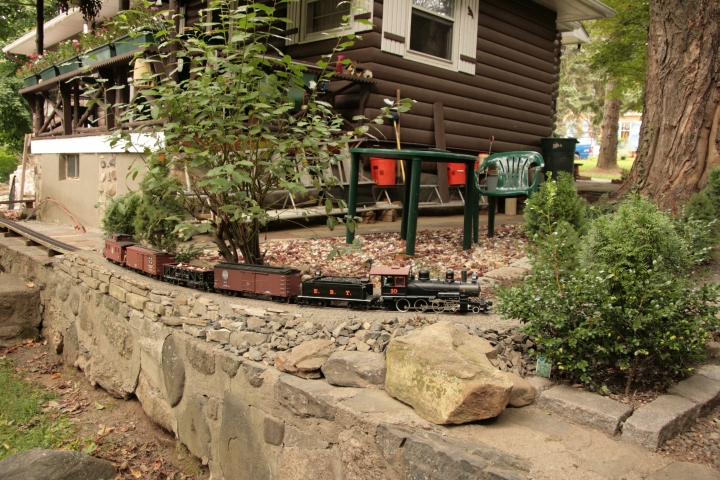
Most of you know I’ve been planning adding a loop for a long time. Initial “hose trials” took place in the fall of 2006 (I think)…

Step one was to build a border to protect the track from my neighbors mower This was completed in the spring of 2008…

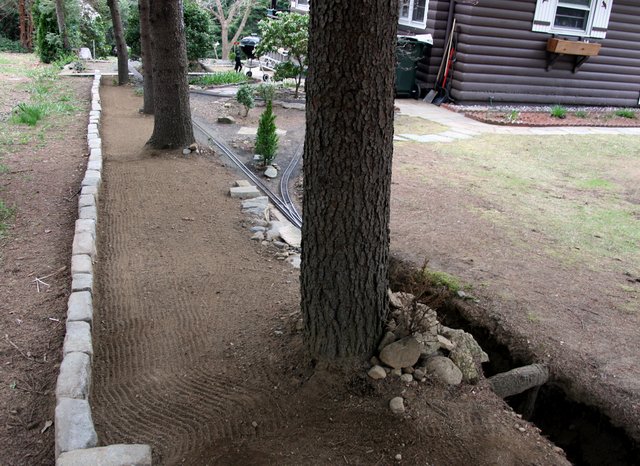
Ladder roadbed trials followed that same spring…

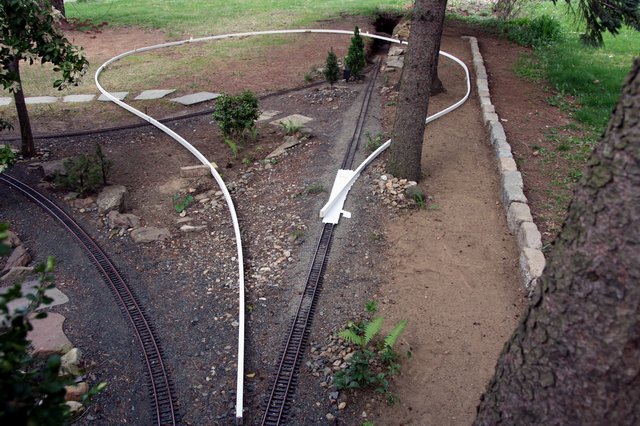
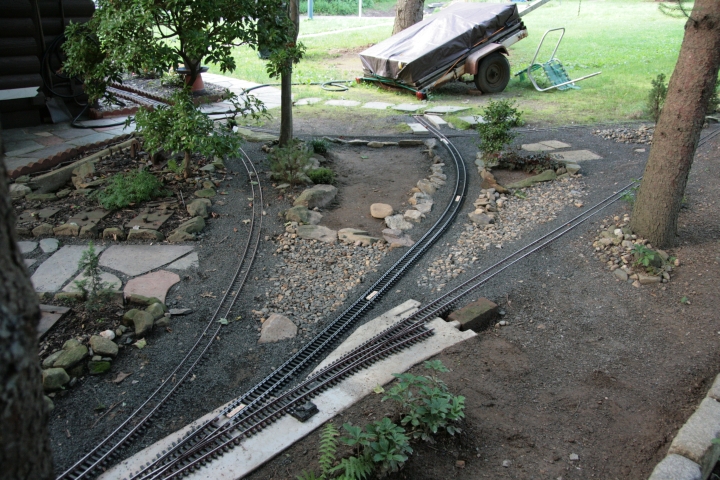
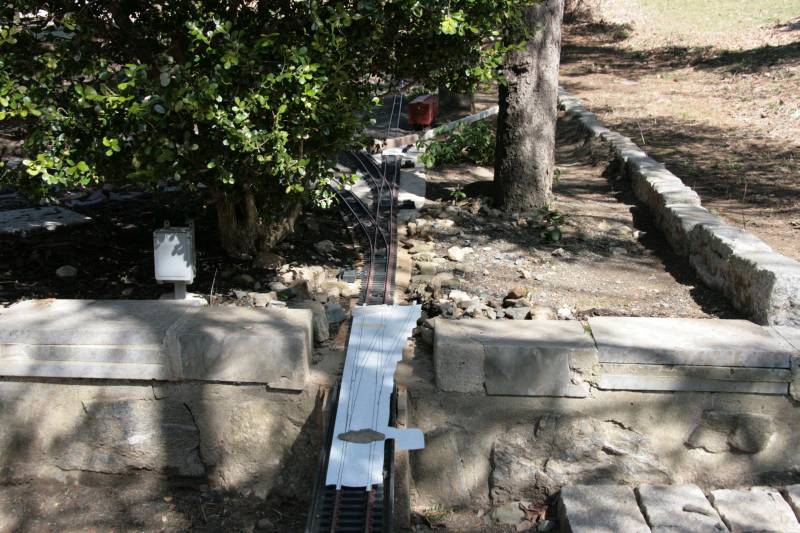
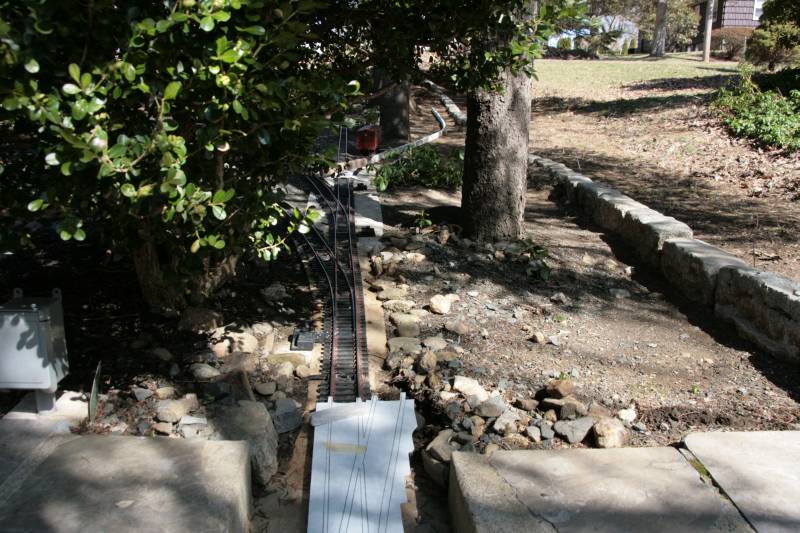
Step 2 - Actual work on the expansion began in Summer 2009 with the installation of a switch pad at Indian Hill Junction and a diamond crossing pad between Deep Cut and Walk…

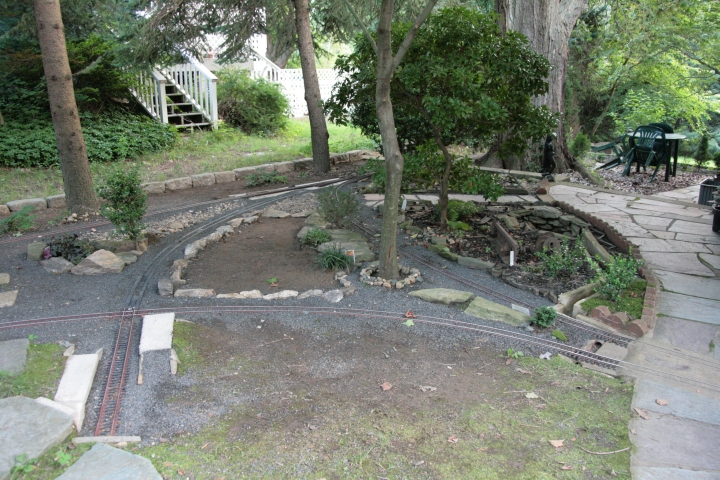
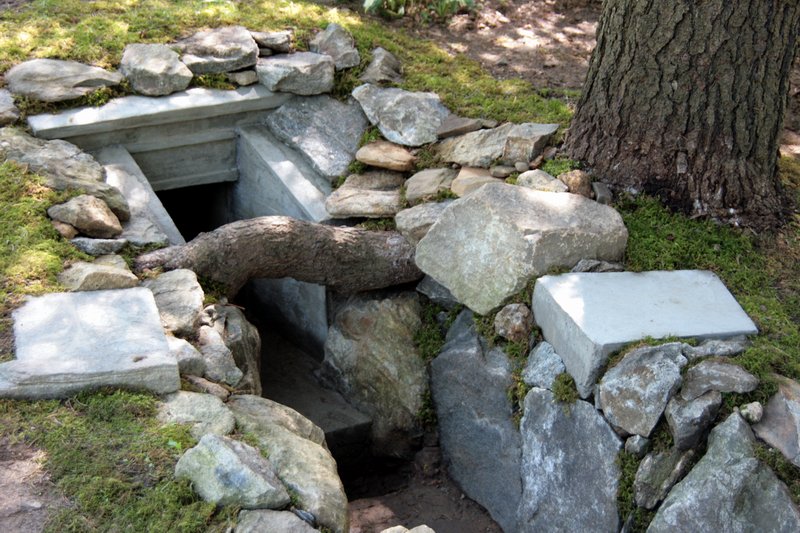
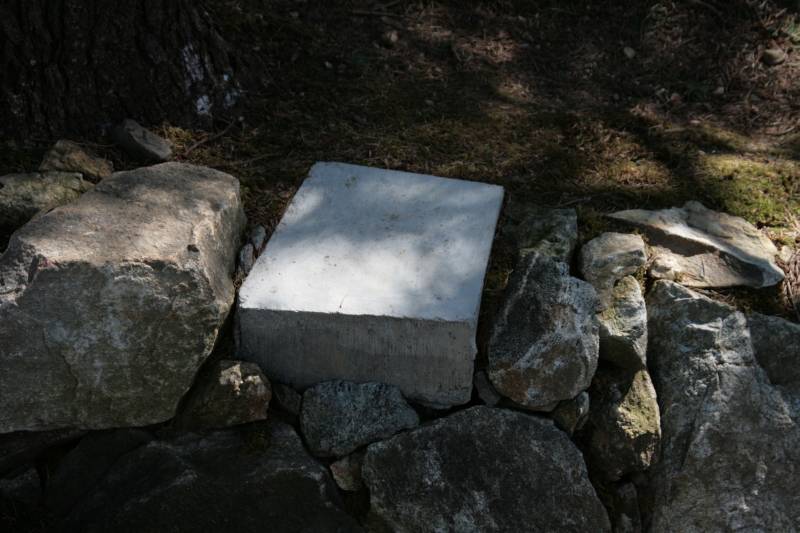
Last summer the project got sidetracked while Deep Cut was rehabilitated with a tunnel and rock cut. Not forgotten, part of the Deep Cut tunnel project was to install the bridge abutments for where the loop will fly over the main…

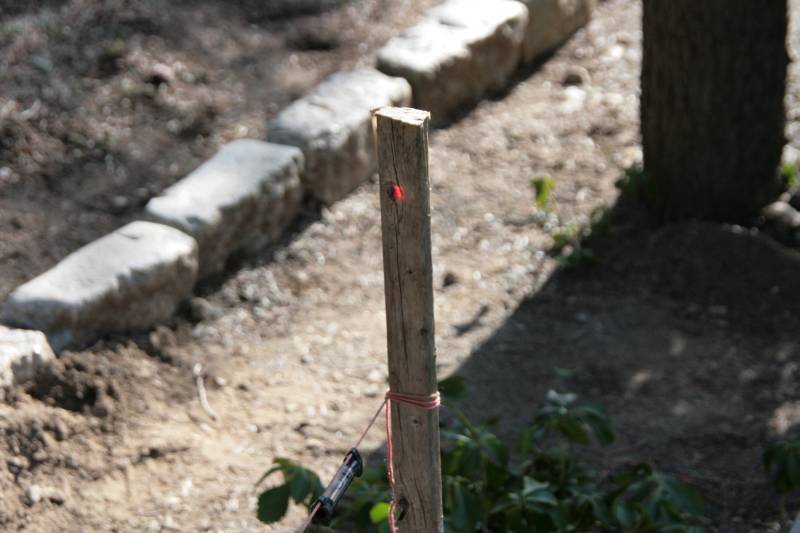
Today, I began laying ladder road bed from the unused switch up the hill toward the bridge. As part of the process I decided to measure the rise so I can set the roadbed to the proper grade. Just before dusk I set up my laser level at the bridge abutment and shot back to the switch. I was shocked at the amount of rise in that short distance: 27.5 inches!!! The run from switch to bridge is exactly 30 feet or 360 inches. 27.5" / 360 = .0764 That’s over a 7.5% Grade :o I think I have no choice other than to lower the abutments. I could probably come down 3 or 4 inches. It’s still going to be over 6% and will require use of a through truss rather than a girder bridge to keep overhead clearance on the main. I’ll verify the measurements before beginning demolition, but I’m pretty sure I have it right.

Welcome to my world Jon. My low loop is at 8% or better

Too bad you already poured the switch pad. You could move the switch back and run the track around the other side of the tree.
You could also extend the loop beyond Deep Cut for some additional footage to spread out the rise.
The “short” side is going to be pretty steep regardless.
Ralph

Just negotiate with your neighbor for right-of-way through his yard for a horseshoe loop to gain altitude. Tell him it’s less for him to mow, and you’ll maintain the garden on it! :wink:

I’d move the switch back another 20’ or so, so the track moves to the right of two of the trees instead of just the one. Swap the order of the switches. The “uphill” switch comes out first, then the one that goes to the diamond, since that’s fairly level from the switch to the diamond. Move the “uphil” switch as far back as you can–even onto the loop if necessary. (Switchcrafters can build you a custom curved turnout.) An extra 20’ of track will knock around 2% off the grade given what you’ve shown.

Later,

K

A couple more swtiches, and 2 sidings, and you have your own ““Helper”” division… :slight_smile:

Before destruction, I think this requires more analysis. What is the objective of the line? Was it for a reverse loop? Continuous running? Serve a certain industry? Are the requirements still there, as they were in 2006? Has the market or your desires changed? Railroads have to follow the market. Don’t be led by government regulation, that that was what the money was allocated for, so now we must build it.

Thanks for all the suggestions. Let’s be sure we are talking about the same trees. Heading up hill, there is a row of trees on the right. Tree #1 is show at the far right in the following picture. The original plan when the roadbed test was laid out was to turn right (up) just past the second tree, before the third tree…

(http://lsc.cvsry.com/Expand12-640.jpg)

When the switch pad was poured, it was decided that it would be possible to get around the right of that tree, so the switch was moved back to where it is now, beyond the first tree leading to the right of the second tree…

(http://lsc.cvsry.com/NewSw-51-720.jpg)

Unfortunately since the switch pad is concrete and formed for either left or right exit, swapping up/down switches isn’t really an option without some major work. Moving back far enough to get around the first tree might be an option. I need to measure this area today to be sure it would not require a new cut through the wall…

(http://lsc.cvsry.com/SteamNSnow_15-640.jpg)

If that works, I’ll leave the existing switch in place and put an industry there :slight_smile: Another option is to pull out the abutments, they are only small blocks, and lower them as much as possible. Perhaps a combination of both might be the best idea. I still find it hard to believe that there is so much rise here. I’m going to double check my measurements today. To answer Ric’s question - the original plan was to allow for a continuous run for battery or steam. This will require spring switches, both indoors and out. I think this is still a valid goal. When not running loop-to-loop, the outdoor loop would serve two industries and be blocked in the middle too force operating from either end as independent sidings. For the continuous run, I’ll probably never attain unattended roundy round because of existing grades, so I might be fighting a battle for no reason. I can always go up the long way (to the left) on a more shallow grade then come down the steep side.

How can something so simple be so complicated?
I have a similar situation for a loop line that WILL get done this year.
Good luck, Lou

Rise is deceiving. Remember last spring when we were doing both the uphill from Majestic, and the lower loop? We had to do a bunch of fill to get the grades to around 3%, some of them were 10!

your other option Jon would be to pack up the track in a box and send the the track to me so I can expand. Tyen you wont have to worry about what to do. LOL

Jon, well there is the Stihl chainsaw and the Bobcat Skidsteer… (just kidding) Man, now I do not feel alone trying to figure out how to keep the ruling grade 3.5% or less.

John

John - Unless you have tons of space, or no natural grade to speak of, it aint easy :smiley: Even Andy who does have tons of space has a difficult time in places. All part of the fun :slight_smile:

Thinking about Kevin’s first option; negotiate ROW with neighbor; When I first started my neighbor at the time would have loved it. He was always hanging around talking while I built stuff and loved to see the trains run. Then he sold to his step-son who was kind of a jerk. We got along by not speaking much. The jerk step-son dumped his nice girlfriend in favor of a bimbo with kids. She talked him into moving in with her, so he rented the house to the family from hell. 3 Dogs baking constantly and crapping on my lawn; parking in the only lane of the street in the winter, junk all over the yard and his leaf piles from last fall are sill blowing into my yard. Expansion across the lot-line won’t be happening. - in fact that block border may become a 10 foot chain link / barb wire fence :o

I feel your pain Jon…I totally understand!

David Russell said:
I feel your pain Jon.....I totally understand!
Didnt you mean your neighbors feel Jons pain. LOL

Actually Shawn…The Rooster nickname came about from bad neighbors!

Spent the day checking measurements, looking at options, drinking some beer and running some trains. There are several viable options. For starters, I double checked the measurements using a string line & level. The string says that my laser level is off by a good 5 inches over 25 feet…

(http://lsc.cvsry.com/Expand_20-800.jpg)

That difference alone reduces the grade to 6.25% if I change nothing. That may be acceptable. For positioning switches I find working with a paper template makes things easier. Now that I have a good source of free PVC board I might upgrade these templates to 3mm PVC. In any case, Kevin’s suggestion to move the switch back to allow getting to the right of the first tree doesn’t quite work physically…

(http://lsc.cvsry.com/Expand_15-800.jpg)

Without modifying the bridge (much) or enlarging the wall cut, I could move the switch back 10 feet. I can’t get around the right of tree #1 from here, but there is enough room to run parallel to the main until I’m past the tree…

(http://lsc.cvsry.com/Expand_16-800.jpg)

This option adds 10 foot to the run, but also adds 5 inches to the rise. Moving the switch alone results in a 5.73% grade. Just over .5% reduction in 10 feet of track. Probably not worth the cost of the track. Back up at Deep Cut I put a plank between the abutments. After this picture was taken I positioned my tallest piece of rolling stock - an Accucraft short caboose. I measured 5.5" of clearance from the top of the stack to the bottom of the deck…

(http://lsc.cvsry.com/Expand_18-800.jpg)

I also looked at the abutment pads to see how much they could be lowered without moving any of the BFR’s…

(http://lsc.cvsry.com/Expand_19-800.jpg)

I can easily pull the existing pads and re-pour at least 3.5 inches lower. That would result in 2 inches of clearance for my caboose and/or space for bridge girders and a reduction of the grade to 5.28%. This looks to be the easiest option to implement and the one I will follow for trials. If I find the grade too steep, I can pull the switch back 10 feet to gain that last .5% and net out at 5%. So now that I have a plan, I can continue with roadbed :smiley:

Sweet…got ya’ page 2!
:slight_smile:

I can easily pull the existing pads and re-pour at least 3.5 inches lower. That would result in 2 inches of clearance for my caboose and/or space for bridge girders and a reduction of the grade to 5.28%. This looks to be the easiest option to implement and the one I will follow for trials. If I find the grade too steep, I can pull the switch back 10 feet to gain that last .5% and net out at 5%.

Did somebody say “switchback”? Hard on continuous running, but lots of fun.

Jon,

Is the opposite direction, standing on the wall, where the steamer is pulling through, all down hill toward the lake? Any thoughts of a patio wall on that side? Great place to ready a steamer and/or get great shots.

Ric Golding said:
Jon, Is the opposite direction, standing on the wall, where the steamer is pulling through, all down hill toward the lake? Any thoughts of a patio wall on that side? Great place to ready a steamer and/or get great shots.

Yes. Let’s see if I can find a shot that is from further back… Can’t find one that shows exactly what I want. Hope these will do. In the next picture, the steamer position you refer to would be directly behind the big tree. You can just see the retaining wall at top left, near the base of the tree.

(http://lsc.cvsry.com/Wall_03-720.jpg)

This is the same area, panned about 30 degrees left…

(http://lsc.cvsry.com/SummerRun2-004-720.jpg)

On top of the wall, track is at about waist level. It is a good spot to get pictures. Most of my better recent ones were taken in that area…

(http://lsc.cvsry.com/Post2/FirstRun2011-2.jpg)