Large Scale Central

Mad Mik '26: Beyond Roundydome

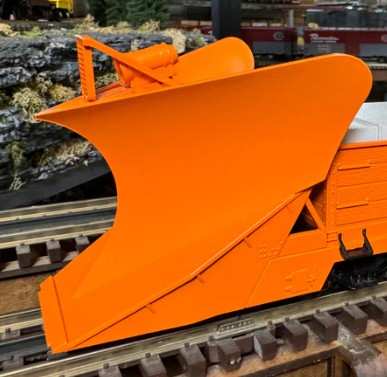
Disclaimer: My title should in no way suggest or imply that Mik was mad or angry or anything other than a very nice person. I was not around the forum when he was active, so I have no personal experience, but for all of you to compete every year in his honor, he surely must have been a super likable individual. My title is just going along with the theme of my build, which is a “war rig” in the style of the Mad Max movies. Here is my napkin drawing.

I have an older LGB F7 that has significant front end damage (I got it off the auction site cheap) that would be a good donor for a heavily armored locomotive. It already has a Piko RC receiver, LGB diesel sound module, LED lighting, and a battery.

Can’t wait to start building.

1 Like

Two trains enter, one consist leaves! :grin:

WITNESS ME BLOODBAG!!! That’s going to be all SHINY AND CHROME!

Put a inflated glove on the back and it will have GHA built in :thinking:

It could be a tethered, floating GHA observation balloon for the rig sort of in the vein of this guy
flying car gyrocopter

Day 1 of the build, off to a decent start. First thing was to paint a few war boys who I didn’t manage to get a pic of before putting them in place.

Next, I measured how much room I needed on the back of the platform for the crane I had, which is from an LGB toy train. Turns out about 6 inches is the minimum to allow the crane counterweight to clear.

So I needed to cut 6 inches out of the middle of the body shell. Big gulp, I have never done this before. I chose a spot that would preserve roof detail, the round portholes, and the rear doors. I marked the cut lines with a level and square and then got out the Dremel. It turned out ok, I think, only a few mm gap on one side to fill.


Then I took apart a VW combi and painted the shell, and painted the crane. Next comes more fitting the train shell and major parts.


Got a little more done yesterday. I had to cut down the back wall of the train shell and door bellows. Once cut, the shell fits nicely on the chassis.

Got the shell painted, first coats, and started to paint the chrome on the roofs of the various bits. The chrome paint takes a very long time to cure, even in the warm weather we’ve had this week. It hit 80 here on Saturday. Still have a good bit of painting to do. I will chrome the side vent panels next.

I decided to do a double crows nest on the top instead of an articulated saw. I plan to put some decking between them and maybe have some extendable “boarding” gangways.

1 Like

I am trying to figure out what kind of plow to attach to the front of the rig. The movie rig had a super cool brushguard / plow combo.

I am also considering something more scooped and elevated like a snowplow.
plow

I will most likely build both and see what looks mo betta

You should throw in some chrome naked lady mud flaps!

We’ll see how much of the $35 is left!

A little more progress today, a bit chilly in the shop but no time to waste. I cut a couple of side pieces and a center bar out of brass stock. These were shaped to fit underneath the handrails for the forward hatch.

I attached it to the front of the locomotive, along with an ABS backplate, with some micro fasteners.

Then some vertical ABS bars were added on top of a bottom plate. It looks like it may give you a close shave for sure :sweat_smile:

1 Like

A bit about my process for the pilot- I printed some supposedly 1/4 inch grid onto some full sheet labels. I guess it was not sized right on my print because when I checked with a ruler it was not correct at 1/4 inch. But having the lines is helpful for drawing out the parts, which I freehanded.


Then I slapped the label on the sheet plastic and cut it with the mini scroll saw.

I filled in the full width of the pilot and then found a killer triceratops skull to mount up front.

I also made a wrecking ball for the crane. I live about 20 minutes from the Augusta National and found this ball on a local municipal course.

Started to do some detail painting. The skeleton arm and “Valhalla” are just laser printed on weatherproof shipping labels.

3 Likes

More work on the sharp end of the business. I painted the tines to look as though they had been sharpened, I used a bright silver for the very edge and a darkened silver for the rear part of the grind. Still a little paintwork to do but overall pretty happy.

I found a 20 pack of tiny human skulls for $7.80, used two so far at $0.39 each. The two dino skulls were had at 30 for $9.50, used two so far at $0.32 each.


I also framed the rear of the chassis around the crane with cedar, made a little tender deck behind the crane, and got the combis mounted up top.

3 Likes

Needs some streaks and spatter of red. :skull:

That thing is WILD!
I can see the wrecking ball swinging side to side and taking out track side objects as the rig tears down the track.

Thank you! Just getting started, more to come :innocent:

1 Like

Jim, when all is finished, I hope you can stage some action shots of this bad boy at work!

I can see the video opening storyboard:

#1 This is the locomotive… [tight shot of cab]
#2 That you do NOT… [tight shot of pilot]
#3 Want to visit your layout. [tight shot of wrecking ball]
#4 It is… [text only]
#5 The VALHALLA 2012. [broad shot of loco, from track level, semi darkness, back-lit]
#6 And it’s COMING to YOUR TRACK. [text only; screams]

:smiley:

So much damage that the Blue Crew could not fix it. :joy:

Ya’ gotta fill the locos fuel tank with sand!

:rofl: :rofl: :rofl: