Large Scale Central

Laser Cutter Install Log

The laser came in today, and here she be.

And so starts a long term project to…

  • Uncrate the critter and somehow horse it down into the spot I have picked out in the basement
  • Make ventilation system that is effective and quiet
  • Modify it for things like an ammeter, water temp probe, chiller, better vent fan, etc.
  • Start learning how to use it

This won’t be a front-burner thing for me, due to work and other issues at present. But I wanted to start sort of log on the process, hoping someone else might eventually benefit.

Thanks for being there,

===>Cliffy

Looking good there Cliff. Of course the only way that the rest of us are going to benefit is for you to get your machine up and running so you can cut out things for us. I would love to venture into a laser but I can’t justify the cost as long as I’m not producing anything on my CNC Router right now. What design software are you going to be using. My machine runs on Mach 3 and my design software is Vectric Pro. The pro version allows me to cut in 2D and 3D. They also offer just a 2D version that is cheaper.

I’ll be watching!!

Thanks Chuck, I appreciate it. CNC router huh? what make / model?

I’m an old AutoCad fart, started with it in '86. So that will be my 2D workhorse for nesting / prepping the linework. But as long as I have access to Solidworks from my workplace, I’ll generate the 3D models from that and pump the 2D views out to Acad. As far as the machine-side software goes, that will be part of the challenge to get the thing running (should have added that as a bullet point to my list, it’s a big one).

Thanks for the tip on Vectric, hadn’t heard of that.

Hi Cliff, I built my machine from parts offered by a company called CNC Router parts out of Washington. Here’s a link to my build log on LSC. http://www.largescalecentral.com/forums/topic/20632/my-cnc-router-build.

It has a cutting area of 4’ x 4’, with 6" of clearance under my “Z” axis for milling. I originally had a commercial machine for my cabinet shop but I had to sell it after I got sick and had to medically retire. But I still had all my software and computers so I decide to make another machine so I could continue to make things and have a little fun.

Well Cliff you finally got it, fun is just around the corner, the most fun toy/tool I have ever purchased

I will enjoy watching this thread.

Dennis

Should be interesting.

I use DesignSpark (free download) for both 2D and 3D and it extremely easy to use, once you get the hang of it.

I see where these ebay laser cutters use water and chillers to keep the laser tube cool. But on the Epilog I use, I see no water attachments or chillers being used. When I turn it on (just one power switch on the unit) the fans come on, but I see nothing more for cooling. (http://largescalecentral.com/externals/tinymce/plugins/emoticons/img/smiley-undecided.gif)

Chuck, thanks for the link. Very impressive heavy-duty machine, and from the build pics you obviously know what you’re doing. Wow.

Hi Dennis, thanks. Yes, at long last, the elephant is in the garage. Getting her down to the basement will be interesting, I’ll post pics as I’m able. Thanks for all your insights.

Todd, DS sure seems like a great tool. I’ll have to look into it more. For chillers, maybe the Epilog tubes are probably much more efficient / higher quality. Maybe they just don’t need it?

I bought a chiller, wanting something more active than a circulating pump. But when it came this week, I noticed it ran on 50hz / 240v – with a standard US plug! So I had to ship it back (to a California warehouse) for a refund.

(Post to check the notification box and make it stick. I’m always forgetting to do that.)

I should have said earlier that many folks helped me think through a lot of stuff on this subject, on this thread:

http://www.largescalecentral.com/forums/topic/26476/laser-cutter-questions

Thanks for your help guys.

Today was awesome. I thought I would have to work, but the need evaporated. And the weather: glorious! 74 degrees in mid February, in Maryland!

So I began the crate move from the garage to the basement patio. The cutter is supposed to go on the other side of that little window.
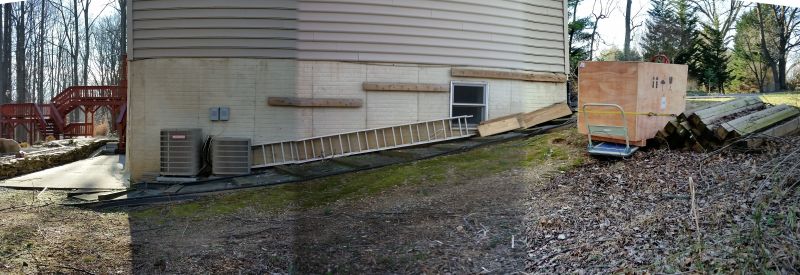
You can see why I was worried about this phase; I had late night visions of the crate rolling down onto a neighbor’s car. So I had my other neighbor’s number on speed dial should things turn dicey. But things went OK. Though the crate’s back end was free-wheeling (blocked and strapped to a dolly), the soft-ish soil turned out to be a natural brake for the cart’s small wheels. I went slowly, and gradually dragged the crate down to the patio.
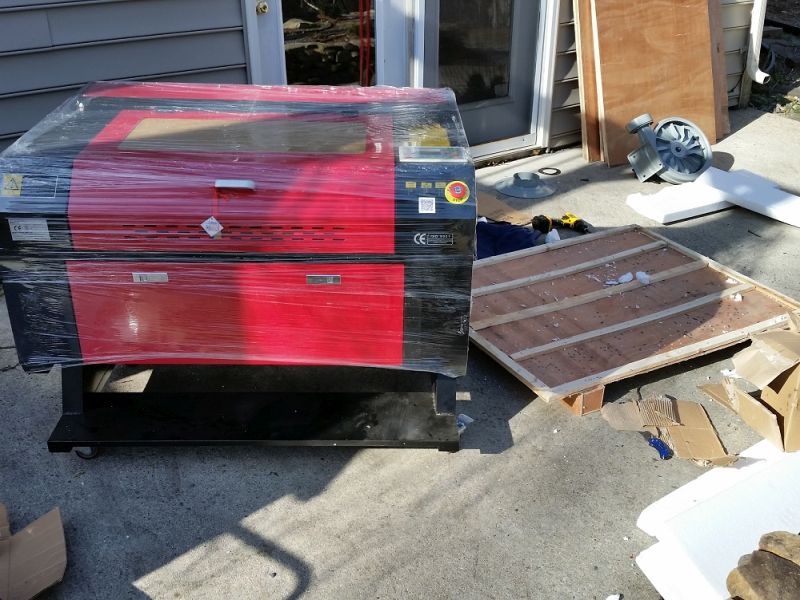
Uncrating was easy, except that they packed the fan (the gray thing in the right background) between the legs – leaving no way to get it out. So I had to partially disassemble the fan (as shown) to get it out. Then came moving the cutter. I was able to lift one end of it at a time (while pushing or pulling) to get off the crate base, and then over the door threshold.

It was a tight fit! The cutter (35" wide) was pressing on the weatherstrip to either side of this 36" nominal door.
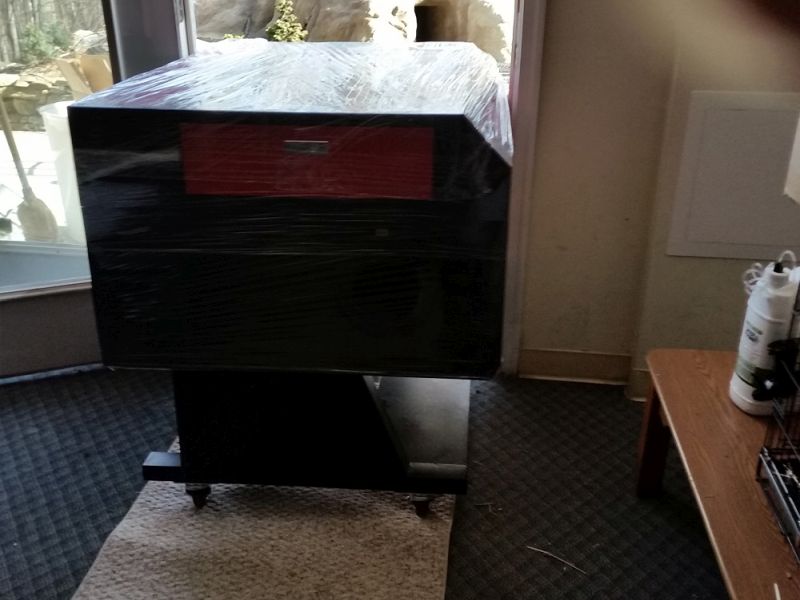
Here’s the corner it’s supposed to live in. My wife graciously donated this corner today after Plan A fell through (due to narrower doors than first thought, long story). As it turns out, this corner, being furthest from daytime activity above, is better suited in regards to equipment noise.
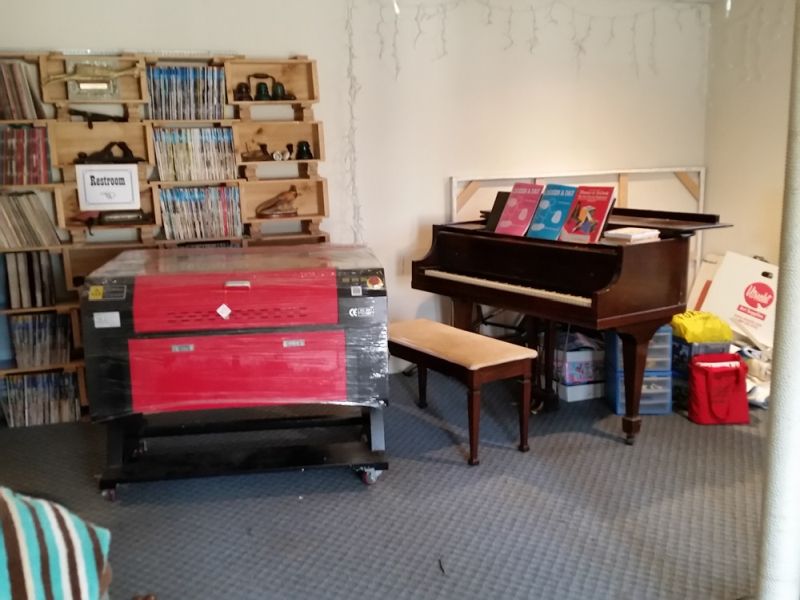
I discovered today that Maryland had its own black hole, and it was located in our basement, under the rear end of that piano. Three of my four kids have moved out; and this was the last refuge of a lot of their endless poo-poo which kept emerging from that corner. After a successful early morning and rapid haul of the beast, this enormous cow-pie required most of my day to resolve. But eventually things moved along, and the corner got cleared.
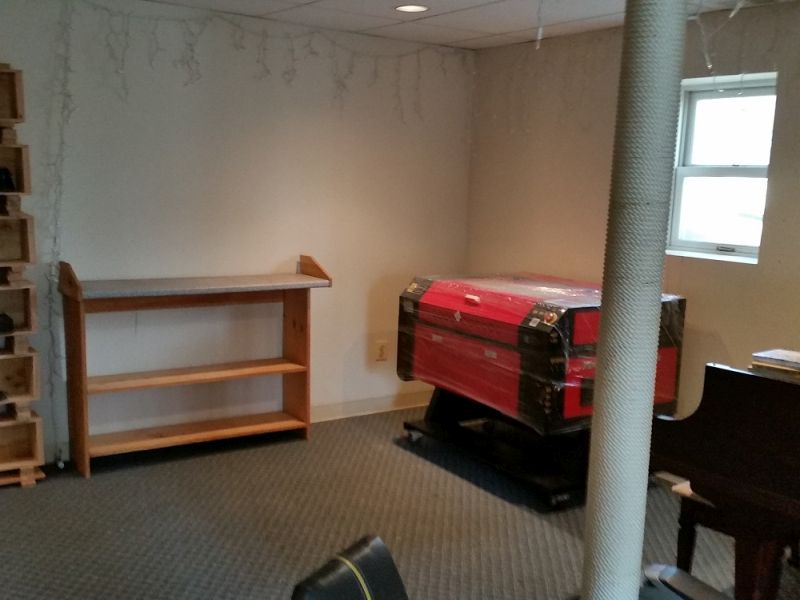
The Christmas lights around the ceiling were hung by my oldest daughter, years ago when the basement served as a rec room for the kids. So, I thought this might be a good time to plug the lights in… Kinda weird though; the phrase “Laser Chapel” definitely came to mind.
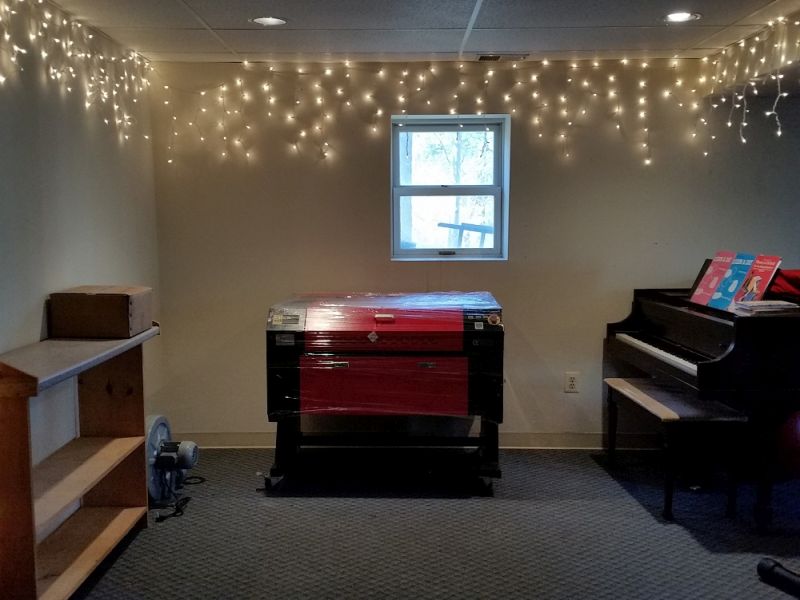
Well, that’s it for phase 1 of this install log. My back is sore, and I have a long way to go. But I’m very relieved this part is over.

===>Cliffy

[edited on 2/25 to re-insert the pics][and again on 3/26 after I accidentally blew away my photo folder]
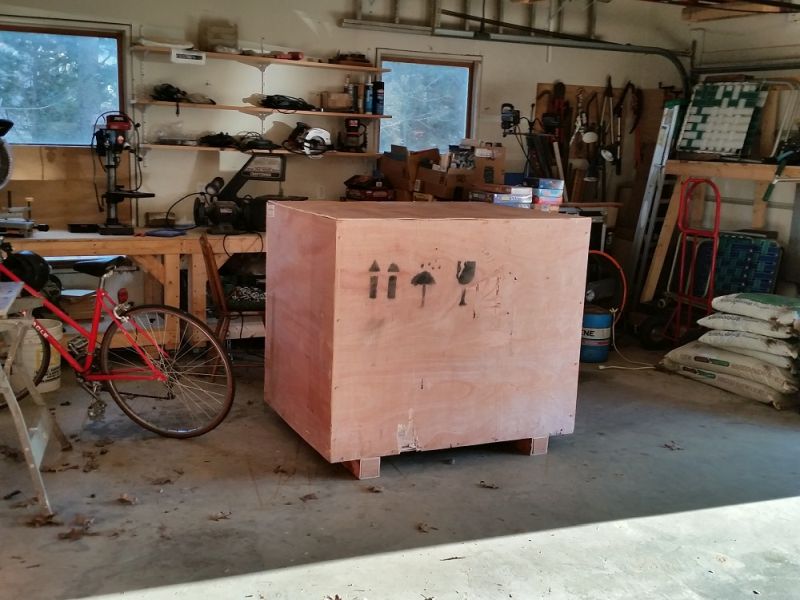
Ive moved things into and out of the house with as much clearance. JUUUUUUST fits. My next shop space will have double entry doors for just such an occurrence.

Looking forward to following this. A laser cutter is on my list eventually, along with a lathe and mill.

Great progress, Cliff - looking forward to hearing about your first cut!

dave

Thanks very much, gentlemen! And I’m looking to talking with both of you again at York!

The next step will be solving the ventilation thing. I explained to my wife, Linda, that I’d need to run a duct hose up through the ceiling and out the wall. But she said, Why not use the window? Well, if she’s ok with that, I sure am!

So I’m thinking about an insulated wooden box that:

  • Clamps into the lower window half, with a weatherstrip seal
  • Has a hose port for the outgoing air

But, since I’d prefer to not suck the heated air out of the basement in the winter, an additional requirement:

  • Has a hose port for the incoming air (requiring an inlet plenum box mounted on the cutter, where its inlet louvers are)

Eventually I’d like to put the fan outside, I’m sure it’s a screamer. But that would require a waterproof mini-shed-box, extra wiring, etc. Until then, maybe I can make a base for the fan that allows me to set it outside in decent weather, or inside otherwise. Not sure.

Edit: I just unpacked the bits and pieces, and from a first visual inspection am quite impressed with the design and materials that went into this.

Another edit: maybe a box on the (broad) window sill can contain the fan, have sound-deadening foam on the inboard side, and be weather-resilient on the outboard side… like a sound-proof mini-shed in the window, vs. on the ground outside… not sure, long way to go.

Cliff

you want if possible to place the fan outside and to always try to suck on the pipe and not blow, suction prevents exhaust air from exiting

any type of hole. If there is any type of hole on the suction end, it will actually suck in fresh air, into the hole and down the pipe and out the fan.

Mufflers are pretty easily made, My wife had a business in our basement for a year, running two lasers, underneath our bedroom. We had one fan pulling two lasers, had a muffler on the fan, could not hear it inside the house.

Thought, exhaust a 4" pipe out window, and bring another pipe in for remake air, make sure your blower blows away from the inlet, so no exhaust air can come back into through make up pipe, you could filter it too.

This way what your fan sucks out, fresh air comes in real close to your laser, replacing it, not sucking out your conditioned air.

I use a Grizzly dust collector for exhaust fan, easy setup.

Dennis

Cliff,

Dennis has given you some very good advice.

Remember most excessive fan noise is from trying to push to much air (cfm) through to small a pipe, creating excessively high velocities and static pressures.

I can’t tell by looking at your pictures if the cutting area is contained within a hood, if it is then your set up instructions must have some information on venting requirements, do they?

I don’t know how much air you are attempting to move across your cutting table but a rule of thumb for hoods is 100 cfm per square foot of opening so if you can contain your machine by enclosing 2 or more sides , top and bottom, the less air movement you will need for capture velocity of fumes. This will usually mean a smaller, quieter fan.

Your window idea is very workable, remove the bottom sash and replace it with a solid panel. Duct the exhaust air out and up several feet and elbow it out horizontal or slightly down. Bring your make up air in through the panel from a turned down elbow and through a filter bank of at least furnace filter quality. Remember the filter has to be much larger than the connecting duct work because of static pressure loss. If you can’t make a direct connection to your machine it should be as close as possible to avoid exhausting of space conditioned air.

Another thought on the exhaust and intake, make sure they are screened with at least window screen mesh also remember a screen like that blocks about 50% of the air flow so they have to be larger than the duct.

For fan sizing you have to first calculate the quantity of air you need to move and the static pressure at which you wish to move it, that will help you select a fan within the proper curve to do the job. Then you have to consider the Sone rating of the fan you want to use. Usually the better the sone rating the more expensive the fan. With the machine being within the house the Sone rating is really important, you want the lowest you can get no matter the price.

Lastly fumes, are they going to be corrosive or explosive if so it ups the ante on the cost of duct work and fans. Always remember in case of an accident you want everything to be absolutely building code perfect for the insurance investigator(http://www.largescalecentral.com/externals/tinymce/plugins/emoticons/img/smiley-frown.gif), I know but it is important and has to be considered.

Looking forward to enjoying your new toy with you.

Rick

Thanks very much guys!

To clarify, I was describing (poorly) an insulated box that contained the fan, sucking from the machine and ejecting the air outside. And possibly having another port for the makeup air (which I called “incoming”). So I think we’re headed in the same direction, with me only vaguely so.

Dennis, I’m now agreeing with you that the fan should just be outdoors. I’d like to make a shelter for it, and not run the risk of forgetting it was out there when the rain starts. I expect it to rust up quickly, but I’l like to give it a fighting chance. And run proper wiring, etc. Maybe there’s a small Suncast box that could be modified, not sure.

Thanks for all your insights Rick, esp. re the filters & screens. The “window unit” would be a logical place for that… Yes, the unit is totally enclosed with the vent outlet on the left side and a group of makeup air louvers on the right. So when I mentioned an incoming air plenum, it would be a box mounted over those louvers. The unit came with a centrifugal blower/fan, and about 12’ of flex duct, so I’m assuming they sized it properly. At least I hope so.

I’ll try to sketch something up, and see what you think. Thanks again!

Cliff

I just read that the fan is rated for 18 cubic m / min, which I believe works out to be 636 cfm. I hope the louvers on the side of the cutter have enough opening, I don’t want to burn the fan motor up (as happened in a case I heard about, for that reason).

mine has been outside for years, mine is the TEFC motor and small dust collector fan, I have about 3 times the need air movement than they Epolog

recommends,. But i get little visual smoke inside the unit too. This fan worked two units for years together, now just one. I say do not over think it.

Dennis

Dennis, thanks for your further insights. Just so we’re clear, the fan I was describing is the one they sent from China with the cutter, which may or may not have the quality of your Grizzly. But, we’ll see. (http://www.largescalecentral.com/externals/tinymce/plugins/emoticons/img/smiley-wink.gif)

Here’s the “window unit” I’m thinking of. The box would be 1/2" thick plastic, with a hinged lid on the indoor side.

The green hose is makeup air, which pulls air from outside through a screen on the undersde of the box, then through a filter area. It terminates at a box that would rivet over the intake louver area.

The yellow hose is exhaust. It connects to the unit’s exhaust port and then just passes though the box to a remote TBD fan enclosure.

The above pic shows the screen area. I might make it more of a box to increase the surface area. We get a lot of leaves, and this is near ground level.

Here’s the inside view again, with the lid lifted up.

The right compartment with the exhaust line would be packed with insulation. Filters on the left slide in from above. In the winter, when I’m not using the system, I’d drop in a thick block of foam behind the filters.

Aesthetically, my wife isn’t going to like the look of this. So on the inside, I’ll spray it with Krylon Fusion to match the walls… put a plant on it and call it a shelf…

[edit] Some spring-loaded dampers like these might be a good move, to prevent outdoor air moving freely through the system when the fan isn’t on.

https://www.amazon.com/dp/B00725XX8C

Thanks for viewing,

Cliff

[edited on 2/25 to re-insert the pics]