painting the frame is going to be the death of you isn’t it. Who would have thought that was going to be your issues.
Yep. When I was a working stiff, not all that long ago, I was a master of the rattle can. But trying to do it in the garage with the door open in freezing temps in the fading late afternoon light wasn’t my best effort. This morning the redo went a little better. Still far from perfect, but I’m wanting to move on so I accepted it.
For previous Mik’s I had my heated and well lit paint room at work available to paint my projects in.
Making progress today - I’ll post an update and an opinion request later.
Big photo dump and a lot of progress today. As noted previously, the frame ends (sills) got another coat of paint this morning. While that dried I worked on a few more attempts to get the front skirting to look right to me. I’ve been experimenting with warming the polystyrene and bending it around the box. It’s easy to overheat and get a sag. This I think is attempt #3…
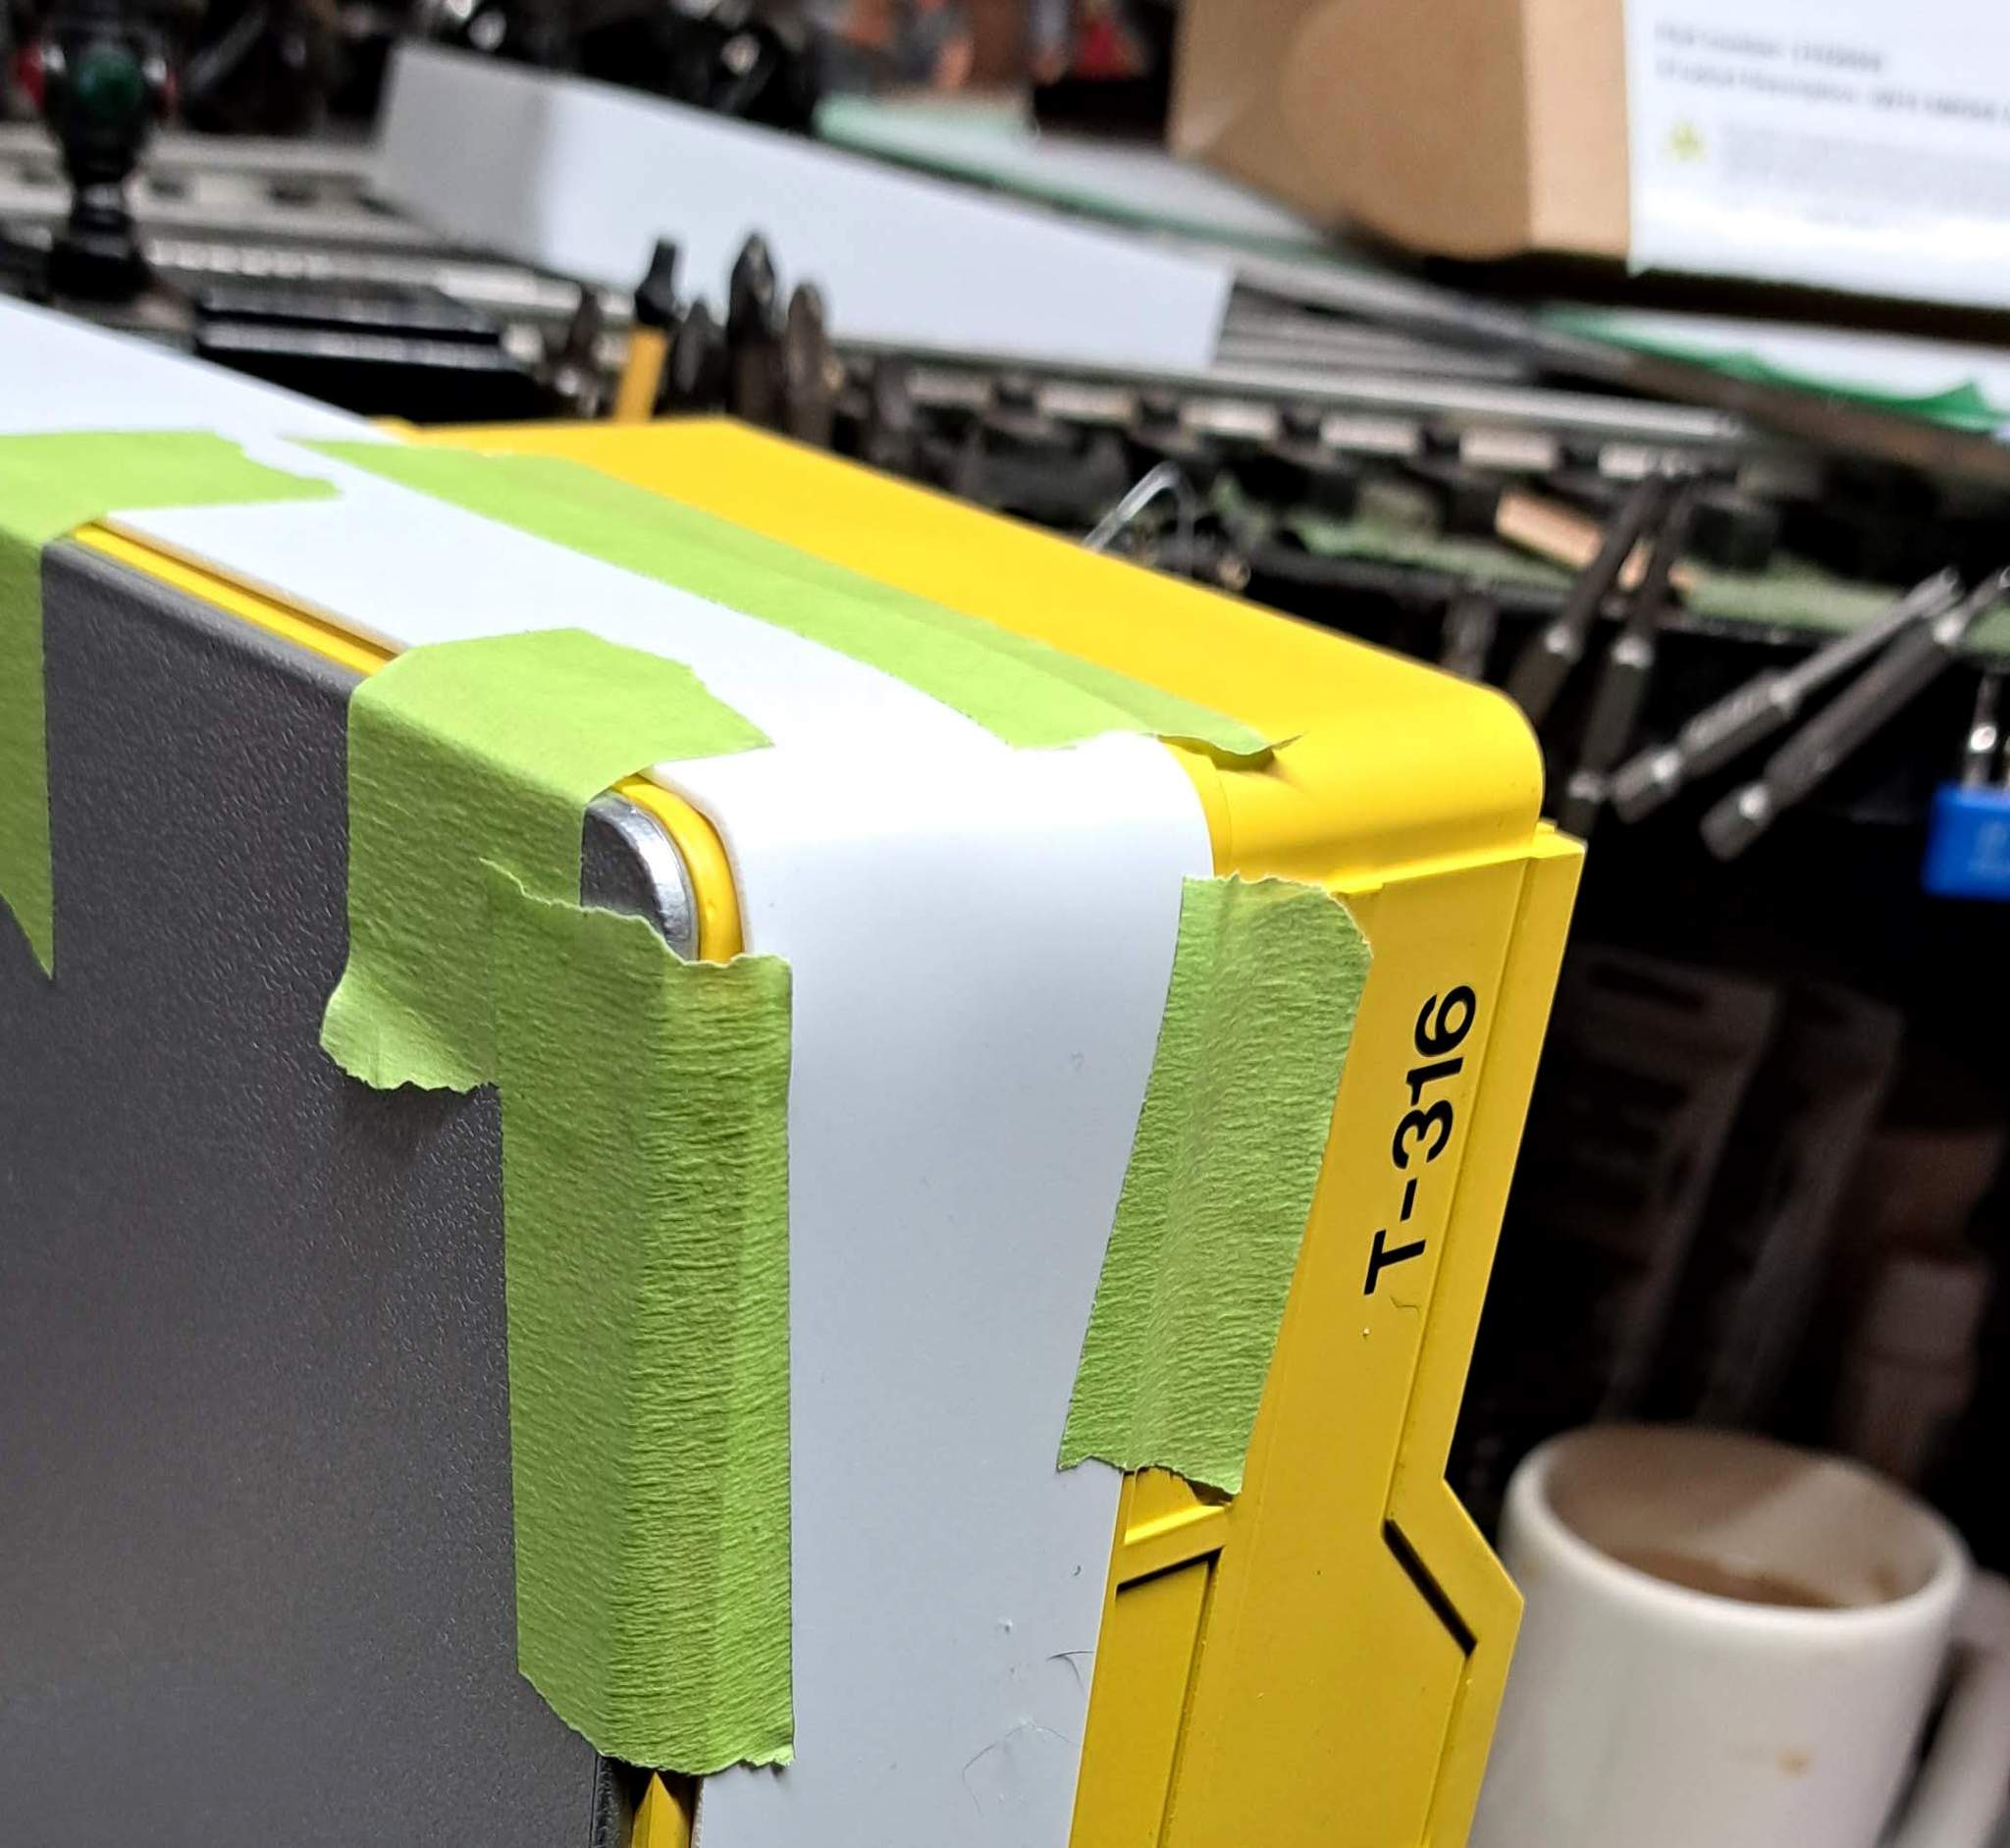
I use a small hand held heat gun that is VERY hot to warm from below, moving it back and forth until the styrene moves easily…
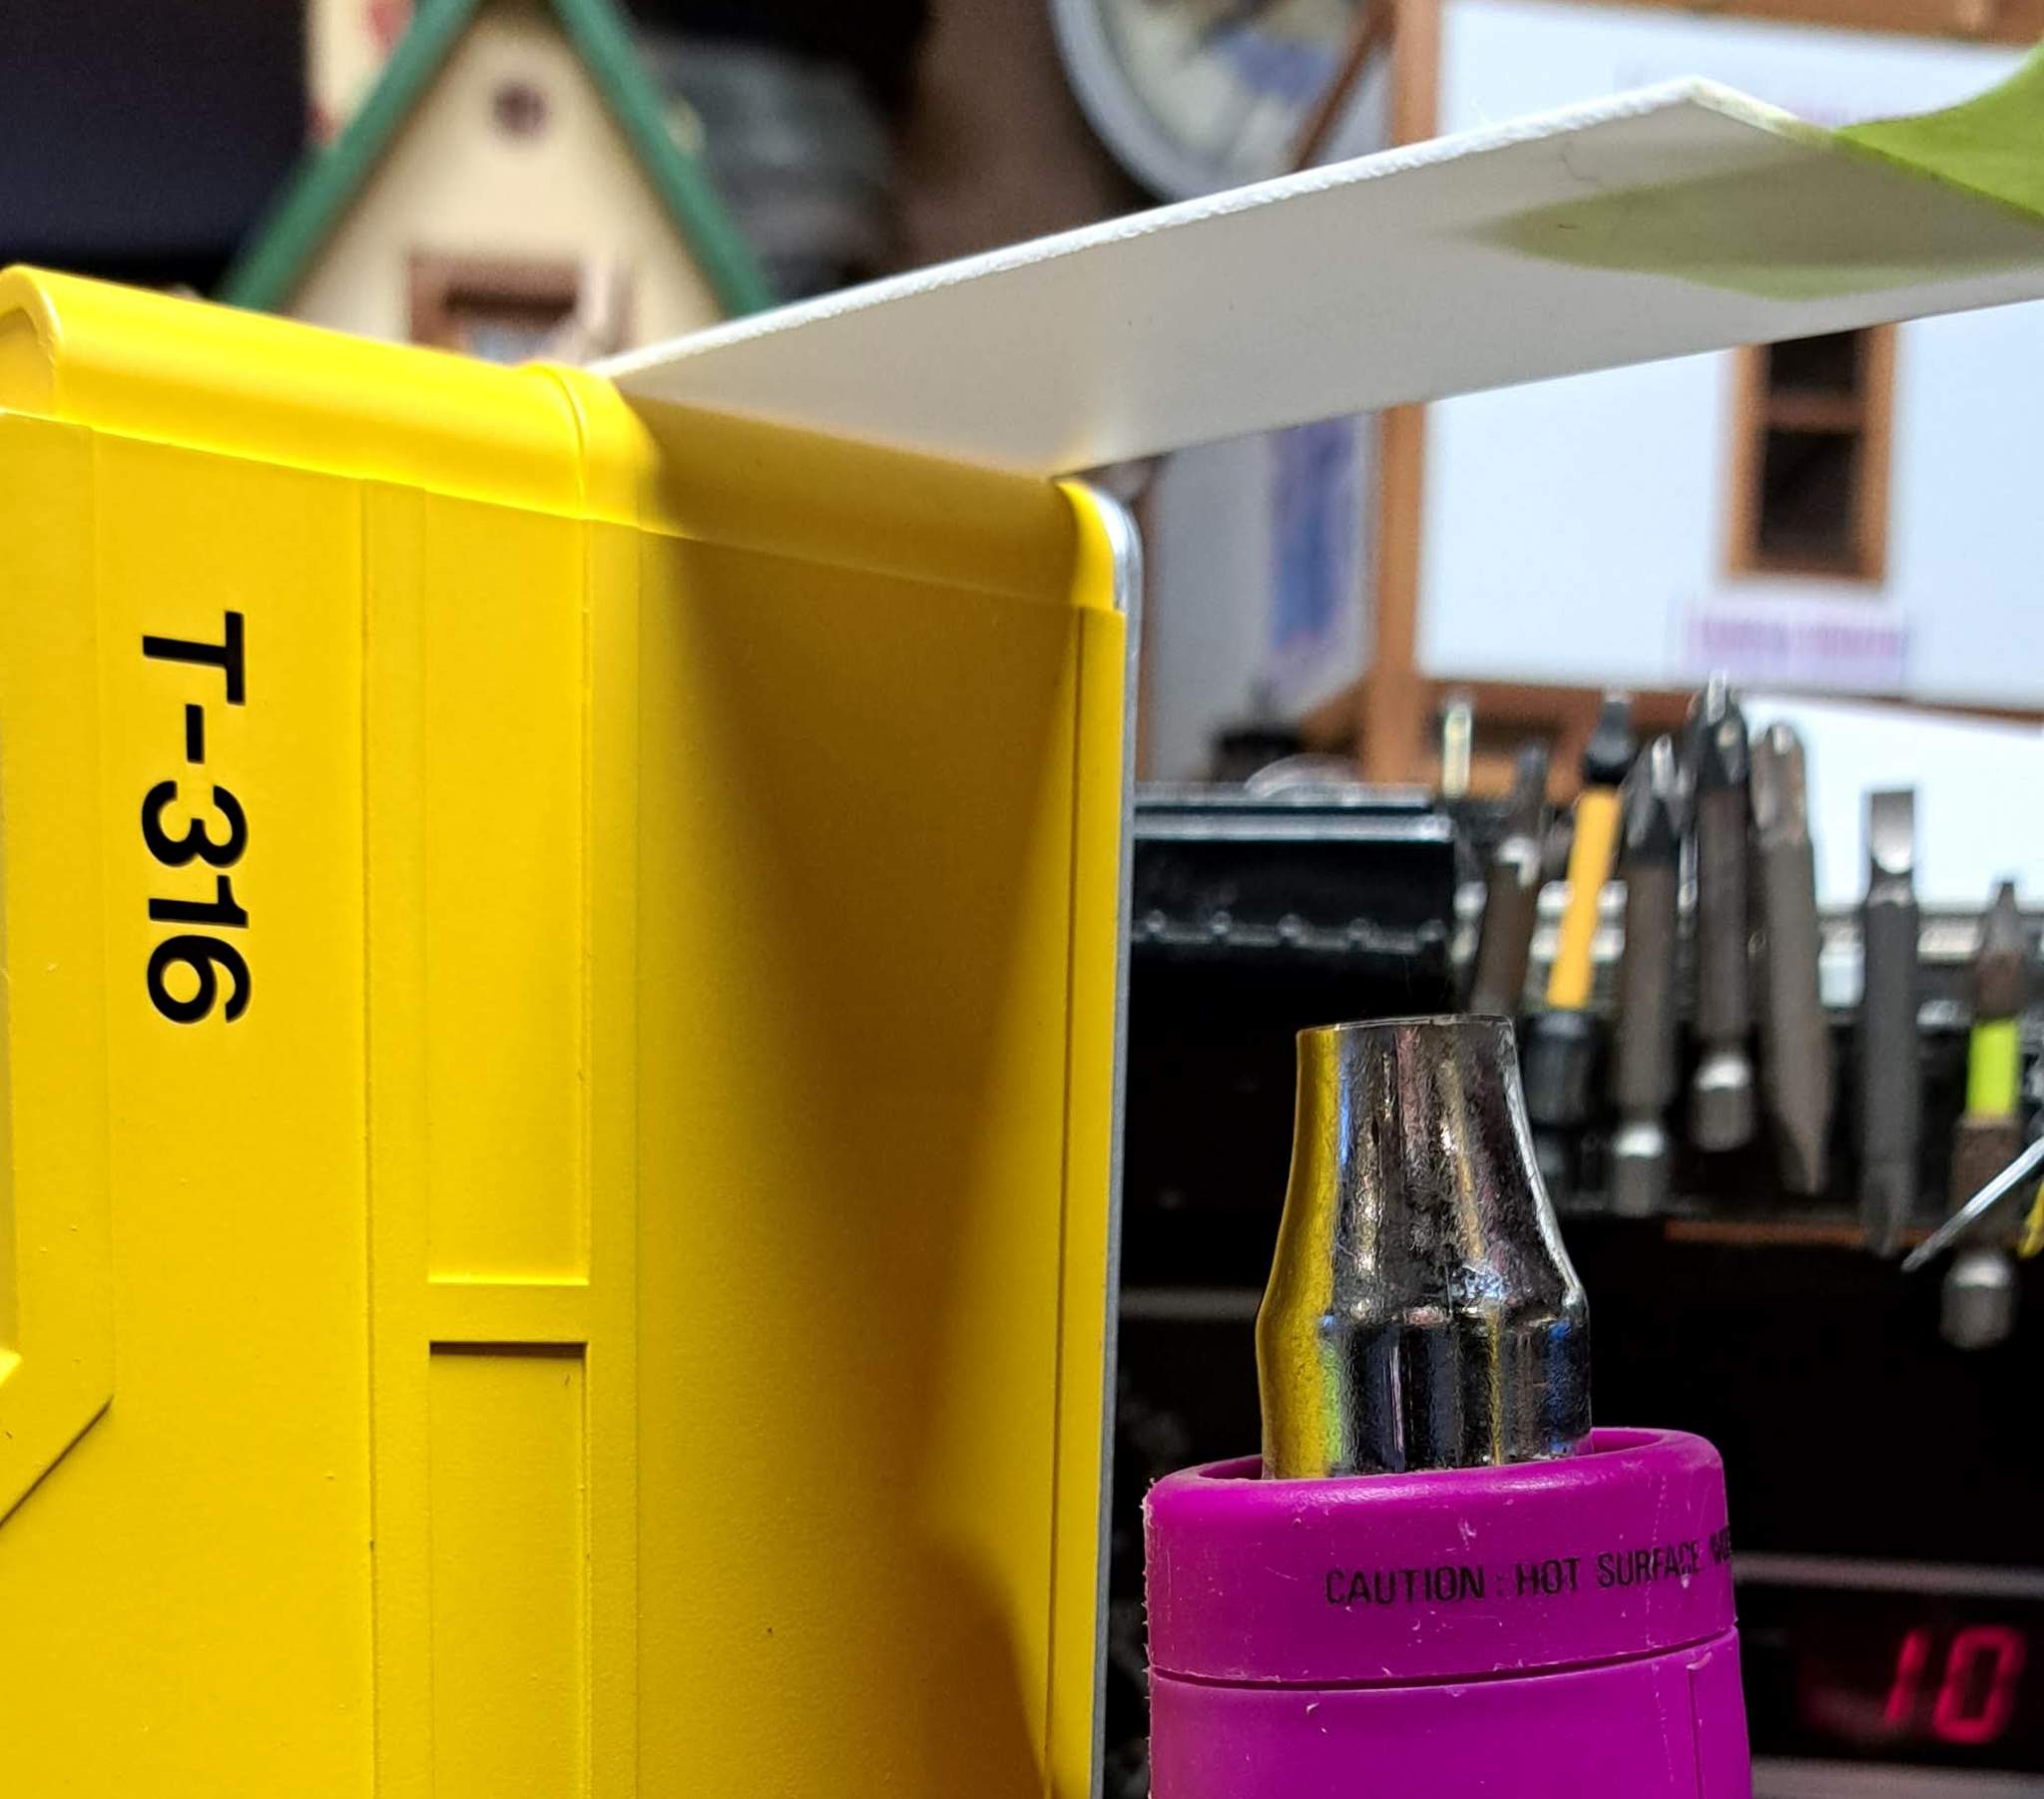
Then I pull it around the corner, tape and let cool…
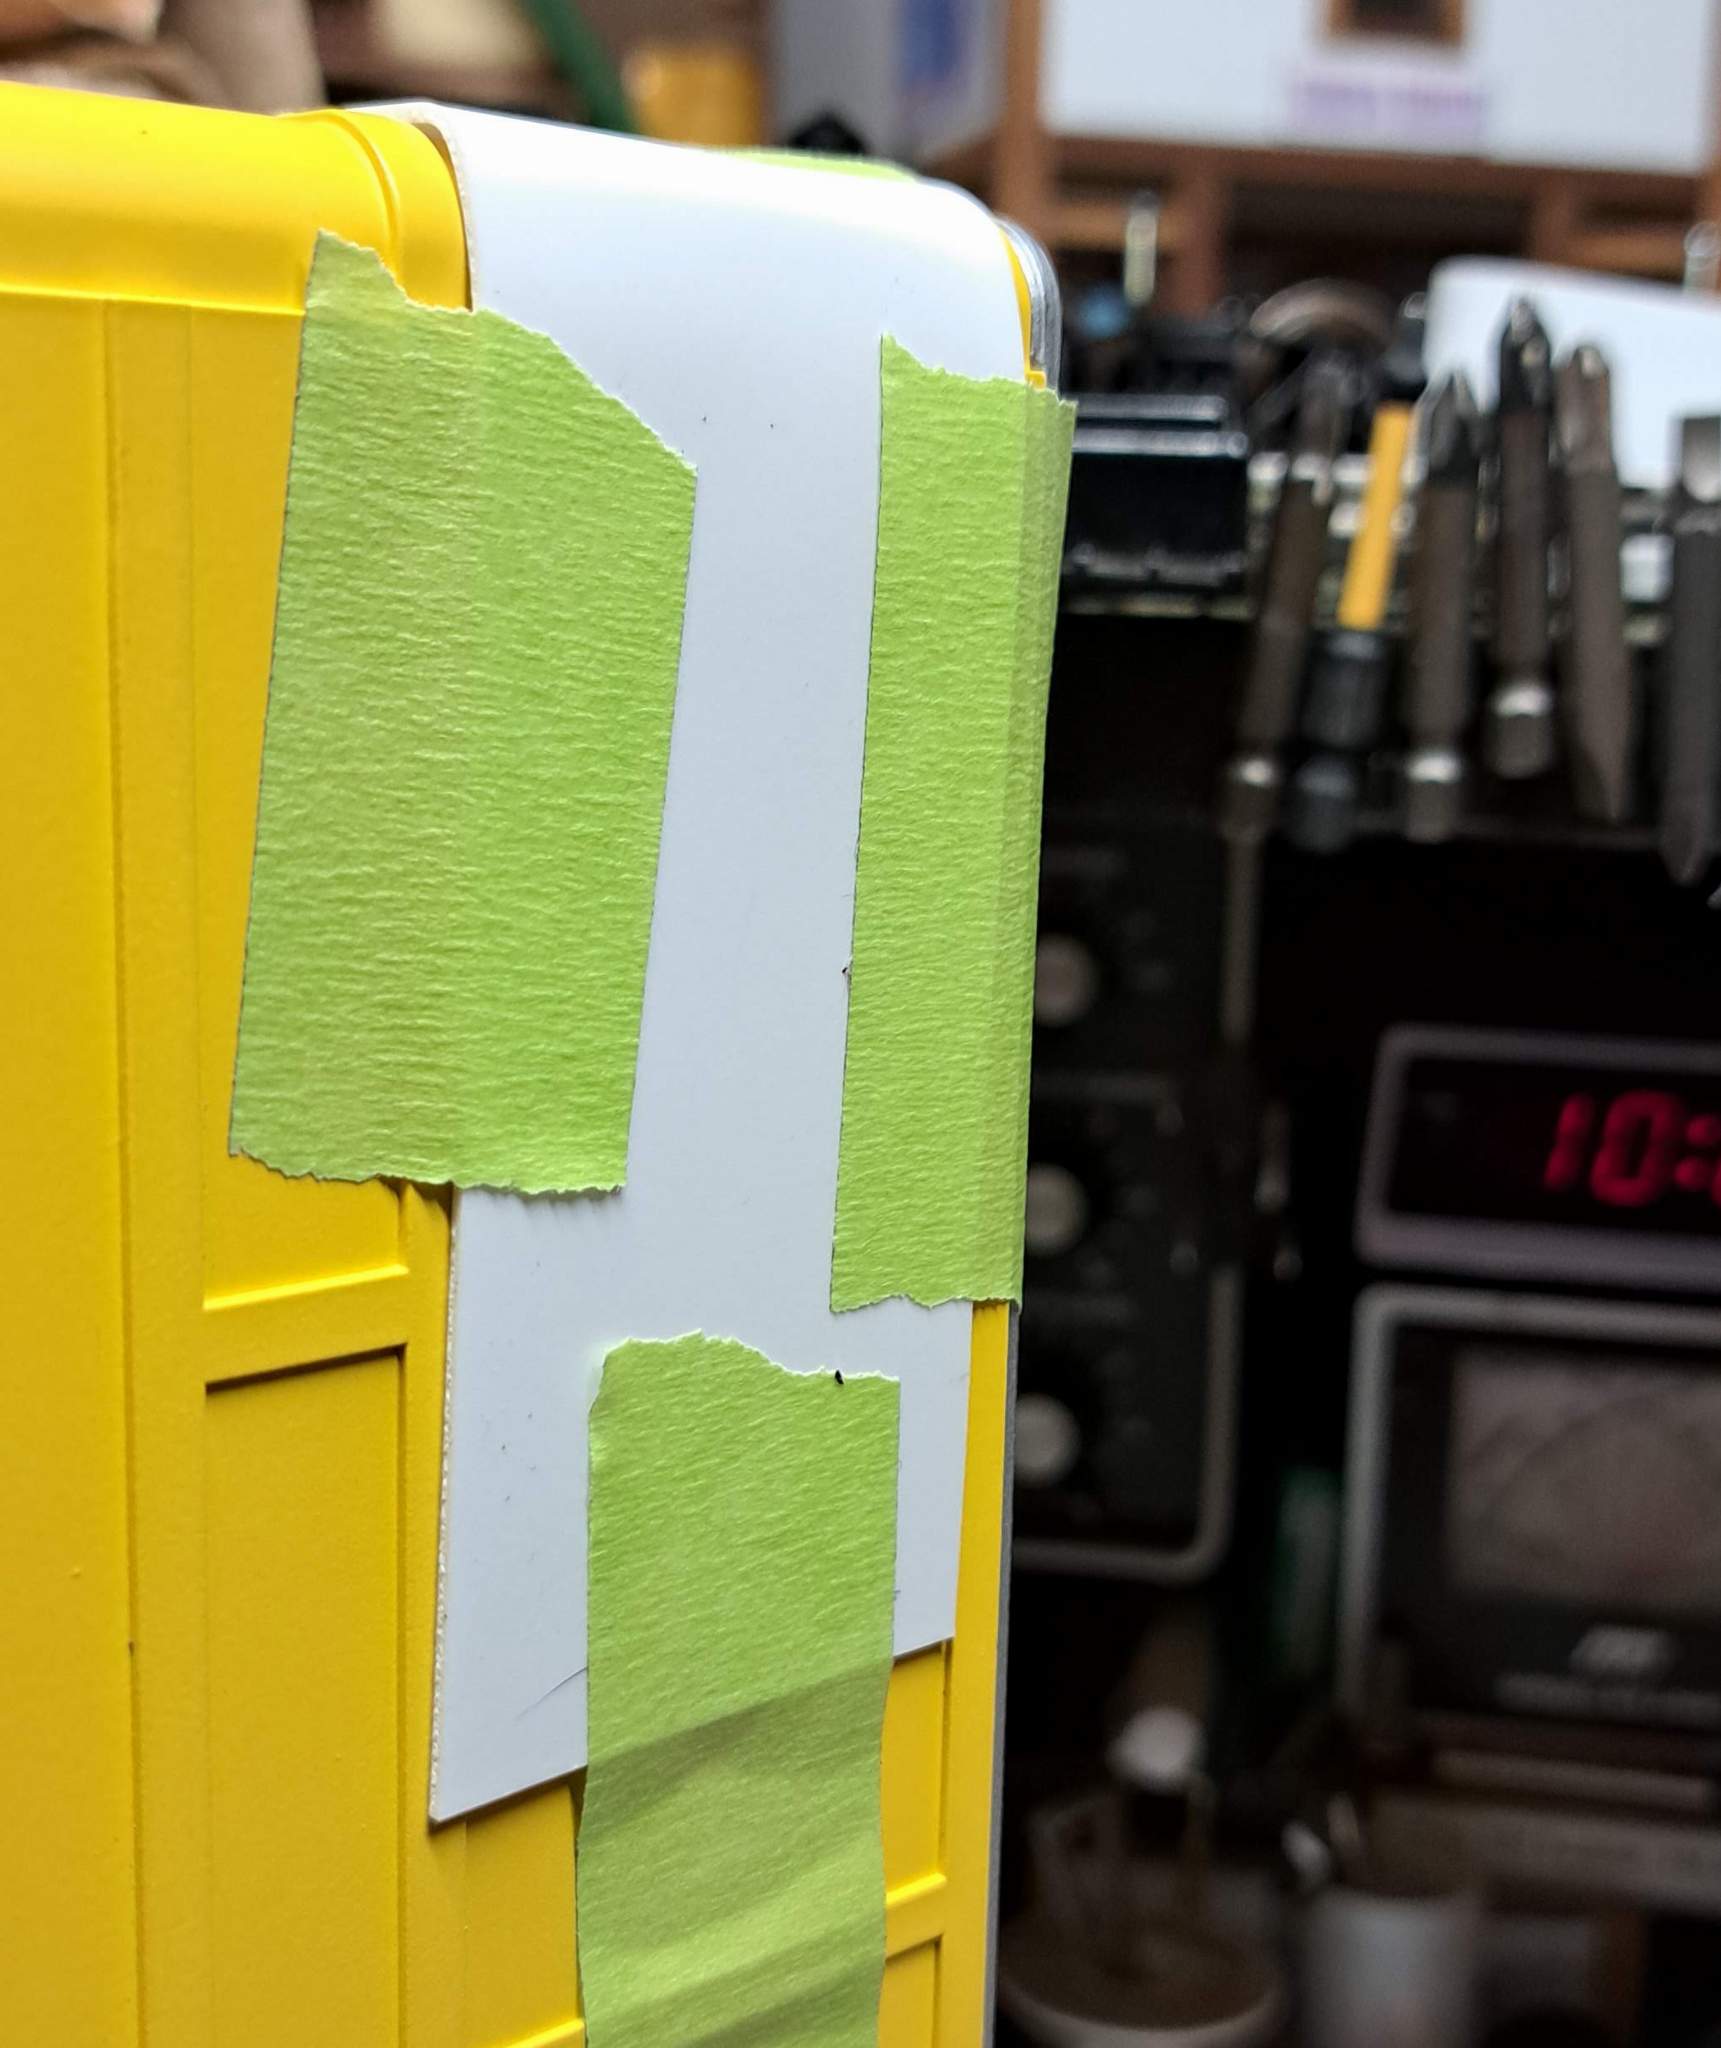
I’ve tried cold bending too. It kinda works OK at this thickness, but wont hold the 90 degree bend. Suggestions welcome 
Next I moved on to window frames. I want to stay with the late 40’s early 50’s look, so I’m going with port hole windows. I had this clear acrylic tube in my stash. I cut a test bit on my chop saw with an 80 tooth blade and it went well, so I set up a stop block and cut a bunch. They fly everywhere so it’s fun rounding them up…
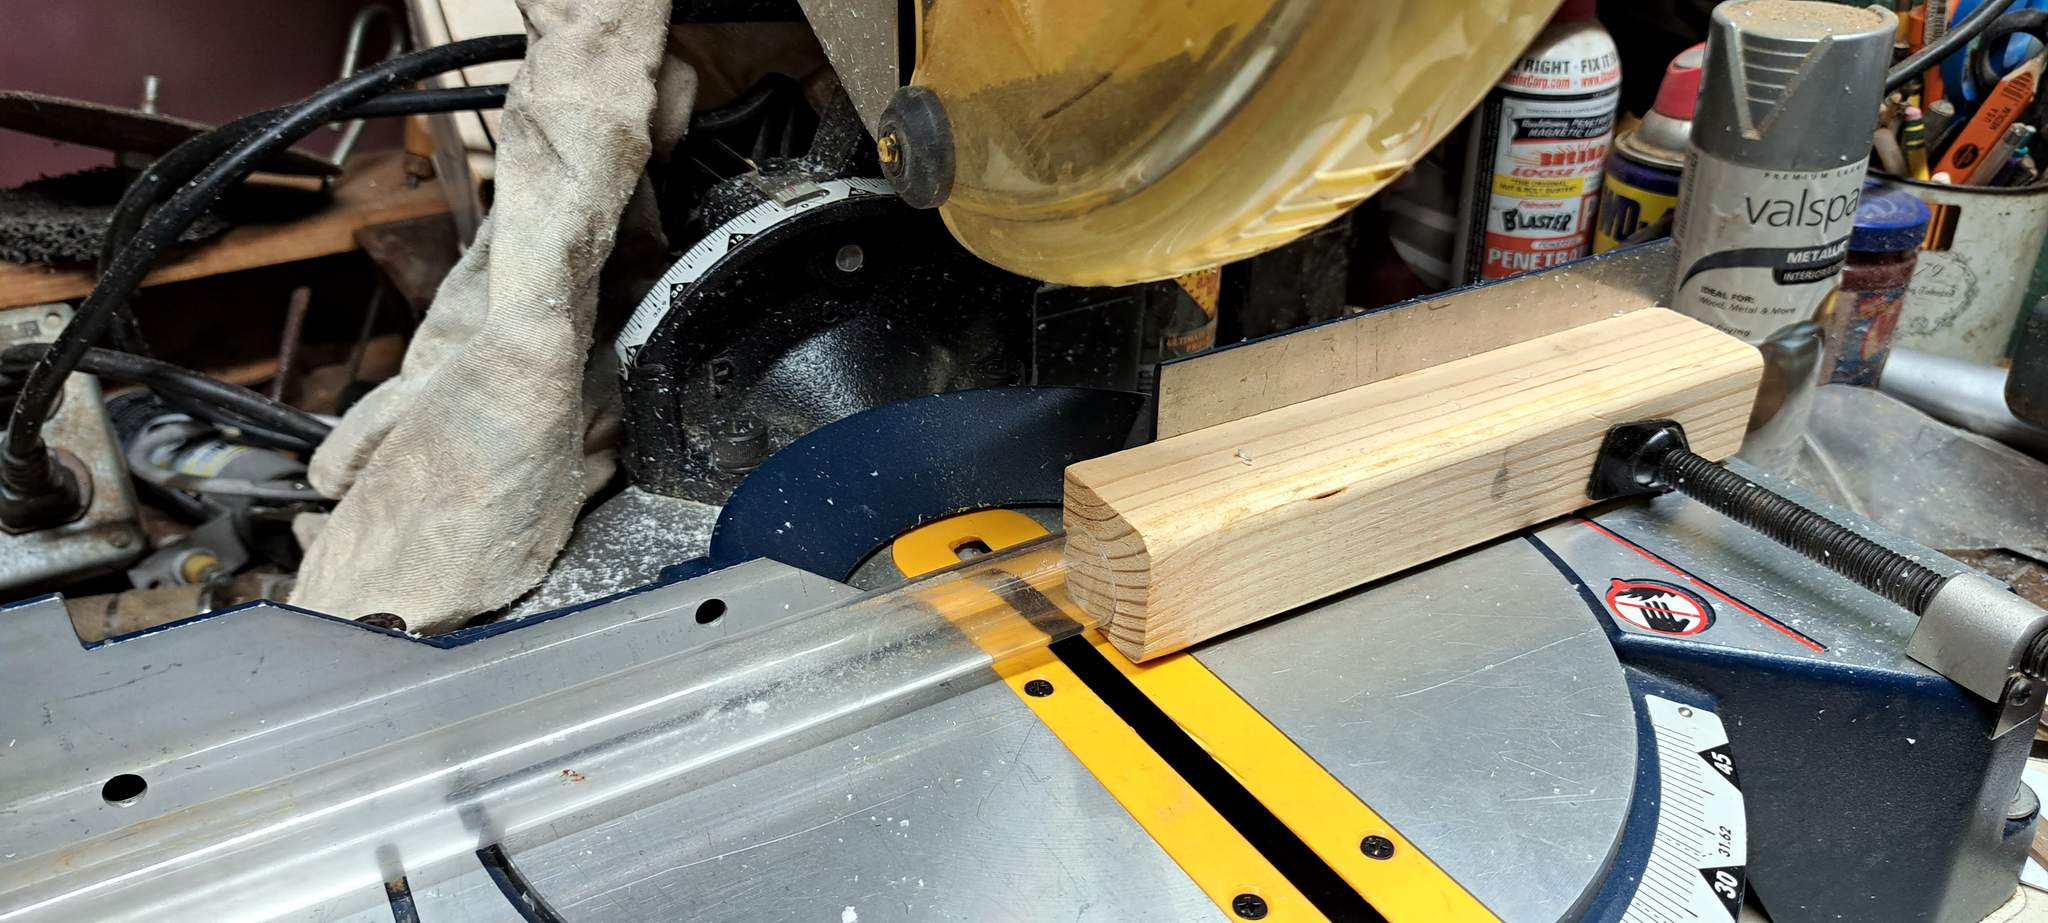
I sanded them after cutting. These will be the frames with frosted acrylic behind a hole in the trailer. They scale out to a little over 21" on the outside…
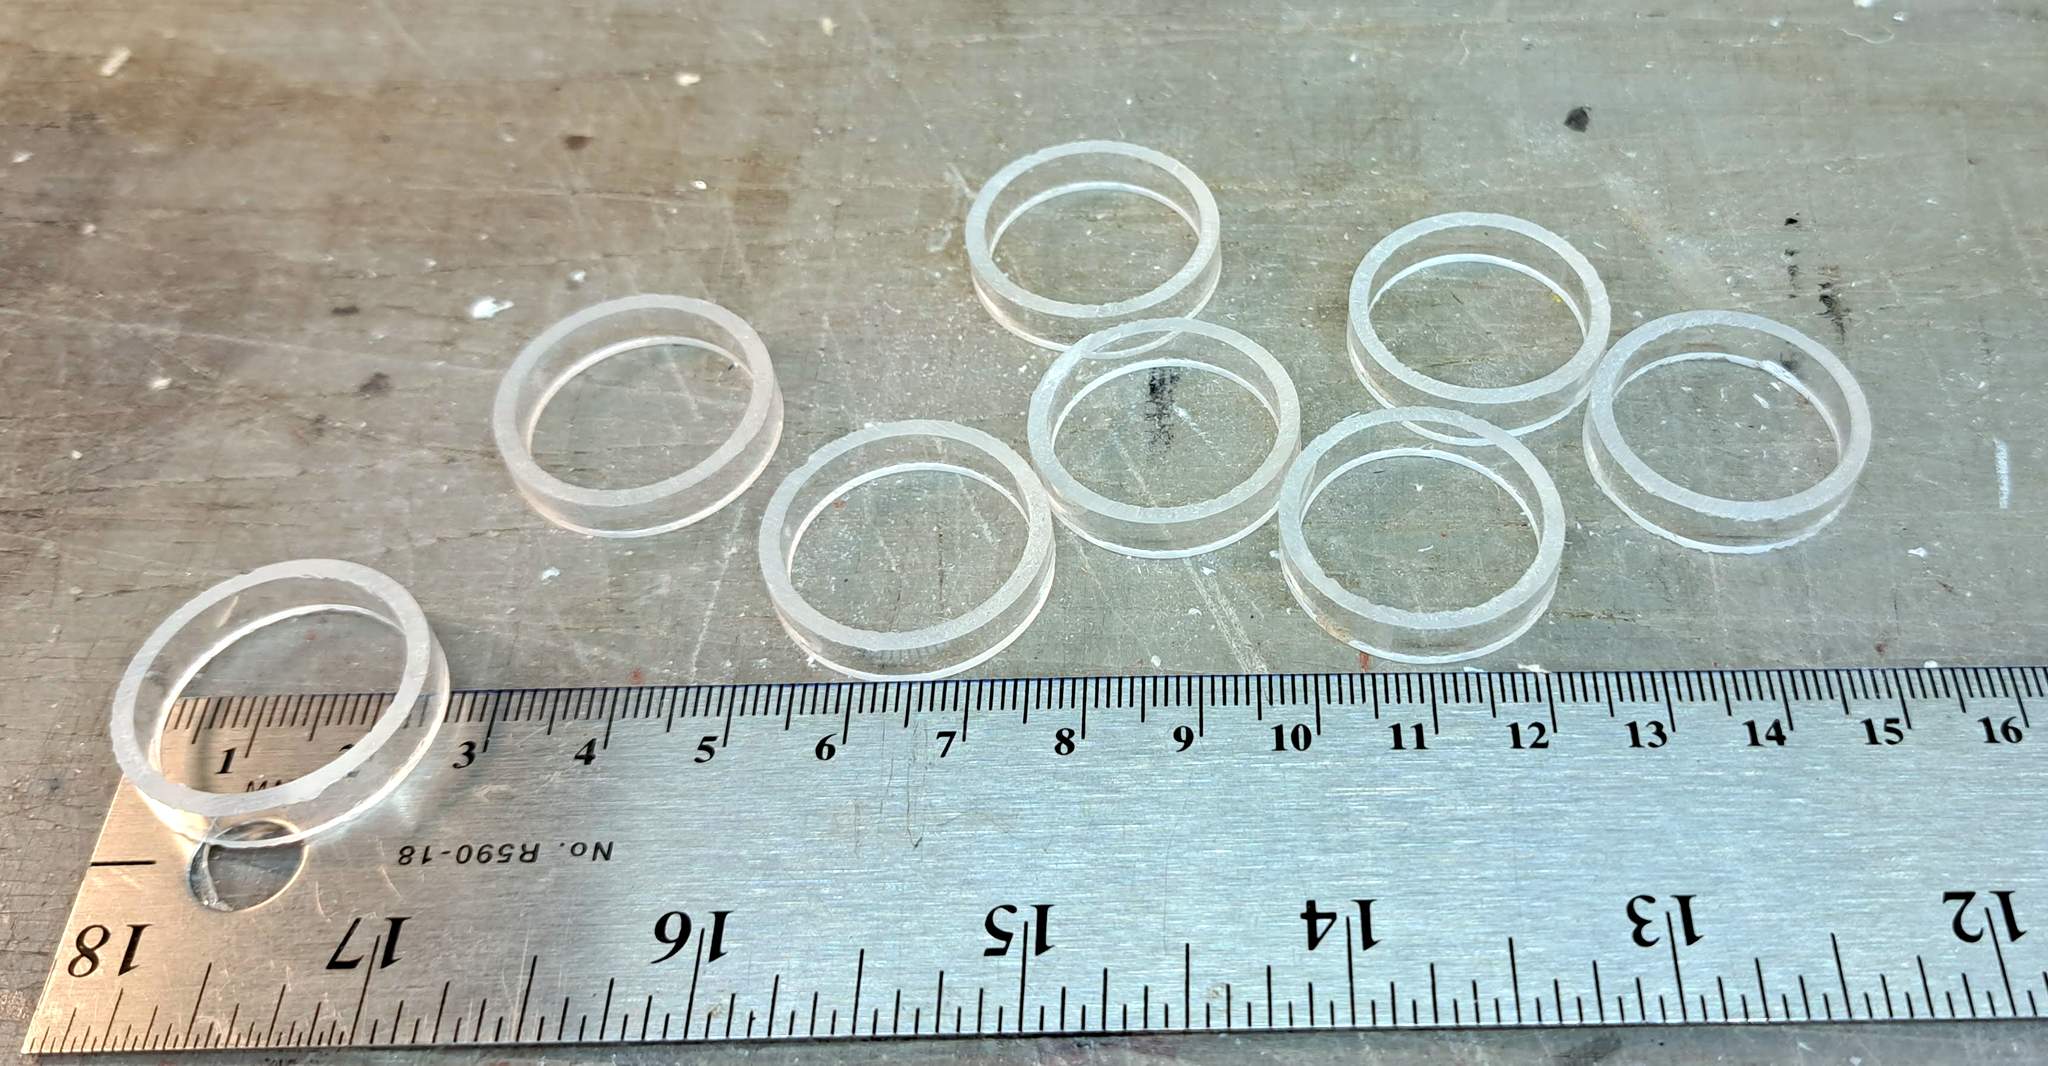
Including the wall thickness these will be very deep port holes! I did a test with one on the inside trailer wall to see if MEK would work to attach, and it did.
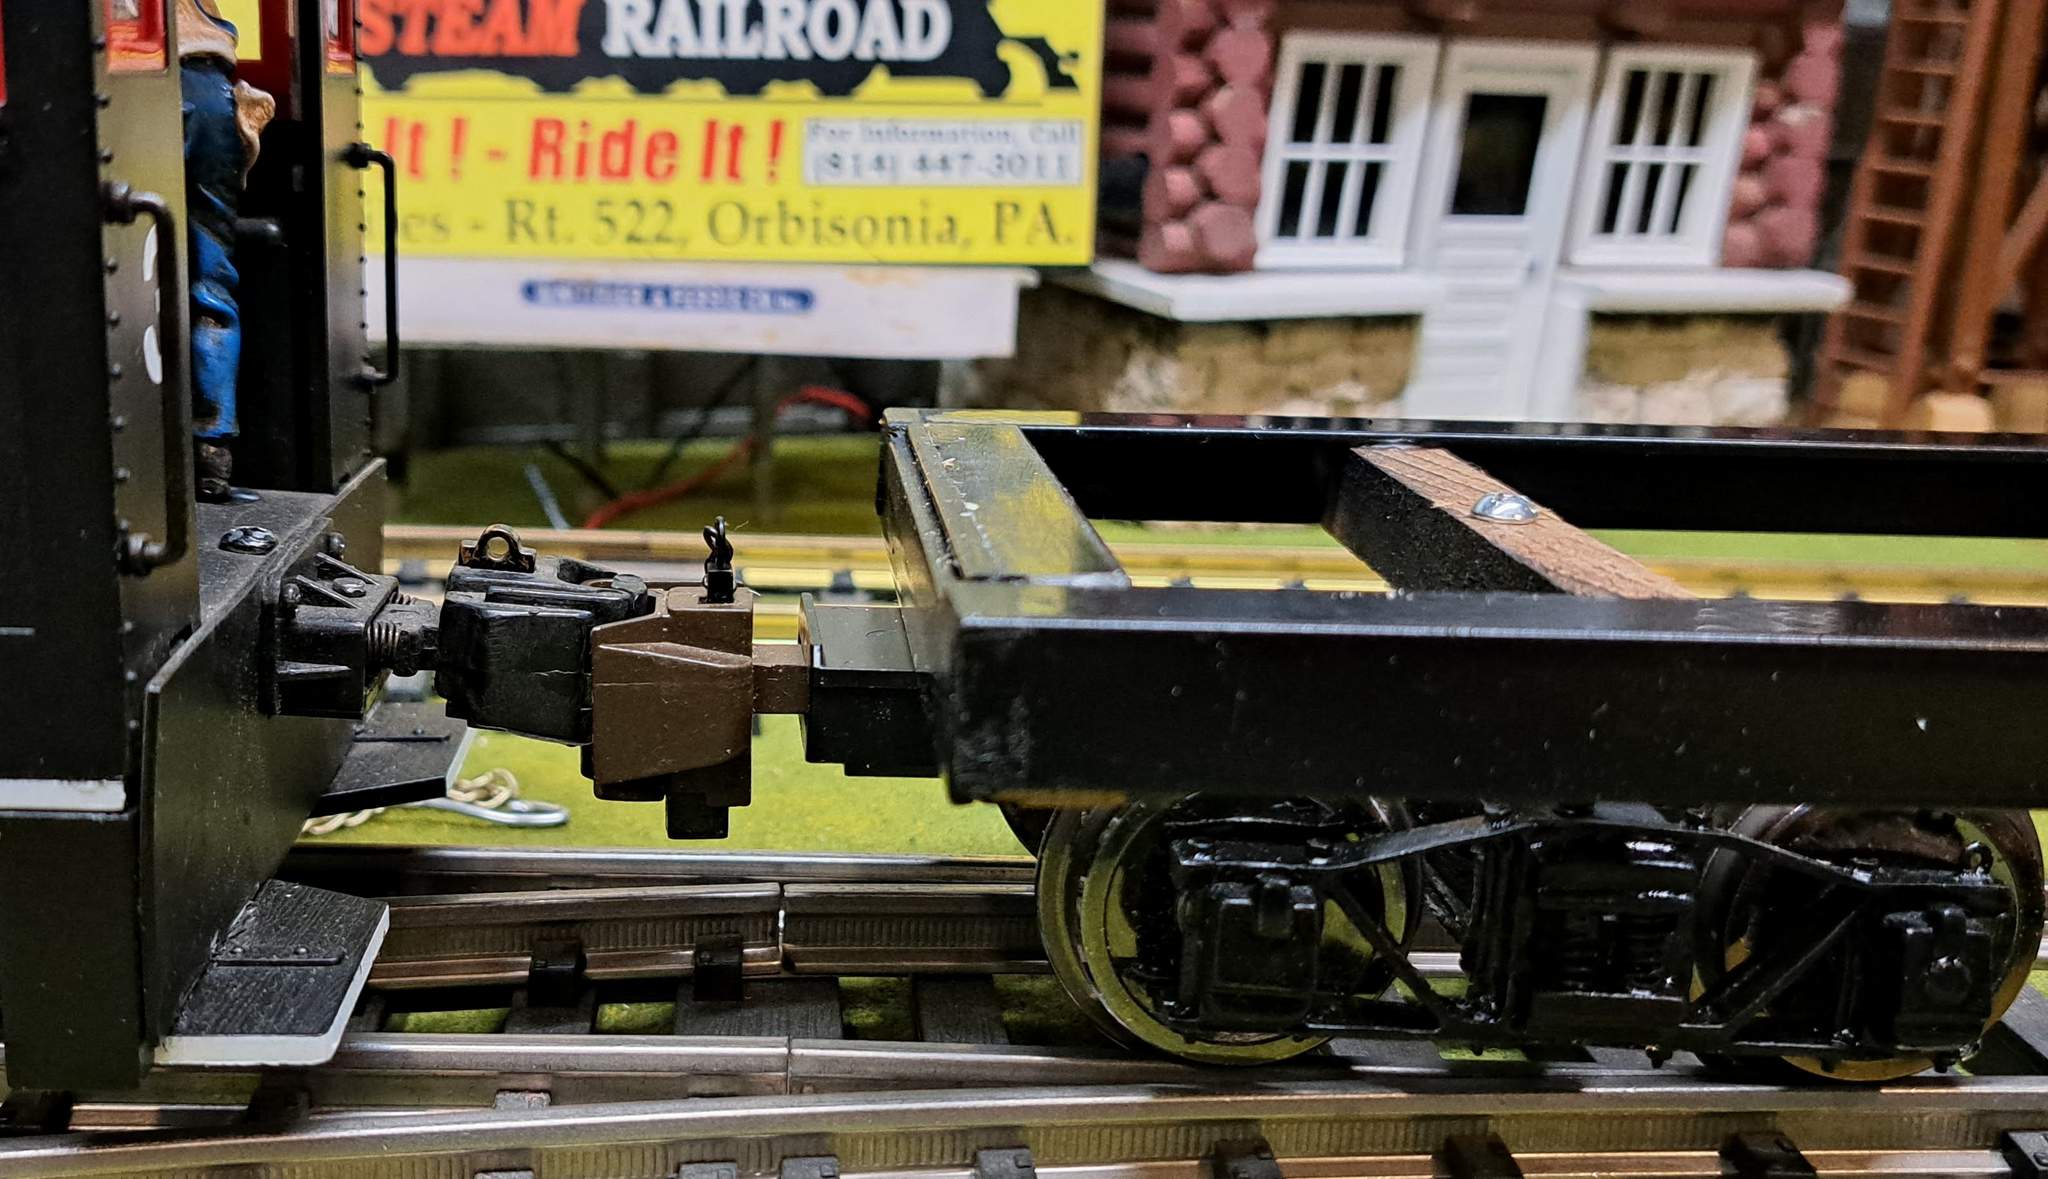
Once the frame was dry I moved on to installing the trucks, mounting a coupler and attaching the decking. Here is my first attempt at a coupler. The sills were made into a three sided box with a second piece of angle and a wood core was glued in. The wood provided a place to screw in the Kadee draft gear box holding a Bachmann coupler…
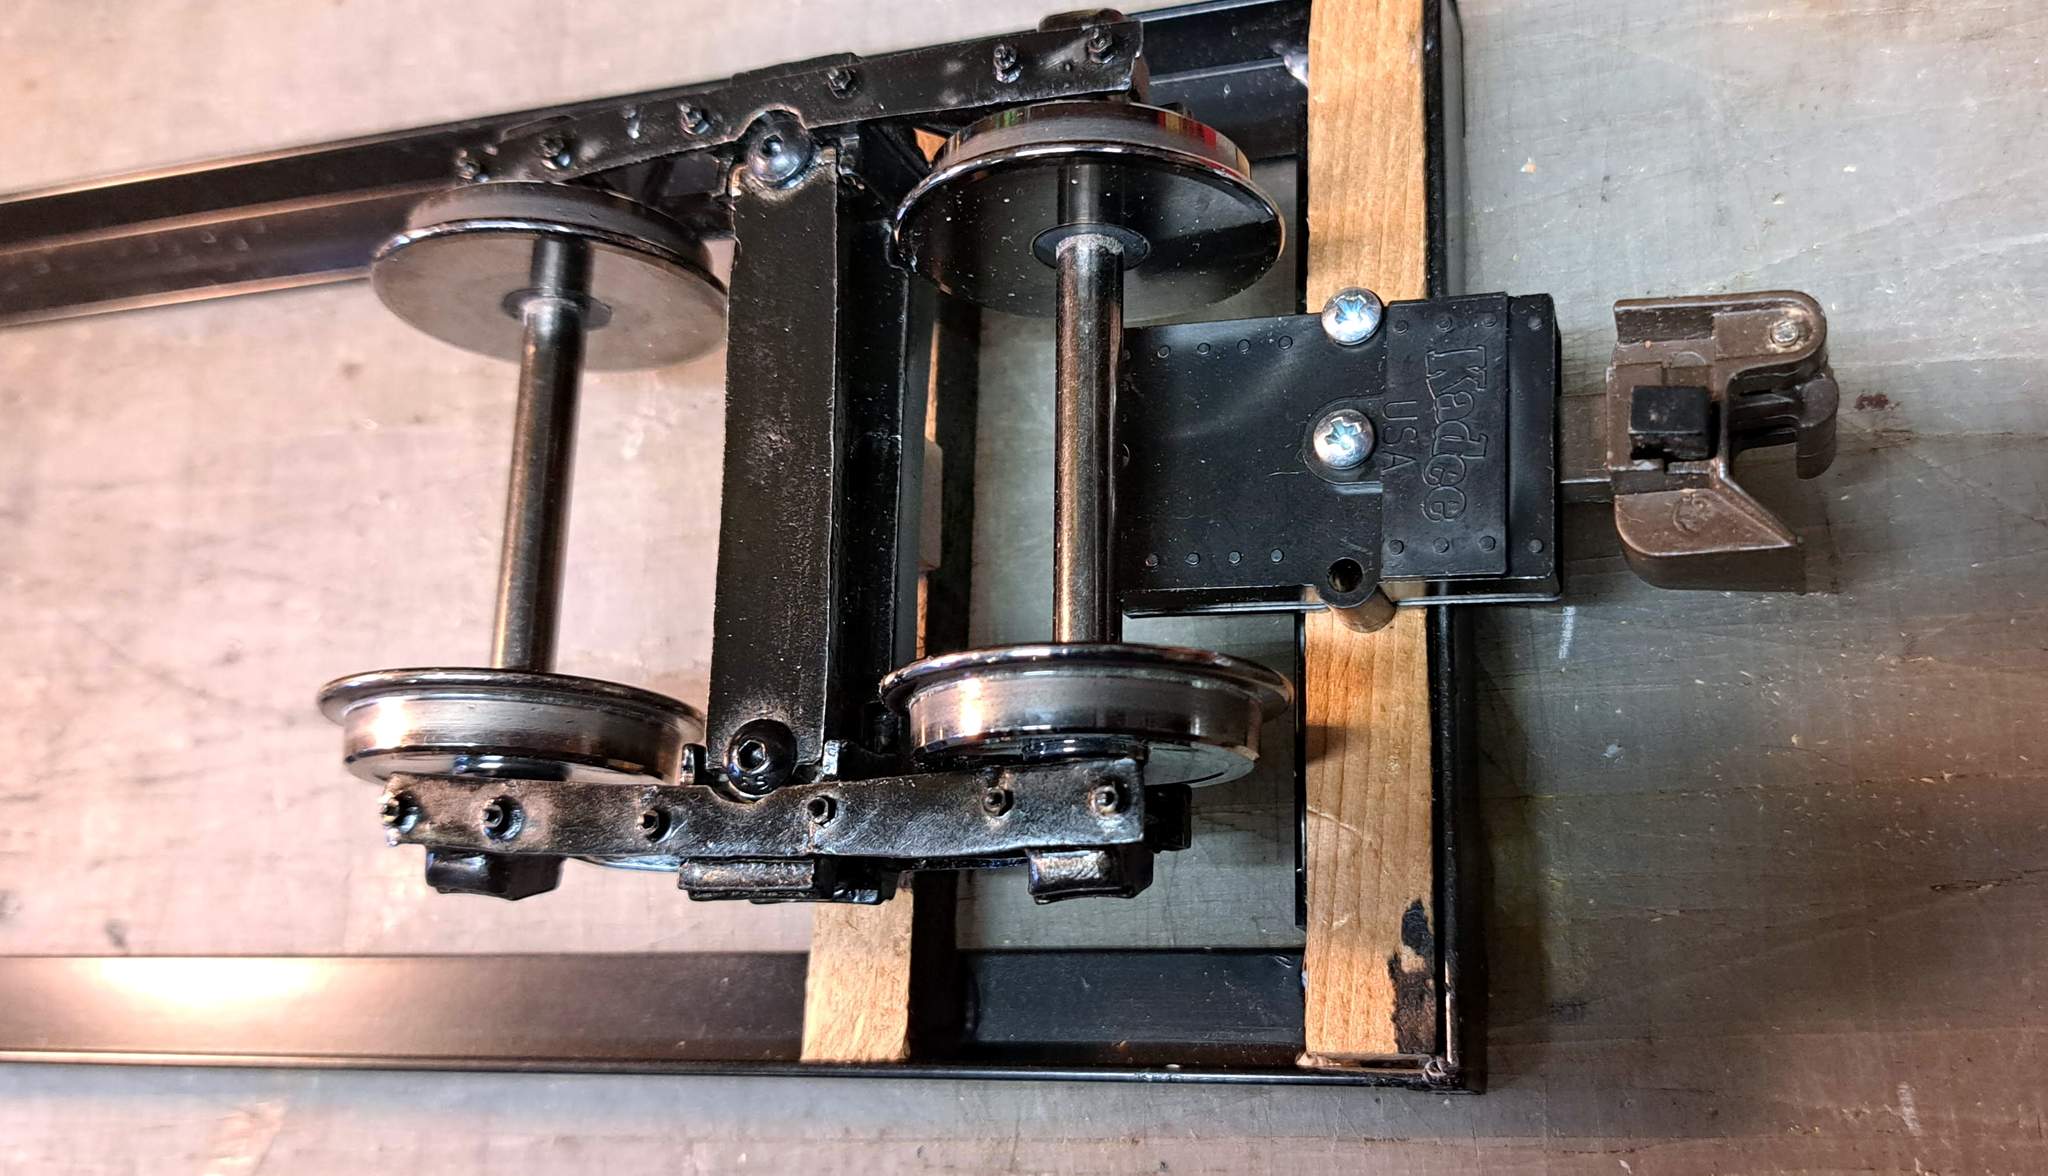
It sticks out from the sill further than I would like due to the mounting constraints. It does, however, line up perfectly with my in-house height gauge…
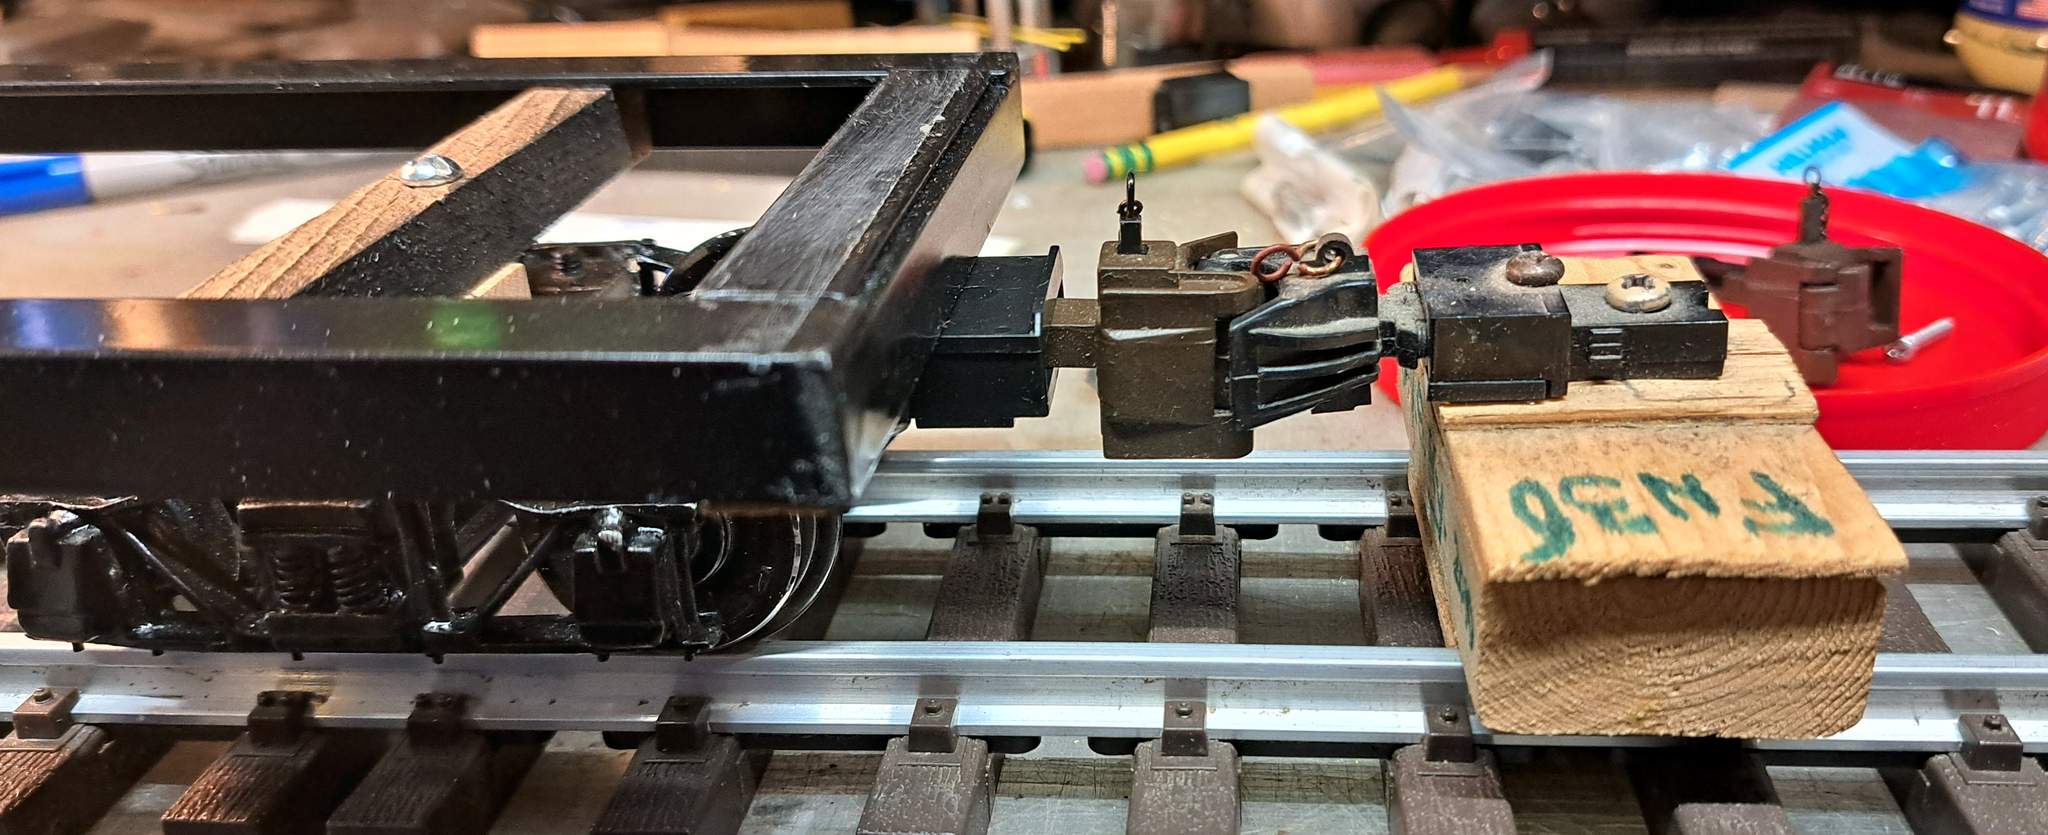
With the trucks installed and one coupler mounted, it was time for road trials. #3 pulled the frame around my indoor through several switches with no issues. Test passed…
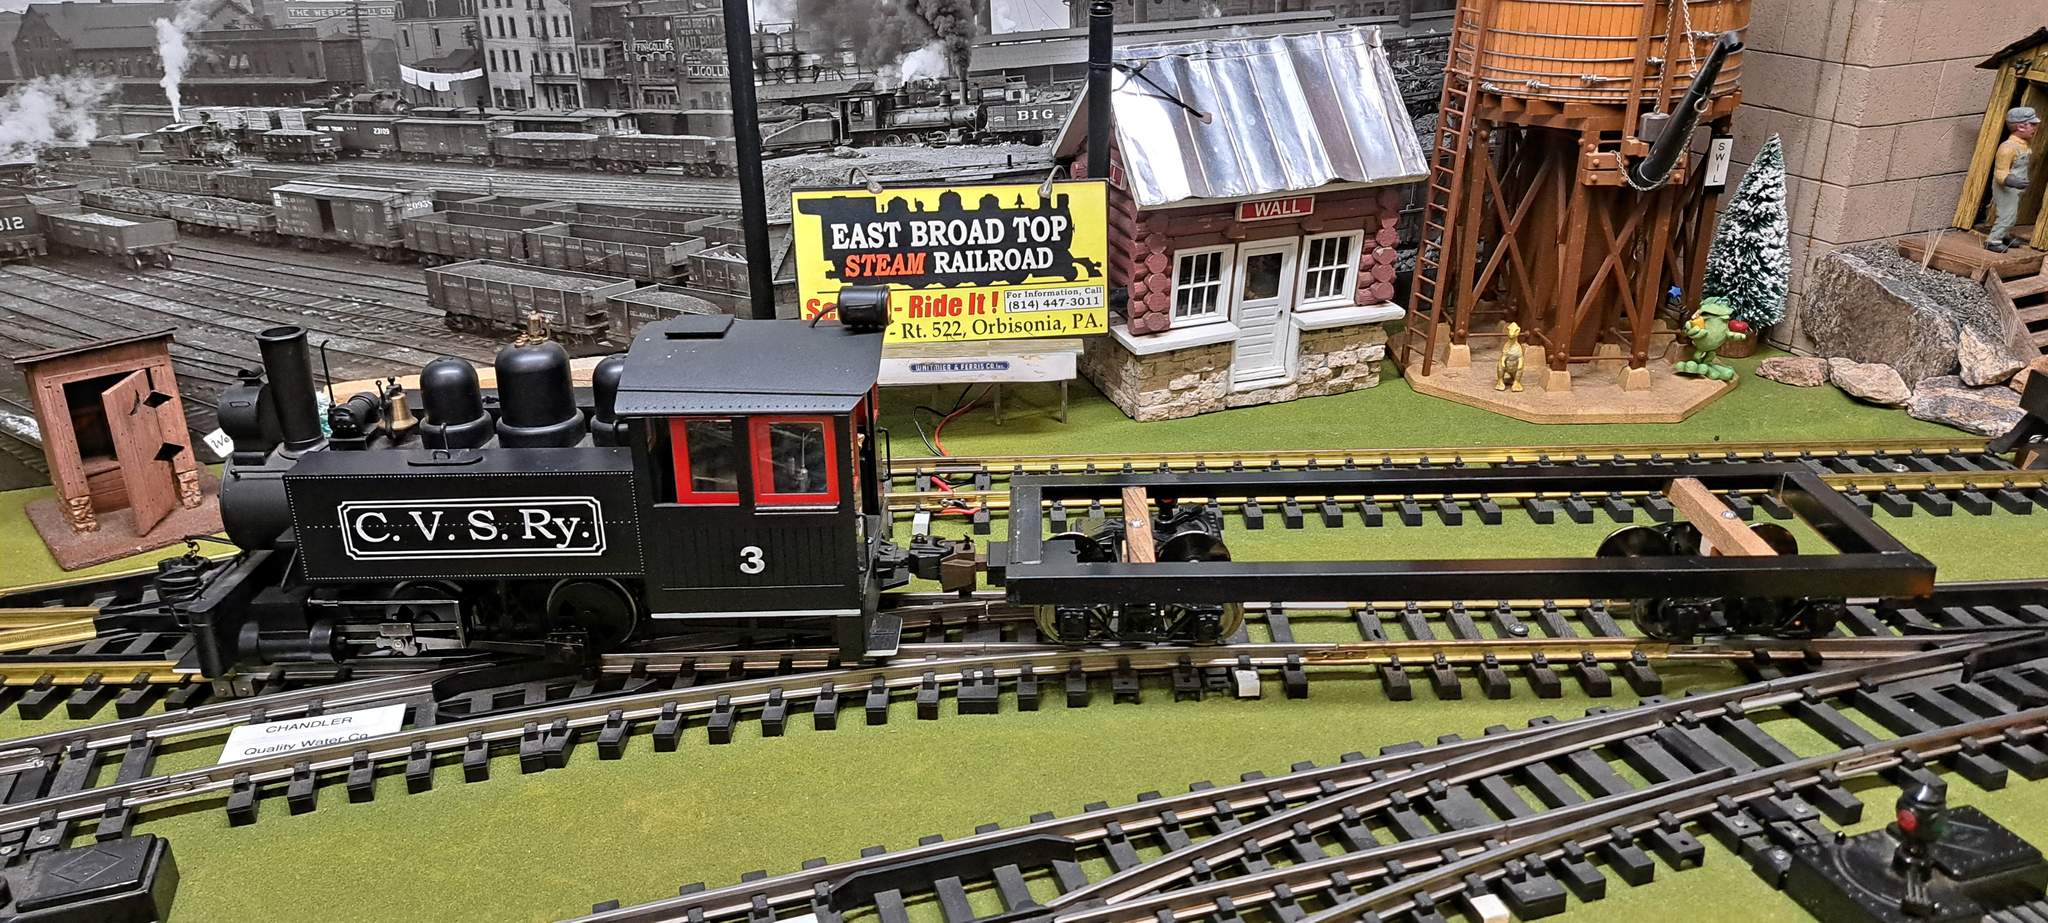
Here’s another look at that coupler mount. I do have a set of the Accucraft couplers like on #3 at the left. If I have enough time at the end, I might change them out…
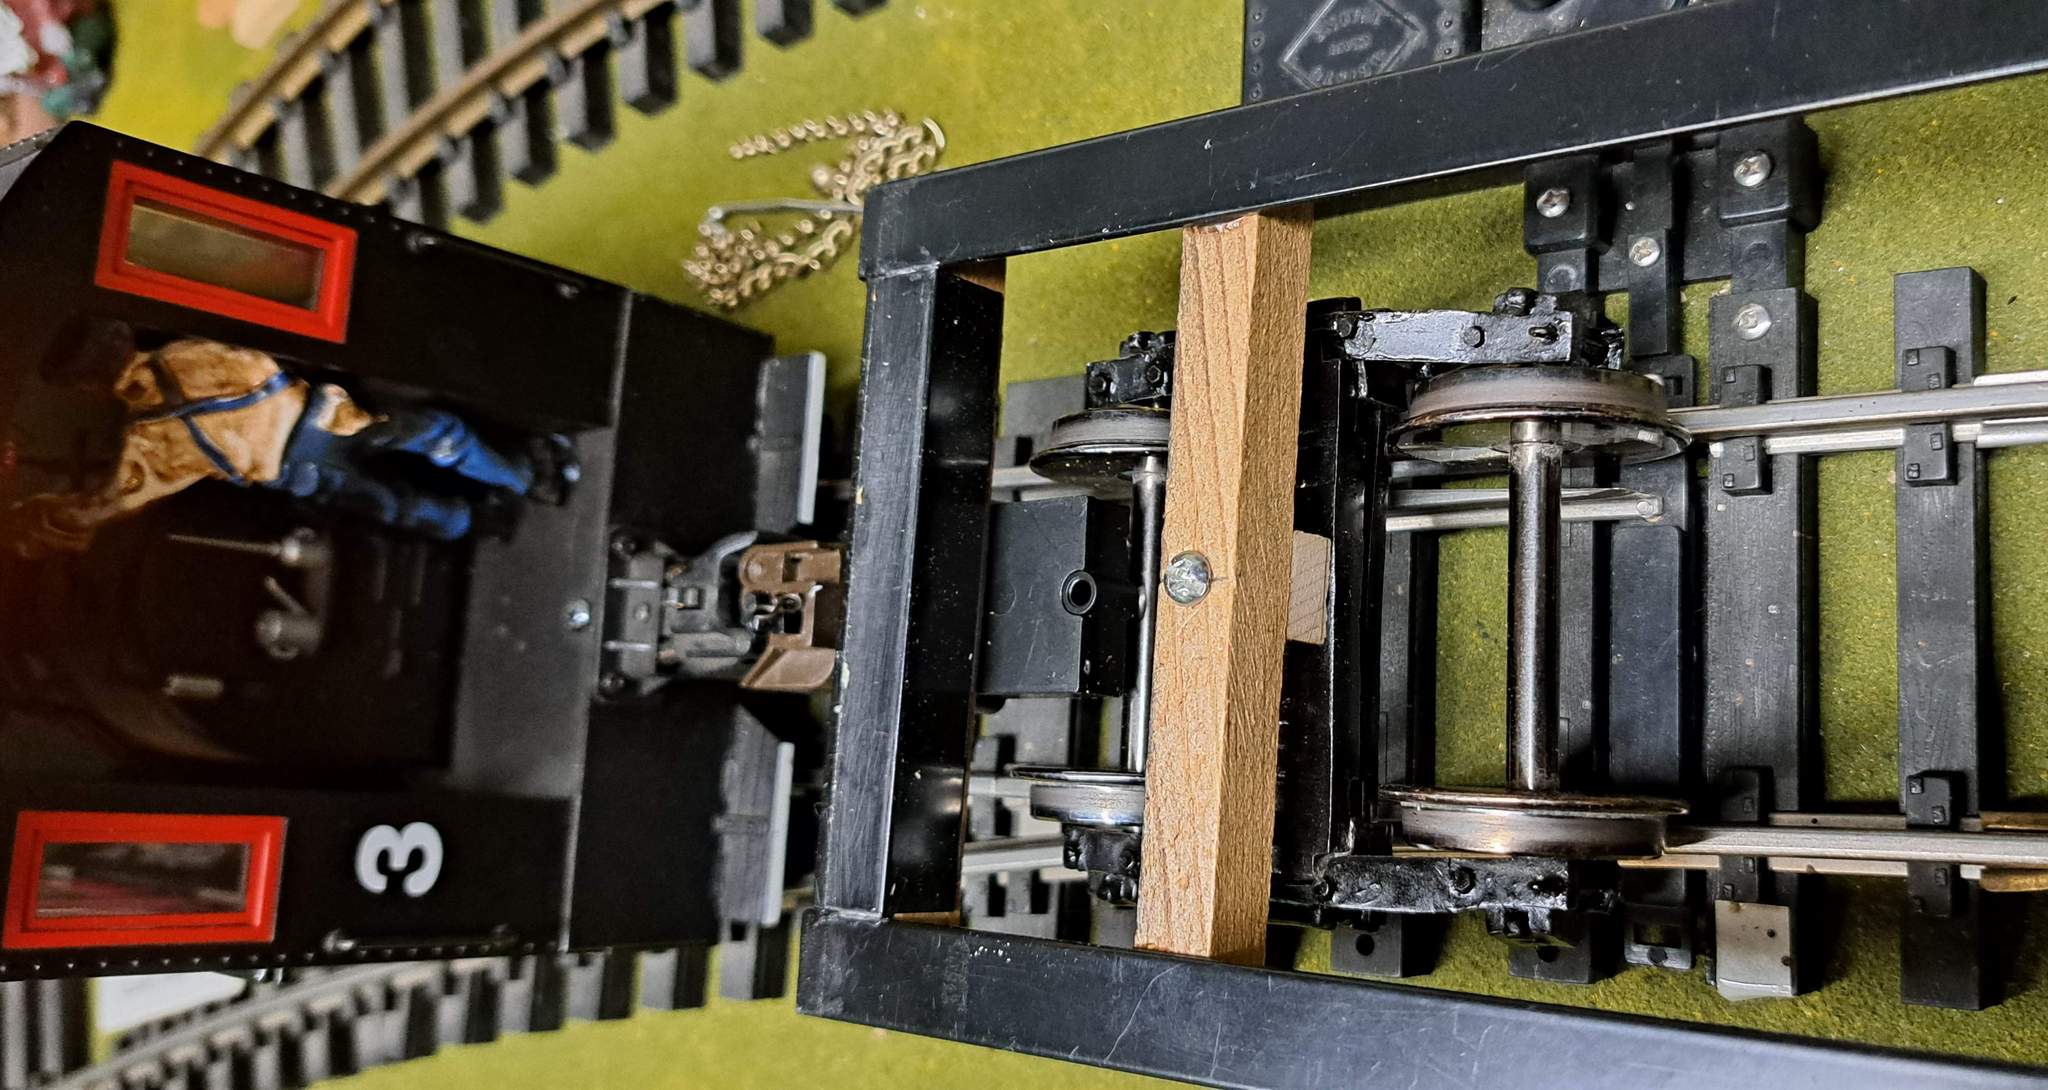
And a look from above at the wood bolster, truck and draft gear box before the decking covers this view…
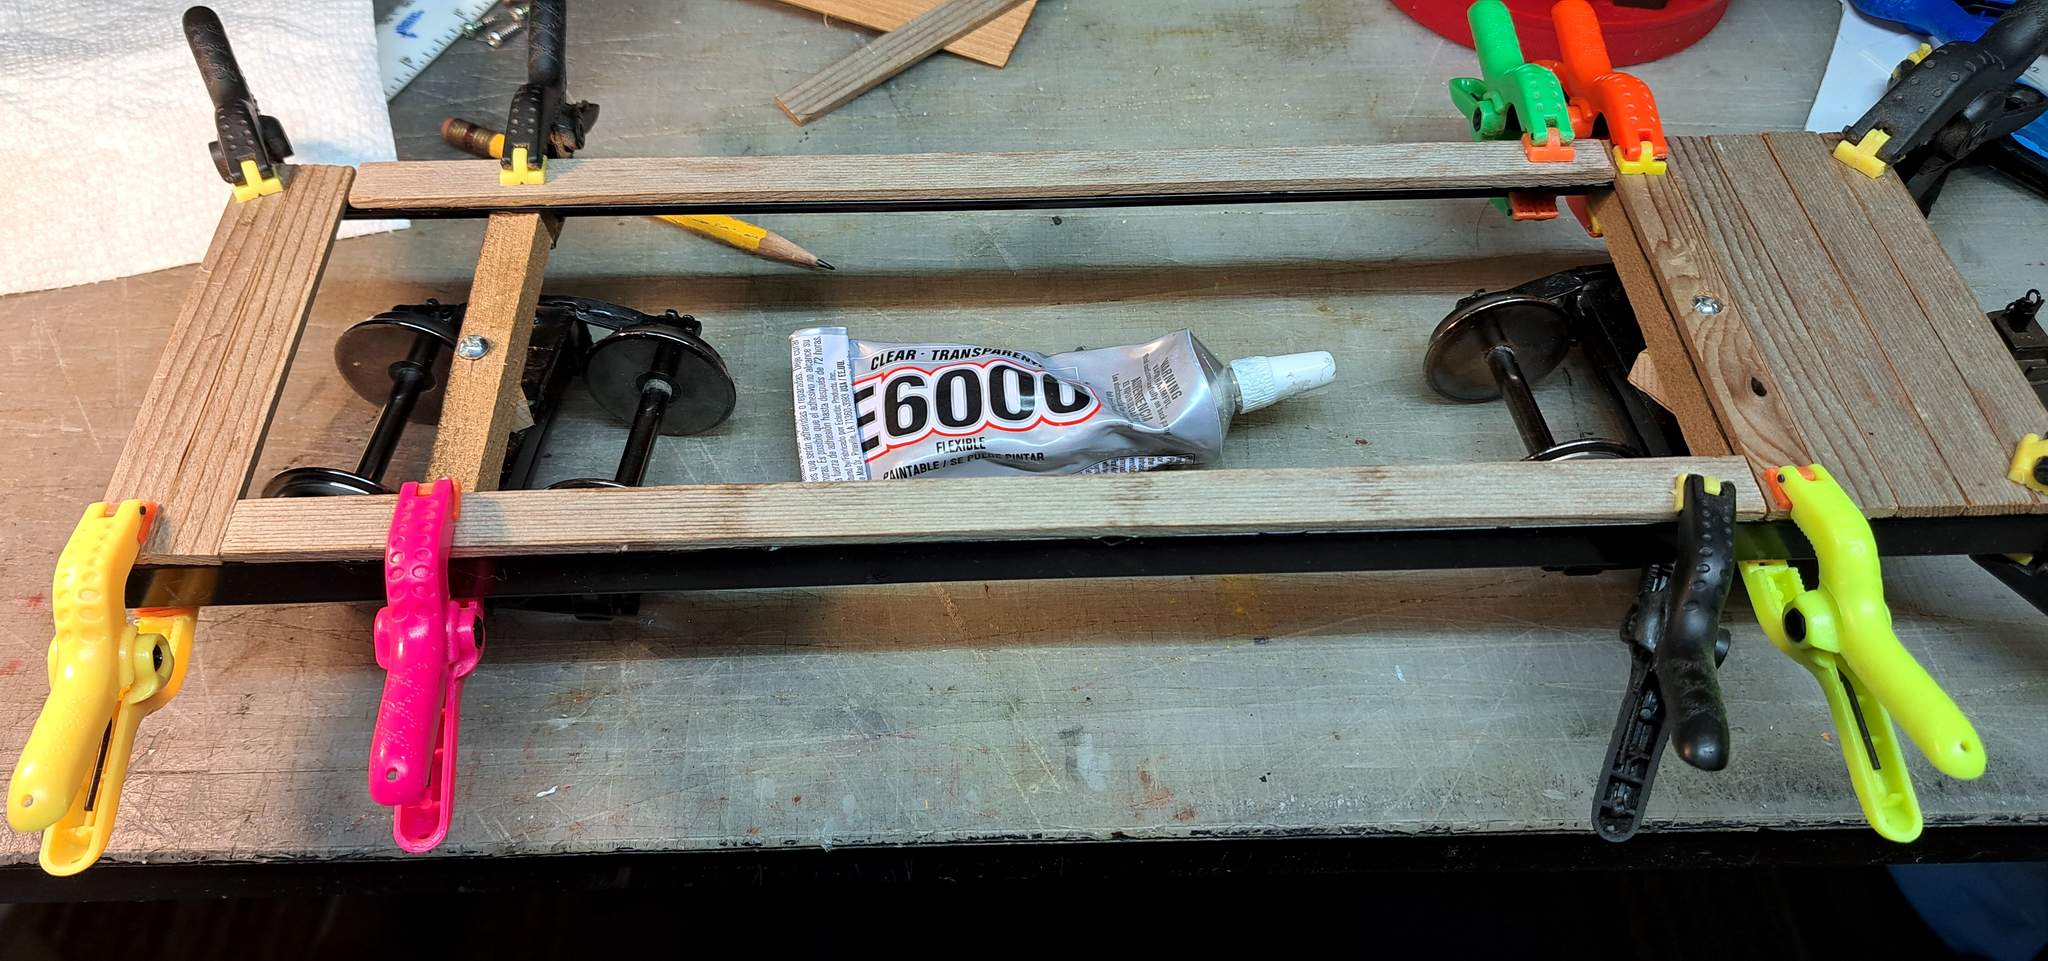
Here, the decking has been installed. This Cedar plank has been sitting out getting “weathered” since a long ago ECLSTS when I bought a bunch just to have. It finally found a use. The under side is a lot more red…
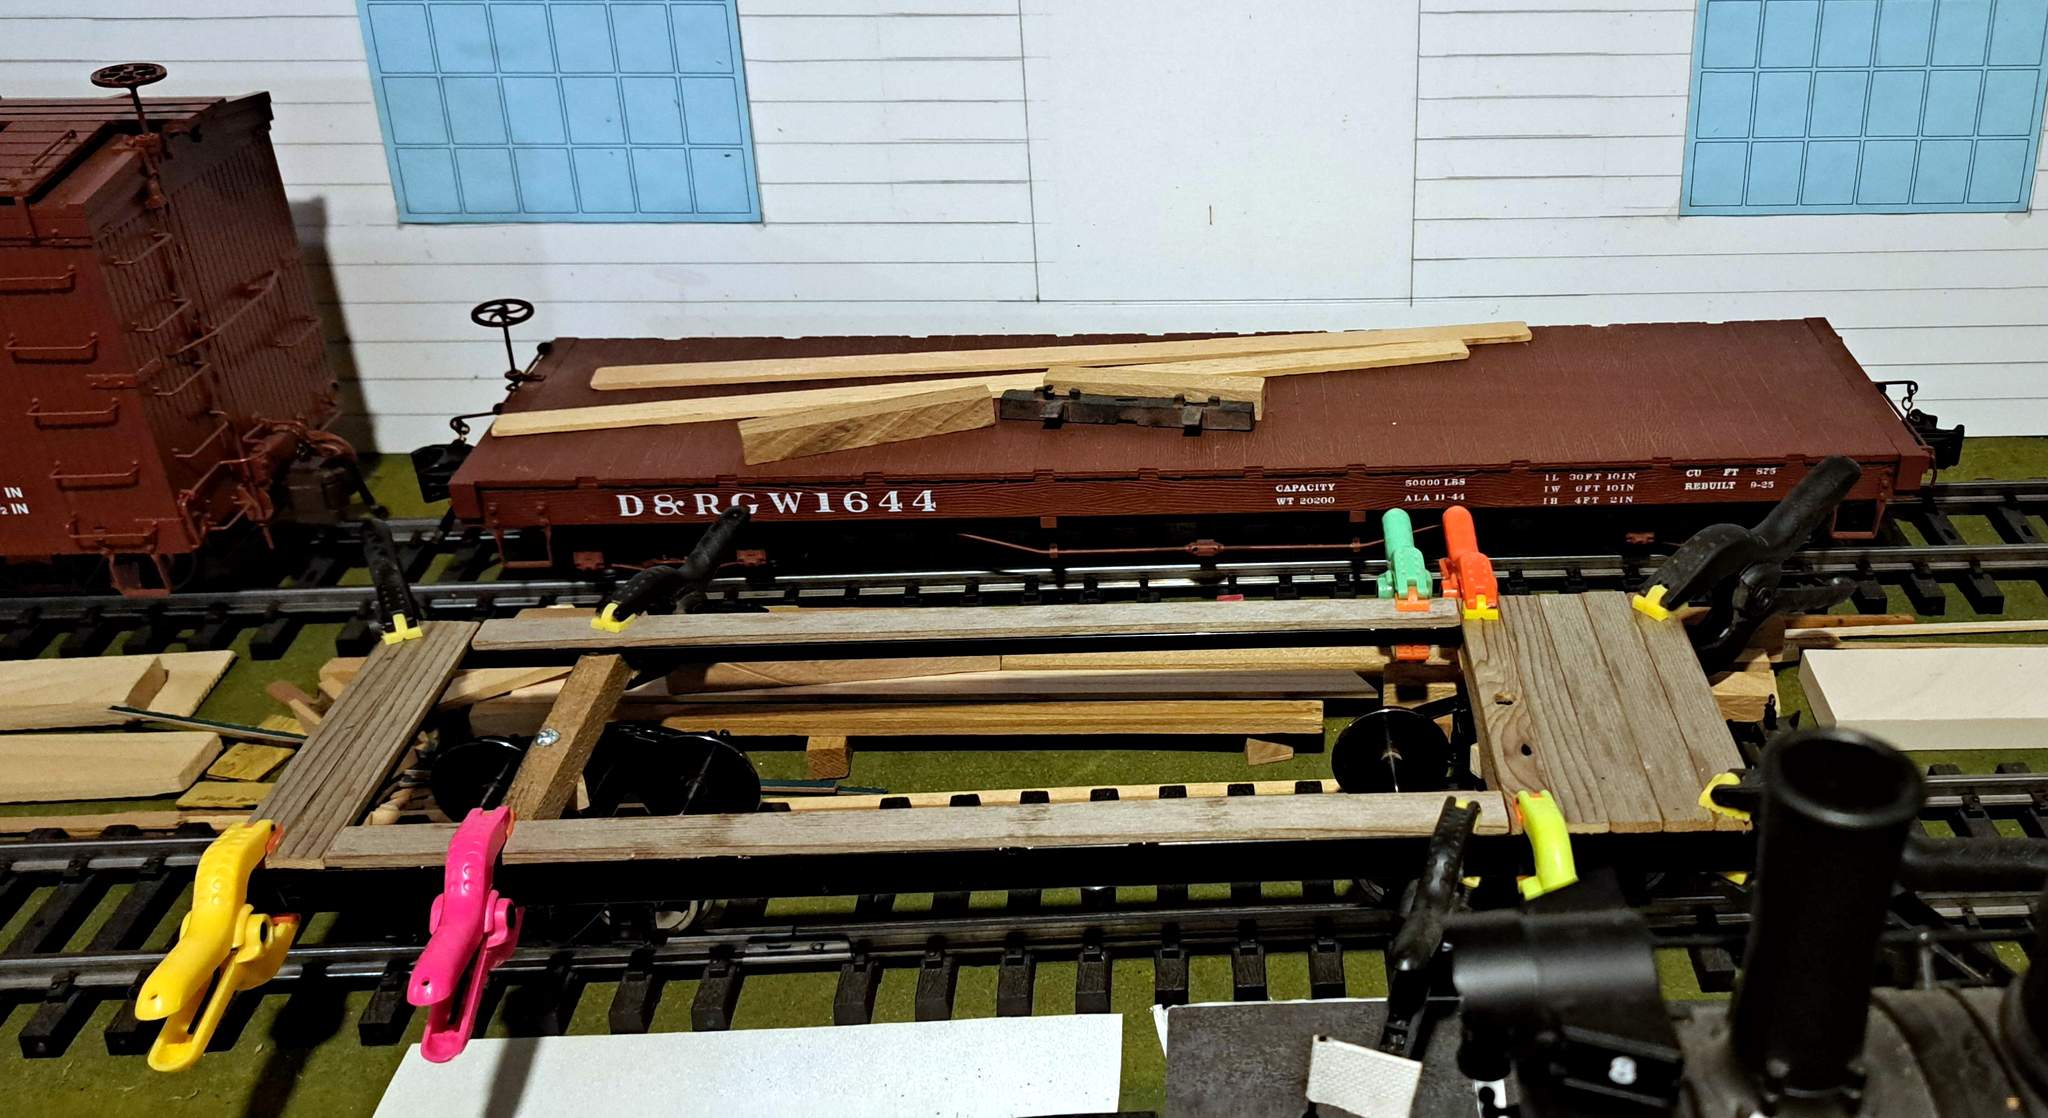
I parked the decked flat on the main near some Fn3 cars. Size looks pretty good…
While I’m waiting for the E6000 to dry (what, a week or so?) I’ll move on to the trailer. I fabricated a door by attaching a slice of a PVC fence rail on to a sheet of styrene, then attached one of my port hole frames, all with MEK. Then, I crossed the point of no return, removing some of the trim and drilling a hole for the window…
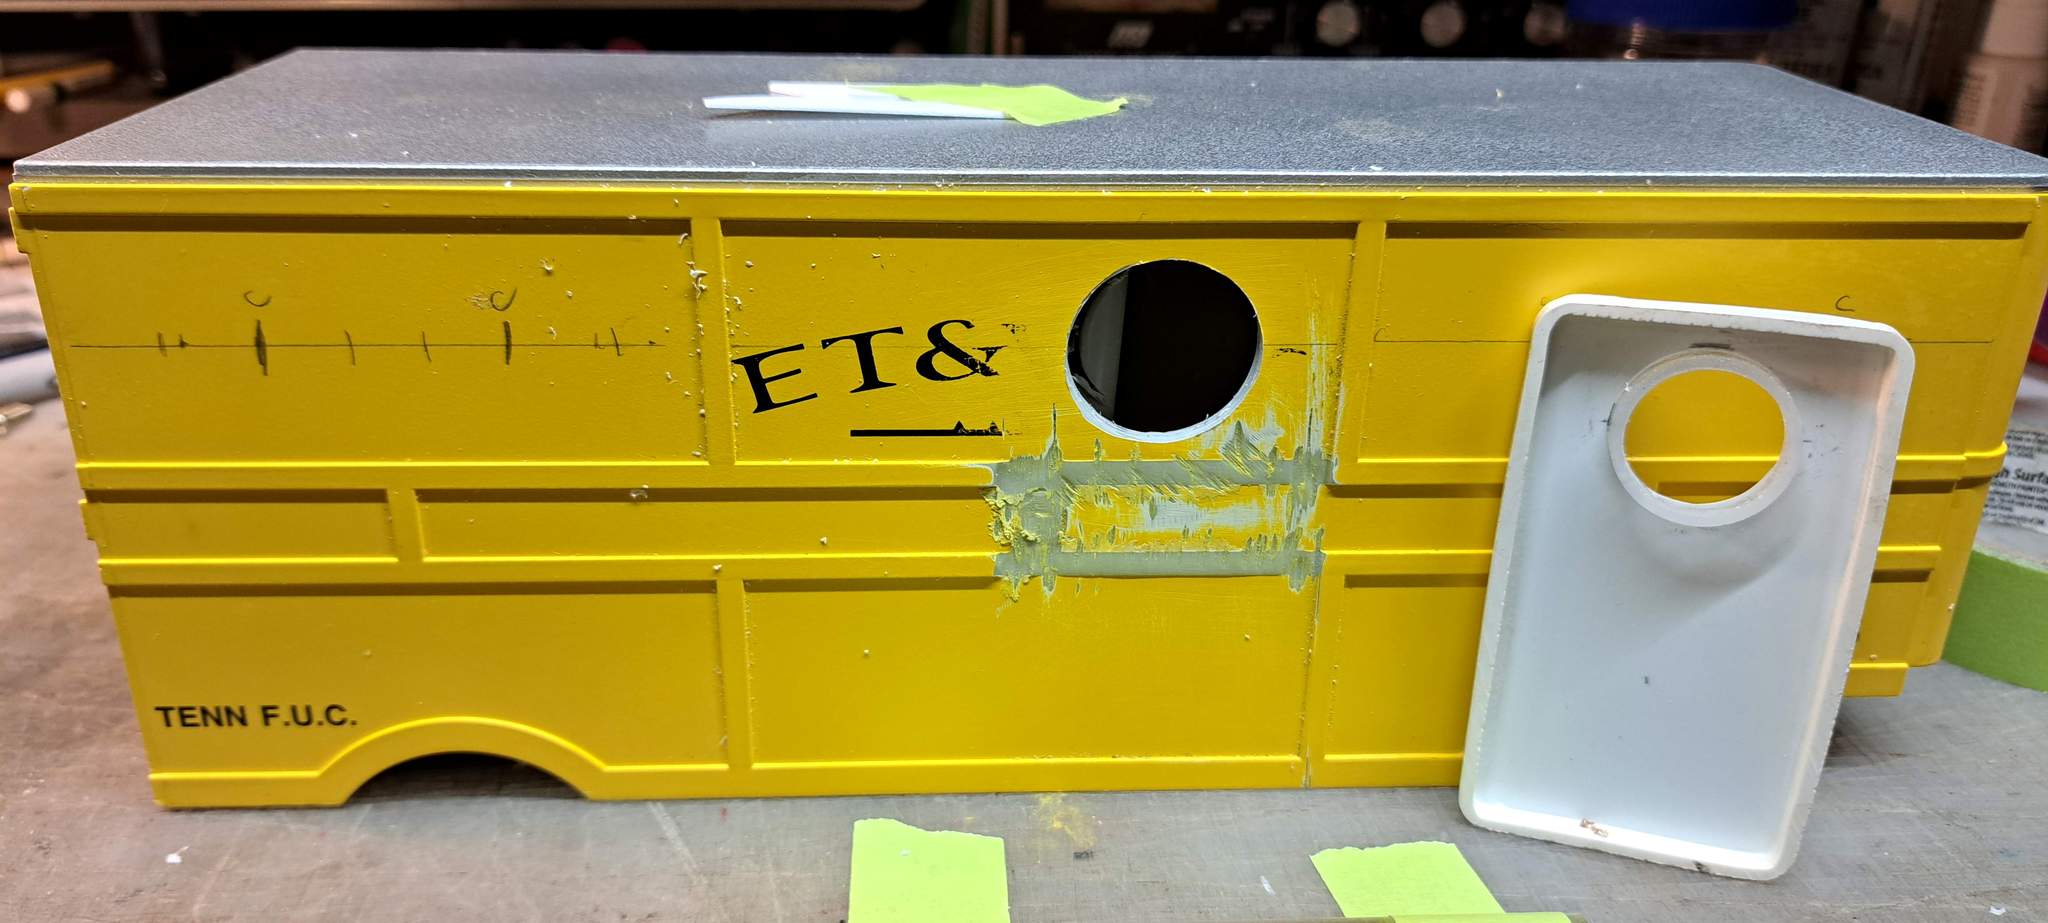
And this is where I found out that The 7/8 bore I had was bent and made a mess. I fixed it with an 1.125" hole saw. The oversize hole will be covered by the door. There will be 5 more port holes on this side, but I need them cut at 7/8". That forced me to send $13 on a hole saw. Other than that, all the materials have been from my supply.
that’s progressing nicely
To that point yes, but yesterday I got distracted with a hobby I’d like to start: Field Recording train sounds. I’ve been selling stuff on Marketplace which means I get to see a lot of Marketplace ads in my feed. I’ve been considering a portable digital recorder for a number of years, but the nearly $200 price tag has kept it on the back burner. When a Zoom H4n came across my feed at a dirt cheap price I couldn’t resist. Picked it up yesterday morning and spent the day learning how to use it.
Back to the topic. My lovely wife waited at HoDePo for nearly an hour while they picked the hole saw I ordered on-line while she was out. By the time she got home I was about done for the day, so it still sits. I could have gone in and picked it myself yesterday and saved her the wait time.
I did complete one step late Tuesday. In order to access the truck mounting screws on top of the bolsters, the van body will need to be removable. I completed the attachment with 4 self taping plastic screws from my hardware bin…
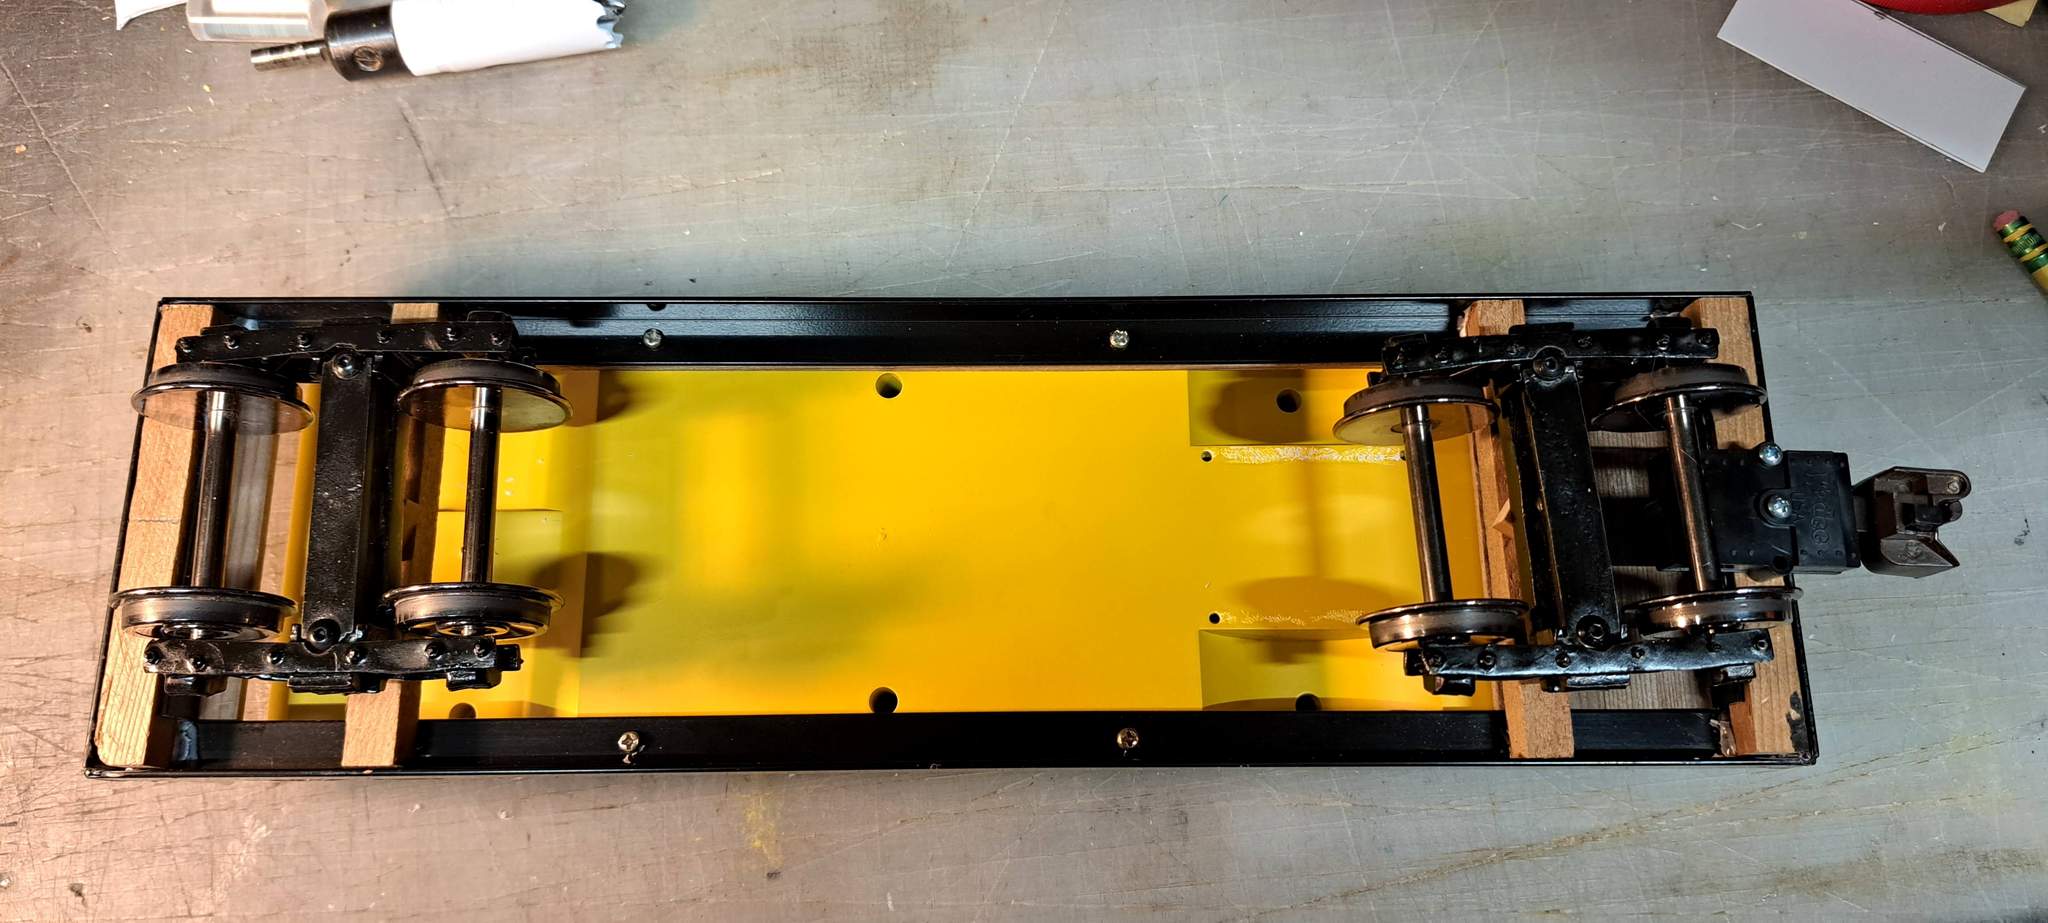
The topside view of just the van base attached to to frame. I might add some thick styrene blocks where the screws are just to give them a little more meat to bite into in case of a derailment…
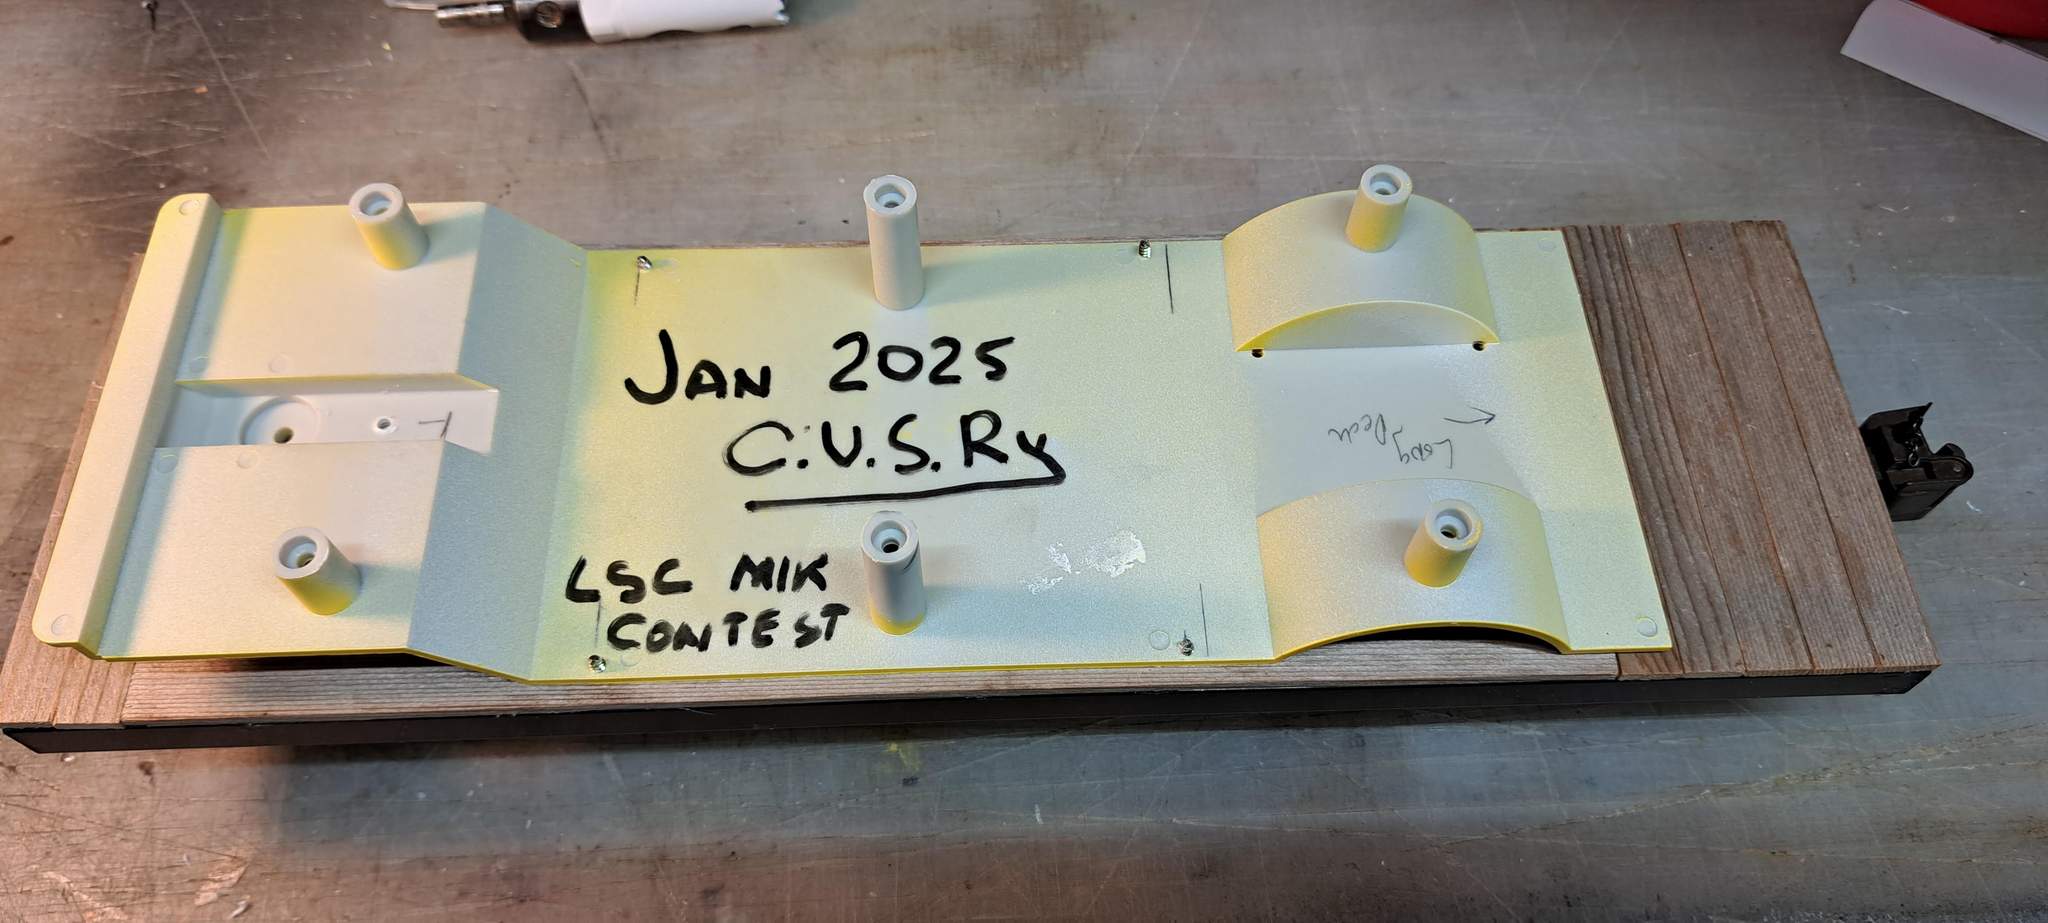
The new hole saw is on the bench just above the car. Perhaps it will get used today.
EDIT to add: I just realized if my goal was a quick and dirty steel frame wood deck flat, I could be done now and beat Vic 
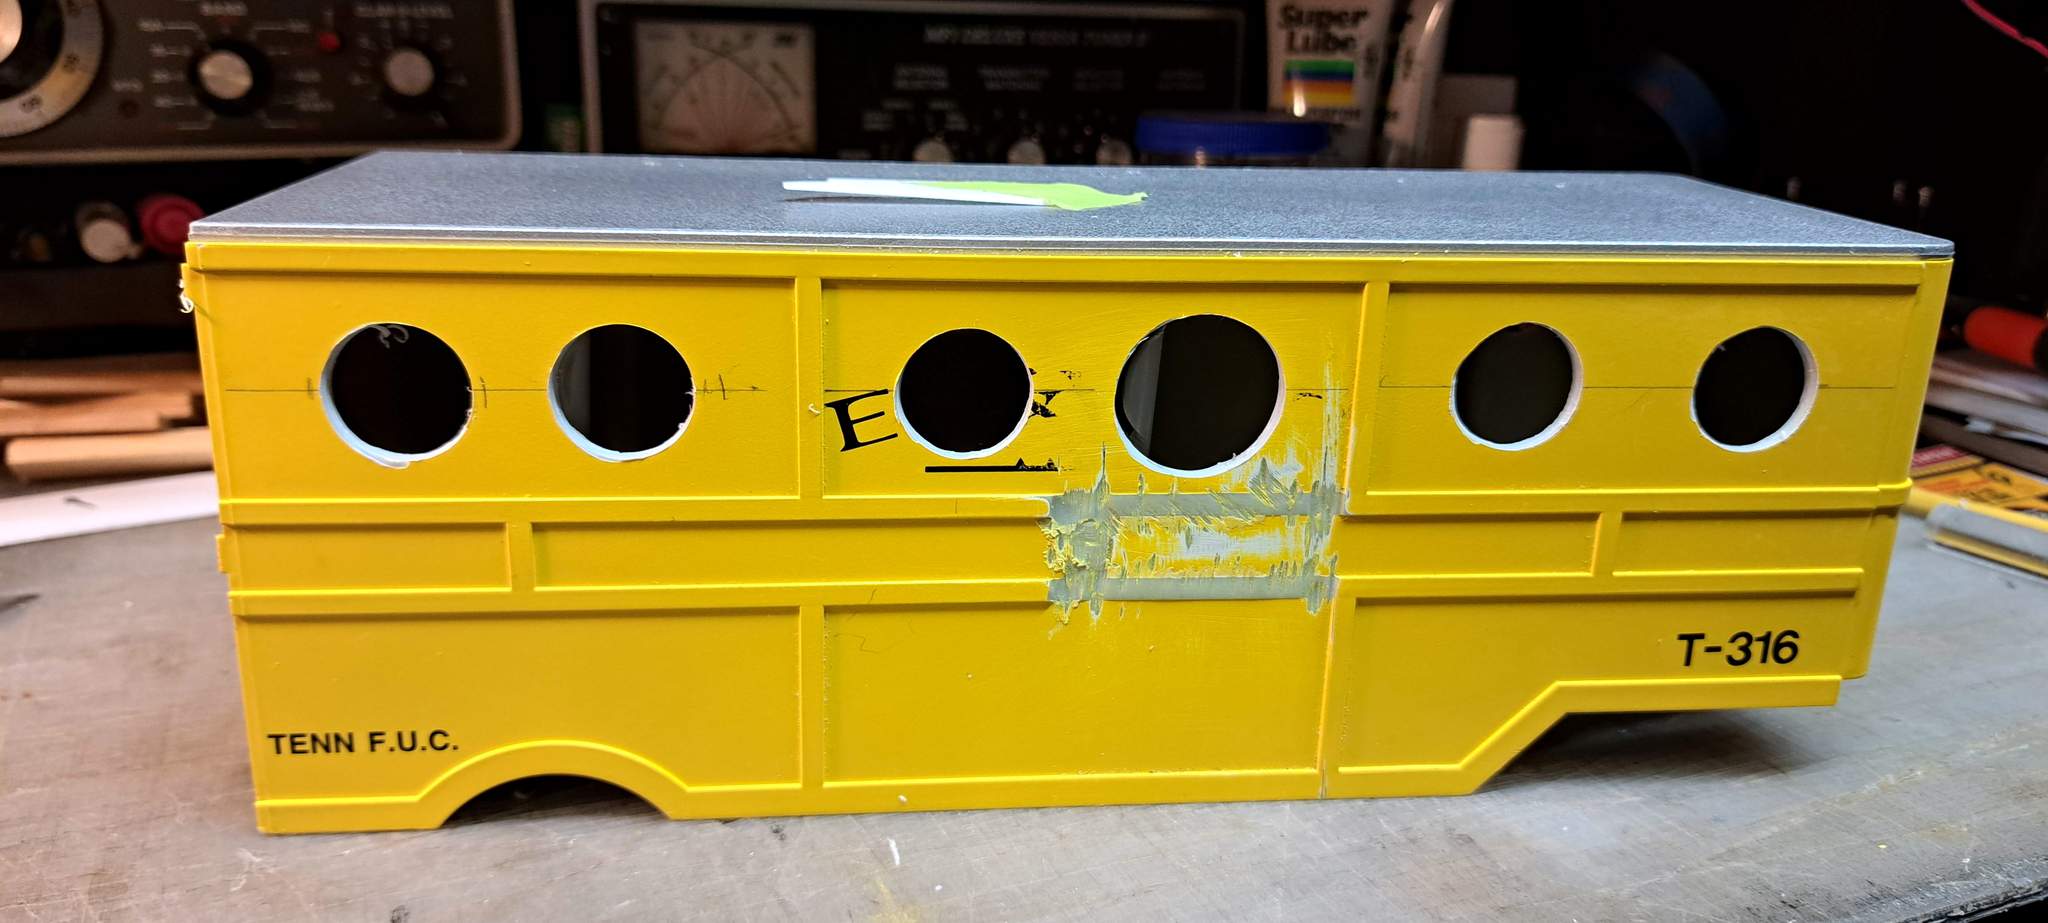
The brand new 7/8" hole saw did a great job opening up the portholes both front (above) and back…
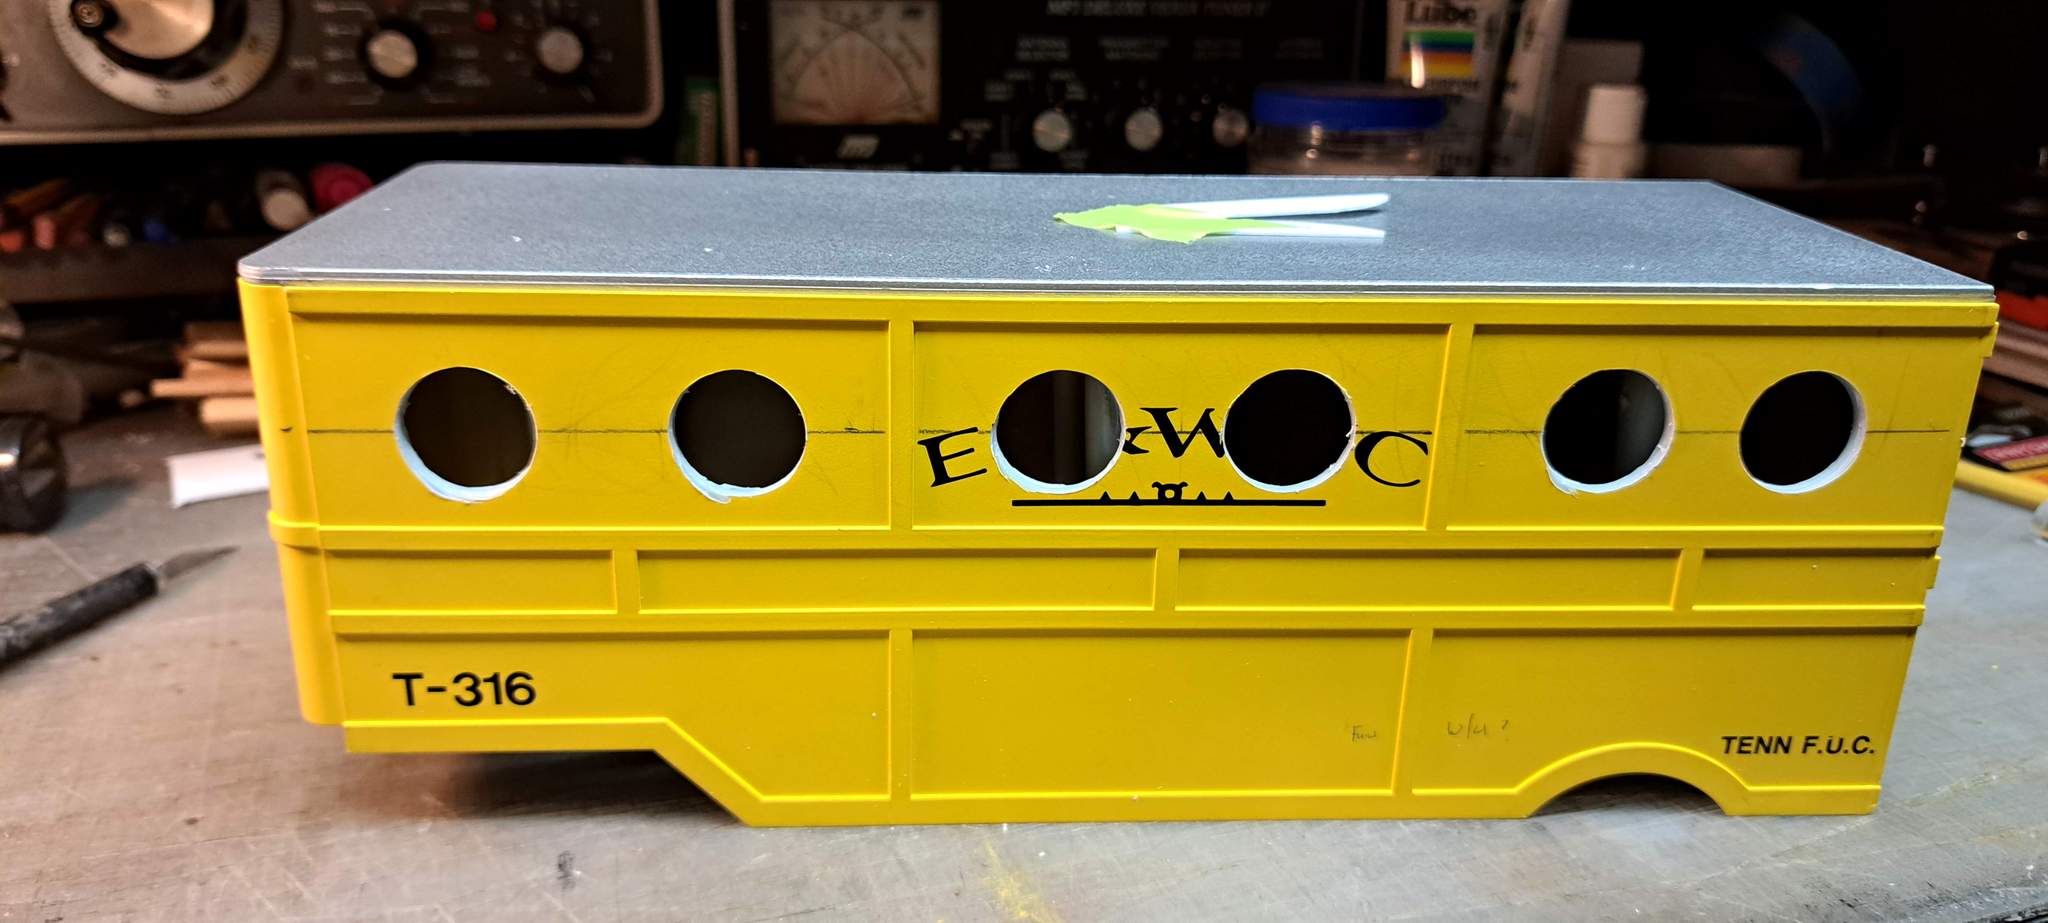
Next, I mocked up what it will look like with the porthole and door frames in place…
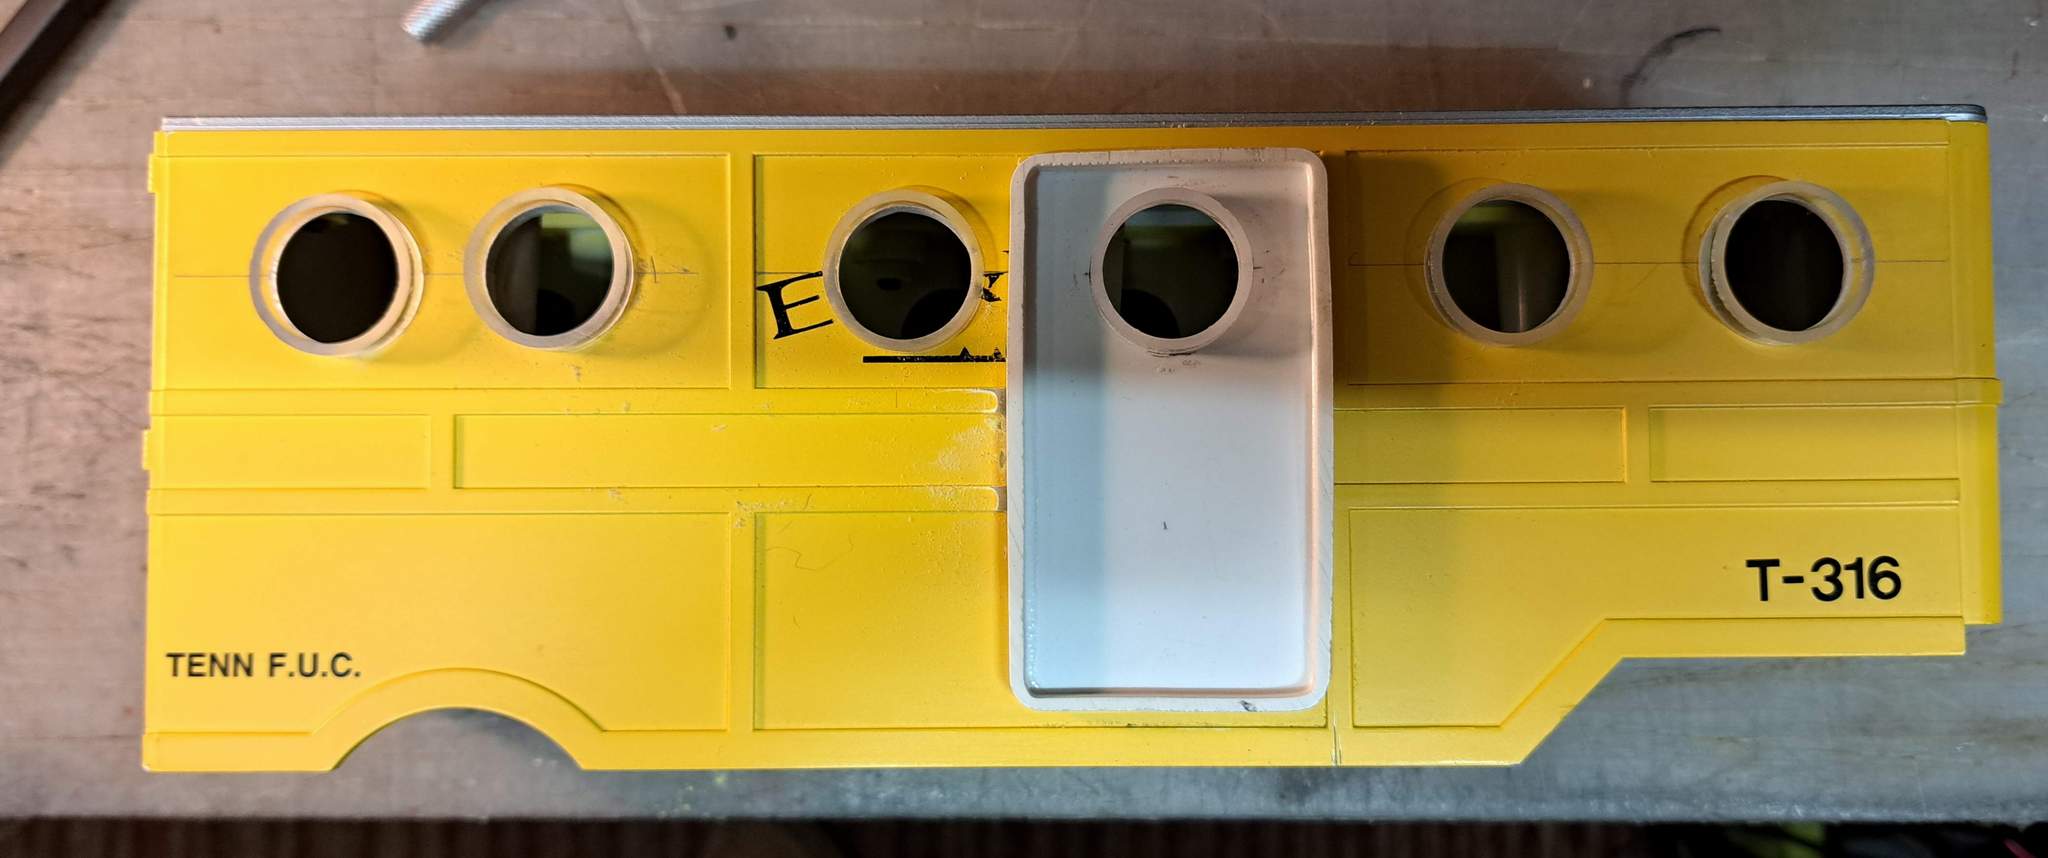
My initial idea was to clad the van body with that scribed siding pictured at the top of the thread. With the added wall thickness added by the siding, the port hole frames would stick out less. Then I kind of fell in love with the look of the 40’s body style. Without any siding, I’m afraid they look too deep…
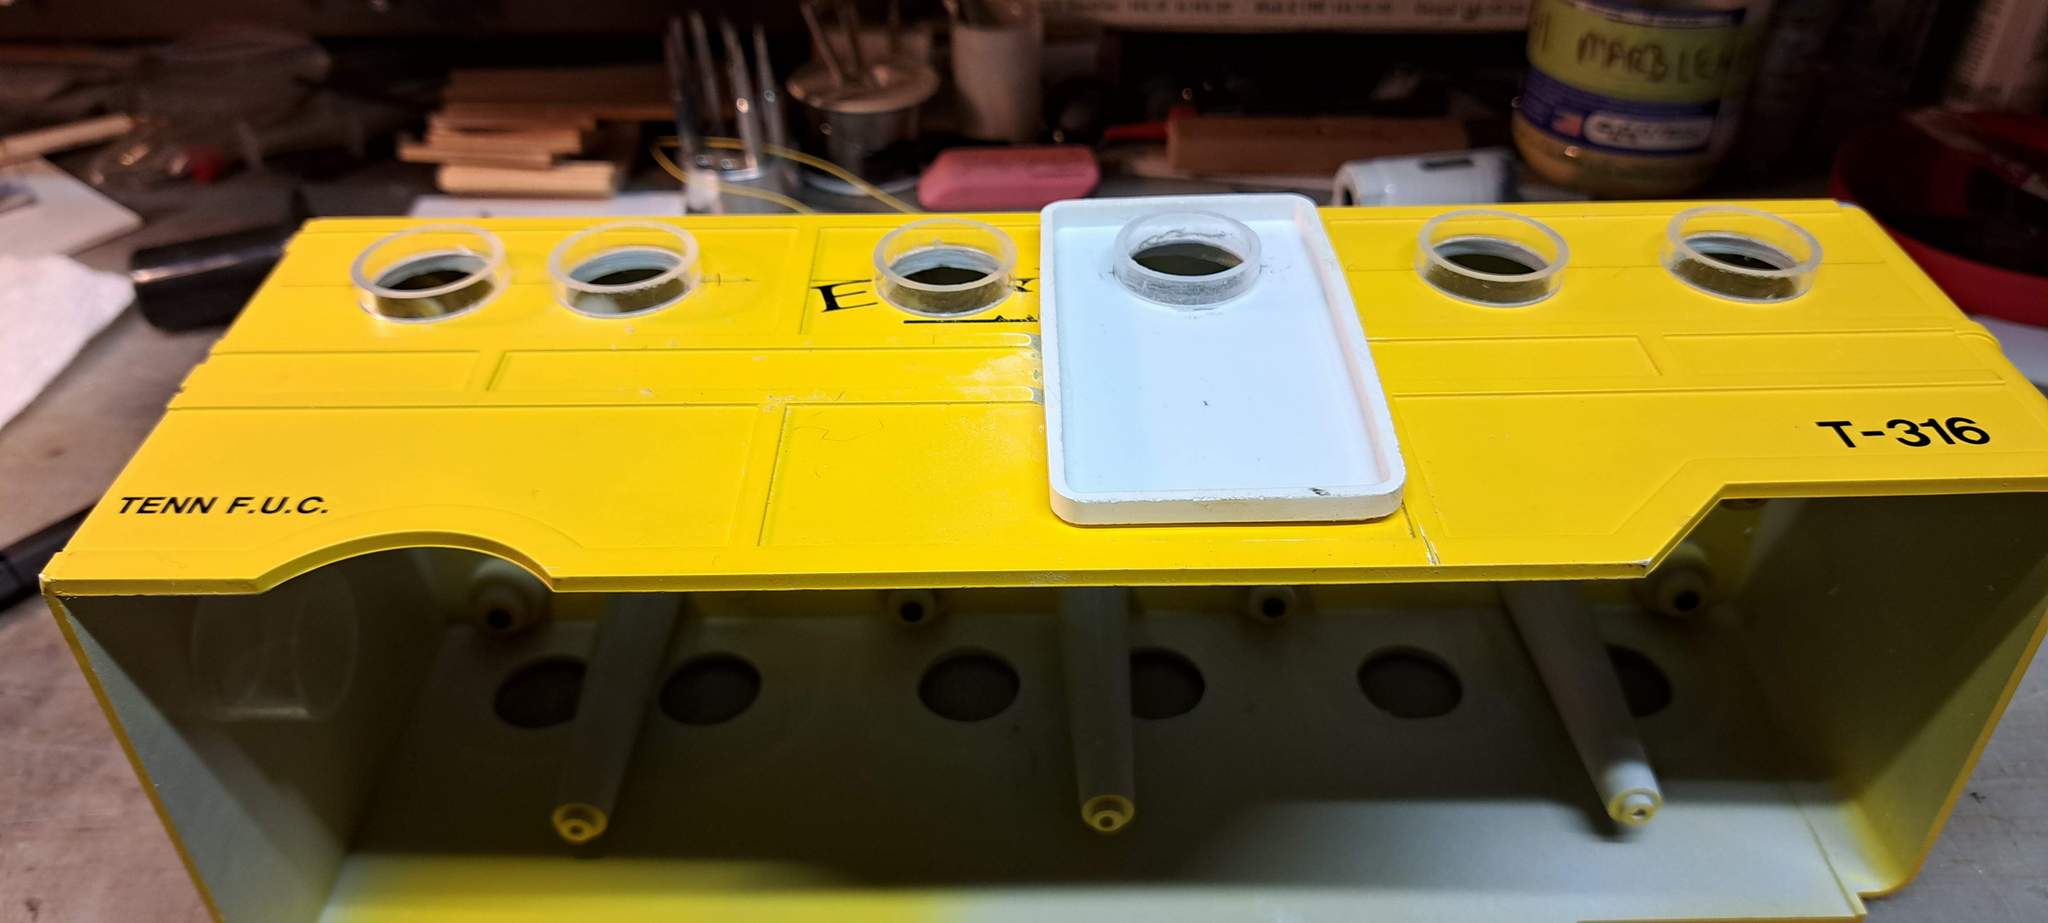
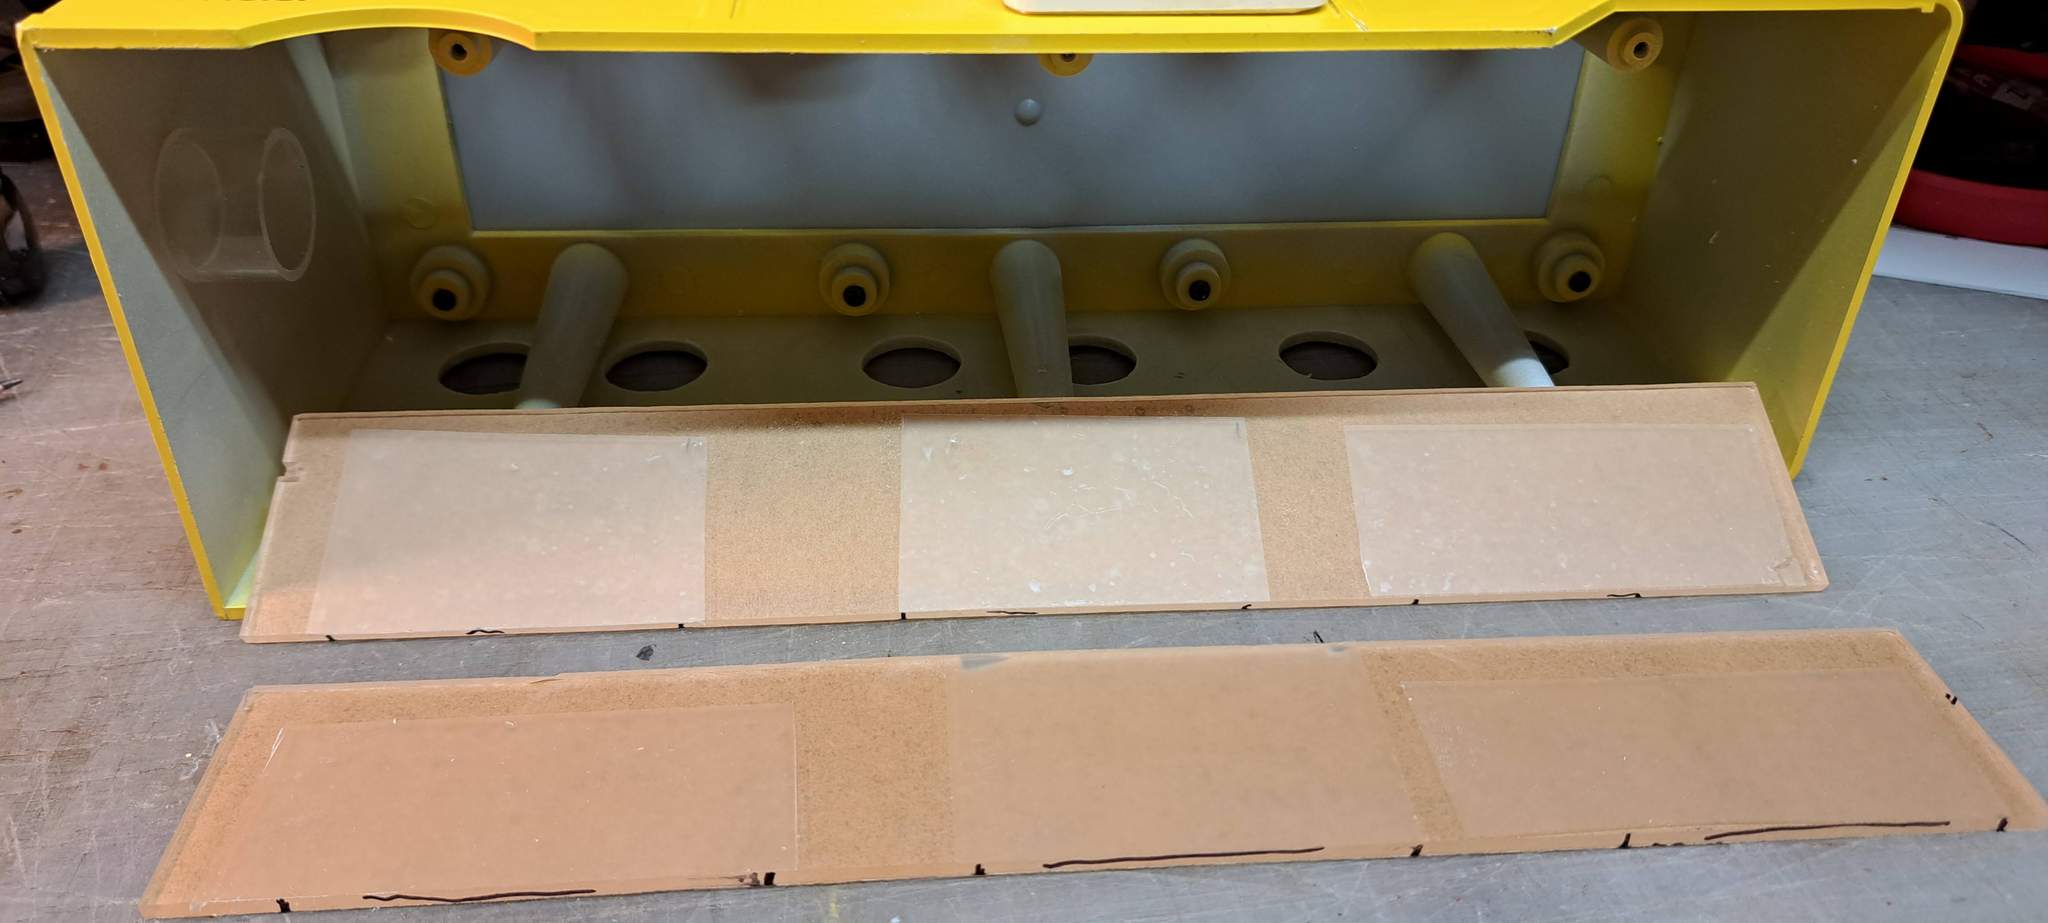
So, now I’m considering putting them on the inside, leaving the outside just plain. Behind the port holes will be these acrylic strips with frosted vinyl. They will allow light to pass but no interior view should I decide to light it. Because of the mounting studs, the sheets will only work in the porthole frames are on the outside…
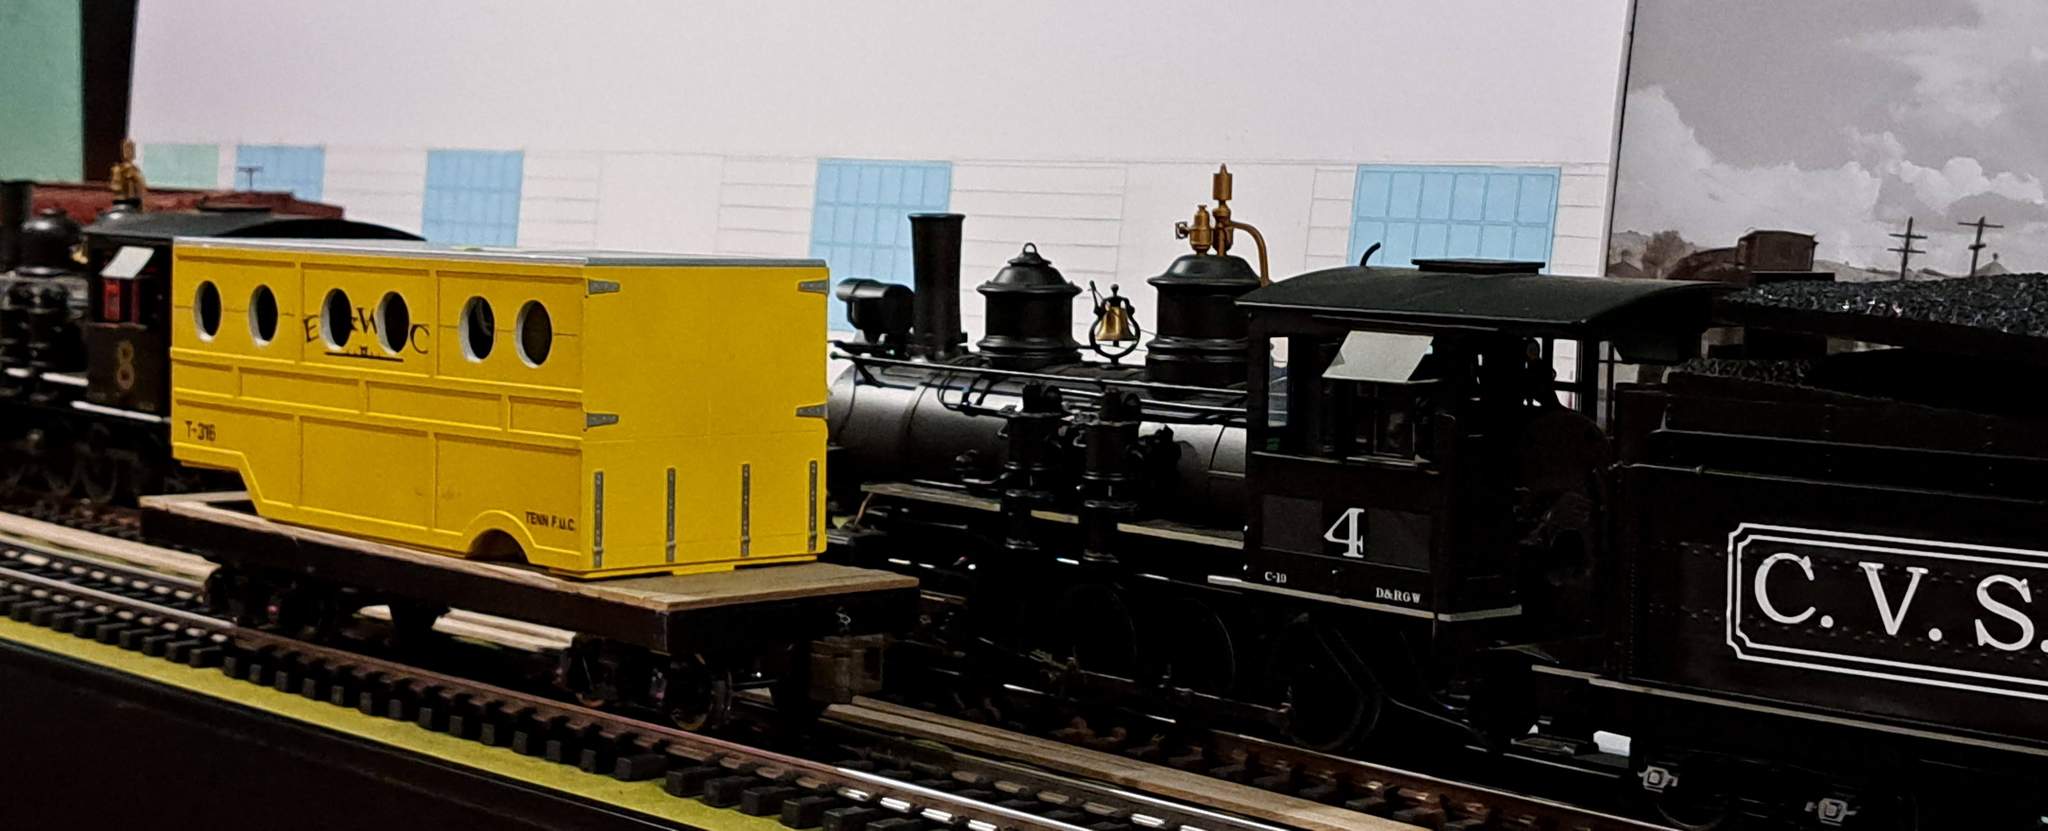
While I contemplate Innies or Outies, I instaleld the second coupler and ran extensive road and switching trials on the indoor. These trucks are heavy. The car tracks great and rolls freely…
YES …was gonna say portal windows …ok, i’m out no more said …Only had to add that for 20 characters
I kinda like the existing sides myself. This is really coming together
Those windows would work really well like light pipes, if you were to add a little LED on the back side of each one… Different colors would make it a neat night time look…
The McKeen and early Airstreams are my inspiration.
Funny coincidence. Before reading this post, I lettered the flat last night. The only vinyl numbers I had in stock that worked with my low numbered flat series was 22! I had no idea the V&T McKeen was #22 
I’ve decided to leave the holes as-is and place the acrylic frames inside if I can figure out how to cover them with acrylic on the inside.If not, just the frosted acrylic inside the body which would look like the McKeen windows. The body color will be silver and I’ll paint the insides of the port holes black.
The door will probably be re-made. I have thinner rectangle slices that will look better.
Starting to think about details like a roof AC and furnace vent.
Today was a dry day with above freezing temps. The weekend will be wet, then snow, then deep freeze next week. So today was my last chance to paint for a while.
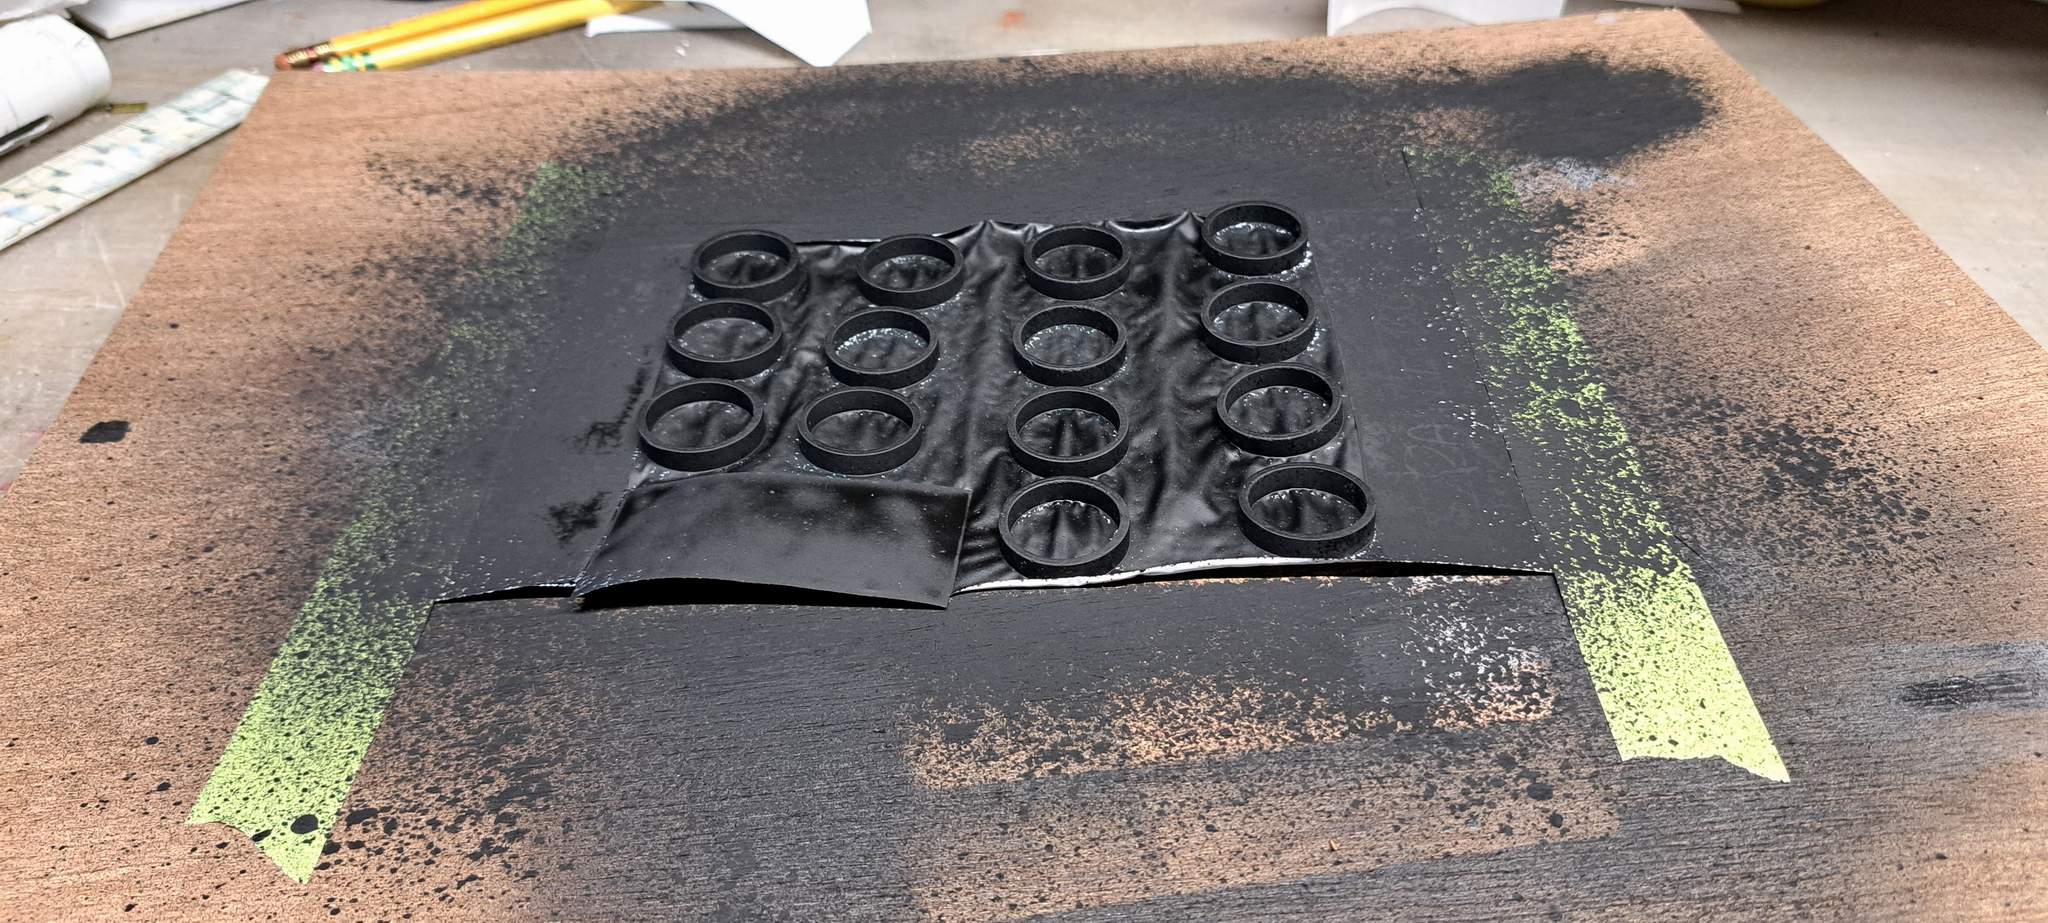
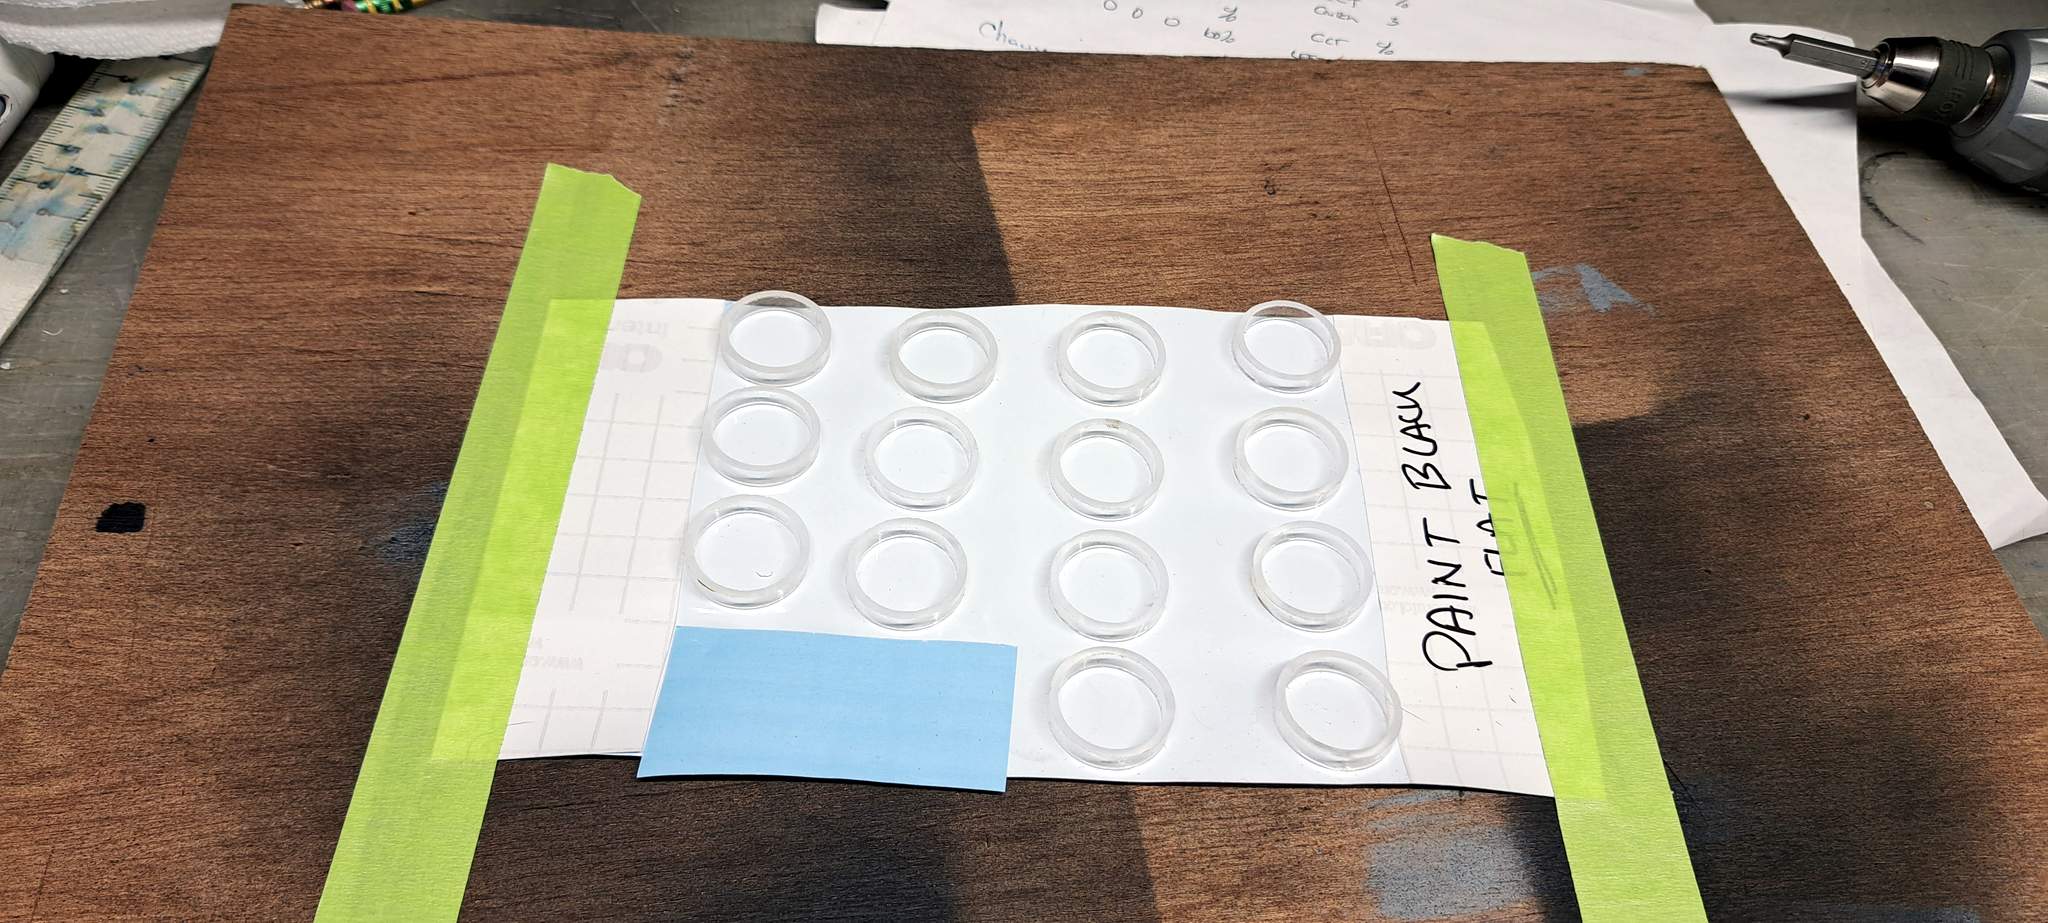
I’ve decided not to use these acrylic rings, but I thought I would share a painting technique. When spray painting small parts, it’s easy to move them with the spray, sometimes sending them to the dirty ground. To avoid that, I use something sticky. Sheets of double sided tape will work, but single sided tape, or in this case self adhesive vinyl, can be taped sticky side up for small parts attachment…
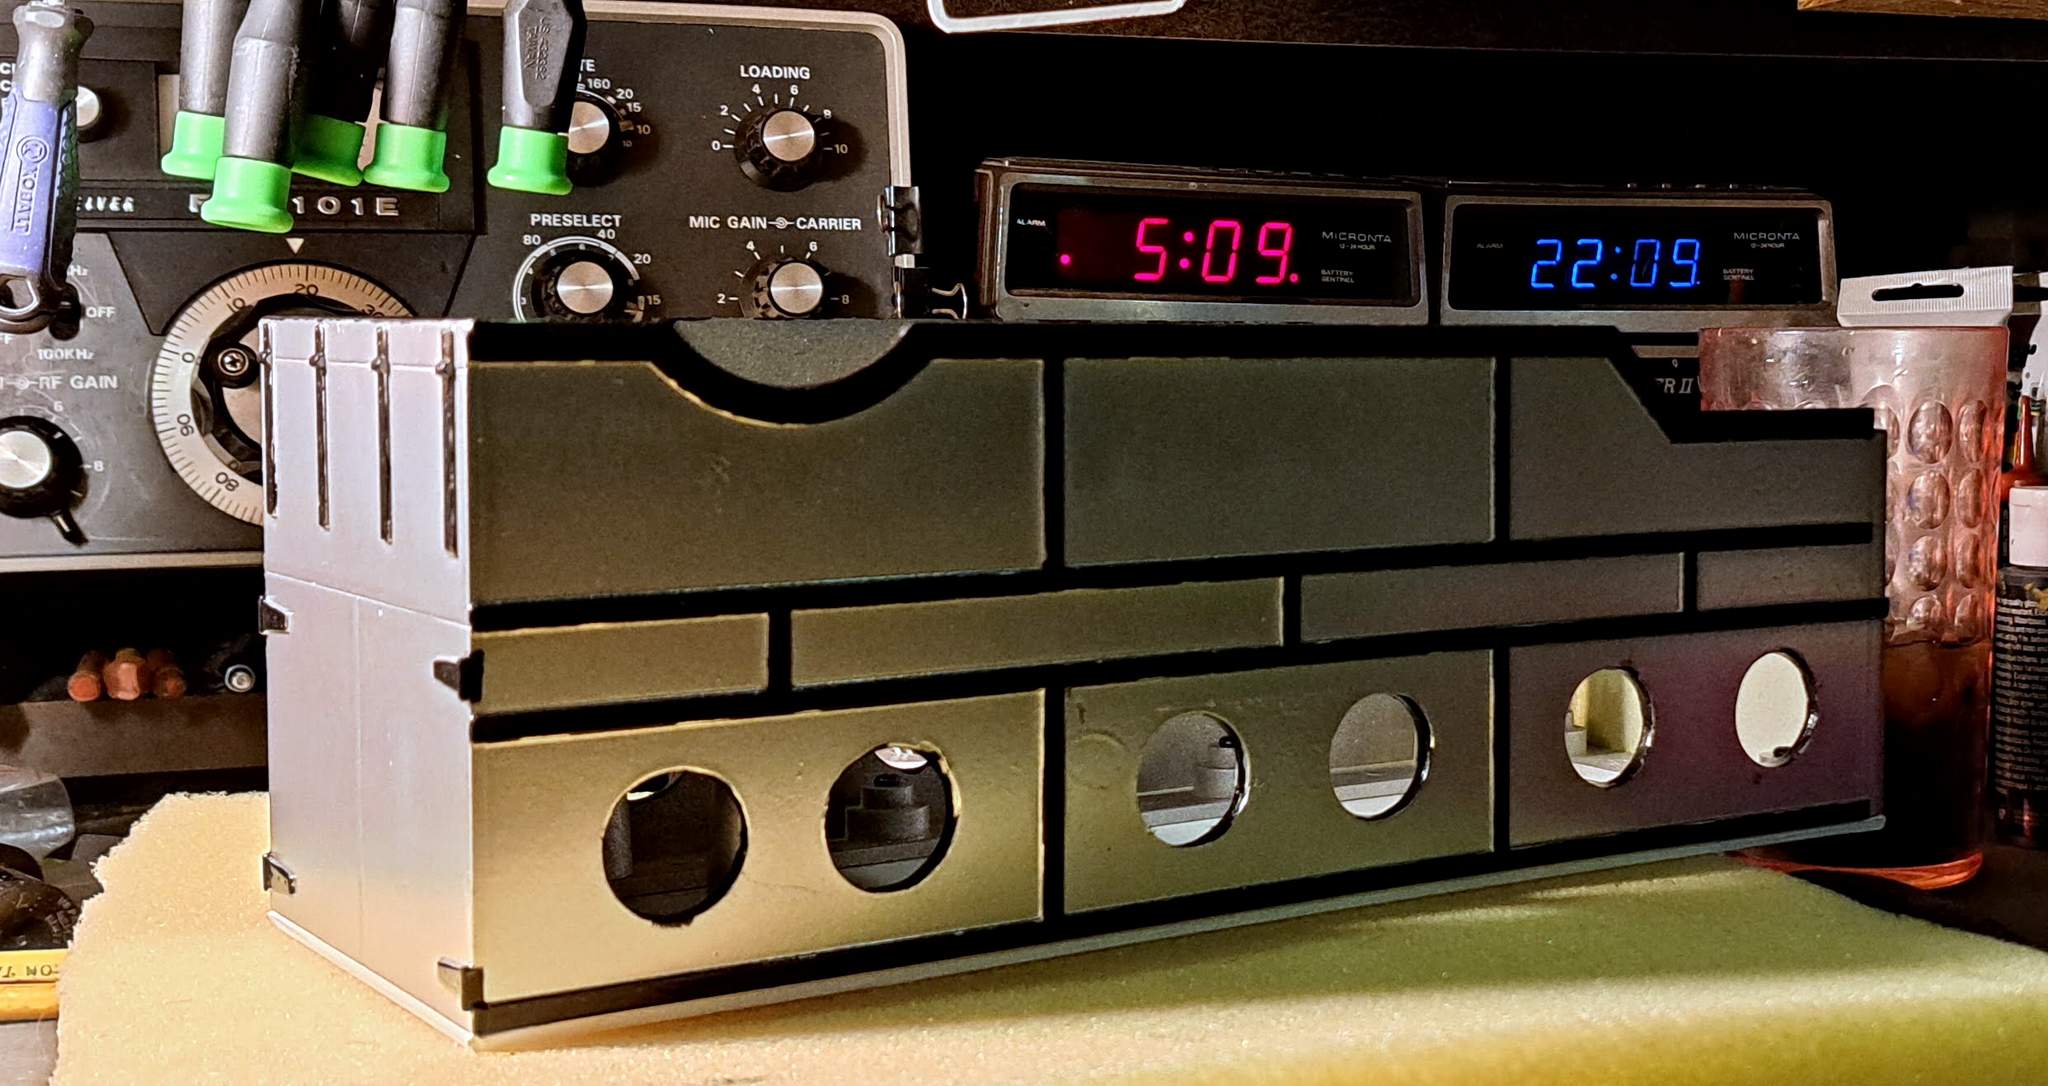
I decided on flat aluminum as the body color. Luckily I found an old can that had never been used! I screwed the body to that wood piece to facilitate handling while painting…
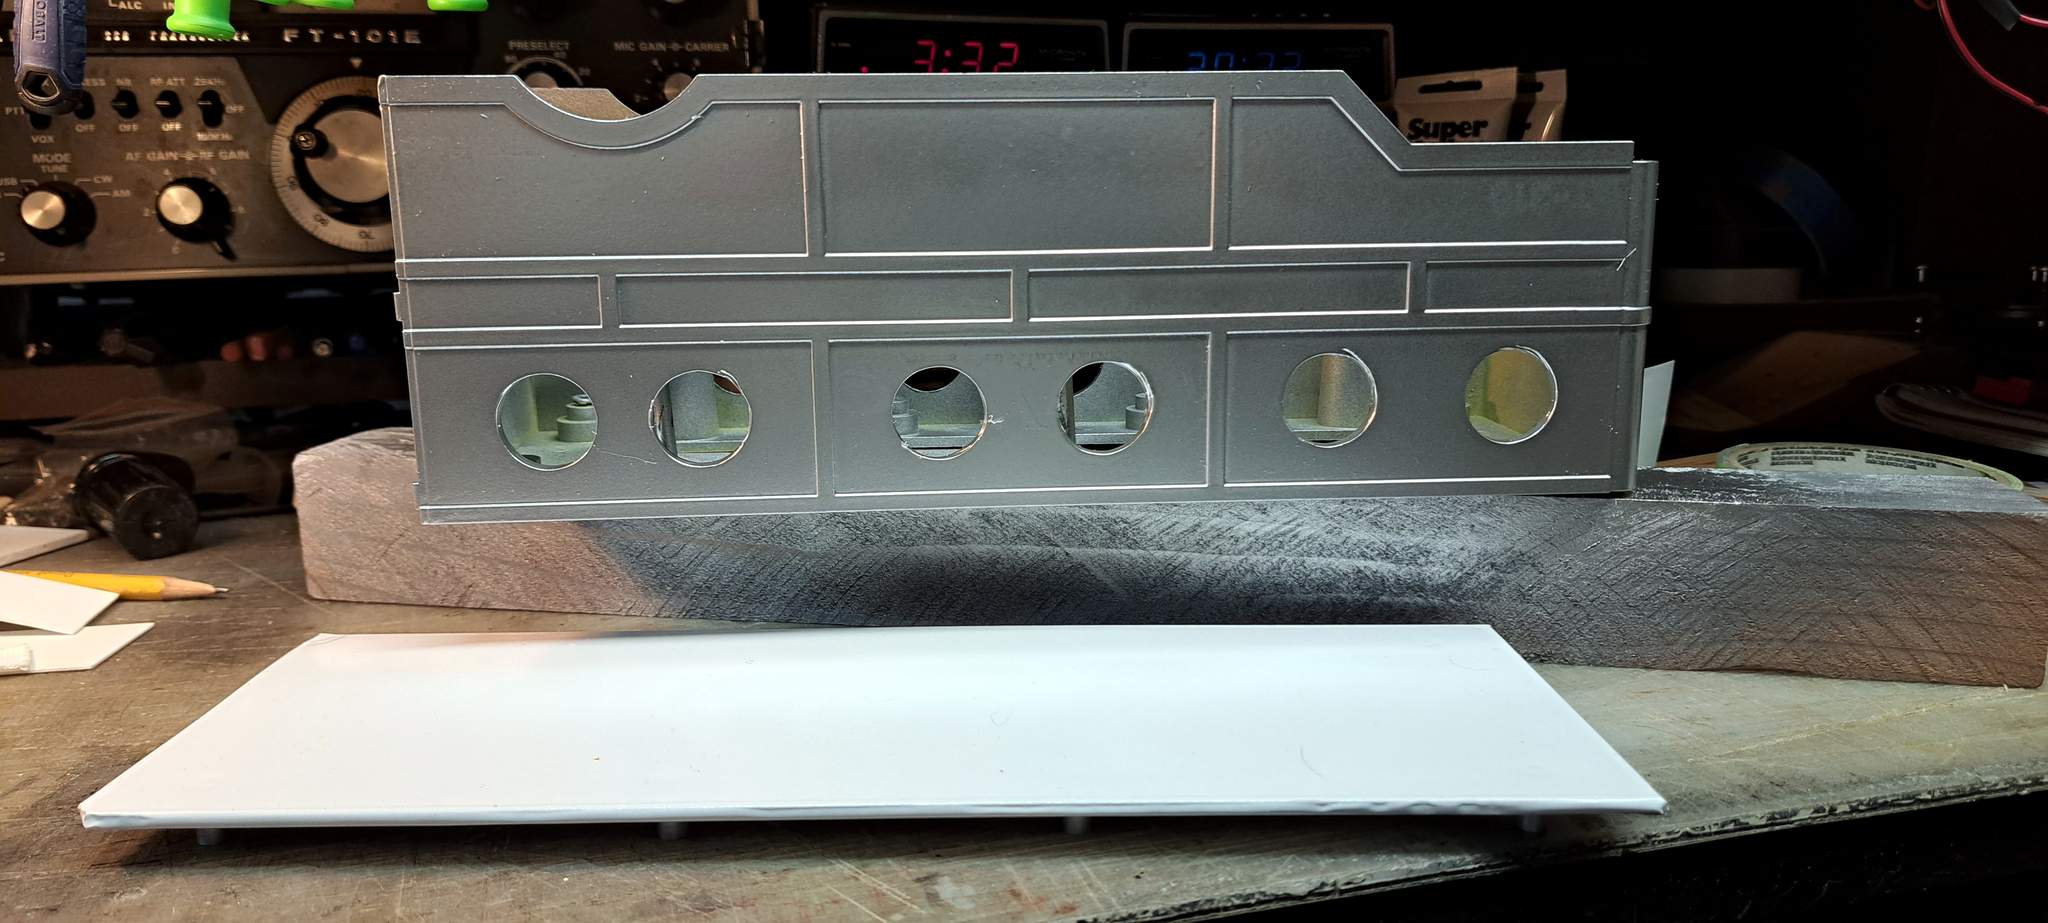
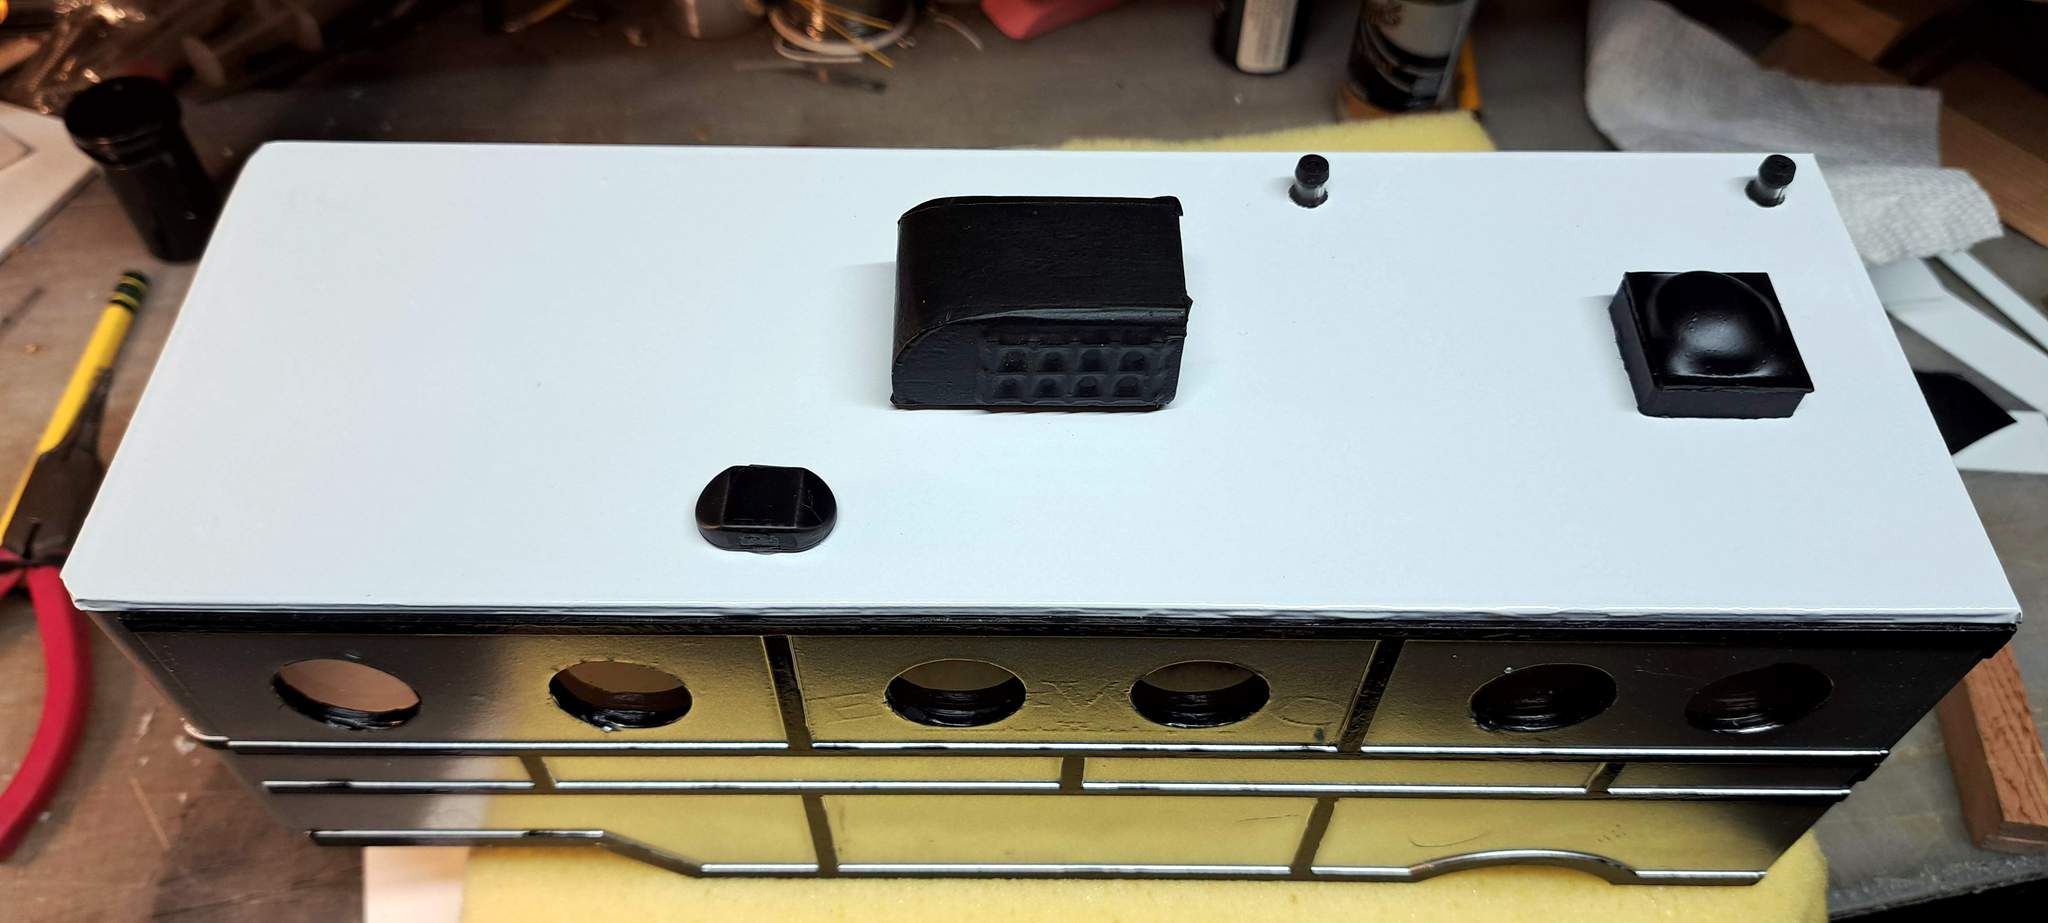
Also shown above is the roof. It had been silver, but I decided that the C.V.S.Ry. Shops would have added a rubber RV roof. They are almost always white. I decided a white vinyl wrap was better than paint and removable should I not like the look.
The body details and inside edges of the port holes were painted with black acrylic paint…
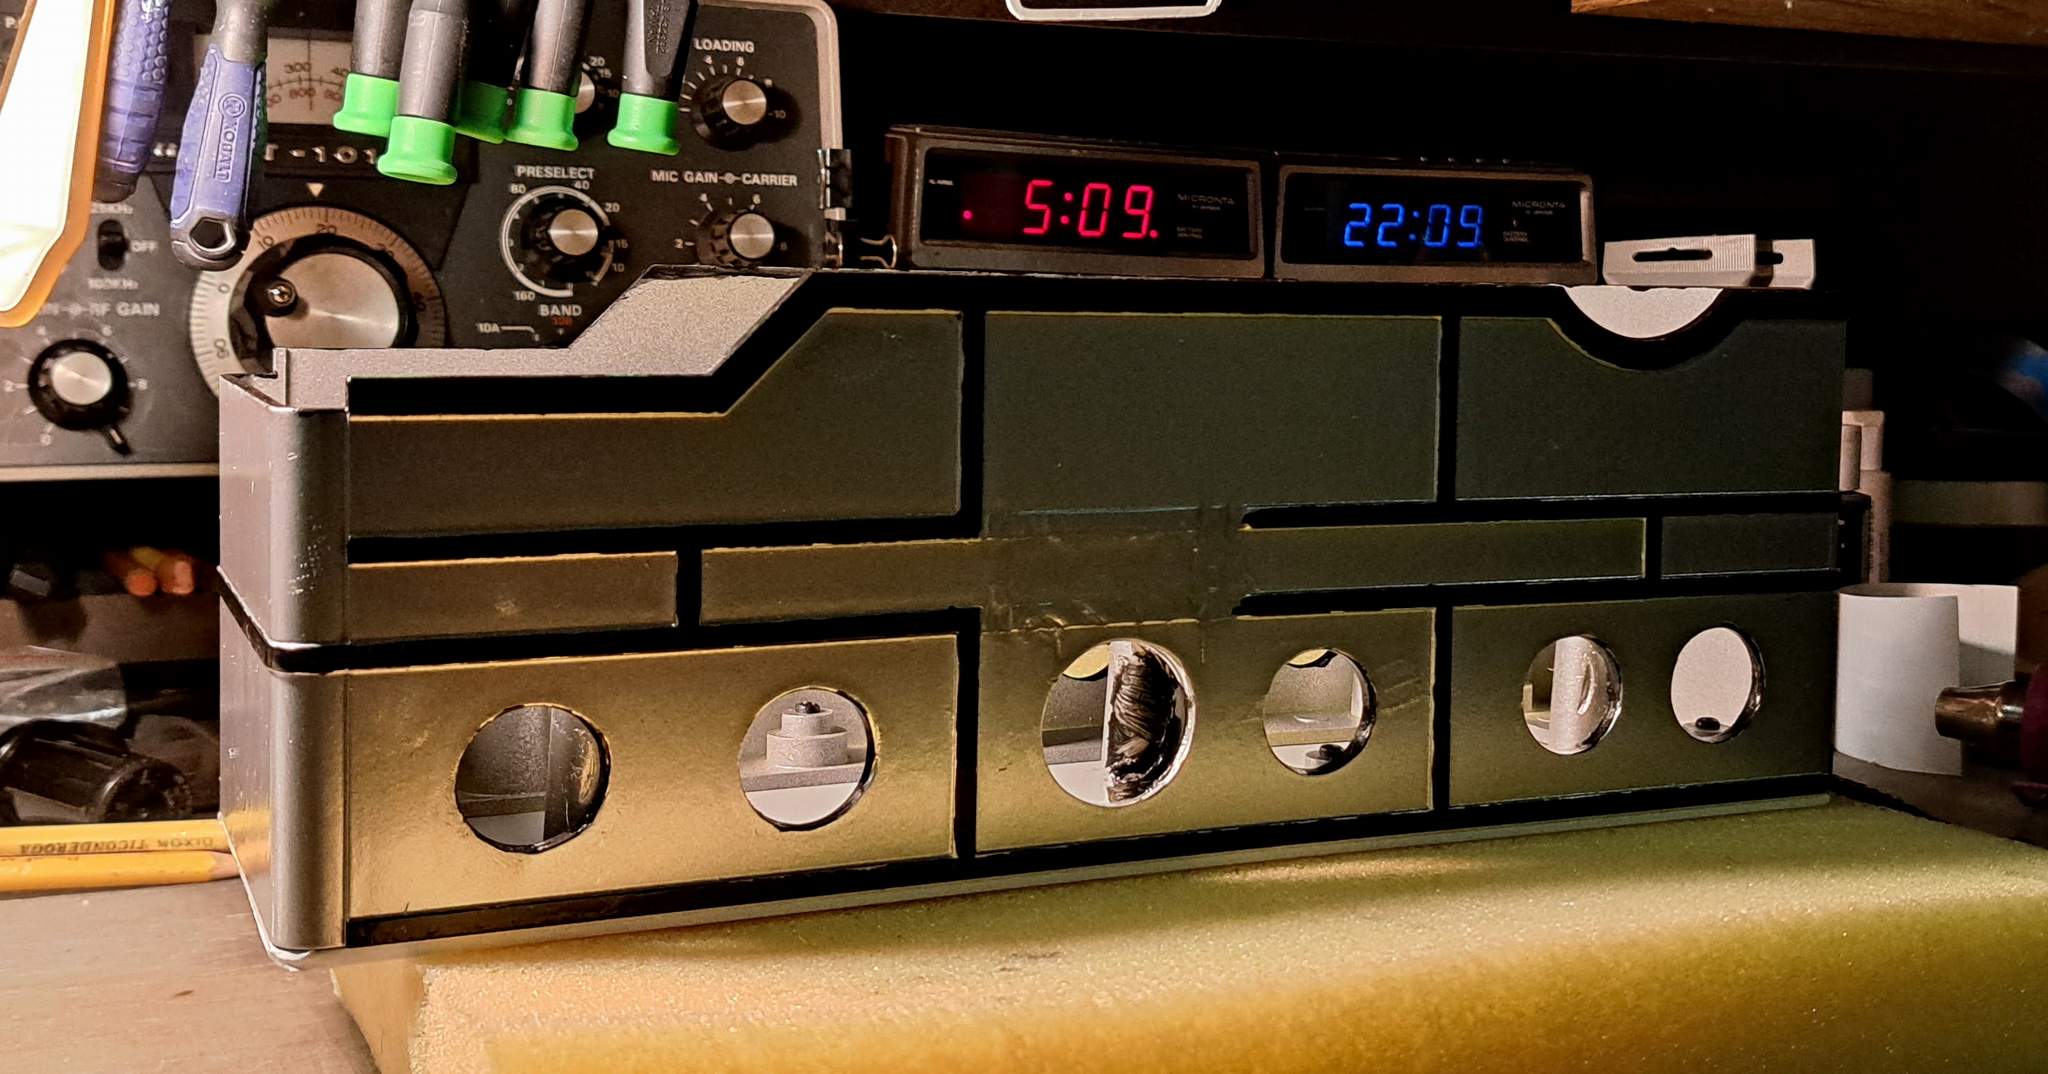
I started working on some of the roof details. I’ve come up with plumbing vents and a roof vent. I have a plan for the A/C unit using a machined wood block and some detail. Work on that tomorrow.
I’d like to figure out how to make one of my plumbing vents a rotary switch for lights but I don’t think I have one and I’m not going to buy one just because it would be cool. I have plenty of toggles I can hide underneath.
That’s really starting to take shape. The world’s first RV flat car.
Love those videos. So many idiots!
During road trials I did check the clearance on my one indoor tunnel, so I think I’ll be OK!
Yeah, I thought I had all my clearances checked and set for my stuff as well until Hollywood the conductor didn’t keep his animals in check. That single elephant stopped a GP9 dead in it’s tracks and that was even with extra sand! As long as Hollywood isn’t a conductor you should be fine then.
I also knew a guy that took his farm animals, donkey, sheep, etc to a live Christmas nativity for his church. His animal trailer had a brake problem so he used his camping trailer.
The local police were not very happy to see him go by with the animals heads hanging out the sides. However when he told the officer the story and how far he was going the officer gave him a police escort 2 miles to the church and told him to get his animal trailer fixed before picking them up!
A little progress on Saturday, but no pictures yet. I worked on several fronts…
I painted the mounting posts inside the body flat black so they won’t be as visible through the frosted windows.
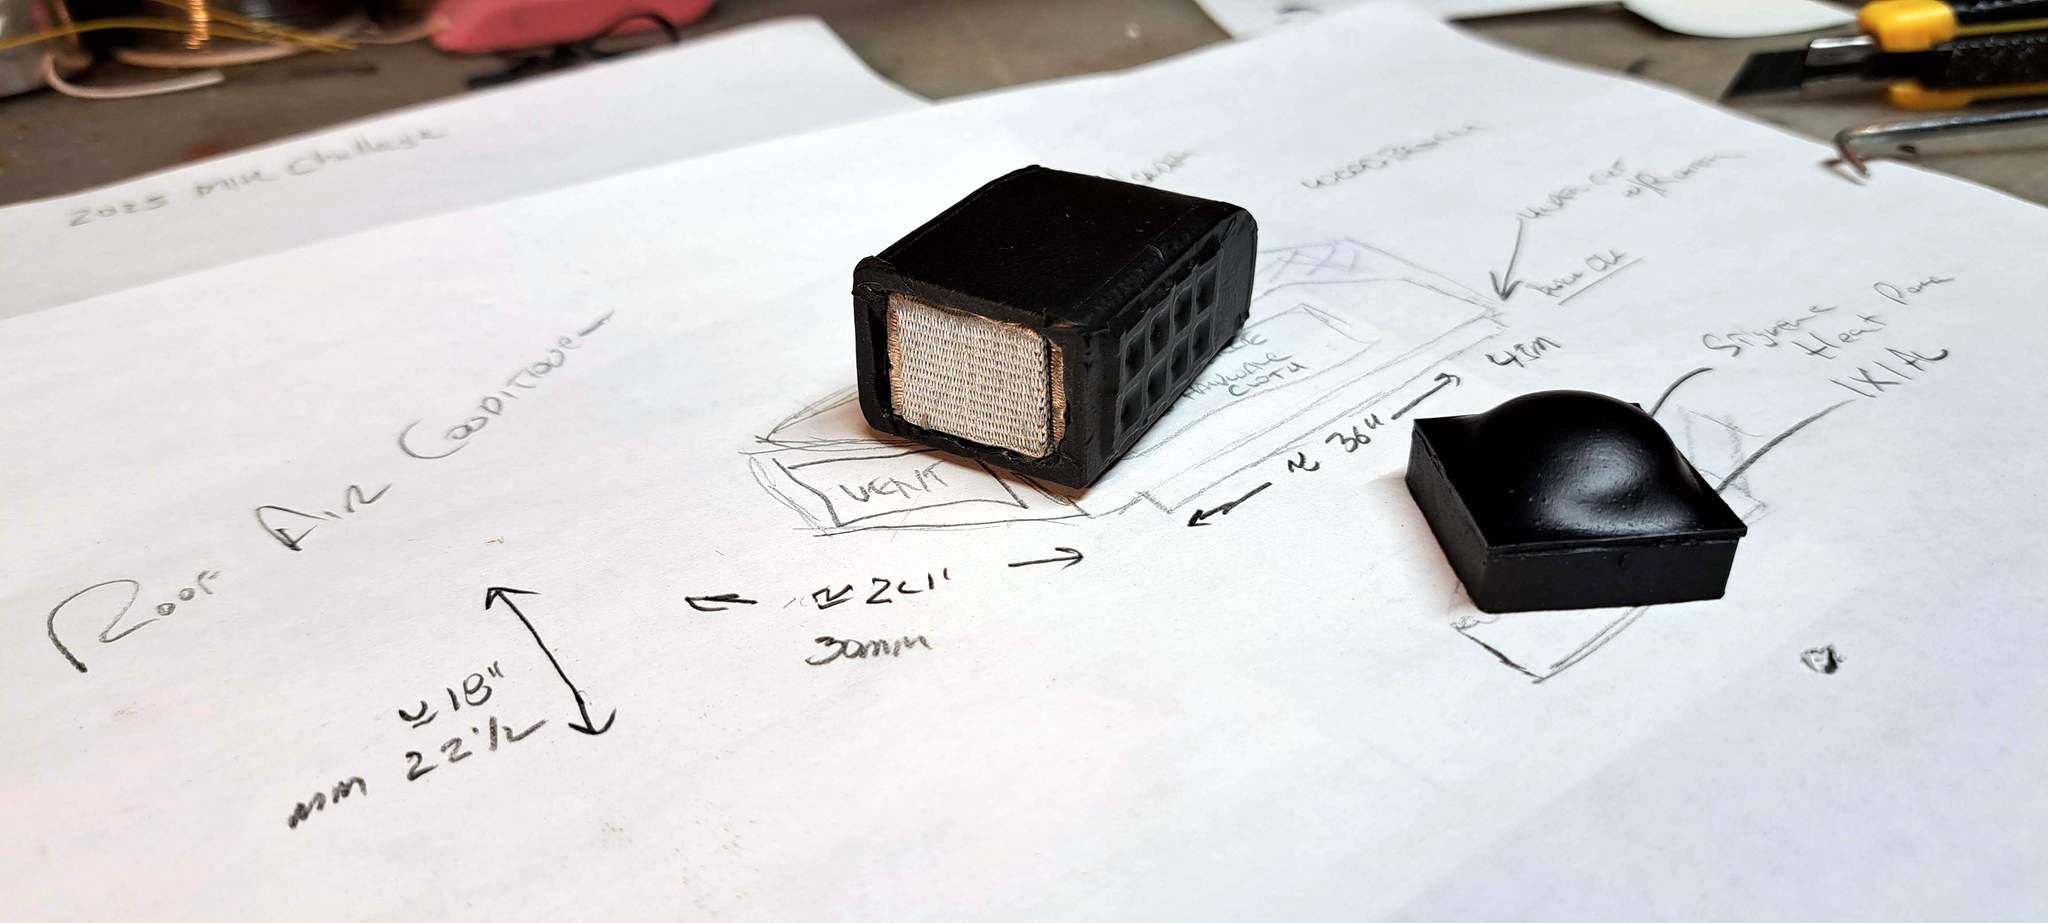
I used my ancient Craftsman router table that I bought for $20 a few years back to shape a Cedar block to become the roof AC unit. With multiple bit changes, this took up a good part of the morning. Some detail was added and the entire unit was wrapped in matte black vinyl. I want to improve upon the look just a bit today before pictures.
I gave up on bending styrene for the front kingpin area. I used my mini table saw to cut some of that scribed siding and began the process of attaching it.
Additional roof details were contemplated. Then it was time for football!
I still need to re-make the door and figure out the one detail I’m not sure how I build: access stairs. It’s possible the RR may utilize the Walk Landing Transload loading platform as a staging point on the RR for guests. That would only require a short ramp to bridge the gap rather than stairs. If I have time, I’ll build both stairs and a ramp so the railroad has more options on staging.
That sure is a neat concept. It reminds me of a rig I saw a photo of a while back. Someone had taken a LGB lil red truck and turned it into a 5th wheel hauler for a passenger car.
The round windows are going to give it nice character.
I didn’t get a lot of hobby time this weekend, but I did get several things accomplished. The window acrylic was installed followed by the roof and roof details…
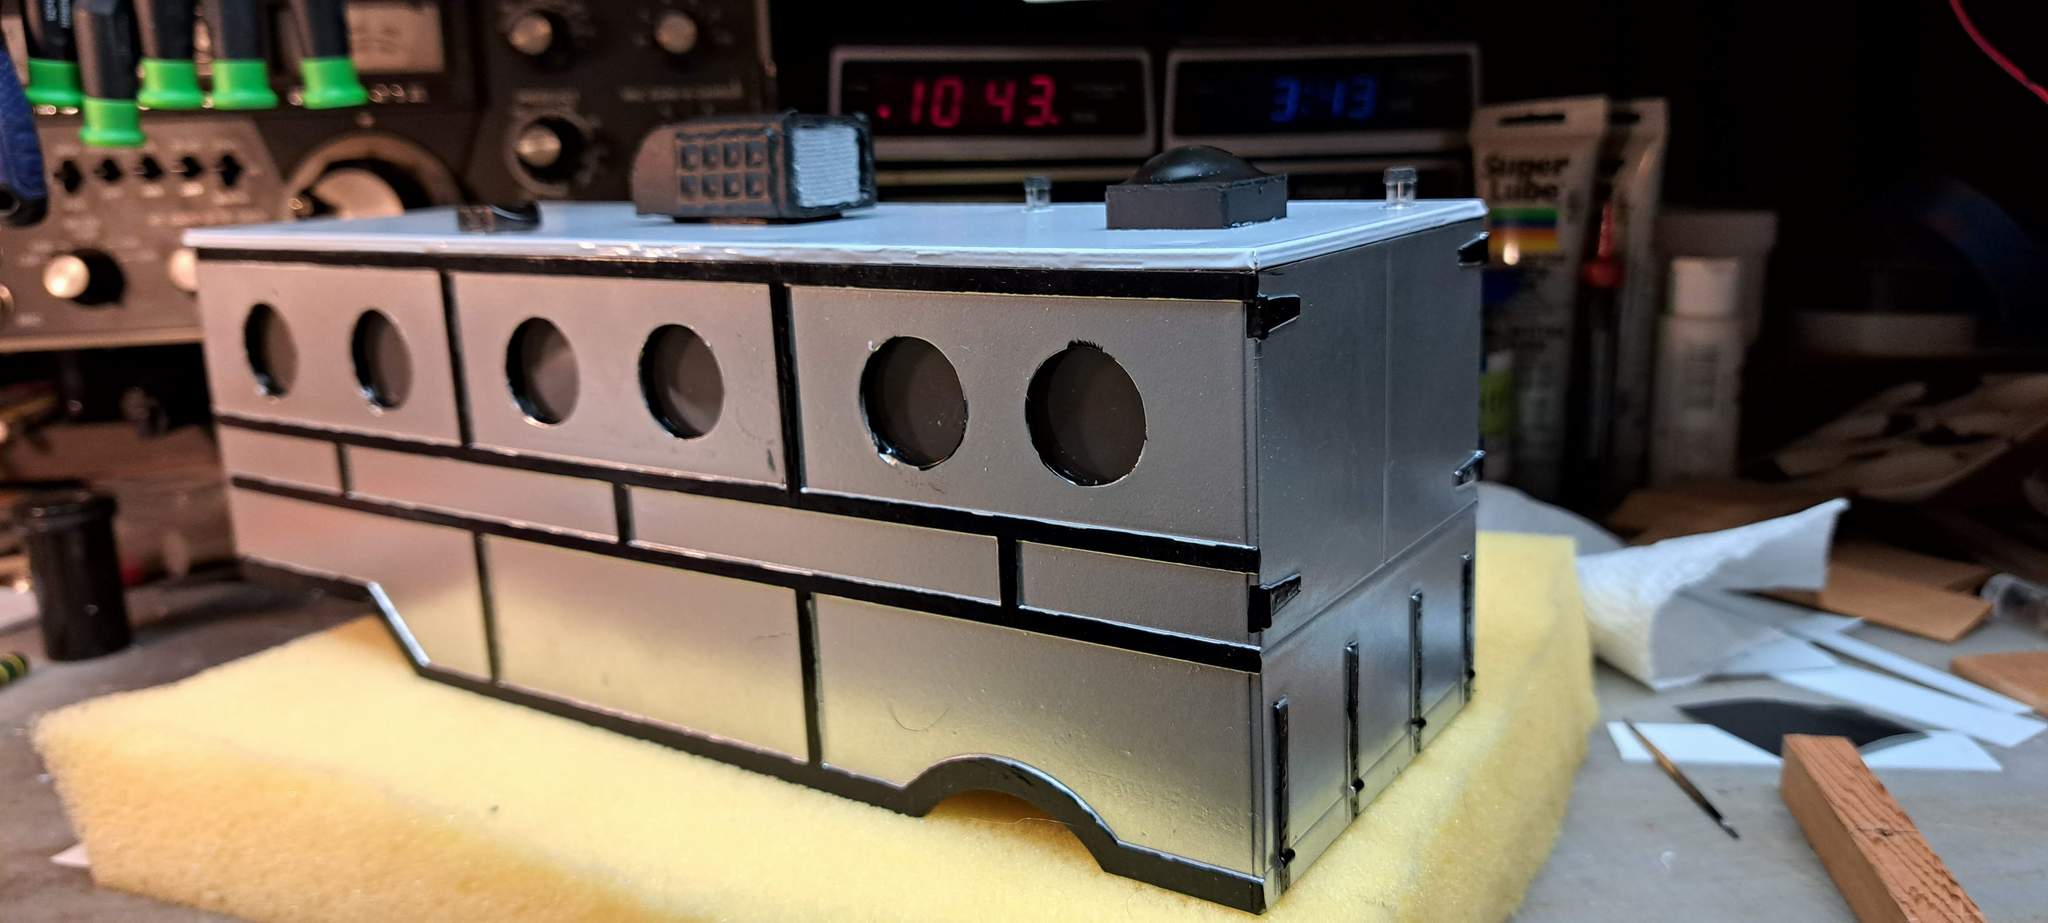
The roof AC was fun. Started as a Cedar block and some junk box parts. Was shaped on the table router with a few different bits, then wrapped in matte black vinyl. The Condenser Fins are simulated with some woven fiberglass strap that I saved think I’d use it for something someday…
Tomorrow I need to figure out lighting. I think I will cheat and use some LED fairy lights that I bought to use on our porch in hurricane lamps.
The door and king pin enclosure are done, just didn’t make the photos. Jus some details to go 
This is very cool. I loved the concept and you are really pulling it off. It has that total retro look.
