Jim said “church” so that makes it okay. This is in Lauren, Id.

Too rainy and cold (for wimpy me) here to make progress on the rock walls, so I have been thinking about interior, just for fun.
I really want a safe kind of like this, but basic black, no decorative curlicues:

So I started building one. PVC main part. Needs putty, sanding, rounded edges top and bottom. And of course a lot of details.


We shall see how this turns out.
1 Like
You are employing some neat build techniques and that safe is really going to be cool.
Scrolling through the log here and it was fun to see that cliff hanger you made. Great stuff.
2 Likes
Rain has stopped for a while. Feast or famine here. But that means I can work on the walls!
First up is placing the smaller rocks around the arches and other stress relief rocks, and the plugs.

Then I had to cut holes in the wire mesh to be used for strength.

Next I will add some rocks on the sides, climbing up the side walls enough to clear the mortar. Then we add mortar and hope it is mixed right. Tomorrow.

Some??? Wow nice job on that Jim!!!
2 Likes
That safe is coming out brilliant. Can’t wait to see it done. And I am really watching your progress on the stone walls. I think this will be how my rock church gets built.
1 Like
That’s going to be a sharp looking safe, Jim.
1 Like
First, most difficult wall, has been mortared.

Should get about a wall per day or so. Mortar has to set.
I paid closer attention to measurements this time. About 2.5 cups of mortar. About 1 cup of water. Hard to pin down consistency but near pancake batter. Depending on how you mix pancakes.
@WaverlySouthern aka Dan Hilyer was kind enough to print my bank sign. My son did the design. Thanks to both.
Pics from Dan, before he shipped the 2 versions to me (he says the black filament looks weird in these pics but it looks fine in real life):


I’m looking forward to having a wall to attach one of these signs to!
Okay, did I miss something Jim. For some reason I had it in my mind that you were making rock panels. But now looking at it I get the impression you are going to rotate this form and rinse and repeat the process and when you have done it all the way around you will remove the mold and it will all be on monolithic pour. Is that what this will end up being is one piece and not 4 pieces that then need to be attached?
I was wondering about this when I do my church. I want to do the foundation as a rock foundation and I love this technique. And I can see doing what you are doing as one piece and then when the walls are done then filling the center with concrete so that the building has a solid cement foundation.
Yes, @Devon_Sinsley - rotate, rinse and repeat. At the end it will be all 4 walls as a single object, strongly held together by mortar and the wire mesh.
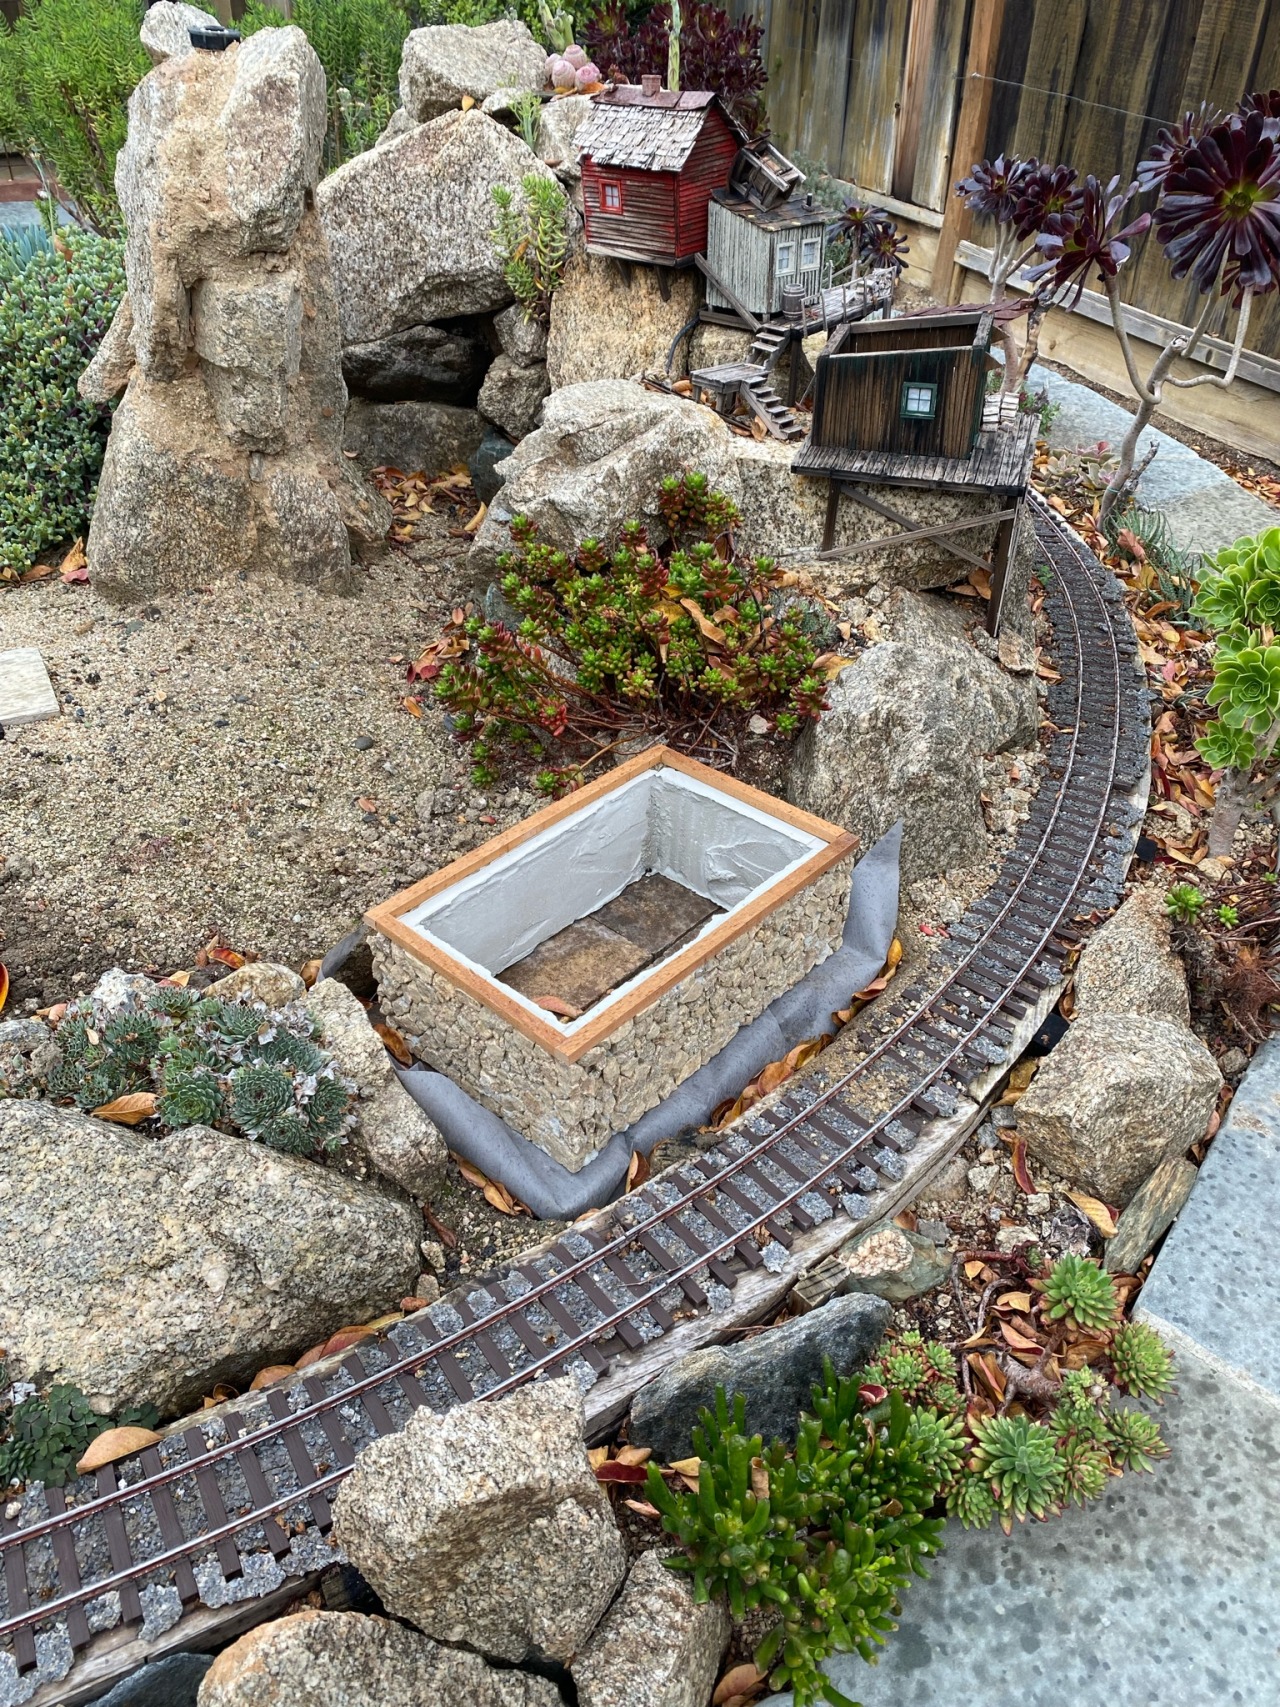
See the foundation for Casey’s Saloon. Pointer to that earlier in this thread. I posted for each wall there.
Makes a sturdy structure. Here is a photo showing the foundation for the saloon:
I am probably doing this the hard way. Making some fixtures for the safe to hold the horizontal (locking?) bar.


Using PVC and some not too subtle tools to “sculpt” them. A bit tedious.

At least I am not scoring mortar lines for entire walls!
Advice for next time?
1 Like
Not done. Still bolt heads and a bit of trimming to do. Getting there!

Oh, and a handle to pull the door open, a combination dial, and feet for the safe!
Sigh.
1 Like
Shhhhh, don’t tell anybody, but 3D printing is great for these small details and you don’t risk losing a fingernail, skin or even a finger 
I think your details look great, Jim. Once painted and in the bank, they will look quite realistic. Oh, and didn’t i see two combination dials on the eaxample specimen? I guess so it would take two people to open it.
1 Like
Dan:
You did see two dials. Seems like overkill. I’m dropping back to one. Not storing nuclear material here after all. I will just have to live with the historical inaccuracy.
I guess I should have done the entire safe as a 3D print. But this is more satisfying.
Jim that safe is awesome. I’m no safe expert so it looks very plausible to me.
Thanks for the explanation on the rock process. I’m already thinking and working on my next building. And I want a rock foundation. This technique is perfect.
1 Like
As one who started in bare bones scratch building and now relies heavily on 3D printing. I have to agree there is a level of satisfaction that can only come from glueing bits and pieces together. I am not sure I could go back. But I very much appreciate those who still can and do make things the “old way”.
1 Like
Well, having led a looong professional life wrangling computers to do what I want, making things by hand satisfies me.
Drawing the 3D model, figuring out how to break it up into printable pieces, etc is too much like what I just retired from.
But, as in all things, there are annoying and tedious parts, and it is lovely to whine about them.
Thanks for not laughing at me. At least not where I can hear.
Cheers!
