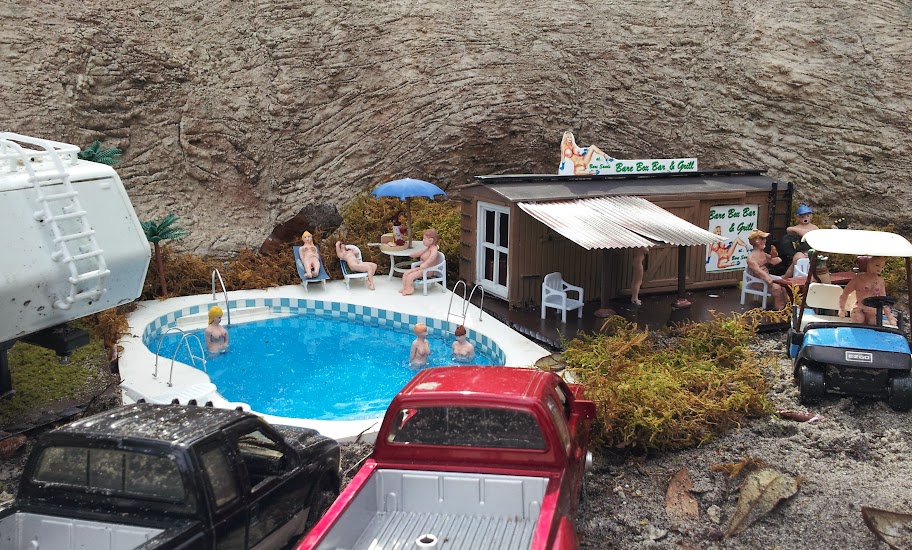
My Philosophy on my garden railroad is to have it be a caricature of the 1:1 world. I am not a rivet counter, or strictly adherent to scale. This is my world, out of my own demented head. My favorite part of the hobby is making things out of scrap, or free (or cheap) items. I aim to represent the real world, not make a prototypical exact copy.
I love it when a plan comes together and can use scraps to make it happen. I had a piece of Trex (plastic wood) trim board (3/4” thick) that was in my scrap pile and thought this might make a nice pool and deck. I drew a free form pool on the board, and cut it out using a scroll saw.

Next, I did a google image search for pool water. I found a suitable file and printed it on my laser printer onto waterproof label stock. http://www.onlinelabels.com/products/OL9805LP.htm?src=mp-5 is what I use for printing signage for the garden railroad. I stuck this self adhesive label to coroplast, the material used to make election signs. (free after election)

Then I glued the bottom of the pool to the Trex board cutout using “Amazing Goop”. There are many versions, but I can’t tell the difference, I just buy the cheaper one labeled “household”. I use this Goop for almost anything, and it sets fast and is a strong bond on many materials.
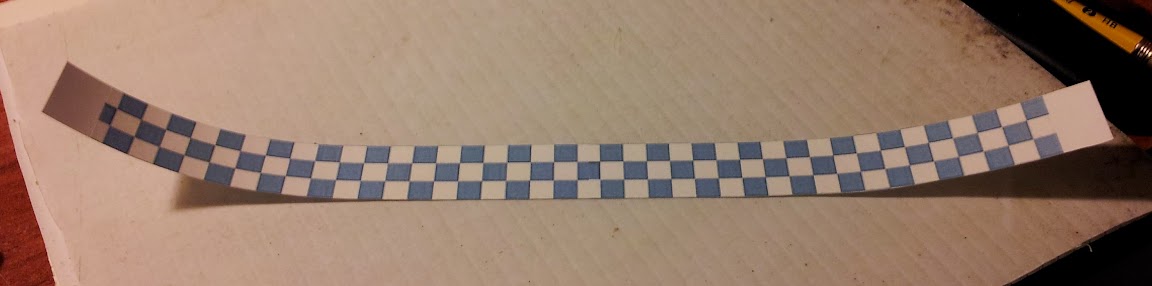
Next I printed “tile” onto the waterproof label stock. You can find many surface textures, and wallpapers at http://www.jennifersprintables.com/printables1.html. For the tile, I picked one and resized it in half and it came out to about 6” tiles in 1:24 scale (¼”).

I then cut rows of tiles. My Luck of the Irish had three tiles high fit exactly to the Trex board cutout. (¼” x 3 = ¾”)
After getting the floor and tile in place, I fashioned ladders out of “hardware cloth”. This is wire mesh that you can get at the hardware store with different size square openings. Shown here before I trimmed them up with a Dremel tool to remove the burrs.

Next, I used the portion that was cut out of the pool to create steps. I cut the one end for the first step, then cut its thickness by ¼” so that it would be about ½” high. Then I cut the next step out of the remaining cut-out to be about ¼” high x ¼” wide. Since these were made from the cutout, they fit the curve of the wall. I used 14 gauge copper wire to make a railing and drilled a small hole to glue the railing into. After removing the burrs off the ladders, the ladders and railing were sprayed with silver paint.

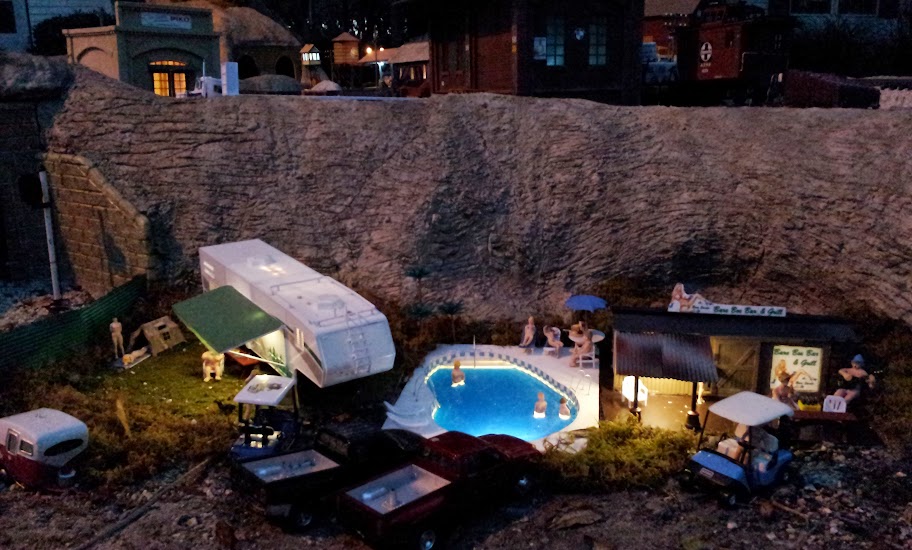
At this point, I thought it would look great to have underwater lights. I had been lighting everything with LEDs lately because I bought this roll of 300 LEDs from Amazon for $8.00. http://amzn.com/B005GL5UG2

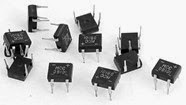
The self-adhesive backing roll can be cut every three LED and powered by 12V DC. Each 3 LED section contains its own resistor. Now for my garden railroad, the lighting is powered by a 12v AC Malibu landscaping light transformer. I use the 4w bulbs and sockets and discarded (used for other projects like a silo) the tier light plastic fixtures. So I had to use a bridge rectifier to go from A/C to D/C. http://amzn.com/B00HR50416.
I had these parts already for my other lighting projects. I make up a wiring harness first, then use the adhesive backing to place the LEDs on the ceiling of a structure or in this case the pool wall. Then I encapsulate the whole mess in clear silicone sealant for weatherproofing, insulating, and mechanical strength. In these photos, power comes from the left. I am sharing the rectifier to serve more than one LED strip, the red/green wire going off to the right goes to another strip. I have used up to 3 strips in parallel on one building powered by the same rectifier.
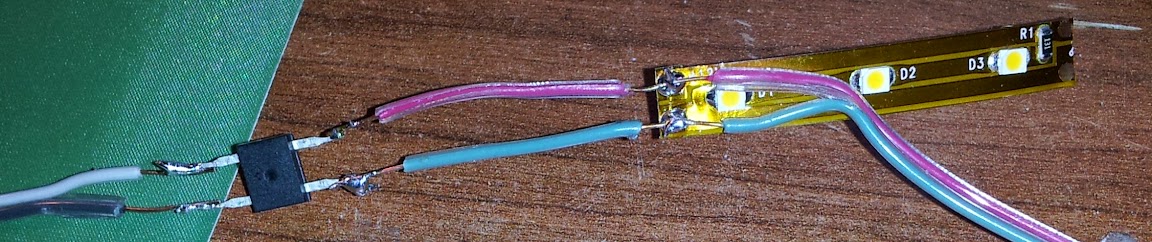

I use bullet butt crimp connectors in order to unplug the structure to remove from layout. http://amzn.com/B00FIK6LDM

Now that the lights are in the pool, I do some surgery on people and glue them to the bottom with Goop.
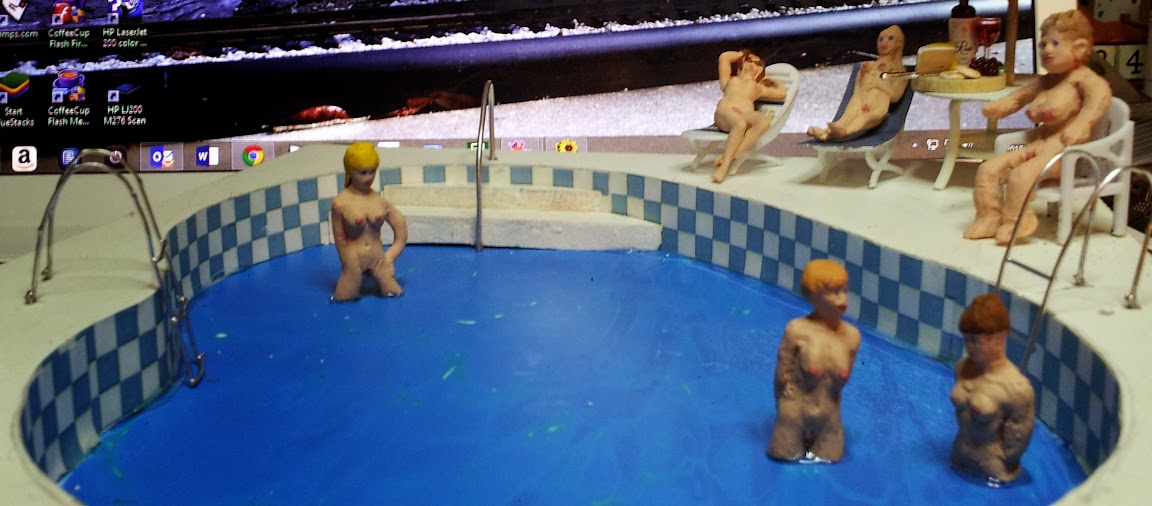
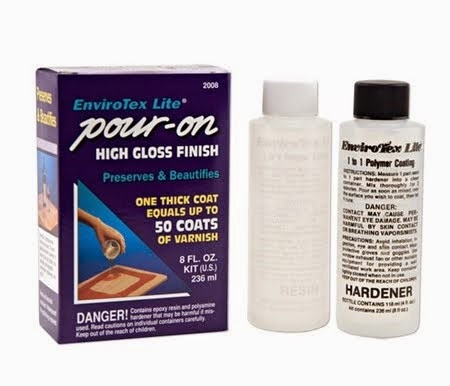
After making sure the people and the silicone encapsulate on the lights are cured, it’s time to add the “water”. I used a 16 oz package of EnviroTex casting resin available at Michael’s, etc. This two part epoxy-resin was poured into the pool in three 1/8” layers at a time, waiting 8 hours or so in between layers to make sure they cure.
Chairs and lounge chairs can be found at http:/www.aliexpress.com/promotion/baby-toy_g-scale-buildings-promotion.html in 1:30 or 1:25. Also from their ebay store, http://www.ebay.com/itm/YZ3001-8pcs-Model-Railway-Layout-1-30-Sun-Loungers-Beach-Chairs-G-Scale-NEW/221102895094?
After all the layers cure for a couple days, I placed the pool in the resort on the garden railroad.
