I have the car sided and sanded. Here are some pics as I went along. These show the siding almost finished. I think I will go ahead and start the interior.


up next I will be painting the windows and doors and get them fitted… Thanks for looking…
I have the car sided and sanded. Here are some pics as I went along. These show the siding almost finished. I think I will go ahead and start the interior.
up next I will be painting the windows and doors and get them fitted… Thanks for looking…
For a one armed bandit you are doing a nice job on that car. Keep it up.
Chris
Looks good Travis.
I have a question though? Are you going to put the letter board(above windows) and watertable/sill(under the windows) over top of the siding or are you just going to omit them all together?
Well rooster I am going but what i think the plans are showing. the letter board is shown what looks like on top of the siding and the water table too. Should it have been done before the siding was applied?. Don’t hesitate to give me input. If it should be done first then I will know for the second one . The plans from Ted Stenson in GR. sometimes seem to have some discrepancies. like some measurements. So I go by what looks right to me anyways…
Travis Dague said:
… So I go by what looks right to me anyways…
I can imagine a grumpy grizzled short line shop manager pointing to a car under construction while saying to some suit, “I know that’s what them brand new high-falutin blueprints from back east show, but I’m tellin’ ya, that looks right and has worked right for decades.”
Ted Stinsons drawings were cool but did leave quite a bit up to the builder. they certainly were not precision replicas of the prototype but good enough to build a good looking model. I built a couple of his kits, they were the same.
Your car looks great! Letterboard and window sills: up to the builder’s discretion. some cars had a “widow sill” rail running end to end some just had them under the window. some had letterboards some just a bit of trim.
On the coach I have been studying the window sill runs the full length of the car and the lower siding actually fits up under it. the letterboard is cosmetic and structural on our car. the windows actually slide up behind it all the way to the roof sheathing.
Okay, tonite I took another shot at this. I managed to get the letter boards, corner trim, and the water table on. All this was about 6 hrs total of work…Whew!.. But I have plenty of time on my hands…or (hand)… :-). So here is the progress pics.
This shows the test fit of the water table under the windows. I also have the letter boards installed and the corner trim. The water table is 5/16 x 1/16 with s small piece glued into a L shape 1/16 x 1/8 cedar.

next Letter board vie and the end with corner trim applied. I didn’t get a pic yet of the end of the car, This trim is on too. I will later add some tim I think that will match up to the water table. I realized after it was put on i cut the letter board to short where the arch is on the ends. I didn’t allow for the overhang of the corner trim…So this will be painted in Western and Atlantic yellow color I will just fill the small error in with some wood filler. I have a few minor places to fill in any ways…

So up next . Test fit of the resin cast windows… When I was looking at the plans for this car It showed the widows framed in. I decided to cast some from resin as I am getting better at this new technique somewhat anyways. Ever since I had cut out the openings for the windows, I had been contemplating how they were going to be installed. So I came across a build log from LSC by Ron Spencer I will add the link later… He did a outstanding job from plans set # 55. I used his idea on the installation of the window frames. The simple solution he used was Lowering the letter board 1/16 and raising the water table 1/16 to help "frame in the windows. So that has worked really well. My next car I am gonna follow along on some of hi techniques he used for his build. Here is the pic of the test fitting of the windows. I am short one window… ( maybe “Rooster” has it?  I still need to make 7 more for the other side so no big deal…
Here we are…

I will add more pics when I get to the doorways I really wished I had made them about 1/8 wider to be able to frame the door. This car is a learning project so I will make improvements on the next one from notes. Just small stuff ,but it will make a big difference in appearance.
Back to the underbody and flooring…
I realized I had forgot something on this as I was reading thru Ron’s Build log. It is missing the needle beams…Oops. So they will be added along with some other details. I won’t be adding air brake type stuff since this is a 1860’s car… So a few small stuff queen post from Ozark Miniatures. The Link and Pin draft box. truss rods and turnbuckles. Also the brake linkages to the trucks although not functional. Like I said before This car is practice for my others to improve on…other detail also will be the end beam with nuts and bolts details…

That is all for now. I really kind of over did it today the shoulder is really hurting. Actually most of the day it has been, but I can’t sit still. Still no lifting anything or reaching so this makes building this more of a challenge being right handed.
Thanks for looking … The “One Arm Bandit Builder” Fer now … Thanks Chris…LOL
Here is the link to Ron Spencer’s build log. Take a peek at it He did a fantastic job on all. Much better than mine in my opinion…
http://www.largescalecentral.com/forums/topic/12366/new-passenger-cars?page=1
Looking great Travis! Are these going behind your General?
Chris
Travis
Car is looking great!
Only reason I asked what I did was kinda what Eric already explained. It’s always been my understanding that the siding was installed last. It’s called a watertable(drip edge) because it does just that (directs the water). It doesn’t matter on a model but on a prototype car sitting out in all weather conditions the siding comes down on top of the watertable and then the siding on the bottom goes under it not behind it. That way when the water runs down the siding it doesn’t go behind the watertable and lay there rotting it out. (make sense?)
The letter board I always assumed was a structural piece meaning it would go on first and then the siding goes below that. I’m getting to anal because it’s a model. I was just typing out loud…
P.S I don’t have your window but I believe I saw one “JUST LIKE YOURS” forsale at Viggianos Pawn Shop on Ken’s RR ops pictures and video.
Chris Kieffer said:
Looking great Travis! Are these going behind your General?
Chris
Yes eventually… (http://largescalecentral.com/externals/tinymce/plugins/emoticons/img/smiley-wink.gif)
" Rooster " said:
Travis
Car is looking great!
Only reason I asked what I did was kinda what Eric already explained. It’s always been my understanding that the siding was installed last. It’s called a watertable(drip edge) because it does just that (directs the water). It doesn’t matter on a model but on a prototype car sitting out in all weather conditions the siding comes down on top of the watertable and then the siding on the bottom goes under it not behind it. That way when the water runs down the siding it doesn’t go behind the watertable and lay there rotting it out. (make sense?)
The letter board I always assumed was a structural piece meaning it would go on first and then the siding goes below that. I’m getting to anal because it’s a model. I was just typing out loud…
P.S I don’t have your window but I believe I saw one “JUST LIKE YOURS” forsale at Viggianos Pawn Shop on Ken’s RR ops pictures and video.
Yup Rooster that makes sense to me. I think this time it worked out pretty good the way it ended up. Next time I think some of the details like letter board corner trim, and the water table will be added before siding.
" Rooster " said:
Travis
Car is looking great!
Only reason I asked what I did was kinda what Eric already explained. It’s always been my understanding that the siding was installed last. It’s called a watertable(drip edge) because it does just that (directs the water). It doesn’t matter on a model but on a prototype car sitting out in all weather conditions the siding comes down on top of the watertable and then the siding on the bottom goes under it not behind it. That way when the water runs down the siding it doesn’t go behind the watertable and lay there rotting it out. (make sense?)
The letter board I always assumed was a structural piece meaning it would go on first and then the siding goes below that. I’m getting to anal because it’s a model. I was just typing out loud…
P.S I don’t have your window but I believe I saw one “JUST LIKE YOURS” forsale at Viggianos Pawn Shop on Ken’s RR ops pictures and video.
Ah…So While Rooster was out “window” shopping he spotted my “misplaced” coach window at Viggianos Pawn Shop…Hmmm…I wonder if Mr. Viggiano put his Russian partner Boris up to this…LOL (http://largescalecentral.com/externals/tinymce/plugins/emoticons/img/smiley-tongue-out.gif)(http://largescalecentral.com/externals/tinymce/plugins/emoticons/img/smiley-laughing.gif)
Worked on the car some more last coupe of days. I cheated a little bit this time and bought some material from Hobby Lobby for my roof. This is Basswood already planed down to the proper thickness. Normally I like to mill all of my own stuff, but due to the fact I cannot lift heavy stuff I had to go this route… Oh well. So I have the roof on and the opening cut out for the clerestory. I also started the Clerestory top. I am gonna skip this time around for the openings in the top after I realized all the cutting I would need to do. So I will probably just add some raised sections to represent the windows along the top. Really wanted them opened for lighting but oh well next time.So this car is a Generic version of a 1860’s Passenger car. I looked up some more pictures and found mostly they had a flat arched roof ( no Clerestory ). Searched some more and did find what I believed to be a period car with the Clerestory added. So we’ll go with it. Thought I had made a major OOPS… So here is what i have done last two days…
Laying out the Roof.


marked for the over hang and centre cut out for Clerestory…

One side glued on and the other awaiting to dry…

Both sides added. need to still do some final sanding and some filling around the ends…

Will need to fill the crack in the centre before applying the “Tar Paper roof”… and sand smooth.

Next while waiting for the glue to cure completely, I usually wait over nite. I started to add the end beams and work on the under body. I will be adding the needle beams also for adding the truss rods. The end beams are made from walnut scrap on hand. I figured I would use a harder wood to help protect the end of the car. Maybe over kill, but it was just laying there waiting to be used…

And while that is setting up to dry the Clerestory has been framed and assemble.
Now since this is pretty narrow and would be pretty difficult and time consuming plus hard for me too cut with one hand I decided against the window openings on this. It will be sheathed in basswood in two pieces from what I had left over from the other two halves of the roof…

So now for those of you that have checked in and following the progress of this build is there any improvements or changes that could be made?. Any ideas for lighting? I will be going with track power lights. I was leaning toward a amber or soft white light. I did decide I am gonna finish the inside with floor and walls… will go with the old bench type seating as this is a mid 1860’s style car. What I found was they had benches along the walls facing each other or rows of em. I will have a stove also on one end too.
Thanks for checking in…from “The One Arm Bandit” car shops…
That is really starting to take shape Travis. Nice work.
Chris
Sean McGillicuddy said:
Led strips for the lighting.
Wow, Sean, that’s pricey. I pay about $2 for 1 meter of 12v led stick-on and power it from a 9V battery.
Somewhere buried I’ve got John H. White Jr’s 2 volumes of The American Passenger Car. And I’ll bet cars of that era were just barely sufficiently lit by oil lamps.
Which means super bright white 10mm LED are probably not what’s needed.
But the one in one of my Big Haulers lit up Mike’s neighbor’s wall!
Pete Thornton said:
Sean McGillicuddy said:
Led strips for the lighting.
Wow, Sean, that’s pricey. I pay about $2 for 1 meter of 12v led stick-on and power it from a 9V battery.
I posted that as a helpful idea …only. They had different hues and brightnesses … (http://largescalecentral.com/externals/tinymce/plugins/emoticons/img/smiley-innocent.gif)
Sean, Forrest,
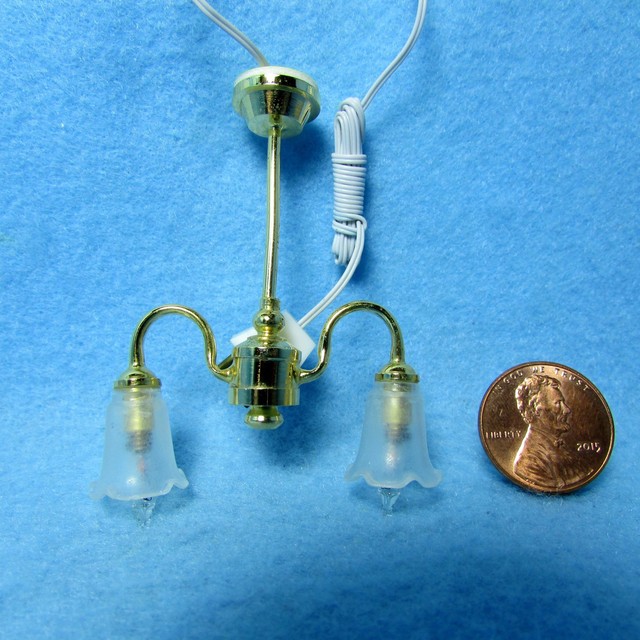
Sorry, I wasn’t trying to be obnoxious. I have White’s book too, and I can confirm they were oil lamps! [Dollhouse lamps can make a good substitute/alternative. I think Bob Poli used these in his coaches.]
The strips I buy may be ‘superbright’ but if you only use 2 or 3 in the car they aren’t that overpowering. On my EBT #5, which is under construction, I cut 3 pieces from a strip of warm white LEDs and wired them together, spreading them out behind the ceiling of the coach. I then made holes in the ceiling strip to allow light to shine through. ON 9V they are well-lit, and probably too bright, but it was quick and painless to install them.
Great Idea Pete… Thanks… Would these run off of track power?