Large Scale Central

From Bachmann Flat to Fn3 Outside Braced Boxcar

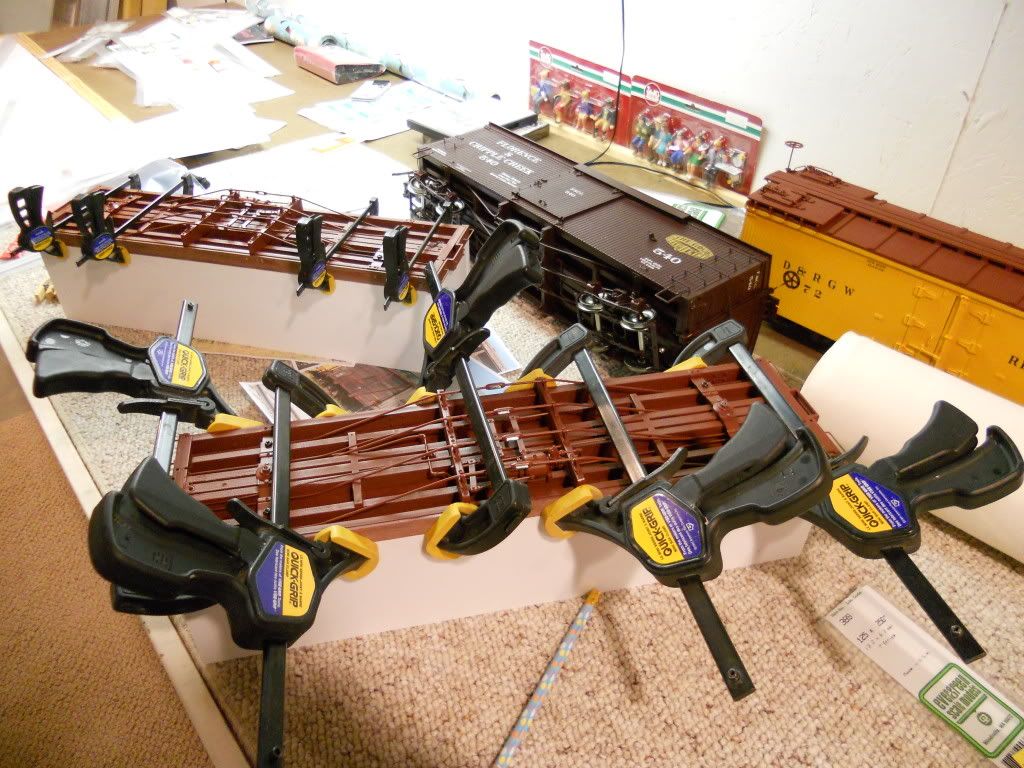
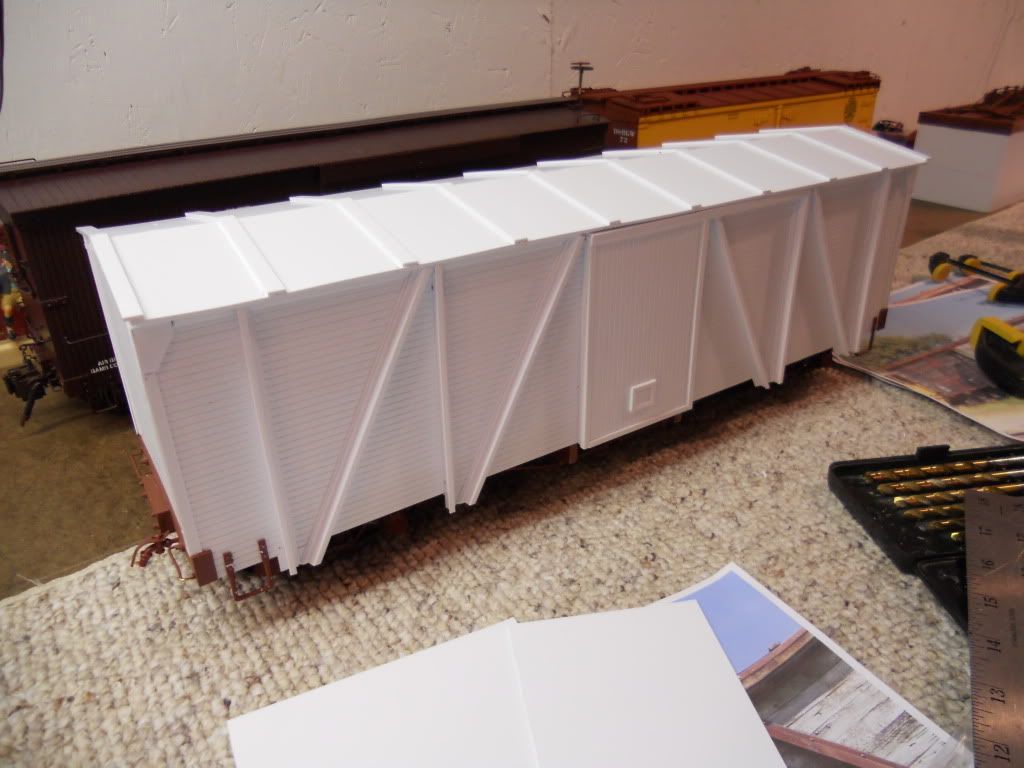
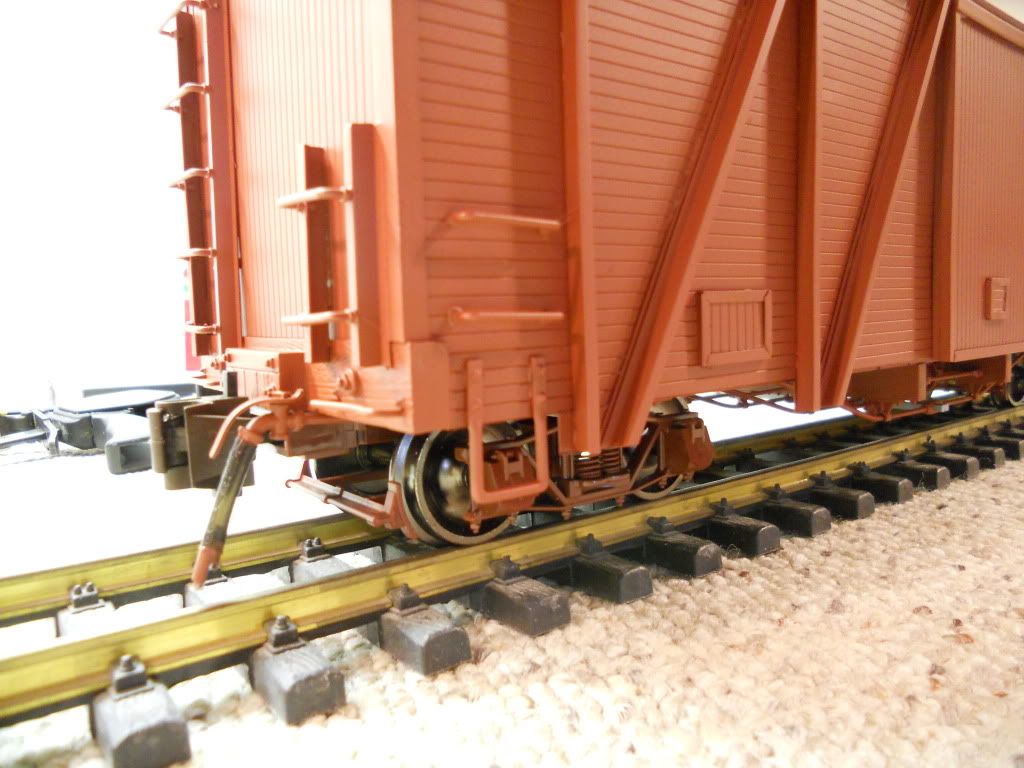
I noted I don’t post a lot of “in progress” work so I thought I’d start with this project. Again I found the major manufacturers lacking what I wanted in Fn3. Not a big market I guess. I wanted several outside braced and composite box cars for my own railroad but no way to purchase them. Along comes a great deal on ebay for some Bachmann Spectrum flats…And it begins. I thought the flat makes an ideal base for an early box car, an added bonus is they come complete with most of the hardware…full under body detail, brake system, couplers, lift bars, brake wheels, sprung trucks, metal wheels…you get the idea. AS RECIEVED:

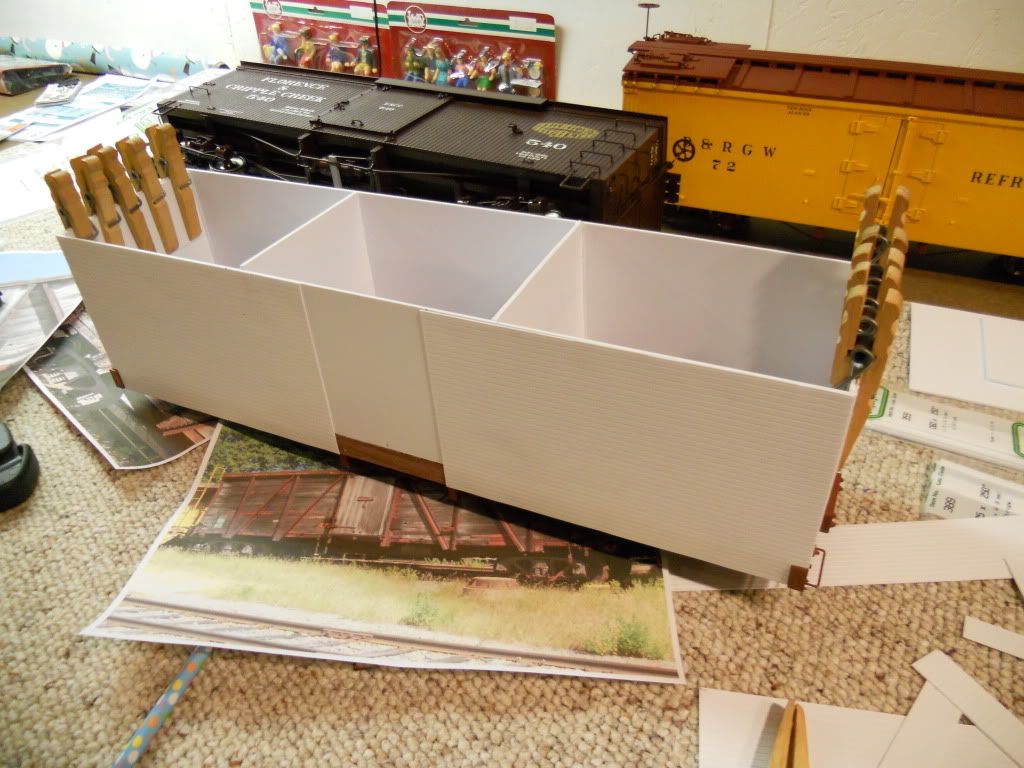
First I stripped off all the detail parts for use later on the box car. I sawed off the stake pockets and used a utility knife to remove the bolt details. Then I trimmed the deck boards even with the side of the car. This was followed with a vigorous sanding with heavy grit paper to roughen up the sides to accept glue (The car sides will go over this area so appearance is not critical but a good gluing surface is).

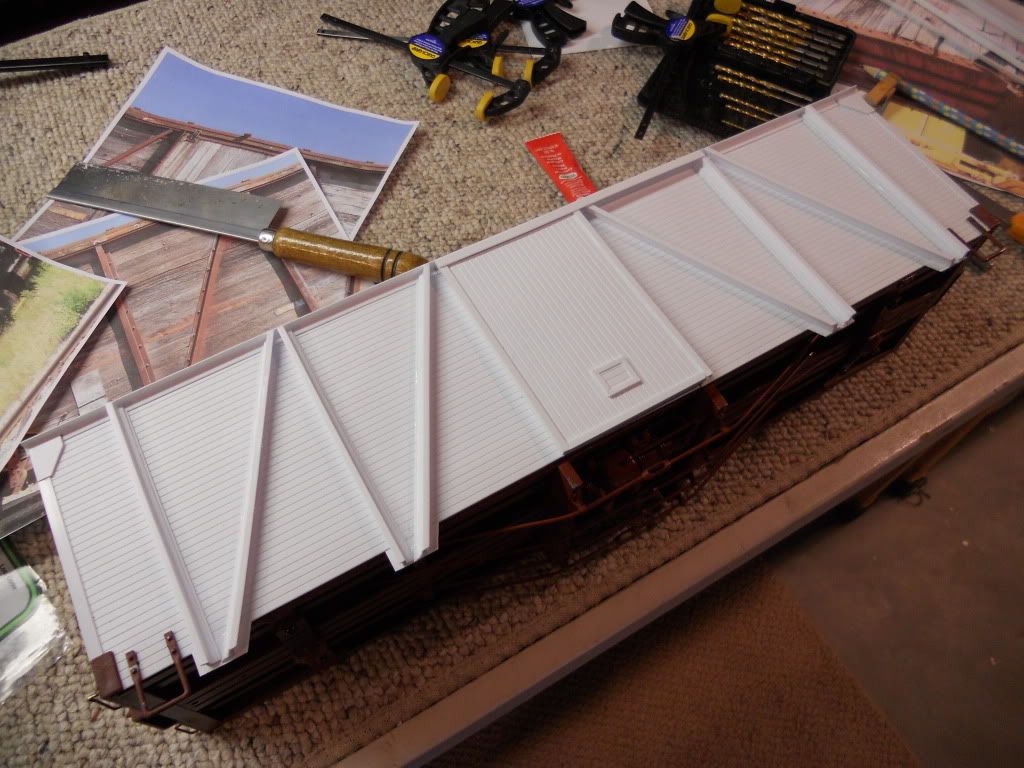
That’s all for now. My Evergreen plastics order should be here any day now…More to come!

Looking forward to the finish.
I have three of these flats waiting for bashing.

A little closer to a “box”. Starting with two “all wood” older cars before moving on to the composites. First pic is building the box…Note in the background the flats have been prepped by gluing styrene strips to hold the sides flush.

(http://i273.photobucket.com/albums/jj222/Noble_Dreg/DSCN0320.jpg)

ATTACHING THE BOX…

(http://i273.photobucket.com/albums/jj222/Noble_Dreg/DSCN0324.jpg)

APPLYING THE SIDING…

(http://i273.photobucket.com/albums/jj222/Noble_Dreg/DSCN0325.jpg)

GETTING CLOSER…

(http://i273.photobucket.com/albums/jj222/Noble_Dreg/DSCN0327.jpg)

Next comes the roof truss’s and building the ‘Z’ bar stock.

Added a door or two…

(http://i273.photobucket.com/albums/jj222/Noble_Dreg/DSCN0330.jpg)

And the bracing that makes this an outside braced box car…

(http://i273.photobucket.com/albums/jj222/Noble_Dreg/DSCN0335.jpg)

(http://i273.photobucket.com/albums/jj222/Noble_Dreg/DSCN0334.jpg)

Now on to the roof!

Great looking project so far Mark. How about a picture of the car you’re making for reference. BTW I have a question for you, what do you use to glue the larger flat sheets together without getting glue coming out the sides?

Chuck

Chuck, I’m just using standard Testors model glue…I find the liquid “fancy stuff” sets to fast for me. No “squeeze out” yet! I am cheating on this car, it is based on a standard gauge box car I photographed at a local Rail Museum. These cars are being built to go with my Bachmann 2-6-6-2…I figured since Bachmann based their “fantasy” narrow-gauge loco on a real life standard gauge engine I’d do the same! There is no prototype for the one I’m building, just a design I liked! Also the engine and cars will be lettered for the “L&I Central”, a fictitious railroad named after my kids…So technically it’s coming from their shops so anything goes! :smiley: 
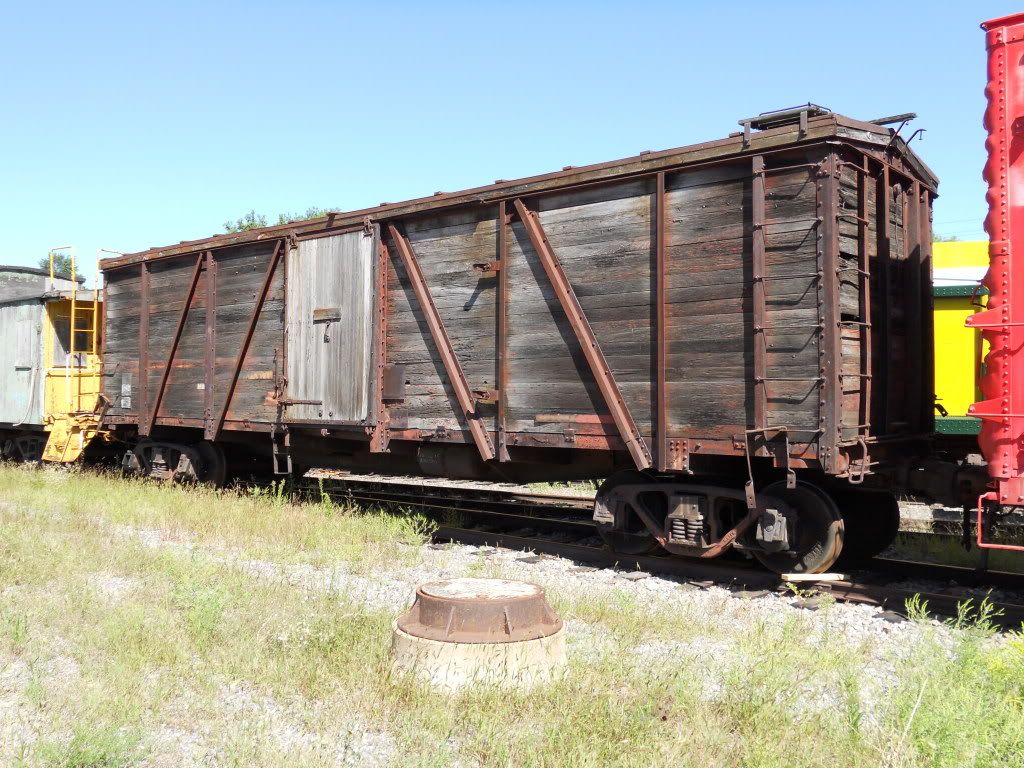
Here is the car I am basing the build on…

(http://i273.photobucket.com/albums/jj222/Noble_Dreg/DSCN0254.jpg)

More work on the roof…

(http://i273.photobucket.com/albums/jj222/Noble_Dreg/DSCN0337.jpg)

(http://i273.photobucket.com/albums/jj222/Noble_Dreg/DSCN0338.jpg)

(http://i273.photobucket.com/albums/jj222/Noble_Dreg/DSCN0341.jpg)

Now to complete all the detail parts, paint and letter. Then on to building some composite versions.

'Way cool! You make it seem so easy.

I was wondering where you were going with the horizontal boards, but now I see.

Thanks Steve…After these two are done I will be building some “traditional” composite box cars with vertical siding (metal ends and doors). After those are complete I will be out of “spare” flat cars!

Okay, now I’m inspired to get working on my steel box car again. Of course, it might help to finish the other projects first… (Locomotive, two depots, wood box car, passenger cars still not completed for coming up in three years now…)

Later,

K

Last update before I “quit” for Christmas…Added some door hardware and grab irons from what I had lying around. Makes it a little harder to paint but it beats trying to glue all the little detail pieces on a painted surface!

(http://i273.photobucket.com/albums/jj222/Noble_Dreg/DSCN0349.jpg)

Mark,
That is really turning out nice :slight_smile:
Ralph

FINISHED!!! Well almost…I want to wait at least a week for the paint to fully cure before I add the dry transfers. I also need to instal the coupler lift bars. I don’t see any sign of a flat car here…Do you?

(http://i273.photobucket.com/albums/jj222/Noble_Dreg/DSCN0402.jpg)

Of course the whole point of the build was to have something to pull behind my 2-6-6-2 so a lap or two around the indoor test loop was a must!

(http://i273.photobucket.com/albums/jj222/Noble_Dreg/DSCN0389.jpg)

(http://i273.photobucket.com/albums/jj222/Noble_Dreg/DSCN0391.jpg)

One down, one to go…Then four more composite boxes and I’m done!!!

Mark, Beautiful job… :slight_smile:

(http://www.largescalecentral.com/chat/emoticons/good.gif)

Very Nice!
:slight_smile:

Mark,
What did you use for the steel side braces? I know it’s styrene, but what shape?.

(I have my flat car shaved and ready to go.)

John,

I used 3/16" styrene angle (Plastruct 90505) to which I added 3/16" “Z” stock (Plastruct 90594). Together this made a very stiff brace. It is also difficult to glue the “Z” stock alone and keep it straight/square. I glued the angle to the box car side first, then added the “Z” to the angle.

The hardest thing was keeping track of proper orientation! Did not want my “Z’s” to be pointing the wrong way!

I was torn between the 3/16" or 1/8". I think the 3/16" looks good but the 1/8" might look good too…

FYI,

The “box” that sits flush with the flat car sides was .080 plain sheet (along with the interior formers).
The car siding that overlaps the flat car sides was .125" v-groove (Evergreen 2125).
All corners/top cap ridge was .125" angle.
The door is .040" covered with .125" v-groove on 3/16" stand-offs (to give the appearance of clearing the side brace).
The roof was .060 plain sheet and the roof “seams” are .060" x .250".
Ladders are just “Z” stock

There are other misc. angle sizes and bits of sheeting here and there made up as I went along.

Working on finishing the 2nd one now.