So after posting these questions …I reread the post and I see the blue tape is the height …Ya I should of read it twice … right Rooster …(http://www.largescalecentral.com/externals/tinymce/plugins/emoticons/img/smiley-wink.gif)
Sean said:
So after posting these questions …I reread the post and I see the blue tape is the height …Ya I should of read it twice … right Rooster …(http://www.largescalecentral.com/externals/tinymce/plugins/emoticons/img/smiley-wink.gif)
Not my motto Sean …Greg’s motto is Re Read it twice before posting?
I’m only following the experts but more interested in Jon gutting his basement currently!
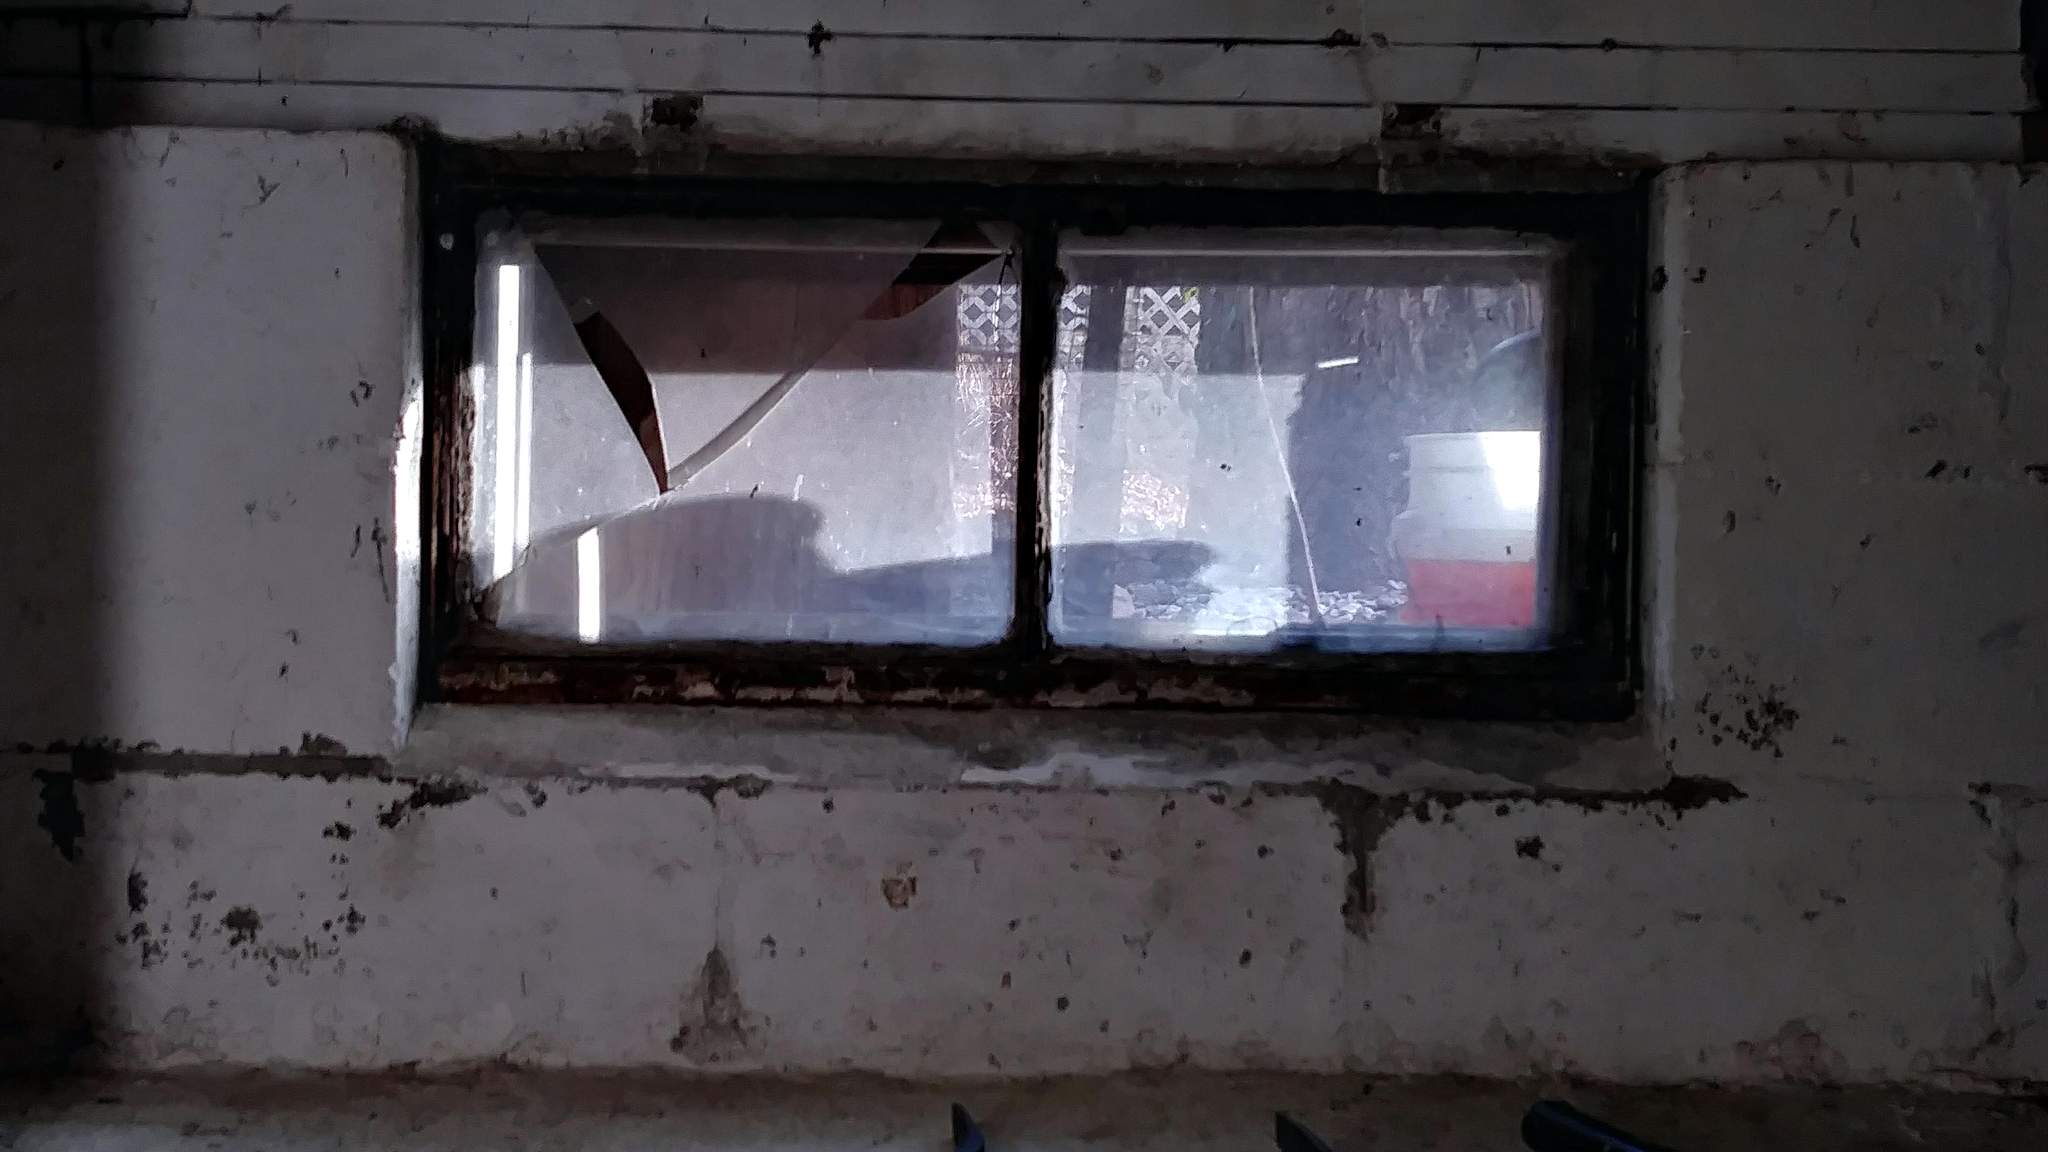
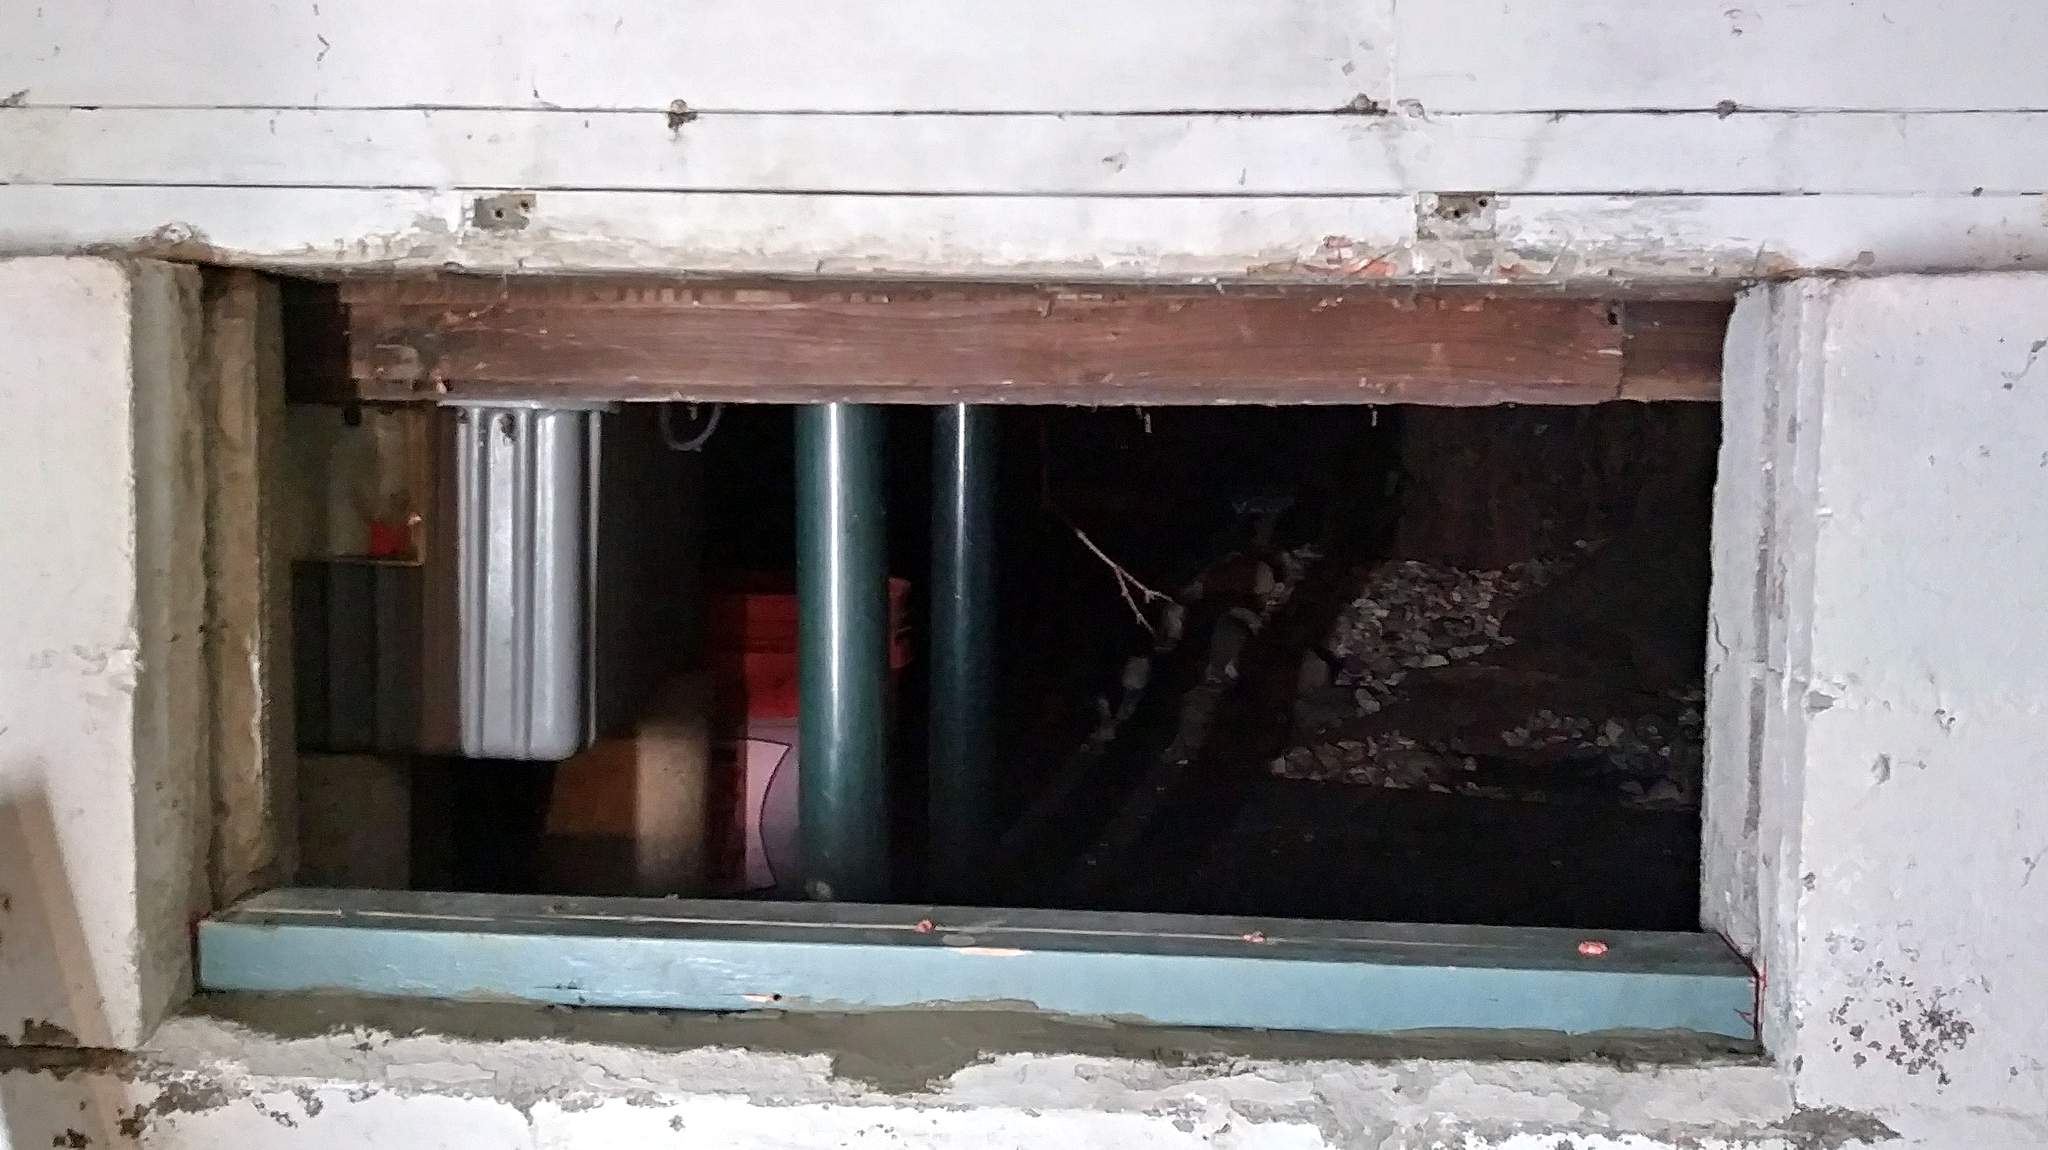
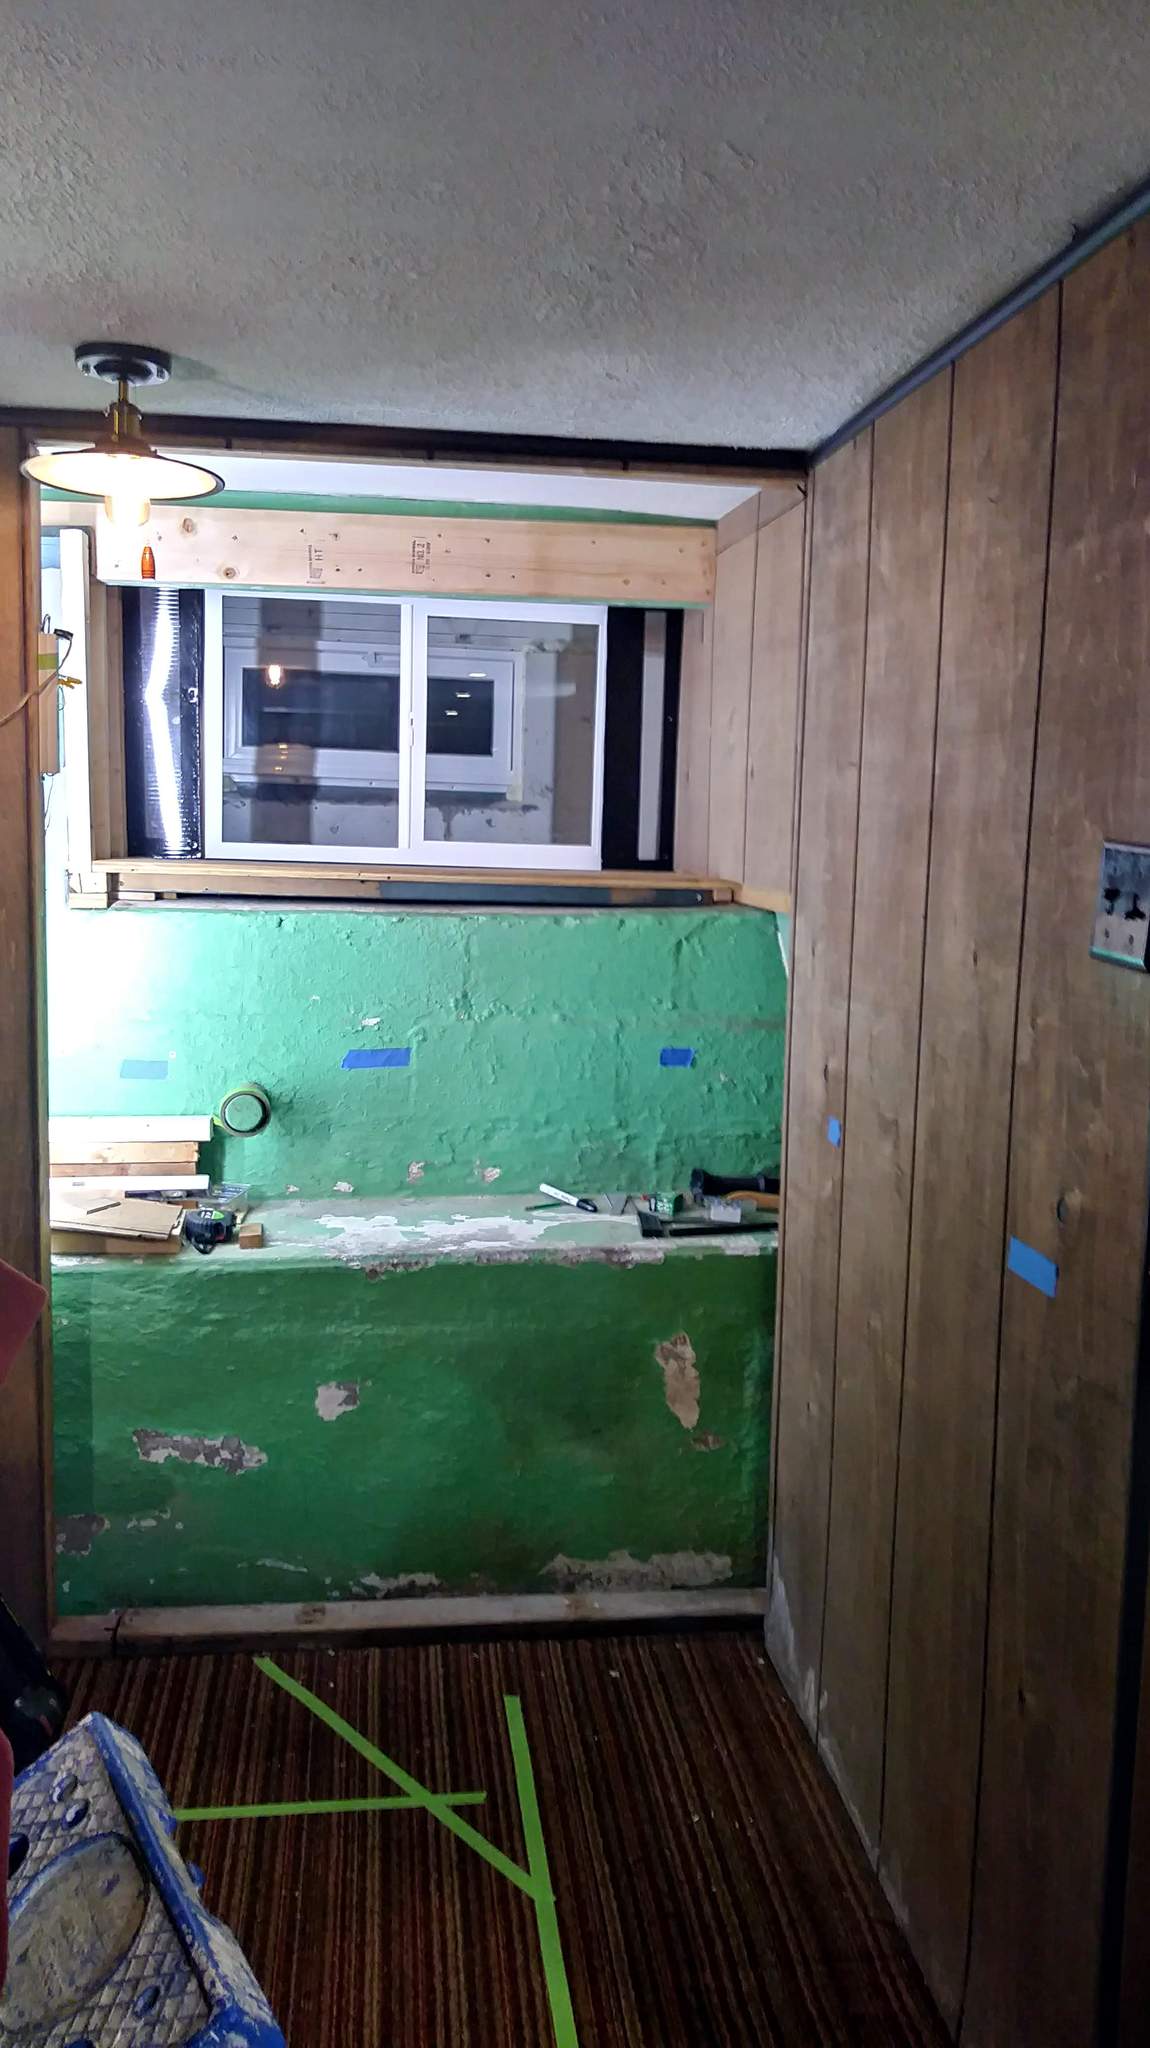
I knew this window was in horrible condition; broken pane on the outside and a storm that didn’t seal hung on the inside. I decided it had to be replaced while I had access…
The steel hopper window was trash. Probably job surplus when it was installed in the mid sixties. It was a joy to chisel out. They used some nice grout…
That was a boatload of dirty / dusty work; but I got it out…
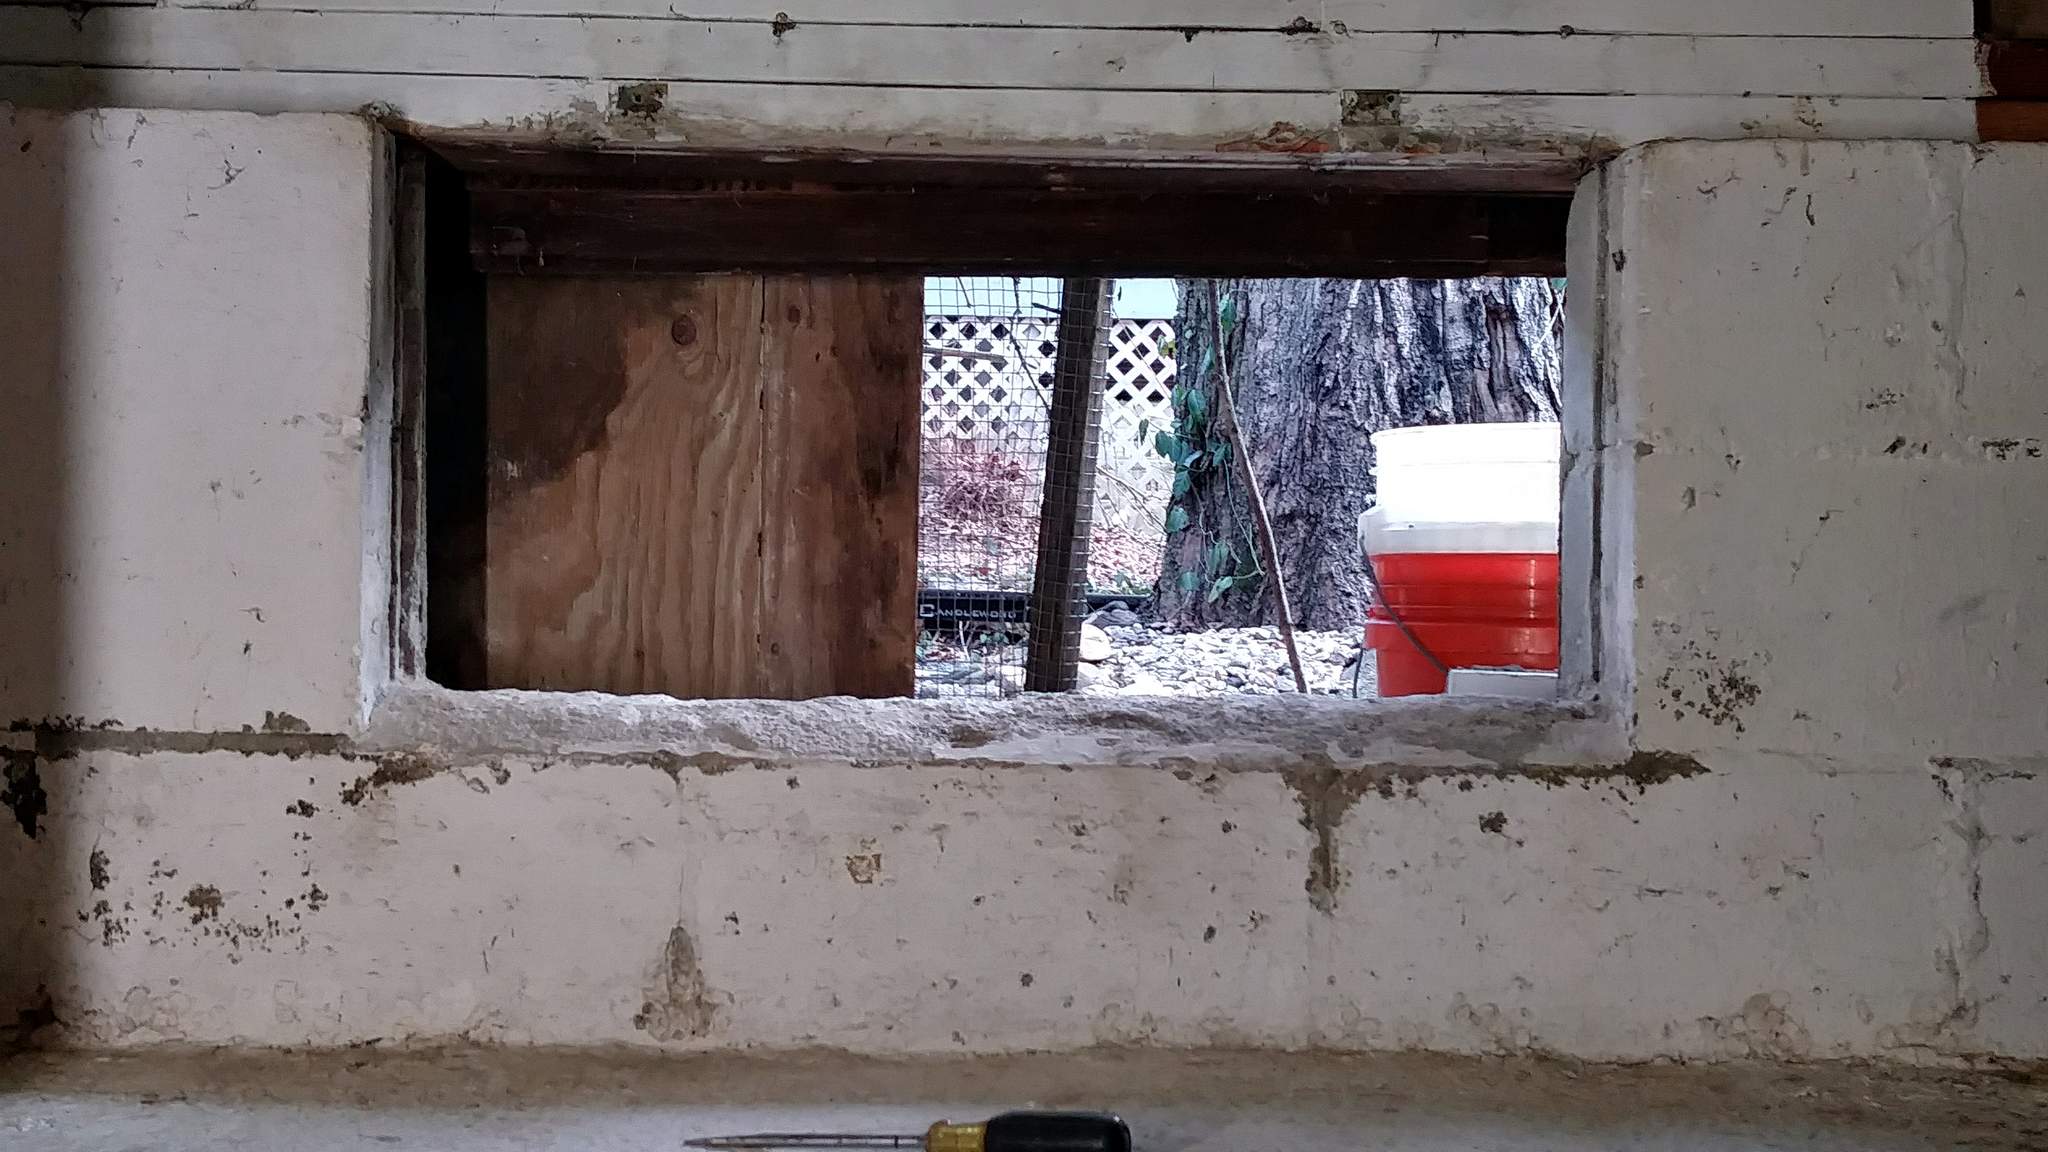
Look close in the bottom of the opening of the pic above. That’s Indian Hill Bridge. Give you any ideas???
Once the window was out I needed to hand chisel a bunch more grout to fit a 2x4 and keep the rough opening size. More dirty and dusty work…
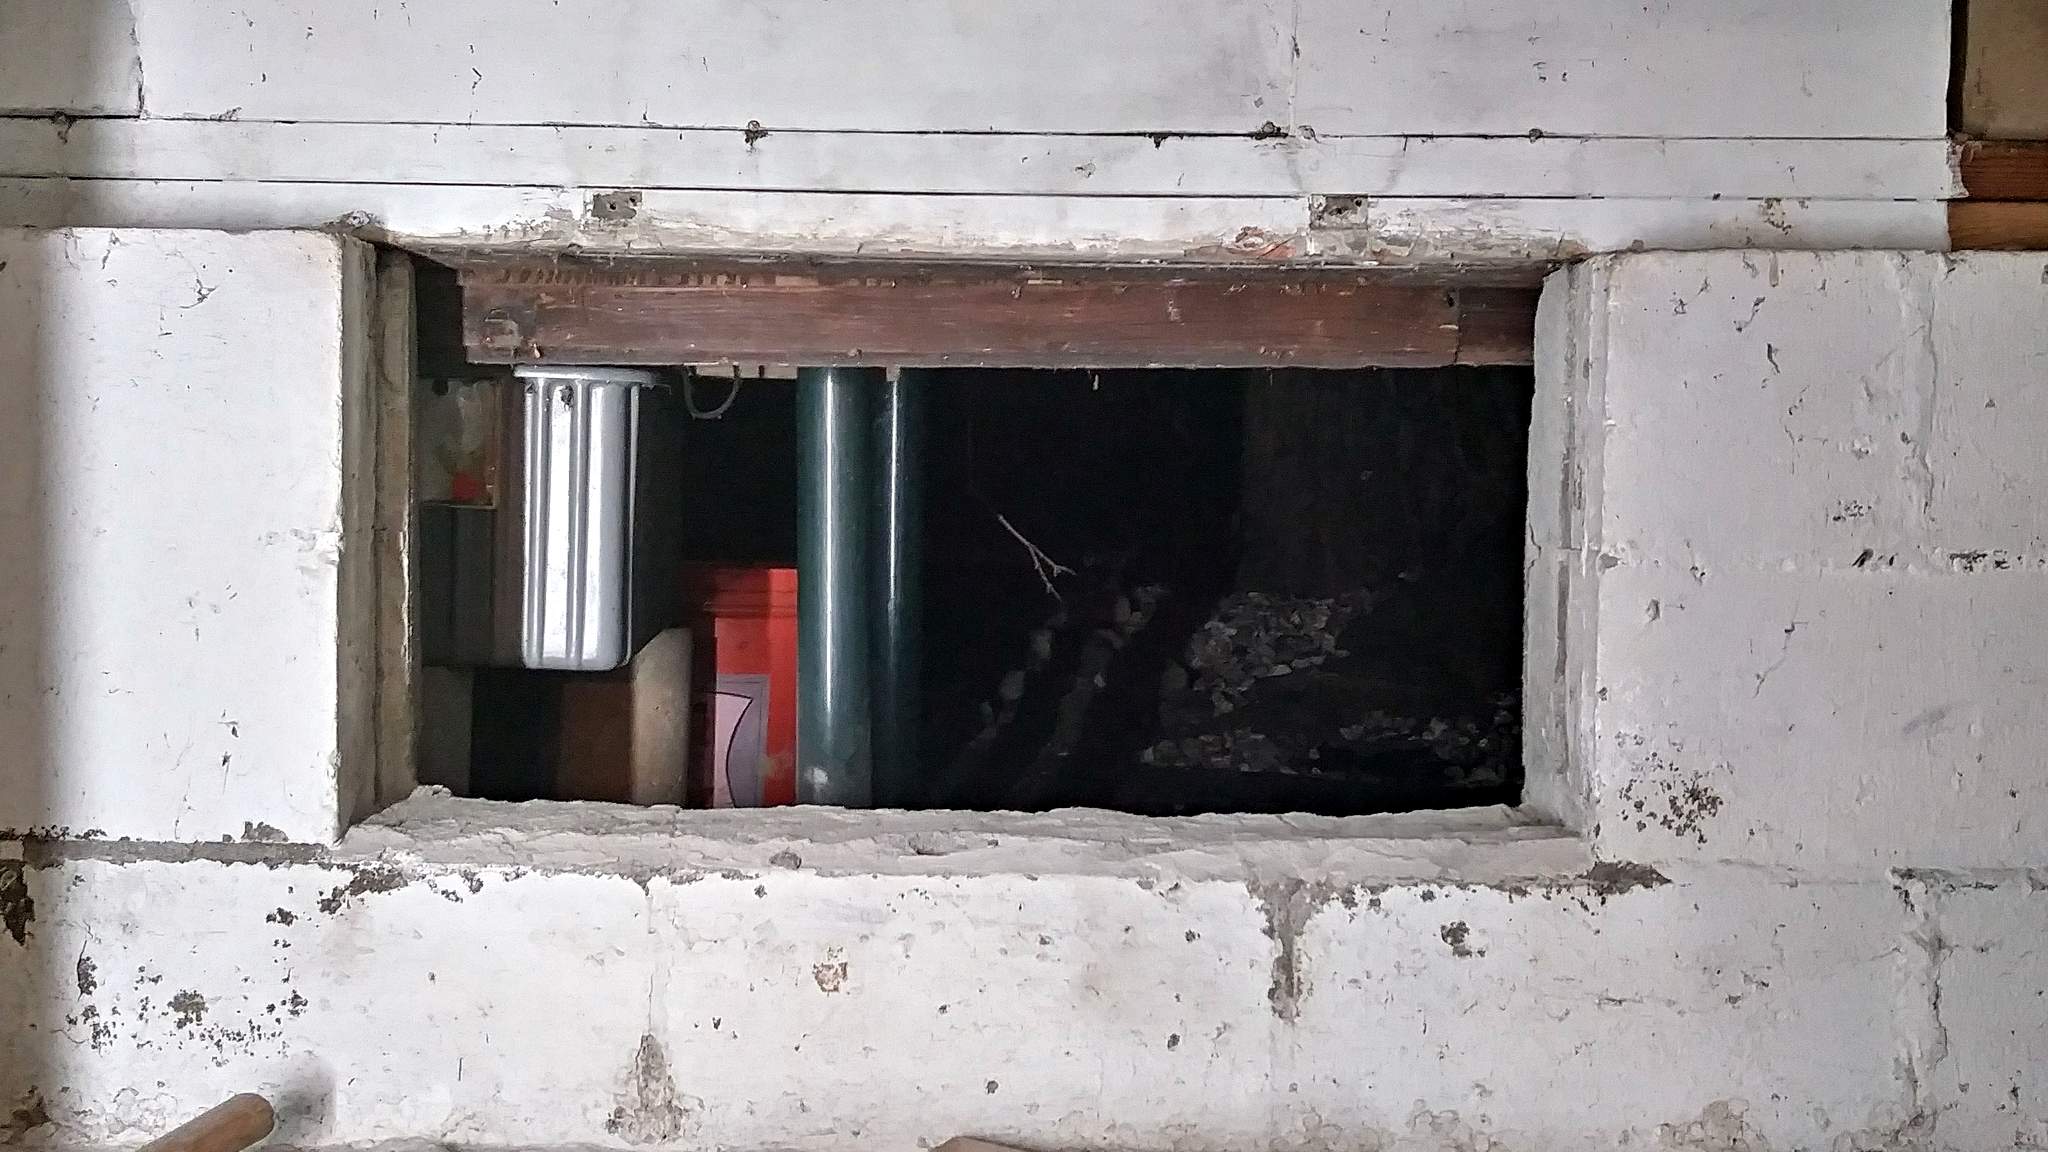
Mixed up some vinyl patch cement and bedded a painted 2x4 held in place with Ramset nails…
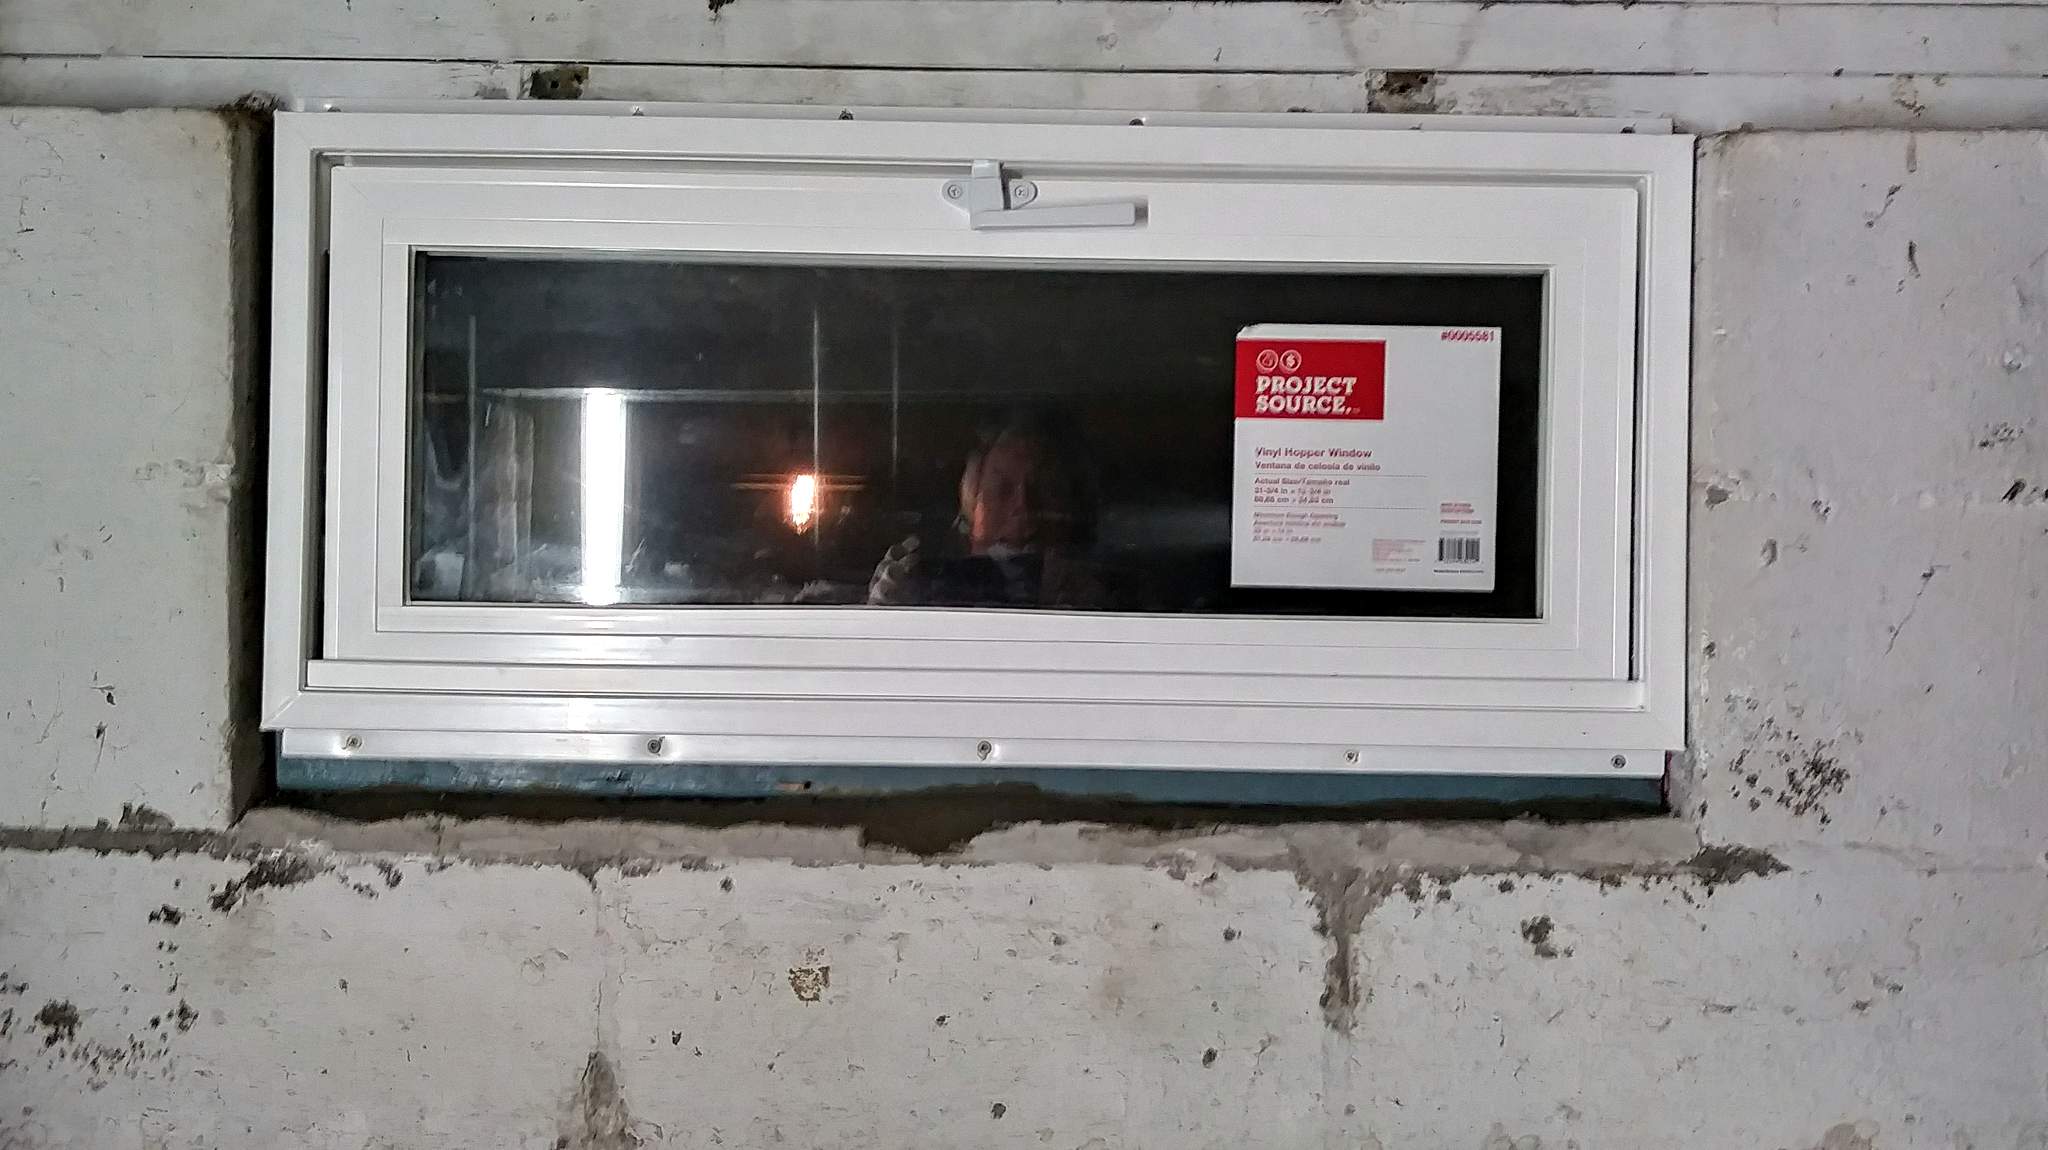
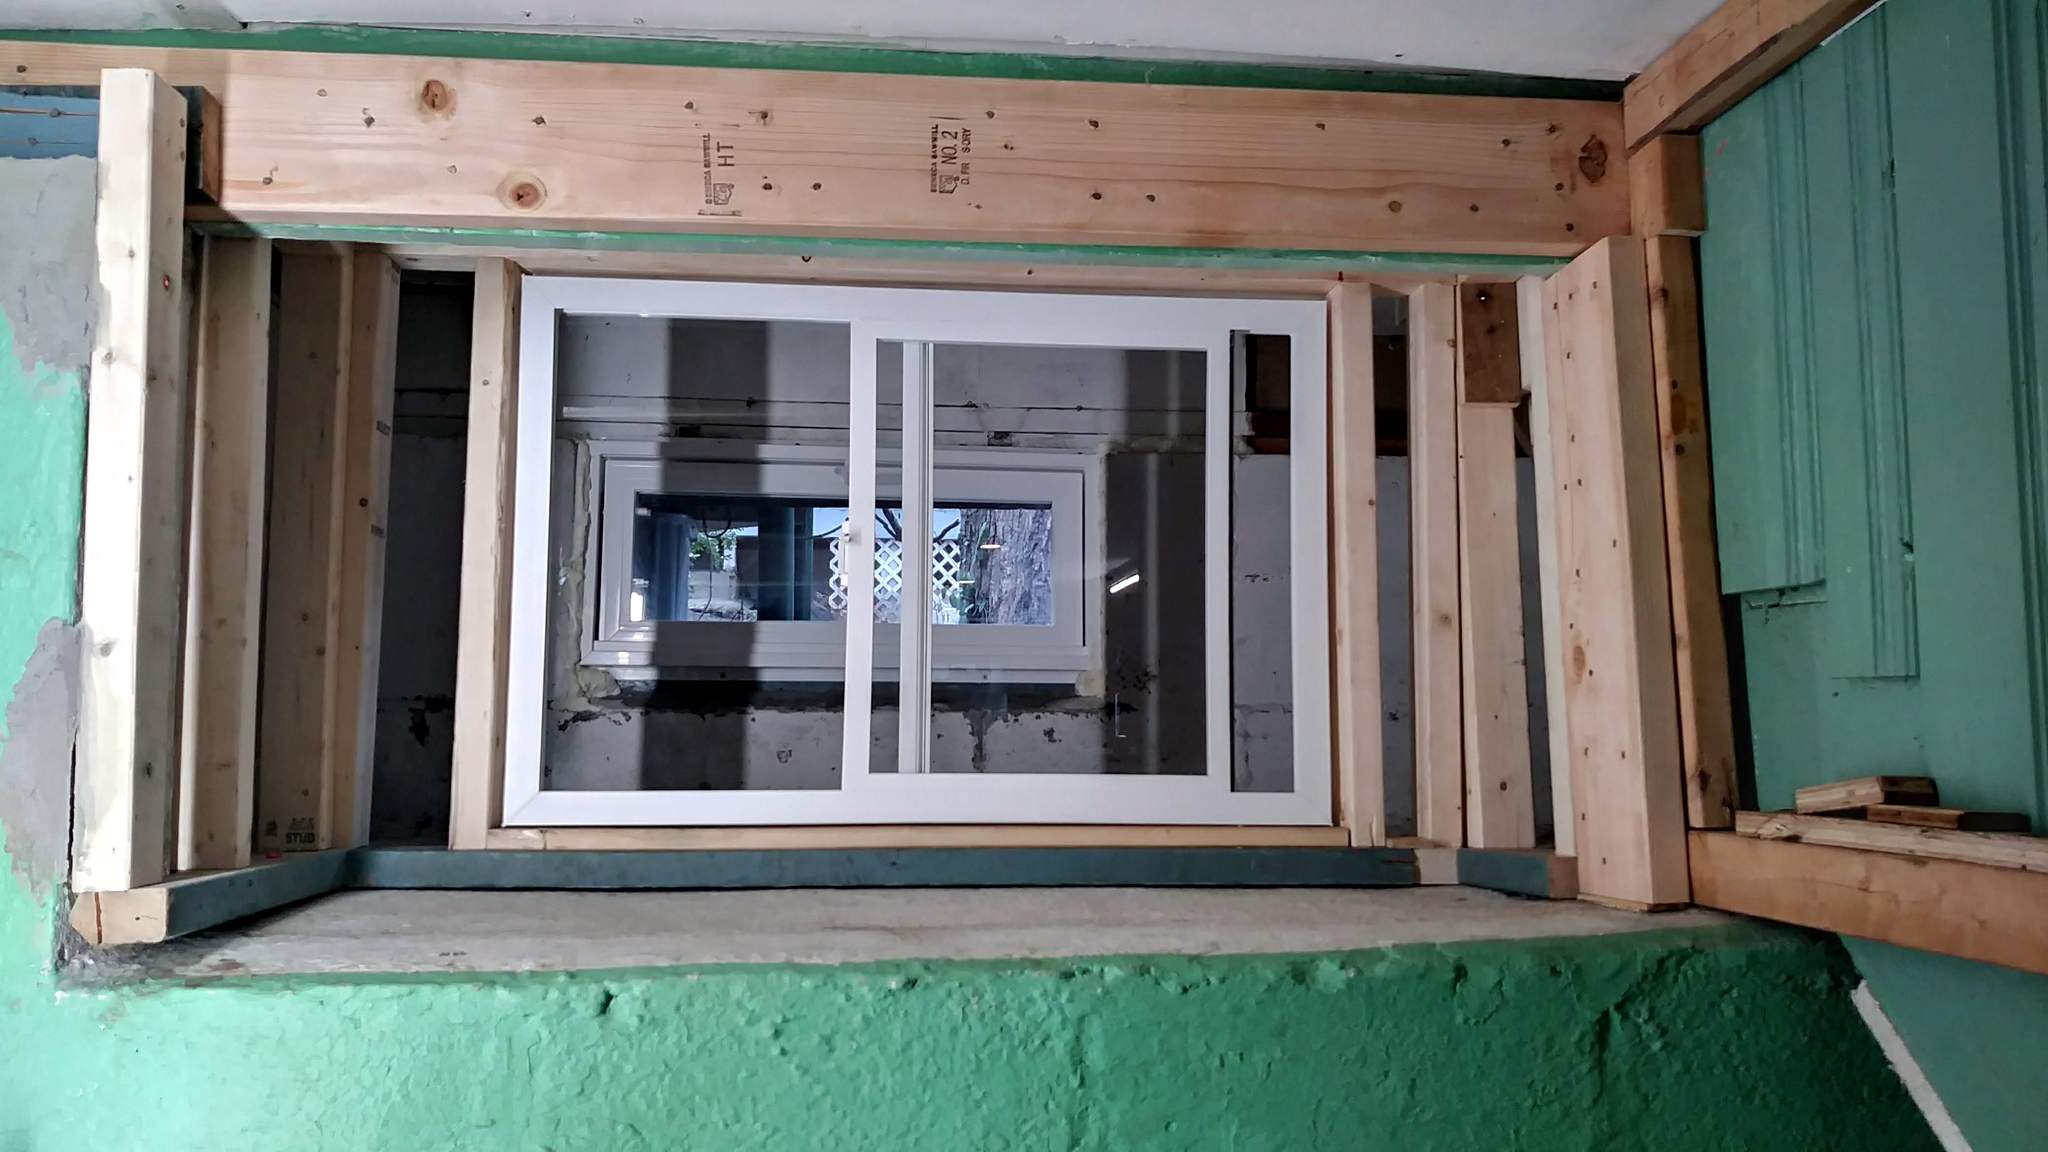
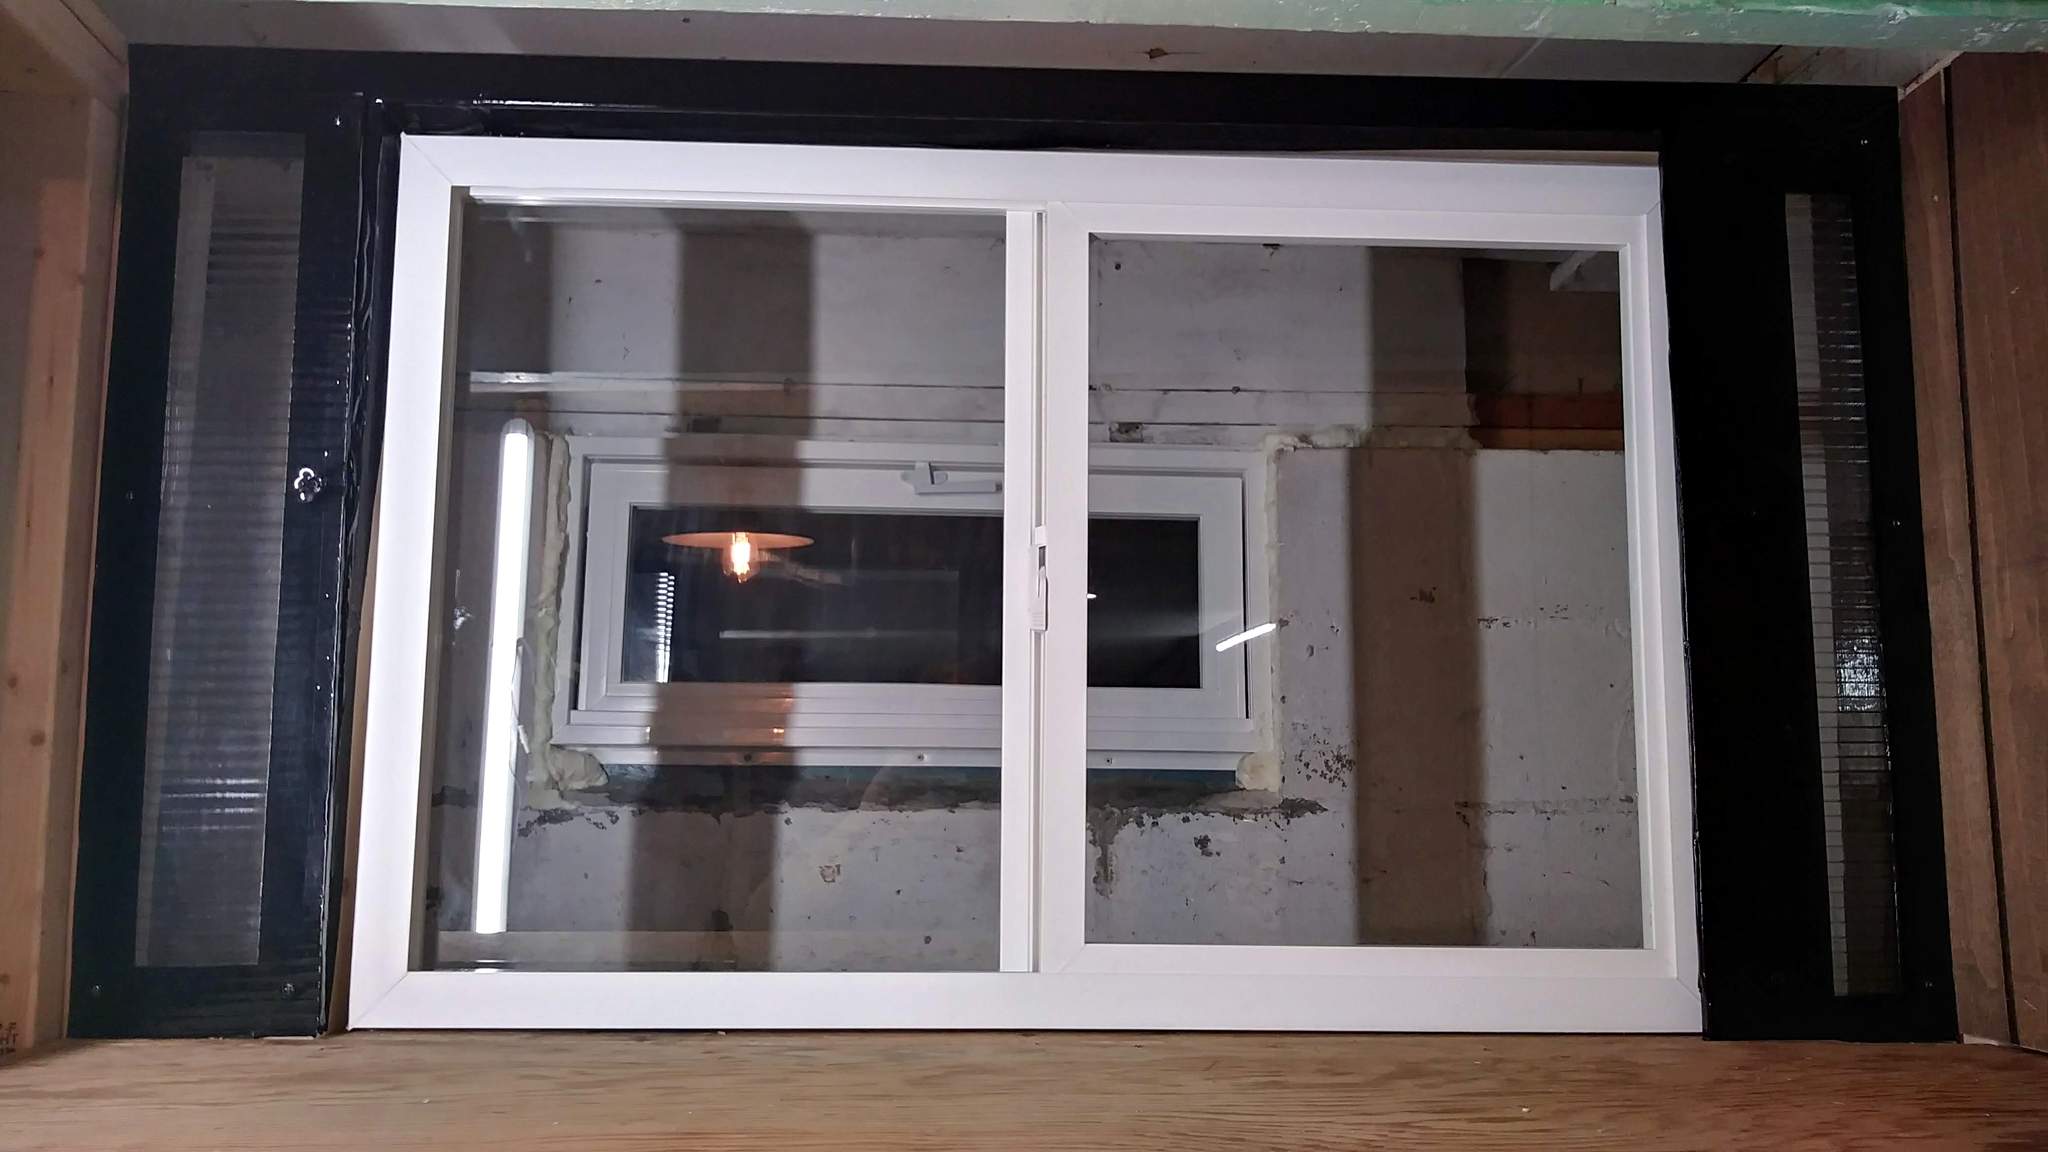
Finally, in plenty of time for tomorrow’s rain, an el-cheapo vinyl hopper window is screwed in place. I later sealed around it with expanding foam…
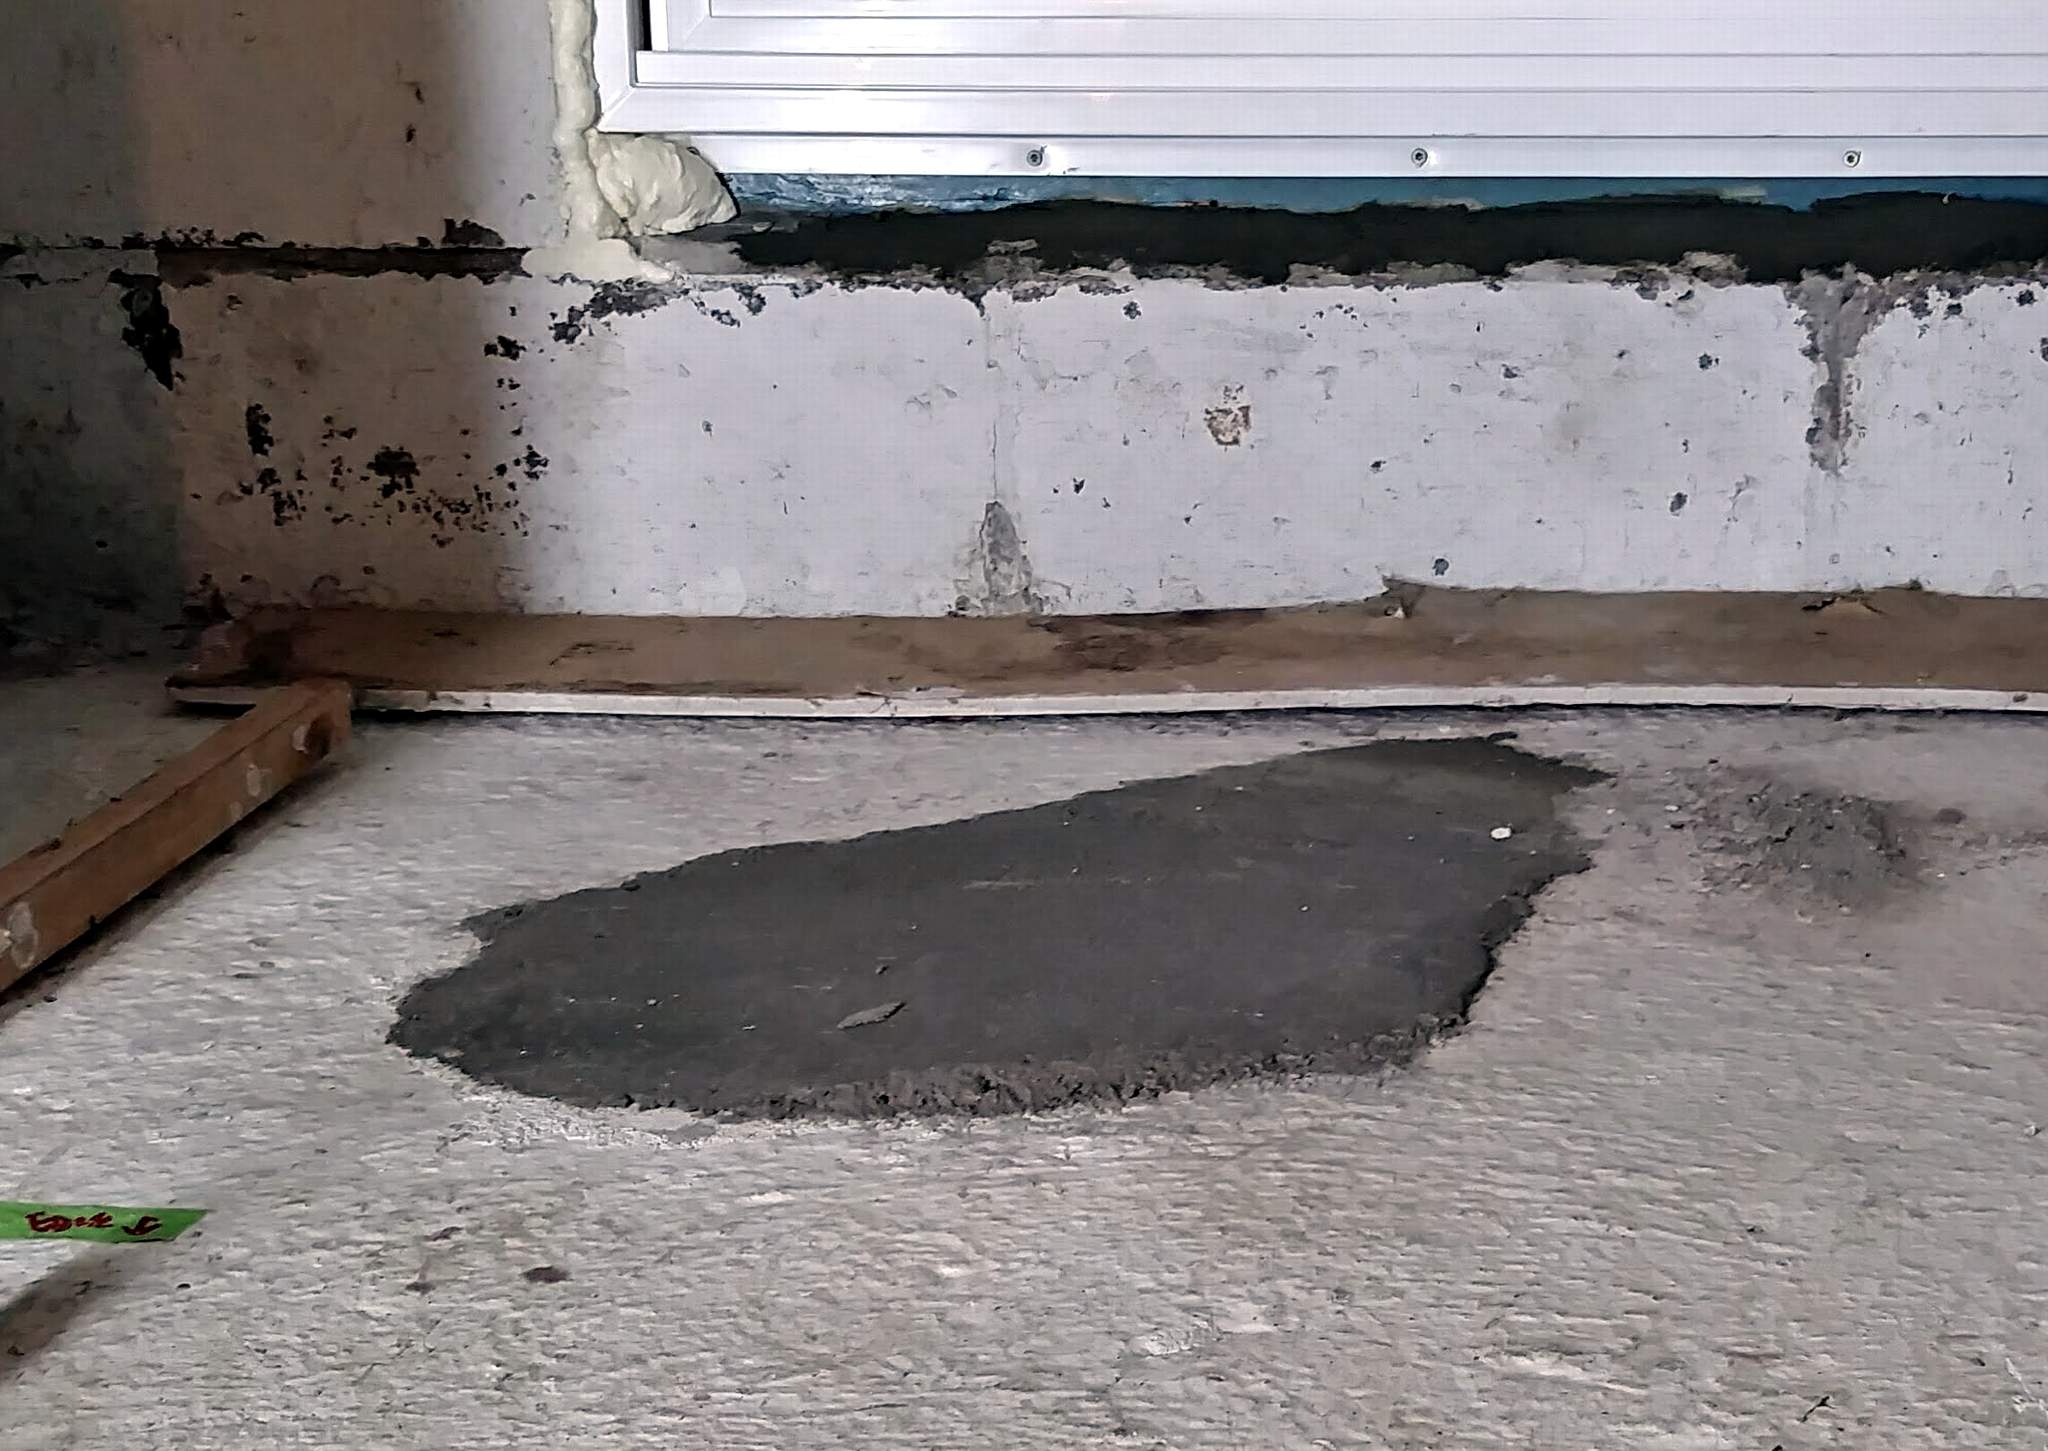
Two more structural issues to deal with before I can build bench work. My pressure against the floor while prying out the metal frame broke open a patch in the floor. I’ll dump in a bag of concrete mix tomorrow. Then there is the non-existent header and support holding up the landing of my stairs (see first pic in this post). I picked up a 2x6 to sister with the existing one and will beef up the 2x4 pillar on the right.
Ken Brunt said:
You manage to find any trace of that squirrel while all that’s apart?
Not in here. There was a mouse nest above the paneling in the old book case, but the crawl space was pretty tight except for the window. I think the shards would deter them from that route.
Sean said: This will become a tunnel and end up here ?
Yes.
Why are there legs … is there that much height difference ?
And Yes !!!
Yesterday was structural repair - enhancement day. First up; fill the hole in the concrete floor I made with my knee while prying out the old window. Some quick set concrete mixed in a 5 gallon pail did the job…
Next; reinforce the header over the opening that is holding up a traffic are above at the stair landing. I sistered a 2x6 to the existing floor joist and another to the 2x4 pillar that was holding up one end. Also got a tiny bit of the framing for the shadow box / storage area done…
And this one is for Hollywood - I like your idea for under the stairs. It will be a bit more restrictive than BOX, but I’m pretty sure I can get my 0-4-0 Porter in there with maybe a small car to allow switching a track close to the vertical wall one or two cars at a time…
Today, hopefully, the shadow box framing gets finished and the window installed. Then I can move on to bench work.
Jon,
It has been awhile since I have been in your basement, something I may be able to rectify in the near future. it looks like you are adding a nice indoor space for your RR. one thought would be to depress the track closer to the foundation slightly and you may be surprised what you can fit in the new hole. Sidings off the mainline often dip down sharp grades off the mainline then level out at the shipper/consignee dock. and it not like you would be running 10 car trains in here, I suspect more in the neighborhood of five cars or less.
Al P.
Thanks Al - I did have a thought about dropping the bench work here just a little lower. I am limited by the pipe sticking out of the wall if I want the back deck support to be continuous. That section under the stairs is about 3 feet deep. Enough for a small switching engine and one, maybe two cars. I’ll need to scope it out a bit. I suppose I could build this section on roadbed rather than flat plywood deck. I have plenty of PVC for roadbed.
Got a lot of construction done today. Film at 11.
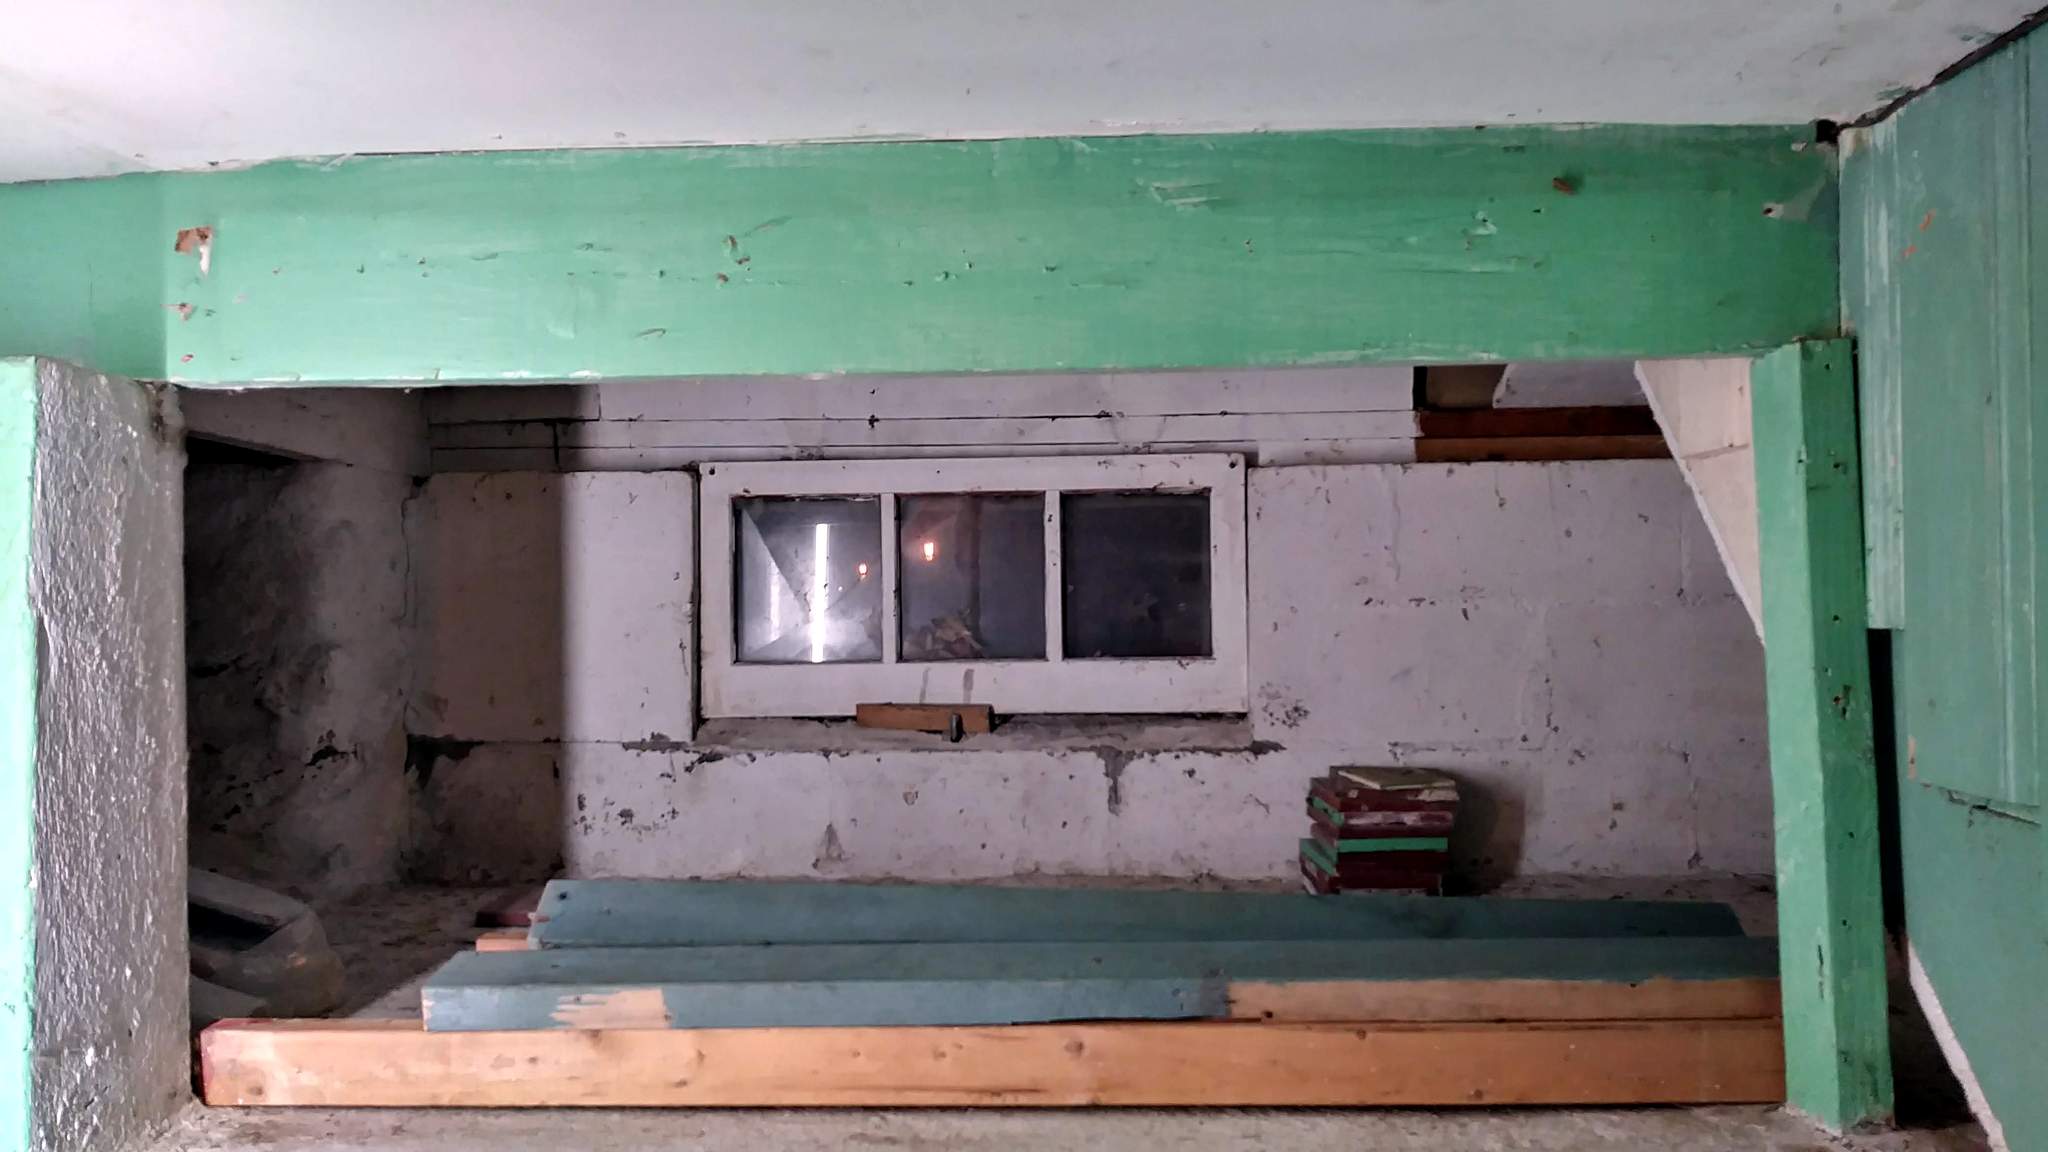
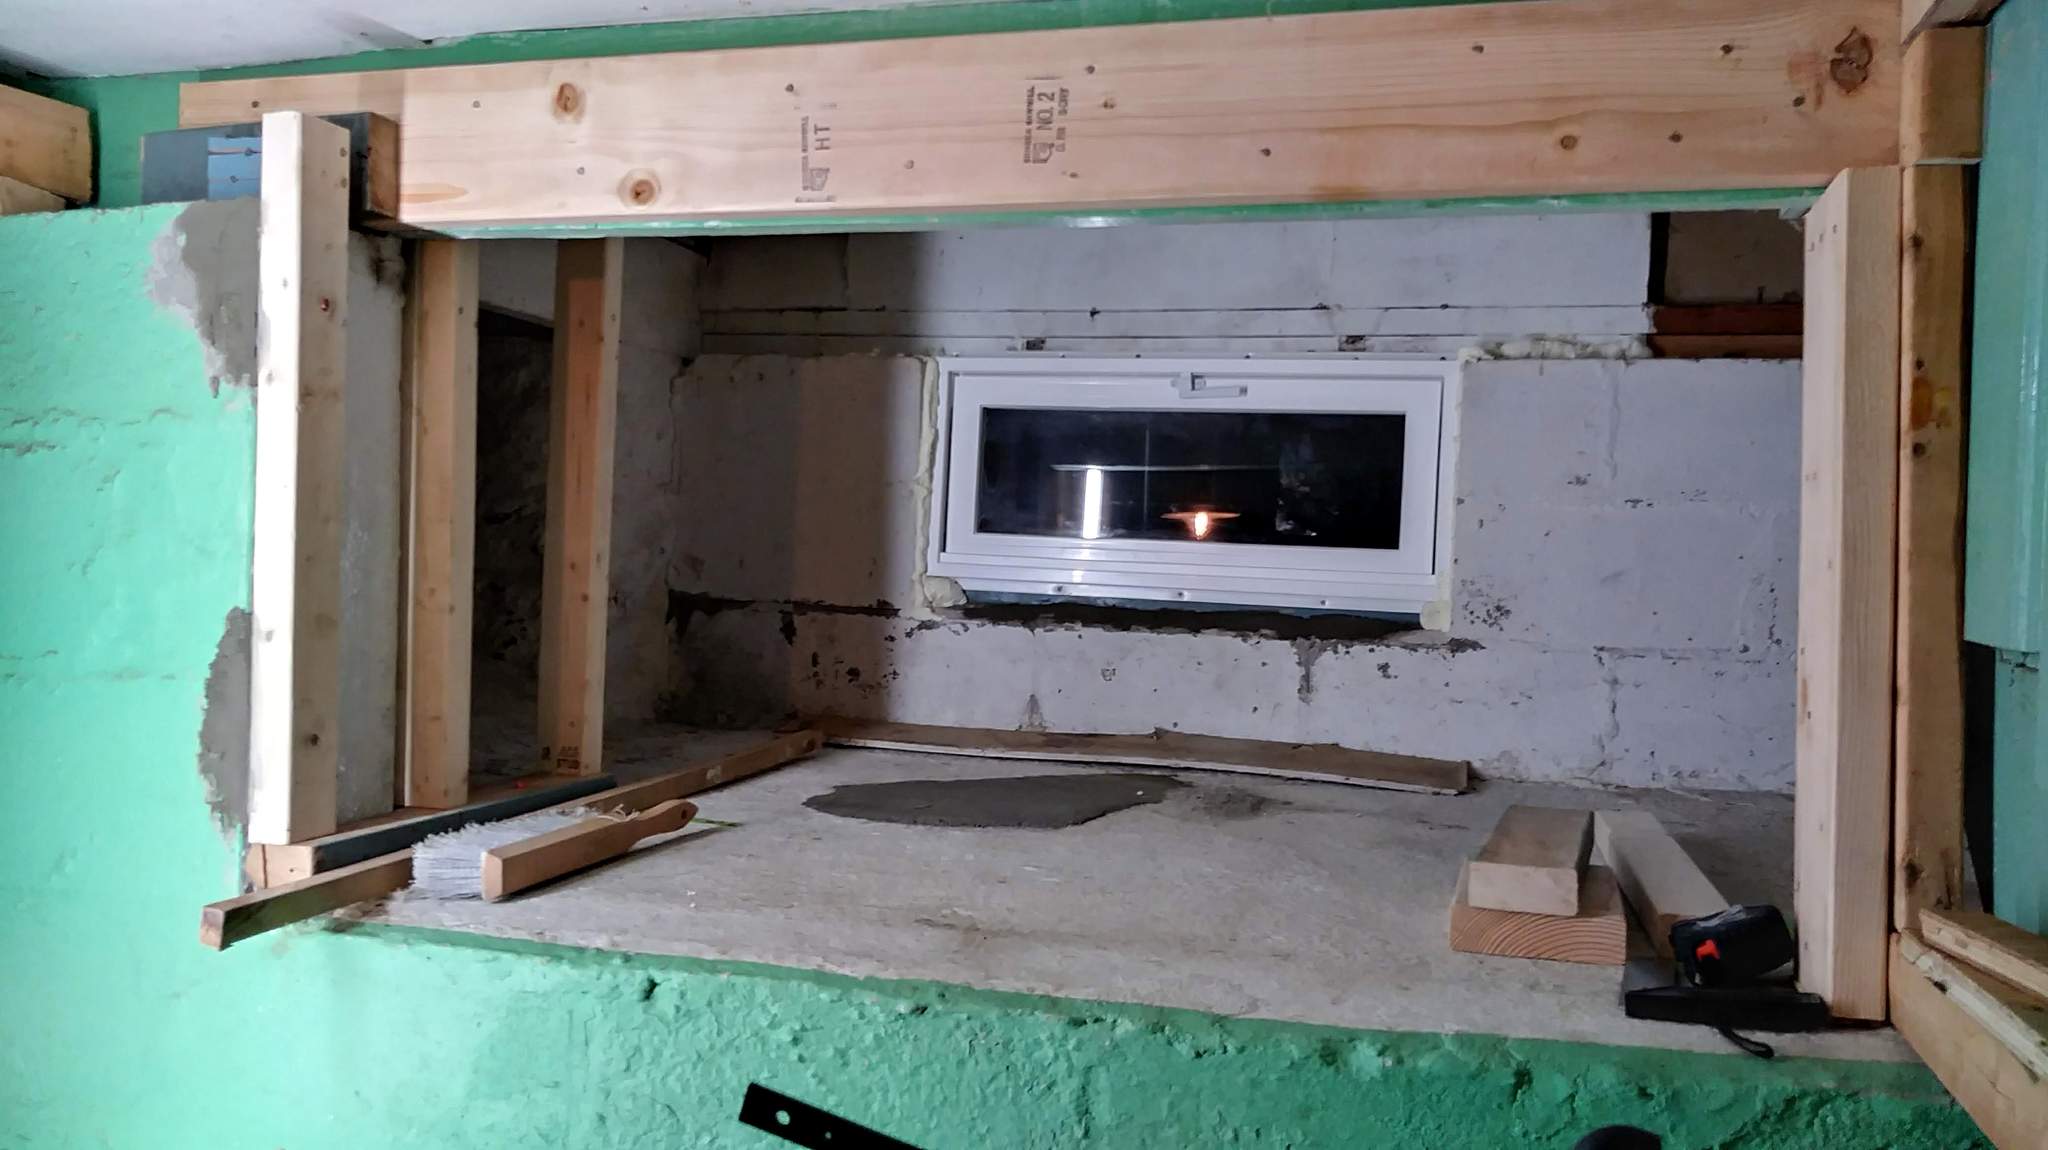
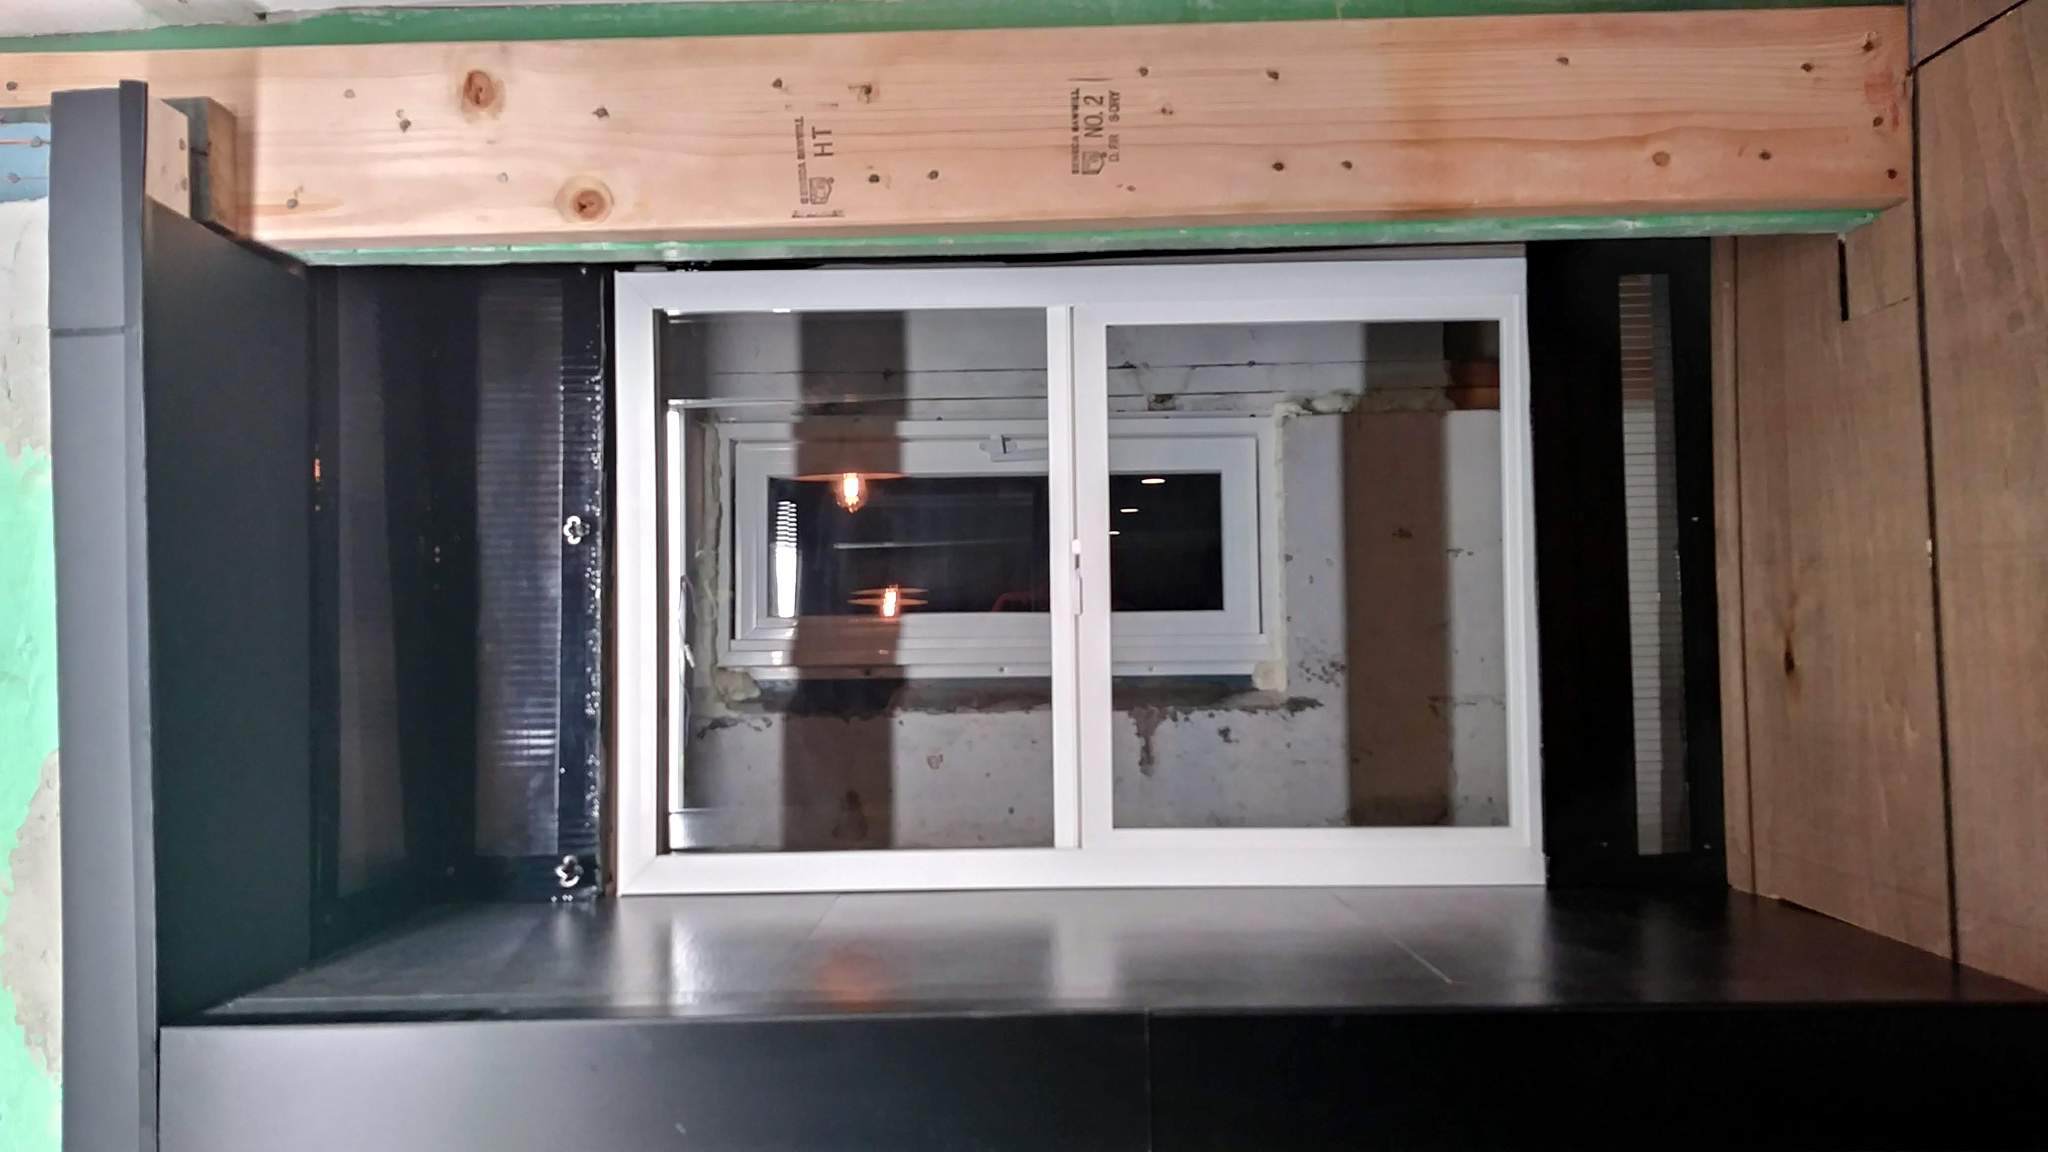
Film just got back from the developer; so here goes. Framing for the shadow box was completed this morning. The wall with the sliding window will be screwed in place so it is removable if more access is needed than the 16" x 22" hole with the slider open provides. I can crawl through the window if needed. Here is the window wall just prior to dry fit…
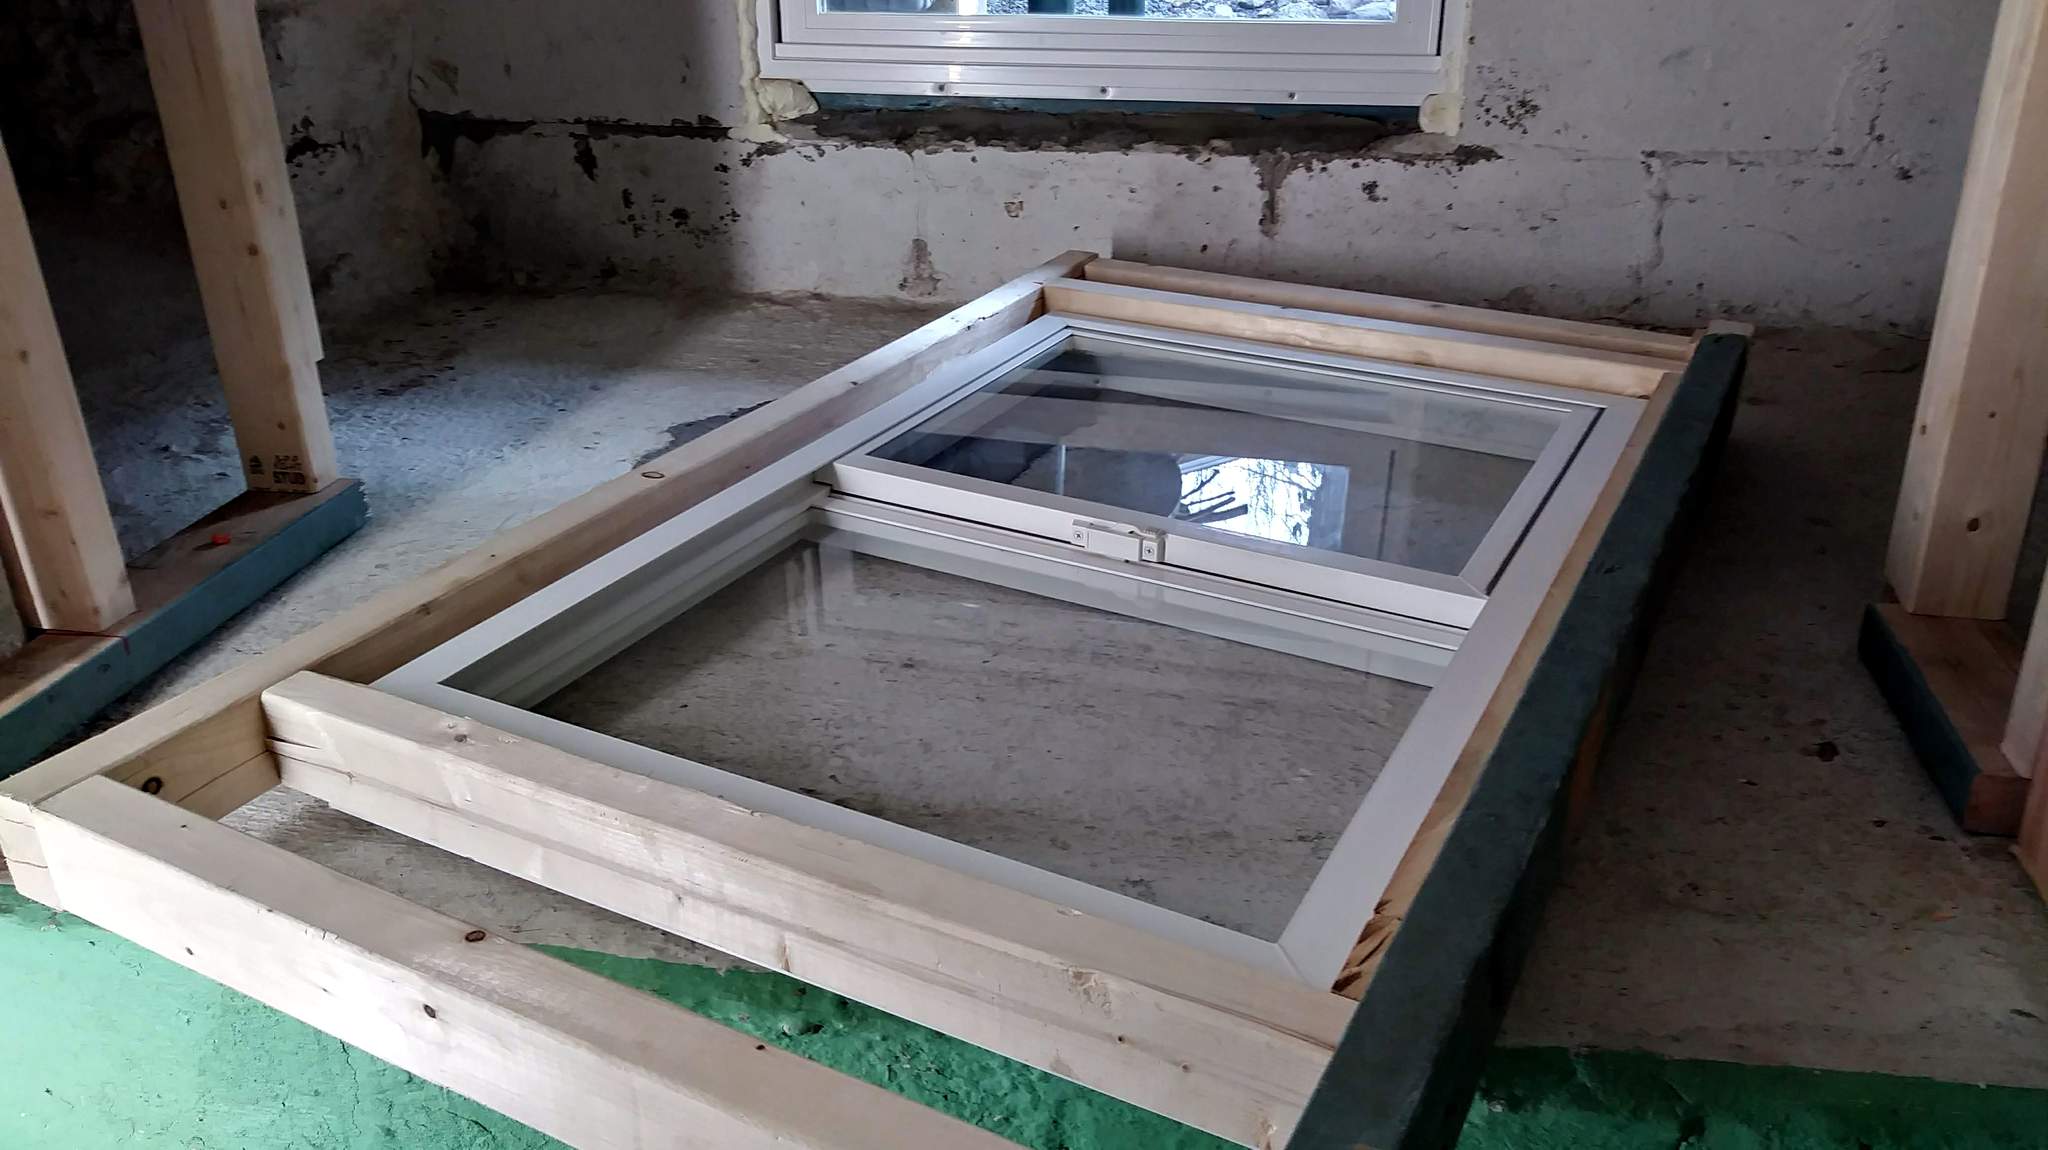
Dry fit fit passed, so the wall is screwed to the two wing walls…
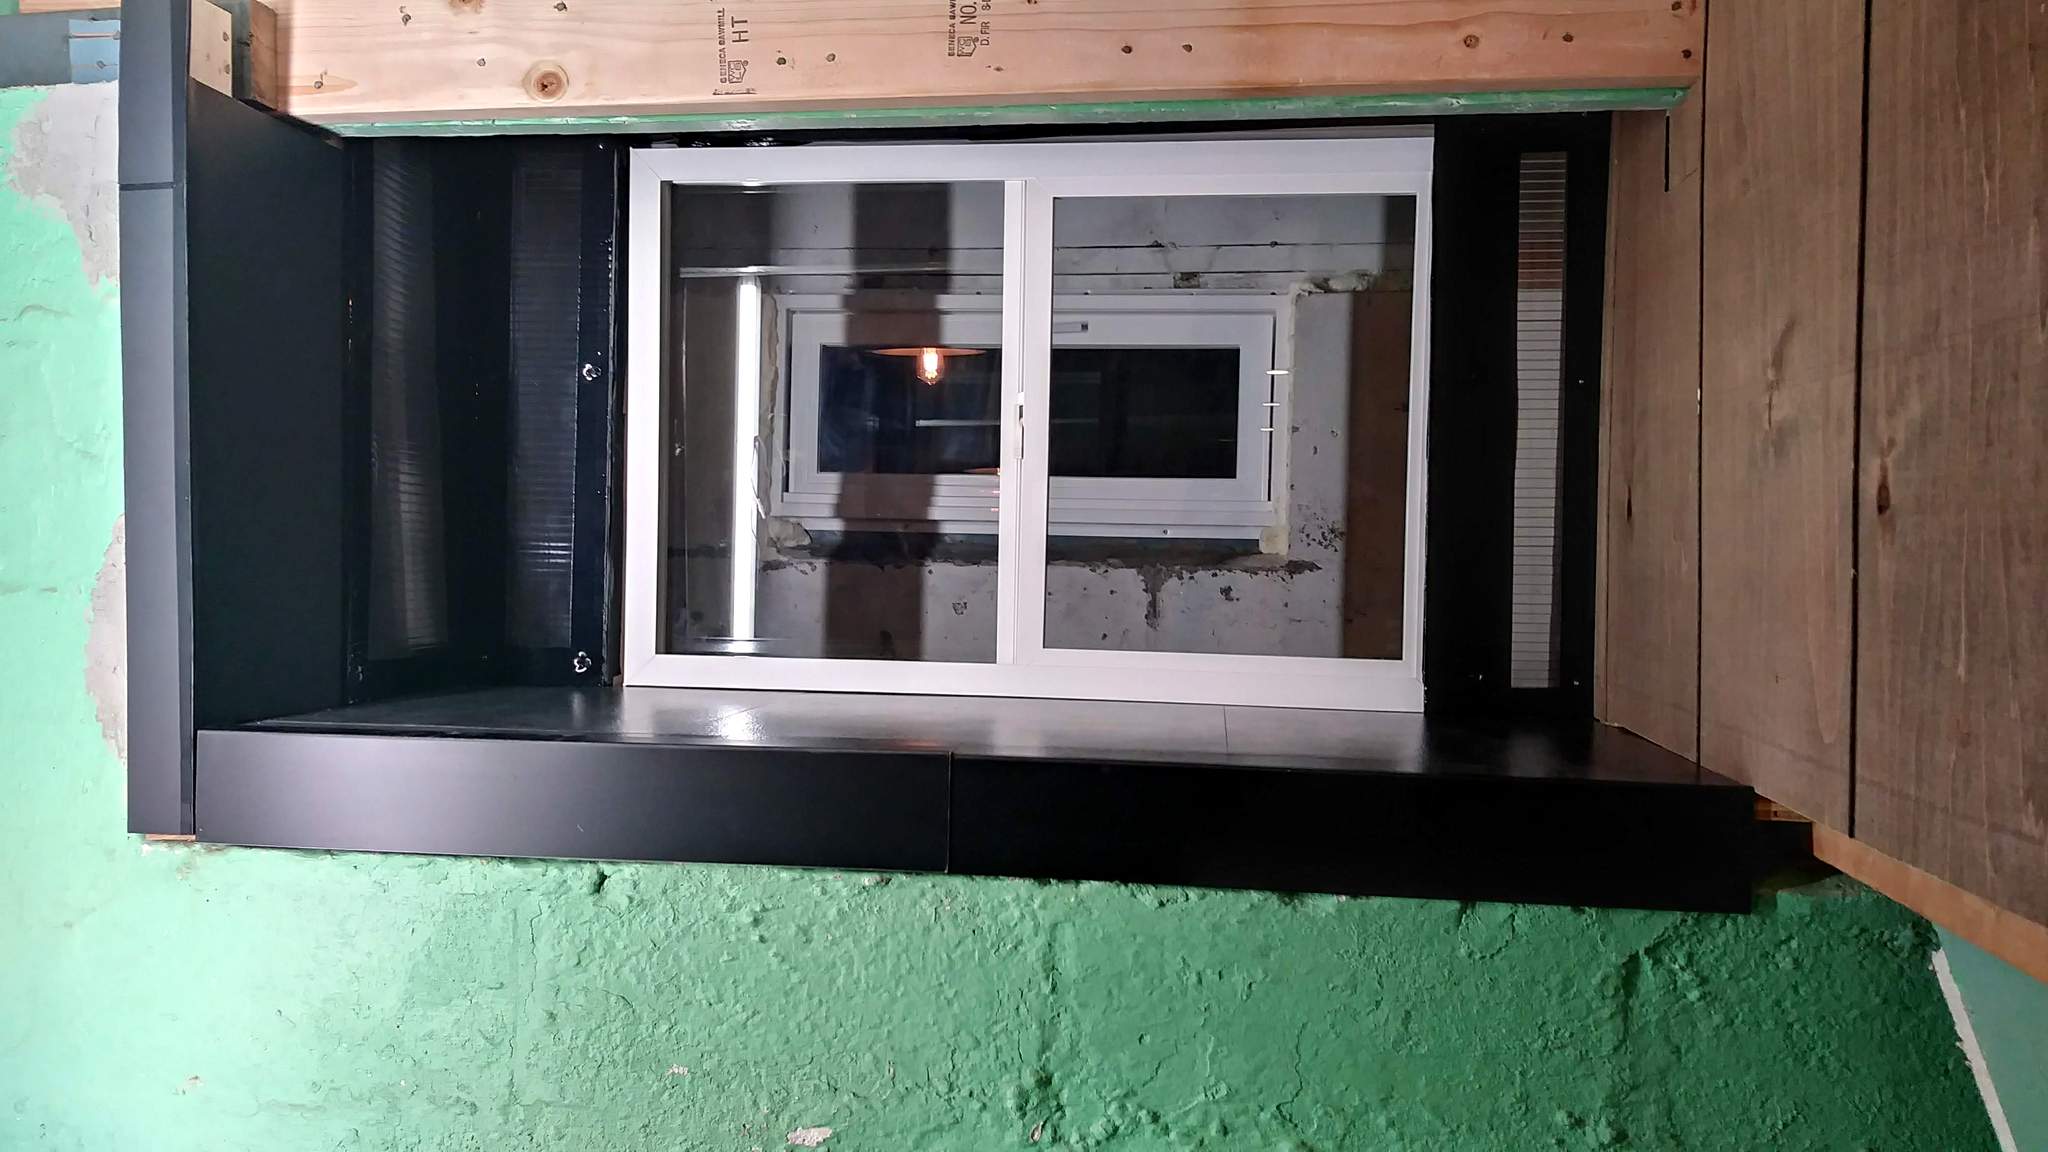
By late afternoon I had the decking on and most of the dress trim done…
Pull back shot of where I quit using power tools for the day. Green tape on the floor was preliminary bench outline. It has since been reduced with track placement brainstorming late this evening (Film of THAT by 11AM, maybe)…
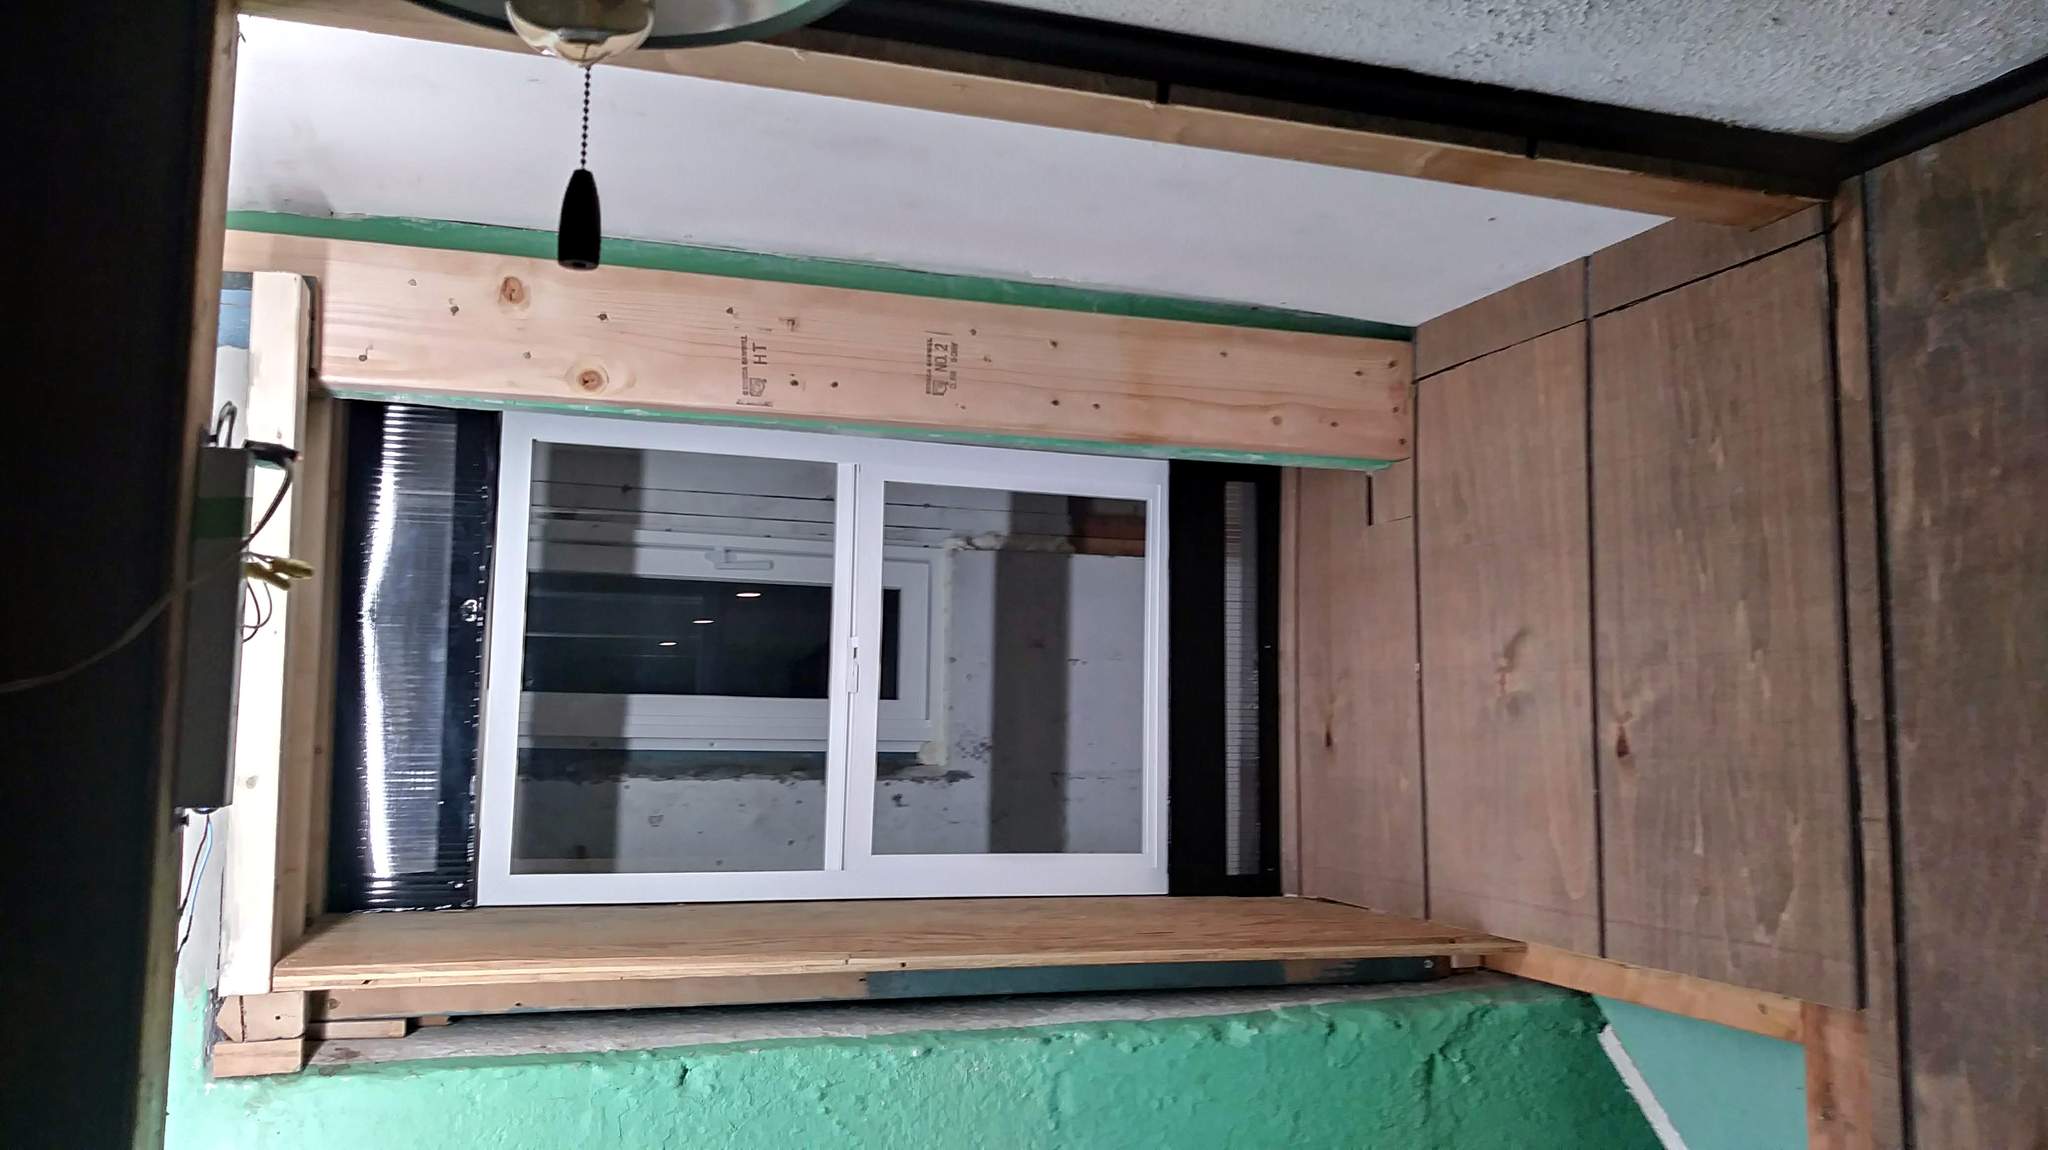
And finally, a close up shot of the window and two home-brew side lites made from corrugated clear acrylic; wrapped in black vinyl, then the lite hand cut out. I may do part of the left wall that way too. It’s really nice to have this natural light source in the winter. It’s a South facing window…
I’m thinking I may want to paint the crawlspace flat black or a dark grey. The white was supposed to make a larger light source, but it really points out the ugly. You also may notice I was voted down by the boss on exposing the bead board. She didn’t want surface wiring and I was happy to have an excuse not to do the additional demo and trim work.
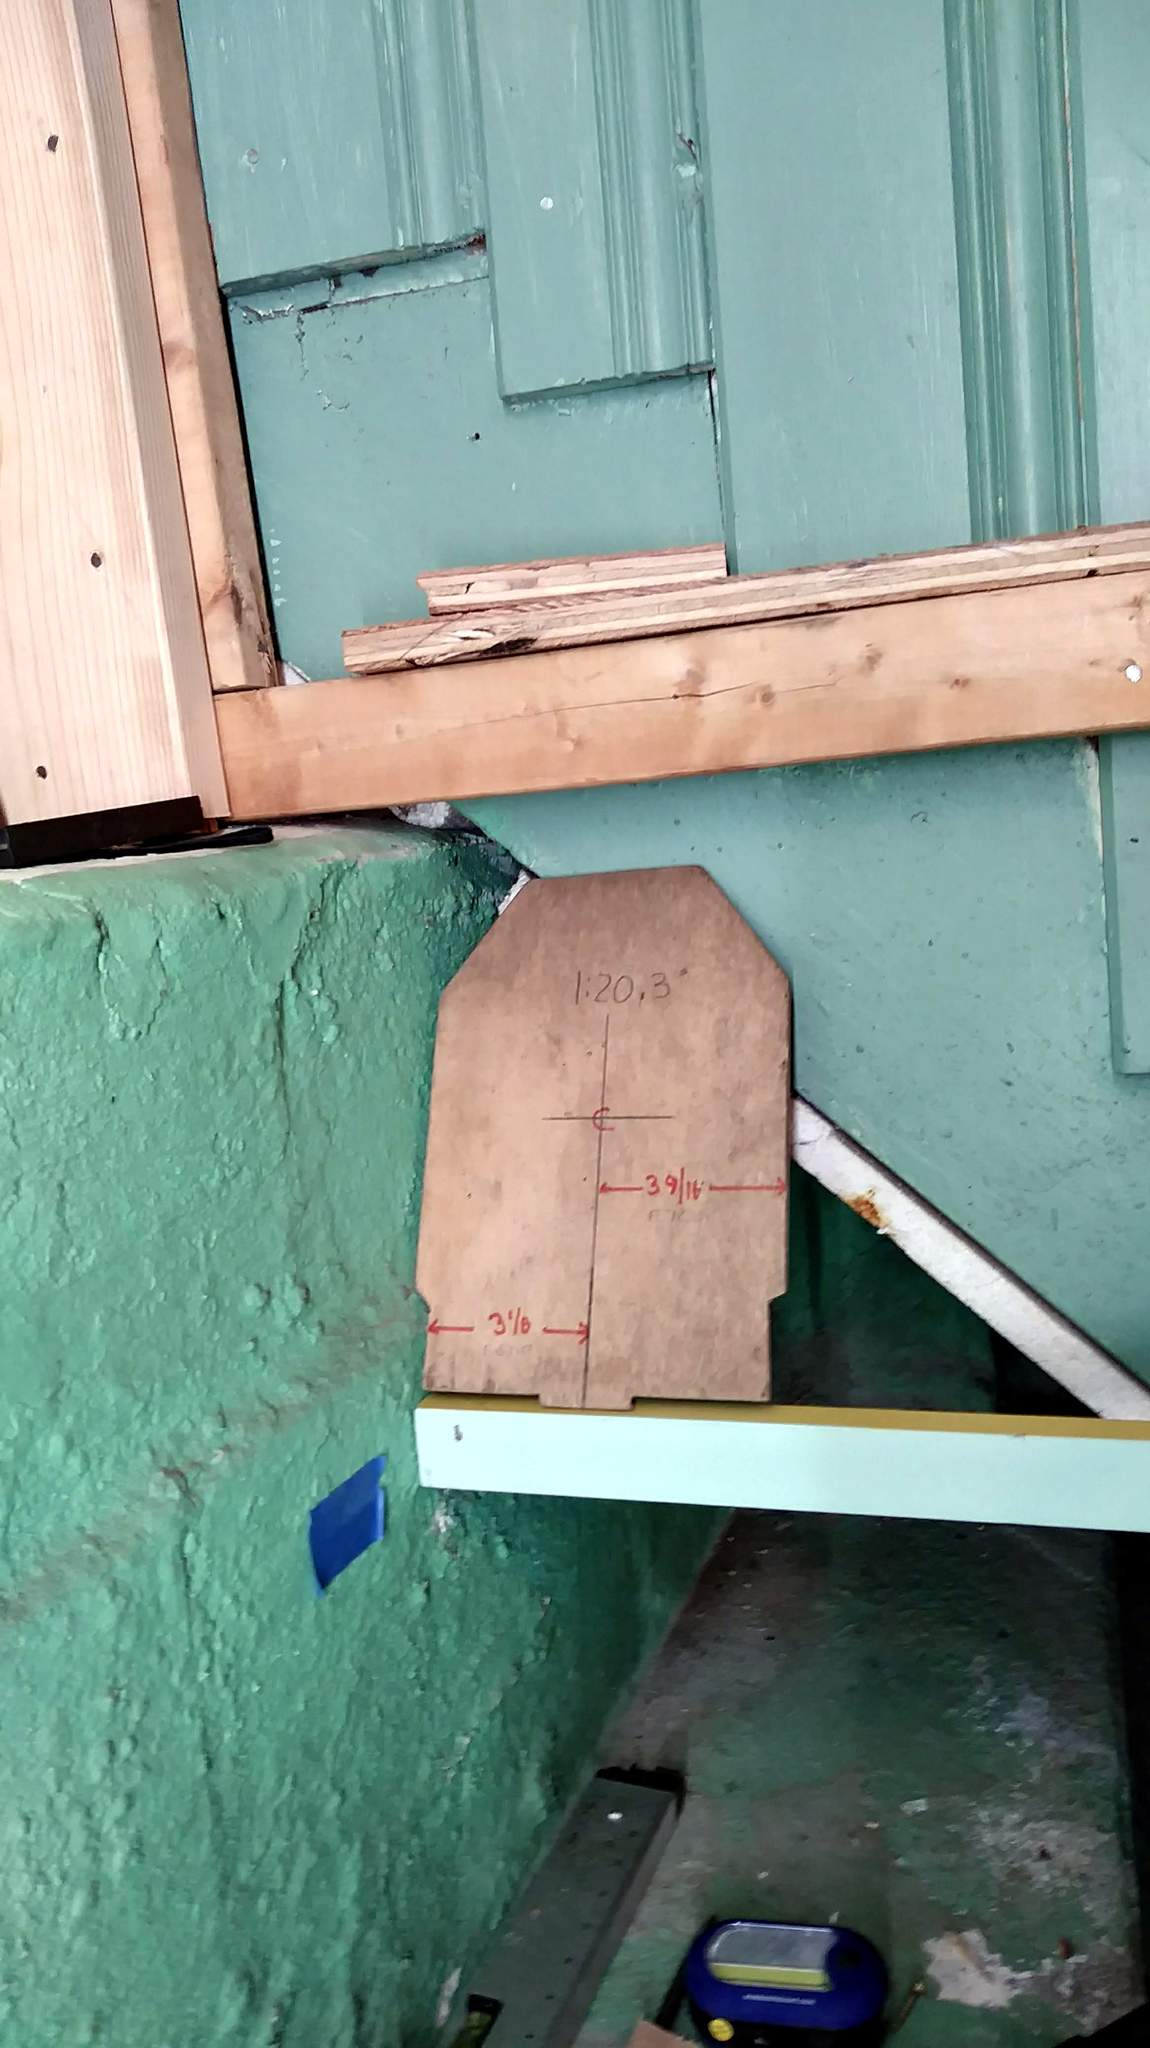
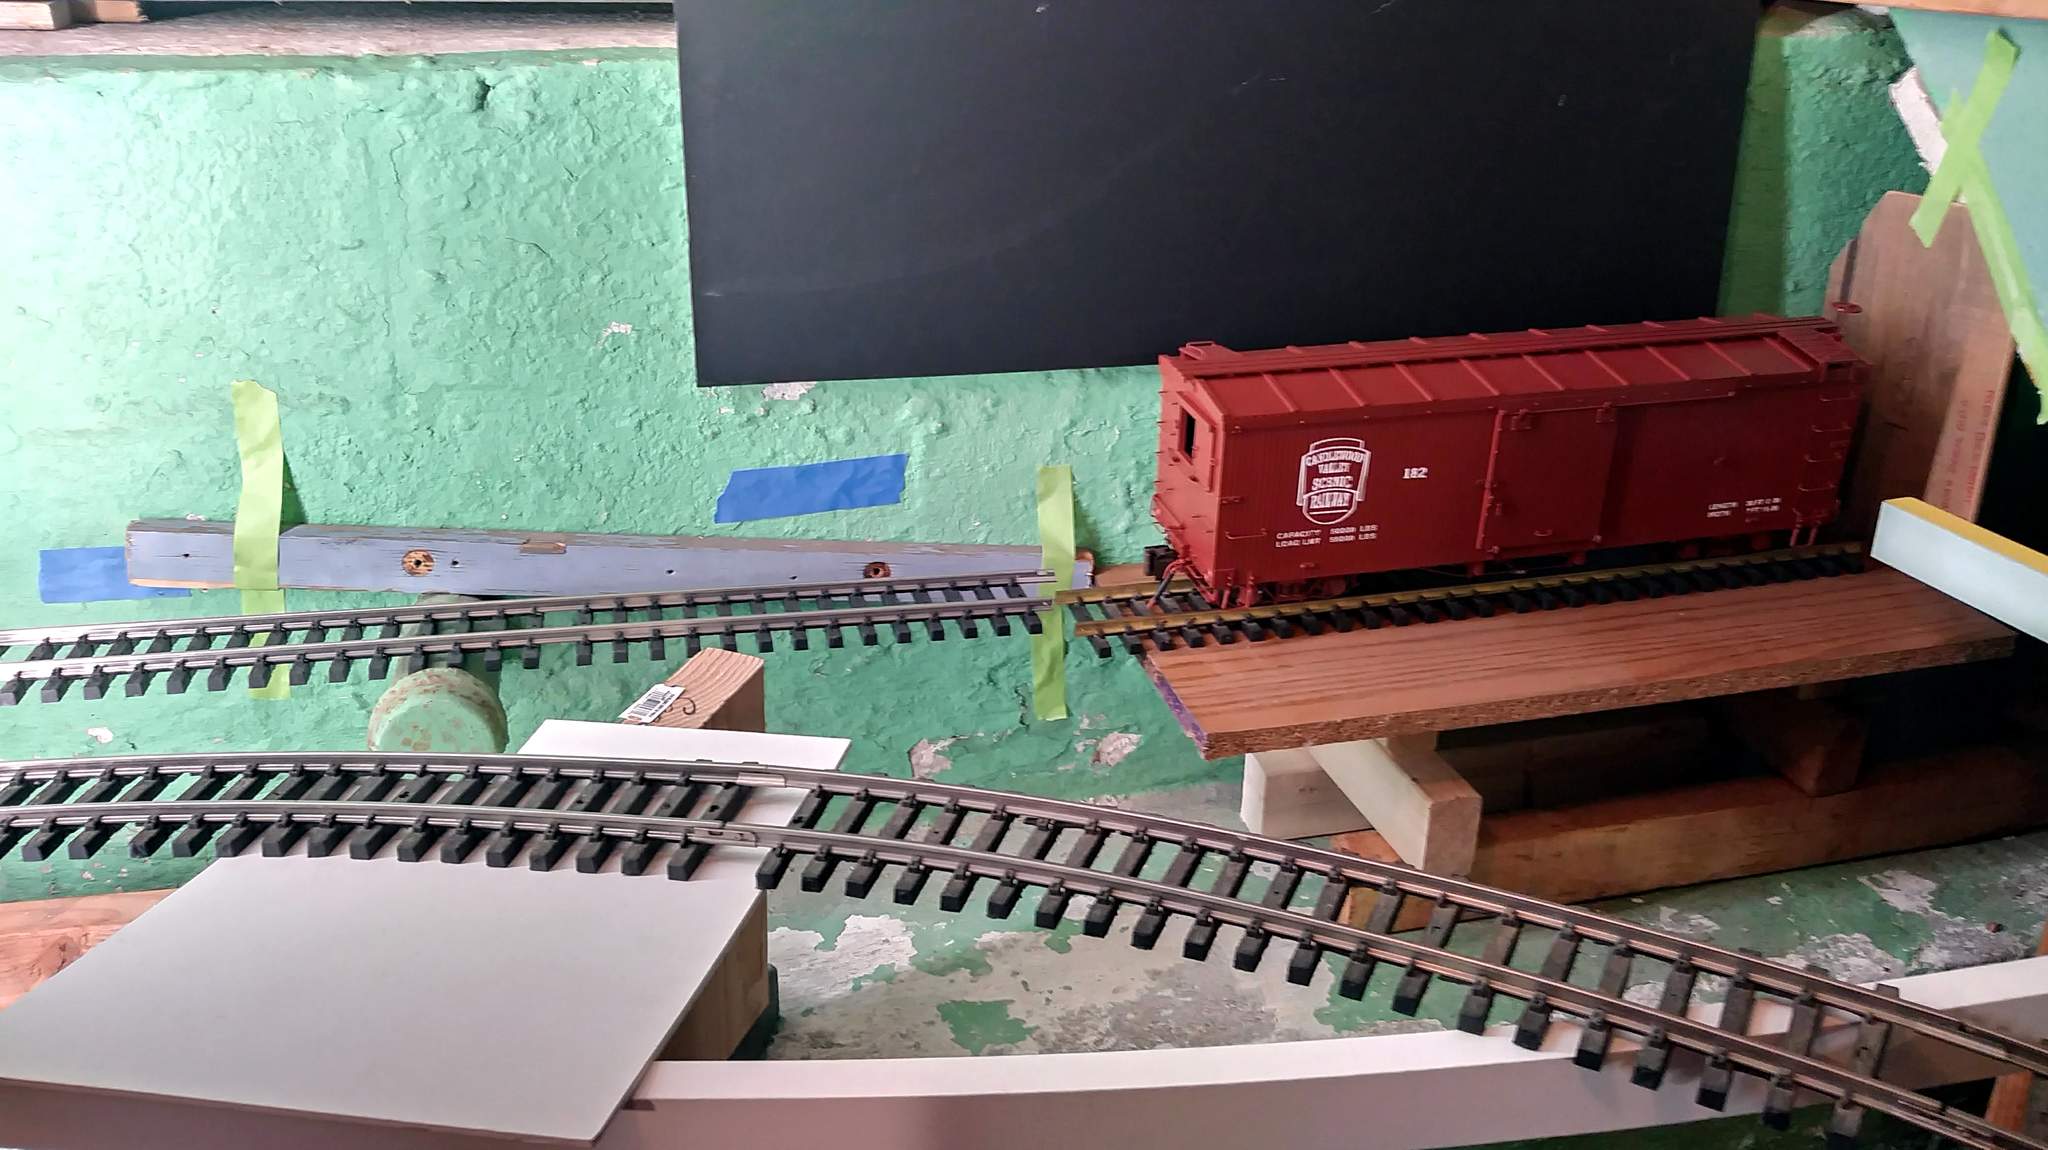
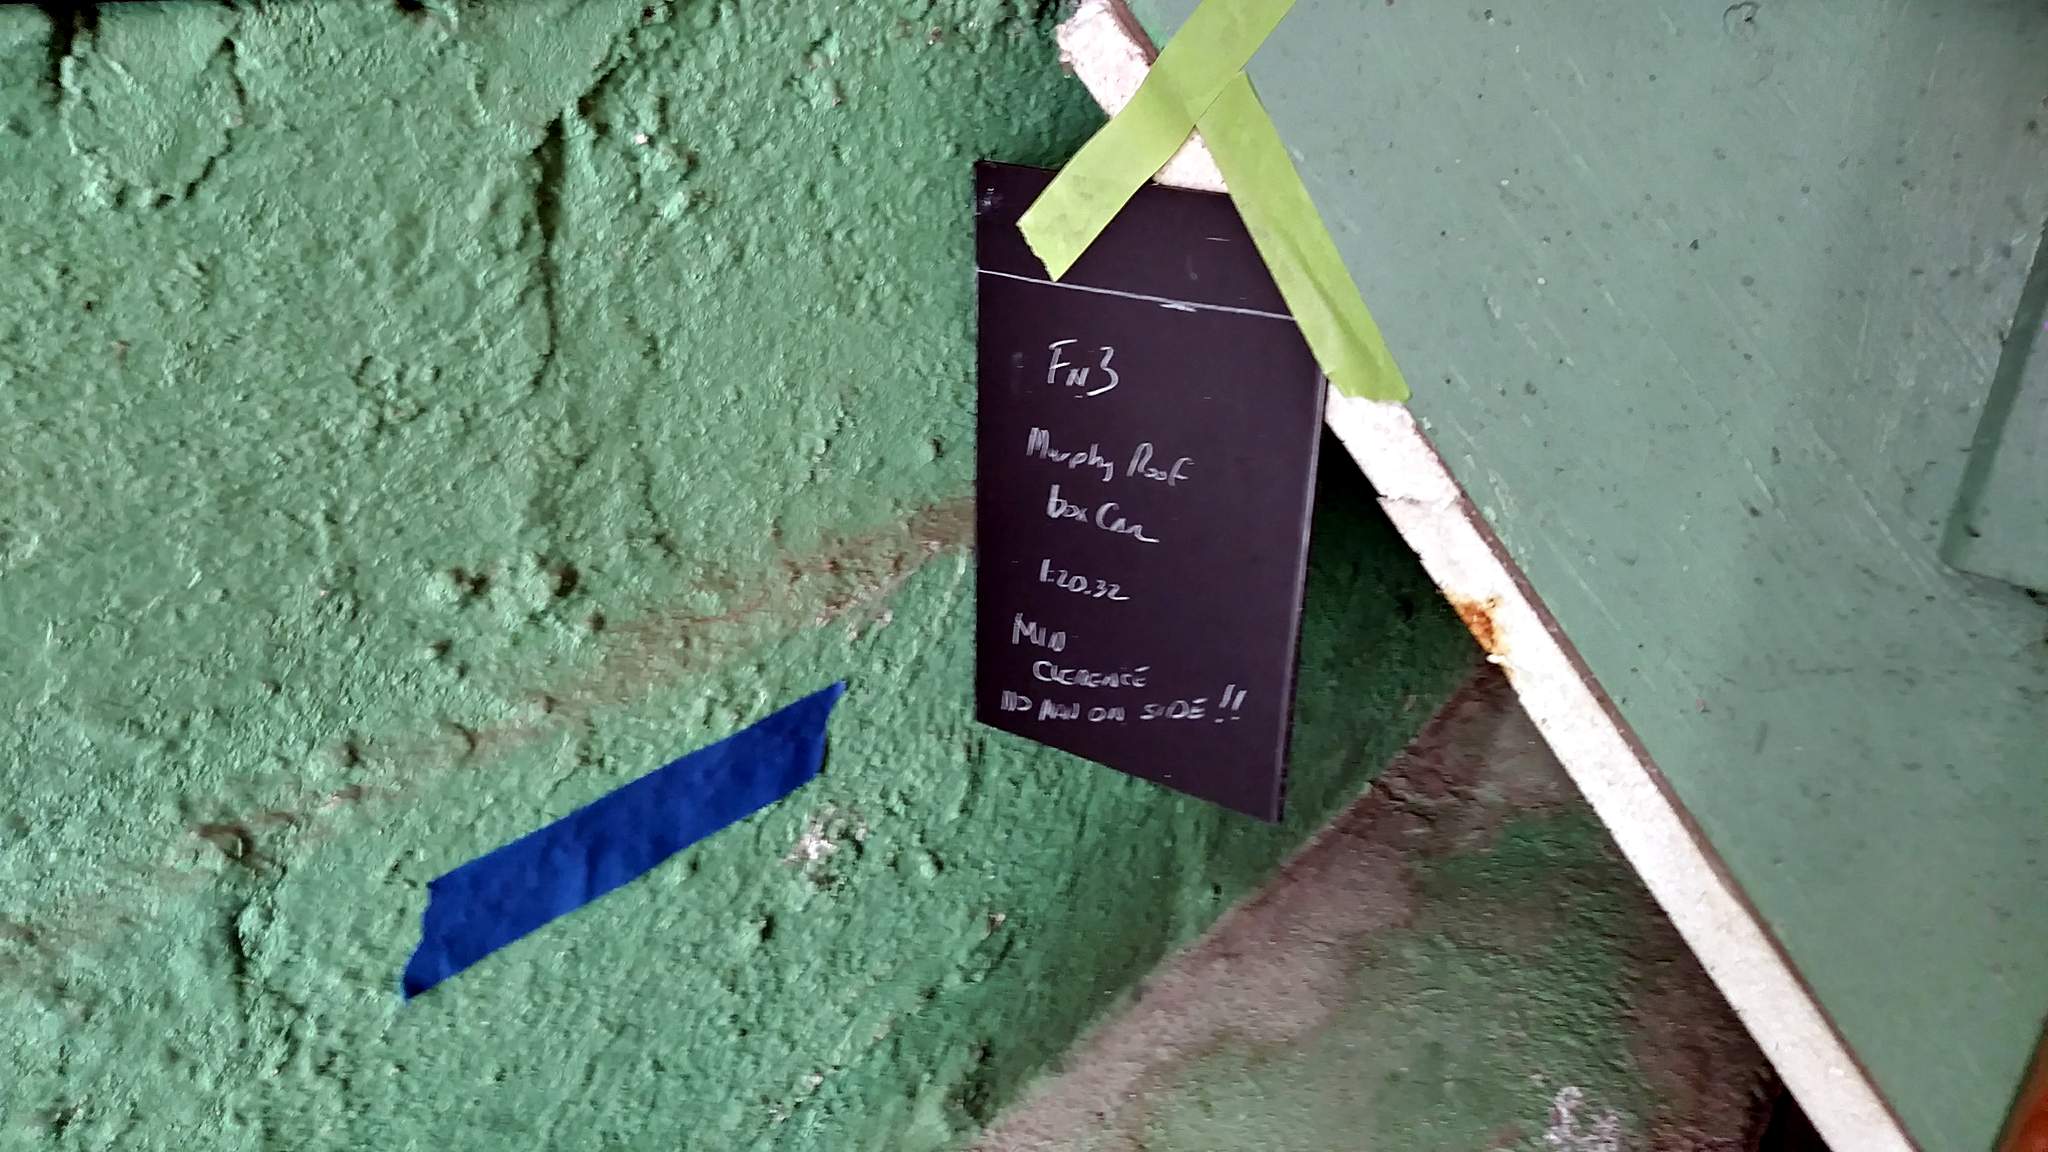
Taking Al’s advice; I experimented with getting full clearance under the stairs. This picture shows my clearance gauge butted tight to the concrete wall and the stringer of the stairs. Full size Fn3 box car on temporary support at approximate height for full clearance. The blue wood taped to the wall to the left of the box car represents the grade angle needed to get to this level after clearing the pipe. I’m pretty sure the pipe is an abandoned drain, but I am not messing with it!!!
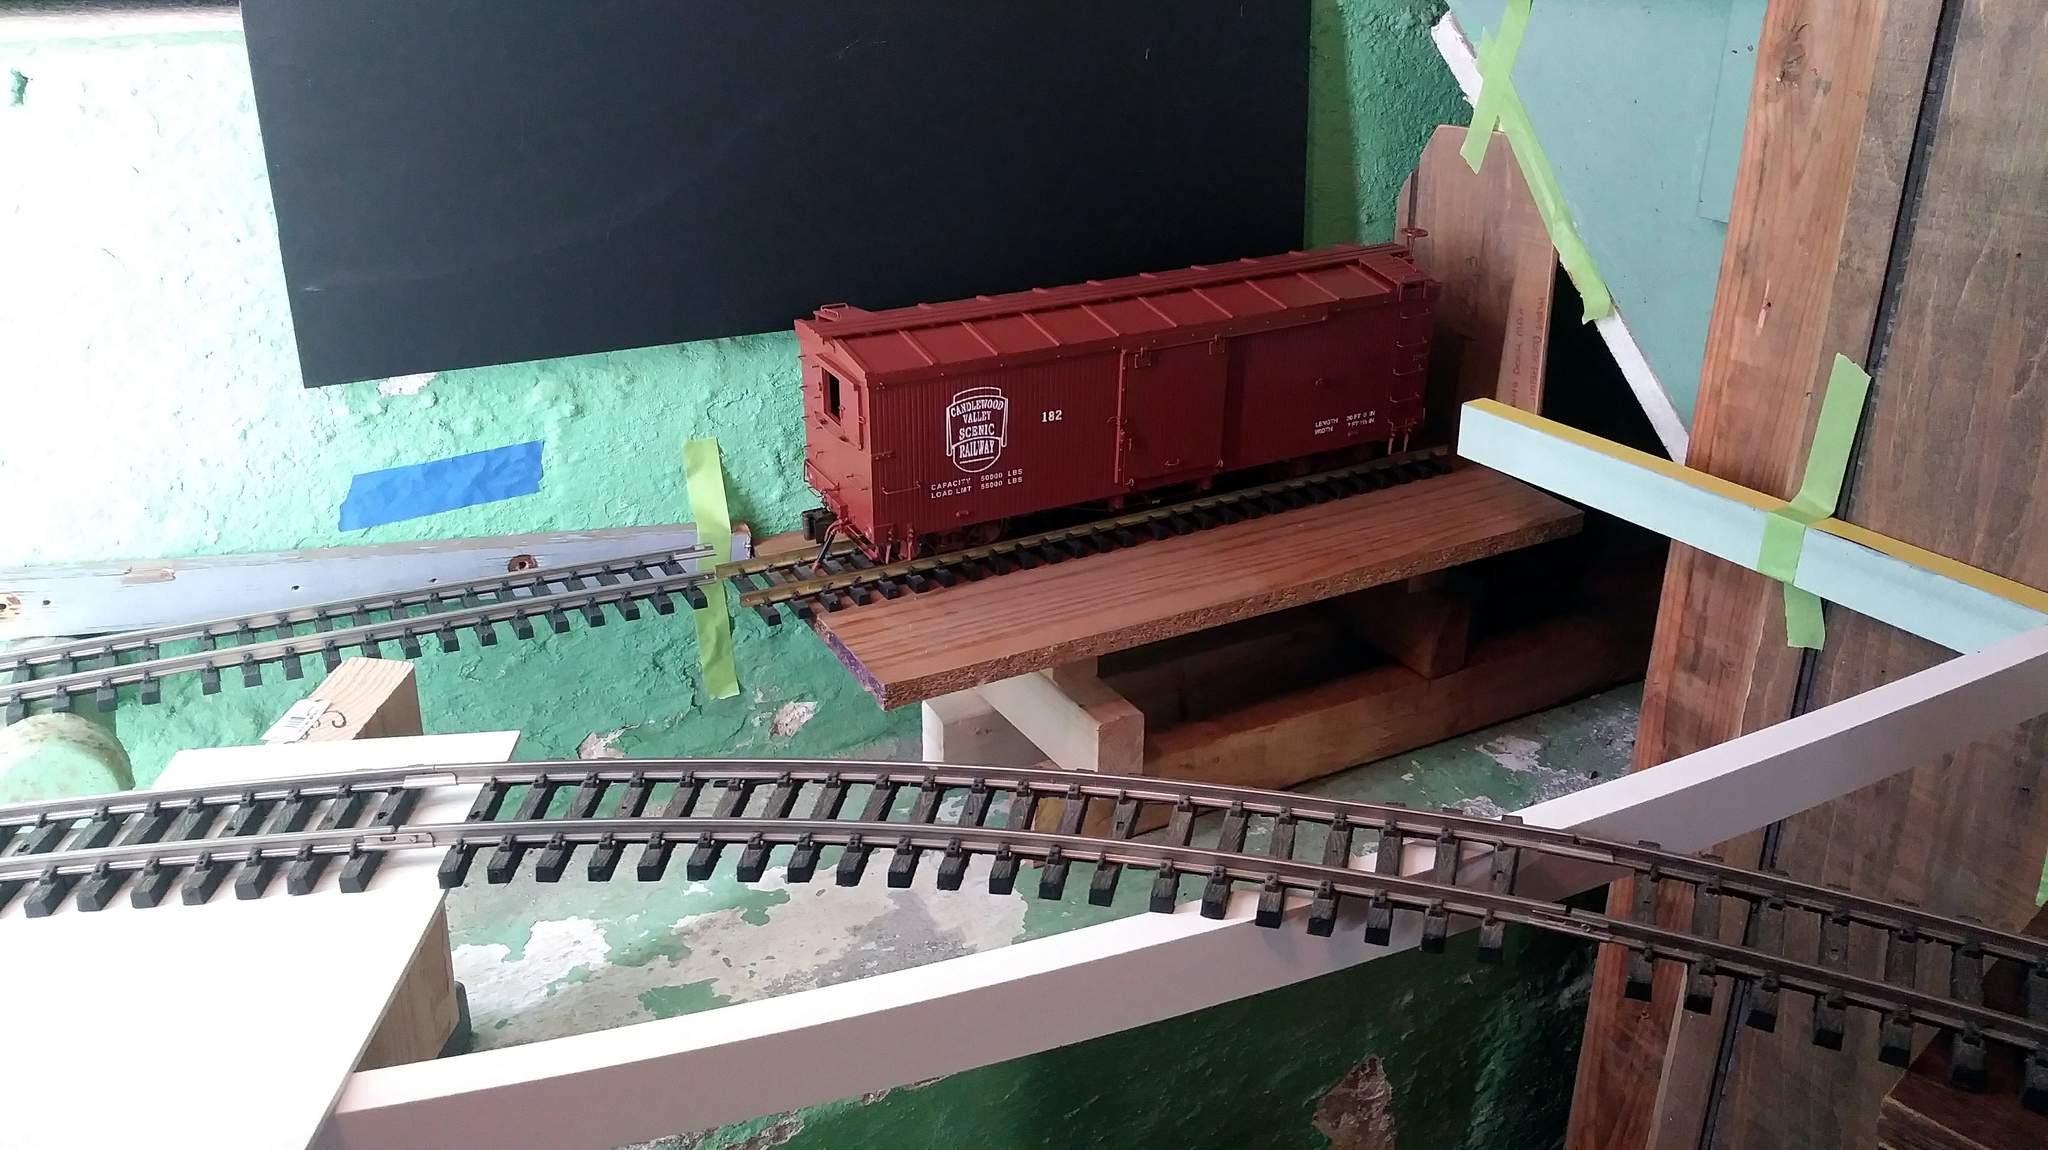
Where I am leaning with this right now is to raise the roadbed closer to bench level while still allowing tight clearance for a full size box car. That will reduce the grade requirement which is good because I have very little room to transition. The switch pair for this siding will be just left of the pipe, behind the wall that is staying and I do not want them on anything other than level roadbed.
Since my work on the Shadow Box is nearly done next up will be to build a module that slides in under the stairs. That will determine track height for the dropped section. Once that is done, the area behind the wall needs to be built. I still want to have a box in that area to keep the track free of dust & critters settling out of the floor above. I’m thinking that above the track box I may be able to create some more storage area.
Just a thought…instead of climbing back there and painting. Perhaps get some stick on glass film for the new window that they sell at Home Depot and Lowes. That way you can still let the natural light enter with less work and hide the wall. https://www.homedepot.com/b/Window-Treatments-Window-Film/N-5yc1vZarc3
We want pictures of you climbing through the window. I would pay to see that!
Jon,
Most defiantly raise up to min boxcar clearance. the gauge includes K37 clearances.
Al P.
Lou Luczu said:
We want pictures of you climbing through the window. I would pay to see that!
Well you should have been here this evening. In order to get the “roof” on the shadow box I needed to first shove a 24" x 48" chunk of 1/2" black acrylic in the form of an old sign through the hole and then climb in there to hoist it up on top of the wall frame. Fortunately the acrylic is heavy enough that gravity will hold it in place as there is no room to get in there with fasteners. It was also fortunate that I remembered how I got in so I could go back exactly the same way. I don’t think I would have a prayer of getting through the hopper window opening to the outside.
" Rooster " said:
Just a thought…instead of climbing back there and painting. Perhaps get some stick on glass film for the new window that they sell at Home Depot and Lowes. That way you can still let the natural light enter with less work and hide the wall. https://www.homedepot.com/b/Window-Treatments-Window-Film/N-5yc1vZarc3
Yes, I have been giving that some thought. I have some film here. Not sure how dark it will be; pretty sure it makes a mirror on one side- not sure which side I would want mirrored - good reasons for each side. If the stuff I have doesn’t thrill me I have a wider choice at work - boss will probably give me the few square feet it would take.
It must be 11 somewhere 'cause I gots film!!!
Today I did a supply run and didn’t get much done except the trim out of the shadow box. A 5/8" acrylic sign that was originally the backer for various plaques at the USS Nautalus exhibit was delicately maneuvered through the open half of the window. I followed it through the window to place the heavy sheet atop the wall’s I had framed out. That was followed by installation of some peel & stick floor tile and some panels I home-brewed from clear corrugated acrylic panels and black wrap vinyl. The flat black areas are either gatorplast or aluminum with vinyl trim. I think it came out OK. Not my best work, but it’s done…
And for those who are interested in the track plan side of the project; I created this minimum clearance gauge based on my largest box car - the Bachmann Murphy Roof. Using this gauge and a laser to sight the existing bench level I determined a need to drop about 2.5 inches in about 38" of run from the pipe…
The supplies I laid in today consist of 15/32" plywood to build a stilted structure like BOX (back side in earlier pics) to fit under the stairs. I want it fully enclosed and removable like BOX is now. I expect that will take some head scratching and a few attempts to get right. I think completion during my holiday break is now pretty much impossible.
Lou Luczu said:
We want pictures of you climbing through the window. I would pay to see that!
Oh Bother …
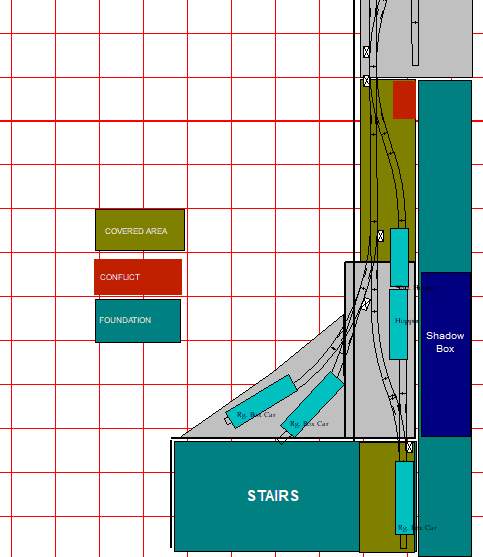
Here is the preliminary track plan. I could use some advice from the Ops experts. Existing RR / mainline is at the top of the drawing. Just left of the red square is where the current BOX tunnel and EOT are today. The block representations of cars are scale accurate including couplers.
My thinking is the track at lower right that will be under the stairs is the primary industry with indoor loading or unloading. Current track configuration would allow a car to be pulled from under the stairs, dropped on the main then the next car on the run-around / storage track gets shoved in. The two tracks to the left could be additional spots or a pace to drill cars - one at a time.
Thoughts and/or suggestions welcome.
Nice Jon…
If you wanted more industry spots, Make the track with the 2 boxcars on it a separate industry, have the track along the front edge of the triangle a team track, and use the other track on the triangle as a storage track for the industries…
The Industrial where the 2 boxcars are at would just be a building front… The team would be with an imaginary loading dock on the front…
That’s just to cornfuse you more… hehehe
edited to add, this would also remove one more switch to your plan…
Jon, I think I would paint the wall area below the shadowbox and left of it as the side of a building. Give it a role to play. No access just a long wall to enhance the door wall you allude to under the step. Maybe even a few high on the wall window out of vinyl too. (https://www.largescalecentral.com/externals/tinymce/plugins/emoticons/img/smiley-cool.gif)
I’d go with what Andy suggested (which isn’t often…(https://www.largescalecentral.com/externals/tinymce/plugins/emoticons/img/smiley-wink.gif)). You don’t want to make too easy.